Do Not Sell My Personal Information Jump to content


Undersealed The Rear Arches


Recommended Posts

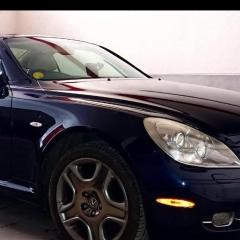
I had a glorious day yesterday, as it was the 1st time I'd had the wheels of the Lex. I was feeling guilty about the signs of corrosion on the rear wheel wells and notice a couple of bubbles on one arch.

An hour later and theyre all lovely and black and I cant stop looking at them and sniffing the arches admiring my handiwork.

Sad huh ;)

I also took of the wheel arch protection strips and found them to be full of mud, so I cleaned them off and put some underseal on them before screwing them back on. That was the cause of the small bubbles on the arch, so hopefully with that, and that I scraped the rust off the arch lip and the undersealed arches I've caught it in time, although I will need to get a touch up pencil, especially as the blade slipped and put a 2 inch scratch on the paintwork - doh !!!! )

The pampering is commencing.

My wife doesnt belive I'll get rid of the Lex, she's probably right :)

Link to comment
Share on other sites

I give mine similar treatment every year after the winter to remove the crud and salt deposits.

Remove and clean the arch strips and the arches with a jetwash, I tend to run my fingers on the inside of the arch lip as I am spraying the water ( but be careful of the possible sharp edges) then allow to dry completely.

Check for damage to the sealing and apply new ( aerosol waxoil works great). I finish off with a spray of aerosol silicone to give it a gleam.

At 15 years old there are no rust or paintwork issues.

Link to comment
Share on other sites

  • 3 weeks later...

I'm thinking of doing the same thing. On areas where there's already a bit of surface rust what's the best way to deal with it? Paint on a bit of Kurust or similar, or is it OK to just spray the underseal straight on?

Link to comment
Share on other sites

I dont bother with the rust convertor treatment but simply clean the wheelarch and use spray on underseal which has waxoil included.

The nozzle requires regular cleaning as it gets clogged and then you can't get a controlled fine spray.

Link to comment
Share on other sites

dont worry about it, i was planning on doing it too :innocent:

but should have done it a couple of years ago really. :whistling:

There is no rust on the outside of the arches but i can see small bubbles and the odd small rust like corrosion when opening the rear doors (at base on flat footplate), strange as you never see this on a lexus do you?

Its 16 & a half years old now and after seeing my dads w plate merc rust all over the arches, doors & boot (and thats after 6 years of being parked indoors every night!!!), then i was more than chuffed at my cars superior paintjob compared to the poxy (top of the range) s class :shutit:

but still didnt bother when i should have......

so now when i open my rear door i see a colour that shouldnt be there, only a few mm's wide, but im sure it will grow.

Whats the best way to prevent further damage to the suspect areas?

How do you get rid of rust without scrubbing the corrosion more and weakening surrounding metal?

Reading these has finally made my mind up to check my arches aswell and crack on with the job, but whats the best way for the spots?

Link to comment
Share on other sites


Manc,try Kurust or similar to kill the rust then prime/paint the area.

I've used Waxoyl for years, brilliant for underneath and cavities.....

Link to comment
Share on other sites

  • 7 years later...

Digging up an old thread as I've been busy doing the same, cleaning out the wheelarches and arch lips.  The rear arches were caked in mud, especially on the trailing edge, the leading edge not so much.

If you haven't done this, I'd recommend getting your fingers into the wheelarch lips and clearing out the muck - plus, both the leading and trailing edges of the rear wheelarches are ready-made muck traps, just waiting to cause you grief.

I tackled the rear initially with just a hose and water, then sprayed with a dilution of Bilt hamber Surfex HD and scrubbed with a bug remover sponge, although any all purpose cleaner would do.  Will let the area dry overnight, and will treat tomorrow with liberal coatings of Bilt Hamber Dynax UC (underbody clear) wax. 

Are there any 'gotchas' removing the front wheel arch lip protectors?

  • Like 1
Link to comment
Share on other sites

Removing the protectors is easy enough, the muck collection between the inside edge of the protector and the wing is less likely to get ingress as unless you are driving around fields or country lanes the front wheels pass most of thier muck backwards.

The thing to bear in mind is when you unscrew the screws you expose the metalwork around the screw so when replacing the protector apply the sealant to the screw tips before inserting them.

  • Like 2
Link to comment
Share on other sites

i was planning on smearing some Bilt Hamber wax between the protector and the arch, I may thing again as i if i get the wax uneven, it won't got back on well at all.

will take another look in the morning - today i merely wire brushed any surface rust and used FE-123 rust killer (www.rust.co.uk) where needed, on the sill section in front of the rear wheels.  

can't understand why the rear wheel wheels aren't as well protected as the front

Link to comment
Share on other sites

I did this in the summer (the best time I think) to the whole of the underside of the car the worst rust was around the rear subframe. This took me days to do properly cleaning it first thoroughly then taking all loose or even mildly flaky rust back as far as possible with chisels, emery cloth, wire brushes, shave hooks and just about anything else that worked then allowing to dry. When dry I dusted everything down and then painted with Rustbuster fe-123 allowed that to dry properly and then painted with Epoxy Mastic 121 thinned slightly these are both great products especially the Epoxy Mastic 121 which I cannot recommend enough. The secret is in the preparation if you don't clear back to a solid surface you may well just be sealing in damp and loose rust and you're in for a lot of trouble down the line. The Rustbuster website has a lot of good information on it that's well worth reading. I had the car up on four axle stands when I did this and sent my wheels off for refurbishment and all my brake calipers aswell. I did an oil and filter change, differential oil change, replaced anti rollbar bushes, replaced a/c condensor and recharged a/c. Checked resistance on ht leads and looked at plugs.  When I first got it I spent two days cleaning it inside and out. It runs pretty well now just an autobox flush and filter change to go! Got to sell my 20 yo Mercedes c220 now as it may look better than the Lexus but it's an inferior car.

  • Like 2
Link to comment
Share on other sites

Latest Deals

Lexus Official Store for genuine Lexus parts & accessories

Disclaimer: As the club is an eBay Partner, The club may be compensated if you make a purchase via eBay links

Join the conversation

You can post now and register later. If you have an account, sign in now to post with your account.

Guest
Reply to this topic...

×   Pasted as rich text.   Paste as plain text instead

  Only 75 emoji are allowed.

×   Your link has been automatically embedded.   Display as a link instead

×   Your previous content has been restored.   Clear editor

×   You cannot paste images directly. Upload or insert images from URL.

 Share


Lexus Owners Club Powered by Invision Community


eBay Disclosure: As the club is an eBay Partner, the club may earn commision if you make a purchase via the clubs eBay links.

DISCLAIMER: Lexusownersclub.co.uk is an independent Lexus forum for owners of Lexus vehicles. The club is not part of Lexus UK nor affiliated with or endorsed by Lexus UK in any way. The material contained in the forums is submitted by the general public and is NOT endorsed by Lexus Owners Club, ACI LTD, Lexus UK or Toyota Motor Corporation. The official Lexus website can be found at http://www.lexus.co.uk
×
  • Create New...