Leaderboard


Popular Content
Showing content with the highest reputation on 11/10/2015 in all areas
-
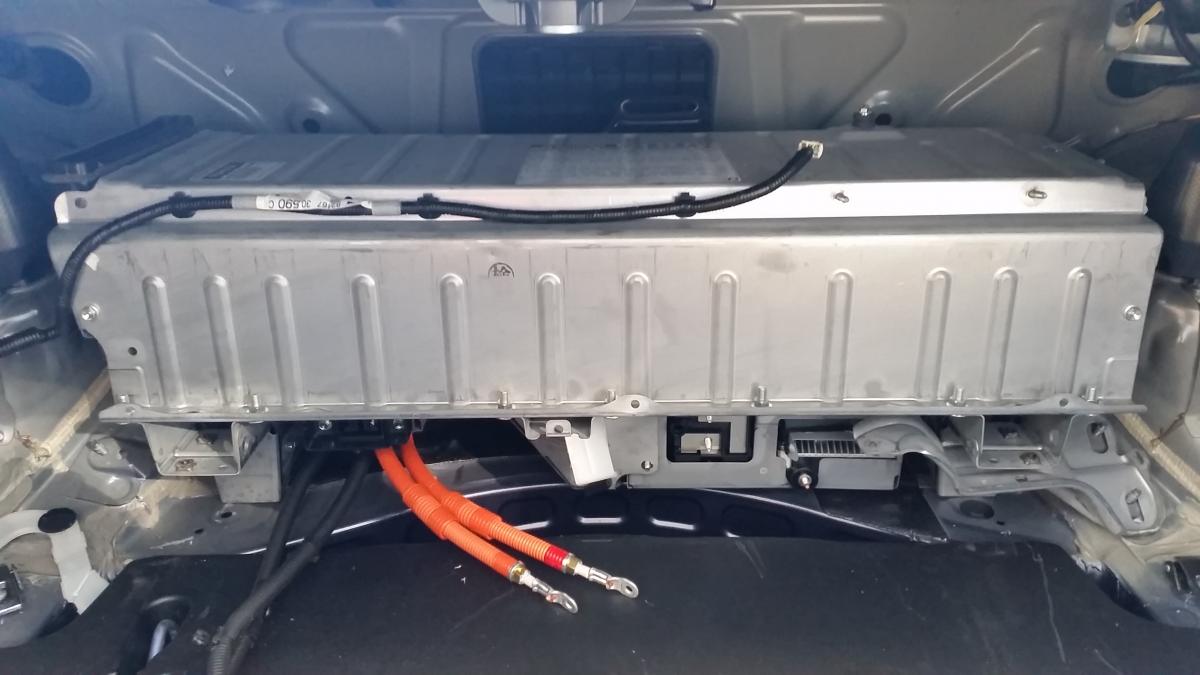
I got the dreaded Check Hybrid, Check VSC and Check EBC warning lights. Fault code readings P0A80 Hybrid and P3017 (battery cell block number 7 fault). Having gotten a quote for around €6000 to fix it, I decided to do it myself. I ordered a battery cell on ebay for €45.00 delivered to Ireland. Tools needed: Socket set with 8mm, 10mm and 12mm. Flat head screwdriver, long nose pliers and a multi meter to read voltage. (You may also need a slow trickle 12v battery charger, I'll explain later). Time needed: about 4 hours, more if your connections a very dirty. 1: Remove ALL carpeted paneling from the boot (trunk if you're in the US). This is done by inserting the flathead screwdriver into the black plastic rivets and popping them out. Remove the boot flooring too, just leave the tool tray in place. You will need the 10mm socket to remove the rear boot floor luggage anchor points once you've popped open their plastic covers. The upper hanging points need to be squeezed to remove. Disconnect the power supply to the light on the right hand panel. 2: Remove the orange circuit breaker on the HV battery by sliding to the right and then pulling towards you. 3: Remove the black air duct on the bottom of the HV battery by popping the 2 black plastic rivets. 4: Unplug the power supply to the white cooling fan on the upper right of the HV battery and remove the 2 nuts holding on the fan. This should allow the 2 upper black ducting to move sufficiently to be able to remove them. 5: Open the panel covering the 2 Orange Cables (3 x 8mm nuts) and disconnect the 2 orange cables, (you can tape them up with electrical tape if you so wish). Pull back the rubber cover on the Black cable and unbolt that too. You should now look something like this: 6: Disconnect the cable running from the HV battery to the 12v lead battery. Continue to remove the 12v battery by disconnecting the +ive and -ive terminals and the white connector plugs attaching it the the HV battery. Also need to take off the temp sensor and the vent hose on the 12v battery. Remove the 12v battery support bracket and the battery tray itself. 7: Remove the last 2 bits of black ducting that was clamped by the 12v battery tray. 8: Remove the white tubing on the right of the HV battery. 9: Remove the 4 12mm nuts holding the base of the HV battery in place, 2 on each side. 10: You need to unbolt the nuts hidden behind the back seat headrests. 11: Pull the rear seats forward enough to remove the large plastic panel in the center between the rear seats and the boot wall, its hidden behind the fireproofing fabric. Use this panel cover to hold the seats away from the boot wall by wedging it between seats and wall. 12: Pull back the fireproofing to reveal 2 smaller access panels covered by a black sticky rubber square. Now remove the 3 12mm nuts holding the HV battery to the boot wall. 13: Now the tricky bit, lift the HV battery over the bolts in the boot and slide it out. (I recommend putting cardboard on the tool tray to avoid scratching when sliding the HV battery). If you are strong enough you can lift the HV battery out on your own, if not get help, it weighs about 50 kilos. Your boot should now look like this with the access panels behind the seats visible: You should also have this, I placed mine on some cardboard on my kitchen table: 14: Take off the HV battery cover by opening all the 10mm nuts, and a few 8mm. unclip the black cable while taking off the three cover panels. 15: Unclip the black plastic covering on both sides of the HV battery to reveal the 8mm connector nuts in the orange casing. 16: Number the cells 1 to 40 using a permanent marker. Use your multi meter to get a reading across each of the 40 individual cells, i.e. one lead on the +ive terminal of the cell and the other on the -ive, and record your findings, as you can see cell 28 was low for me: 17: Pull back the rubber vent tubing running along the top of the HV battery until to get beyond your bad cell/cells. 18: Remove the white end panel holding the cells in place: 19: Remove the 80 x 8mm nuts in the orange casing and clean if necessary. I used bleach and some sand paper to clean all nuts a copper plates, if you're gonna do it - do it right). 20: Remove the 8mm nuts holding each cell in place underneath until you reach your bad cell (this will probably involve removing the support leg and the converter assembly unit below the HV battery: 21: Good cells look like this Bad ones like this: 22: Start replacing your cells back into the HV battery, it doesn't matter what order and you can't mess up polarity as it only screws in on one side. I put my new cell in last in case it was a dud. (If your new cell is of a lower or higher voltage use a slow trickle 12v battery charger to get it to the same voltage as the other cells. 23: WATCH THE TEMP SENSORS UNDER THE BATTERY CELLS (3 of them), MAKE SURE YOU CLIP THEM ON AS YOU GO. See the black plastic clip peeping out here: 24: That's it you're done, just reverse everything to put in back in. Mind your back and don't bother touching cell 1 and 40 at the same time if you have the orange connector put back on. Good Luck!
 1 point
 -
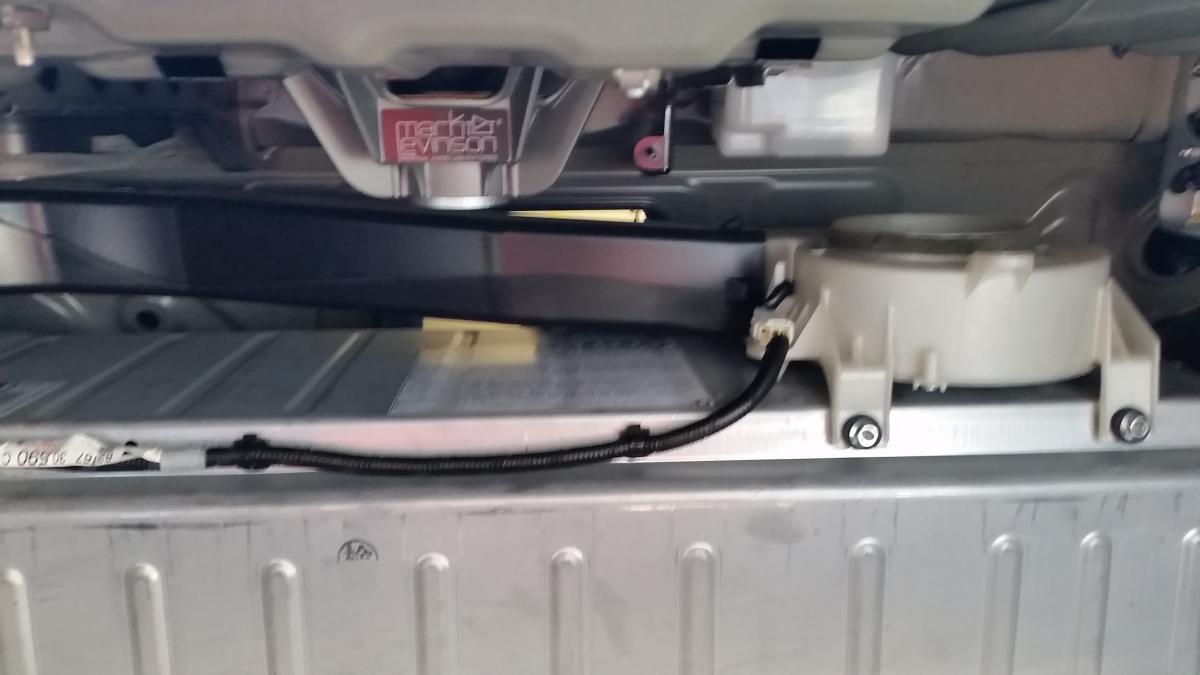
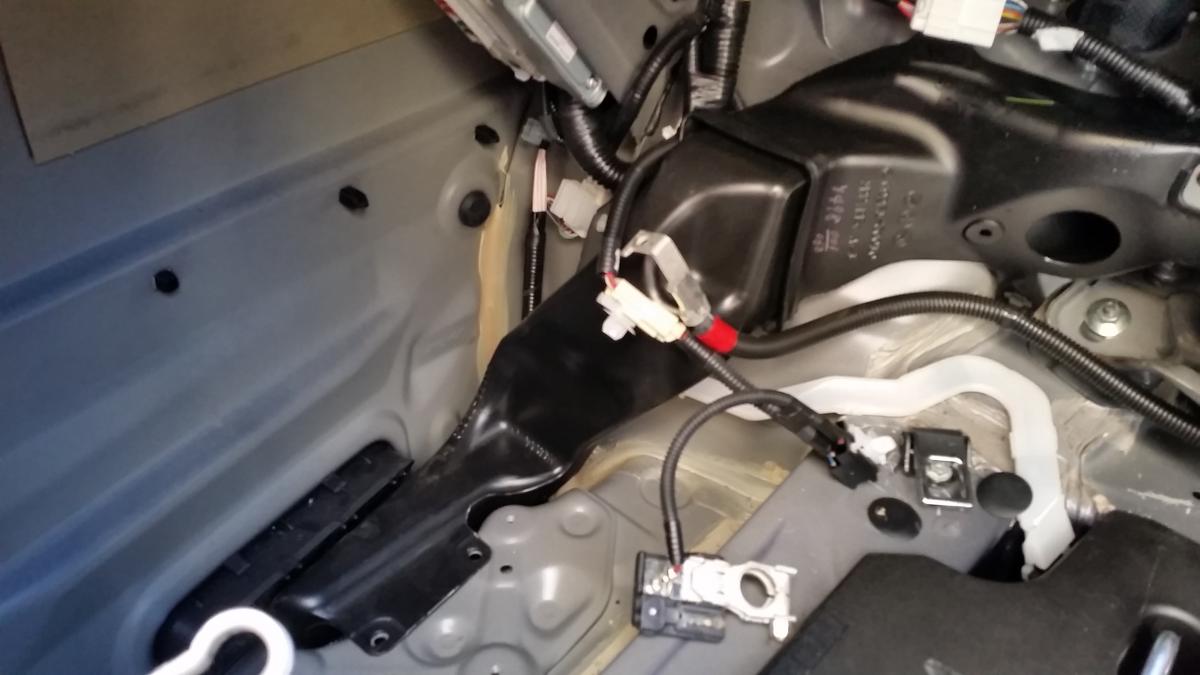
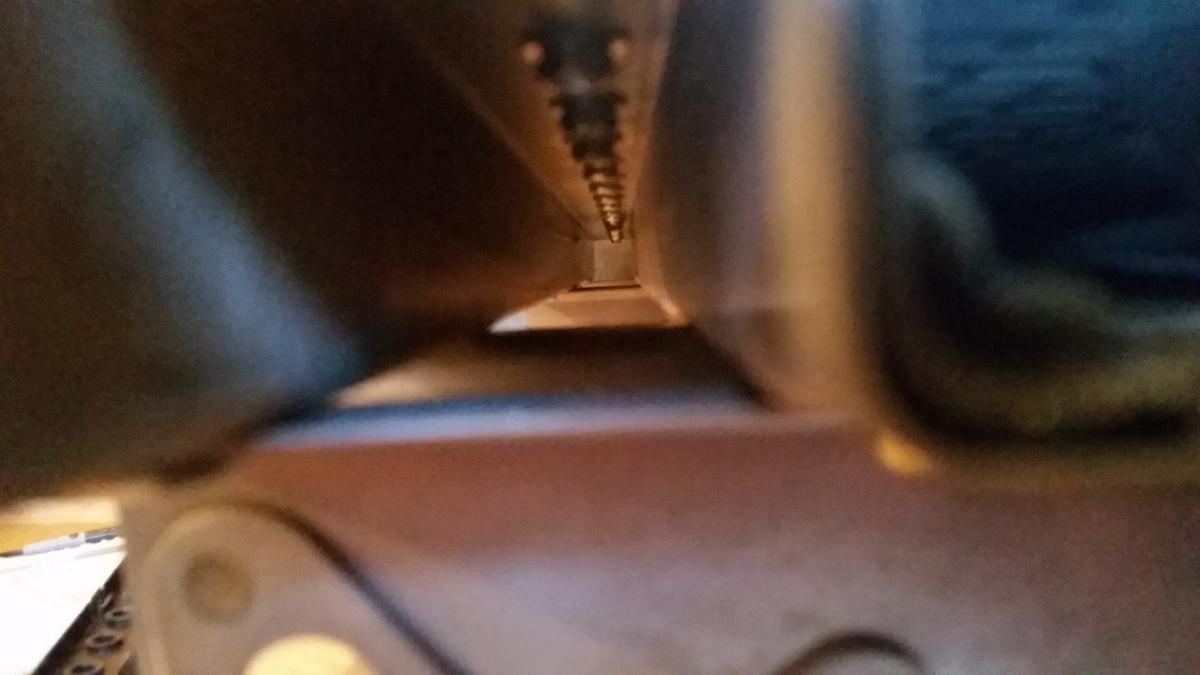
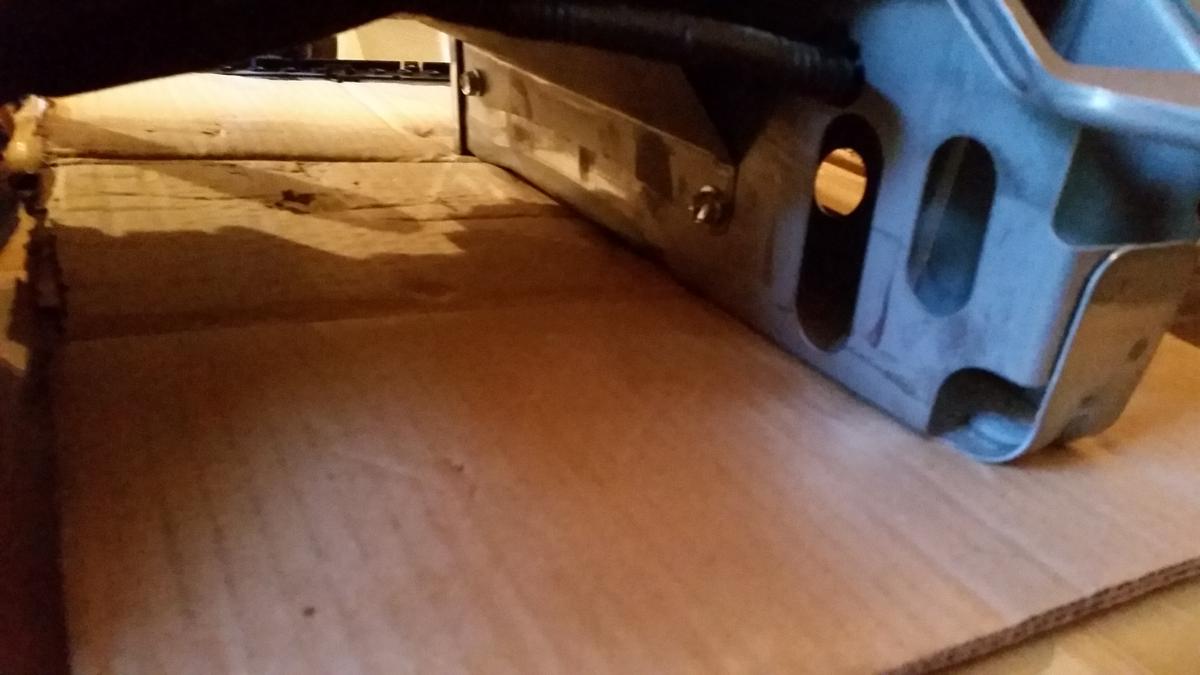
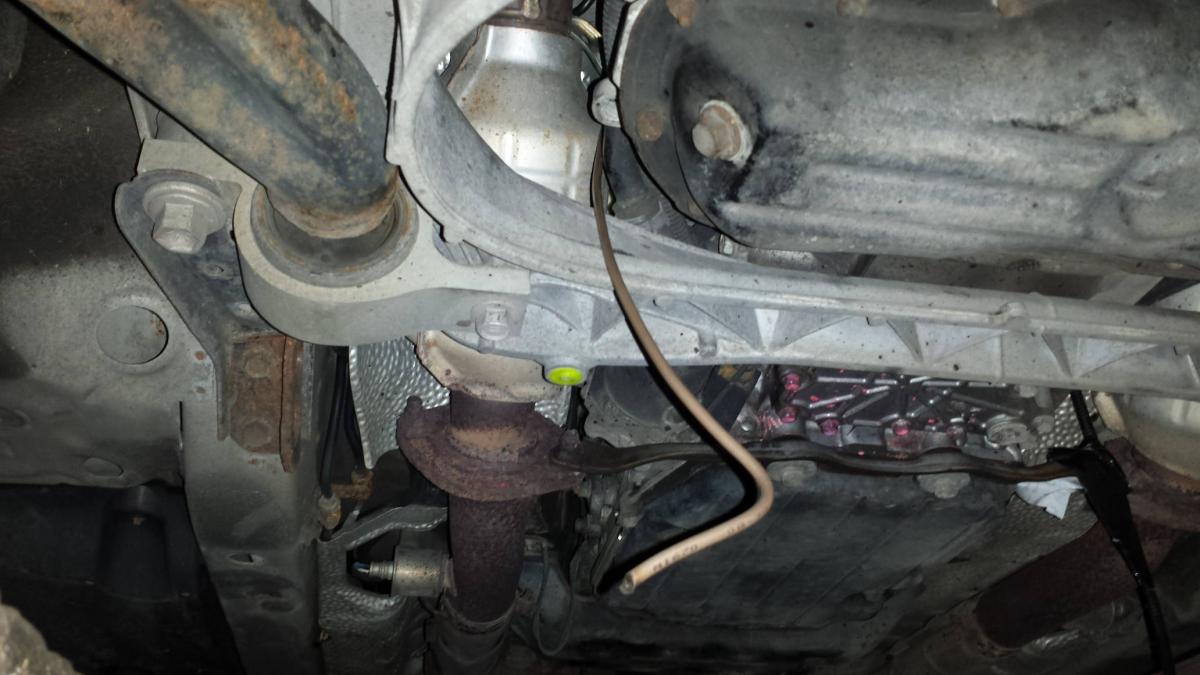
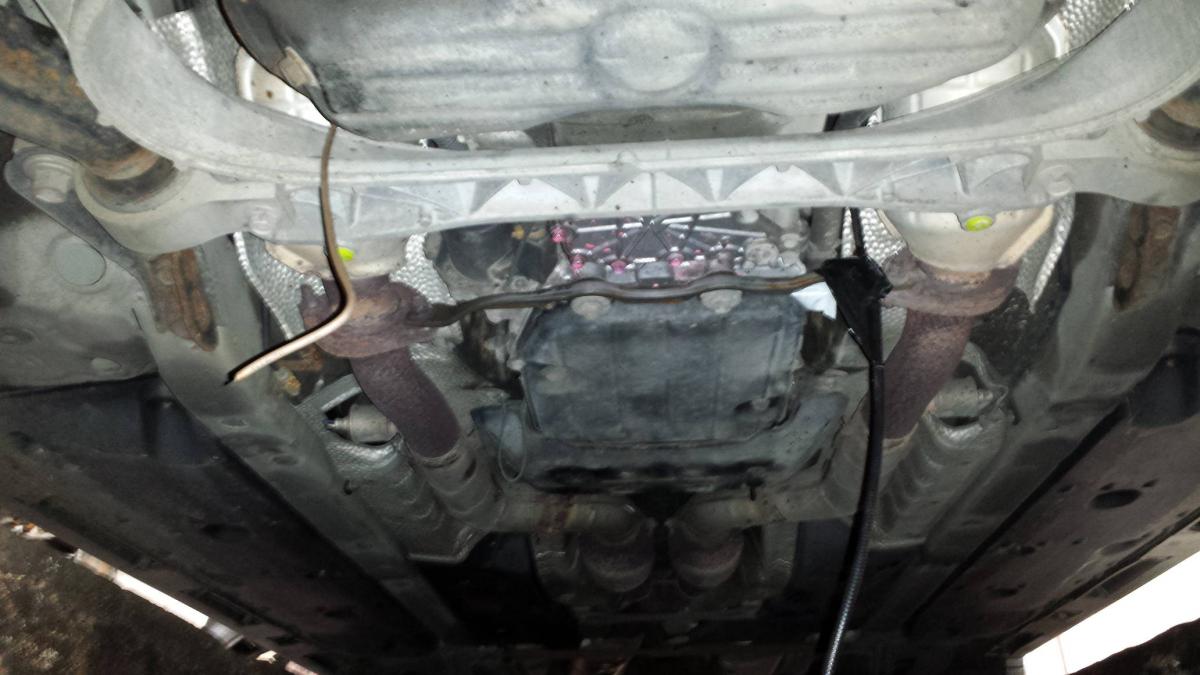
I just thought I'd document my experiences with the evaporator drain on my 2006 GS450h. Apologies in advance for the long post... I first noticed the issue when I found that condensation was appearing on the inside of the windows of the car. This is always a sure sign that there is water in the interior of the car. Initial searches failed to find anything until I decided to lift the rear carpets of the car. When I did so I found the sound deadening foam and underside of the carpet completely saturated. This is a common enough phenonmen due to the waterproof nature of the carpets preventing such water reaching up. There was probably 1.5 litres of water in total in each side. Having researched the issue through the web, I found that the air-con evaporator drain on the 2006 GS models is a known issue, with the drain becoming blocked and the condensate, which would normally puddle under the car, instead drains directly into the car interior. In hindsight, I don't recall ever seeing a pool of condensate under the car in the past. I was lucky (I think) that only the rear carpets were wet. The carpets and underlay under the front seats was mostly dry. There are many great posts on the various Lexus sites describing the issue and detailing how it can be addressed. The evaporator drain is on the "roof" of the transmission tunnel and is designed to allow the water to drain onto the gearbox and run down to the ground. There are a number of TSBs from Toyota and the latest ones describe how to remove the offending drain grommet by yanking it out with a pliers from below the car. I think the most recent TSB for this issue is the following: http://st.club-lexus(blocked word)/attach/u/7cff5226.pdf While this can be done for the IS and GS300 and GS350 models, it seems the fix for the GS450h remains to remove the evaporator unit and replace the drain grommet with a new one. This requires complete removal of the dash and console and was not an option for me. The method recommended in the TSBs for the IS and GS models is to disconnect the exhausts, loosen the rear gearbox crossmember and lower the rear of the gearbox until the grommet can be accessed and removed with a set of long pliers. Some people have commented that it is possible to remove the grommet without lowering the gearbox or loosening the exhaust. Having worked on the GS450h, I believe this option of lowering the transmission will probably not work for the 450h. The "gearbox" on the 450h appears to almost completely fill the transmission tunnel. In addition, the GS450h has a cladding on the interior of the tunnel, further restricting access. This cladding is about 10mm thick and is bonded to the tunnel and does not appear to be fitted to the IS or other GS models. There is about 15mm of clearance along the sides of the gearbox. Even if the gearbox was lowered and the heatshields removed, I don't think it would be possible to reach around the gearbox to access the grommet as the gearbox on the GS450h is very tall. Here's what I did. I was lucky to have access to a pit to do this work, but a 4-post lift of some kind would be even better. I removed the lower tray under the gearbox (2 nuts, 4 screws). The first challenge is to locate the position of the grommet. It is not possible to see it directly at all from under the car. I used the "endoscope" I bought from Lidl some time ago to locate the grommet. The position as detailed in the TSBs is confusing and I was eventually able to find two photographs on the web which helped me locate the position. For reference, the grommet is in the roof of the tunnel, roughly in line with the support bar providing support to the exhausts. In the attached photos, you can see the flexible portion of the boroscope taped to the support bar for the exhausts. If this sounds easy, it took me one day to locate the grommet with the endoscope! Part of this was because I did not know where to look and partly to the quality of the Lidl endoscope (I think it was €75 a couple of years ago). The Lidl boroscope requires that the camera is about 10mm from the area you want to look at. I imagine a better quality scope would provide better lighting and have a camera that would allow a wider view. I believe the cladding on the transmission tunnel also makes it more difficult as the grommet is further recessed in a cutout of this cladding compared to cars without the cladding. I taped the scope in position when I had the grommet in view as even the smallest move meant the grommet disappeared from view! Once I had the grommet in view, I then had to access it. I first used a long gas welding rod to create a tool I could use to probe for the grommet. To access the grommet, it was easier to come from the front of the gearbox, coming from the alloy crossmember, and feeding the wire across the top of the gearbox. I don't think it would be possible to do this from the side of the gearbox. When I located the grommet with the wire (quick to say, but it took at least an hour to even see the end of the rod in the boroscope screen...), I touched the grommet and about 1/2 cup of water came out! I don't think the grommet was blocked with debris, but had just sealed itself, perhaps due to little use of the car over a period of weeks. It might be the case that closing all the vents, stopping the heater channels under the front seats and turning the fan up full might have opened the drain.... Even given the access and means to reach it, it would be still impossible to remove the grommet. I just needed to rip it up as much as possible. To do this I created another tool using copper brake pipe I have from other projects. I basically replicated the shape of the initial tool and flattened and created a barb on the end of the tool to rip the grommet. The copper piping allowed the tool to be stiffer than the welding row, but with enough flexibility to allow it to be manvoured into place. With practice, I could locate the grommet first time, almost! Coming from the front of the gearbox allowed me to use my hand higher up to brace the piping as I moved the end of the pipe to rip the grommet. I think I was able to rip the grommet sufficiently so that it won't be a problem again. After I did all this, I ran the air-con at full cooling and was pleased to see a stream of water from the drain.
1 point
-
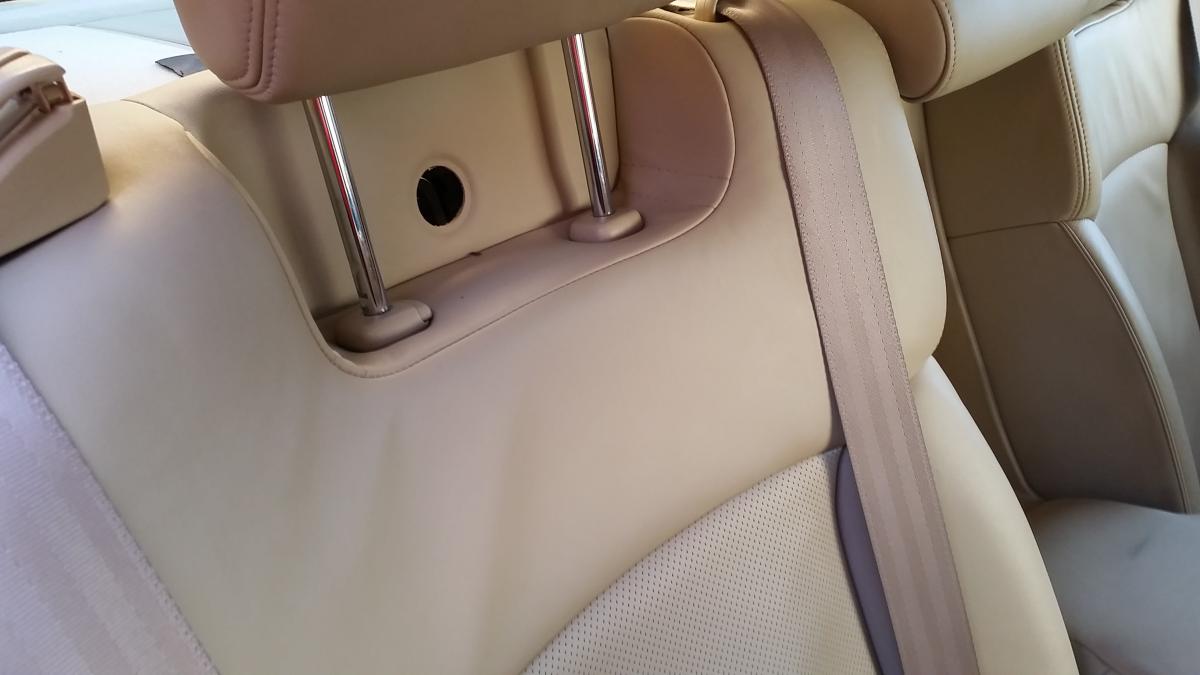
For my next fun machine I have the more practical of the Lexi shortlisted. What I need to know is the shortest dimensions of the floor with the back seat folded; or even removed. Solar panels will be the load. Thxs.1 point
-
Hi seeing as no one has replied ,I have gone and measured mine . with the front seats about central in the adjustment and the rear seats folded I recon a flat usable area of 6 ft x2 ft 9 ins (showing my age here ) 1 metre 830 x 0.840 metric ? I dont think removing the seats would help much as the intrusions are mountings at the sides of the body Dave1 point
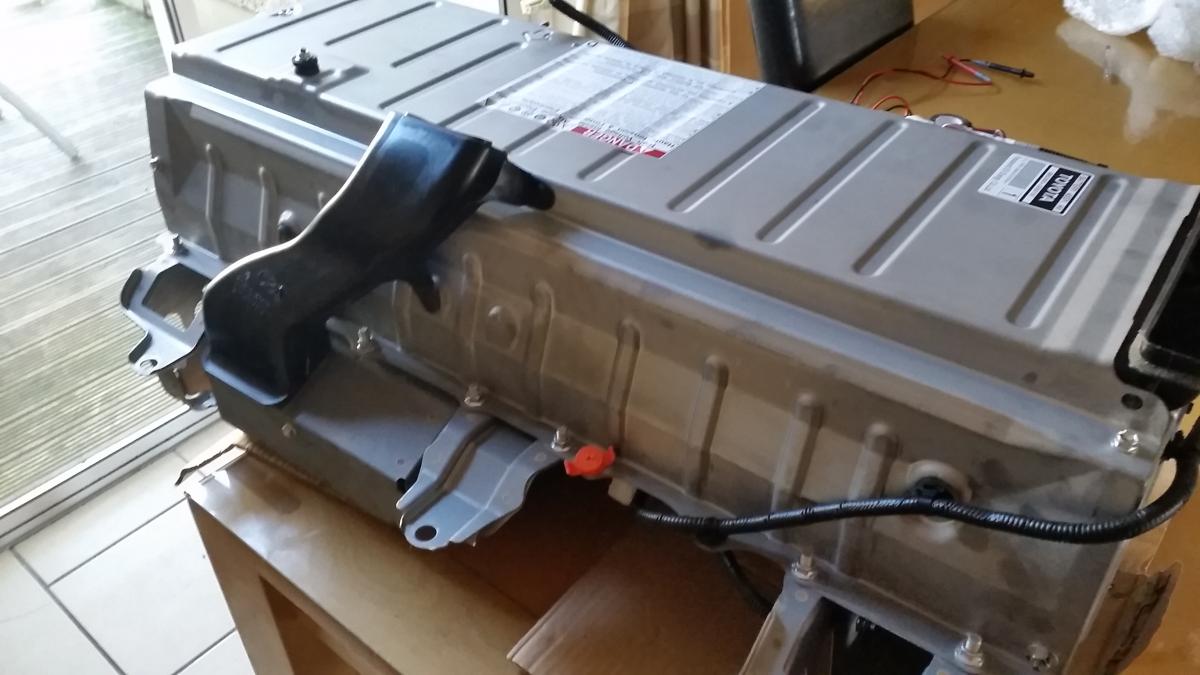
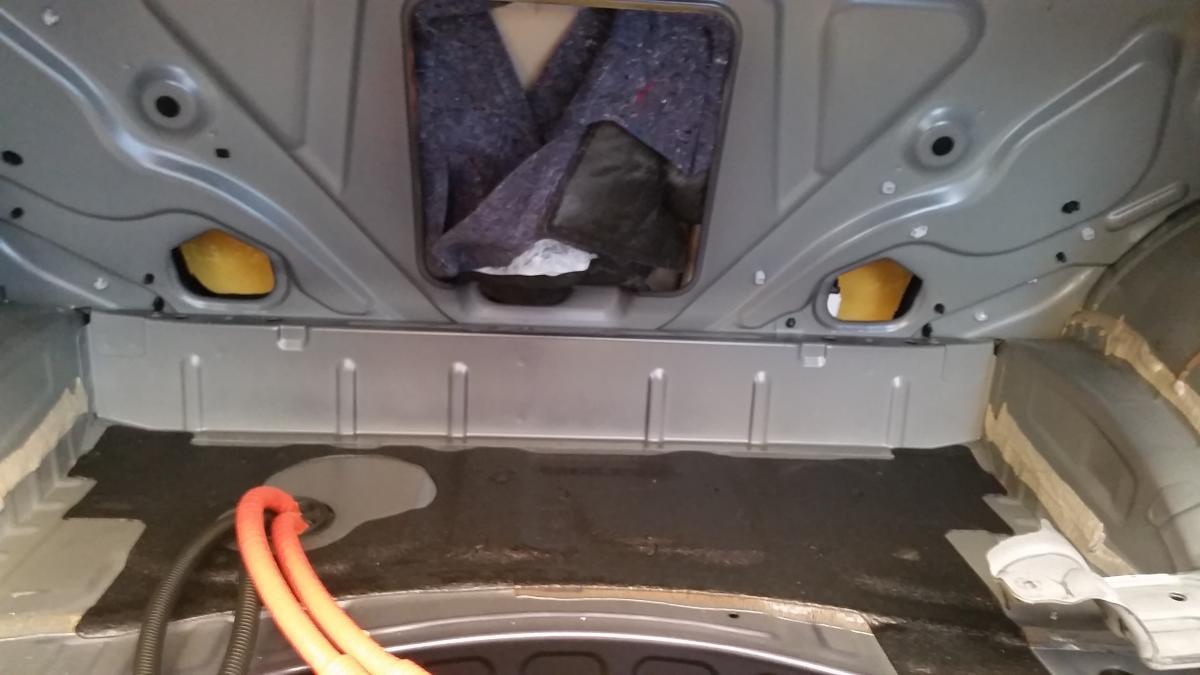
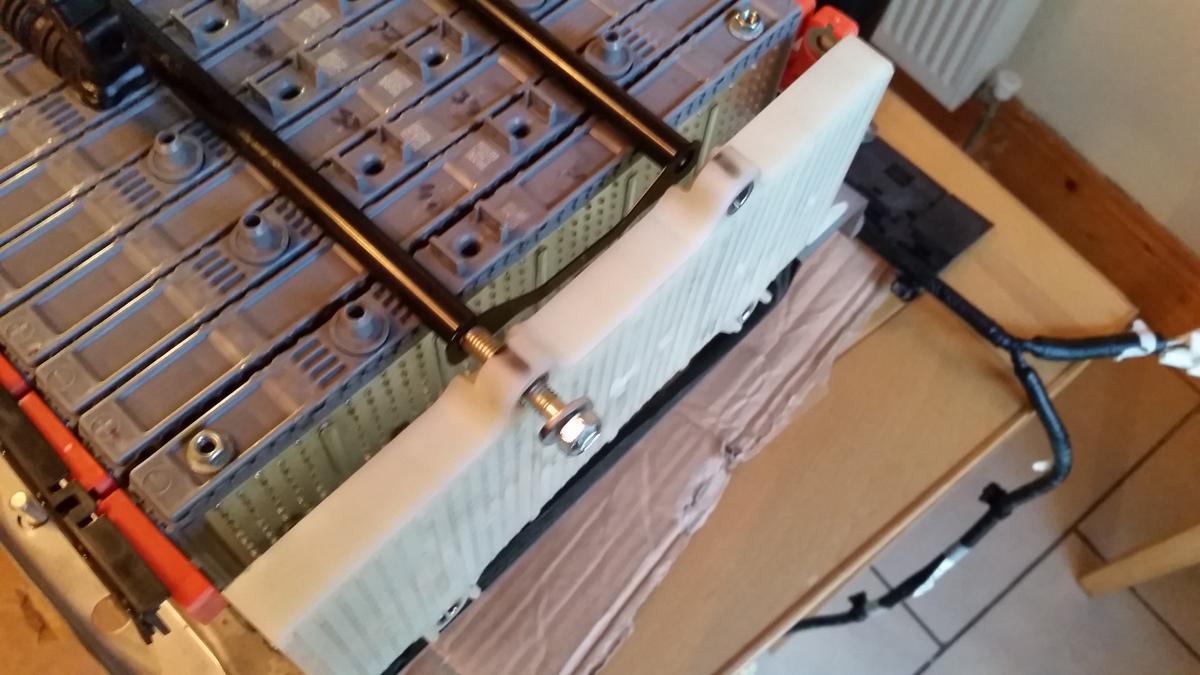
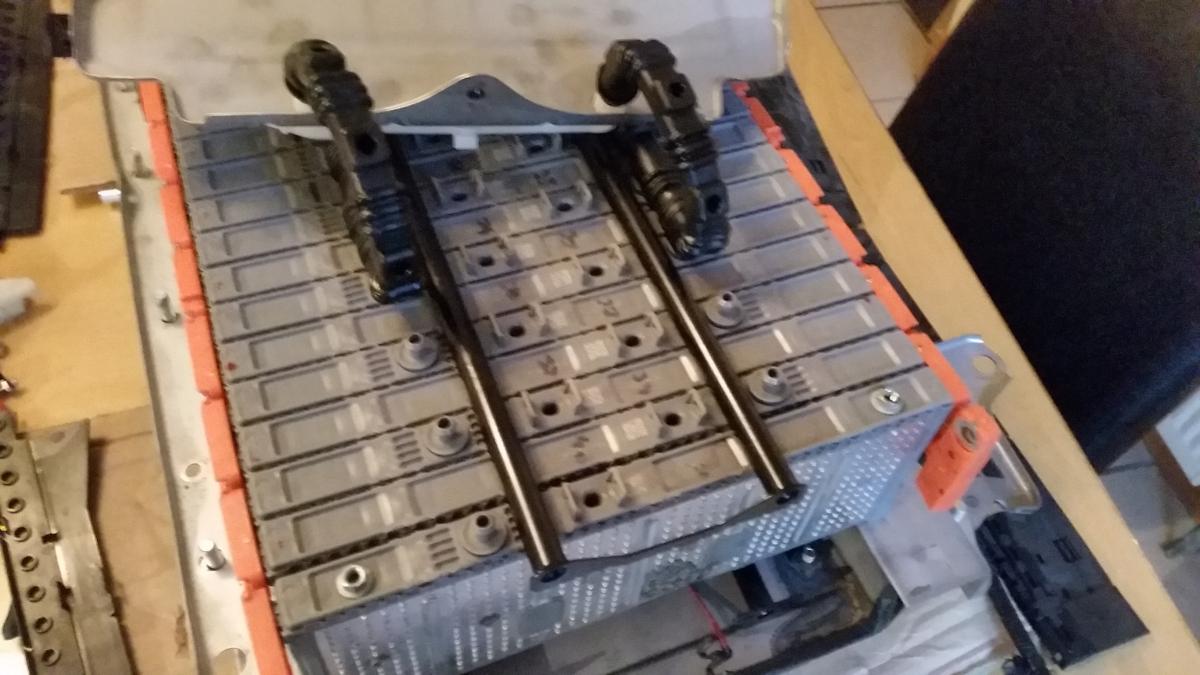
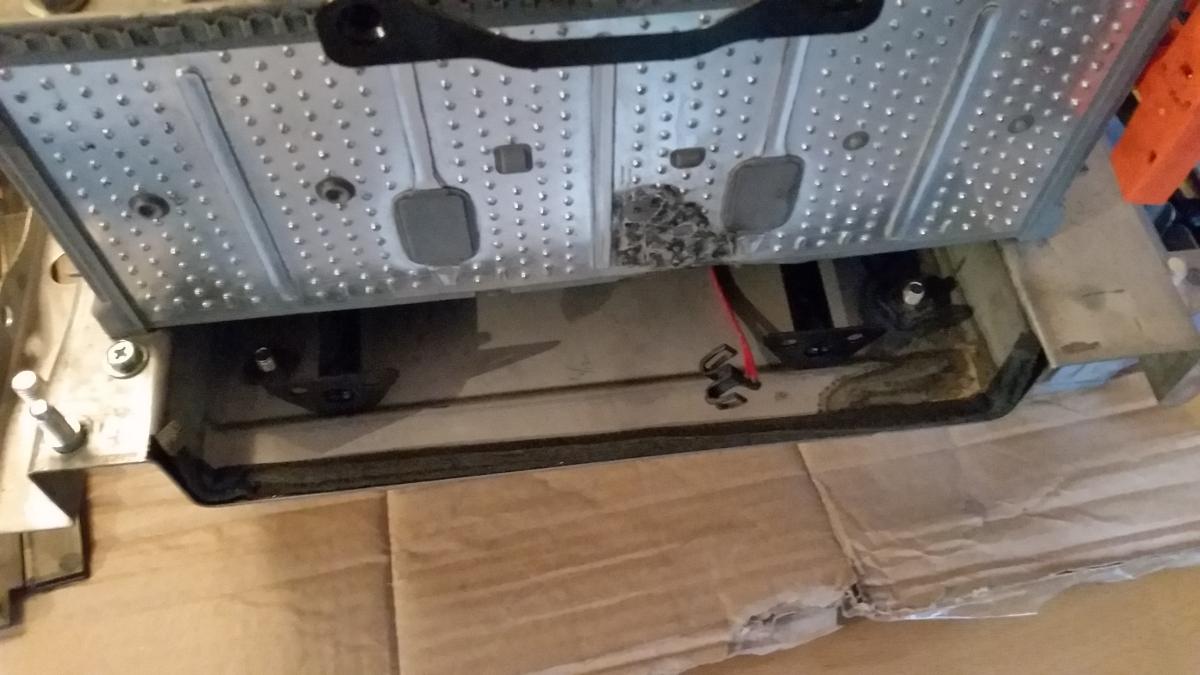
-
Just bought 2 cells from the same guy in Belarus just in case mine fail again same as last week.1 point
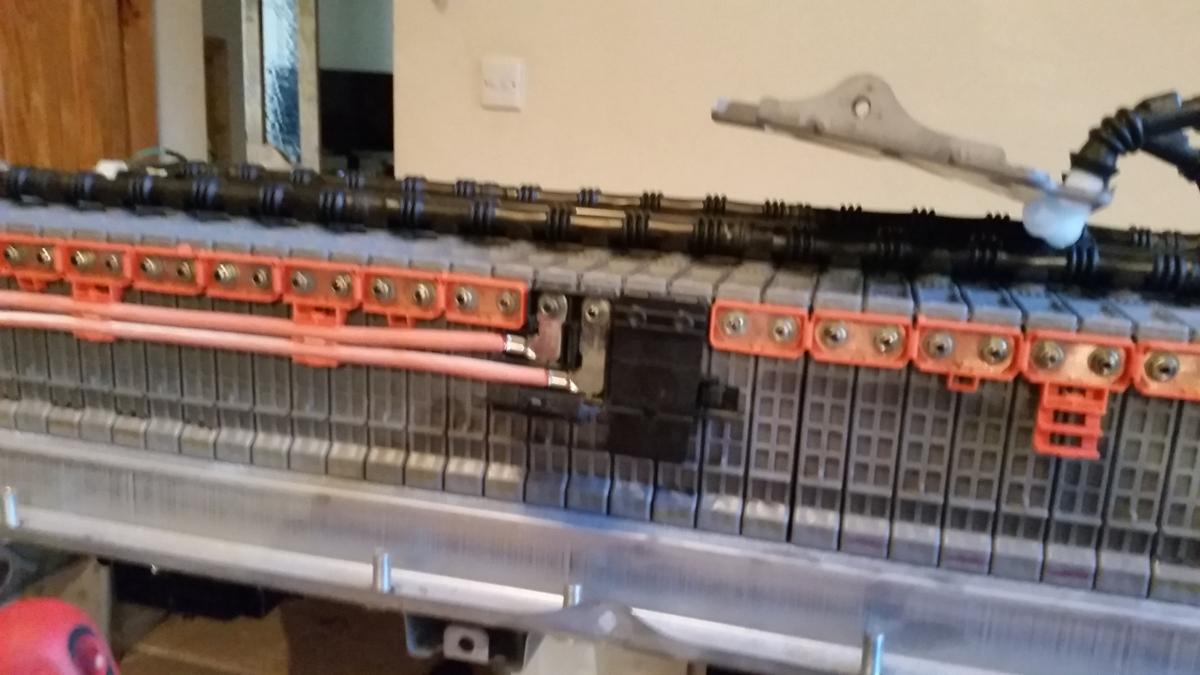
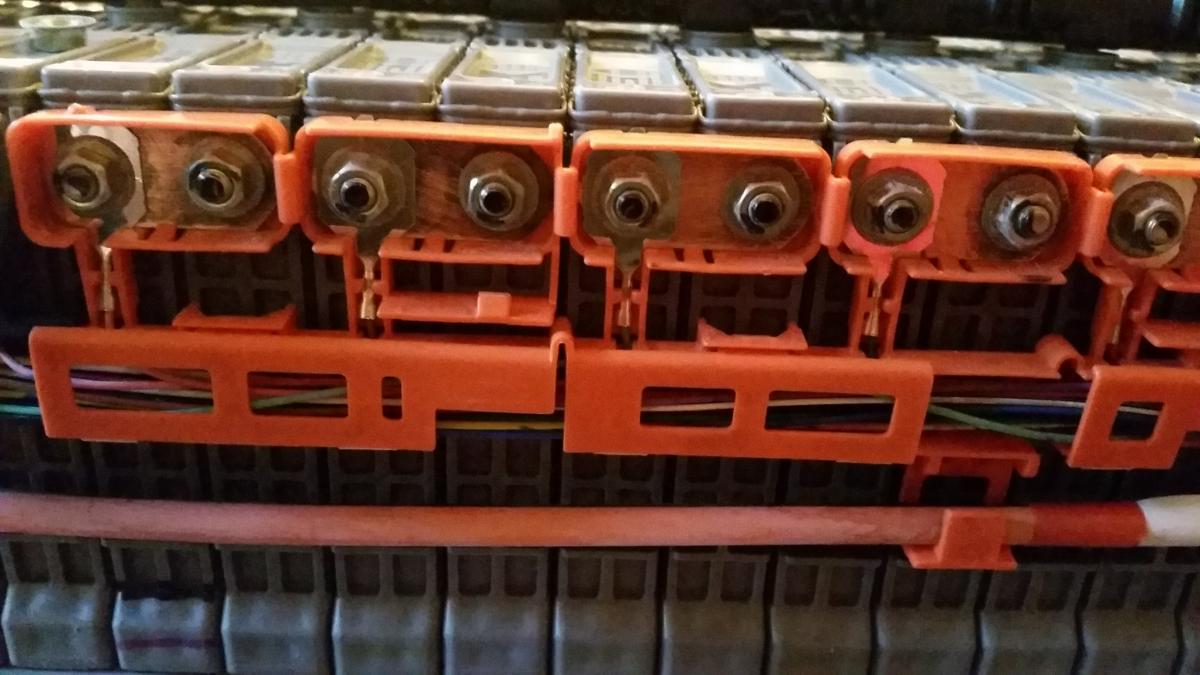
-
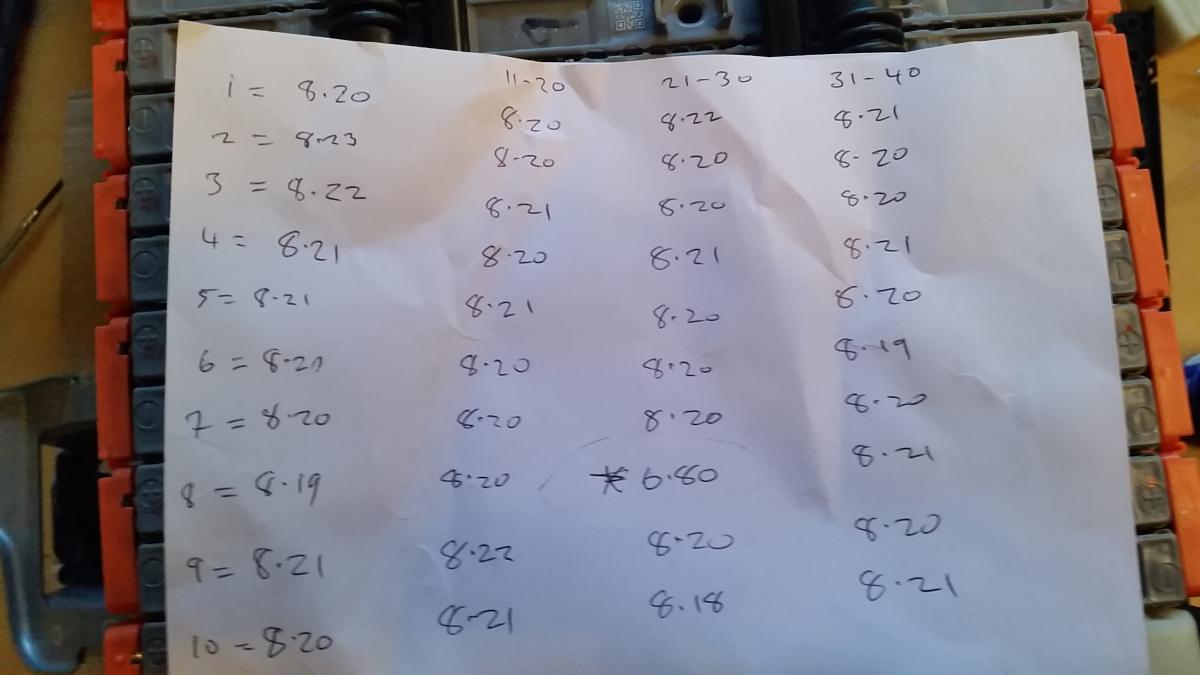
best post ever. There should be 'like' button somewhere :)1 point
-
We could take bets on which happens first. This ^ or hydrogen powered cars This is coming soon as the systems are already in development. We are also developing self-alignment so the car will proition itself accurately over the plate. 3-4 years away...1 point
-
Thanks for the reply Ray.....I'm encouraged ! I've put a deposit on an IS250C today pending the sale of my IS250 tomorrow. My proposed new one is the SE-L so has memory seats, I think we'd struggle without those now. We rarely have anyone riding in the back, they should feel privileged to be having a lift in a Lexus and put up with the space available ! I'll post more details if my sale and purchase goes ahead.1 point
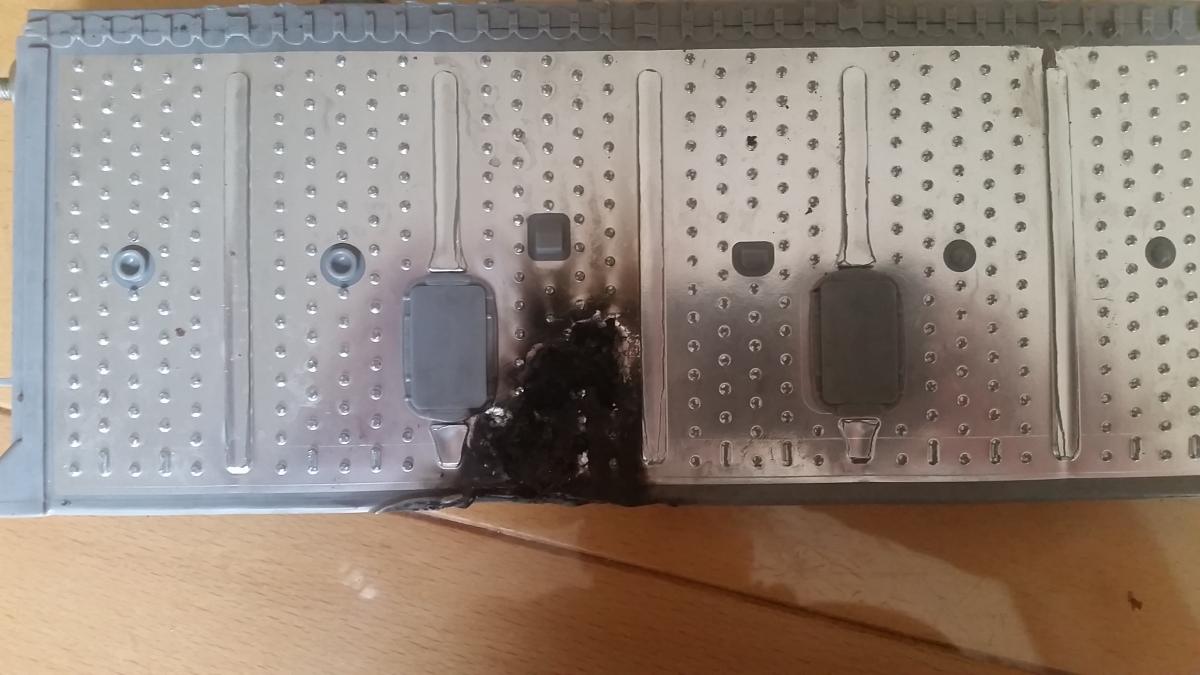
-
Jag, I would suggest you take legal advice immediately and seek to reject the vehicle under the S.O G Act while you are still within the 6 month Statutory Period. The model has been a source of discomfort for Lexus and in my view is not worthy of the Lexus badge. Regards John1 point
-
I use TuneIn radio, Apple Music, and occasional BBC iPlayer radio app. Cannot live without streaming media these days. It must be over 12 months since I last even touched a CD, with the amount of music now on offer via streaming services, I don't even bother with my own iTunes music collection - I do love all you can eat data on '3' - Getting through about 2-3 gigs of data a month :) I can tell that I'm getting/am old, all of this goes screaming above my head!!!!1 point