Monocle
-
Posts
167 -
Joined
-
Last visited
Content Type
Profiles
Forums
Events
Store
Gallery
Tutorials
Lexus Owners Club
Gold Membership Discounts
Lexus Owners Club Video
News & Articles
Everything posted by Monocle
-
It's not easy.....
Monocle replied to Texas's topic in Lexus IS 250 / Lexus IS 250C Club / Lexus IS 220D & IS 200D Club
Bizarre comments for someone who has owned the car a couple of days! Or maybe I'm losing it too! About me: A mature car enthusiast +47yrs who has owned a number of modern classics that were hard pressed to find. I spent months searching daily for hours before I came across this. The examples I kept seeing were either missing one extra such as the Rear Sunblinds, paddle shift or missing the M/L Premium Sound or had all the extras but had high miles or did not have my preferred colour combination. Some days of the week, the car is covered with a waterproof breathable car cover -
DIY Alloy Wheel Refurb
Monocle replied to Monocle's topic in Lexus IS 250 / Lexus IS 250C Club / Lexus IS 220D & IS 200D Club
Thanks for that James. That's great advice. Like you, it is great to be able to say you did it yourself! Btw, the GS wheels look great! I have been thinking I picked the wrong colour for the wheels - the brighter silver option would have been better but I suppose these will hide the dirt a bit better at least. Thanks Lee - it was hard work! Especially the time it takes and abandoning the family during the weekend never goes down well!!! Yeah, you watch the car shows on TV and you get the impression body work is a lot less work than it actually is. And you can see the work that goes into the jobs you've done on your own car - you're far more patient than I am! Cheers Bob! It will take a few weeks to complete the other three. If I finish by the end of July, I'll delighted. I will keep you guys updated! Cheers Linas! Thanks to all for the feedback and advice. Actually looking forward to doing the next one now! -
Well my clock started today! I was staying an extra foot from the kerbs on a short trip today! In the past I'd say if I got 12 months I'd be surprised. Once you hit them once your level of care drops!
-
DIY Alloy Wheel Refurb
Monocle replied to Monocle's topic in Lexus IS 250 / Lexus IS 250C Club / Lexus IS 220D & IS 200D Club
This was a much easier job and turned out great! -
DIY Alloy Wheel Refurb
Monocle replied to Monocle's topic in Lexus IS 250 / Lexus IS 250C Club / Lexus IS 220D & IS 200D Club
Thanks all. I've done a good few jobs on the car at this stage and have honestly enjoyed every one. Not that I have loads of money but it is not really about saving money, just that I get great satisfaction out of completing a job myself. However, in this case, it was just a slog and the end result isn't that great. In saying that, I am stubborn and will give another corner a go. I plan on buying a few extra tools this time. I rang around a few repair shops here in Dublin and all bar one said they don't do the Lexus wheels as they are usually so corroded and require specialist treatment. The one that would do it charges 120euro per wheel. If anyone has any tips on sanding or painting, send them my way! -
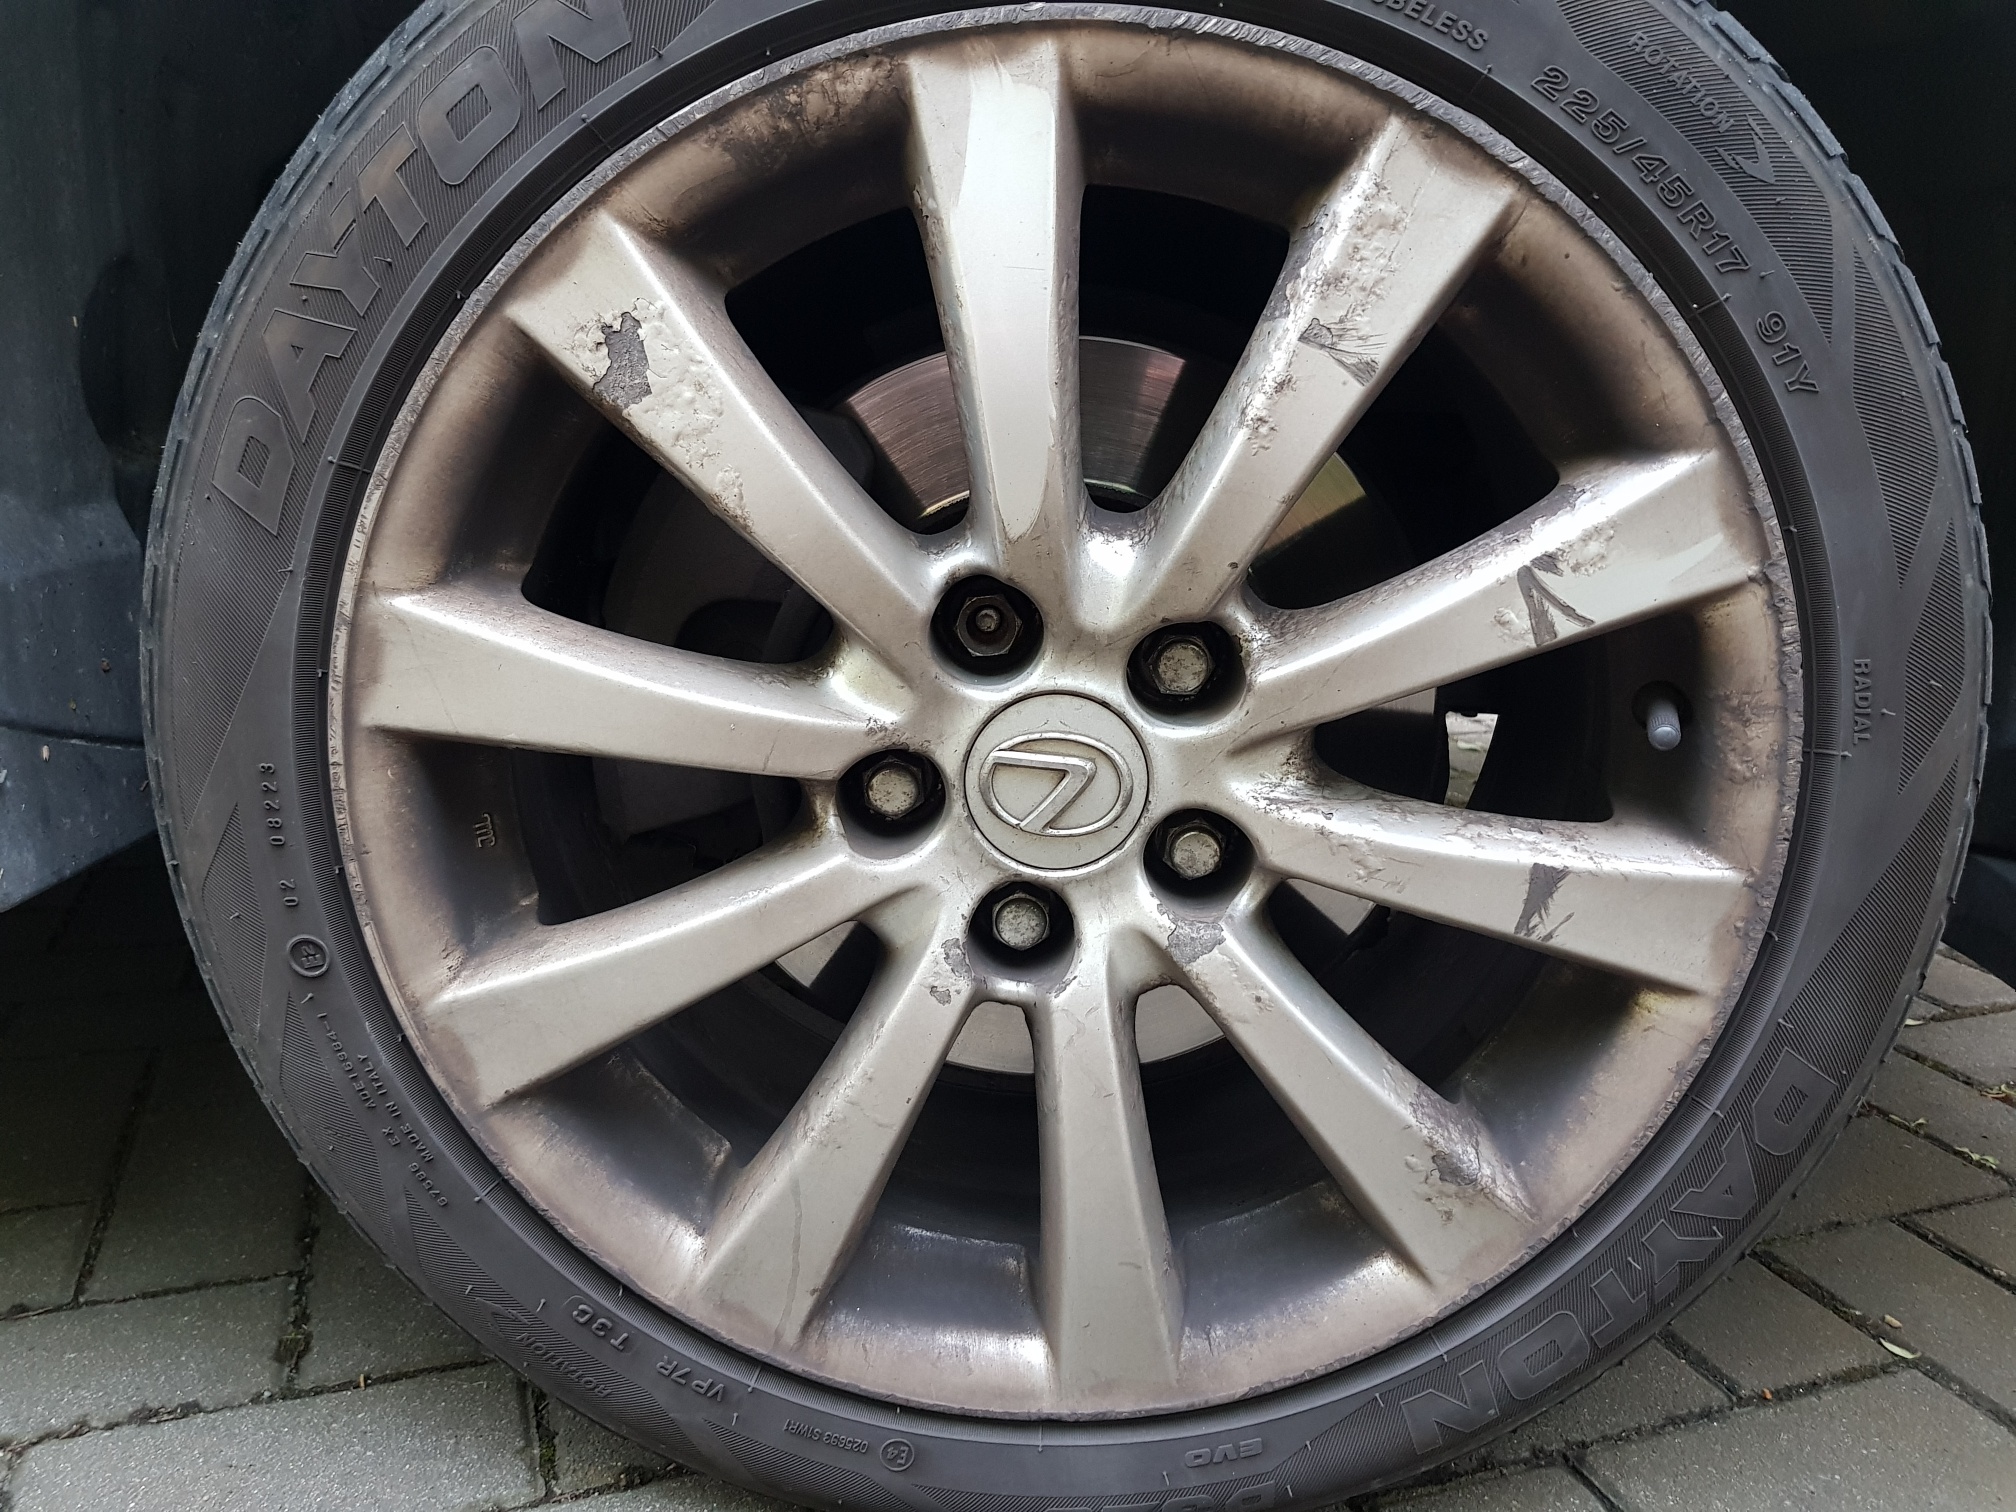
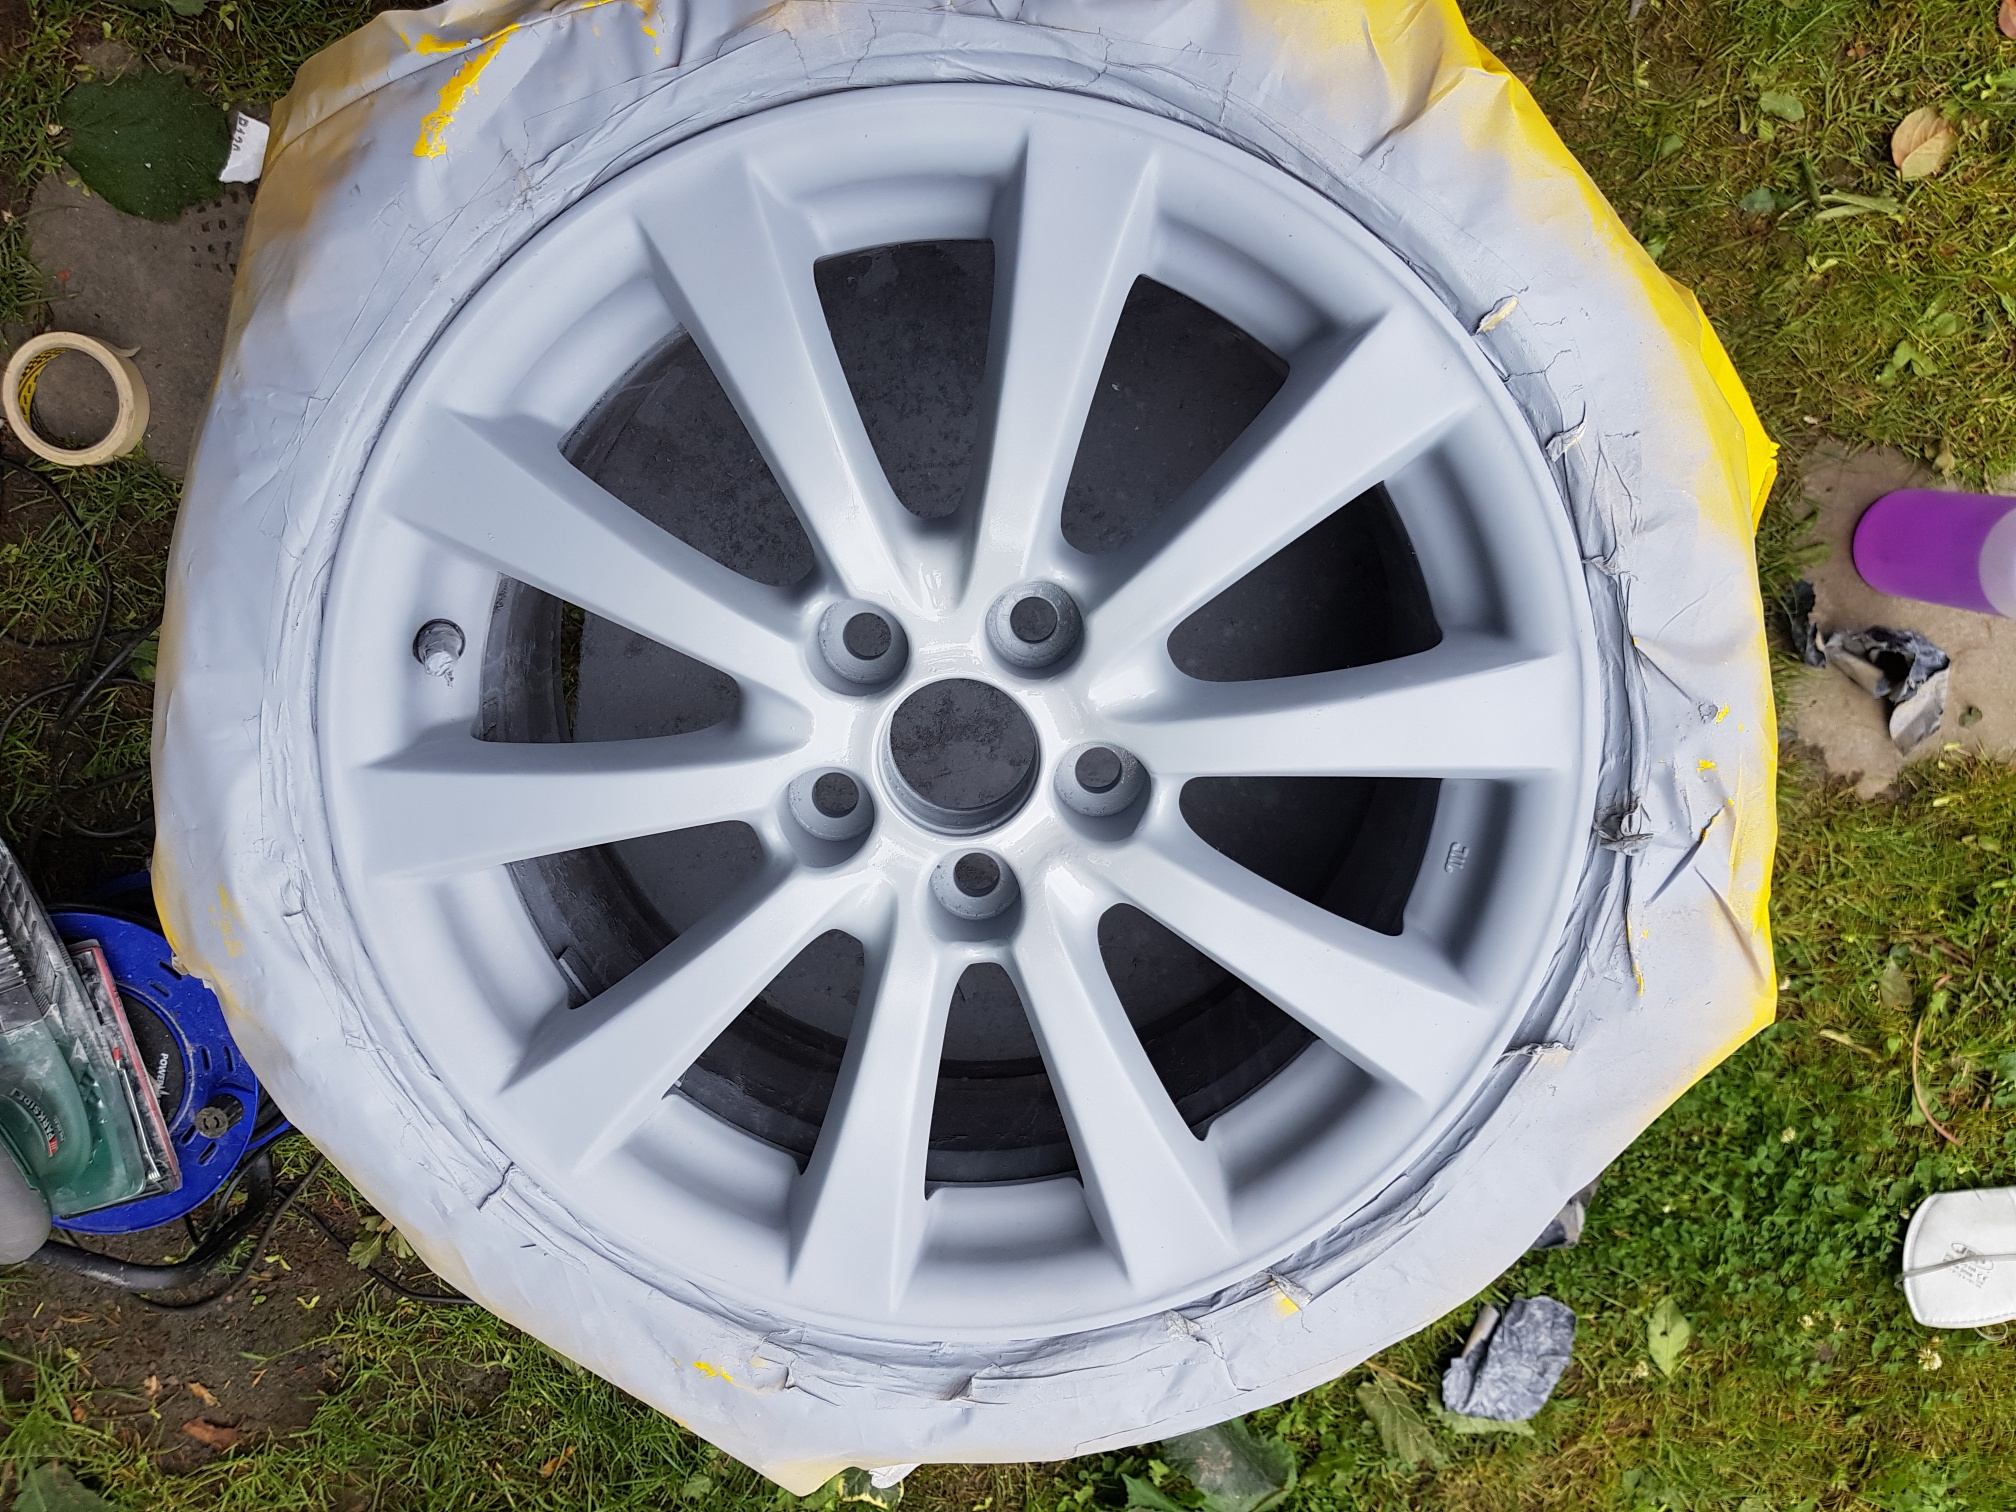
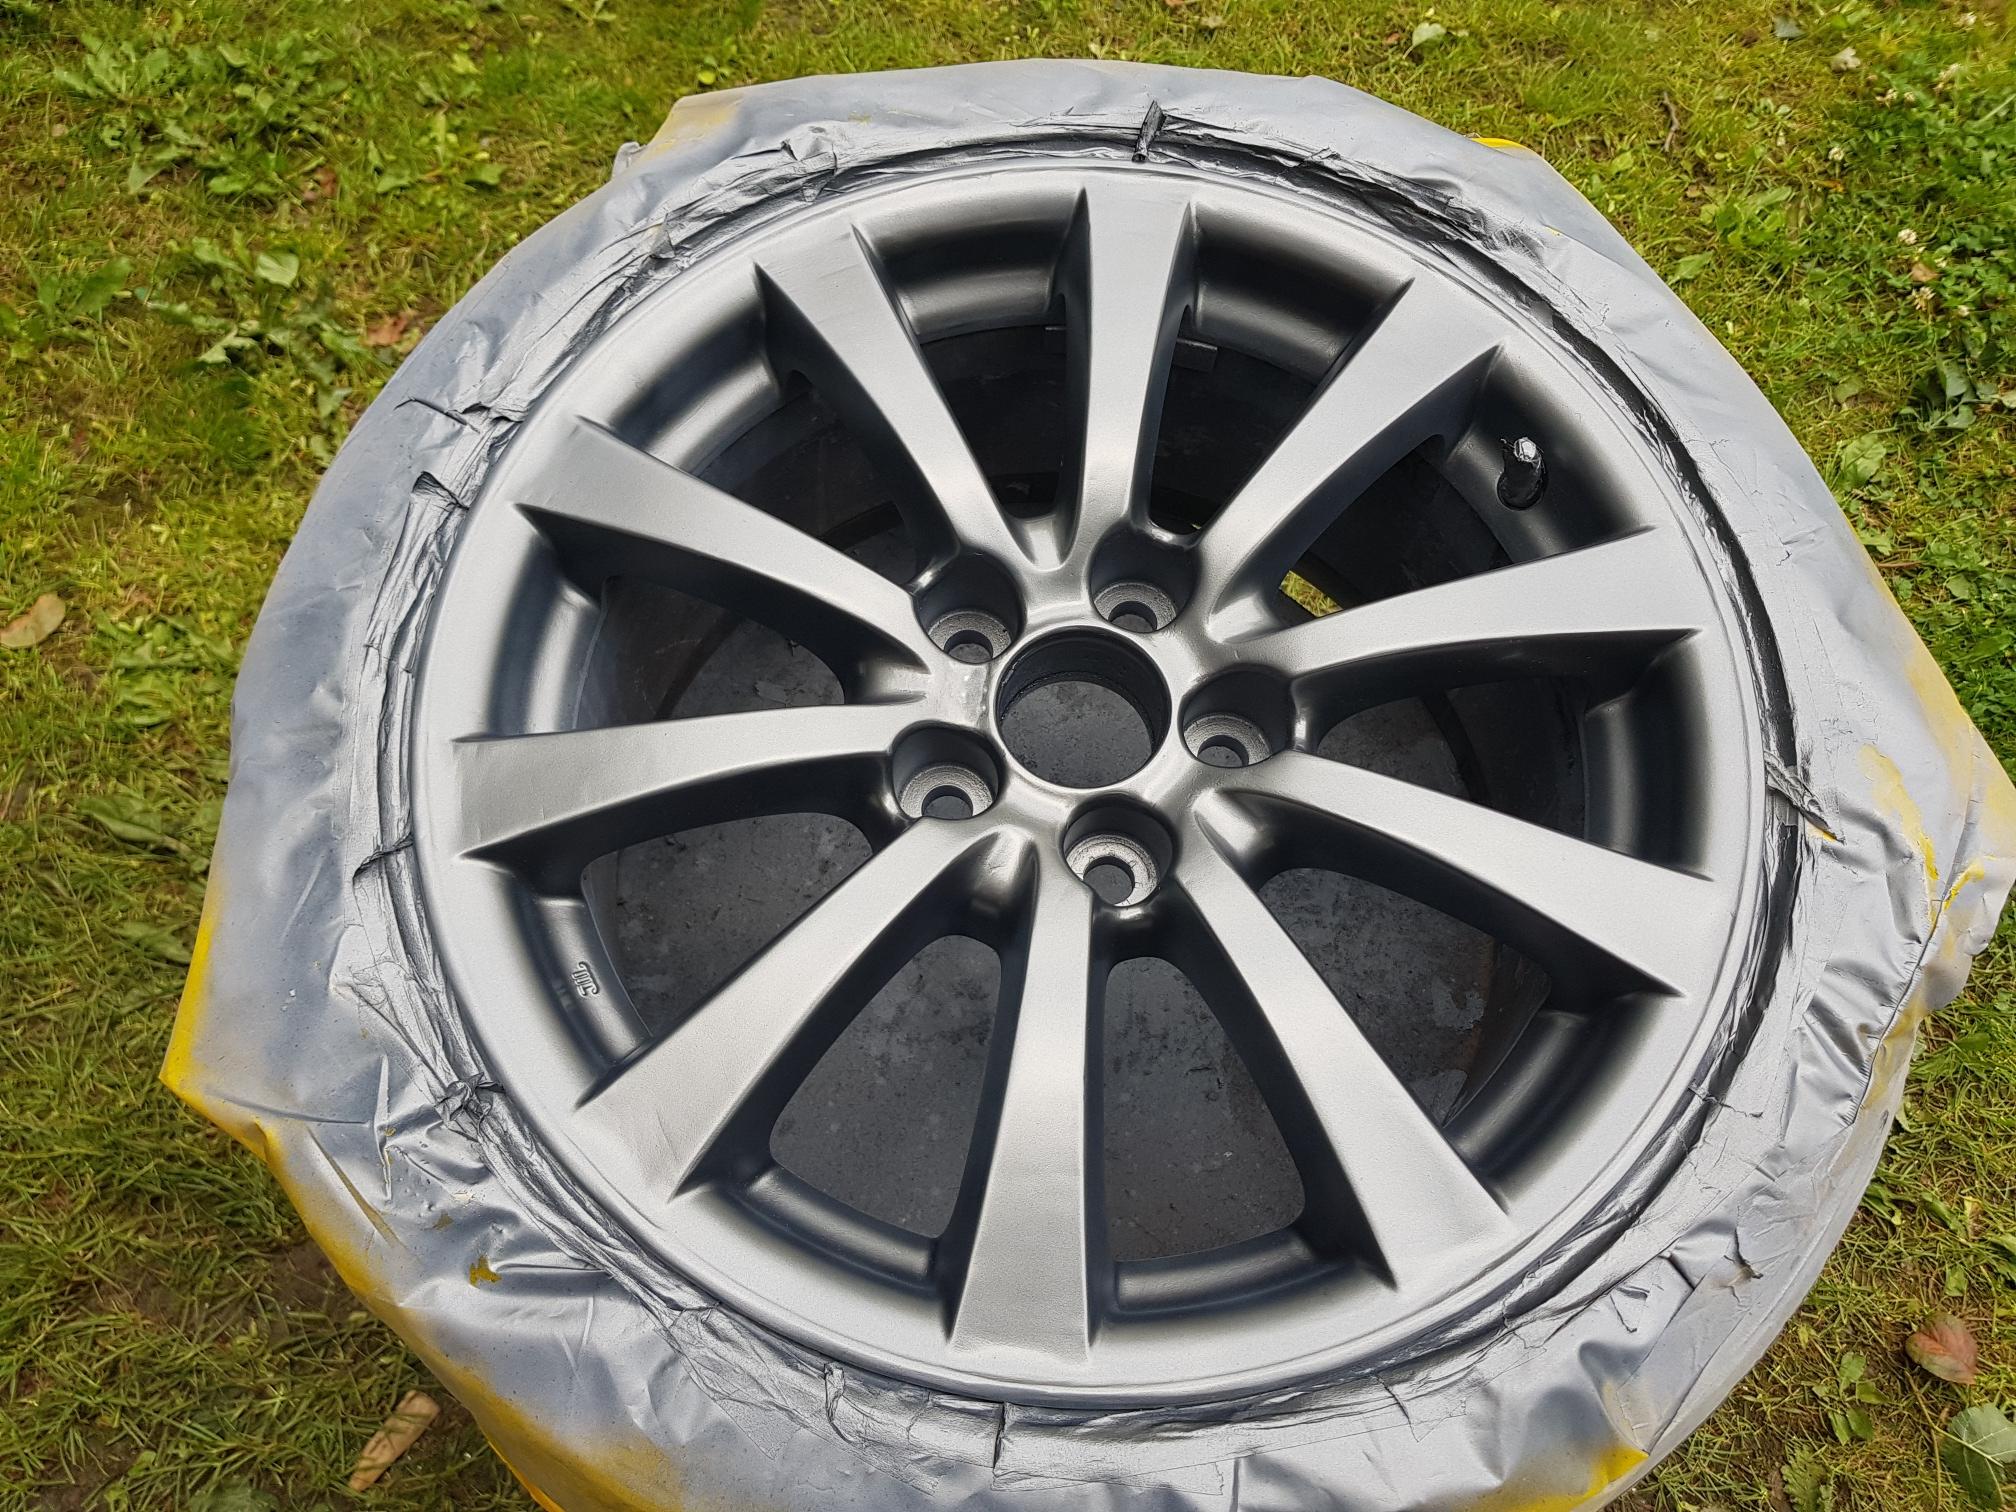
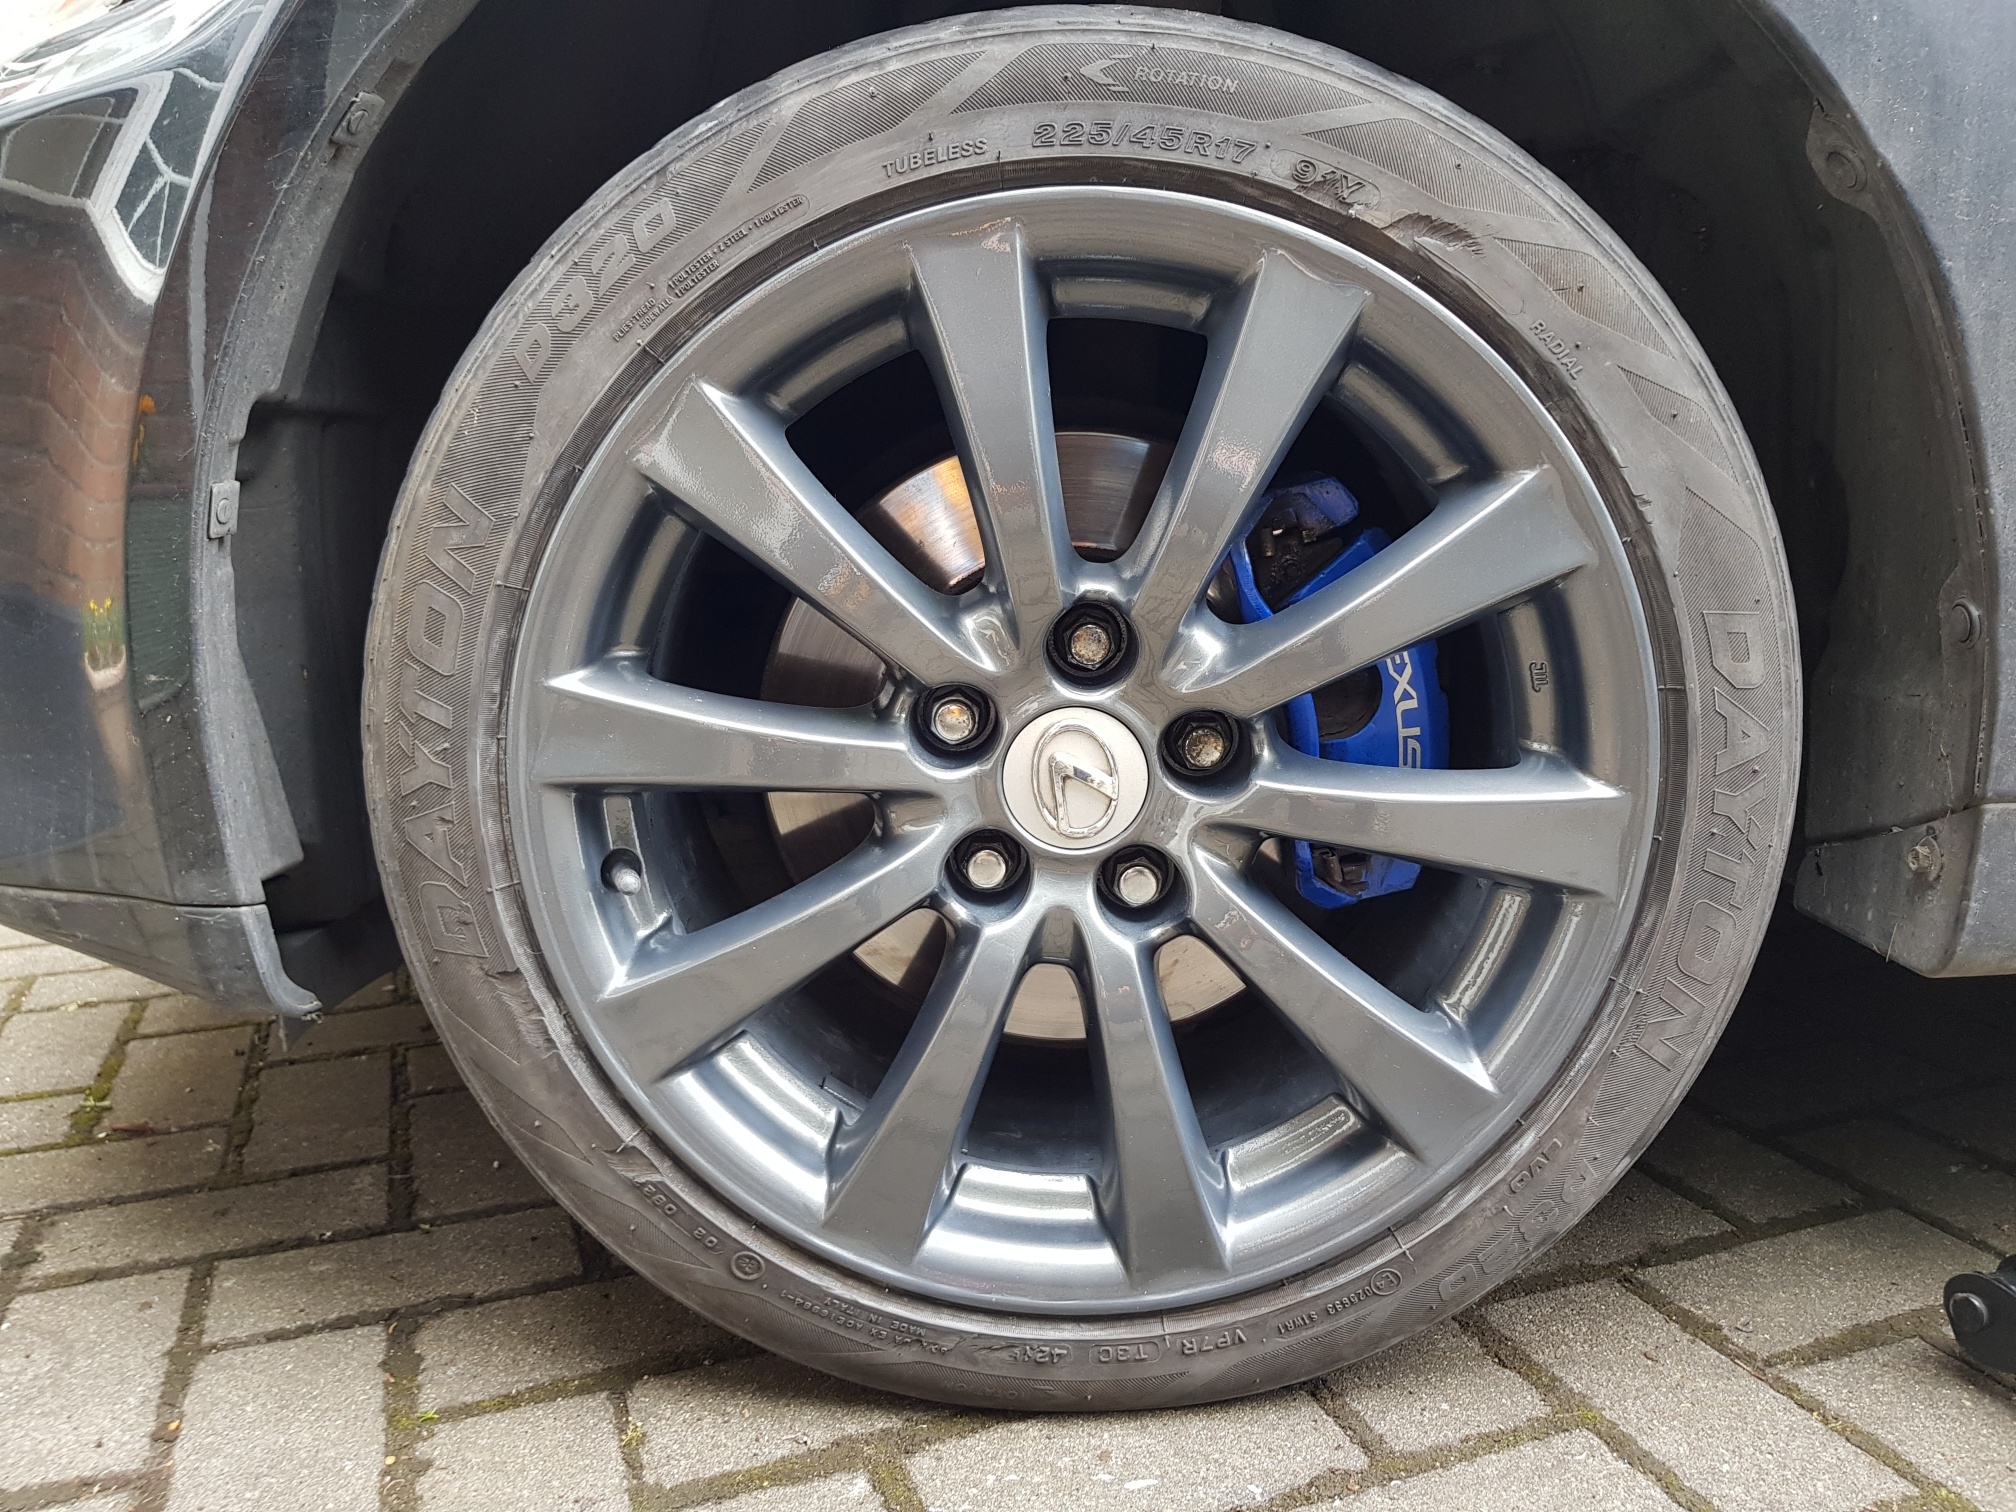
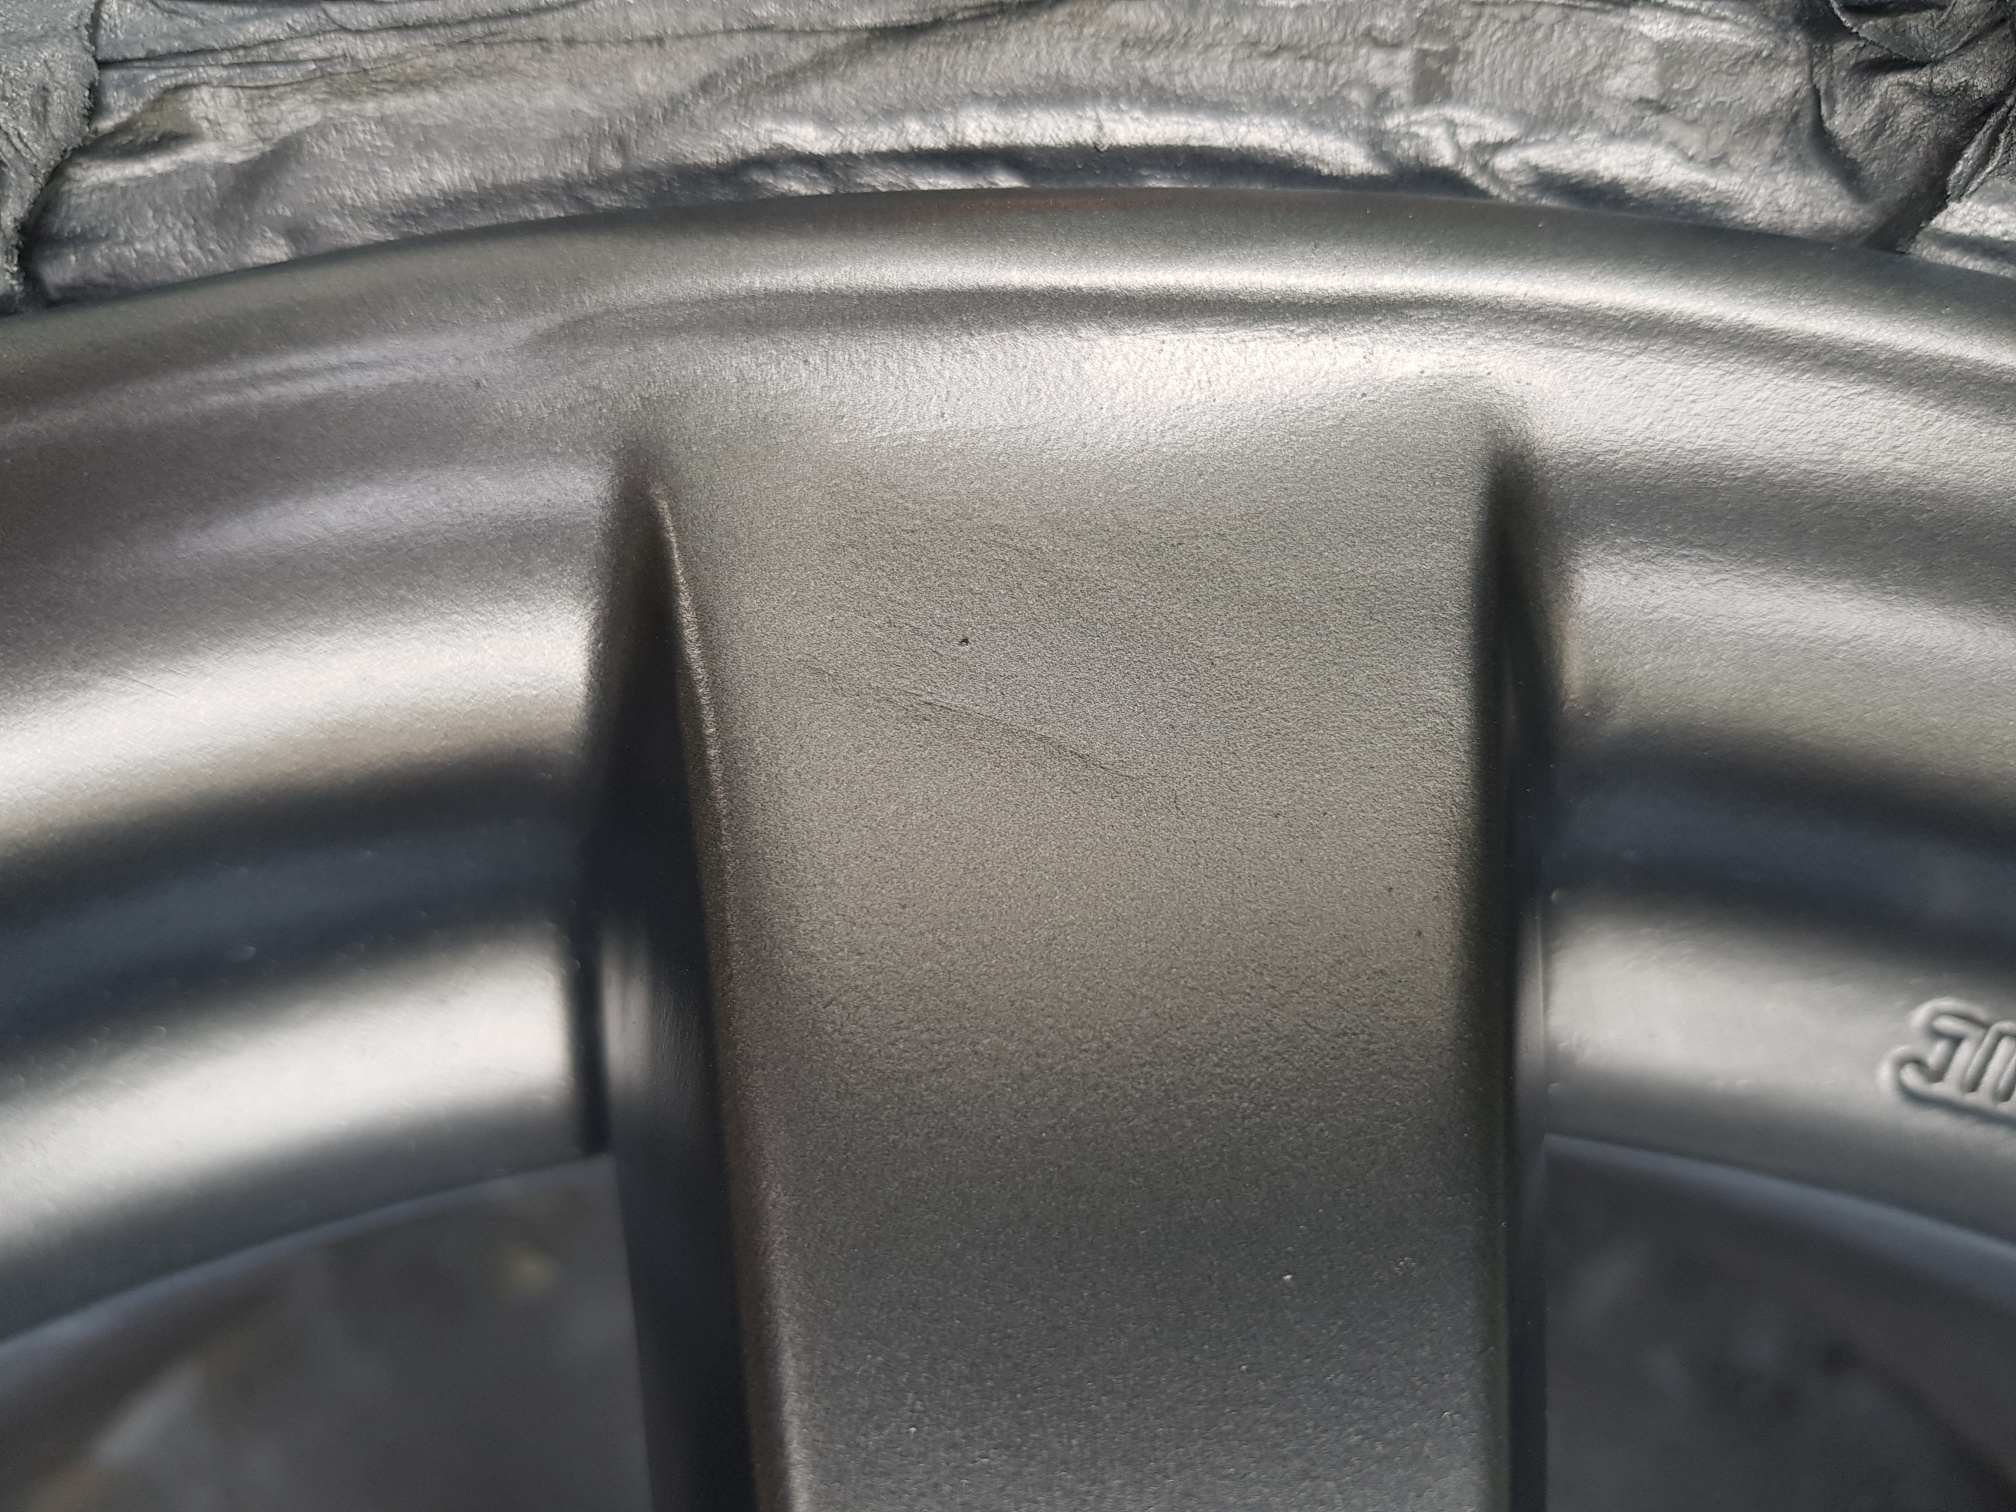
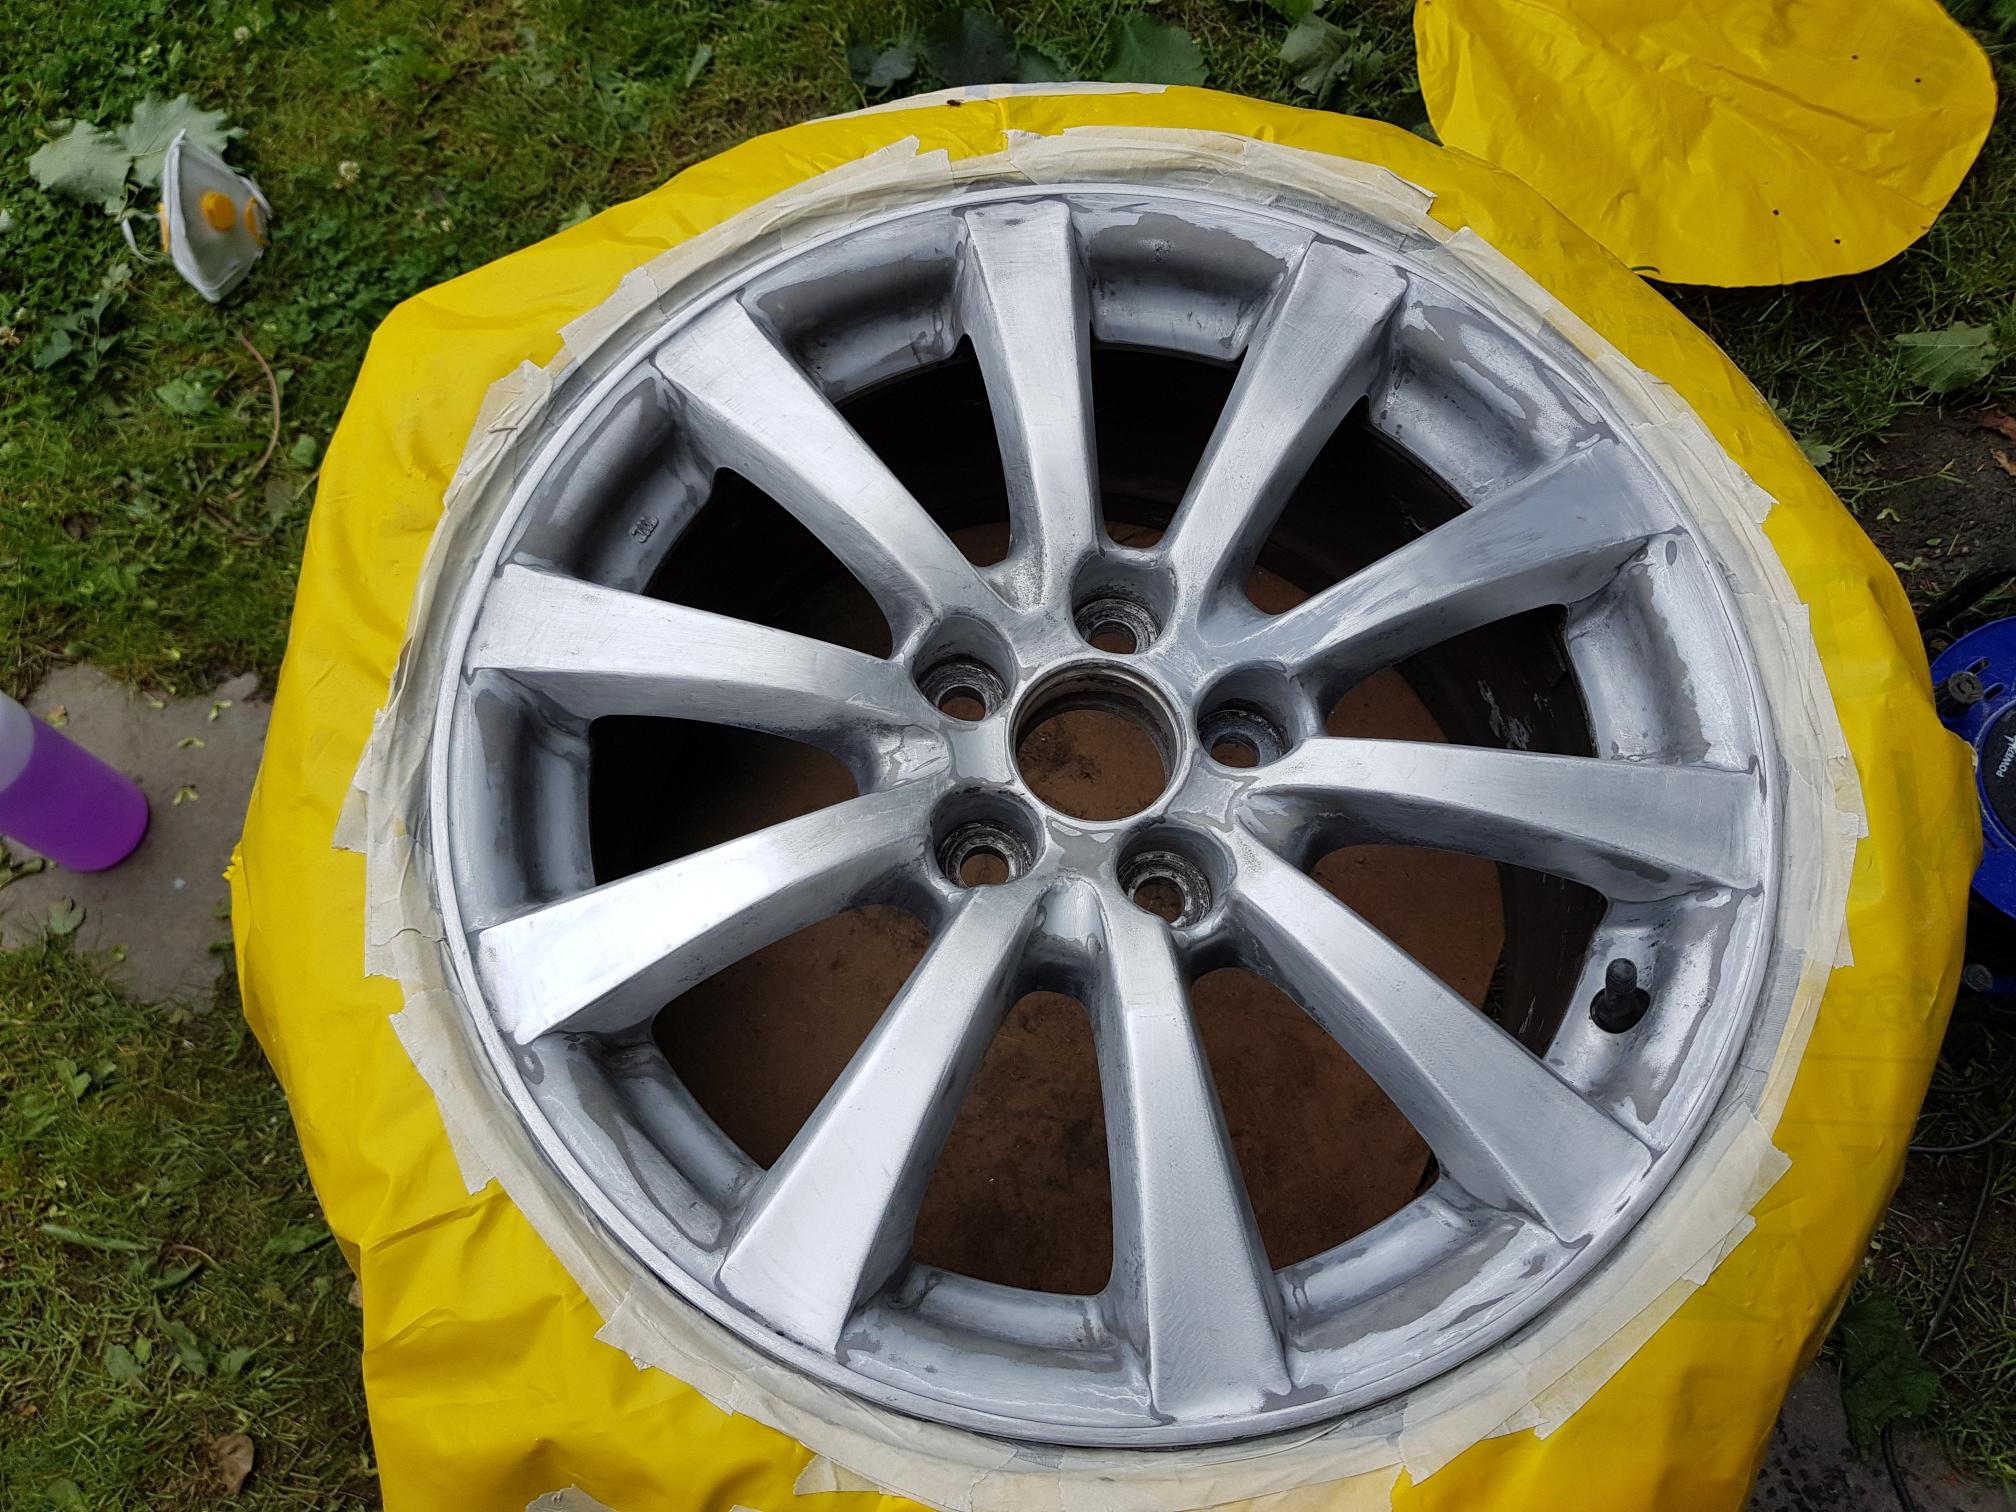
As we all know the corrosion on the IS wheels is heartbreaking and it couldn't make the wheels look worse. So I decided to refurbish them myself. Firstly, this was a very unenjoyable job and I made loads of mistakes. I have only done one so far and I'm not looking forward to the other three! People like @dougie175 should look away now! Brief summary: Purchased primer, gun metal base coat and clear coat (spoke to a paint specialist so he pointed me in the right direction for each) all in cans Bought several grades of sandpaper from 80grit to 600grit Cleaned the wheel with methylated spirits Started working on the corroded sections first by hand - I was getting nowhere (only doing the front section of the wheel - not the inside that you never see) Moved on to an 80grit flap disc which certainly removed the corrosion but was far too aggresive and made the job of smoothing out the marks it left a real chore I used a hand sander (floor sander) with 160grit - this worked well but could only reach about 50% of the area Used 160grit paper by hand on the rest of the areas Used 320grit everywhere before priming Took 4.5 hours of sanding in total to this point Masked off the wheel and valve Sprayed several coats of primer then wet sanded with 600grit Sprayed several more coats of primer Allowed primer to dry (not long enough though, enough though I followed the instructions - must have put too much on) Sprayed several coats of the base coat - noticed some spotting where the base coat wouldn't stick (just layered up in these areas but came up a bit bumpy) Finished with multiple coats of clear coat Allowed to dry for 24 hours Mistakes: Used far too low a grit flap disc on the corroded areas (however it was needed to remove the kerb rash along the rim). Would use around 200grit next time Didn't allow primer to dry for long enough - probably due to coats being too thick I didn't have a ventilated place to do this so I did it outside - wind was a pain when spraying, hence mistake #2! Should have spent more time sanding every little mark as it all shows up when painted All in all, it is far from professional and the other wheels will be better. Photos below. Total job time, 6 hours (excluding drying time between coats). Also need to buy new centre caps. Before (this is actually the other front wheel as I forgot to take a before pic) Sanded and ready for primer Primed and ready for wet sanding Base coat applied - flaws can be seen here Final wheel on the car Lines left from initial sanding can be seen

-
Well it seems like a tough one to call all right. Hopefully you can get it diagnosed easily and with not much cost. Btw, this is a long shot and highly unlikely, but I had a front wheel bearing fail on an old car years ago and I replaced the whole hub. But I used the old hub nut instead of a new one (spring nut I think it is called) and it came loose. There was a significant shudder as a result that did increase with speed and was worse when not under load. Anyway, I doubt that is your problem but maybe worth sharing! Best of luck with it - never want to see an IS leave our roads
-
My experience of a CV joint failure is that it is noisy rather than it creates a vibration. So, you would probably hear a CV joint failure before you would feel it. Unless of course you see the boot leaking first! This is important. Your description would indicate that it is related to speed rather than rpm so the vibration can only be from the gear box and back. A vibration is generally caused by an imbalance (natural frequency is another but this wouldn't appear all of a sudden). There is unlikely to be an imbalance in the prop shaft so, unless it is loose, I would discount this. And if it is loose you should notice the vibration at low speeds too - there would be a very gradual build up of vibration intensity with speed - not just over 60mph. From what you describe above, it seems like a tyre/wheel imbalance is most likely. Could one of the weights have come off? As the wheel is the only part of the drive system that is "cantilevered" it will accentuate vibration. Under drive conditions, vibration is generally less than when in free rotation. I speak from experience of balancing industrial fans so I hope the same logic applies here!
-
That's great info - thanks Jay. Now back to AT to find my perfect GS450h!
-
Definitely clean the manifold. Not sure why you were advised not to. Long job, but simple and well worth it.
-
Thanks for that Luigi - that's great info. My file list is pretty well labelled so that should work. As the ML sound system is so good, it is a little disappointing that a proper interface hasn't reached the same standard for file management. A basic media player interface similar to iTunes/WMP would have been a great addition.
-
Hi, I currently have an IS220D and looking to move to a GS450h probably 2013ish. I had it for a few hours as a test drive but never really got to explore how well it connects with devices. I am mainly interested in connecting a device to play music (iPod, Memory Card, USB Stick, even an old phone). For example, is there an auxially port and if so where is it located? Is there a USB and again where is it? Finally, is there a spare memory card slot (not taken up by the SatNav card)? And if so, what is the interface like if you were to have music files on a memory card? Is it a simple folder view with file names or will it pull the ID3 tags from the file and display album art etc? I know it is a minor detail and won't change my mind about the car (I'm already bowled over by it!) but it would be helpful to know. Thanks for the hekp in advance
-
I would definitely recommend this too. I had Terraclean carred out and helped a lot but didn't fix completely. Issue arose again after a couple of weeks. Had it in for a service with Lexus and they said they would recommend the forced regen. They ran it twice and it has been perfect ever since. On top of that, they told me to run the car between 2,750 and 3,000 rpm for 10km uninterrupted without using cruise control every tank. I have given up on 5th gear too on their recommendation. There hasn't been a hiccup since (5,000 miles or so).
-
What is this part.
Monocle replied to Koum's topic in Lexus IS 250 / Lexus IS 250C Club / Lexus IS 220D & IS 200D Club
It looks like half of the mud flap is missing??? Here is the assembly drawing (part number 57498-53030)... Can't seem to find the part number for the grommet. Give Lexus a call with the part number above and they should tell you.
-
Just saw your phone charging tray - great idea. Not sure if this is any help at this stage but most of the phones I have bought over the years (mainly Galaxy and iPhone) come with a perfectly fitting tray in the box. It might be worth seeing if you can incorporate the tray into your existing set up so it looks like the phone fits perfectly. The tray comes with a lip as well which should help with the installation. Below is an iPhone 6S tray and a Galaxy S8 sitting in the tray
-
They should give you your own show on TV. Incredible work!
-
I was about to head off for a week long driving holiday when a second injector was blowing. That makes two within the space of 1500 miles! Bit frustrating but very lucky that I bought spare seals when the first one went. The washer was a bit more stuck than the last one. The injector came out ok but the washer took about 20 minutes. One thing I did learn (the hard way) was not to do this repair job with the engine hot. The fuel return line is very easy to bend when hot. So much so that when I was loosening the bolts, the line would twist and bend. It didn't break however but it could have been a disaster. Seriously considering doing the remaining two at this stage!
-
Ignore that last post - John is on the ball!
-
This is what I could find... Parking Assist - Back Guide Monitor Rear View Monitor.pdf
-
There is a lot on this in the manual so I can't paste it all in. But here is the contents page. Let me know which sections you want and I'll do my best to get them up here.
-
Great update! Couldn't agree more. 7 years on and 150k on the clock. No plans to change!
-
I doubt this will be much help to you but I have never really noticed the difference between the two. So maybe mine doesn;t work either. Like you, when in heavy traffic or behind a bin truck, etc. I would reach to the button. Sometimes it would be already on other times off. But if you think about it, if you press it to go into recirc mode when there is a bad smell, will that not just circulate the bad smell and trap it in the car? I do notice that when you have the aircon on and you switch from hot to cold air, it will automatically switch to recirc mode. Not sure if that is going from hot to cold or vice versa. I presume that is just for efficiency reasons.
-
Ratty Rubber
Monocle replied to Balthane's topic in Lexus IS 250 / Lexus IS 250C Club / Lexus IS 220D & IS 200D Club
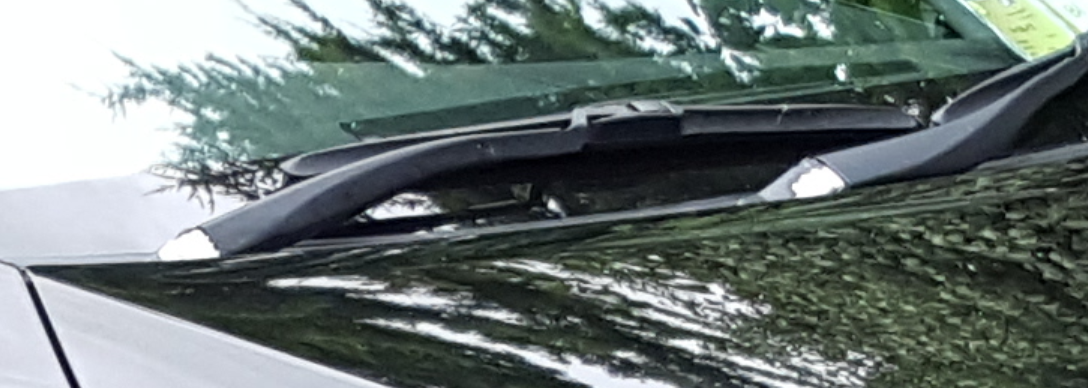
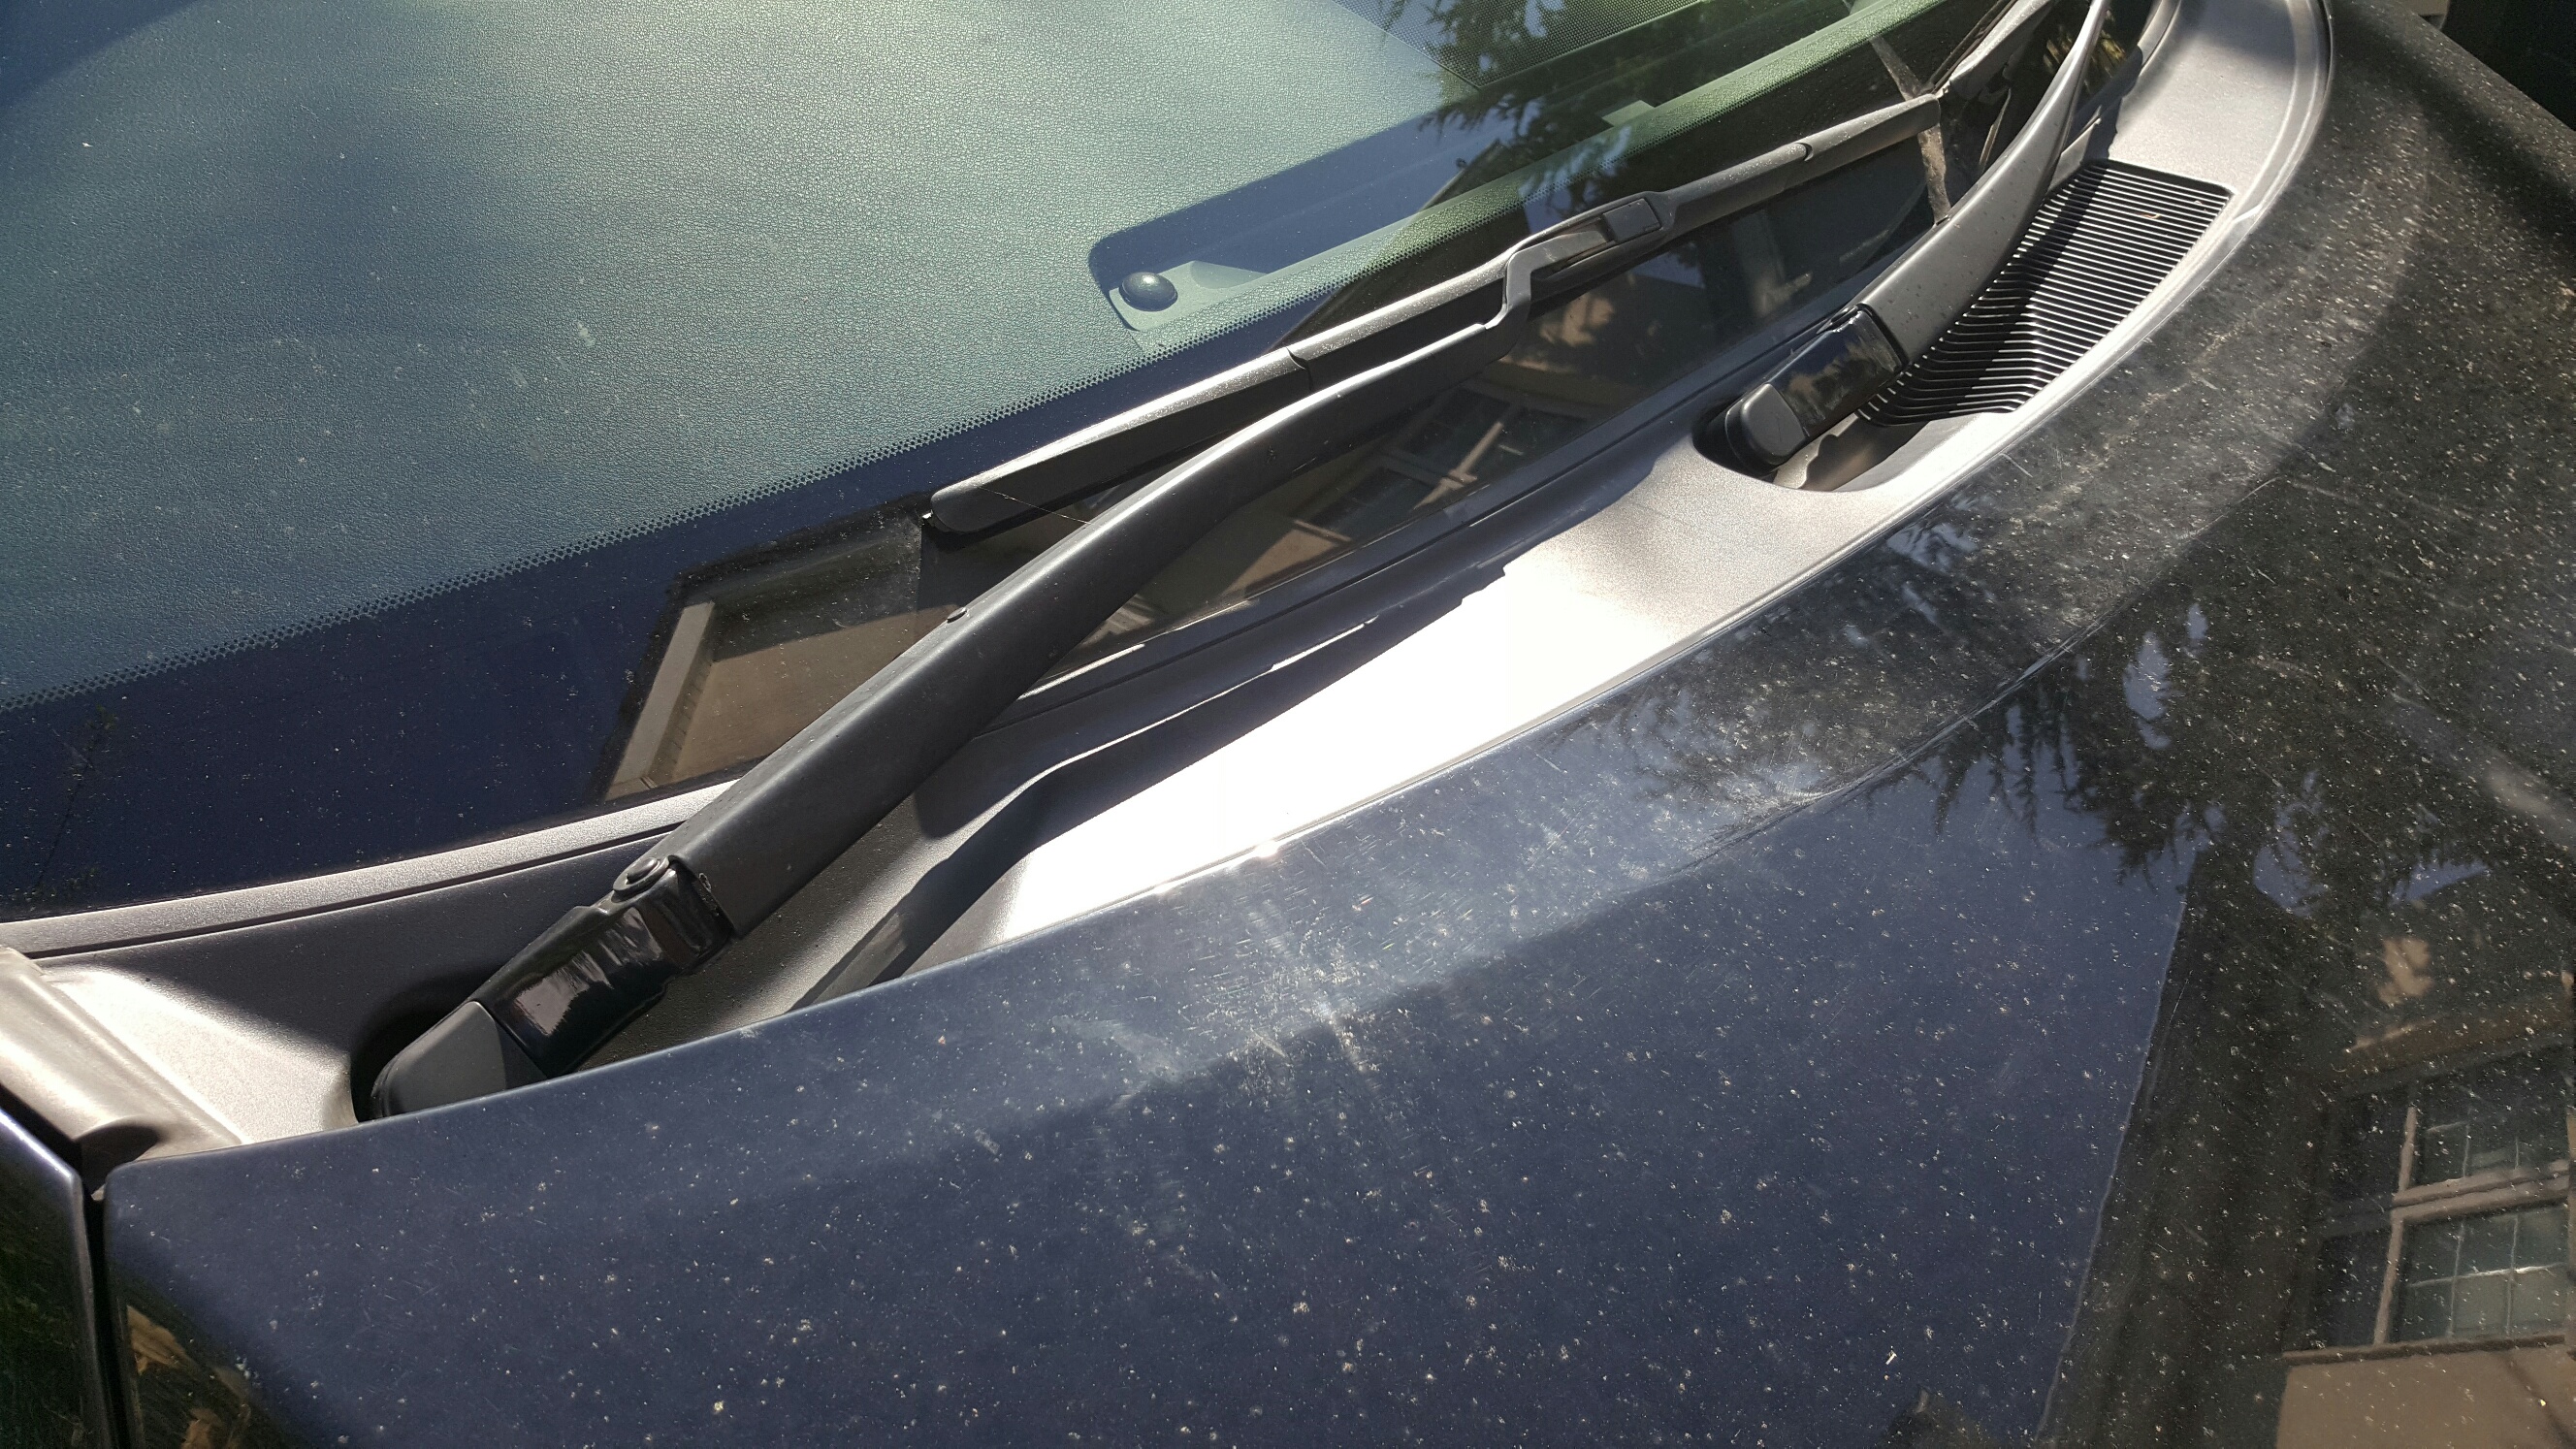
@Balthane I refurbished my wiper arms last year. See before and after pics below. I was very lazy and just used some spray paints I had lying around. It turned out glossy and looks like a just wrapped them in black insulation tape! However, bar the finish, it was a good job and has lasted well since. I removed each of the wiper arms. Just pop the cap on the end and there is one nut holding them on. Tape off the unaffected areas. I used a fine sand paper on the corroded area (something like 300grit) - it seems to be aluminum so easily sanded back. I cleaned down with spirits and sprayed with primer, a black coat then lacquer. I gave it two coats of black and two of lacquer. Probably overkill! Job takes about an hour if you exclude waiting between coats, or three hours if you include waiting time. I was doing the brakes at the same time so wasn't waiting around too much! Not the clearest guide ever, but it is really an easy job and I can't see anything that could go wrong even if you have the technical knowledge of a hamster!
-
Engine Sticker
Monocle replied to Shahpor's topic in Lexus IS 250 / Lexus IS 250C Club / Lexus IS 220D & IS 200D Club
This is great advice!!! Saves lots of time. -
Engine Sticker
Monocle replied to Shahpor's topic in Lexus IS 250 / Lexus IS 250C Club / Lexus IS 220D & IS 200D Club
Totally agree with Shahpor. I think it is definitely worth separating the solenoid end from port end when the EGR is removed. You can get a much better clean around the valve plates and seats which means you'll get a better seal. It is pretty easy to do. The two parts separate very easily. Also, I wondered about the state of the inlet manifold. So I took it apart. Big job. Lots of carbon removed. I put a guide together so you can see photos there. There was a slight improvement in mpg but the biggest gain was in acceleration from low revs.