Search the Community
Showing results for tags 'dash cam'.
Found 4 results
-
 Hi, I purchased a Nextbase dash cam yesterday with the hardwire kit. I want to install this in my 2017 IS300h. Is there an internal fuse box where I can take the power for the hardwire kit from? I want to tap into the cigarette lighter fuse. I have found the fuse box under the bonnet but can’t seem to see internal fuses. All help appreciated. Thanks.
 -
 Just joined up having had our first Lexus (coming from years of Mercs & interesting Customer service!) for 4 months. I want to get a Dash Cam fitted and have been told by our local dealer (Tunbridge Wells) that they only fit it to the cigarette socket. My question is this, should it be wired via the fuse board so that it is powered constantly? We have had the car scratched several times & would like to be able to pick up movement near the car when parked up. The car is great (NX300h Luxury) but there seem to be very jealous people out there. Thanks
 -
Come on, who was it? Anyone here? I've found myself watching these dashcam compilations like hazard awareness training videos; always something to learn. Like (if you don't know already), keep away from BMWs, Audis, VWs and "sh*tting Peugeots!". Lexus drivers hardly ever appear, Drift Kings excepted... .
-
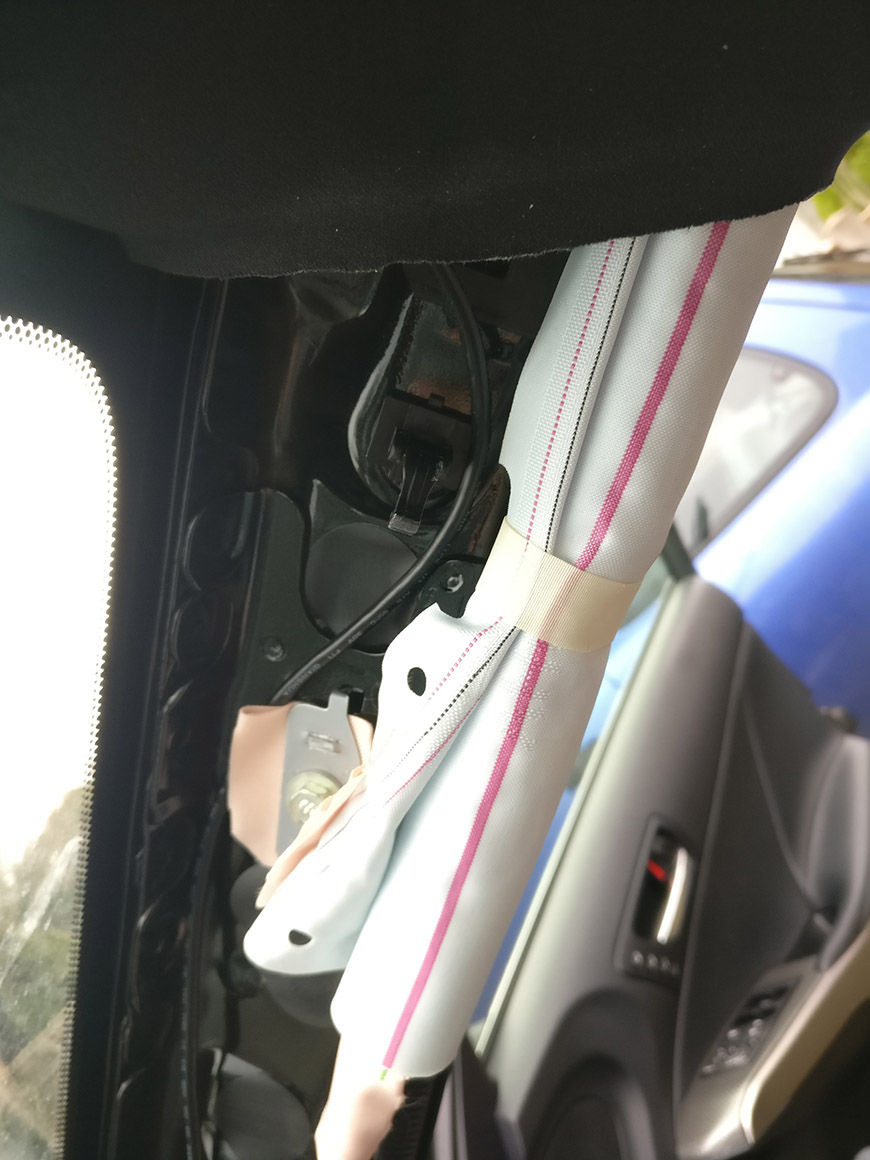
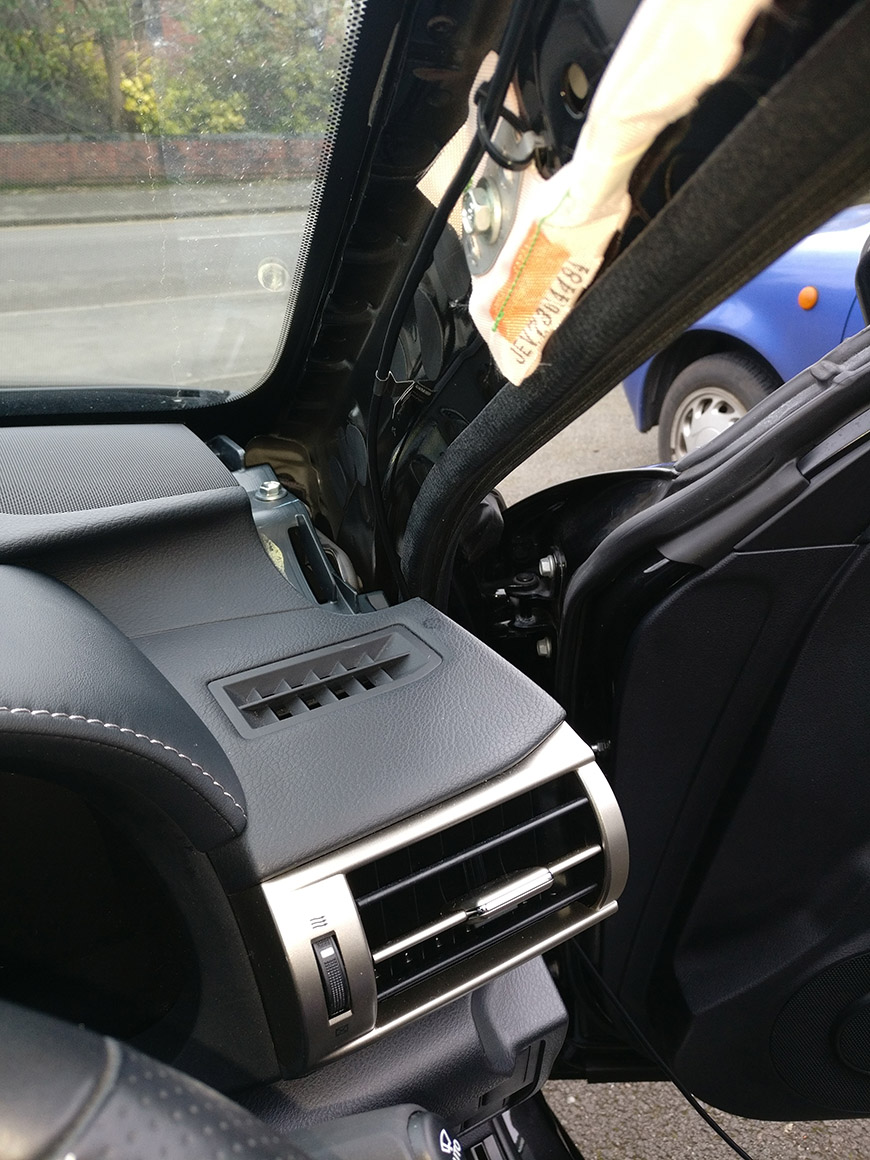
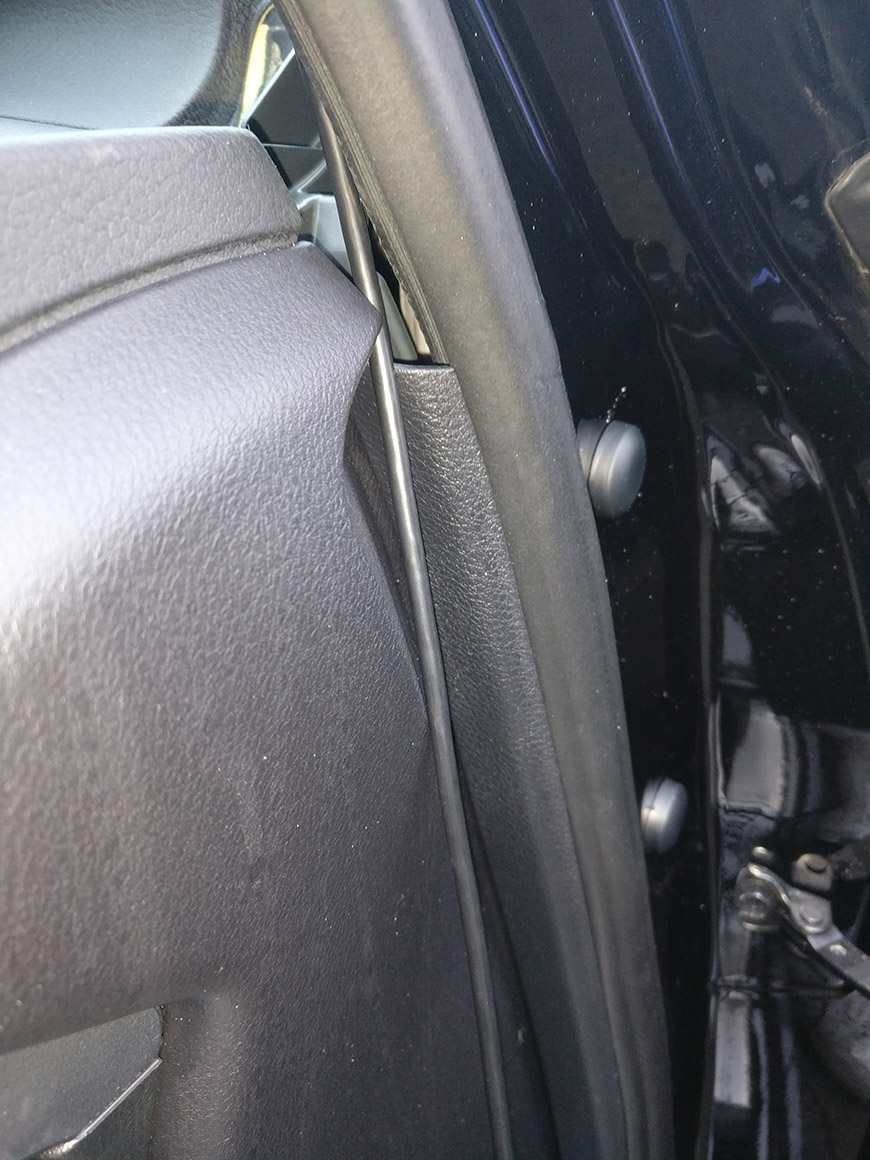
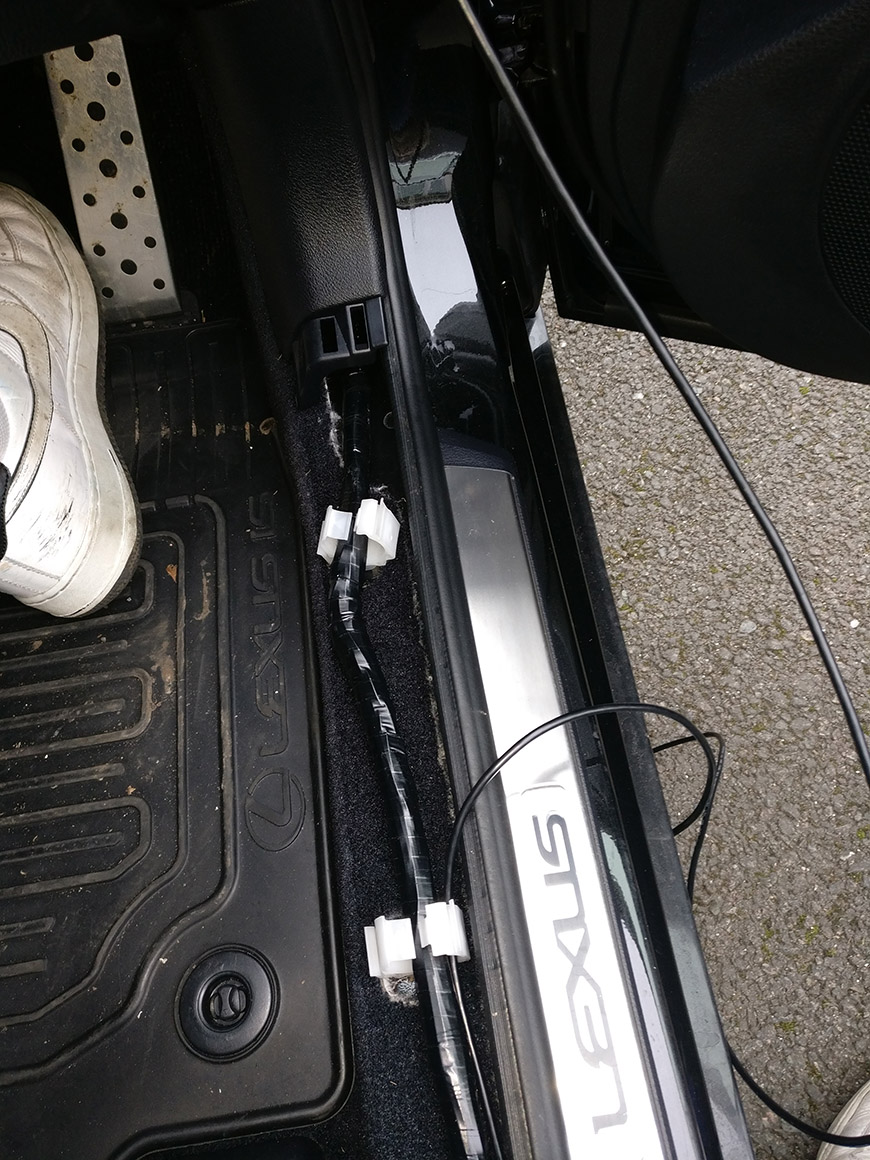
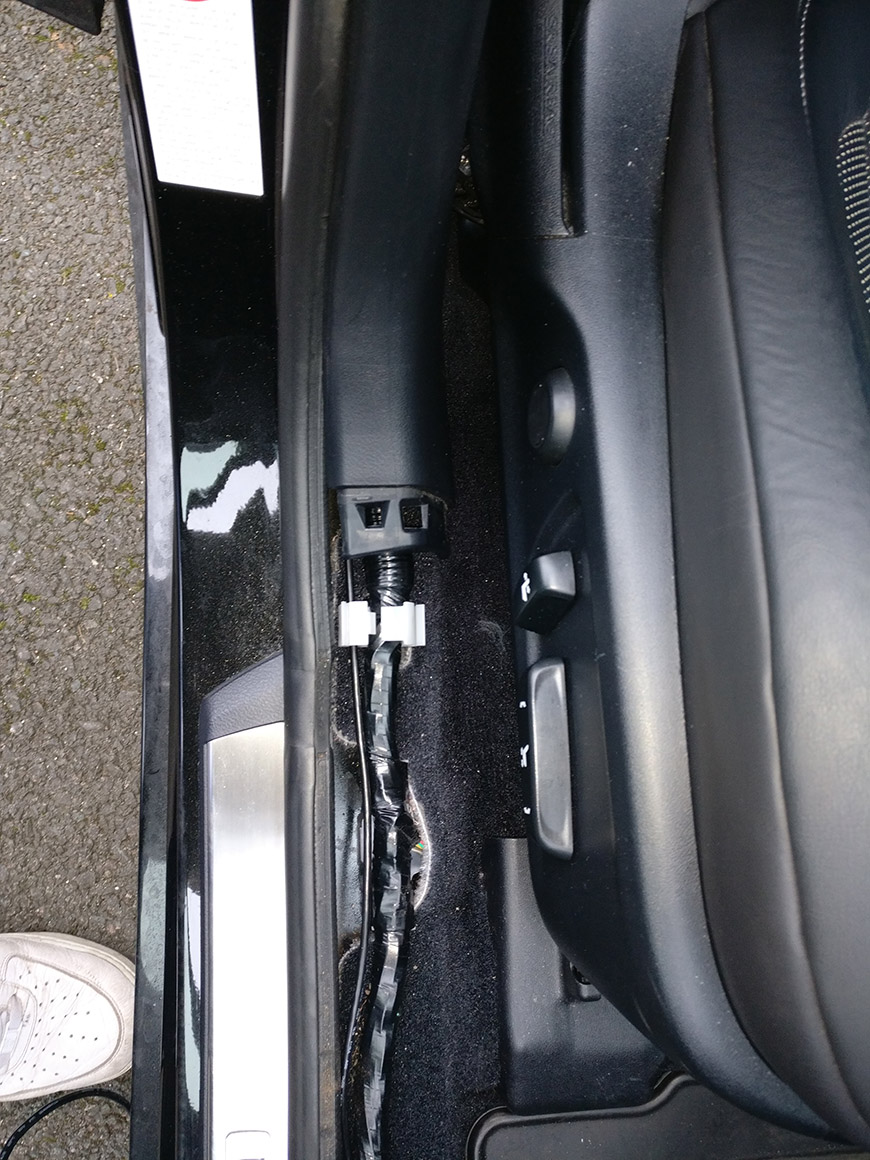
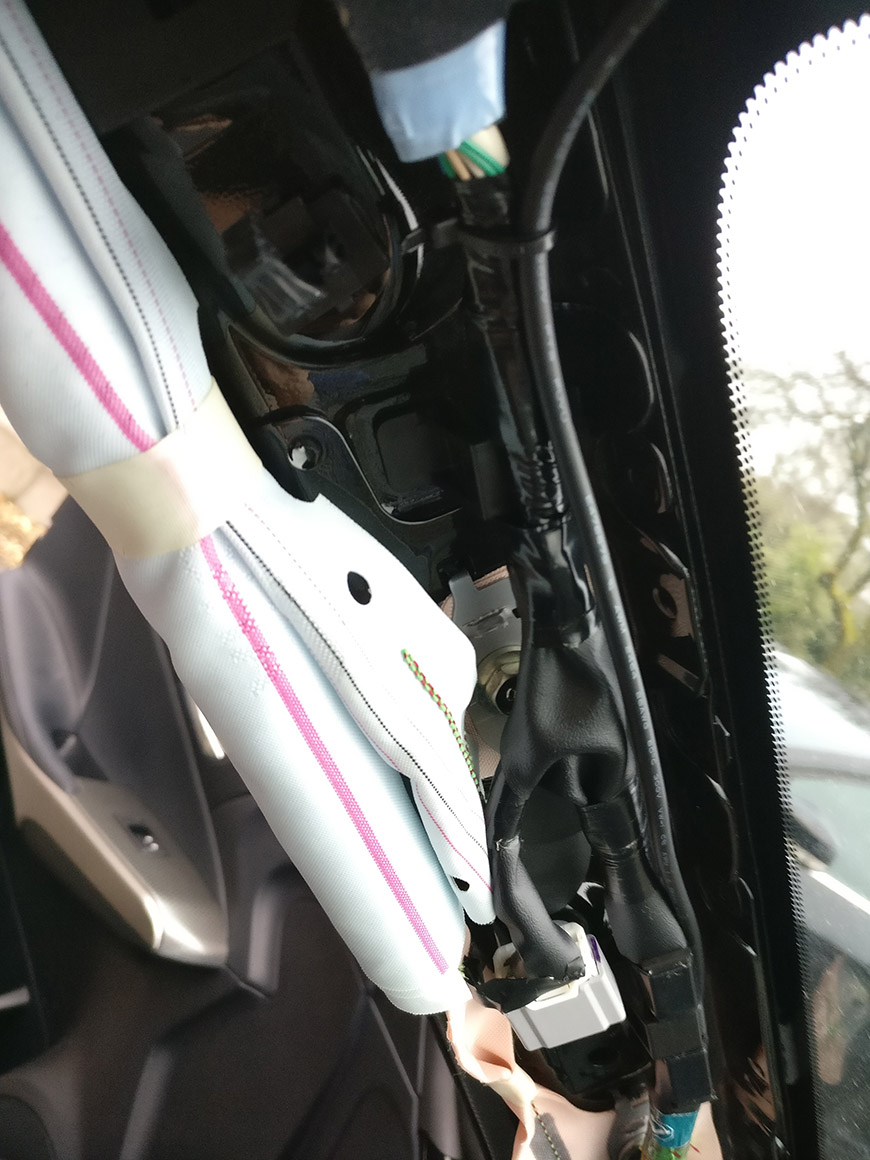
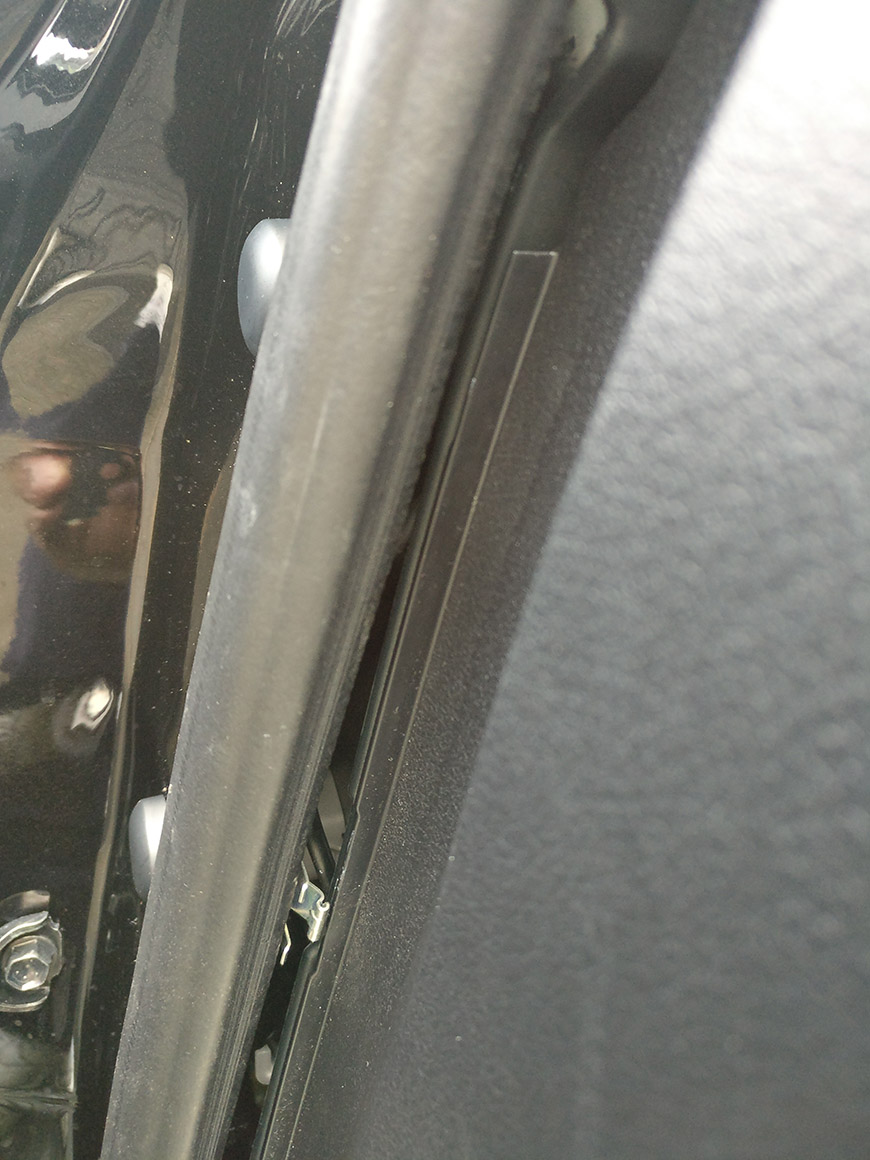
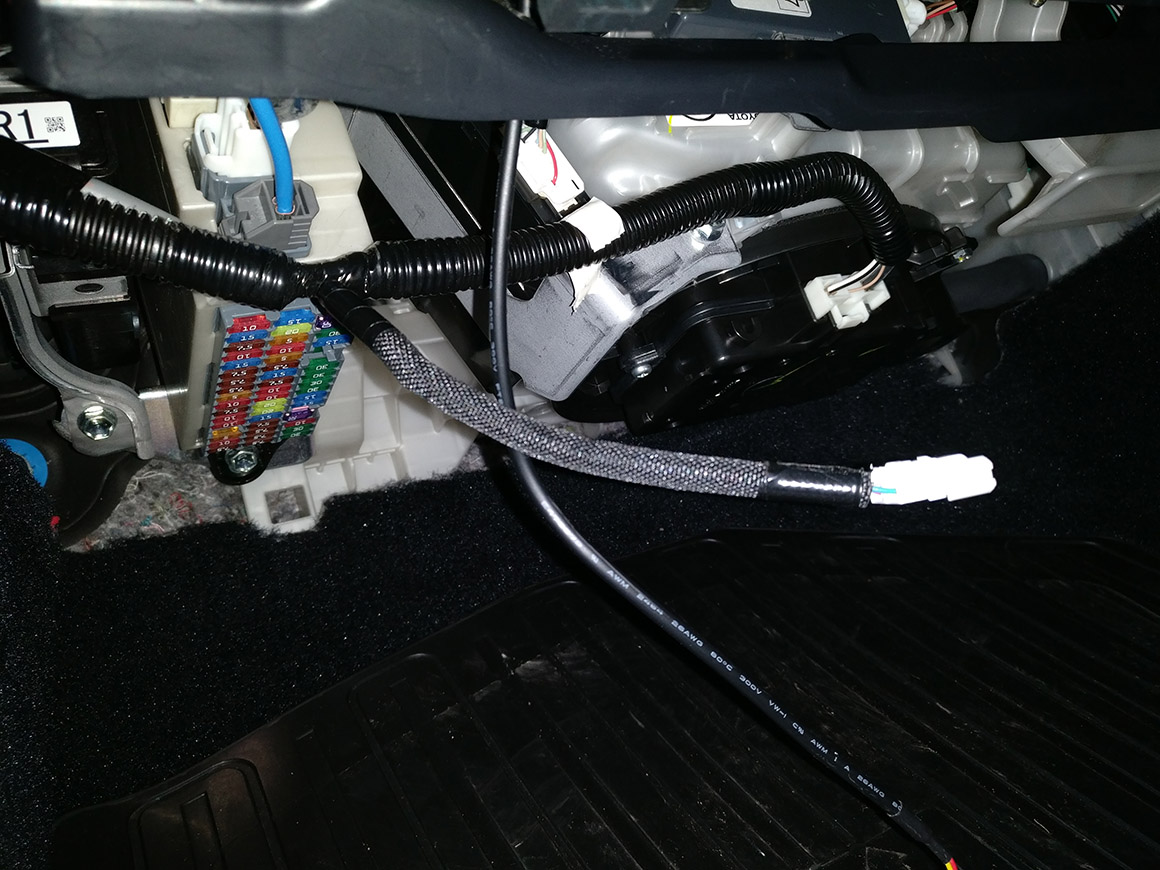
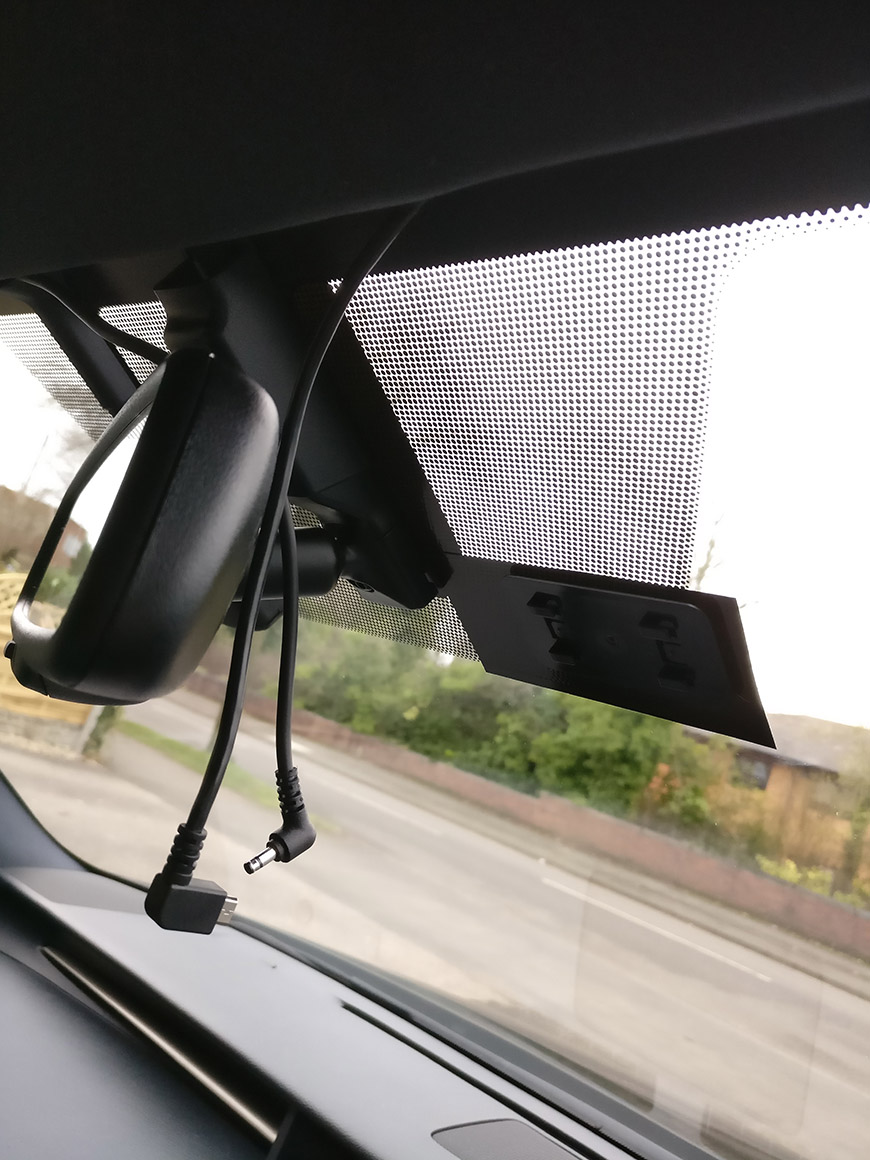
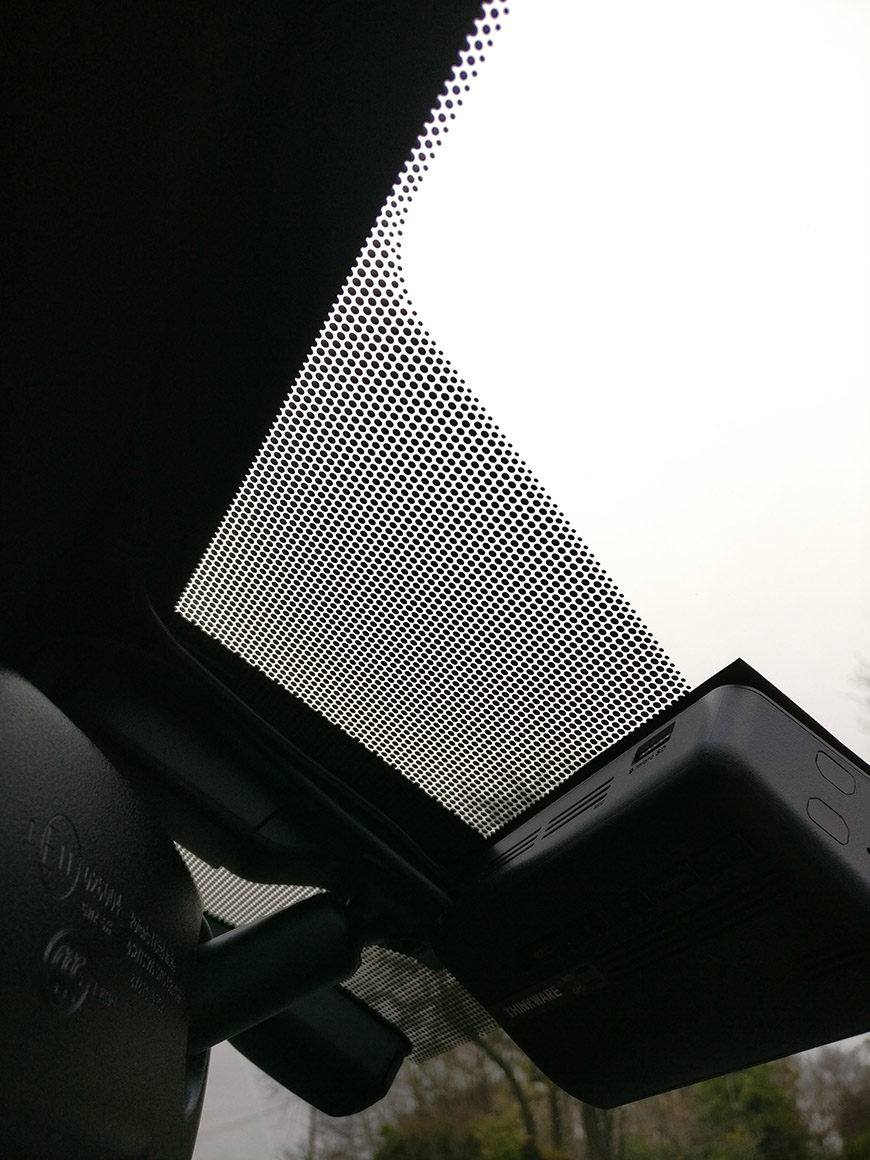
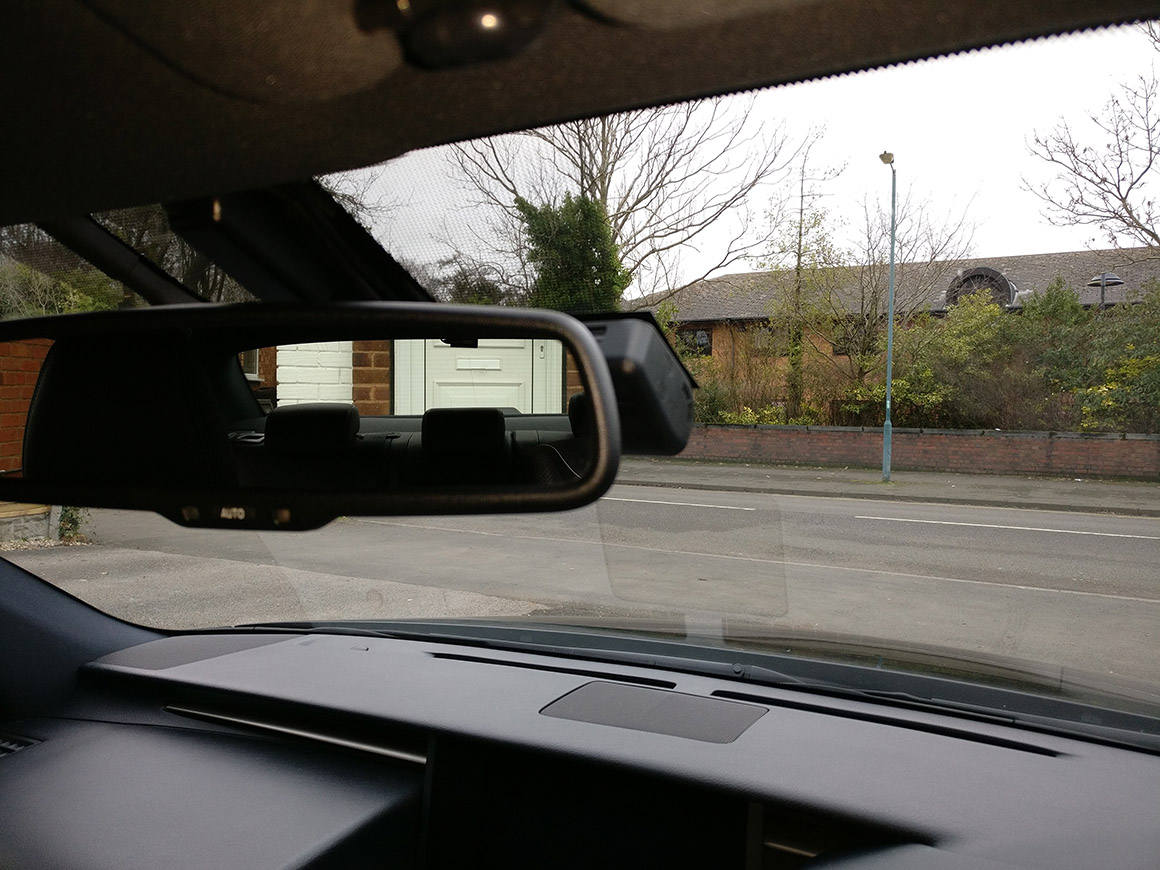
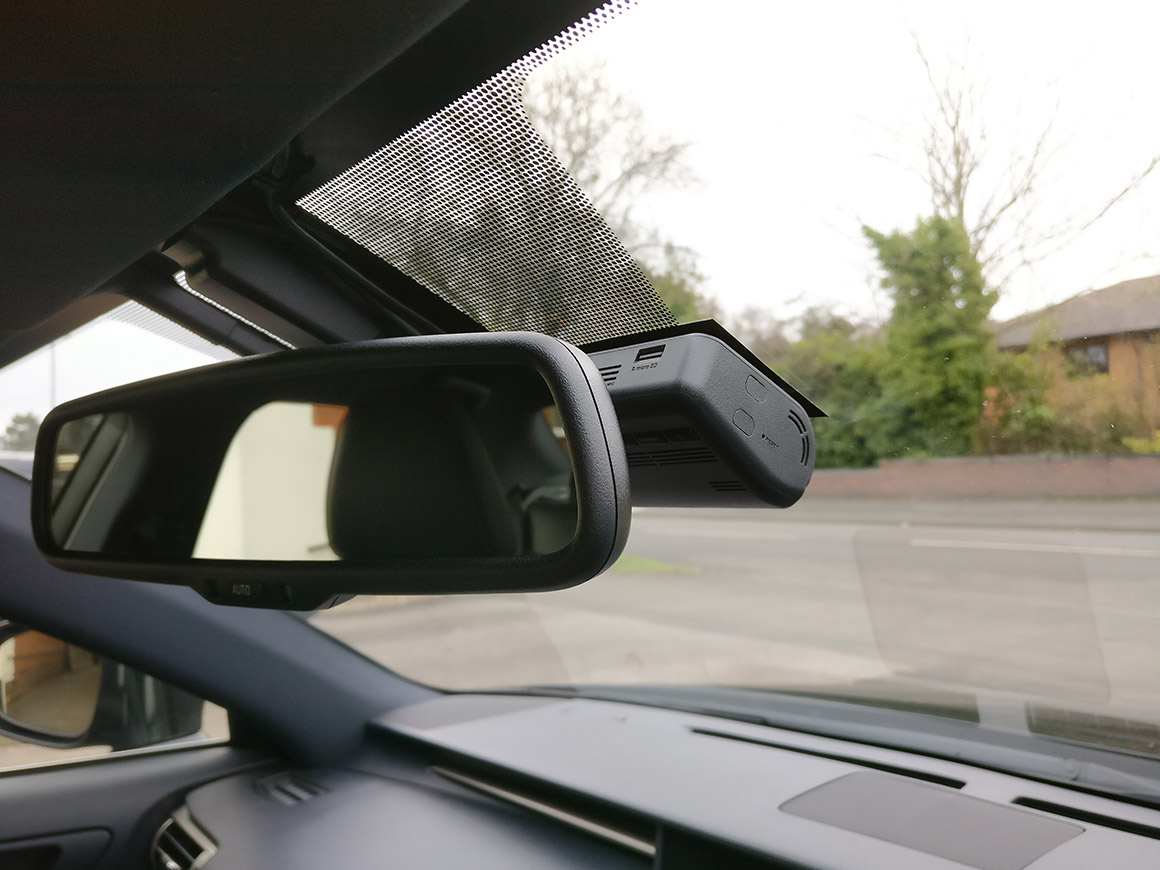
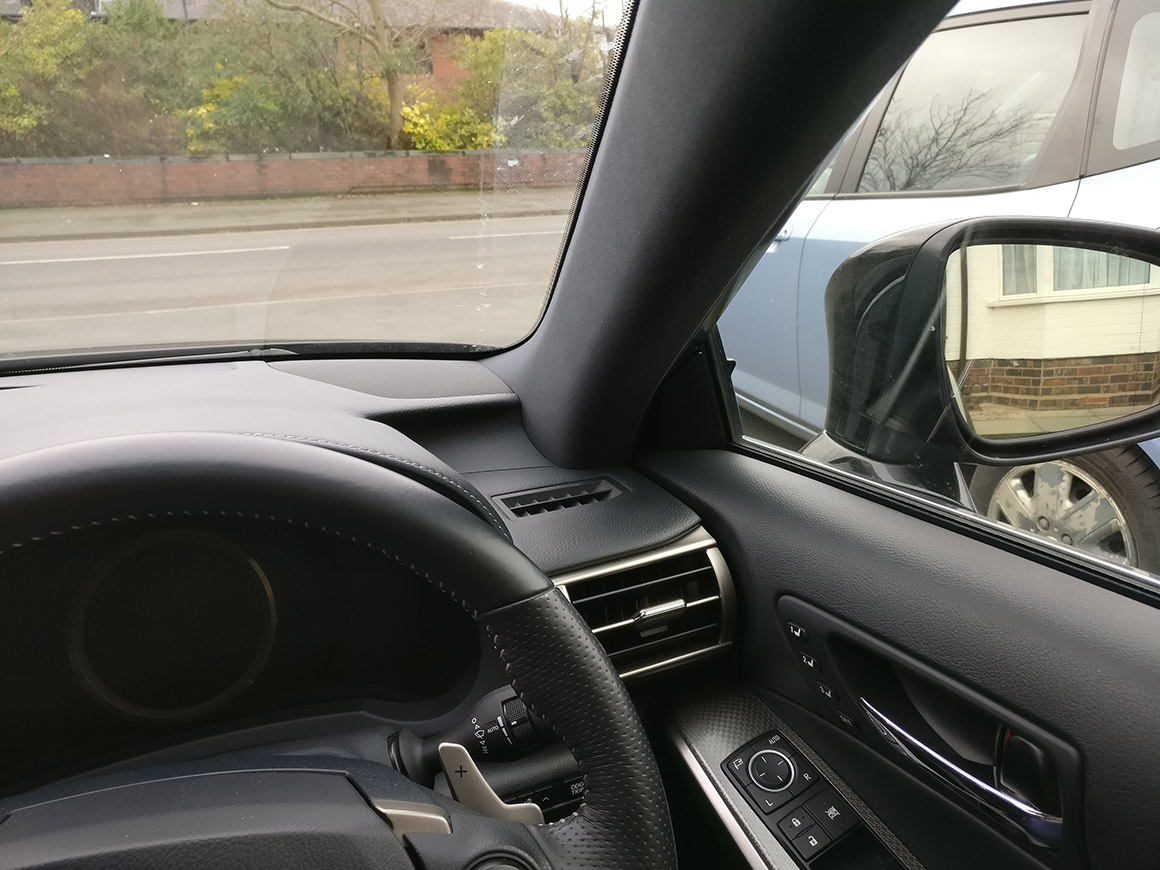
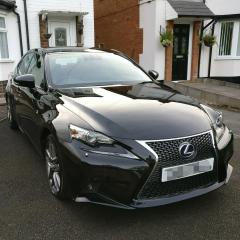 Hi all With pointers from various members (farqui, capese21), lots of reading, looking at service manuals, and mustering the confidence to rip apart the interior of my new Lexus Is300h, I have managed to install a front and rear dash cam (the Thinkware F770, £248 when I purchased, quite expensive, if Thinkware want to give me a rebate, I'd be delighted). It's been fuse tapped to the interior fuse box (no auxiliary / 12v cigarette lighter socket), all wiring hidden, none running in the interior, and I believe, safely (no cables running in front of SRS airbag deployment zones, ready to whip me in the head at 500 miles an hour). Having Previously taken my other cars apart, I usually end up with at least a snapped clip or something broken. This time, absolutely nothing. No broken parts, and all assembled as if it had never been taken apart in the first place. Stopping and starting throughout, and solving problems / making decisions as I went (I had no idea where I'd run it at first), meant it took around 3 hours to lay cables / re-assemble the car, and then another couple of hours or so to discreetly fit / mount the two cameras. I used some Fablon / Sticky Back Plastic to make it look like a factory install / to hide it. I've also got full DAB signal still which some had reported they had lost, due to electrical interference. I was considering a ferrite core (if that's what they're called), but have had no need for it. Pictures are not that good, and I didn't take loads, but the process ought to be quite clear with description. For any folk across the pond reading this, it is a right hand drive car! :-) I believe instructions on the web show the fuse box is in the driver footwell, but that is only the case on Left Hand Drive! Very happy with the outcome! =========== PART 1 - LAYING REAR CAMERA CABLING We need to lay the cables. The long cable that runs to the back of the car, to power the rear camera, and then the power cable to the fuse box. I thought at first, that I'd run it above the head of the driver (interior roof trim), but found that running it along the floor was the best way I ran the rear camera cable by starting from the rear view mirror. First, I disconnected to the 12V negative battery terminal in the boot. Just in case air bags wanted to deploy on me! It lost a bunch of settings, but not all of them. It was disconnected for hours. Make sure you don't shut that boot once it's been closed, I assume the electric opener won't work without the battery connected! Next, I removed the A Pillar. Pull at it (not too hard), and it'll begin to come lose. There are three fixing points. There is a safety clip (should the airbag deploy), that prevents the trim from breaking lose and flying into the cabin. This black clip needs rotating 90 degrees, so it can unclip from the white part attached to the trim. The middle clip (half way down) ought to have unclipped itself when you losened the trim. The final clip at the bottom, is held by the plastic adjacent to the air vent / the plastic that sits parallel to the door. Just pull that plastic panel apart slightly, and the third clip holding down the A Pillar should come off. Start running the cable from the middle of the windscreen (poke it into the gap at the top of the windscreen). Use tape to hold the cable to the trim, so it doesn't sit in front of the air bag. Poke the cable between the rubber seal and the plastic to run it down to the footwell. Then, remove the long plastic sill trim that runs parallel to the scuff plate. Underneath, you'll see a bunch of the harness wiring running inside white plastic clips. You can run your rear view cable in here, alongside that, there is plenty of space. I even cable tied mine in, to make it neat. You'll want to keep running it to the back of the car. Unclip the bottom of the large piece of plastic which houses the various driver seatbelt mechanism. Also, remove the rear passenger driver side sill trim, and also the plastic that runs parallel to the driver side rear passenger seat (this last piece is a bit hard to remove - it's the one with the holes in it, where the air flow runs for the rear passenger). With all these pieces removed, you can run the cable all the way to the back, up the side of the driver side rear passenger seat, and up to top of the seat. I then poked the cable in between the trim (use a plastic edge, I used my ice scraper), all the way to the back of the glass, and then ran it up the edge of the rear window. As I did at the front, ran it around the edge, and ended up with the rear cable at the top of the rear window, right in the middle! Any excess lengths of cabling, I looped up and cable tied together. There was plenty of space for me to leave this behind that ventilated plastic trim (by the rear driver side passenger). Unfortunately, I didn't take many pictures at this point (started in the afternoon, racing against time, before it went dark). That's the cable running from front to back, to support the dual cams! Great check point! Start re-assembling all the trims. They all should clip back on fairly easily. As mentioned above, the ventiled trim for the rear passenger is a bit difficult, but bear with it. The A Pillar is also a bit funny. You need to remove the black plastic clip that you had to rotate 90 degrees (little notches to push in to release it from the body work). I spent ages trying to push it together at all sorts of angles, before realising it unclipped, and it would absolutely not go back together unless removed. It'll push nice and easily back into the body work after. PART 2 - LAYING POWER CABLE / CONNECTING TO FUSE BOX I removed the A Pillar on the front passenger side, the plastic trim that has the airbag on / off key switch mounted in it, the bottom of the glove compartment (prises apart, use the ice scraper again), and the plastic sill trim, to allow unclipping of the one piece of plastic trim. Temporarily disconnect the cable running to the passenger footwell light too. I ran the cable at funny angles (can't remember all the detail, I sepnt a while debating the best route, but I wanted it perfectly discreet) behind the airbag switch and inside the dash board chassis / frame. I had to loosen a few of the door seals to get accces or to make things fit too, don't be afraid to do that. Again, I used cable ties to hold wiring neatly in place. You need two fuse taps (they are micro, low profile fuses in this car), and used 2A fuses for the tapped circuit. One for Battery (always on / parking mode), and one for ACC On (for driving mode). I really like this cam due to time lapse mode (30 mins video, in two min chunks), good night vision, the built in battery saver (to stop it flattening your battery - no need to spend £50 on something like the Blackvue Power Magic), and the fact it is front and rear. Using a multimeter, I checked which side of the fuse was providing the power, so I didn't put the fuse in the wrong way (See https://dashcamtalk.com/forum/threads/piggy-back-fuseholders-a-right-way-and-a-wrong-way.7524/). Wrong way, and a surge could mean the fuse doesn't blow to protect the camera. If I remember, the way my fuse tap was, it means the cable was pointing toward the driver side of the car (away from the front passenger door). That'd mean, left pin / side of the fuse slot providing power. I used the 15A "HAZ" (Hazard) for the always on / battery power (for parking mode), and then the 10A "IG I no.2" for the ACC On (for driving mode) as power sources. Worked perfectly. No interference / issues a week on. The plastic sleeves hosuing the DAB / Rain sensors, and the rear mirror mount, slides up and down. I used this to hold the dash cam cable up to the edge of the windscreen. I had to remove the white fuse box lid, and leave it off. It sits so flush / tightly against the fuses, that there is no room to re-install the it after. I am thinking of buying an additional cover, and cutting bits out, to fit around the fuse taps. I'd not like water in the fuse area from passenger feet. Neither having it kicked. Either that cap being cut up, or a metal frame screwed to the interior plastic, to prevent a foot smashing my fuse box and damaging my fuse taps. Or both. Yet to do this however. Earthed it on the bolt attached to the fuse box (black frame, silver bolt) - visible in the below pictures (image 08) PART 3 - MOUNTING CAMERAS As mentioned previously, I used sticky back plastic / fablon (rip off, £6 a roll in Hobby Craft for loads, I need about 30cm squared max). I cut it to the size of the front and rear cam, and stuck it to the windscreen (a bit of alcohol to clean the window first). What I didn't do, and wish I did, was hair dryer it, so it would melt a bit, and really bond itself to the windscreen. Can see small air bubbles from the outside if you really look, but most people won't. I wanted to do this, so the cam wouldn't get stolen. If it looks factory fit, it's usually less tempting. Great idea from capese21, I saw on his thread from a couple of years ago! Thanks! Also ran a thick strip parallel to the rear view mirror mount, to which I ran the cables up against, to the edge of the winscreen. I mounted the cameras onto this using the provided VHB tape in the camera kit (so difficult to remove the plastic bit to expose the sticky bit - cut it with a knife to get it started). Solidly mounted in place. Cables all connected up, I re-connected the 12V battery, and powered on. Be careful to check which way the rear camera is orientated before sticking it down (I've read people sticking it on upside down, and having a hard time removing it to correct it - the VHB is so strong). Before mounting the camera, I used the Android App, to view the camera in Live View mode (so I could ensure positioned correctly). Front camera is mounted off centre, on the driver side. It's out of view behind the mirror. Not ideal, but there are other things in the way. Smack bang in the middle would have been perfect. I configured my camera to shut off at 12.1V. Whilst car is on, the camera shows it is receiving about 14.4V. I set it to shut off after 6 hours, but as I've had no flat battery, tempted to set it to 24 hours. If the voltage gets too low, it'll shut off anyway. My advice: Take it slowly, leave plenty of time, don't rush the install. Flawlessly working. Any questions, let me know, I'll do my best to help. Pictures below, roughly in order. They should help a bit! Matt