


Marco750
-
Posts
29 -
Joined
-
Last visited
Content Type
Profiles
Forums
Events
Store
Gallery
Tutorials
Lexus Owners Club
Gold Membership Discounts
Lexus Owners Club Video
News & Articles
Posts posted by Marco750
-
-
I changed ballasts on my HID headlights, cost me 75 euros for both, and few hrs of work in the garage. Paying 600+ for one headlight?????? no way
-
I think will be better to put coilovers, than springs
-
-
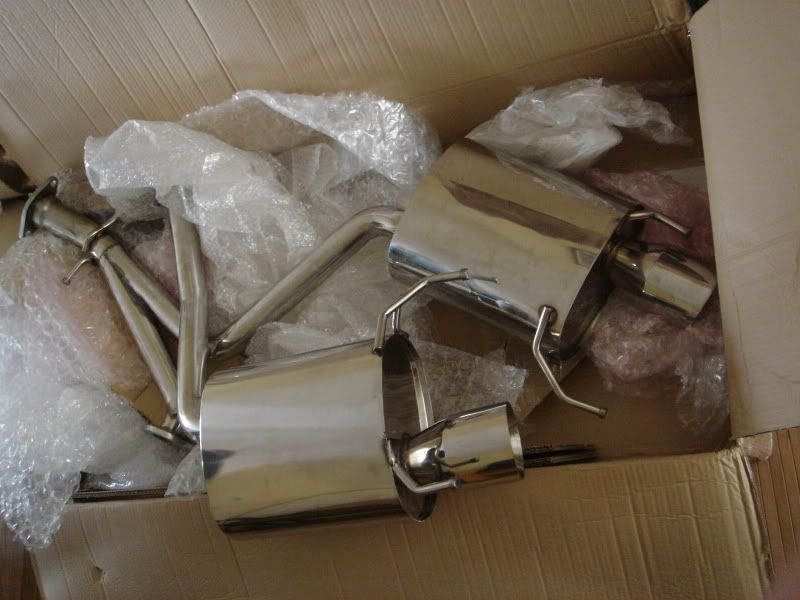
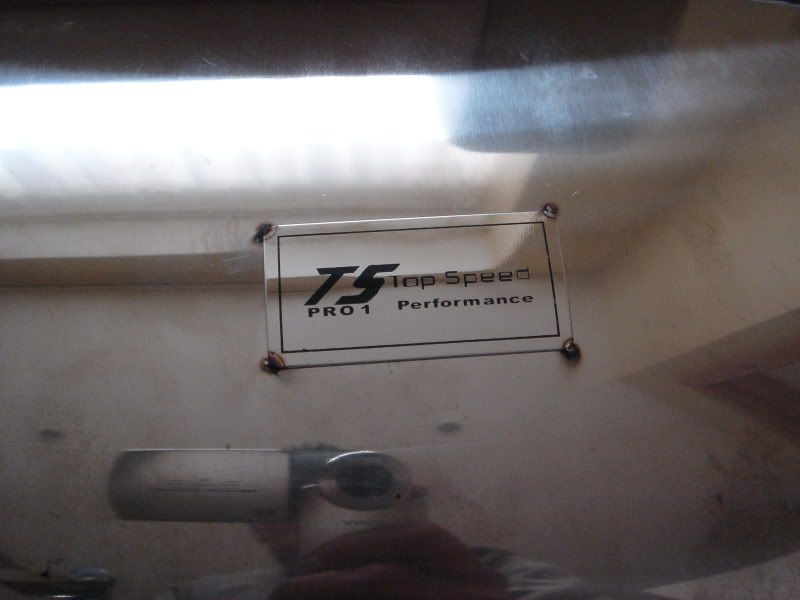
I paid over 300 euros for my Top Speed dual exhaust + 100e for a IS250 bumper + over 70 euros for bracket for one side, in total 500+ for everything lol
-
Haha see I cant put advertise in section coz Im not a Gold member so... :P
-
Nice one, I have some front lip and rear canards and in next 2-3 weeks I will have coilovers if U want
There is a lot of mods option - front lip, side skirts, rear lips, wheels, suspension, front grill, roof spoilers, trunk spoilers etc
-
I just pick up my wheels:

And I got a Blitz carbon fibre grill and JunTW carbon fibre roof spoiler - pics soon
Btw I next few weeks Im gonna change my suspension so I will have a MeisterR coilovers for sale!!! Very nice stuff for good money!
-
How hard is it to change the Ballast? I have ordered a couple of cheap HID bulbs and see how I get on.
I will post back my findings. The left light is going off more freqently. The right is flickering.
Well You should open the headlight, I mean take of a clear part, whitch is quite dangerous, that You can damage clear plastic part. I just make a cut from the back to remove plug, I put screwdriver to make more space to remove plug with cable, I put new one and I glued with liquid plastic. After that I sealed with silicone all around, to stop water getting inside
-
-
New season is starting, good few mods coming, I will make some updates soon, if someone want get nice cheap coilovers or front bumper lip, let me know.
-
No disrespect but those are horrible!
I think U don't know much about VIP/JDM style?
I love them, thats most important ;)
-
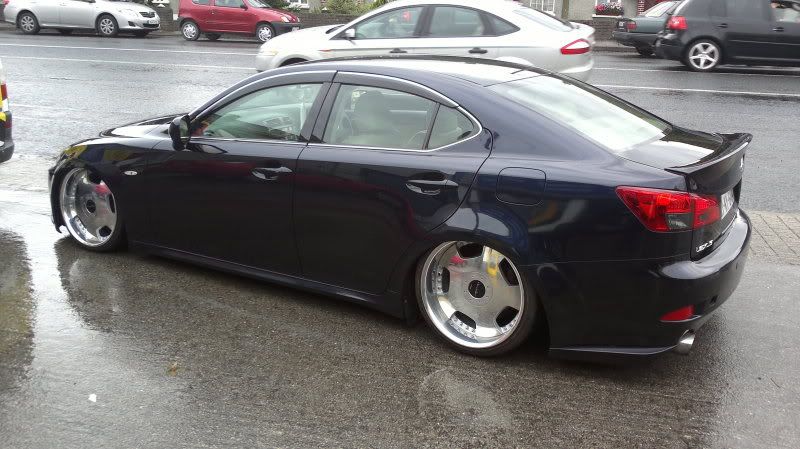
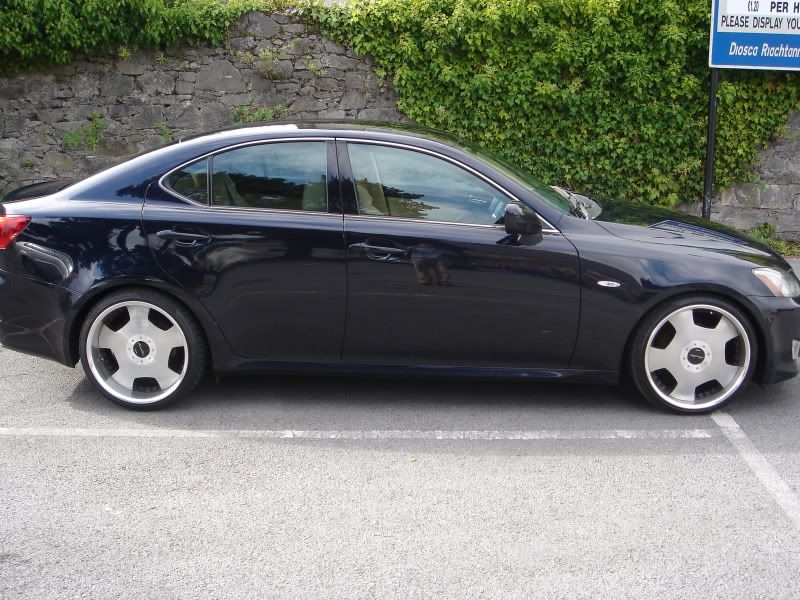
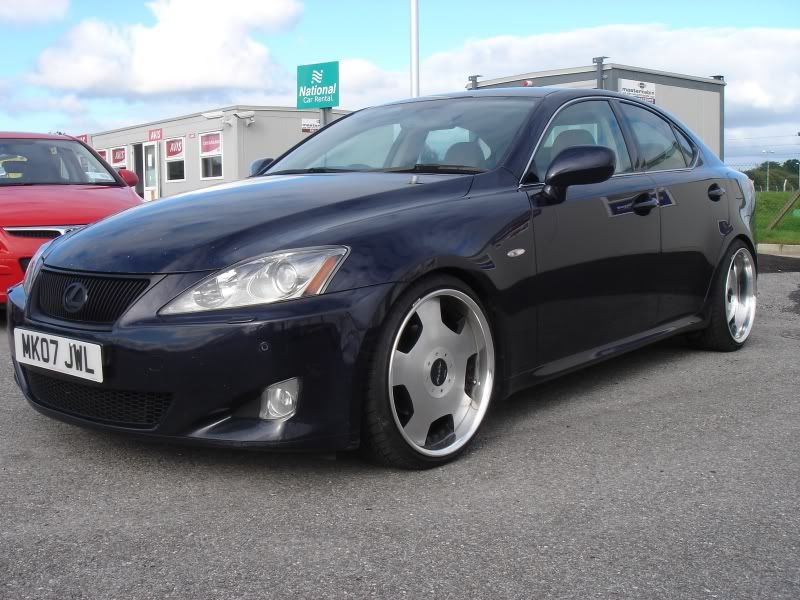
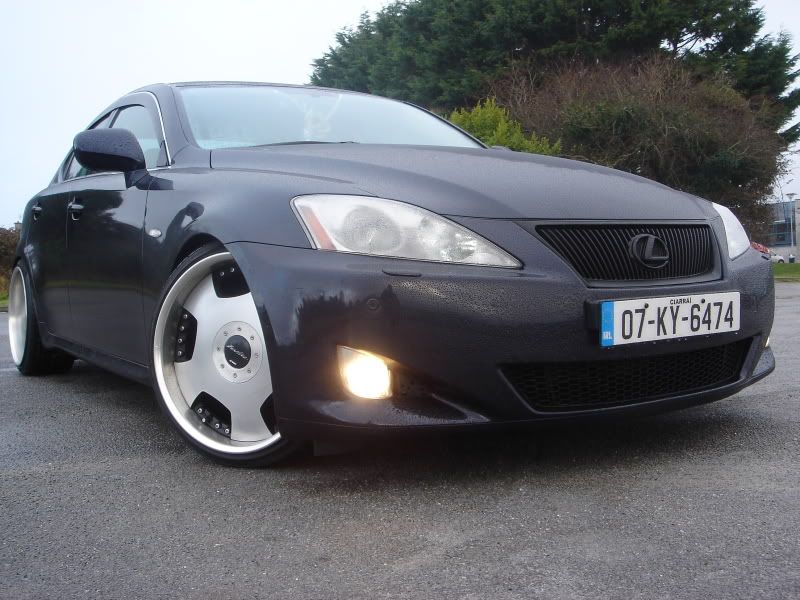
Im first lol:
Work Euroline DH
front: 19x9 +30 tires Falken 452 215/35/19
rear: 19x10 +25 tires Falken 452 235/35/19
Lowering on coilovers ( not finish yet - will be more low ):
-
oh ok, now i can see the diff.. when u lowered it with H&R, did it rub the arches when u drove or when u went around corners?
nope, there was no any rub.
-
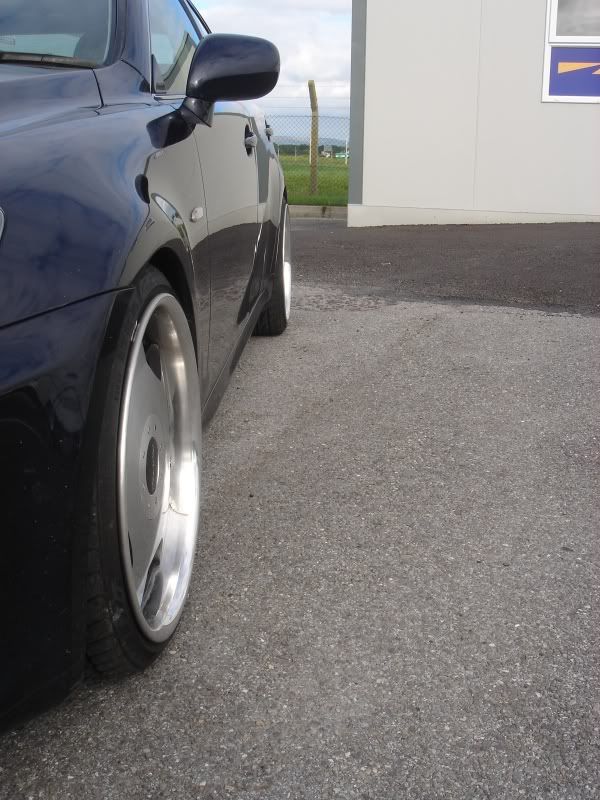
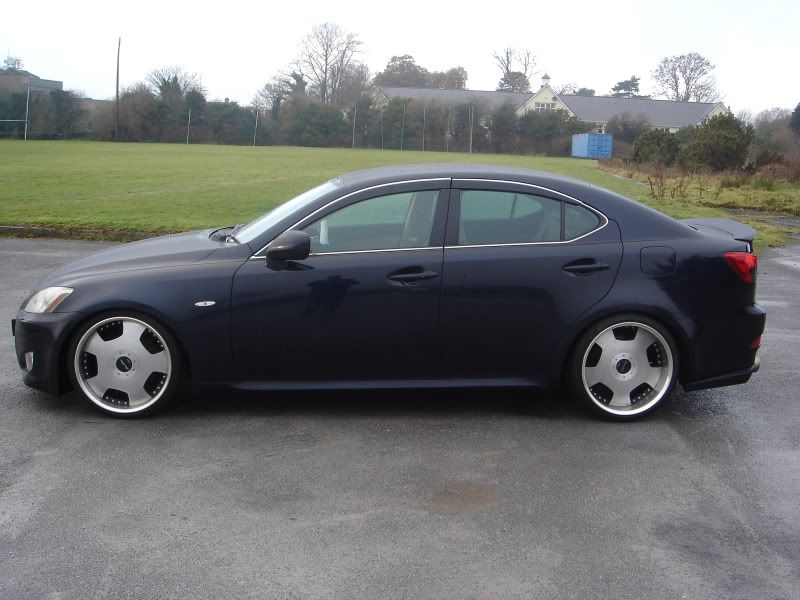
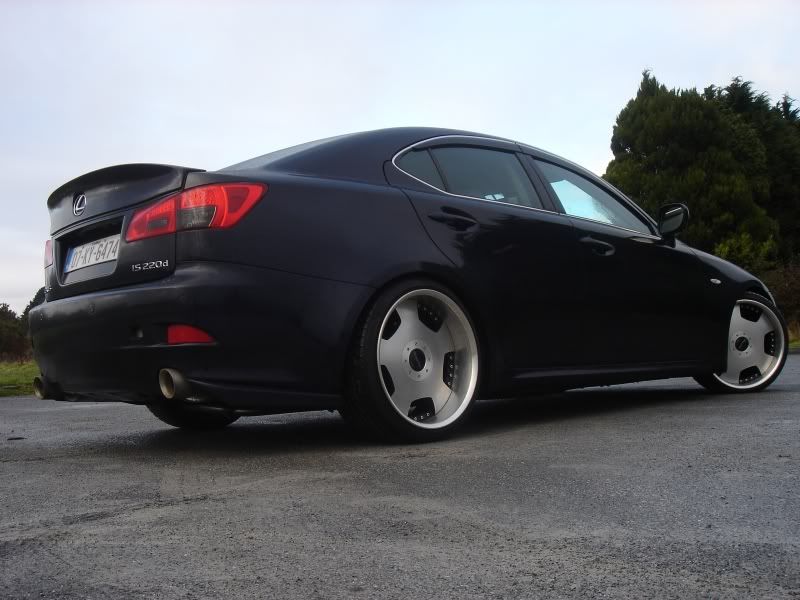
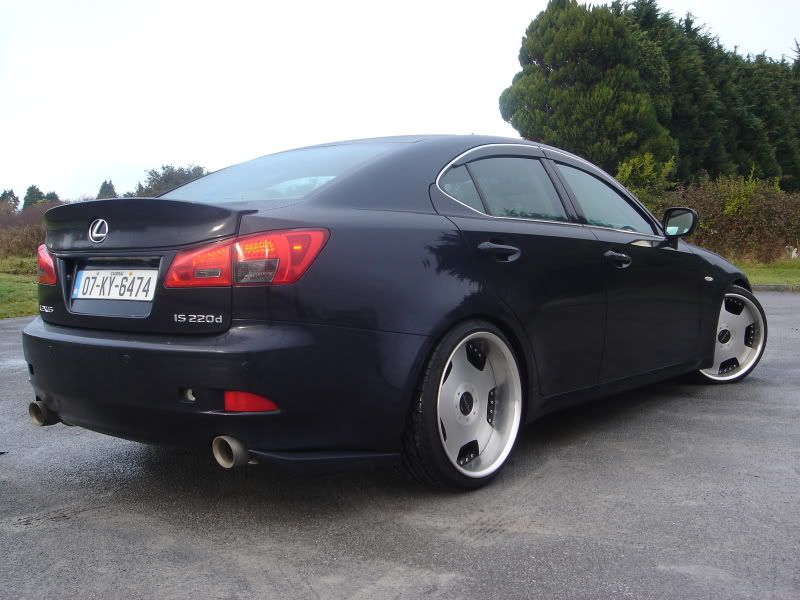
Thats pics with H&R springs and 19" rims with 35/19 tires
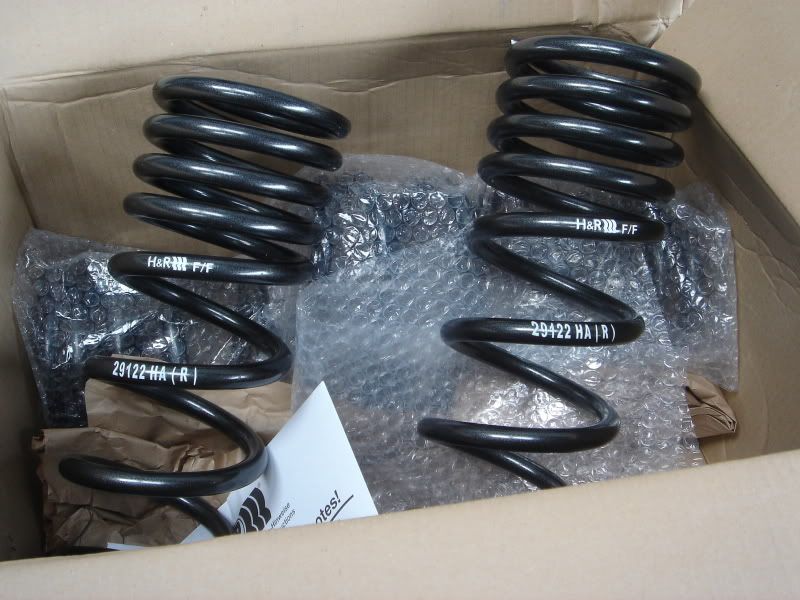
I have these springs for sale cheap. I had them on my car maybe 4 weeks so there are like brand new
-
Thats pics with H&R springs:
Last pics are with coilovers.
-
looking good mate but you dont need fancy camber arms the camber is adjustable on your car....also lower for true vip look
Sorry mate but Youre wrong. In my car camber is not adjustable, and like I said, when I roll fenders and get camber kit I will lower more.
-
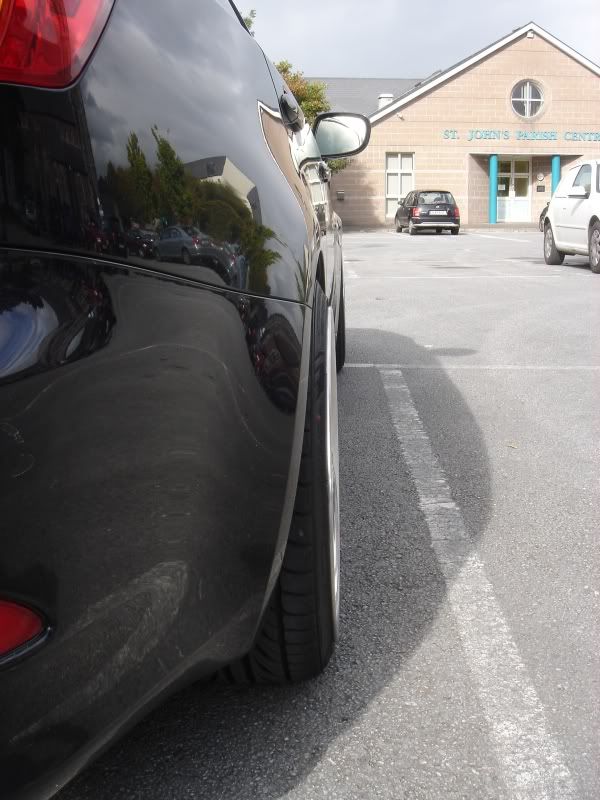
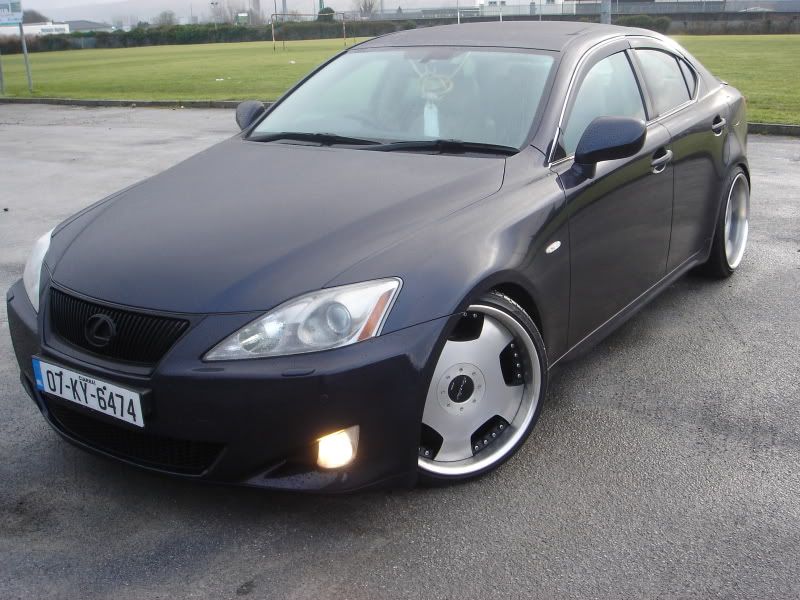
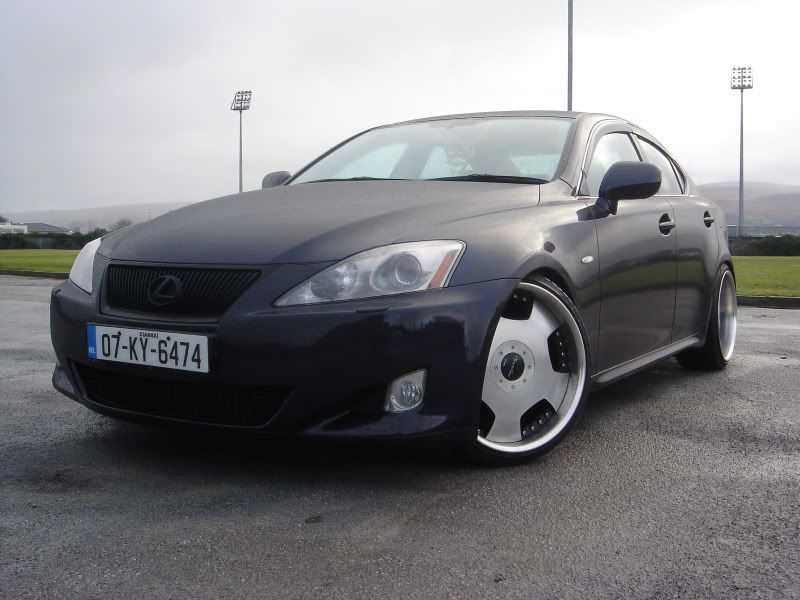
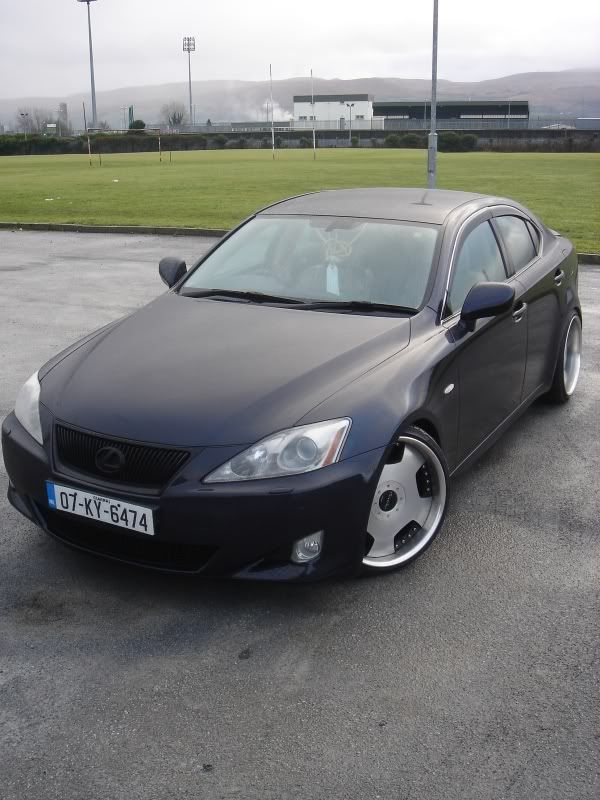
lol guys, becouse so many members asking for pics, I make few ( I apologize for dirty car :P )
Now I'm waiting for a rear and front camber kit, I must roll rear arches,
and put some lip on front ( and fix my HID headlight :(:(:( ) then will see.
I know I know, it must go more loooooooow :D:D:D:D
-
I got them from eBay, I think around 170 euros shipped.
-
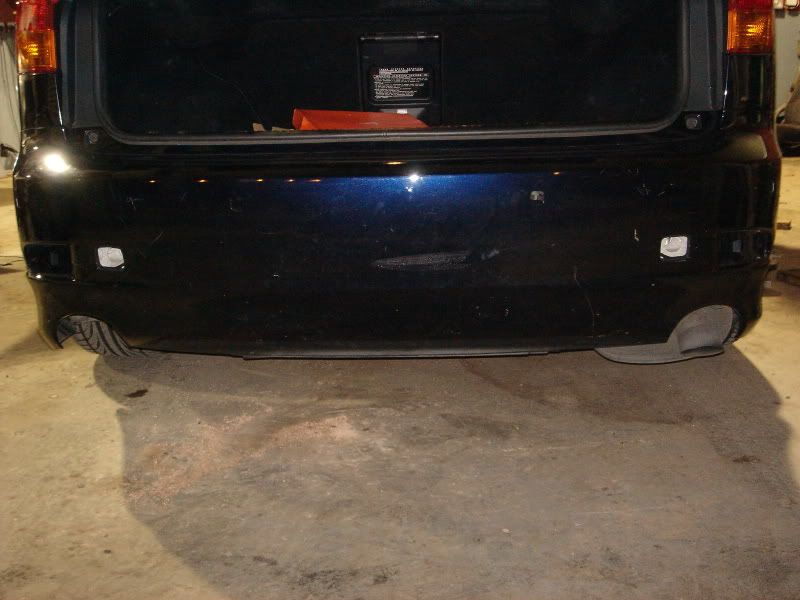
quick question, did the IS250 bumper fit straight away or did u have issues..
also time we need a update on ur car....
Yes, fit without any problems
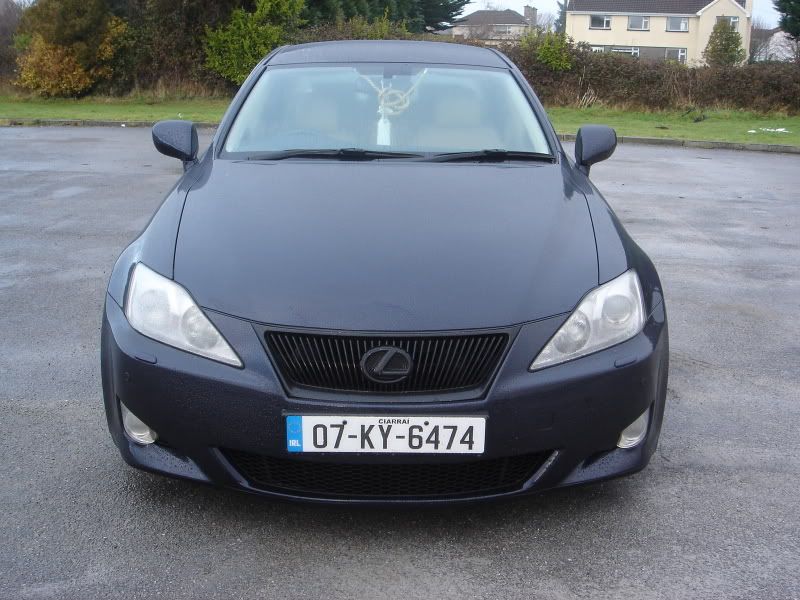
Pic from Coolnight Car Show in Dublin 30/10/10
Btw front lip, H&R springs are still for sale.
Im looking for a left HID headlight if someone have one, please help me
-
Wow that's expensive. I got mine's JDM visors used from friend from states for 280 us dollars shipped to me :D
In states You can get them brand new for 350-450 dollars + shipping
-
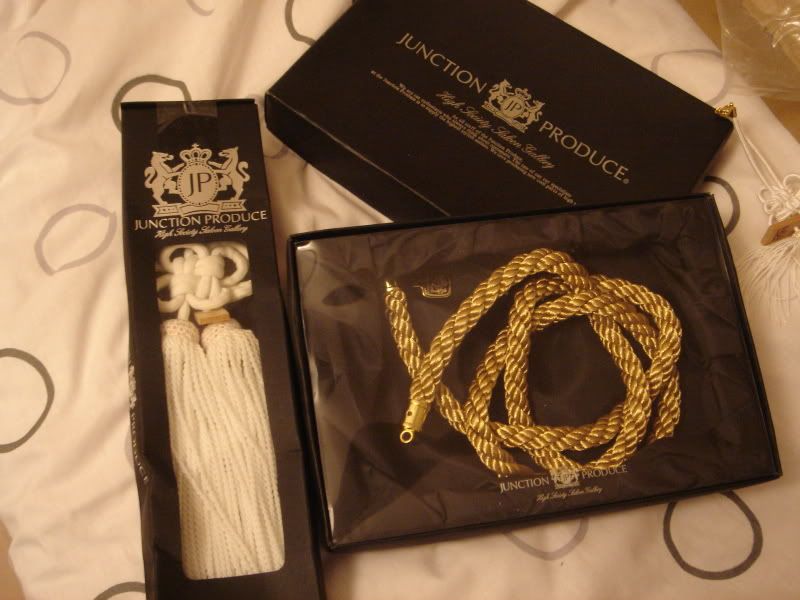
Update time!!!
Thanks for all comments!
New LED tailights:
And VIP rope's: Fusa and Tsuna, made by Junction Produce:
And all stuff ready to fitt:
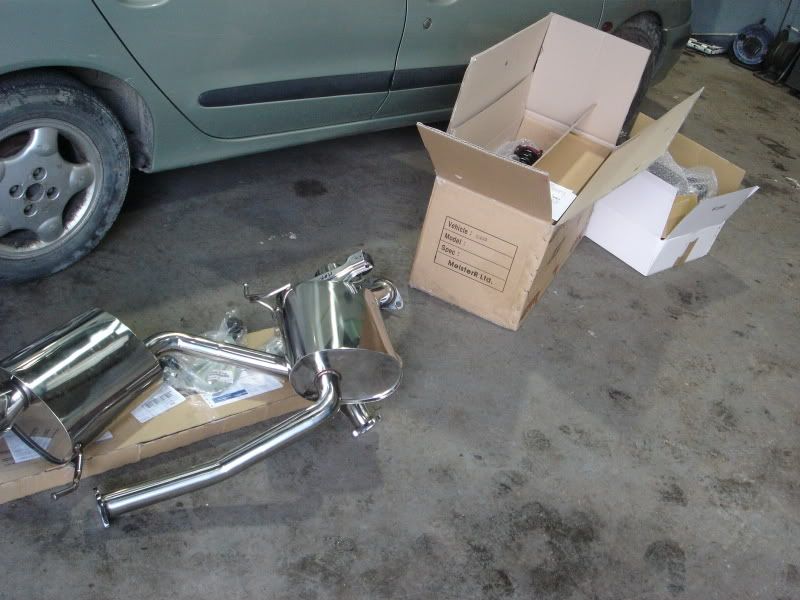
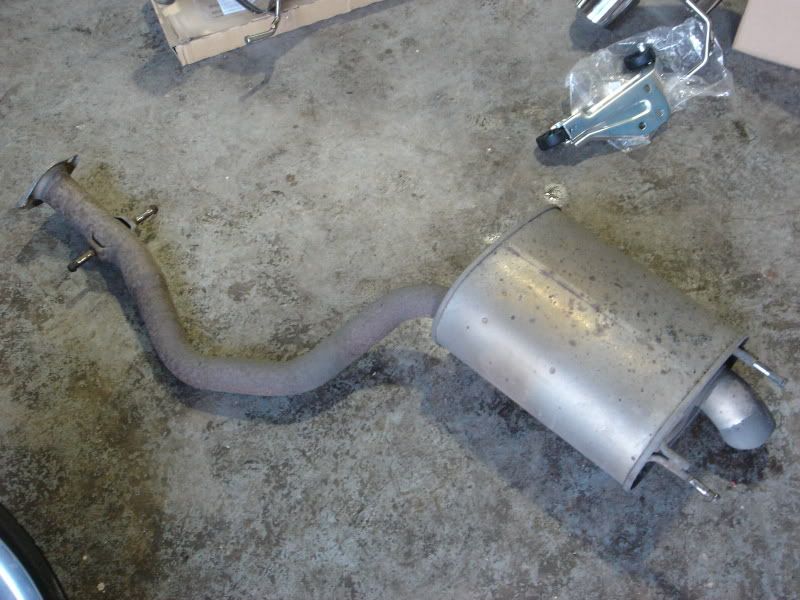
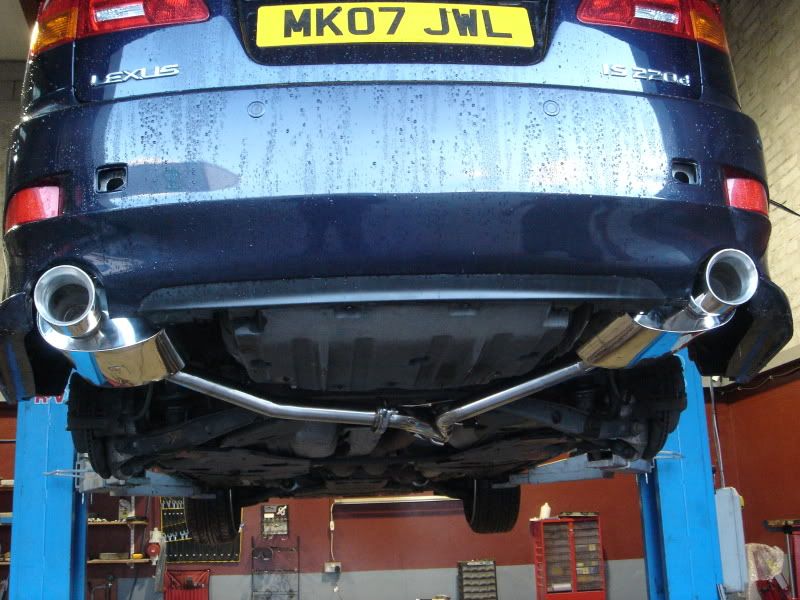
First exhaust:
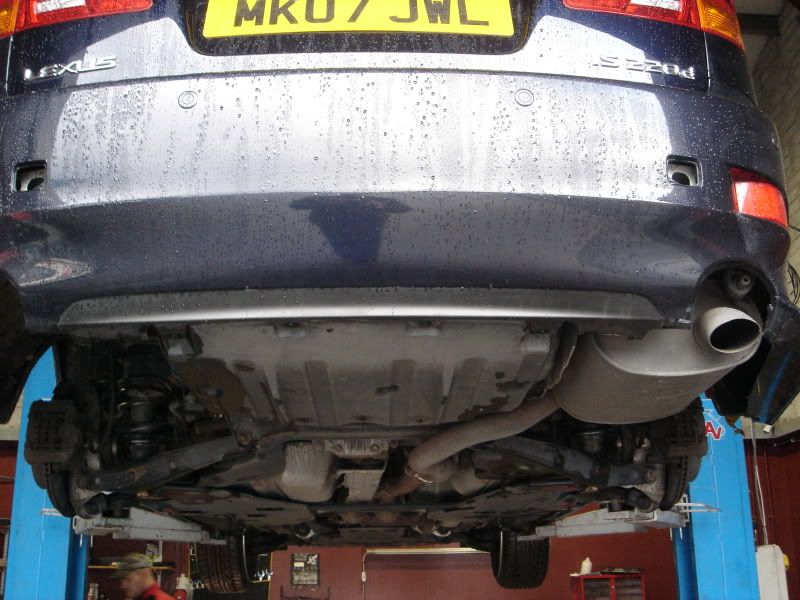
Ugly diesel exhaust box:
So box was removed and on the left side installed mounthing bracket for second box:
And fitted new exhaust:
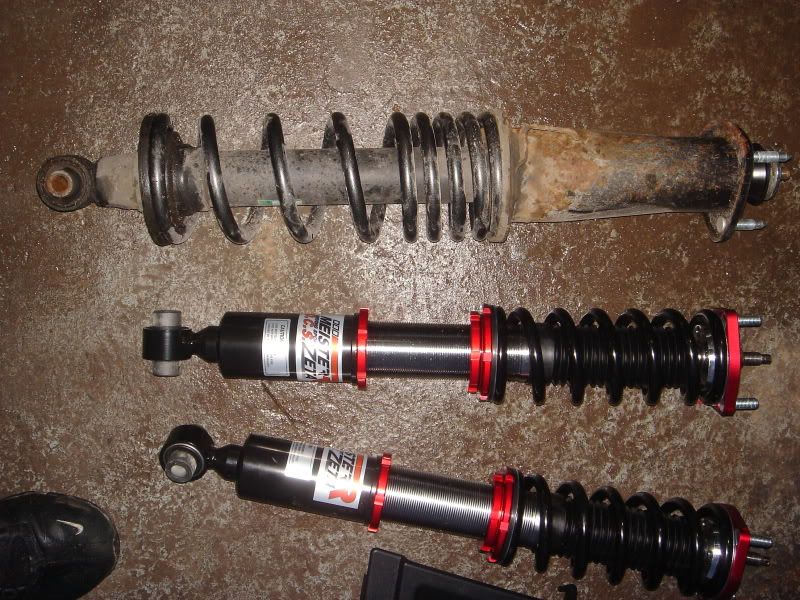
New coilovers:
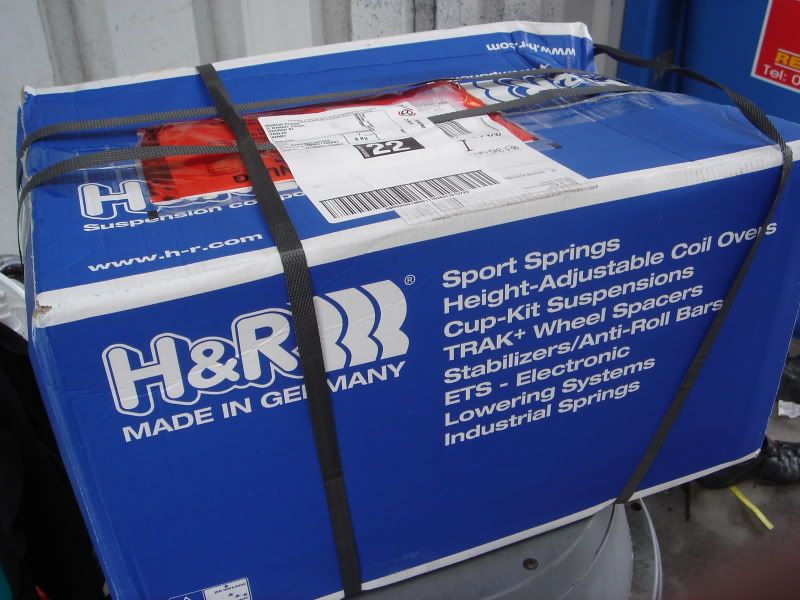
H&R SPRINGS FOR SALE !!!!!!! USED ABOUTH MONTH
-
Update:
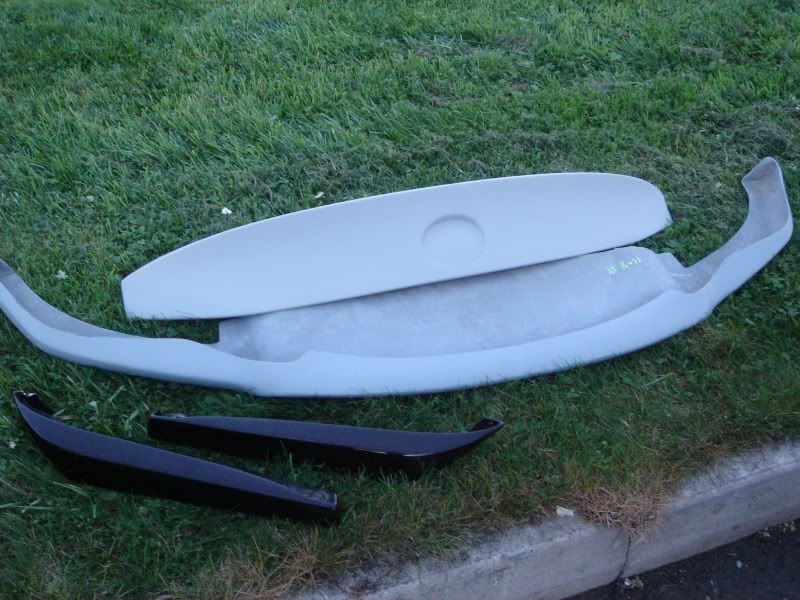
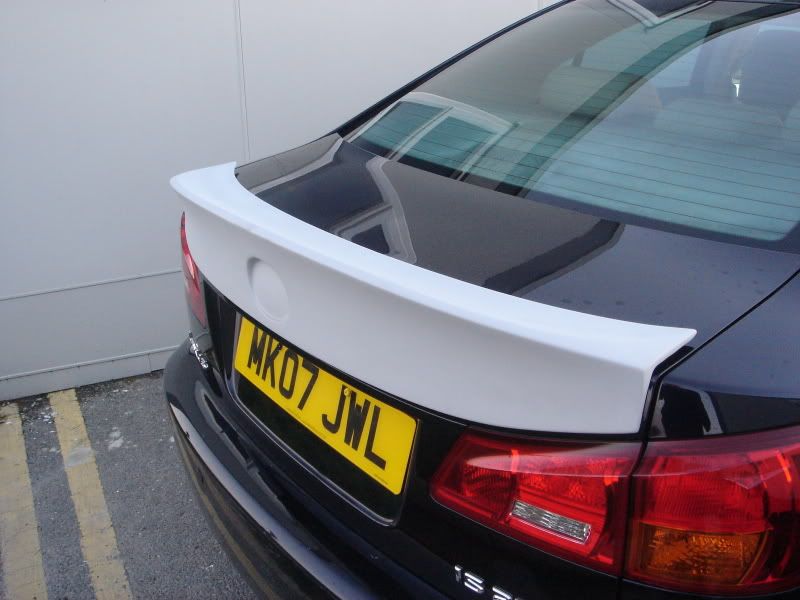
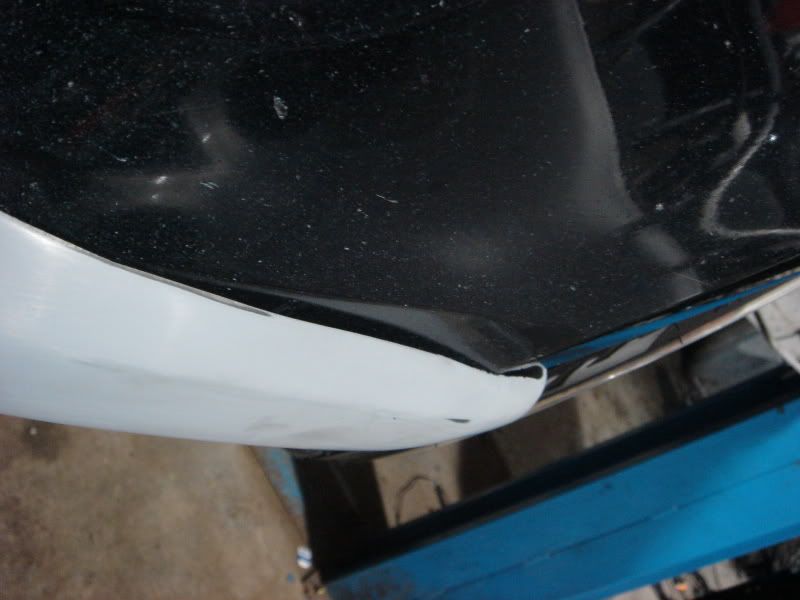
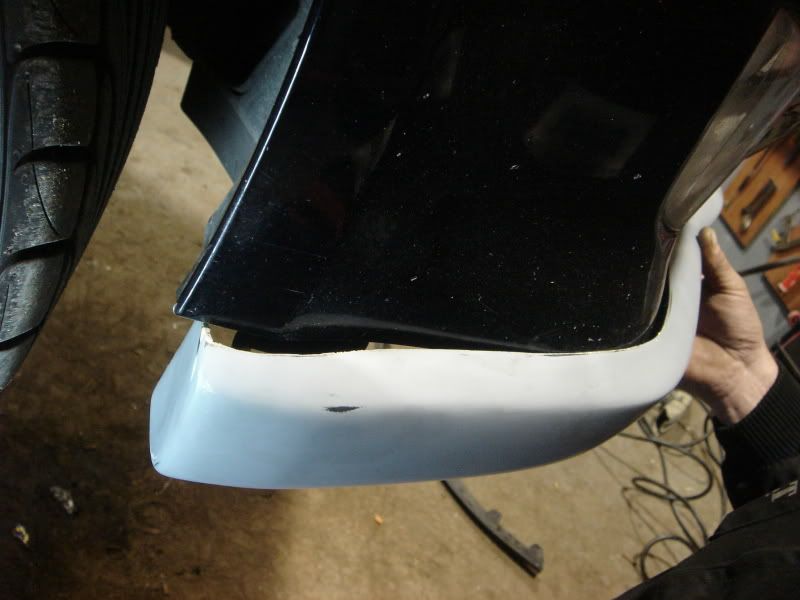
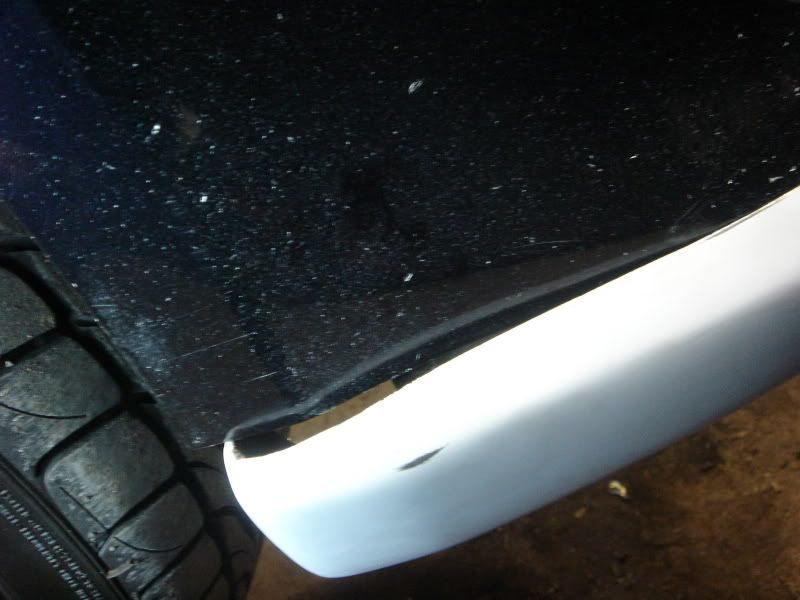
I got body parts:
Carsson front lip, Wald trunk spoiler, fabulous rear splitters:
Quick shoot with wald spoiler:
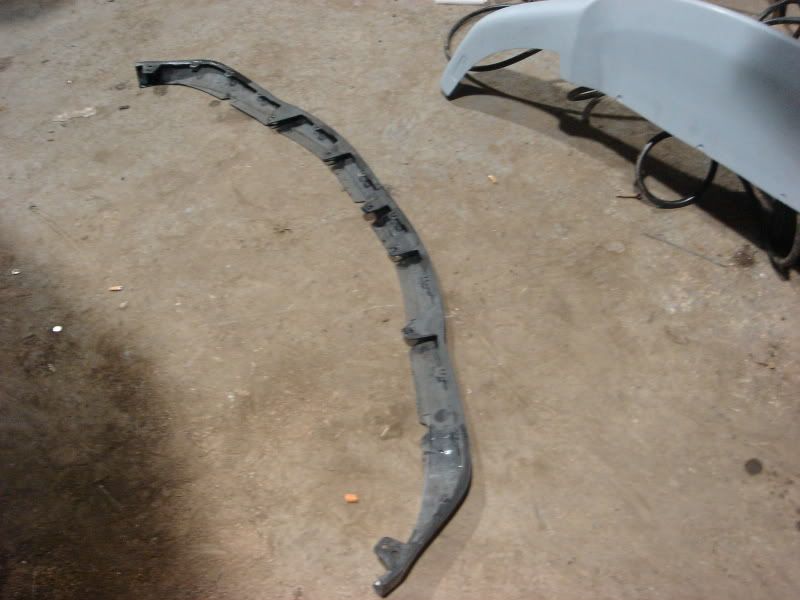
Next, I remove oem lip and I check fitting new carsson lip:
And not nice suprise:
So front lip need some small work done to be fit perfect but Im thinking to sale that lip.
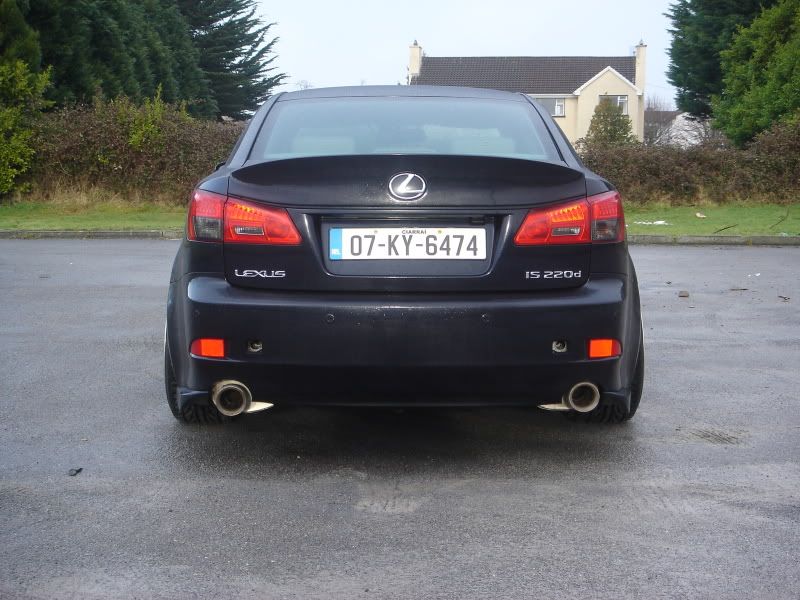
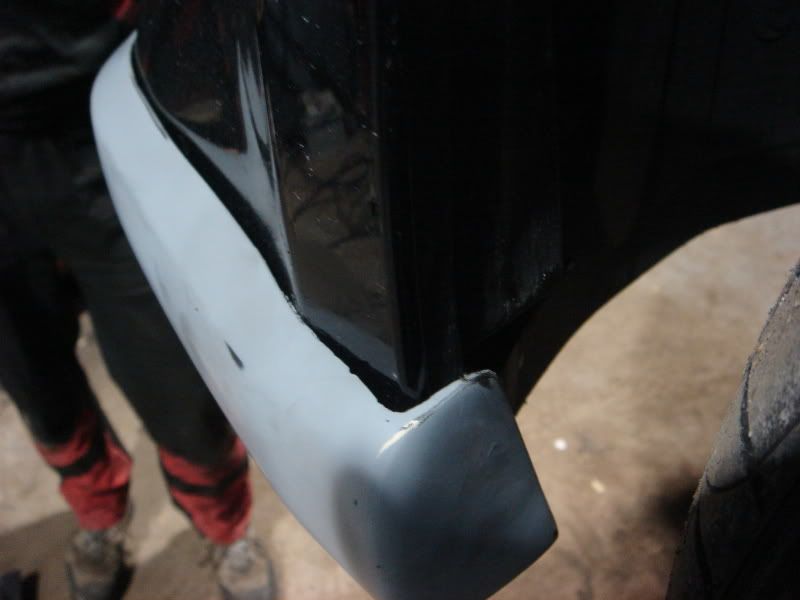
I change rear bumper for bumper from IS250, so now I have exit for second pipe :D
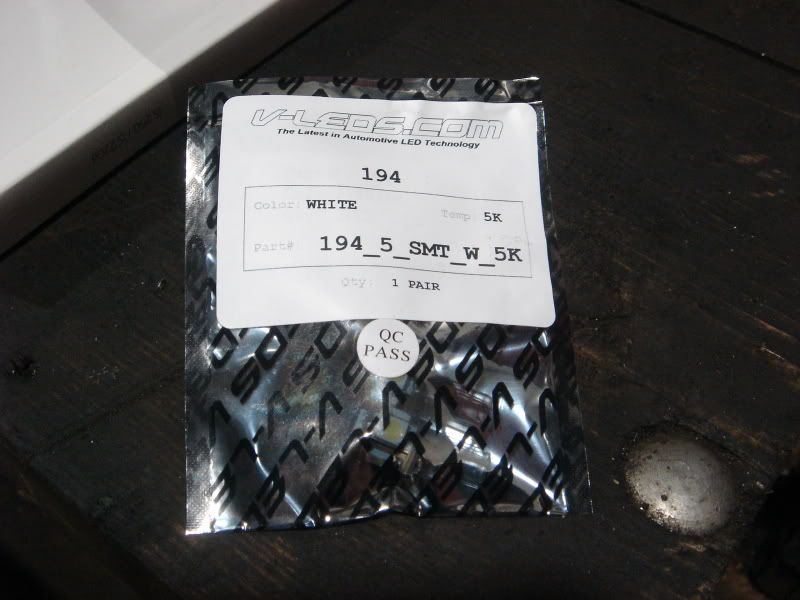
TOday I got LED bulbs from vleds:
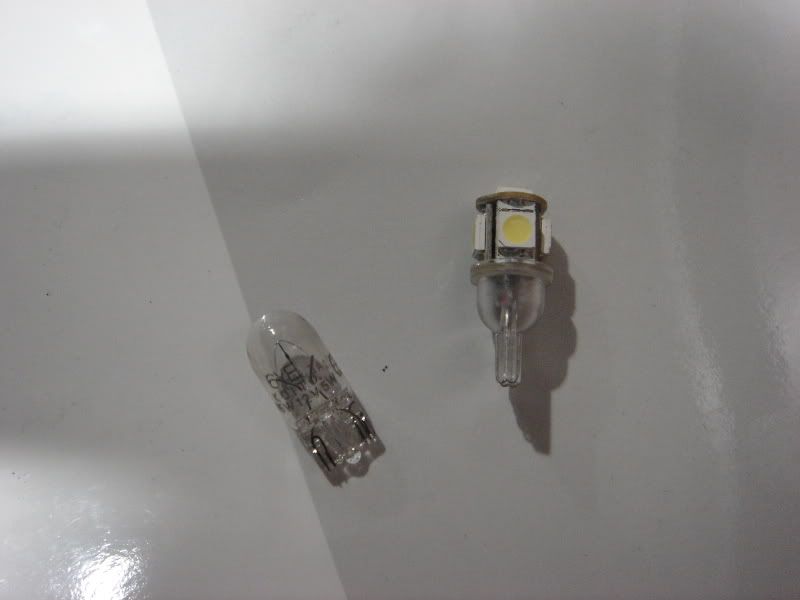
Oem bulb vs LED bulb:
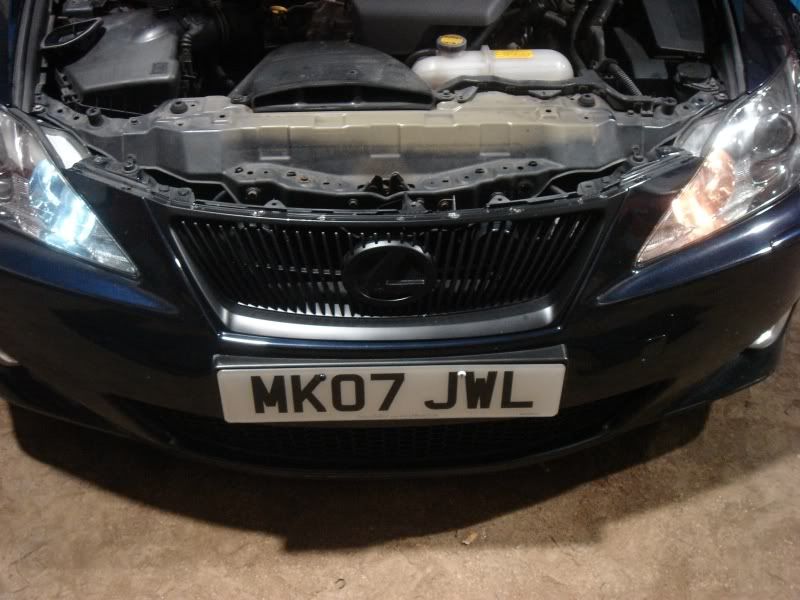
And left LED right normal:
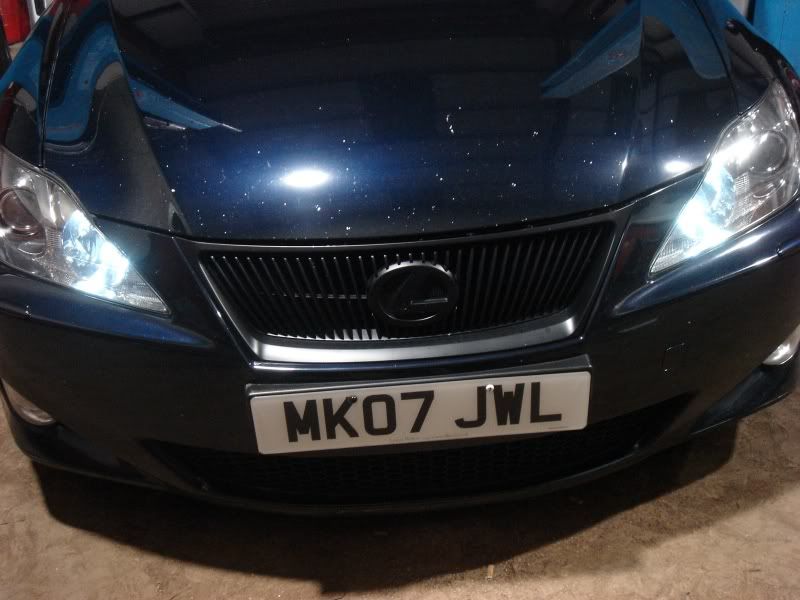
And both finished:
Tomo my car going to bodyshop to refresh few panels and paint new body parts.
Btw carsson front lip i think will be for sale
-
Update:
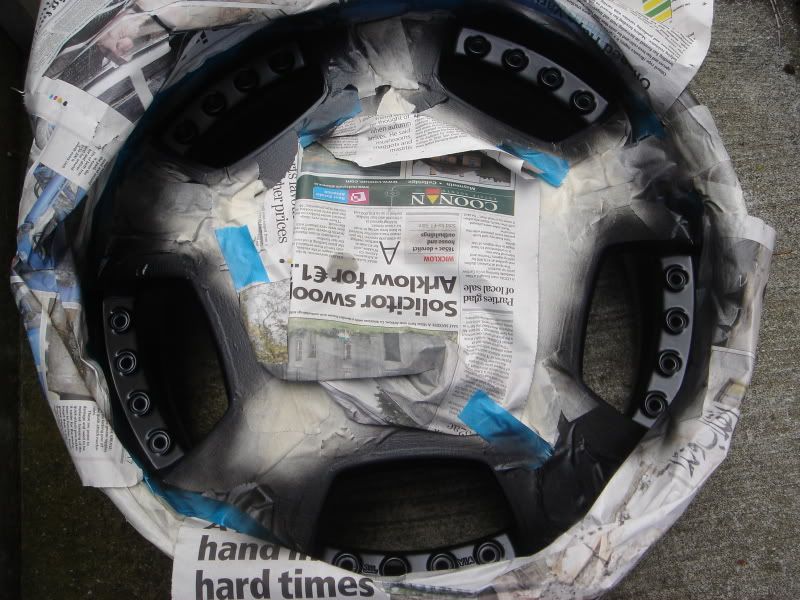
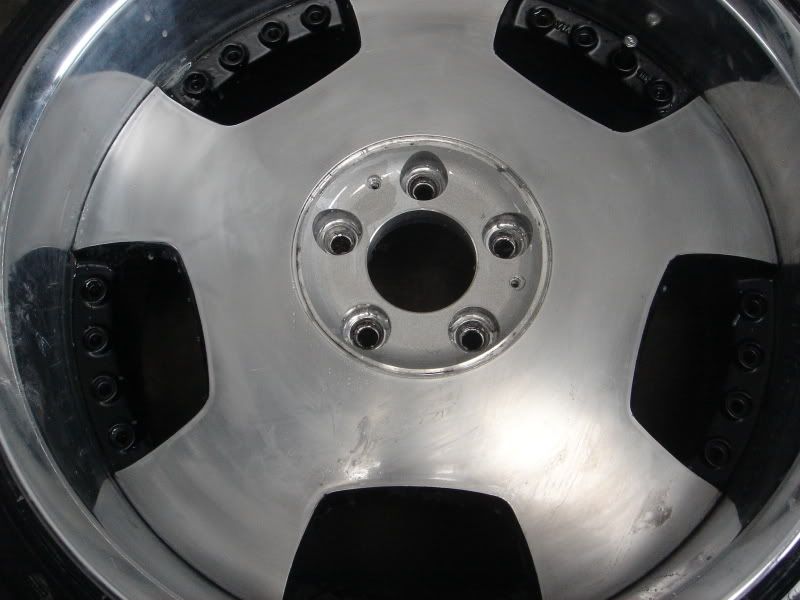
Next step of painting:
Masking and painting with satin black:
Sanding lips with sanpaper 240-2000 grid:
And finish compound of centers:
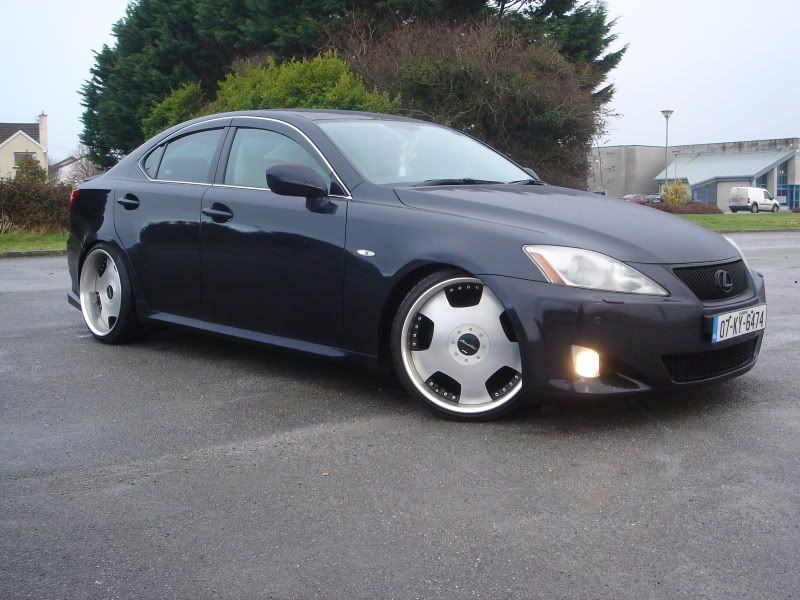
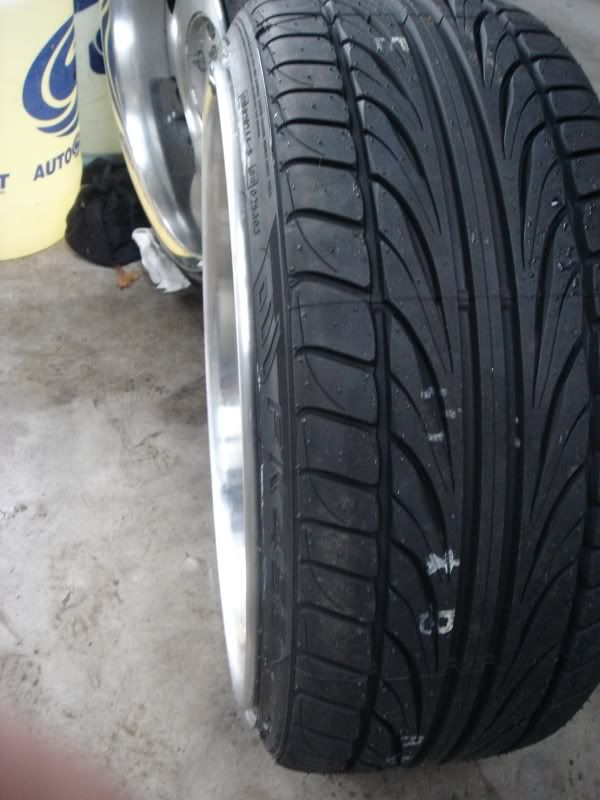
Some pics with fitted tyres, I love this stretch:
Next step - H&R springs:
And few shots fitted:
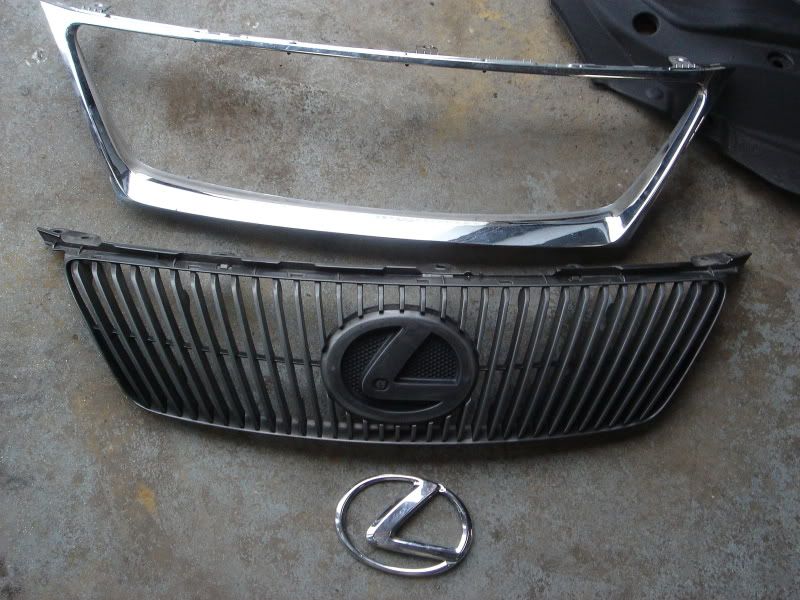
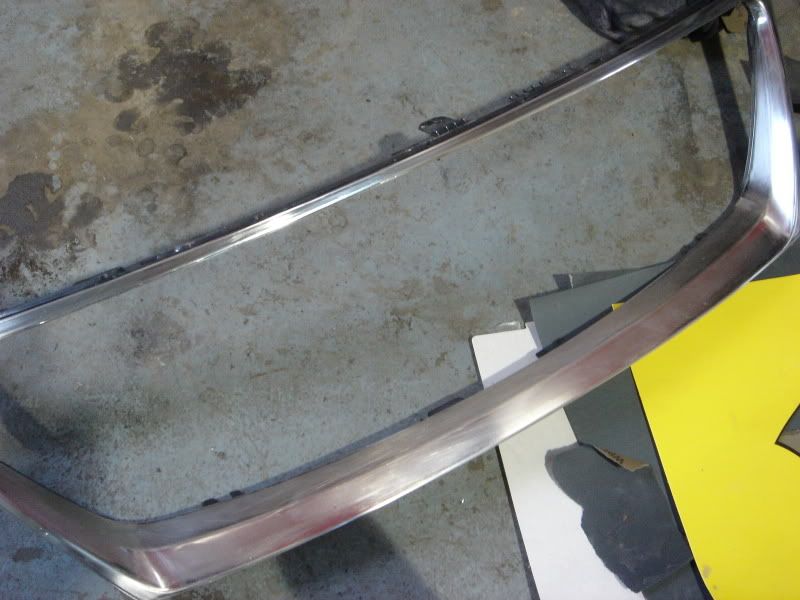
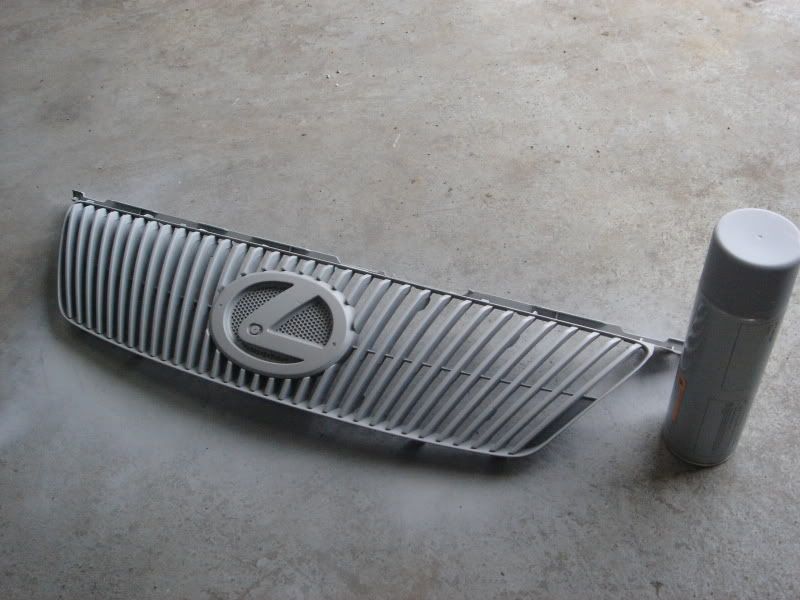
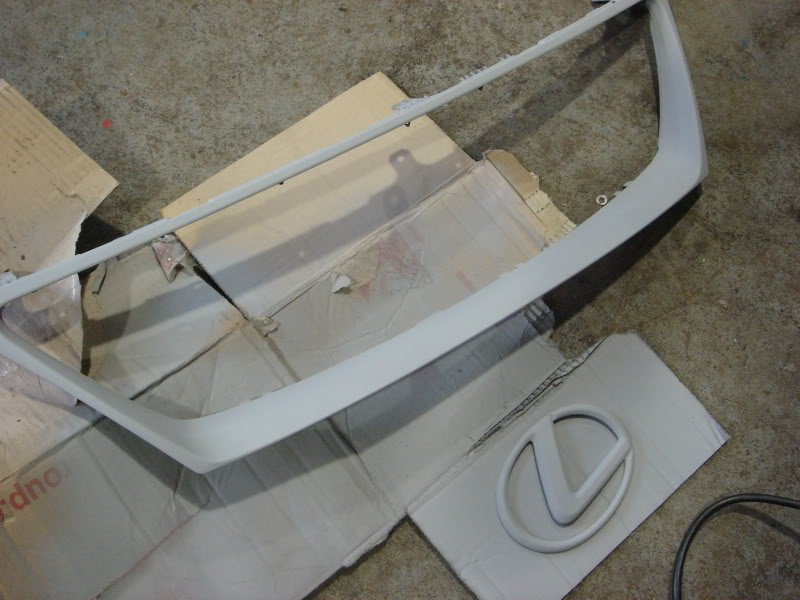
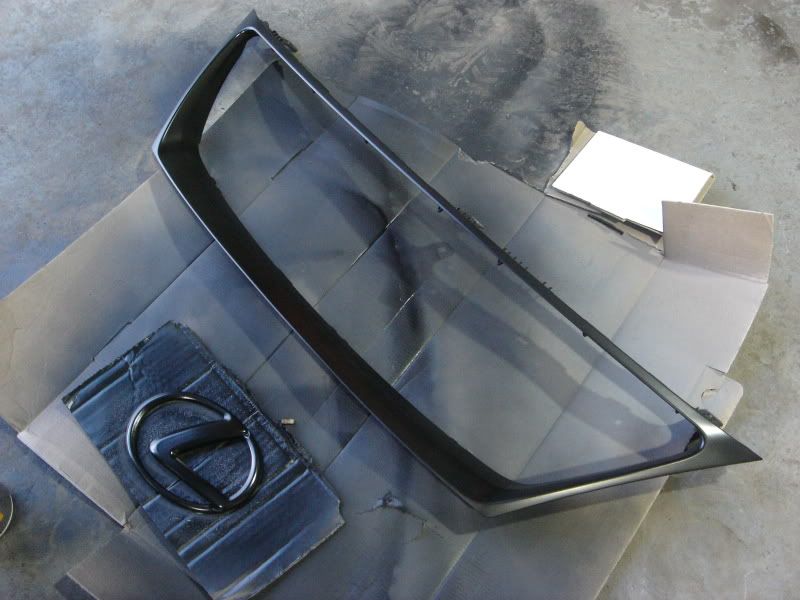
I decided to respray front grill:
After removing from the car:
Sandind chrome for primer:
And satin black:
And Ive got exhaust today :D :
Now I'm waiting for
- Carson front lip
- Wald trunk spoiler
- Fabulous rear bumper spliters
- IS250 rear bumper
- JDM visors
- VIP fusa & tsuna ropes
And last stage - respraying few panels
Btw if someone wants buy a lower springs - they will be for sale soon.
-
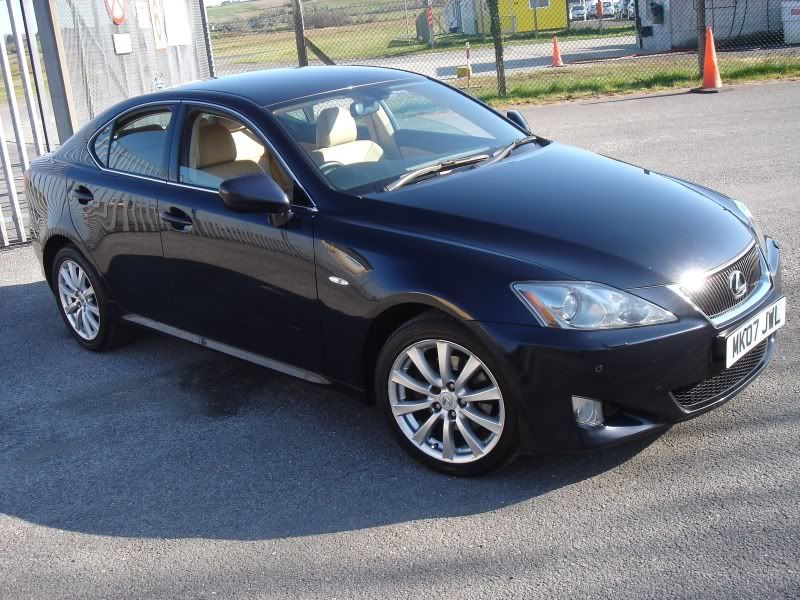
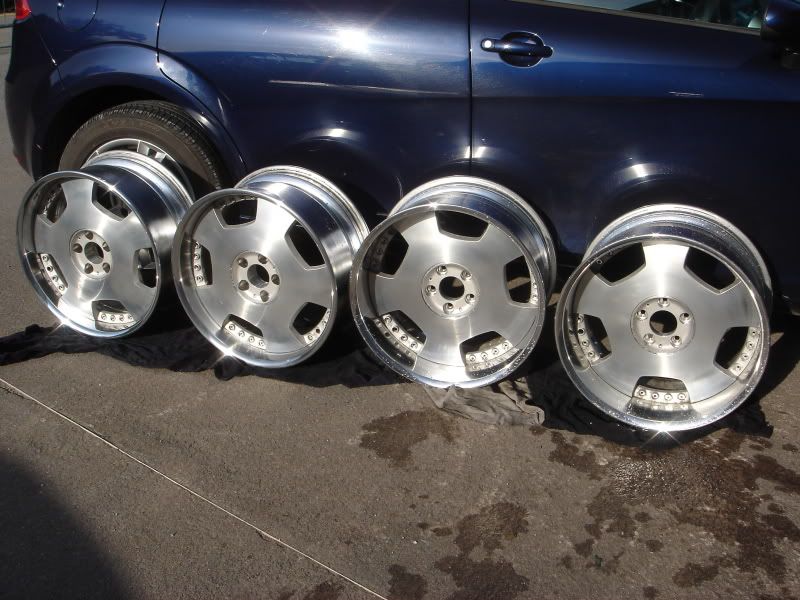
After very busy months in work I start my ViP style project -
Basic car:
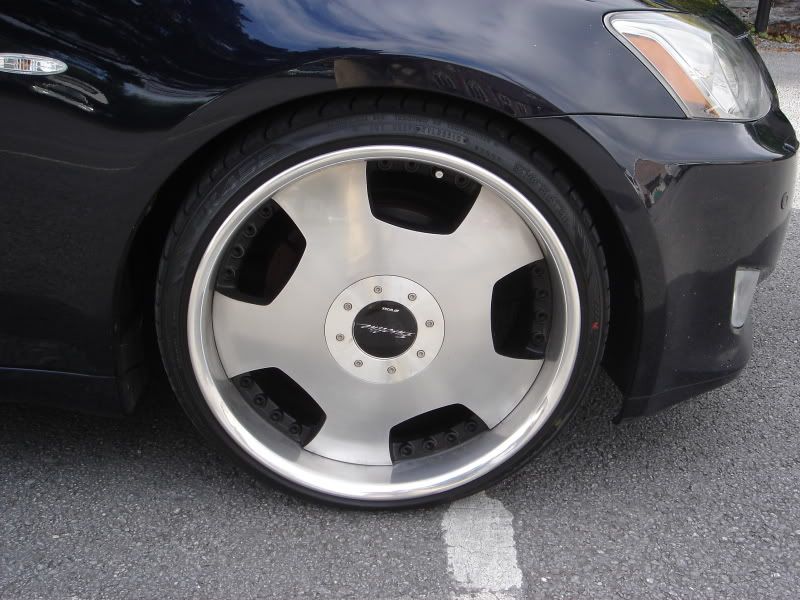
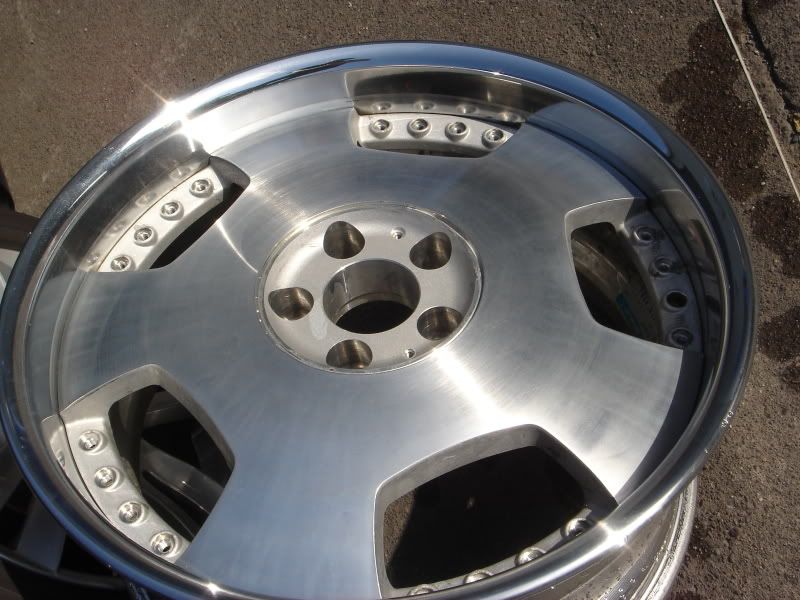
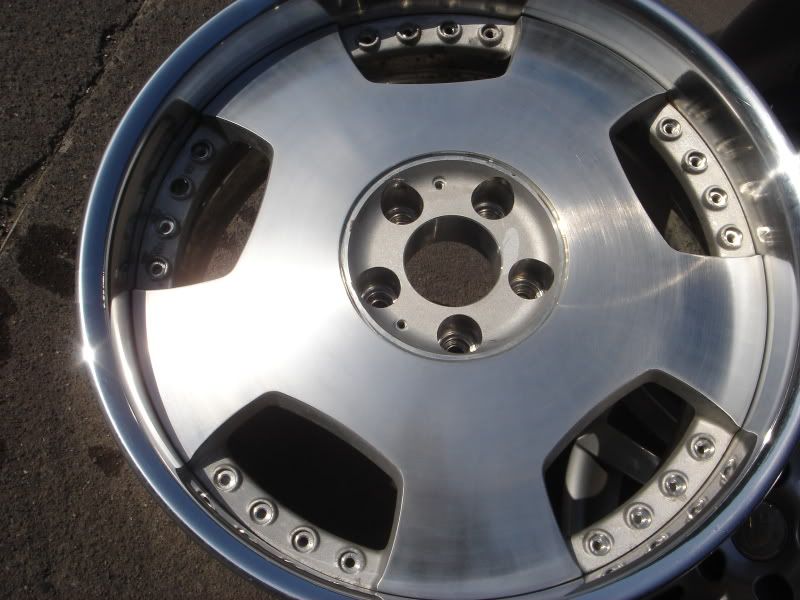
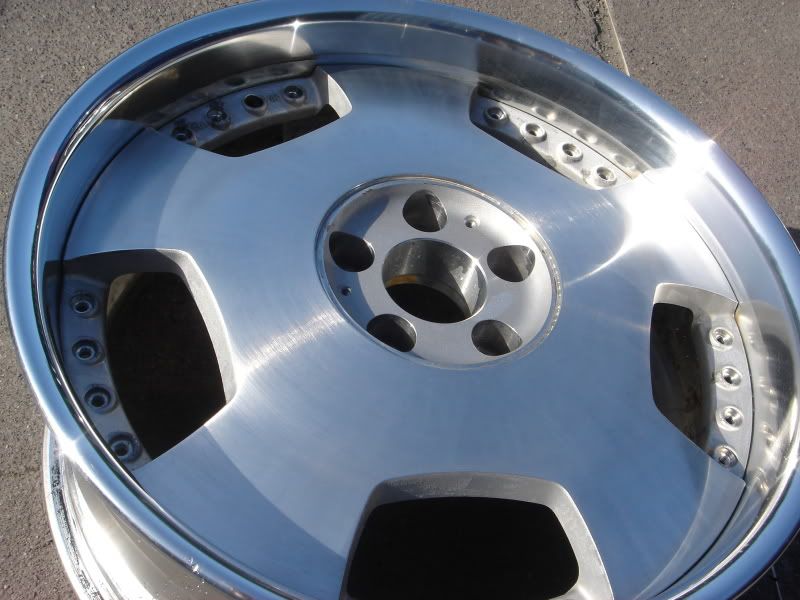
So, first I bought vip wheels -
19" Work Euroline DH
spec:
19x9 +30 front
19x10 +25 rear
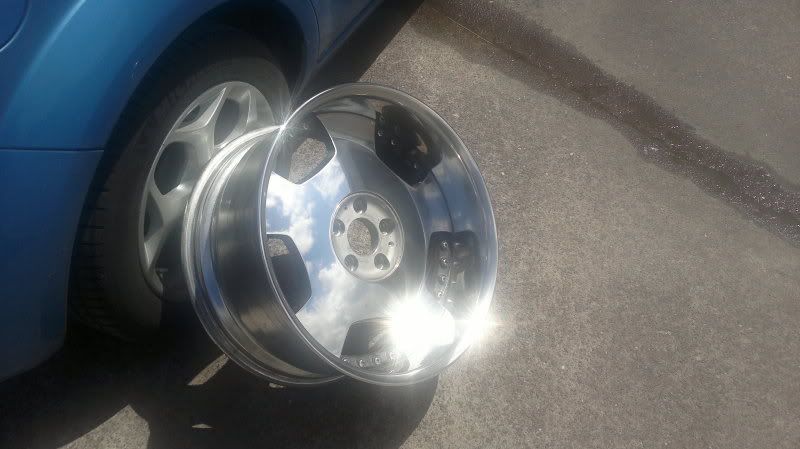
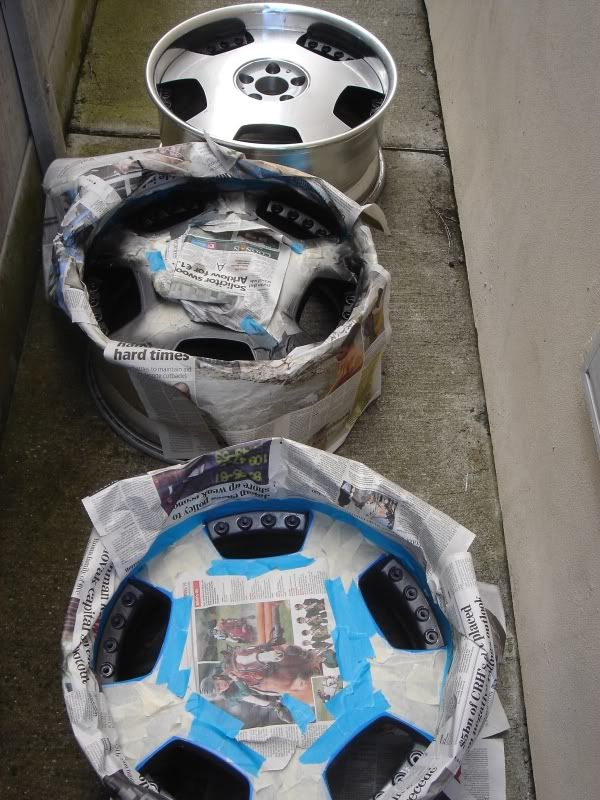
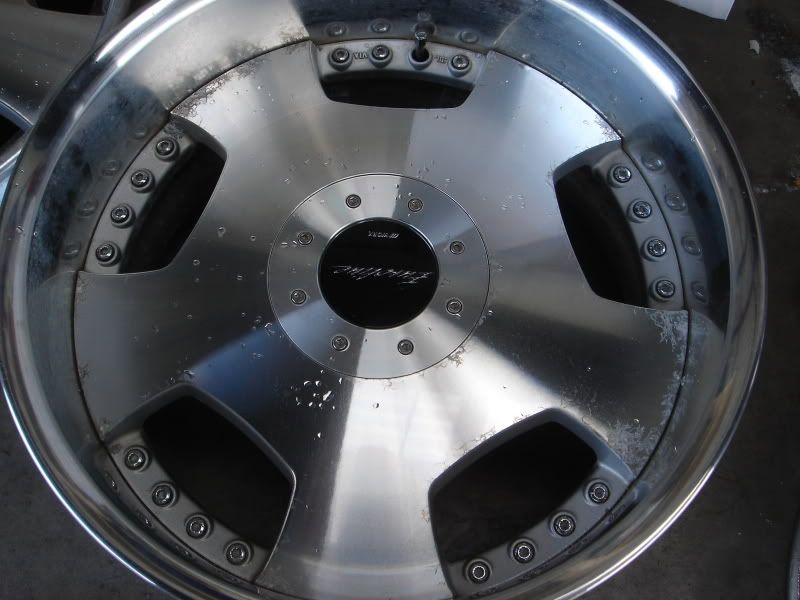
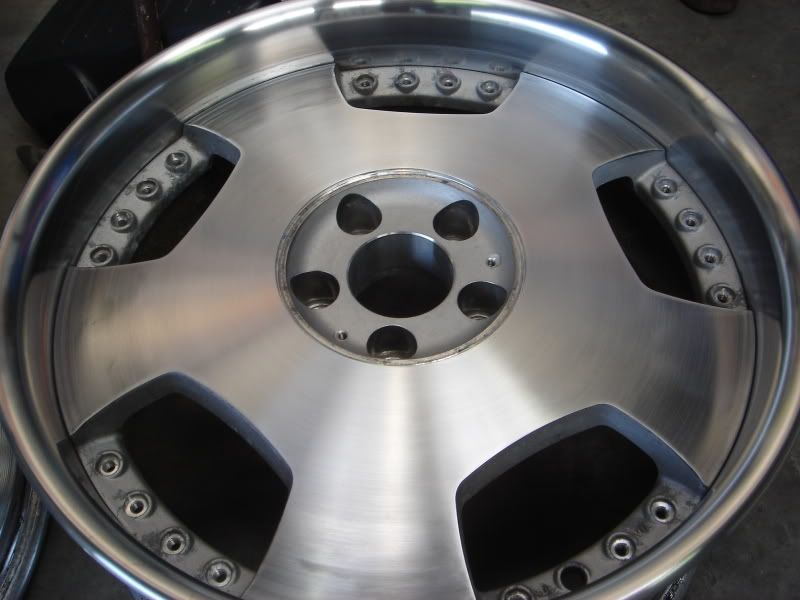
Pic of wheel:
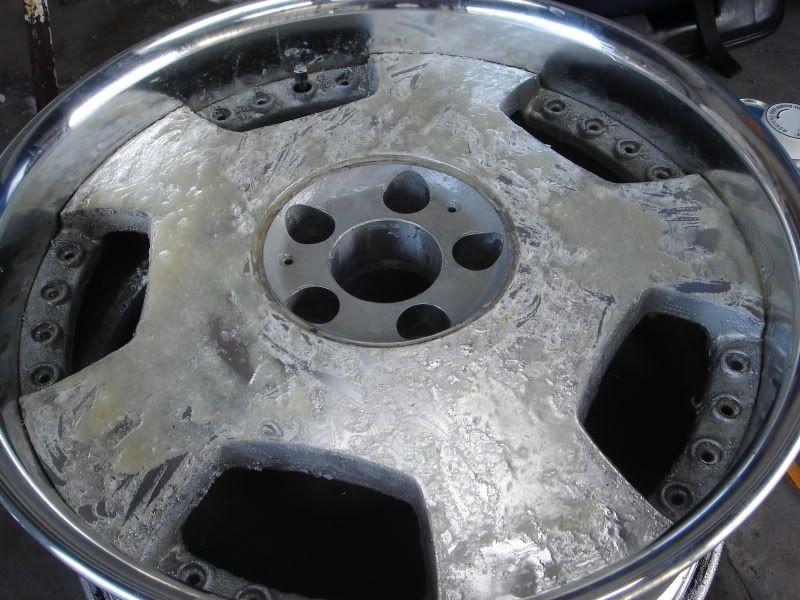
Like You see on the centers there is corrosion:
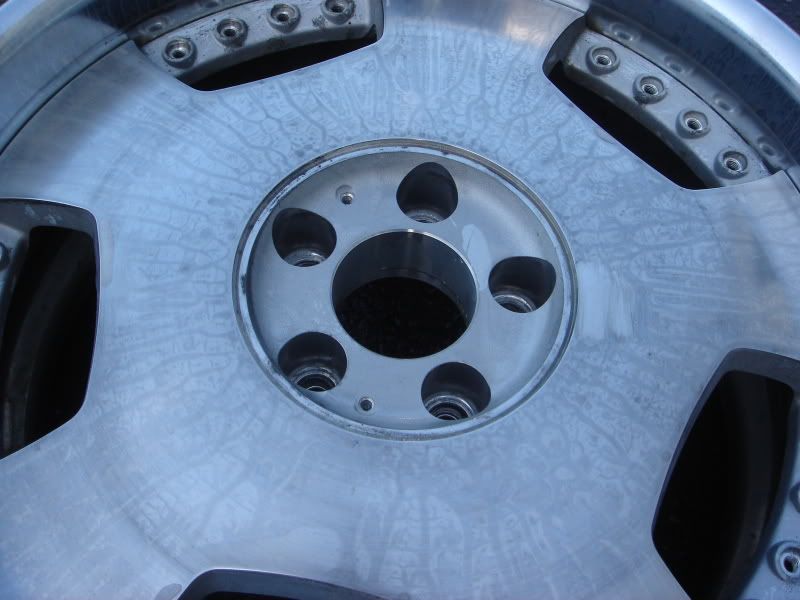
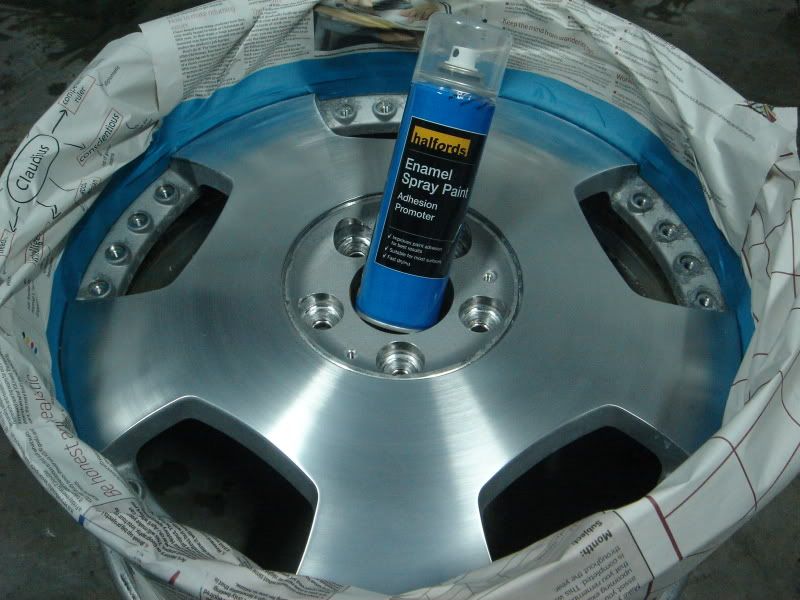
So first step will be refinish the centers. I remove clear coat with paint stripper:
Next, sand down all corrosion:
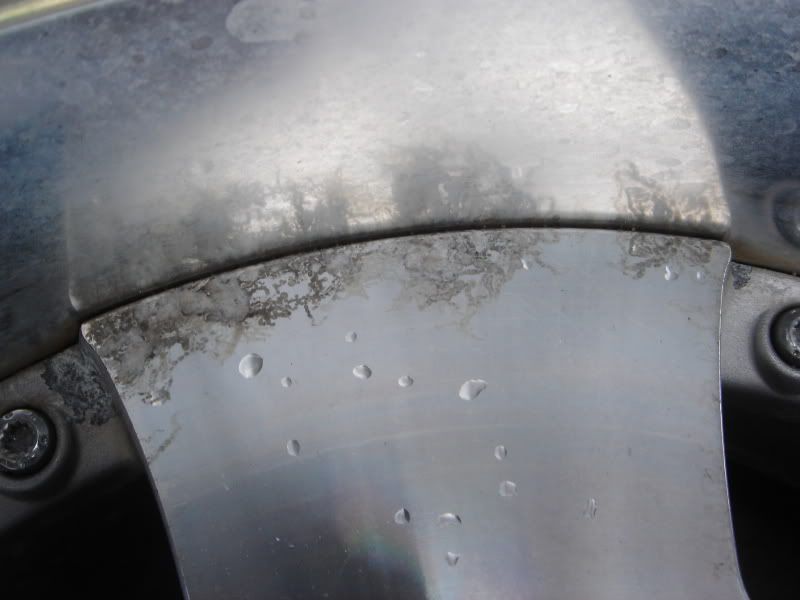
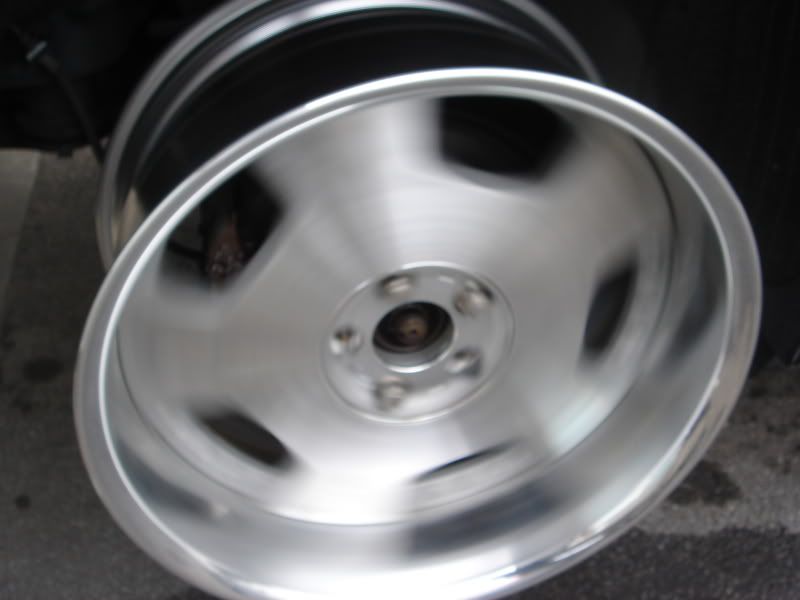
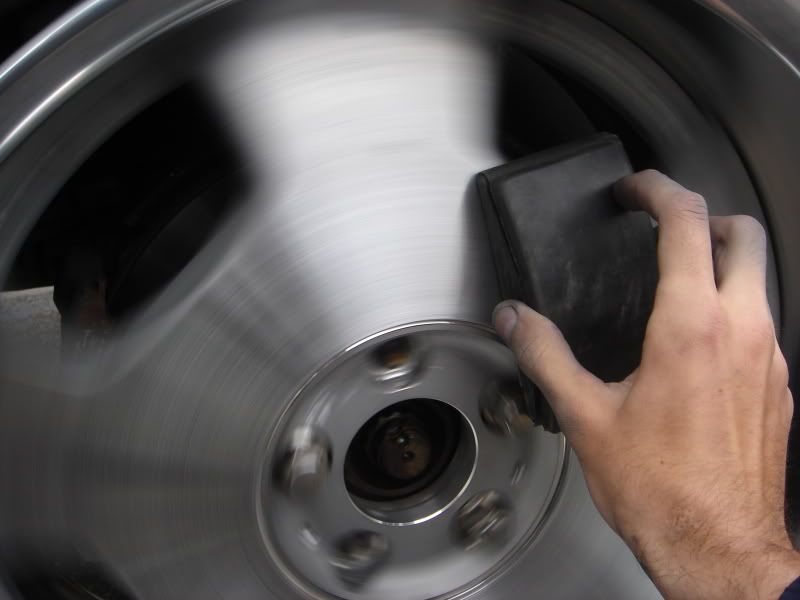
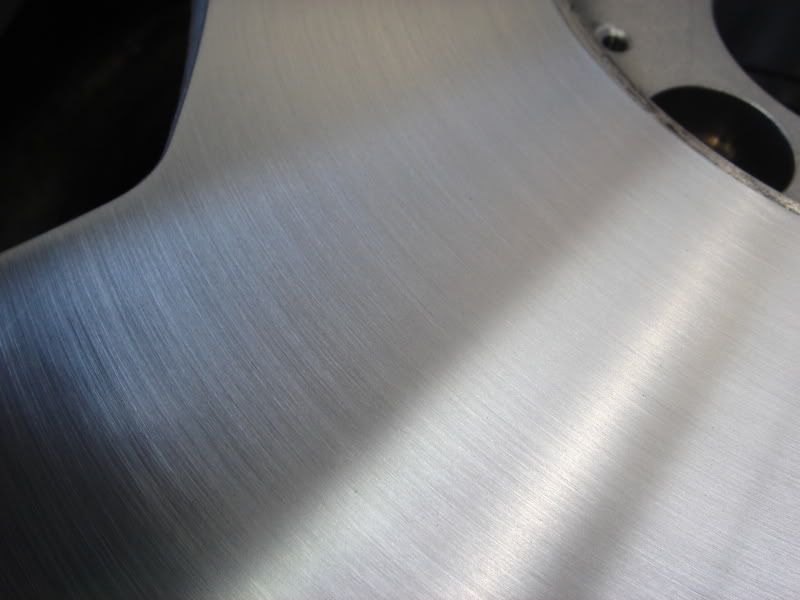
Wheels was in brushed aluminium effect, I love that type of finish and I decide to keep same effect.
It's impossible to make perfect effect by hand. I lift up the back of the car I make wheels spinning and I touch with 240 grid sandpaper:
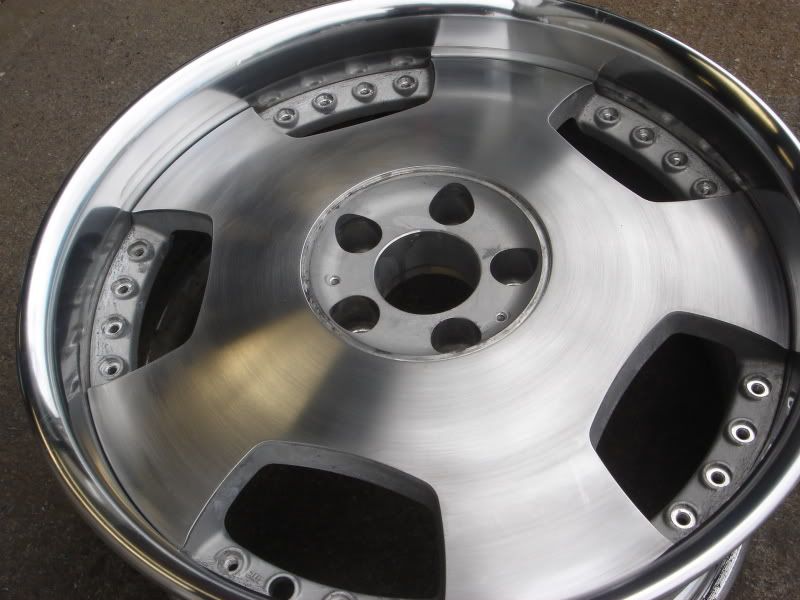
Then some polish with metal polish
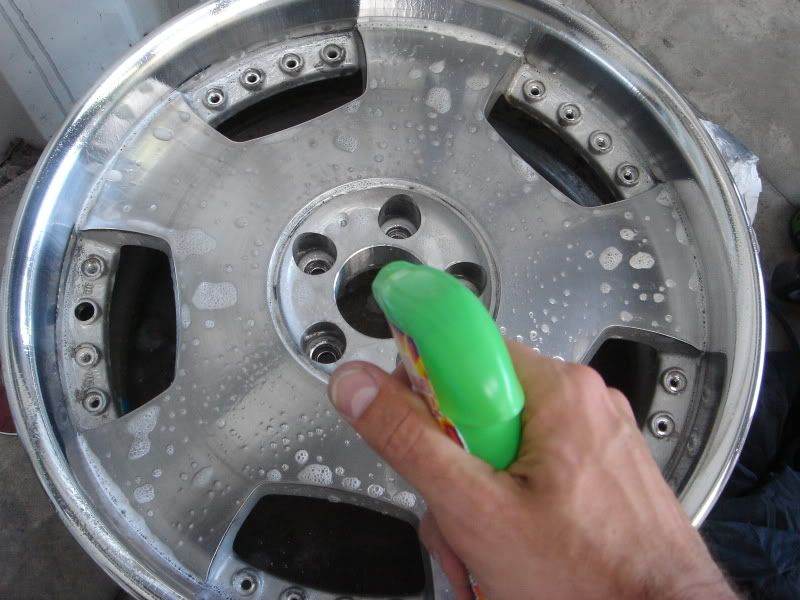
Next some oil and grease remover to prepare wheel for painting:
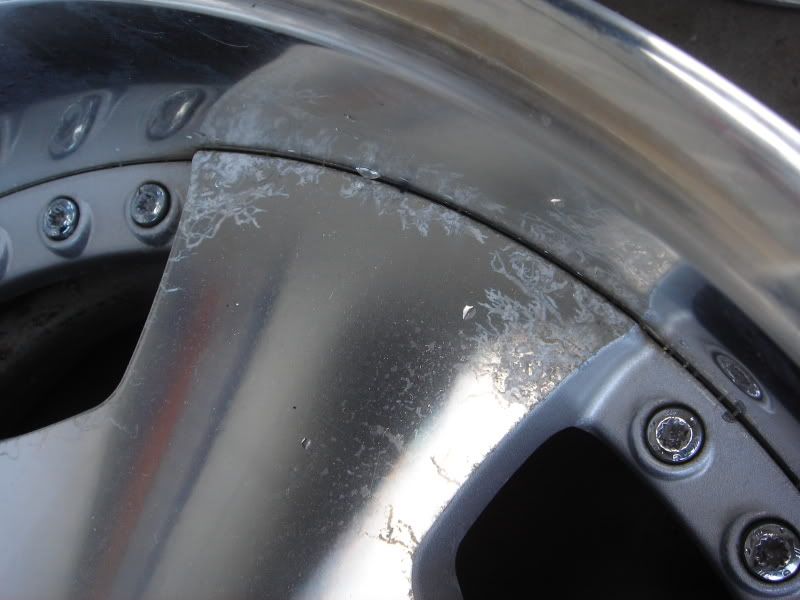
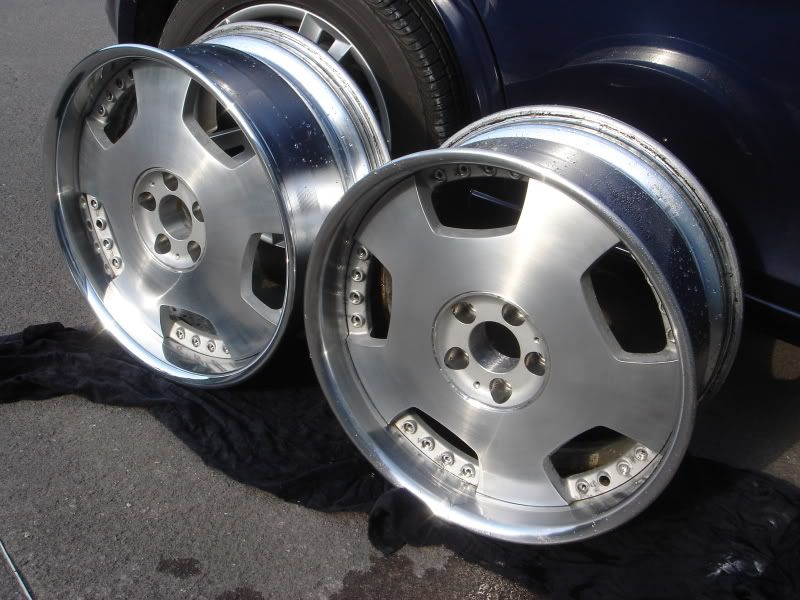
And rim ready to go to workshop:
And group pic:
Some masking and next wheel will be sprayed with Adhesion Promoter ( clear primer ) for metals:
After that some finish with paint (silver/grey) on the sides of spokes and clear coat.
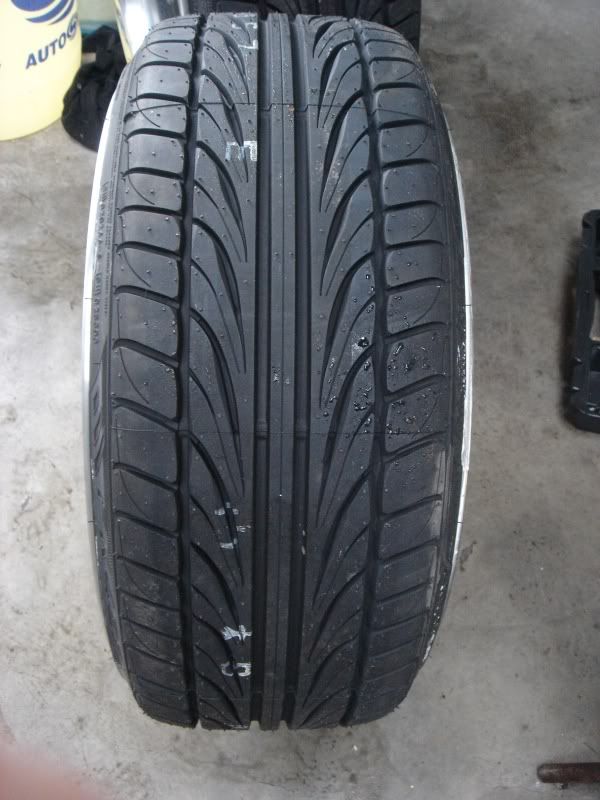
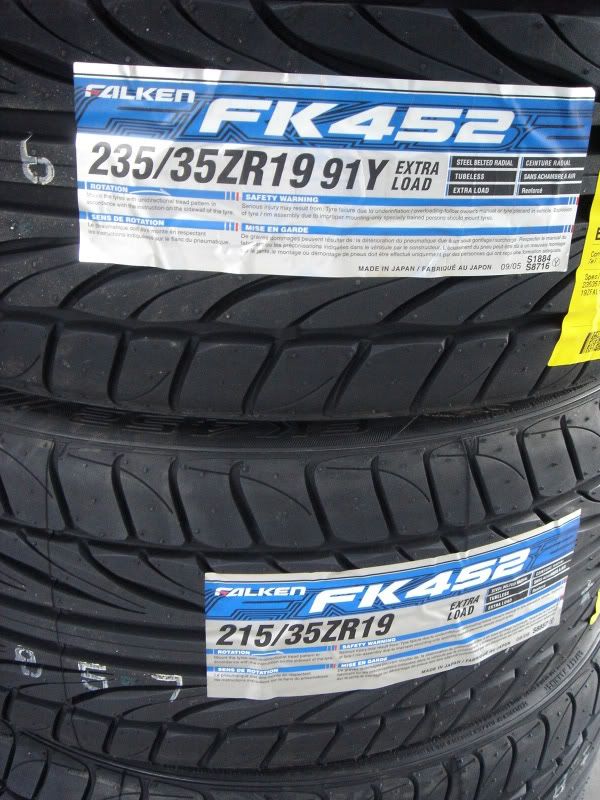
And today I got tyres:
Falken 452
215/35/19 front
235/35/19 rear
So that mean........ yes stretch :mrgreen: :mrgreen:


Wanted Is250 Rear Bumper Lip
in Wanted
Posted
Im looking to buy new or used gfx rear bumper lip for Lexus IS250.
Thanks