

normski2
-
Posts
2,557 -
Joined
-
Last visited
-
Days Won
16
Content Type
Profiles
Forums
Events
Store
Gallery
Tutorials
Lexus Owners Club
Gold Membership Discounts
Lexus Owners Club Video
News & Articles
Posts posted by normski2
-
-
Hopefully this should show you. Starts at at about 5 minutes in
-
 2
2
-
 1
1
-
-
21 hours ago, HighlandJohn said:
Done on site so I'll be watching like a hawk
Might I suggest having a good look [when the old windscreen is removed] and noting where any dash clips are located. There may even be some that look like a wee roll of felt or 6mm foam that may have been fitted at a later date to stop the 'dashboard rattle' that so many spoke of a few years back. Perhaps take a few photos for reference.
Found the pic below in my info folder ... it may be of use.

Also, check that the rain sensor for the wipers is working, they will need to bond the pad to the screen so that all is held securely.
A watering can will start the necessary action!
-
1
-
-
Exactly as John has shown you.
The critical thing is to put it into RECIRCULATION mode.
When you remove the panel at the back of the glove compartment you should find the lid to the filter is in the up position allowing full view of the filter to be replaced.
If it is not up DO NOT TRY AND FORCE THE LID UP MANUALLY you will break the selector arm!!!
Just put the ignition on and try again, when you get it right you will see the lid lift up to reveal the filter.
-
1
-
-
20 hours ago, markeyszoo said:
I was involved in an accident today. Sideswiped by an ambulance who was trying to get out of the way of a blue light police car.
Minor ding and scuff on front wheel arch but when i spoke to my insurers they were quick to say 09 reg, old car, could be a right off.
Is there is no end to the insurance companies greed.
I see a battle looming.
They should not be writing off your car for such small damage. No doubt your own insurance company will instruct a claims management company. CMC's can be tiresomely slow in the extreme.
Stand your ground and be polite and firm.
You are not at fault therefore you can determine where your vehicle goes for repair. Do not let them 'shoe horn' you into having your car taken away on a low loader to goodness knows where. The phrase ' I know my legal rights and as I am not at fault here I wish exercise my right to choose my repairer for my vehicle' ..... usually gets their attention.
Keep all correspondence in a file so you can refer to it. I'd keep that file stashed for about a year to be safe. Likewise with email correspondence .... keep it in a labelled folder so you don't delete it in error.
From my own experience it is highly likely your insurance company will pay out for the repairs and then will seek those costs from the other party's insurance company. This can be slow and protracted. It's a PITA, but it's how insurance companies work. They sometimes resort to threats of court action to get the money from the guilty party's insurer. I have experienced this myself just last year. My insurer said it was fairly common practice ... somewhat alarming!! They were on the point of paying me for my time to attend court. It got as far as me having contact with their firm of Solicitors. The other side then yielded and paid up.
Best of luck and good fortune to you.
-
This should sort out the windows ... assuming this was not done after Battery change
-
1
-
-
Could be the tyres.
What did you go for? I used to have Bridgestones all round and found them dreadful for tram-lining. When they were shot I went for Goodyear and they were/are so much better.
-
Have a look at the info panel between the speedo and rev counter. There may be a warning/alert indicated.
For example .... you might see
- Key Fob Battery low
- Low Windscreen Washer level
These warnings are announced with a beep sound and the first time it happens you wonder what on earth is going on.
-
1
-
Take a look at this. It may prove useful.
With care and the right method of approach you can get the mirrors apart quite easily.
Hope that helps
-
16 hours ago, LenT said:
I have the 18” staggered setup and I’m quite happy with the Lexus tyre sizes. But like others here, I have fitted the Goodyear Eagle F1 Asymmetric tyres mainly because my priority is overall wet road performance.
I think they have certainly delivered in that respect. In considering your actual tyre choice, I would certainly recommend looking at the latest Asymmetric 6 version.
https://www.tyrereviews.com/Tyre/Goodyear/Eagle-F1-Asymmetric-6.htmMe too +1 to that
-
1
-
-
I’ve had these on for about 6 weeks now and I have to say I’m impressed by the improvement it has made.
The car certainly feels “tighter” … it’s quite apparent. It’s all a bit tighter and less “wallowy” on bends and roundabouts and the like.Now this bit is weird I’ll grant you … but it has improved the front end too. Very noticeable on trips we’ve made and especially on tight manoeuvres in car parks … I’ve not heard any wheel chatter ( my own description) … as yet.
Tyres are same as before the change … all I had done was 4 wheel alignment after fitting.
Nice one Ahmed … thank you for the pointers.
-
1
-
-
It's been a few days since I put the last seat back into the car, and I figured that would do for full curing to have completed. Its been pretty warm here despite the rain. To be fair the finish felt fully cured the following day, but hey, best to follow instructions and all that.
Today I applied the Leather Protection Cream. Basically, you wipe it on carefully ( if you have perforated panels) leave it for 10 mins or so and then buff it with a cloth ... and then repeat an hour or so later. It is said to add protection to the leather and add that leather aroma. Well, it certainly did that (the aroma part) ... wifey was dead impressed! So I had to go and do the seats on her MX5 too!
Thus far I remain very impressed with what is achievable with this kit from FC.
-
1
-
-
My IS250 is now 13yrs old and the ivory-coloured leather is looking tired. I’d been mulling over different options and settled on doing the work myself with a restoration/recolouring kit. There are a few companies out there that can supply you with the necessary components. Having watched many tutorial videos and accounts of how the job went I settled on getting my gear from Furniture Clinic based in Durham.
https://www.furnitureclinic.co.uk/
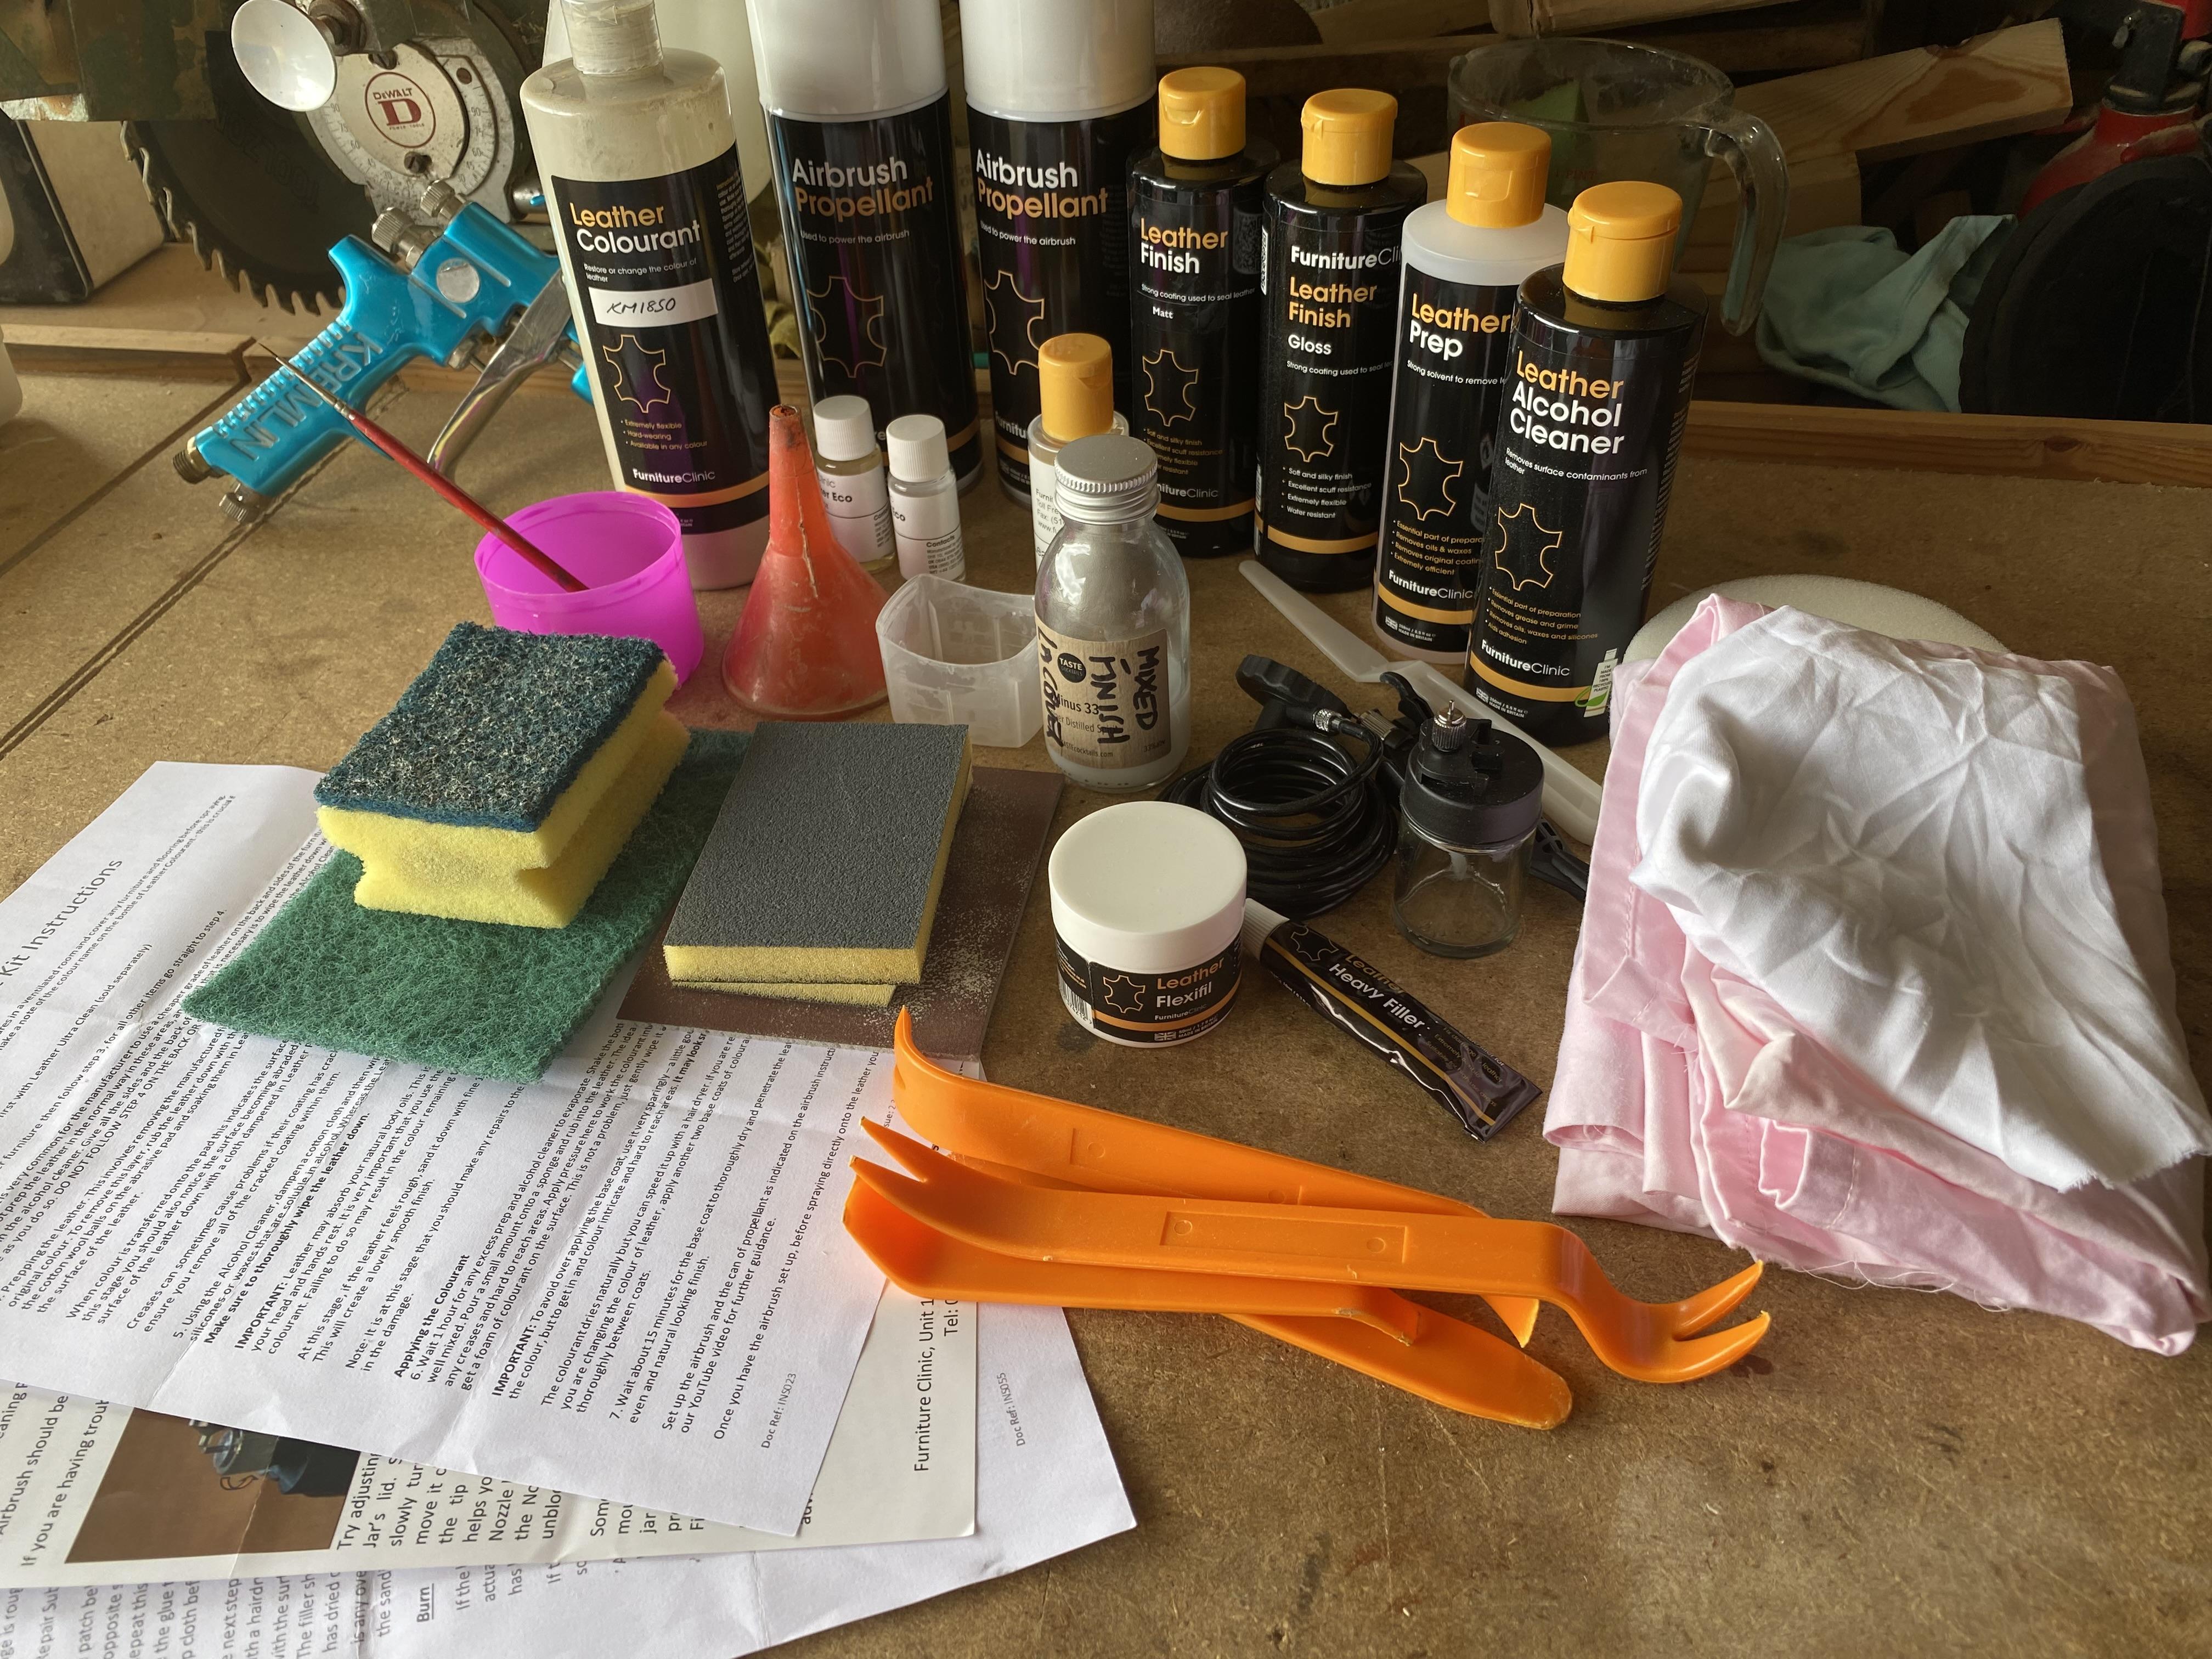
This is the kit I got along with some of my own bits I have in the garage.
My additional bits were a funnel, selection of paint brushes, foam backed sanding blocks [ I'm lucky I have many from previous], measuring pot say 5-50ml is damned handy [the type from the top of Tomato feed is spot on] and a selection of Pry tools for getting thing apart without damage. Oh and my spray gun got in on the act too I see!
It is the medium colourant kit plus I got the repair add on pack so that I could do some filling with their flexible filler. I also sought out a small leather sample piece from inside a headrest for a colour match to be made.
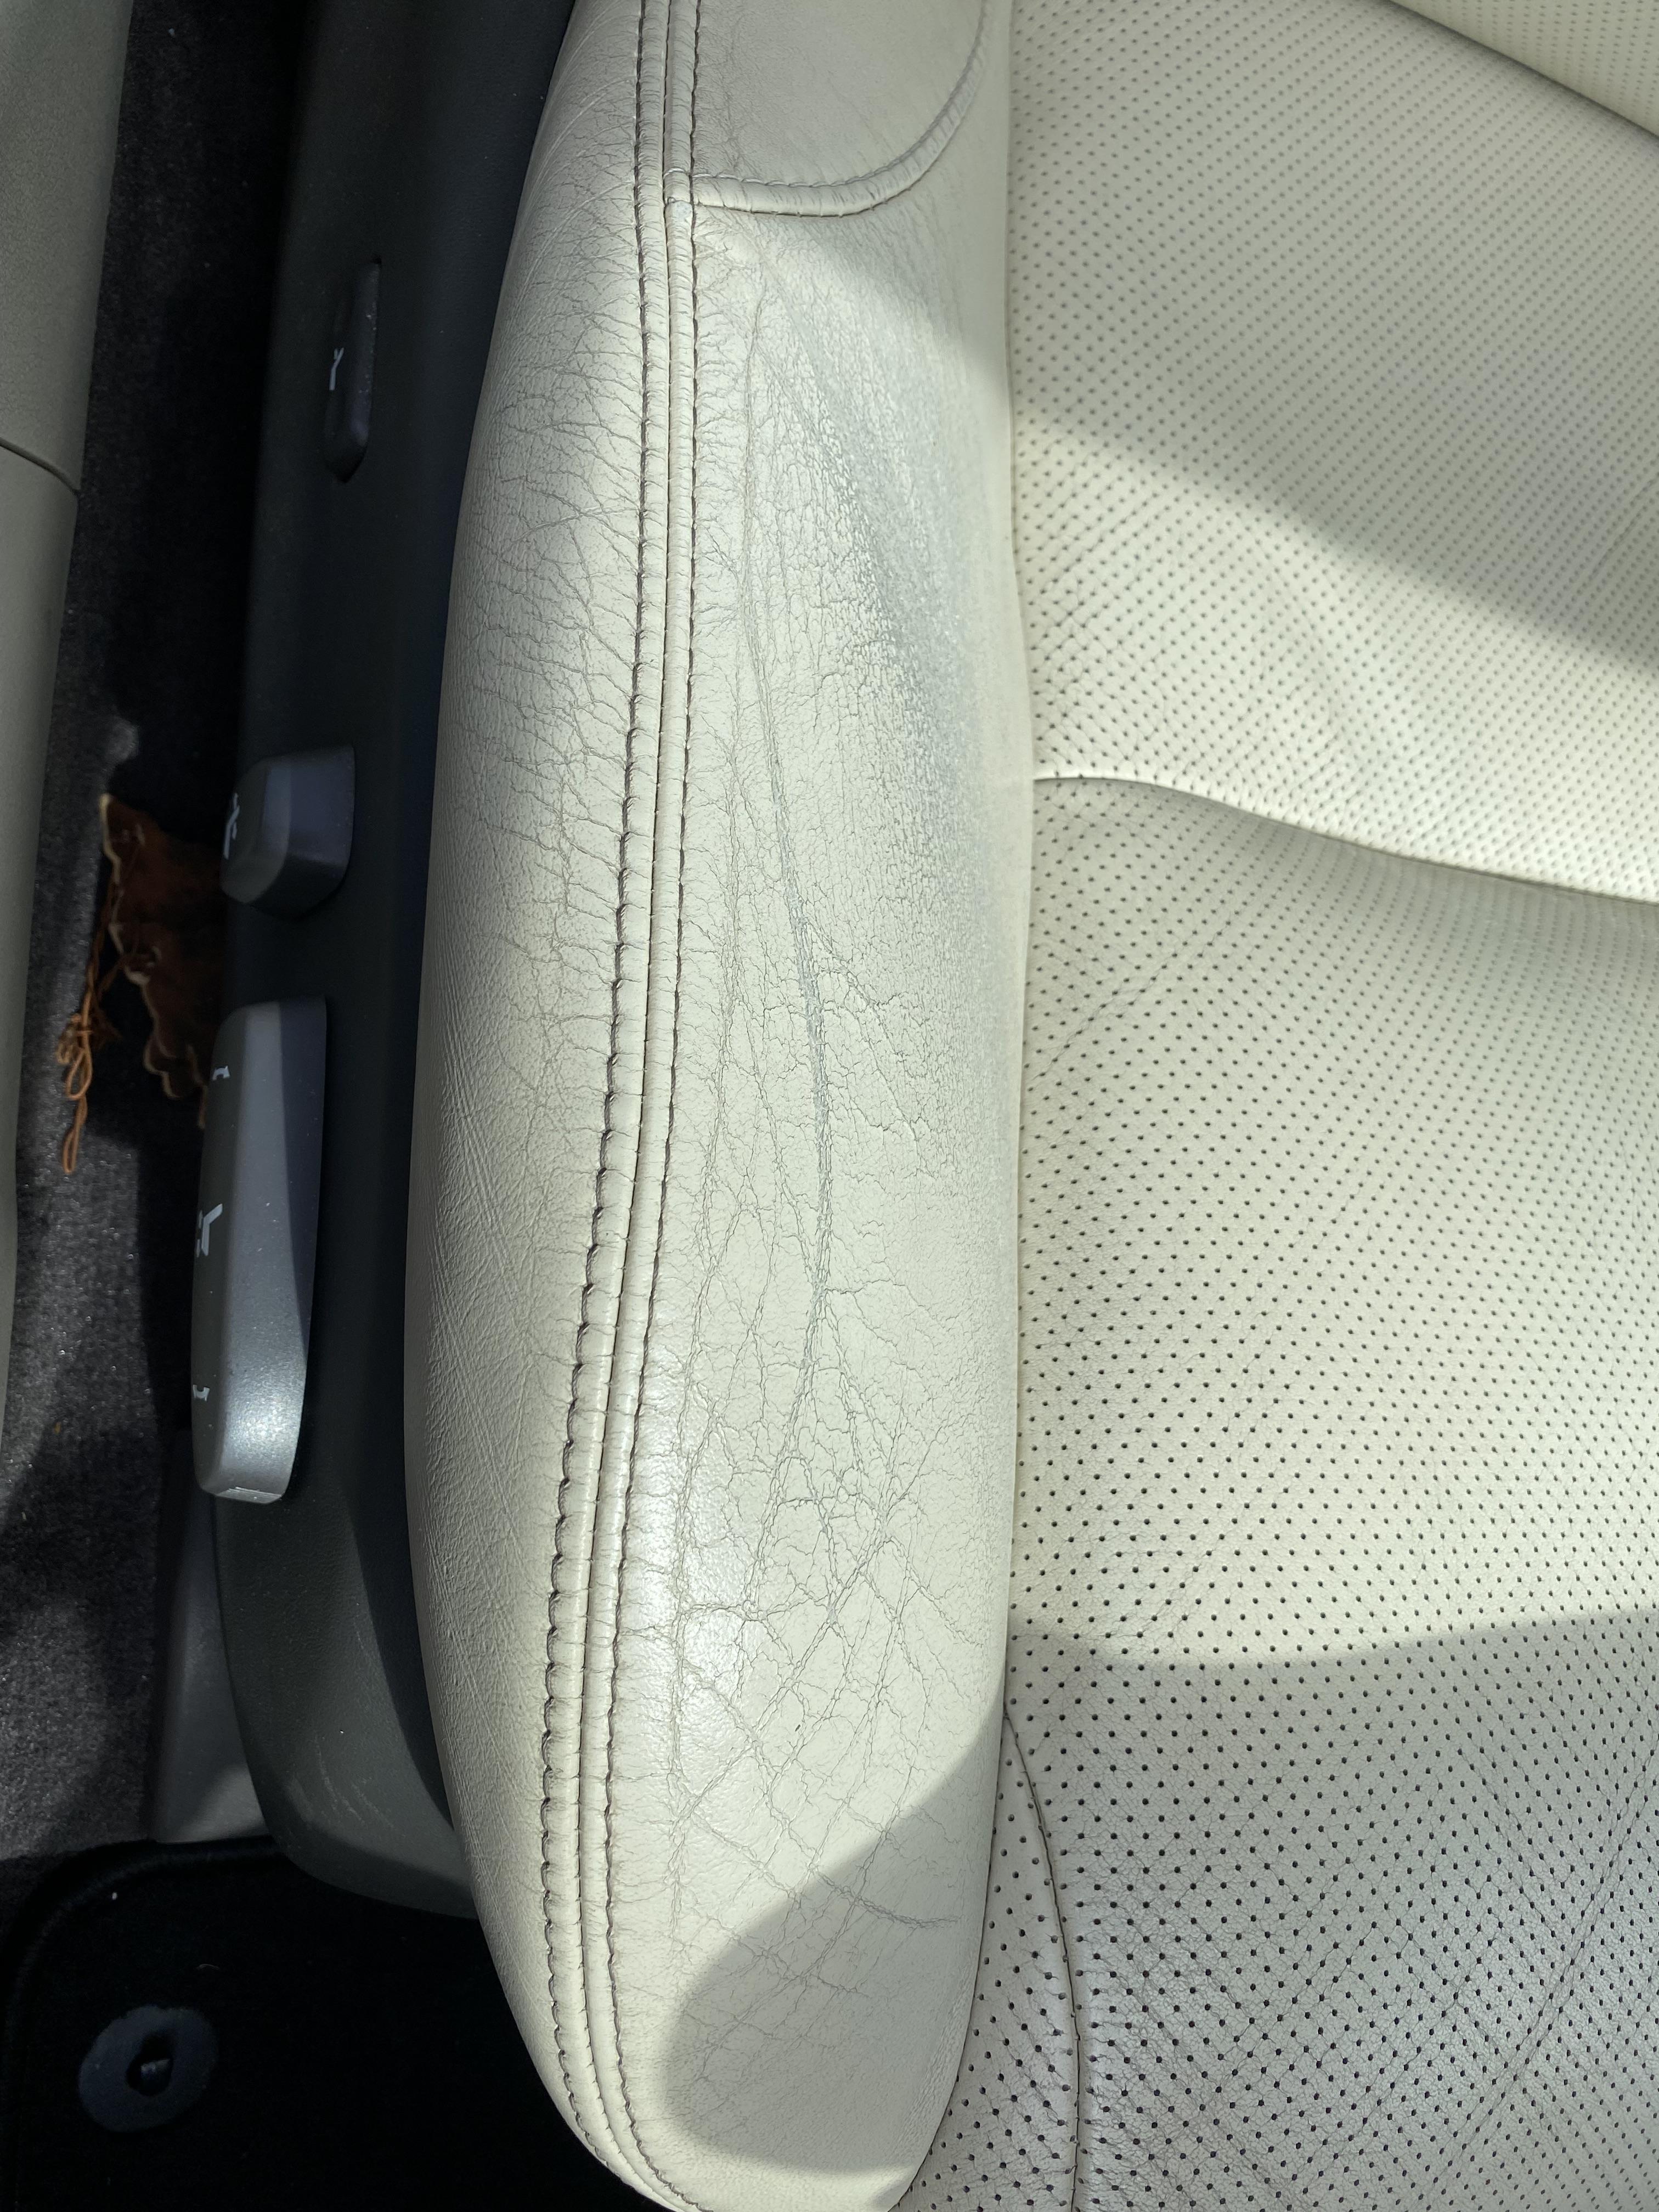
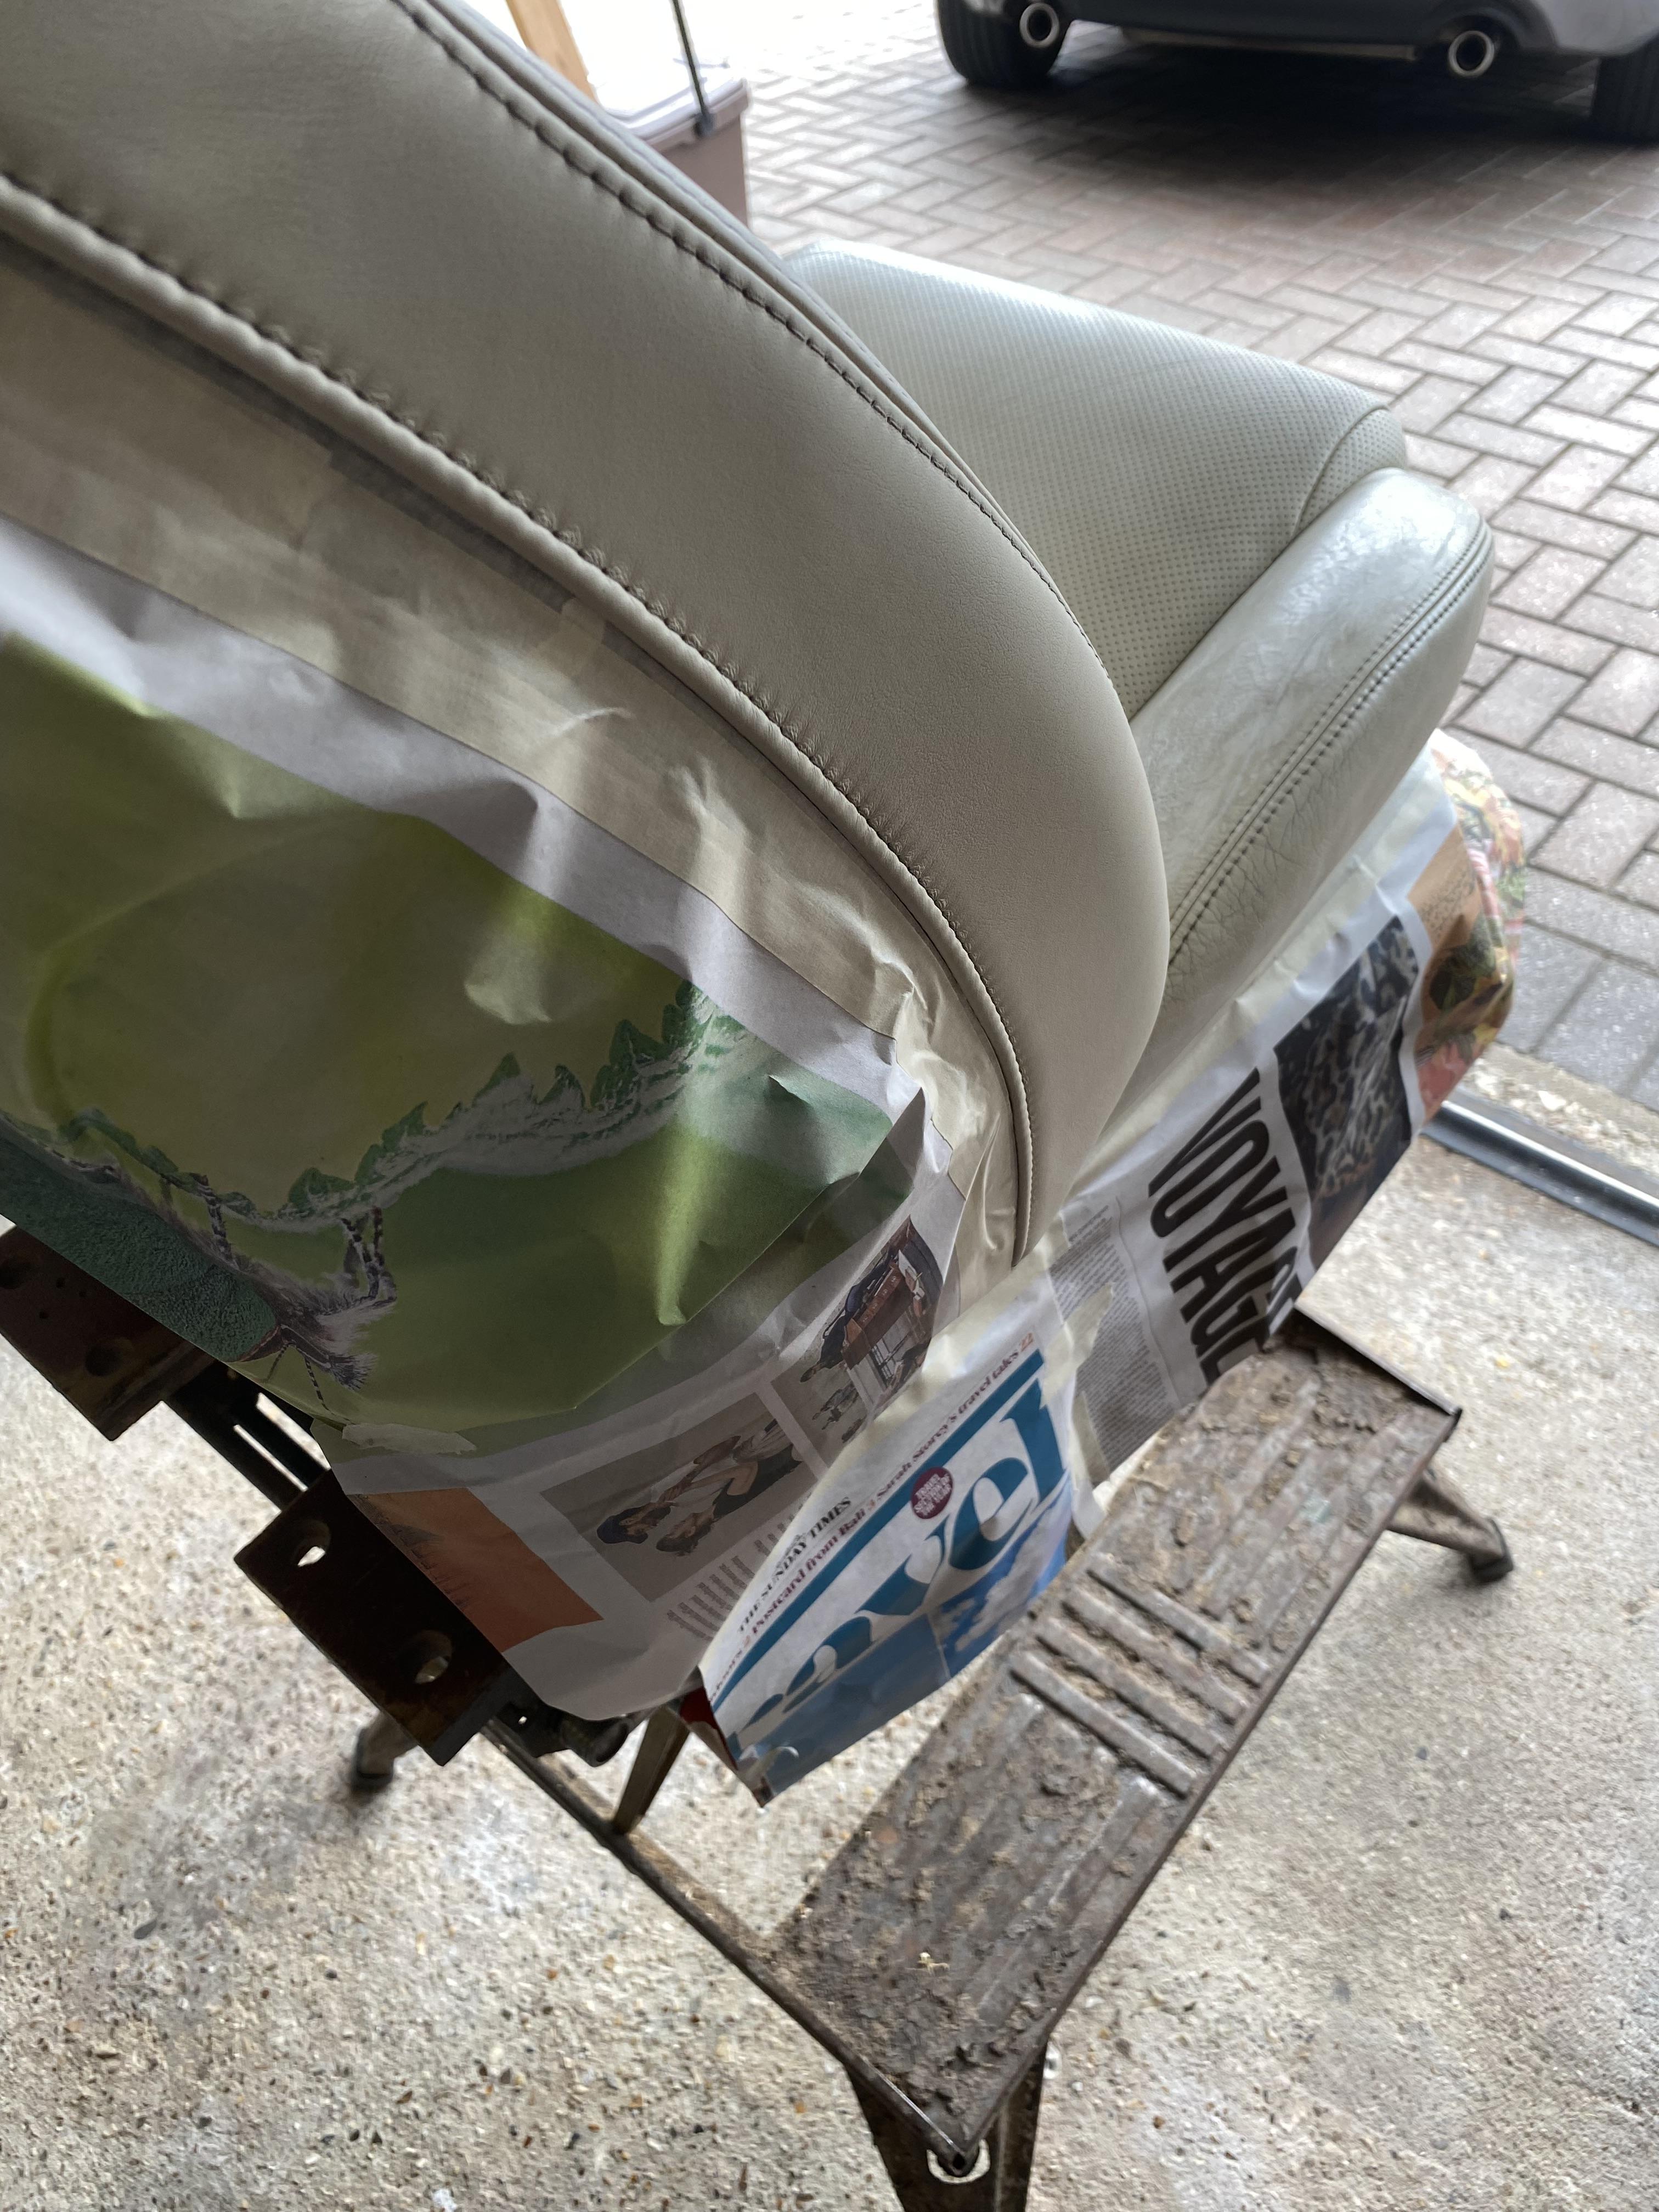
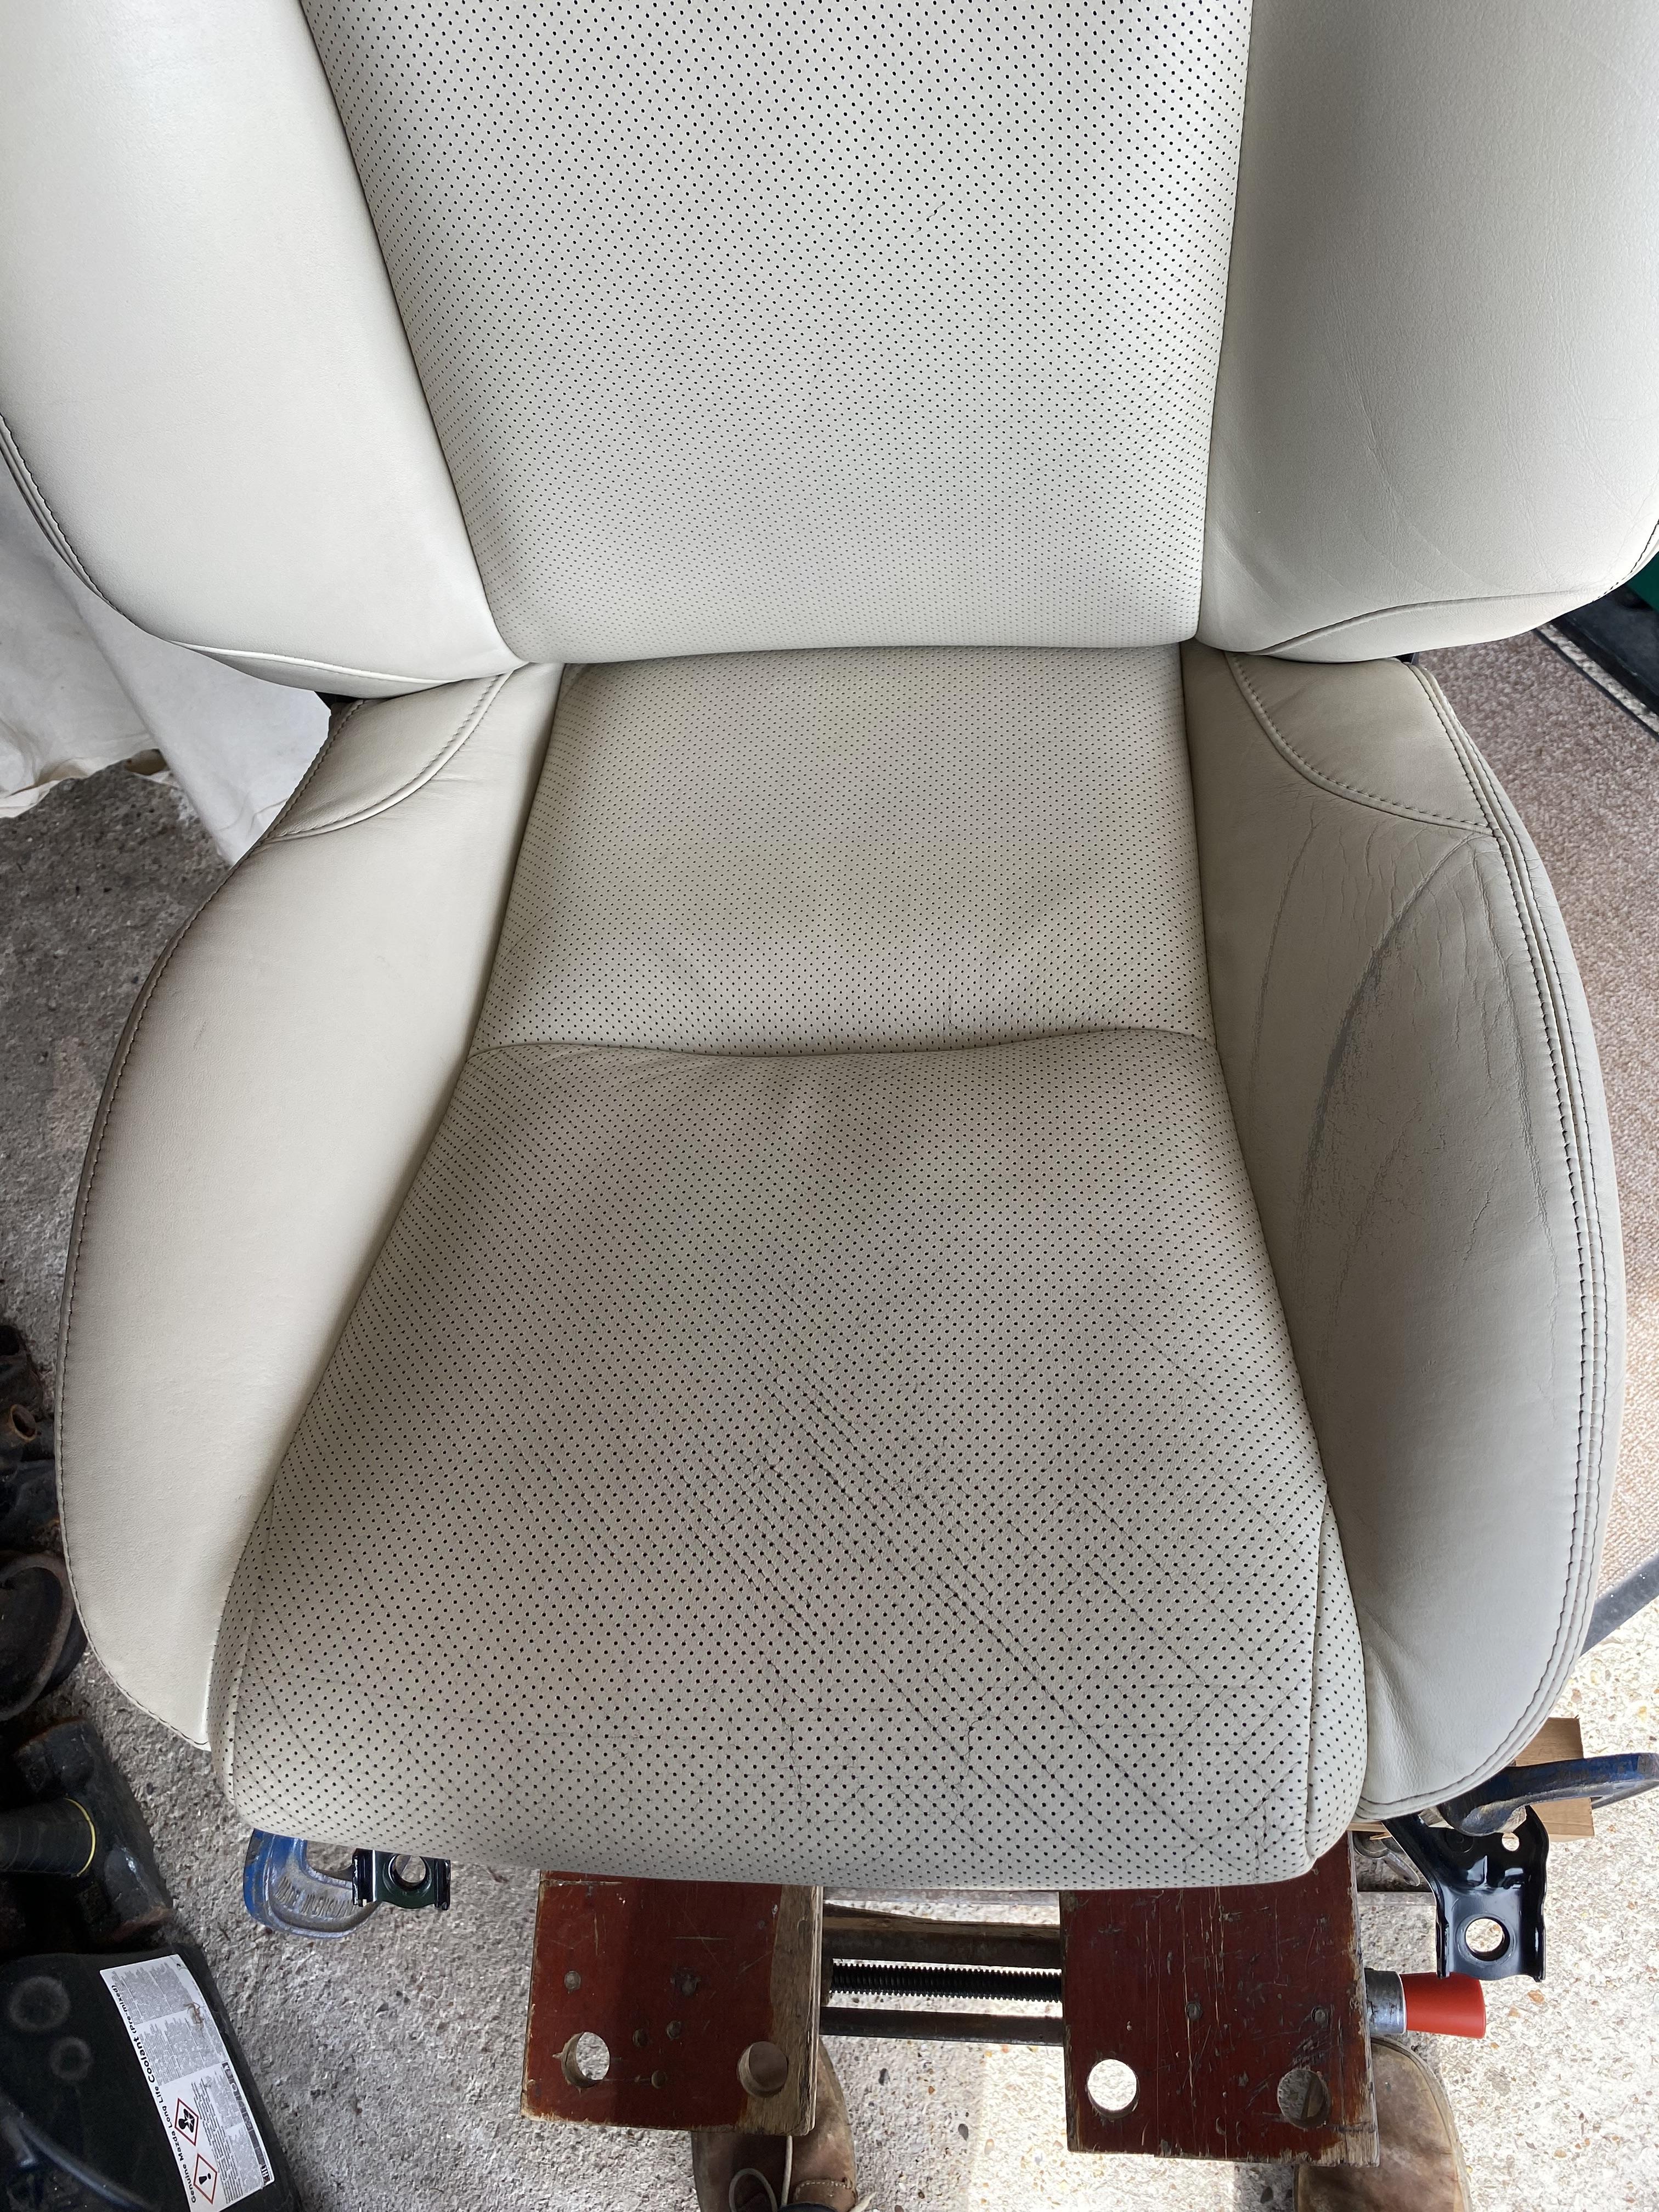
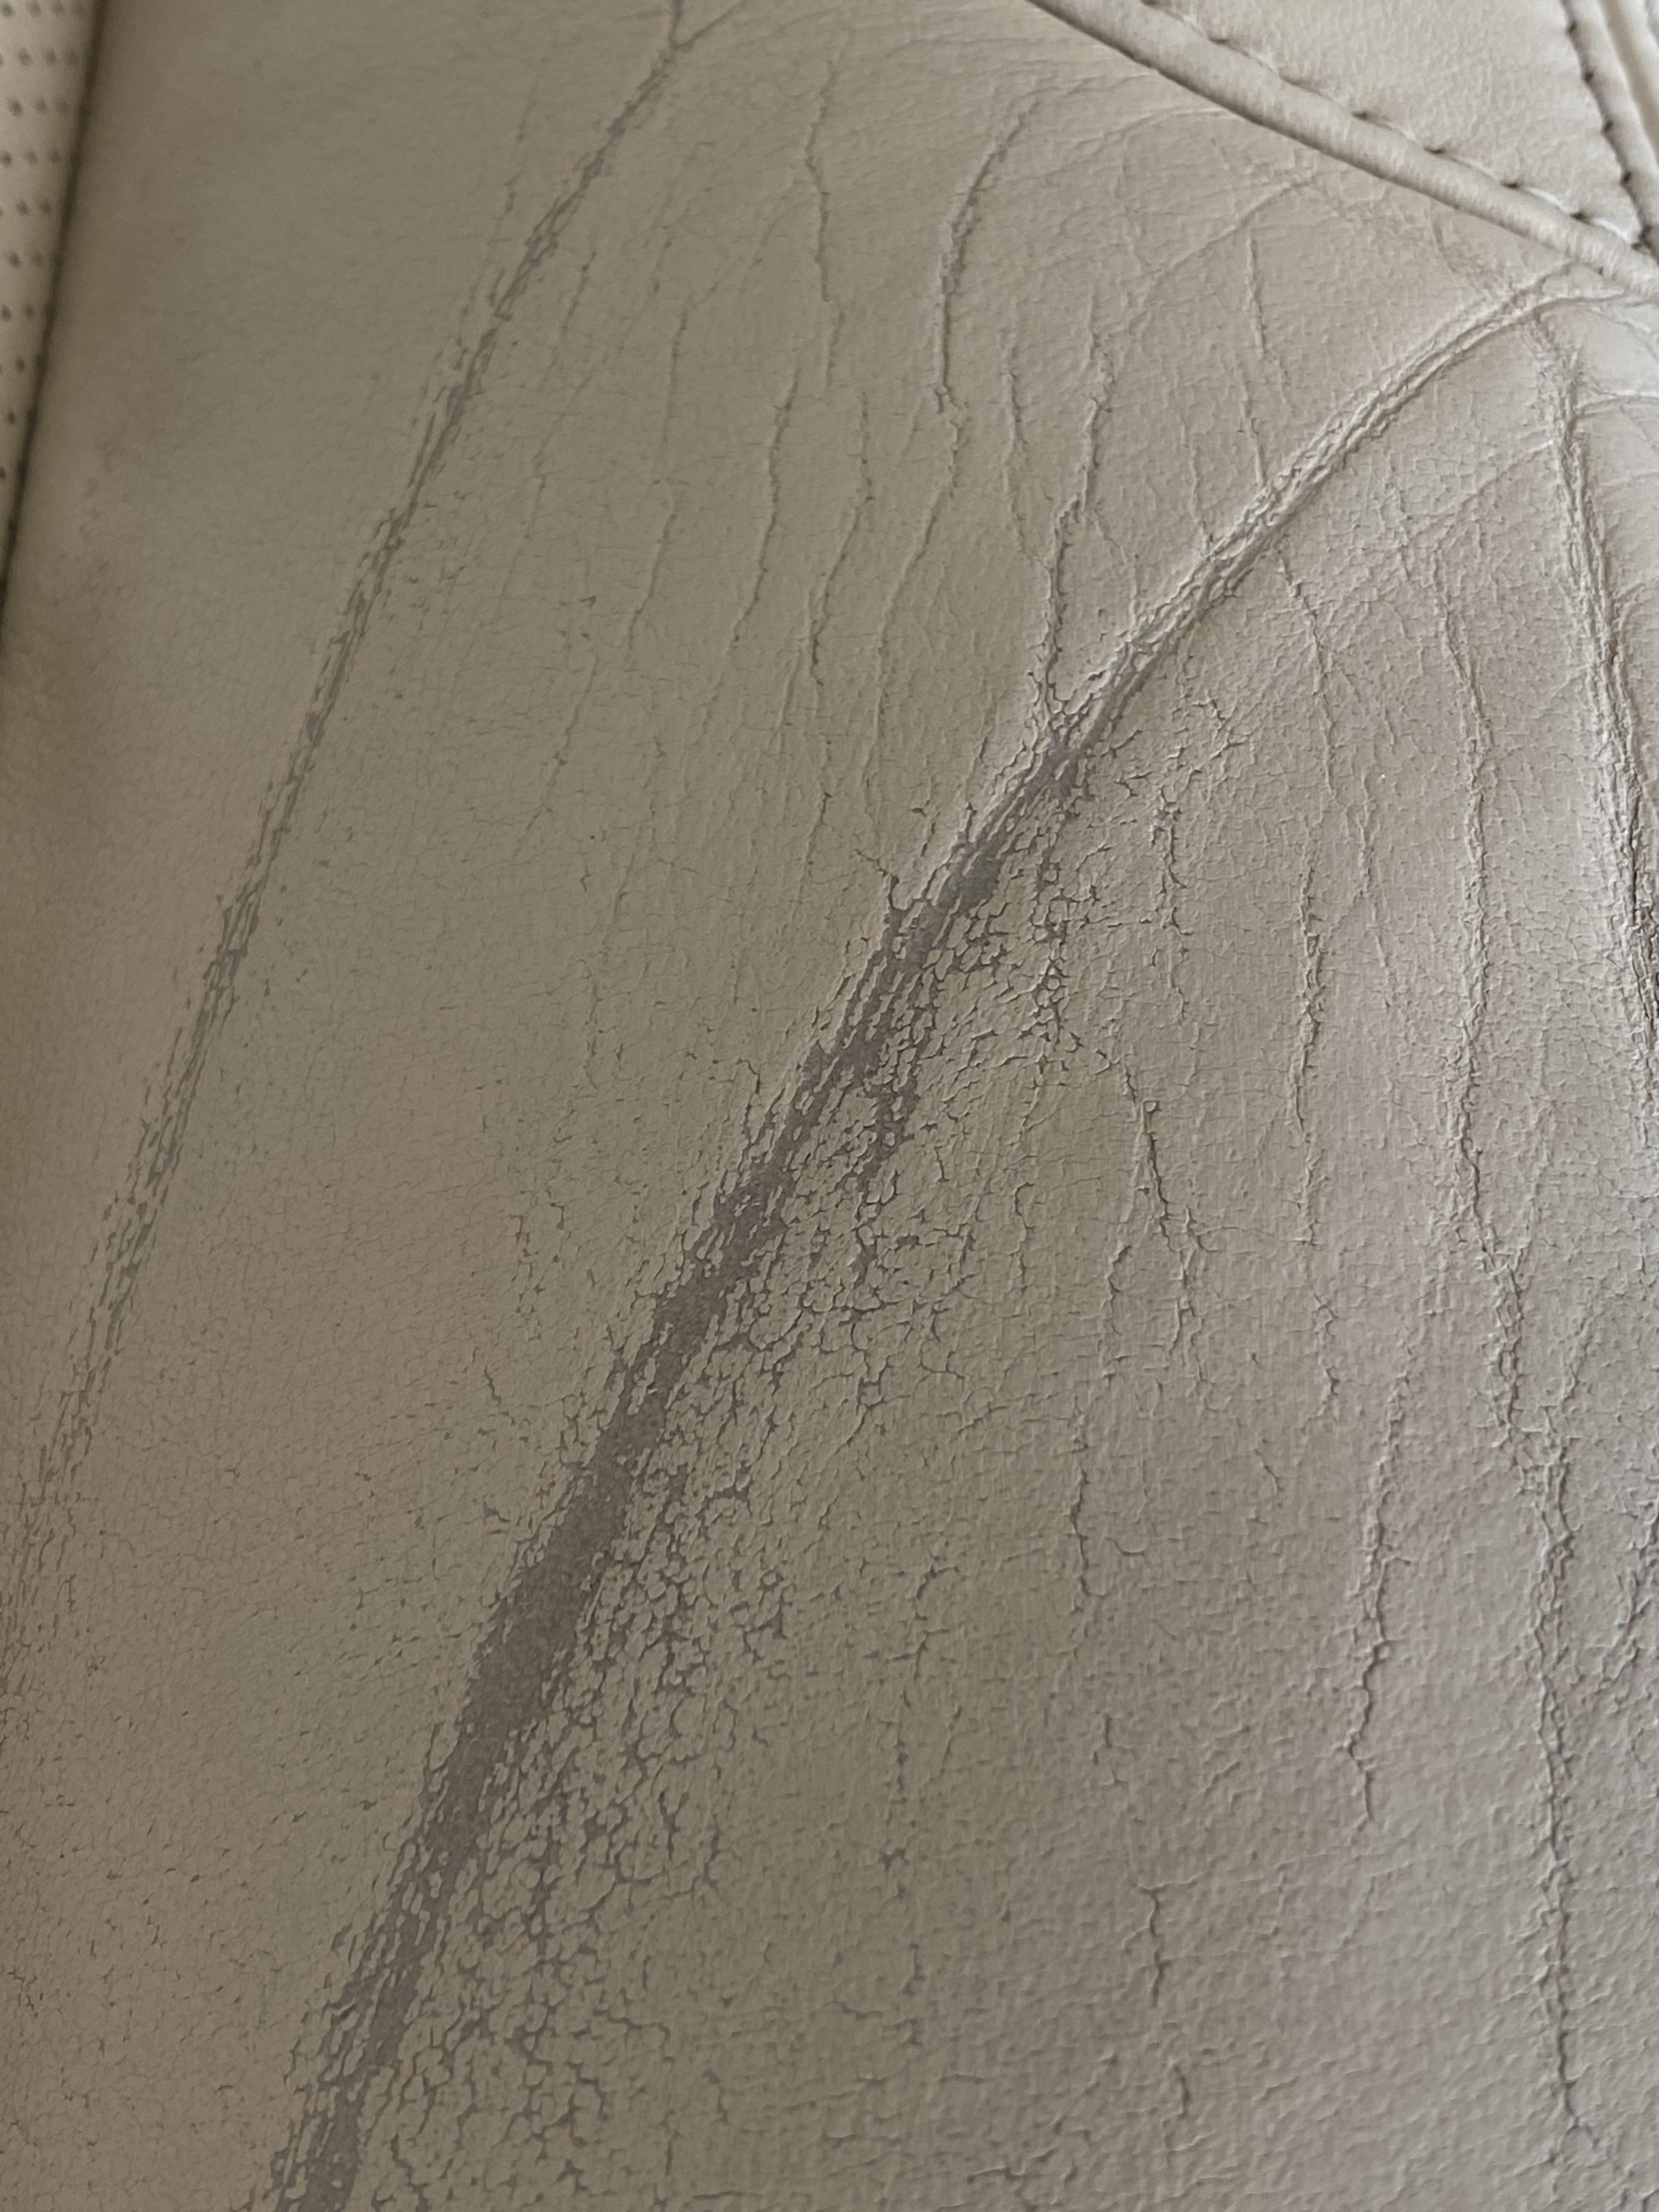
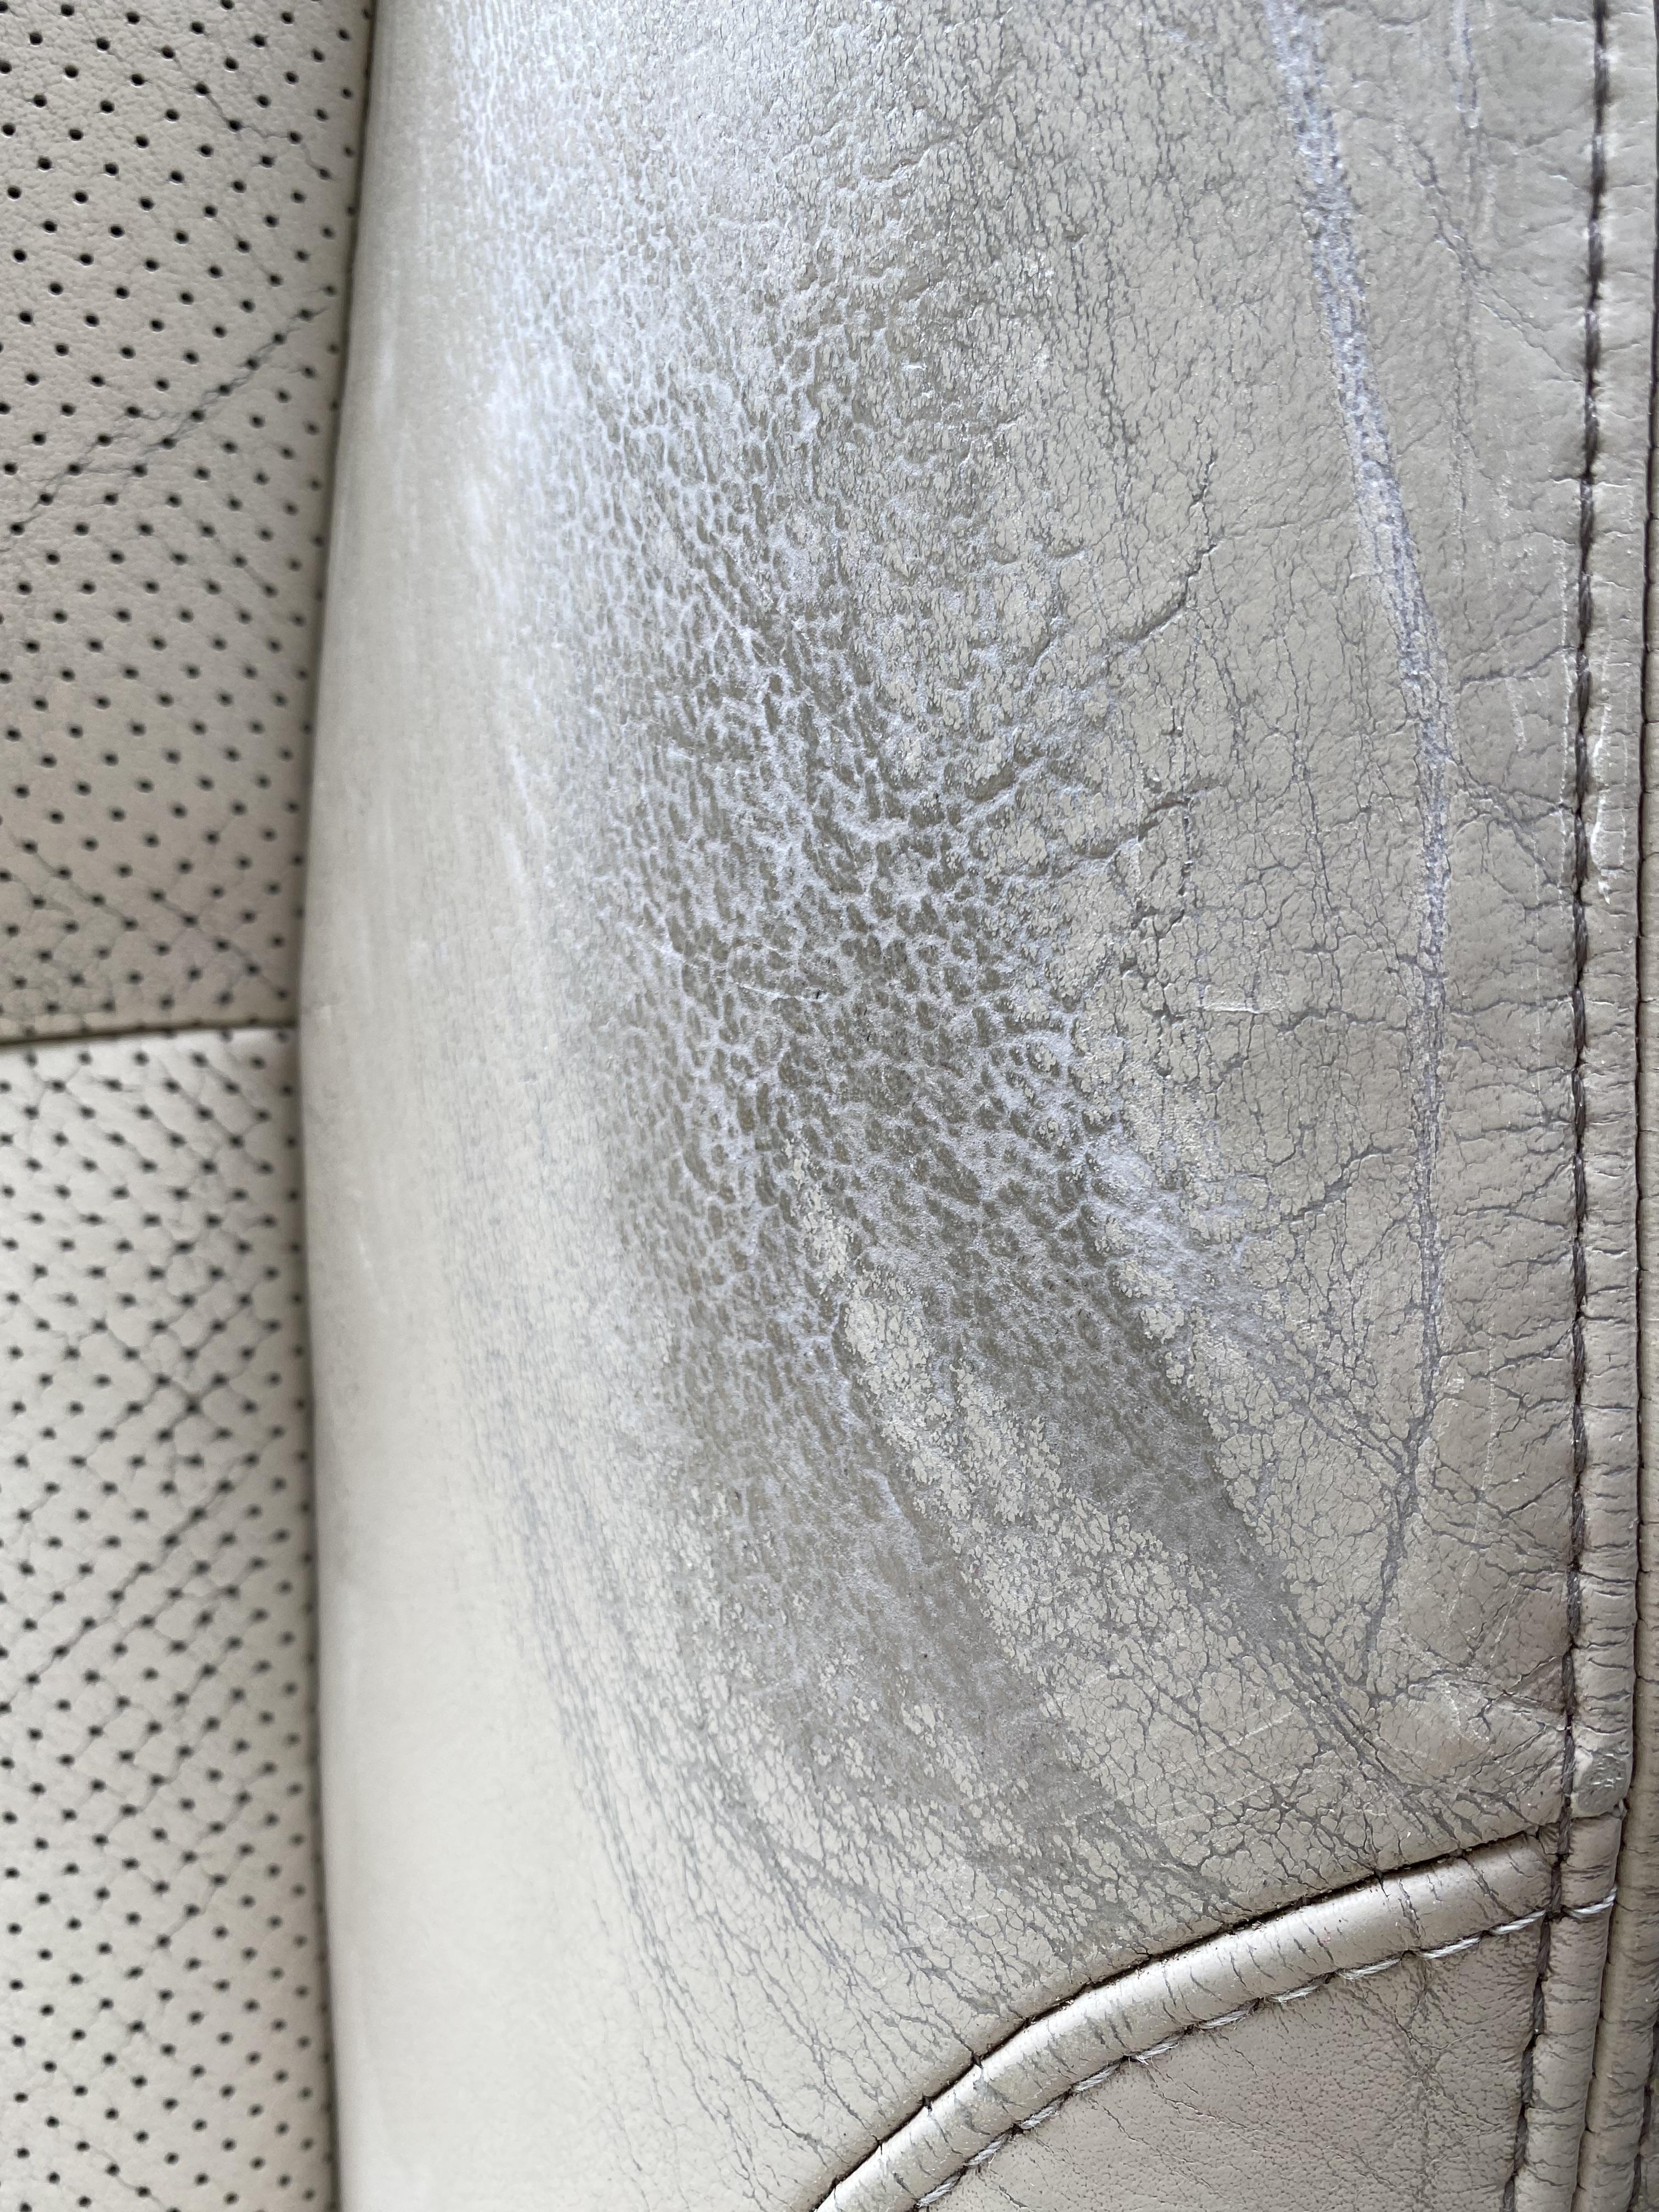
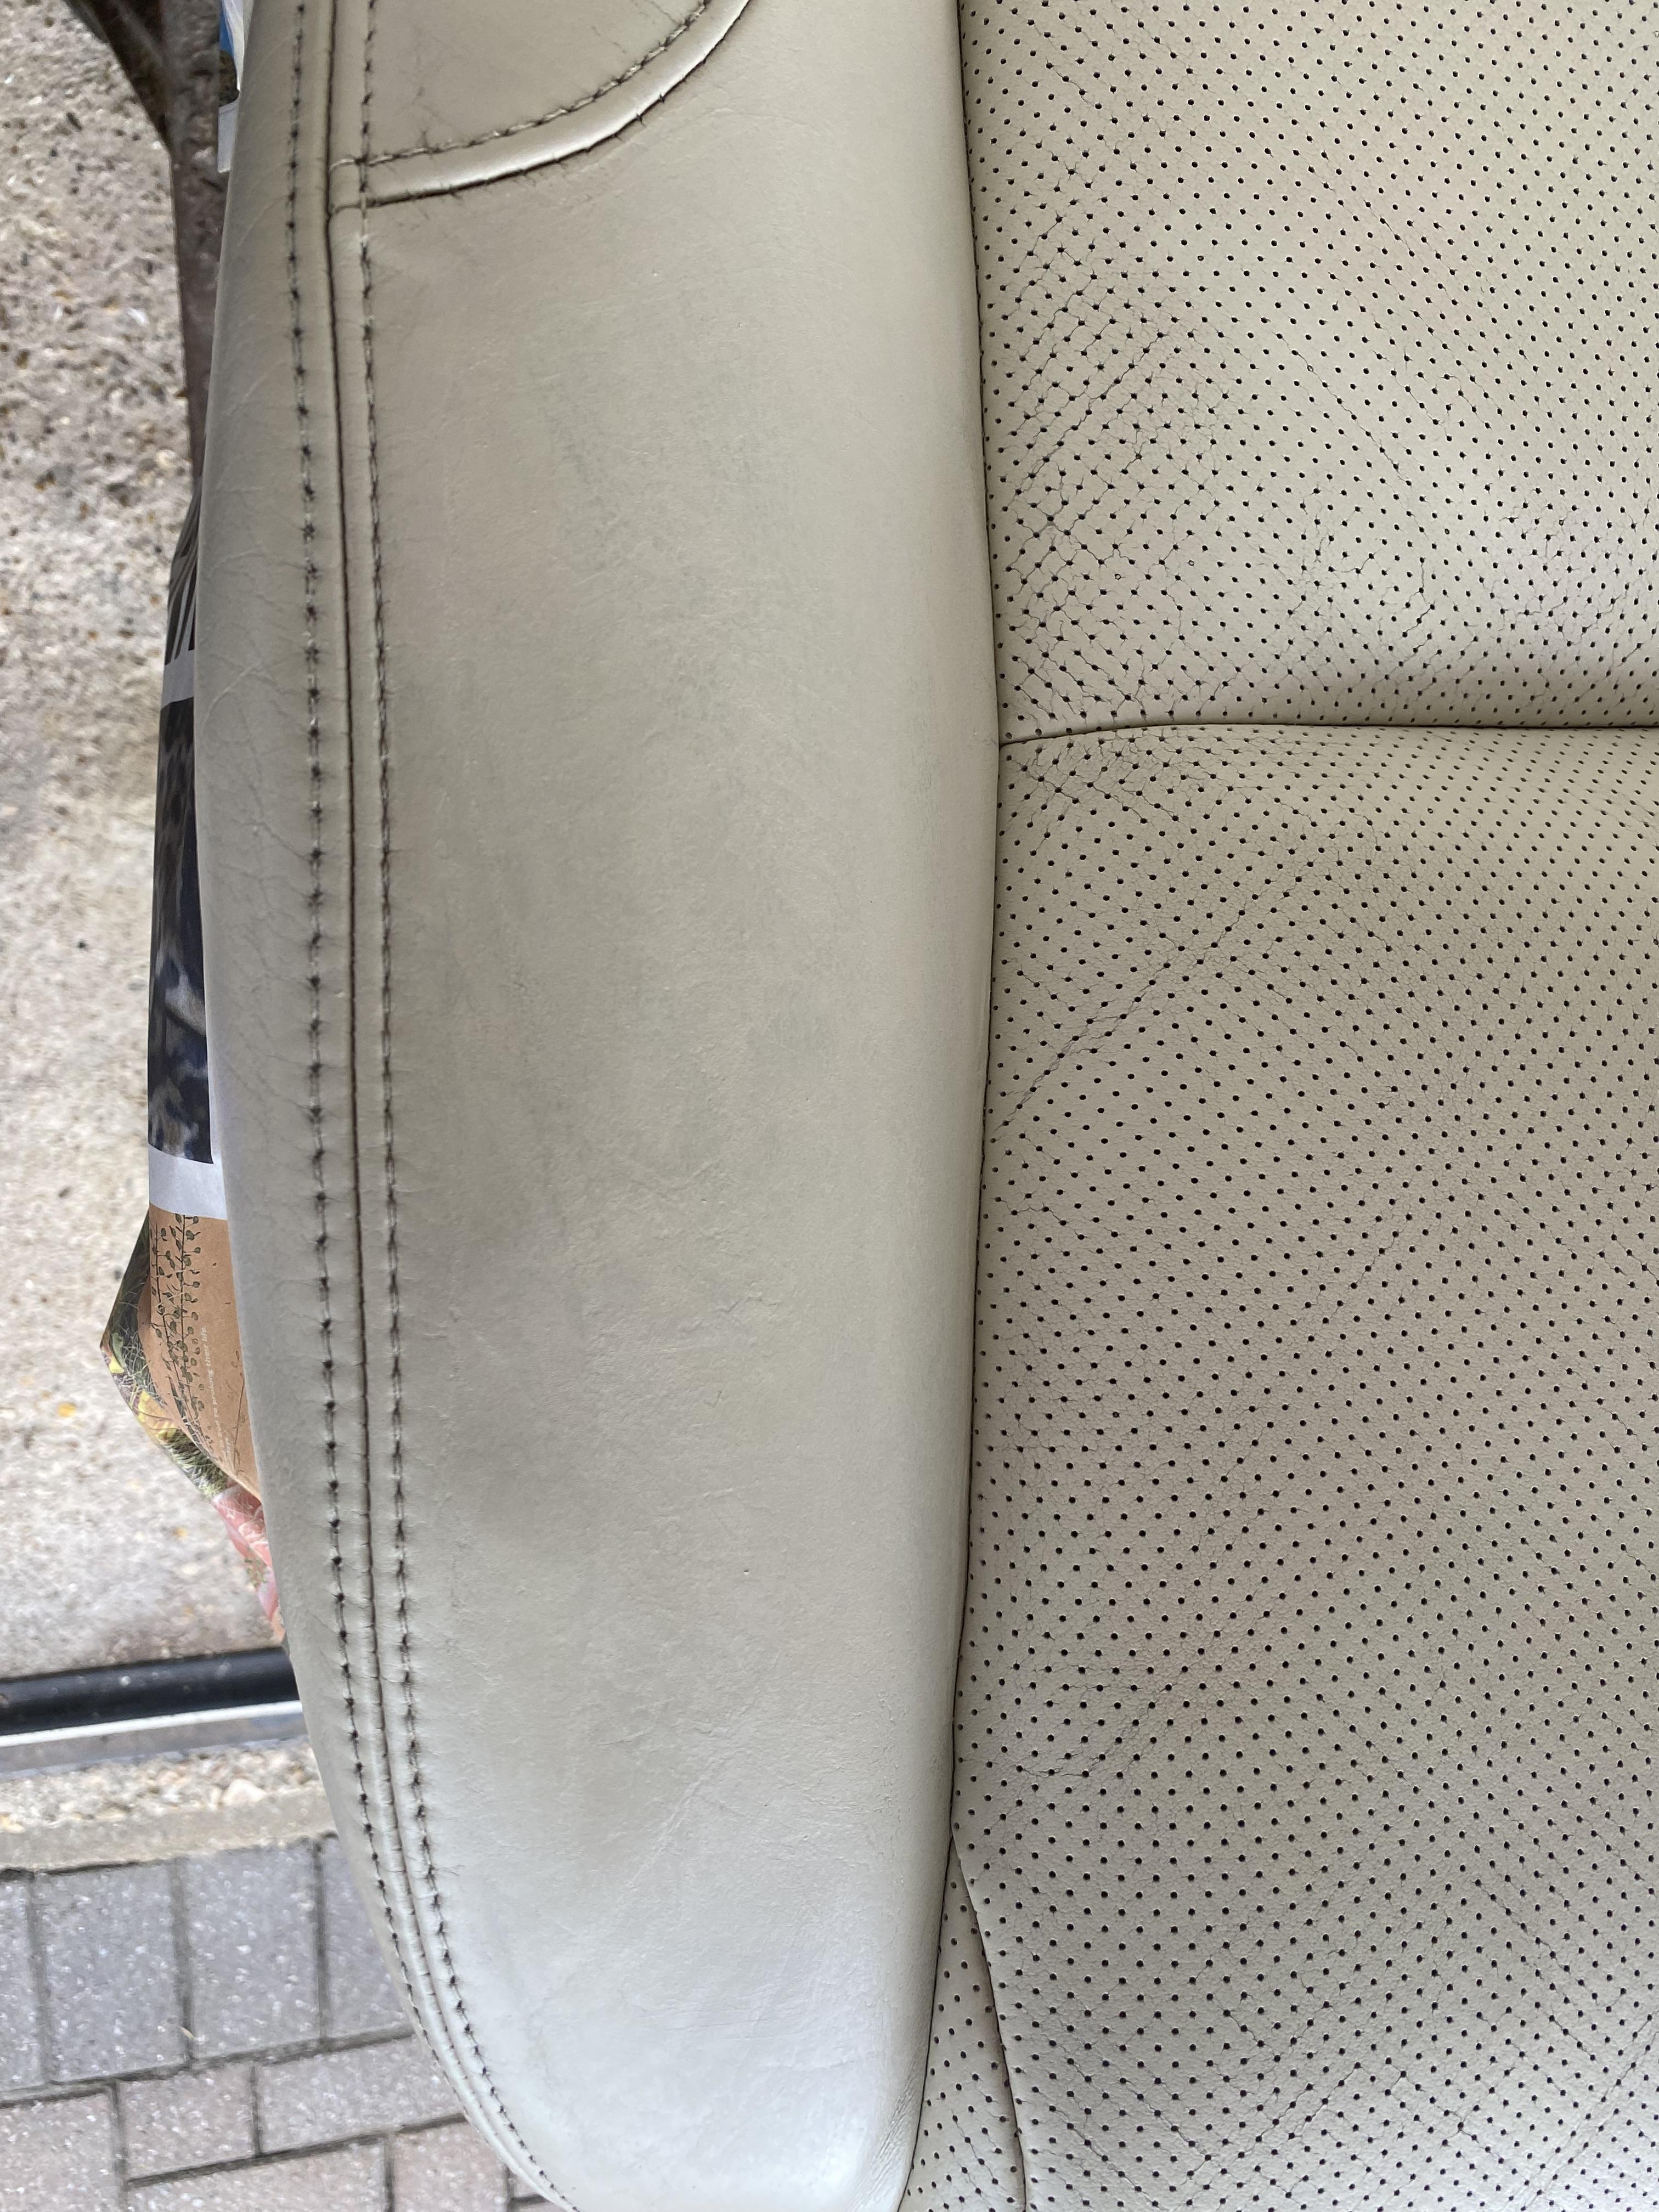
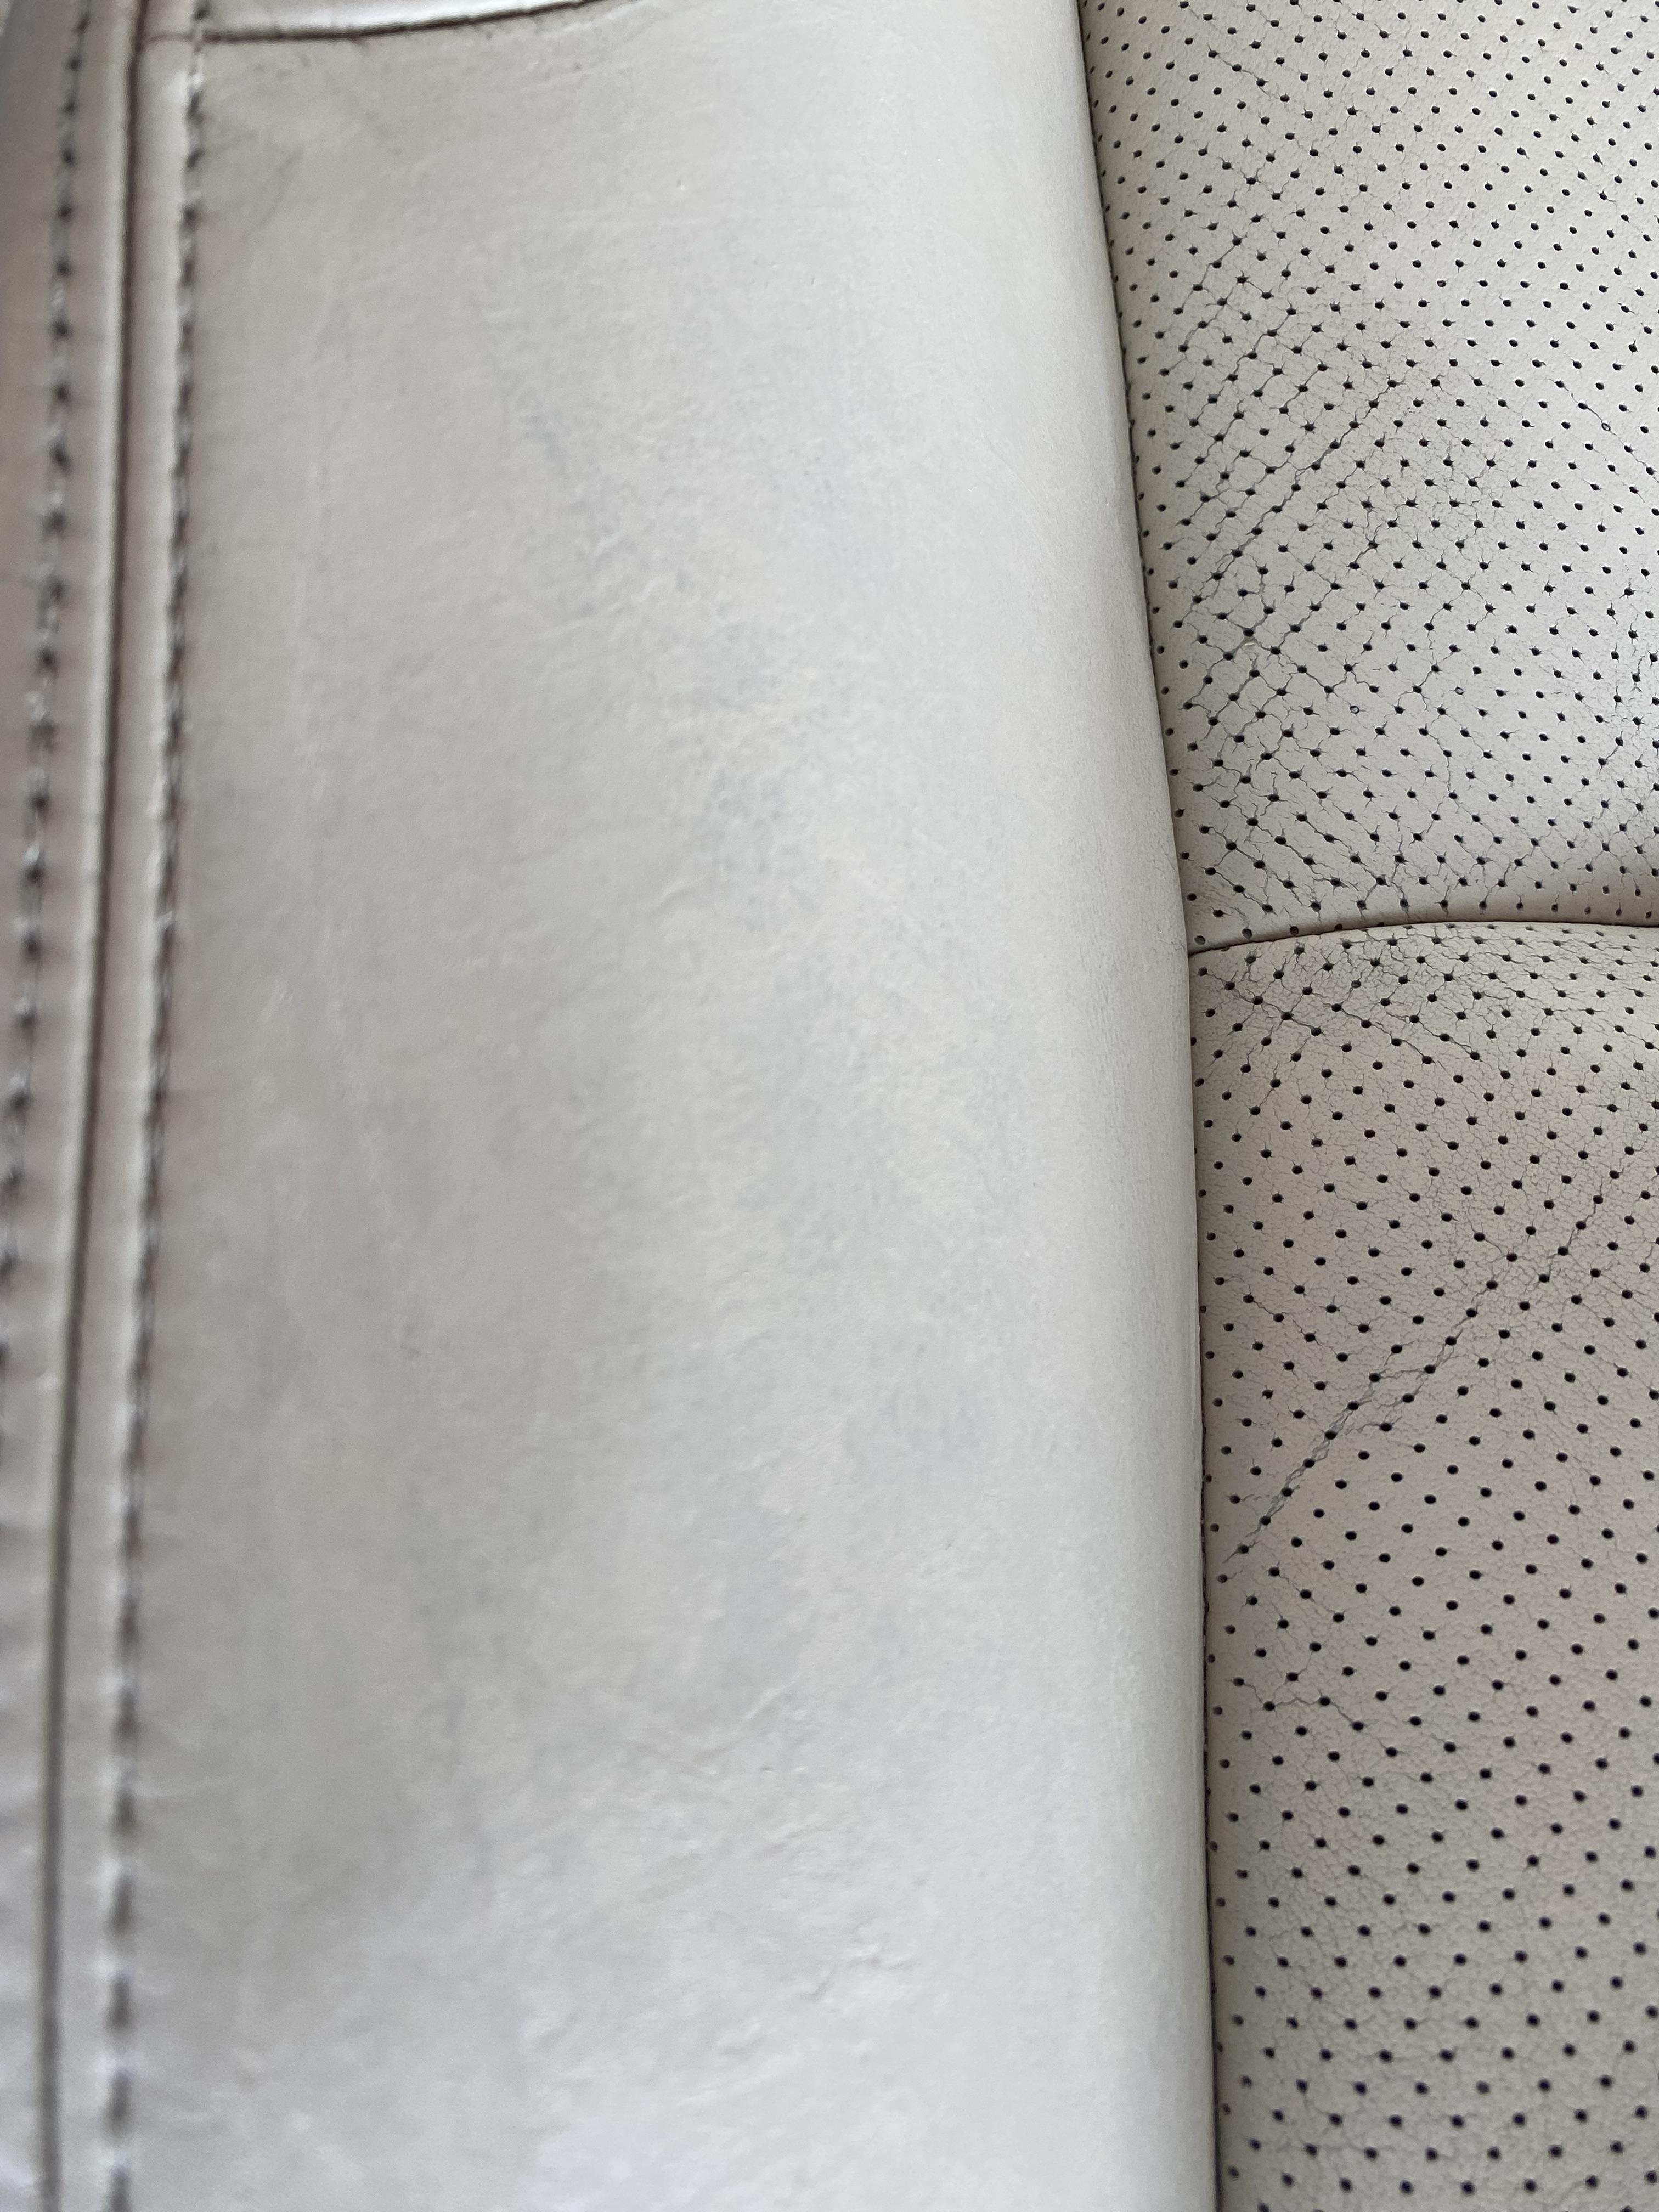
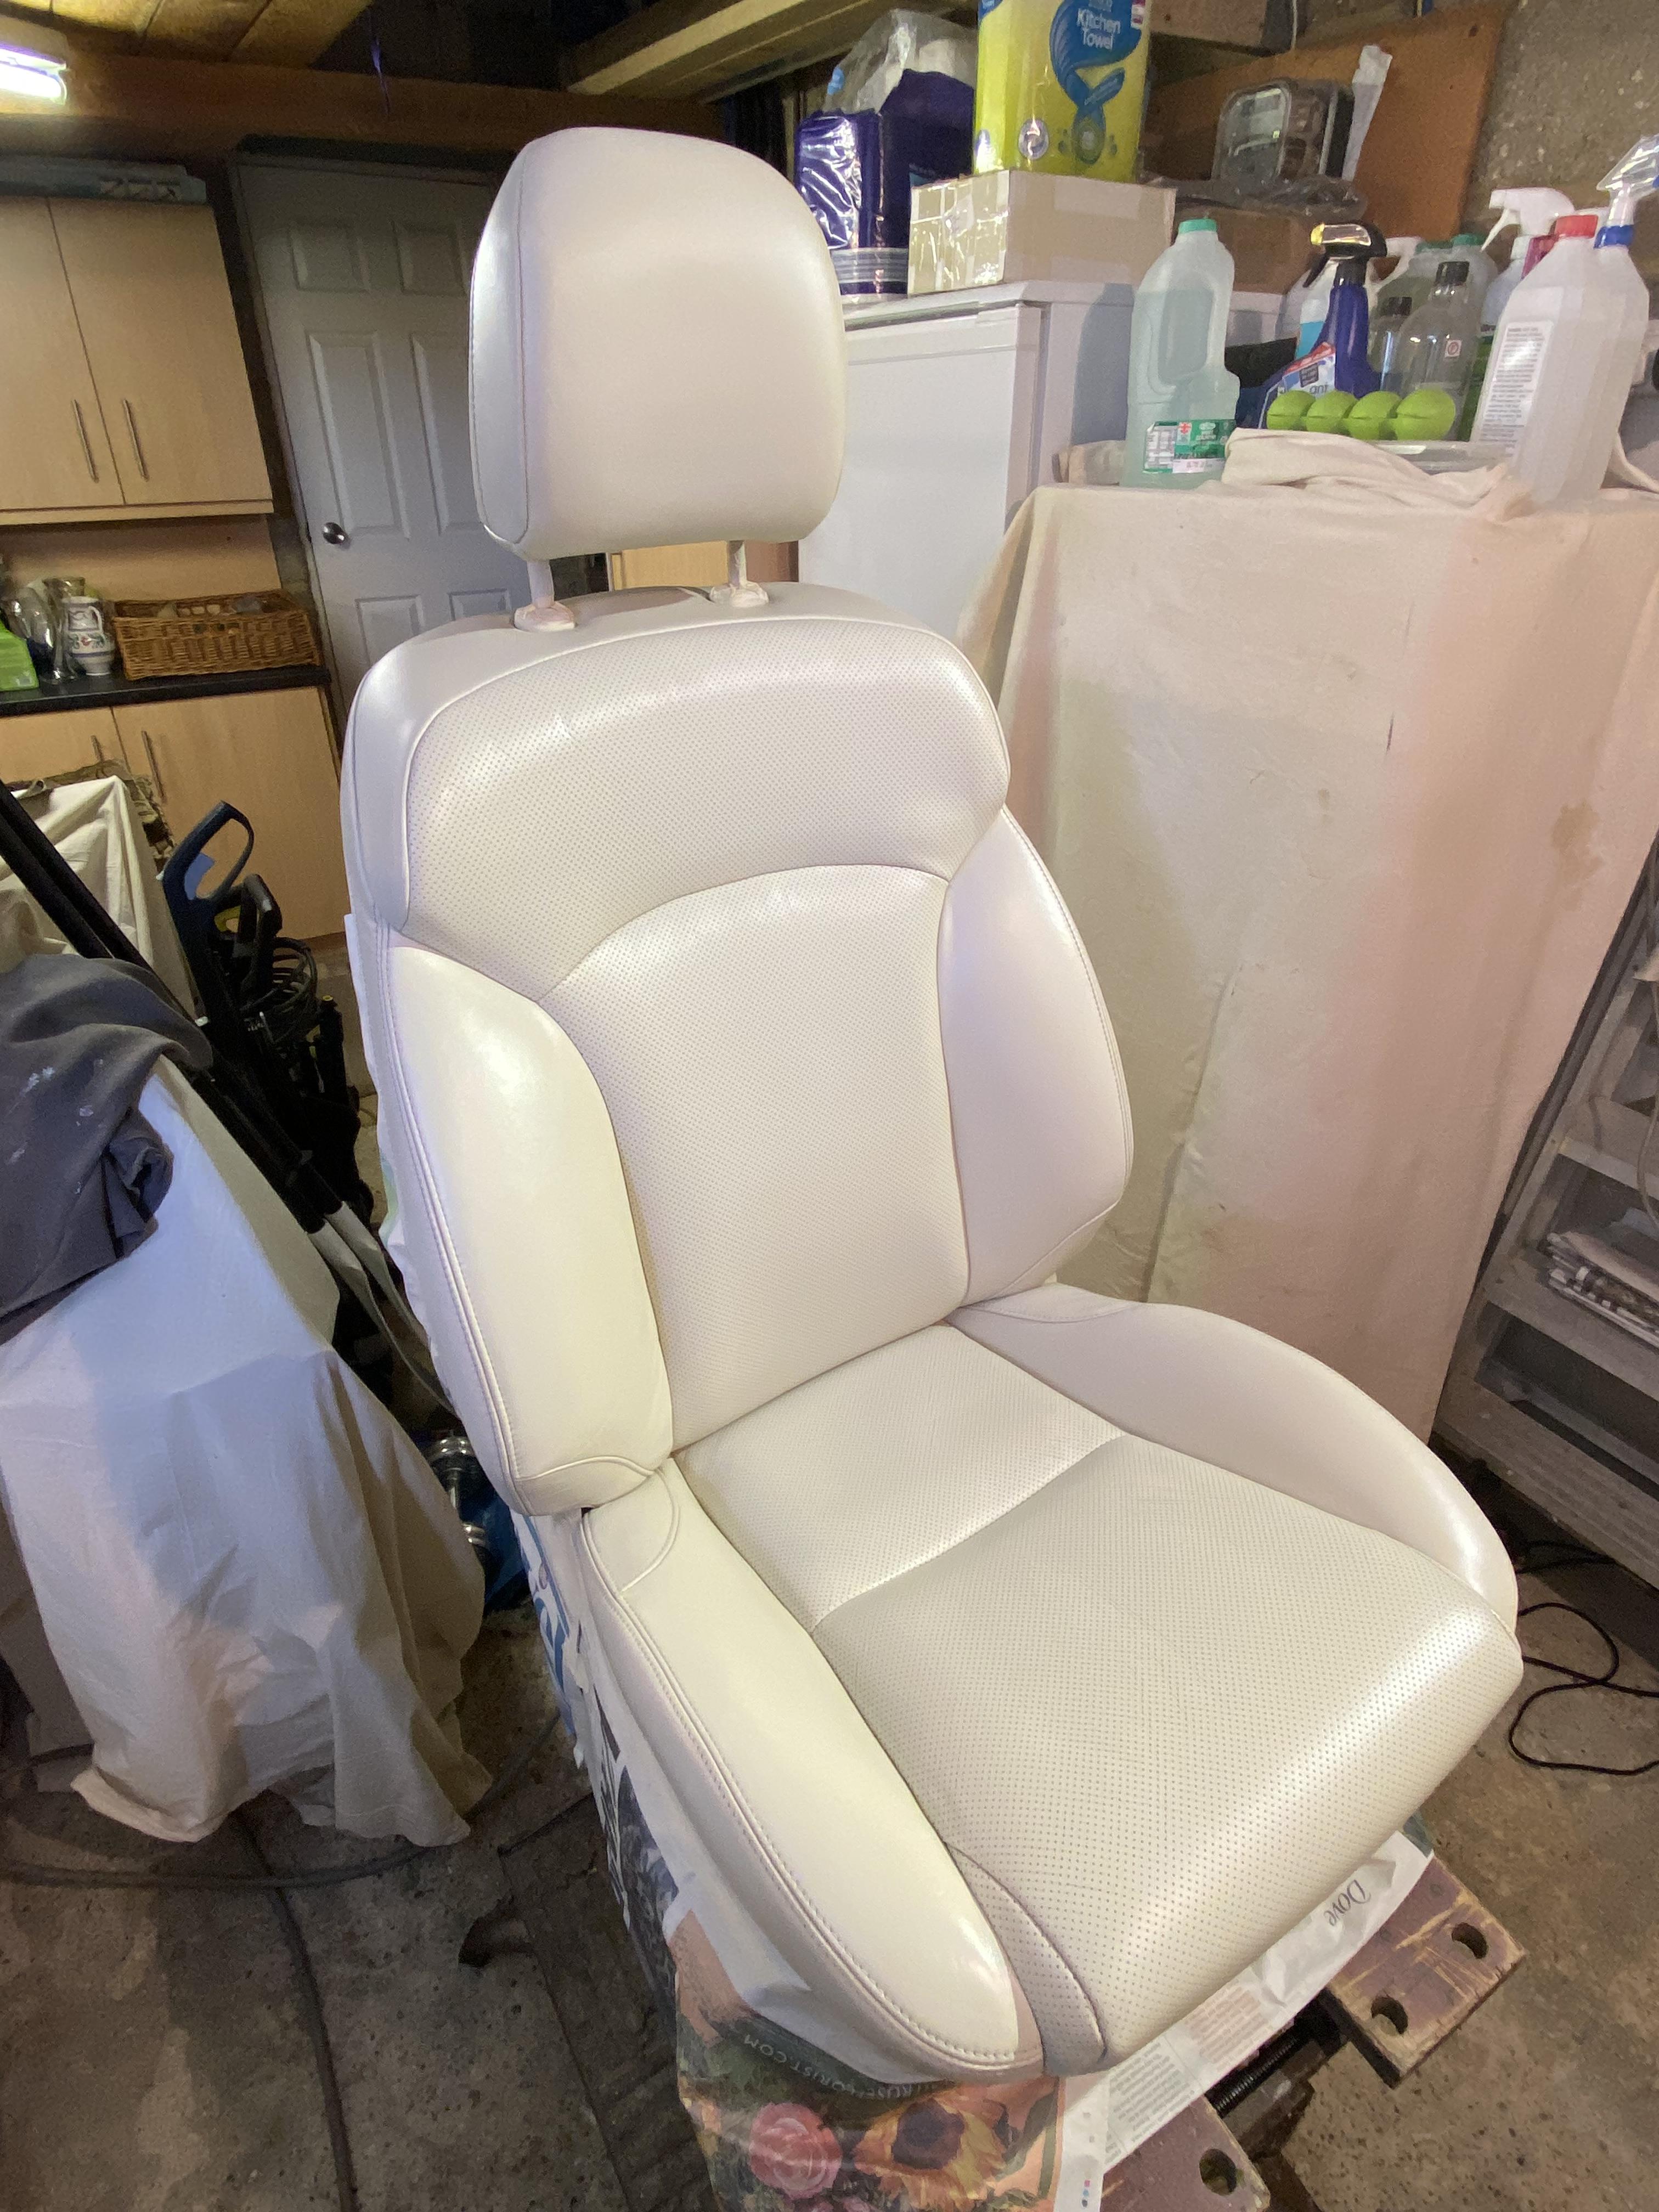
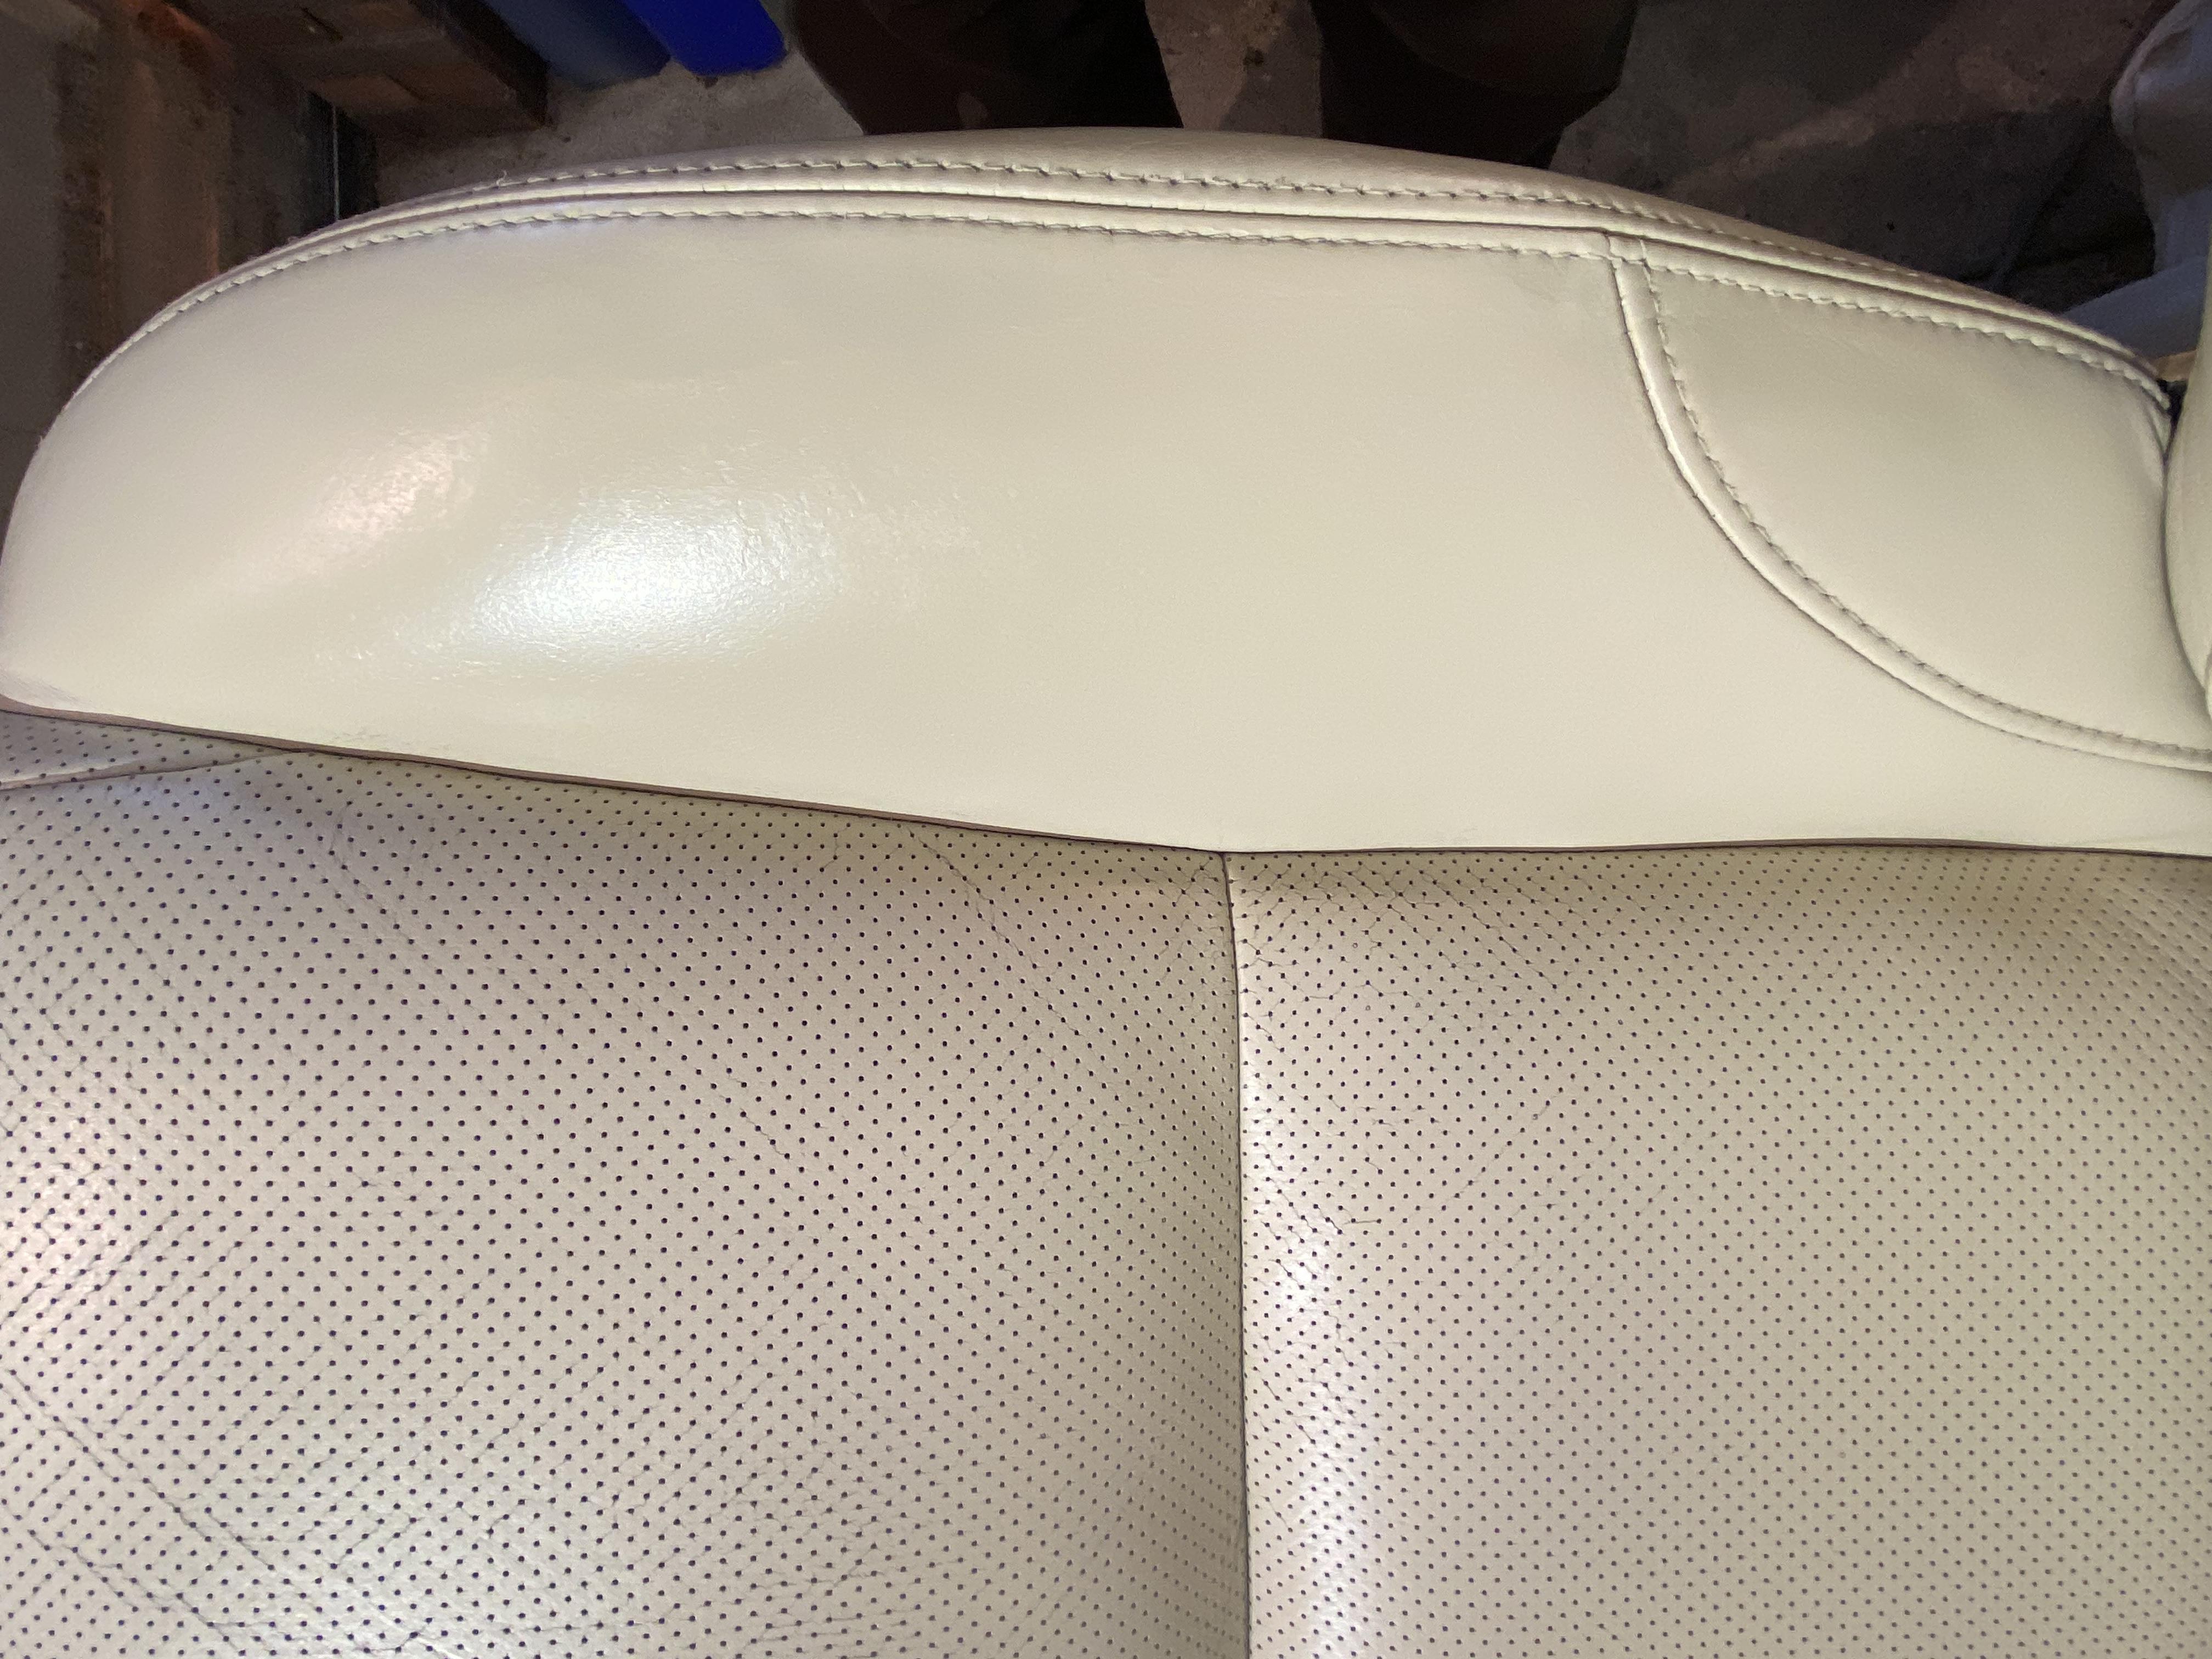
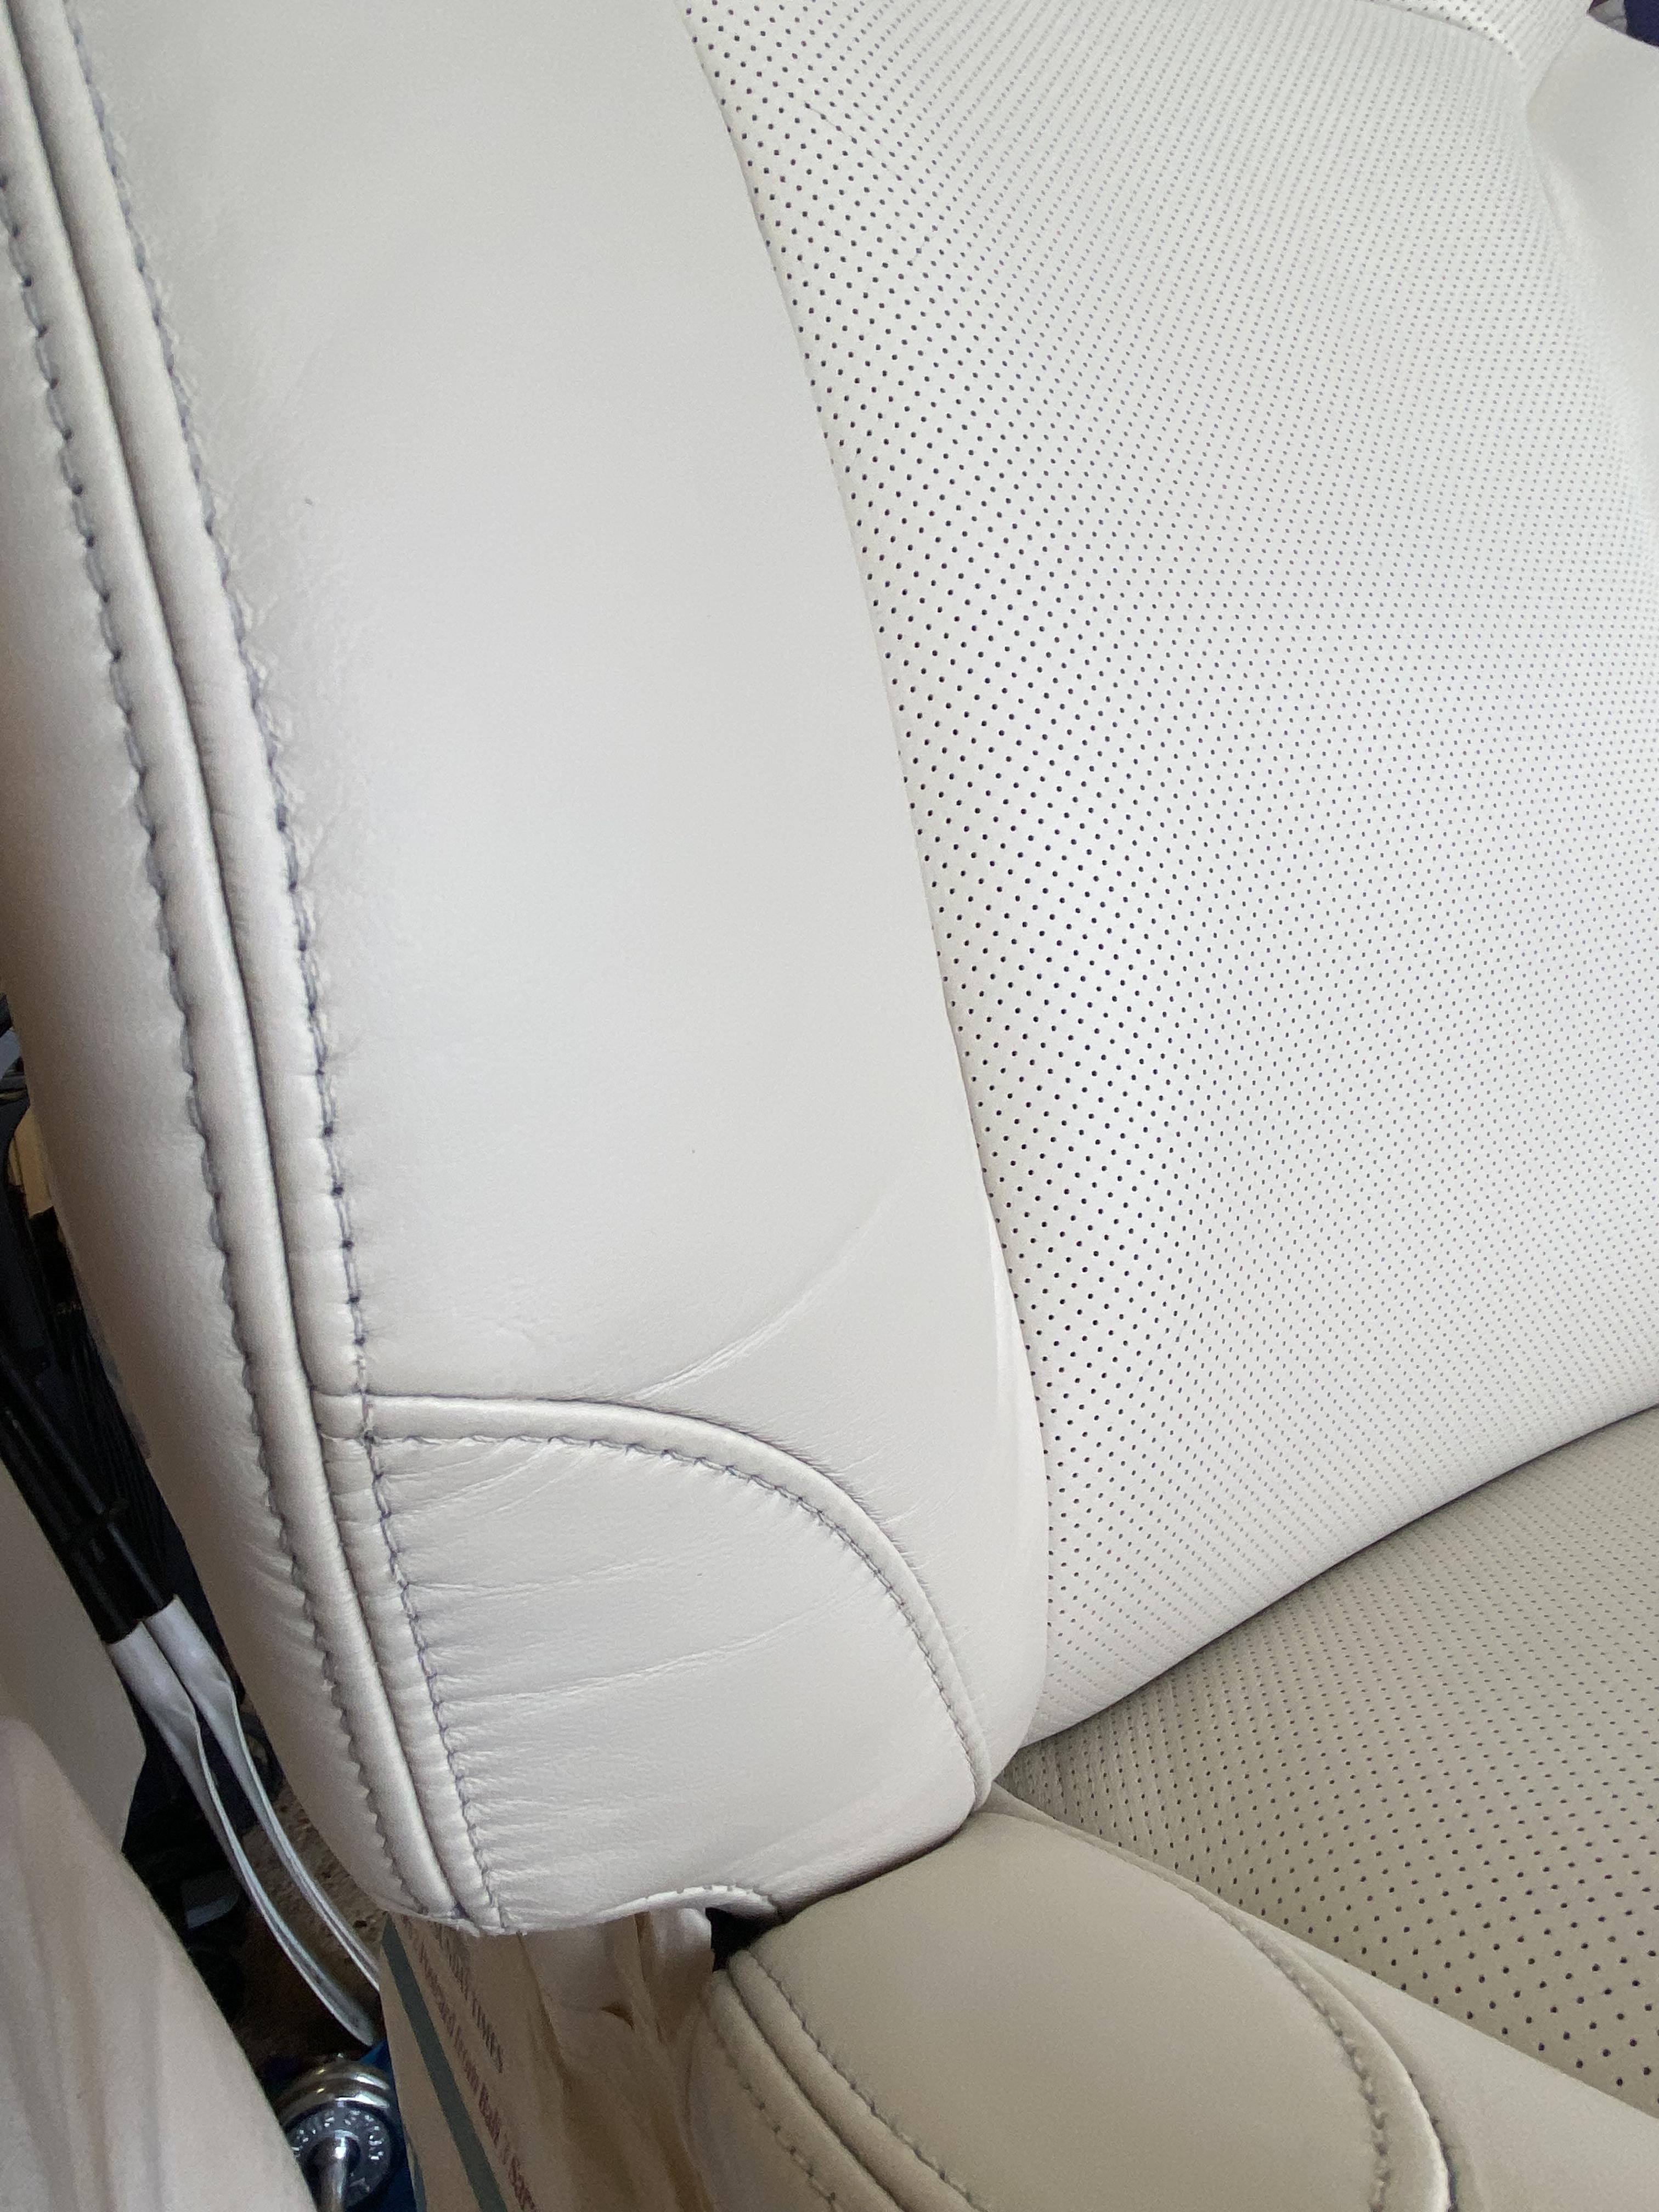
The worst scuffing/wear/cracking and discolouration was on the driver’s seat and the centre armrest as you would expect. These three photos show the condition of the areas needing the most work. So, the plan was to fully refurbish both front seats and the armrest. The seat bolster was really pretty grim.
This video from Furniture Clinic [FC] is very good and pretty much encapsulates what I did.
https://www.youtube.com/watch?v=aFXkraC9B7o
I found all the products to be very good apart from the airbrush kit. I have a compressor and spray gun of my own thank heavens! No matter what I tried the airbrush would not play ball. I will return to it and get an adapter for my airlines. They can be very useful tools so I will attempt to get it functioning. But that’s for another day. So, I used my own spray kit and just closed it down to low pressure and low feed and it worked a treat. I should point out everything is water based which makes it all rather pleasant!!
FC videos seem to show a lot of work being undertaken in the car but that requires a great deal of masking and you can’t get to every surface properly. So for my needs it was out of the car repairs.
This next video is useful for showing how some of the armrest components come apart.
https://www.youtube.com/watch?v=WXgTBn8MHZ0
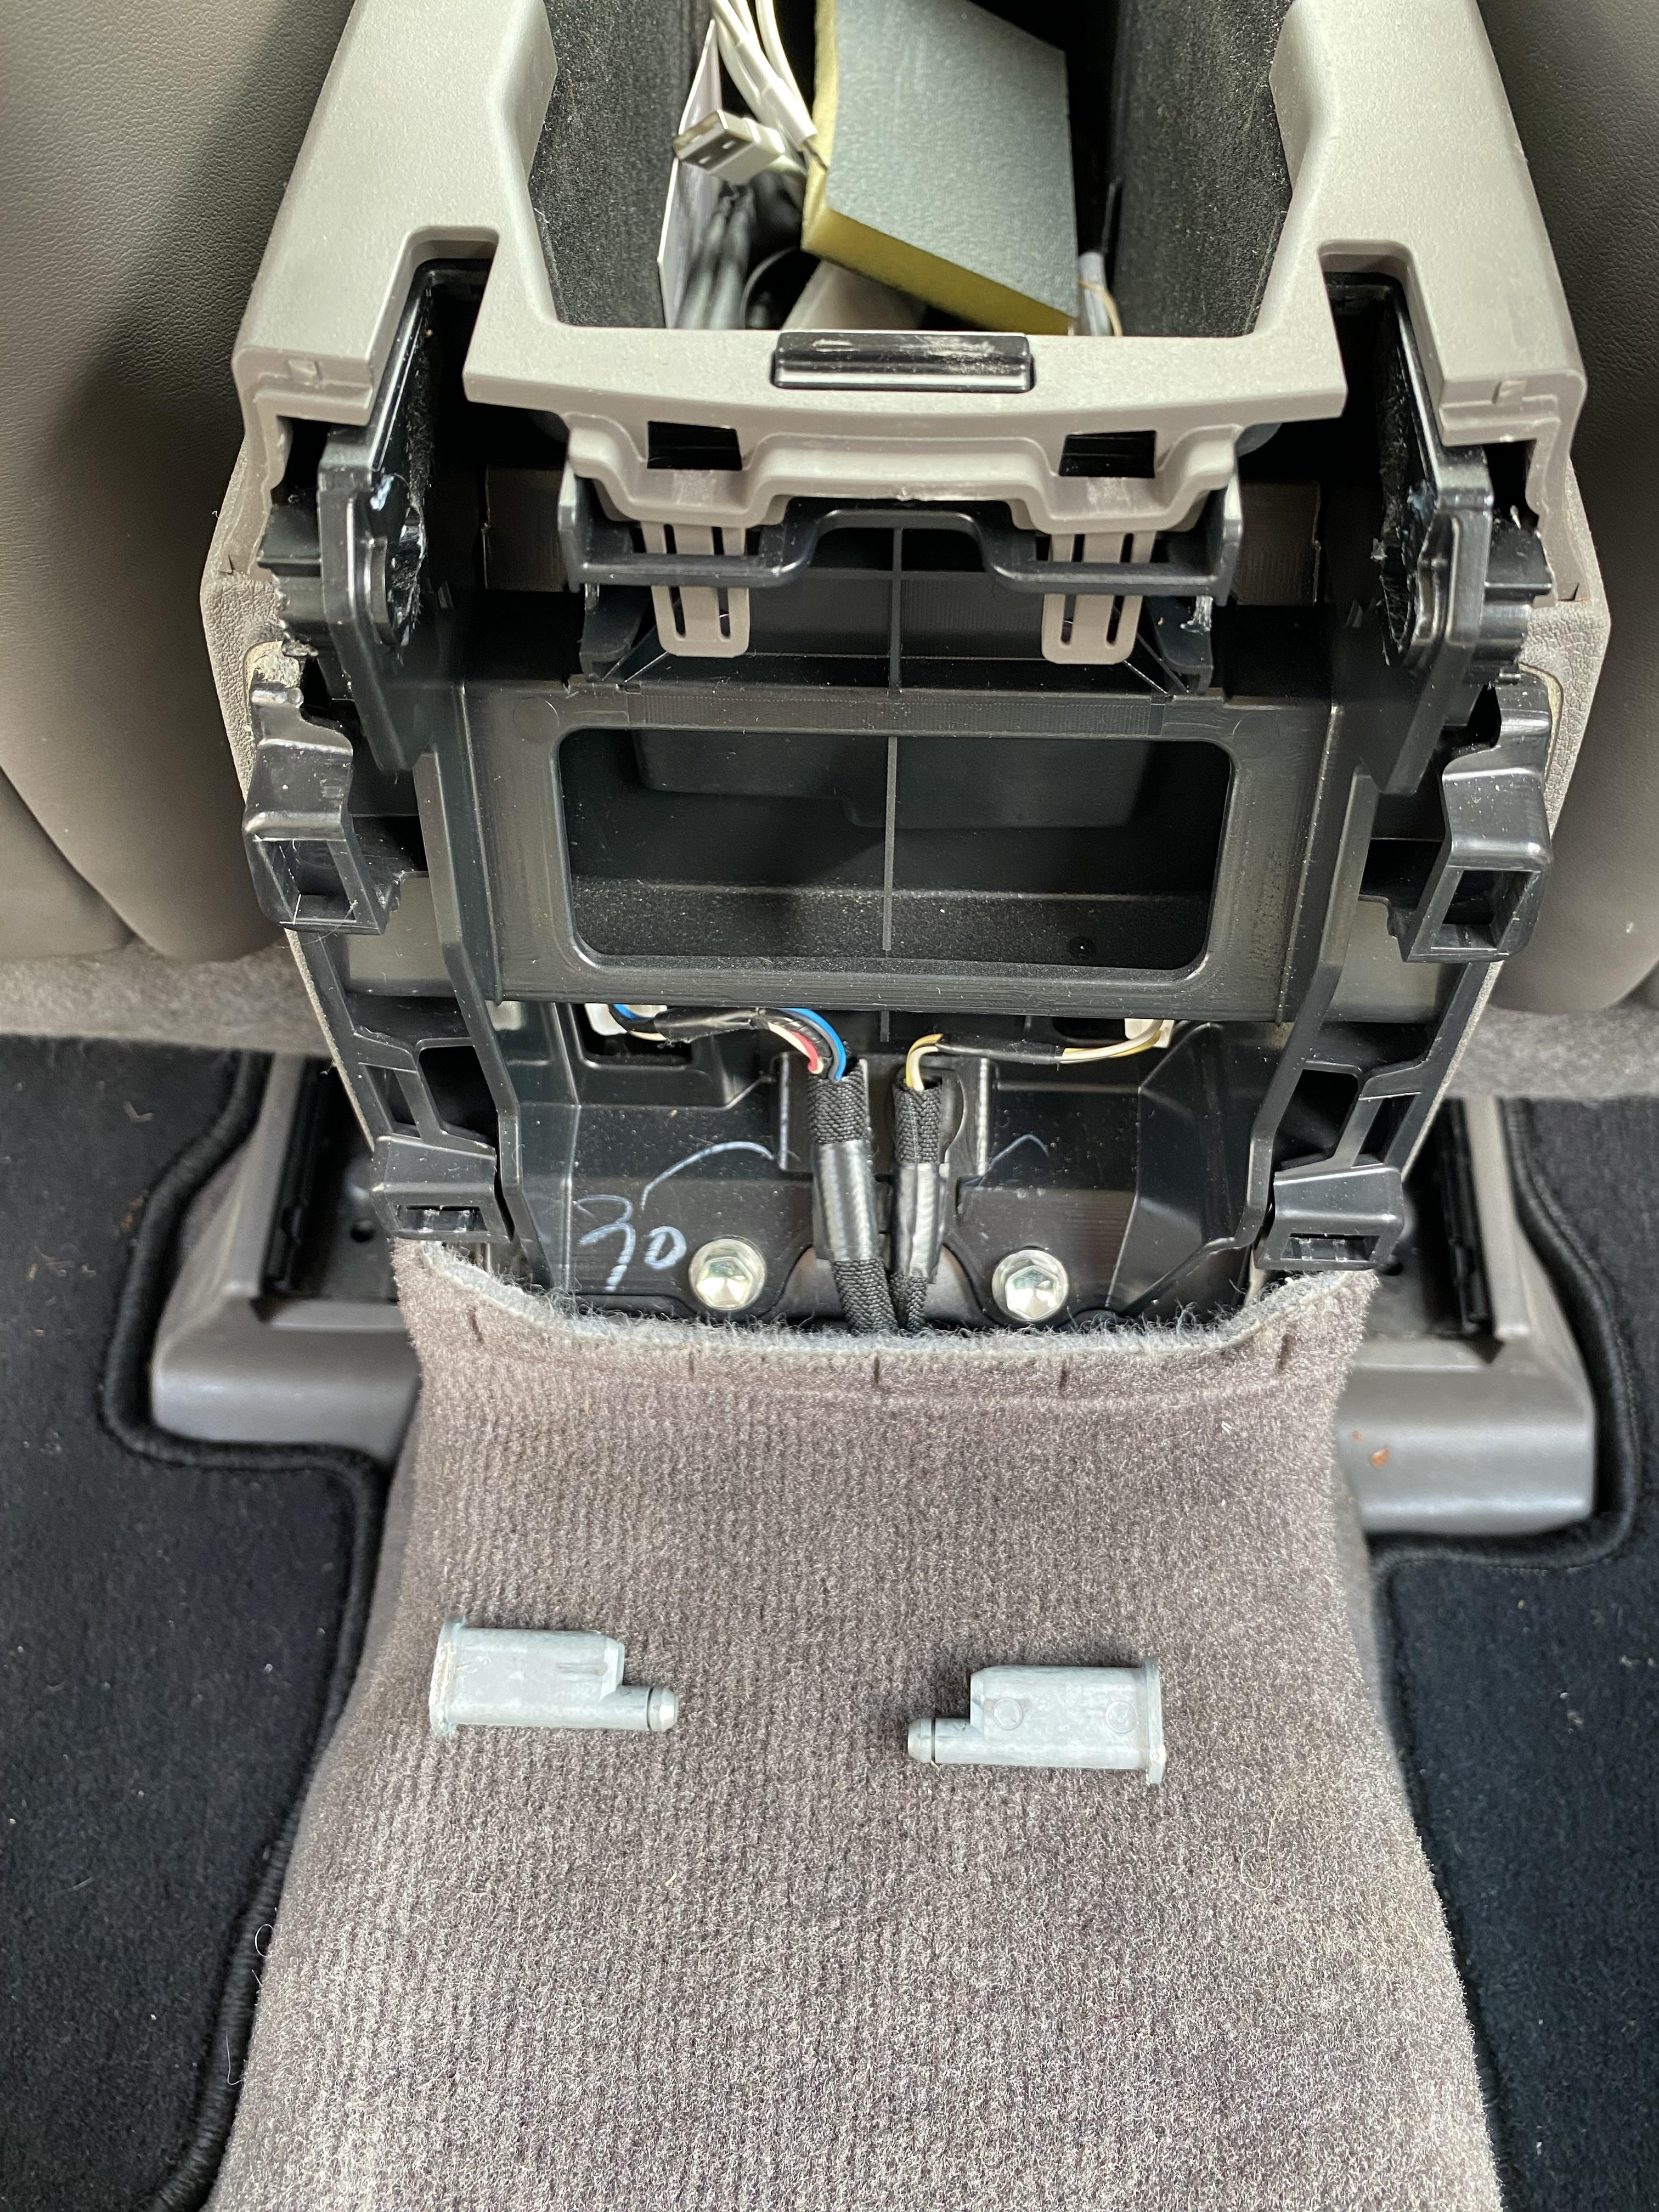
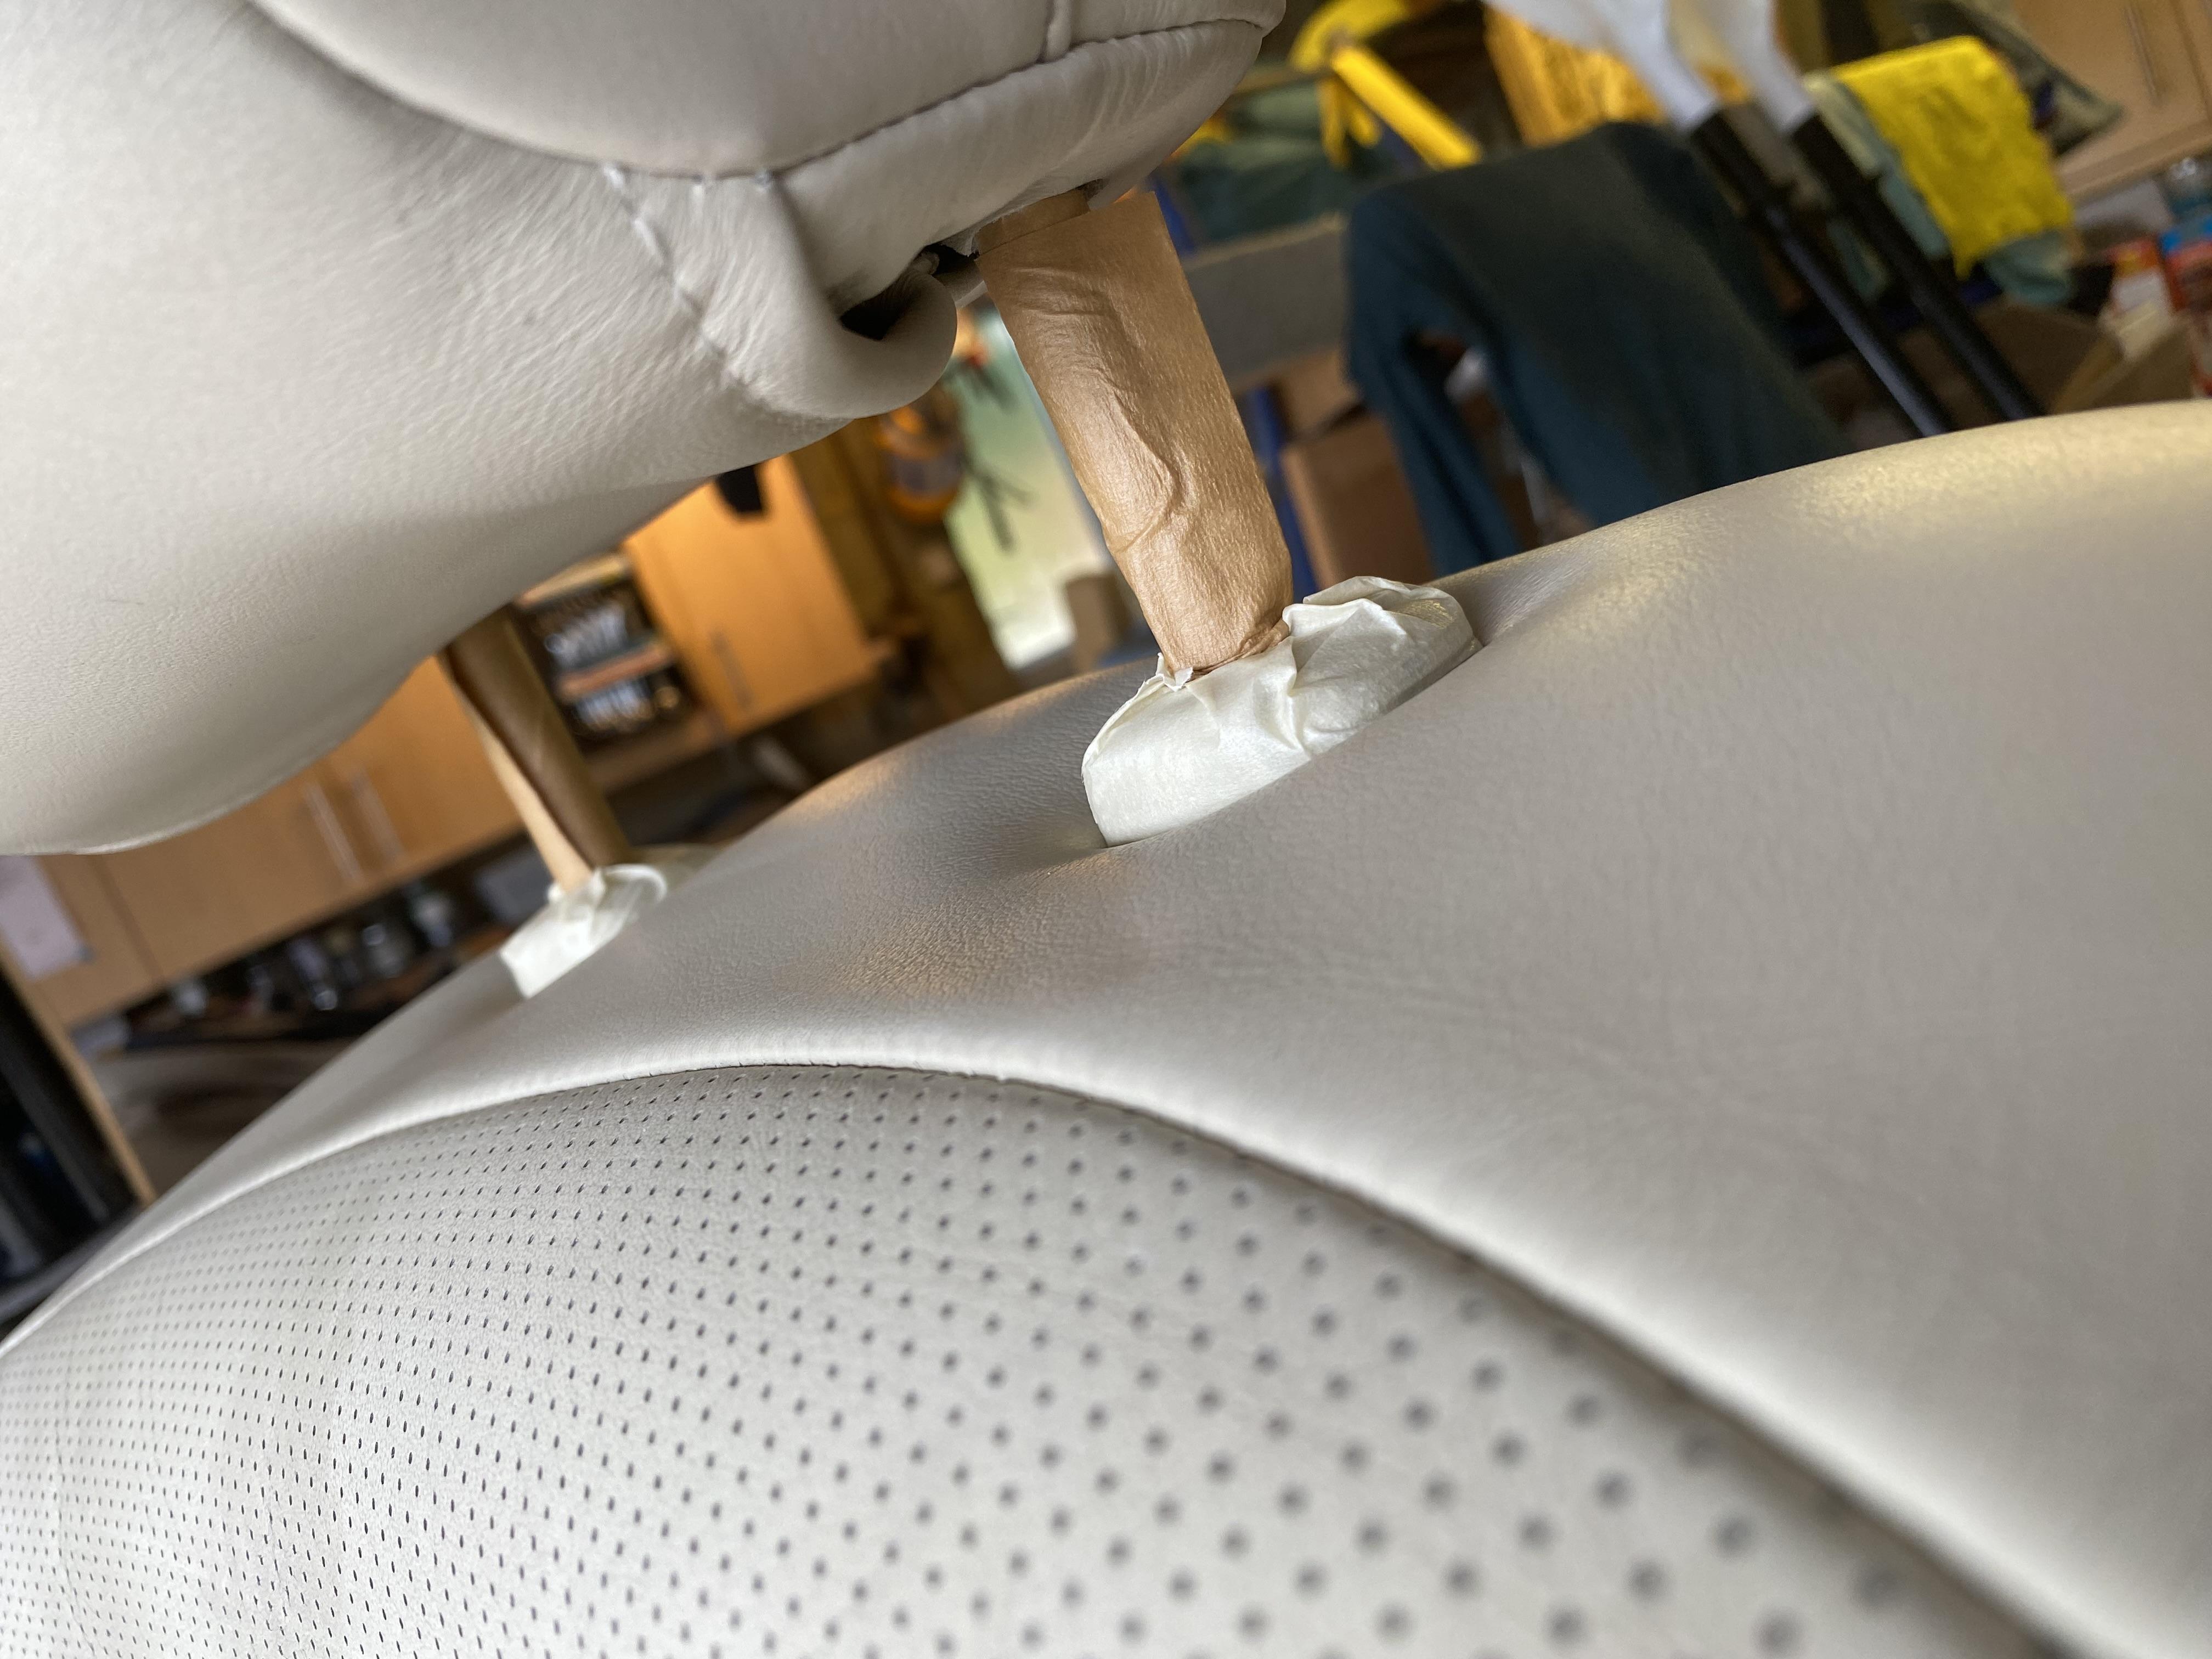
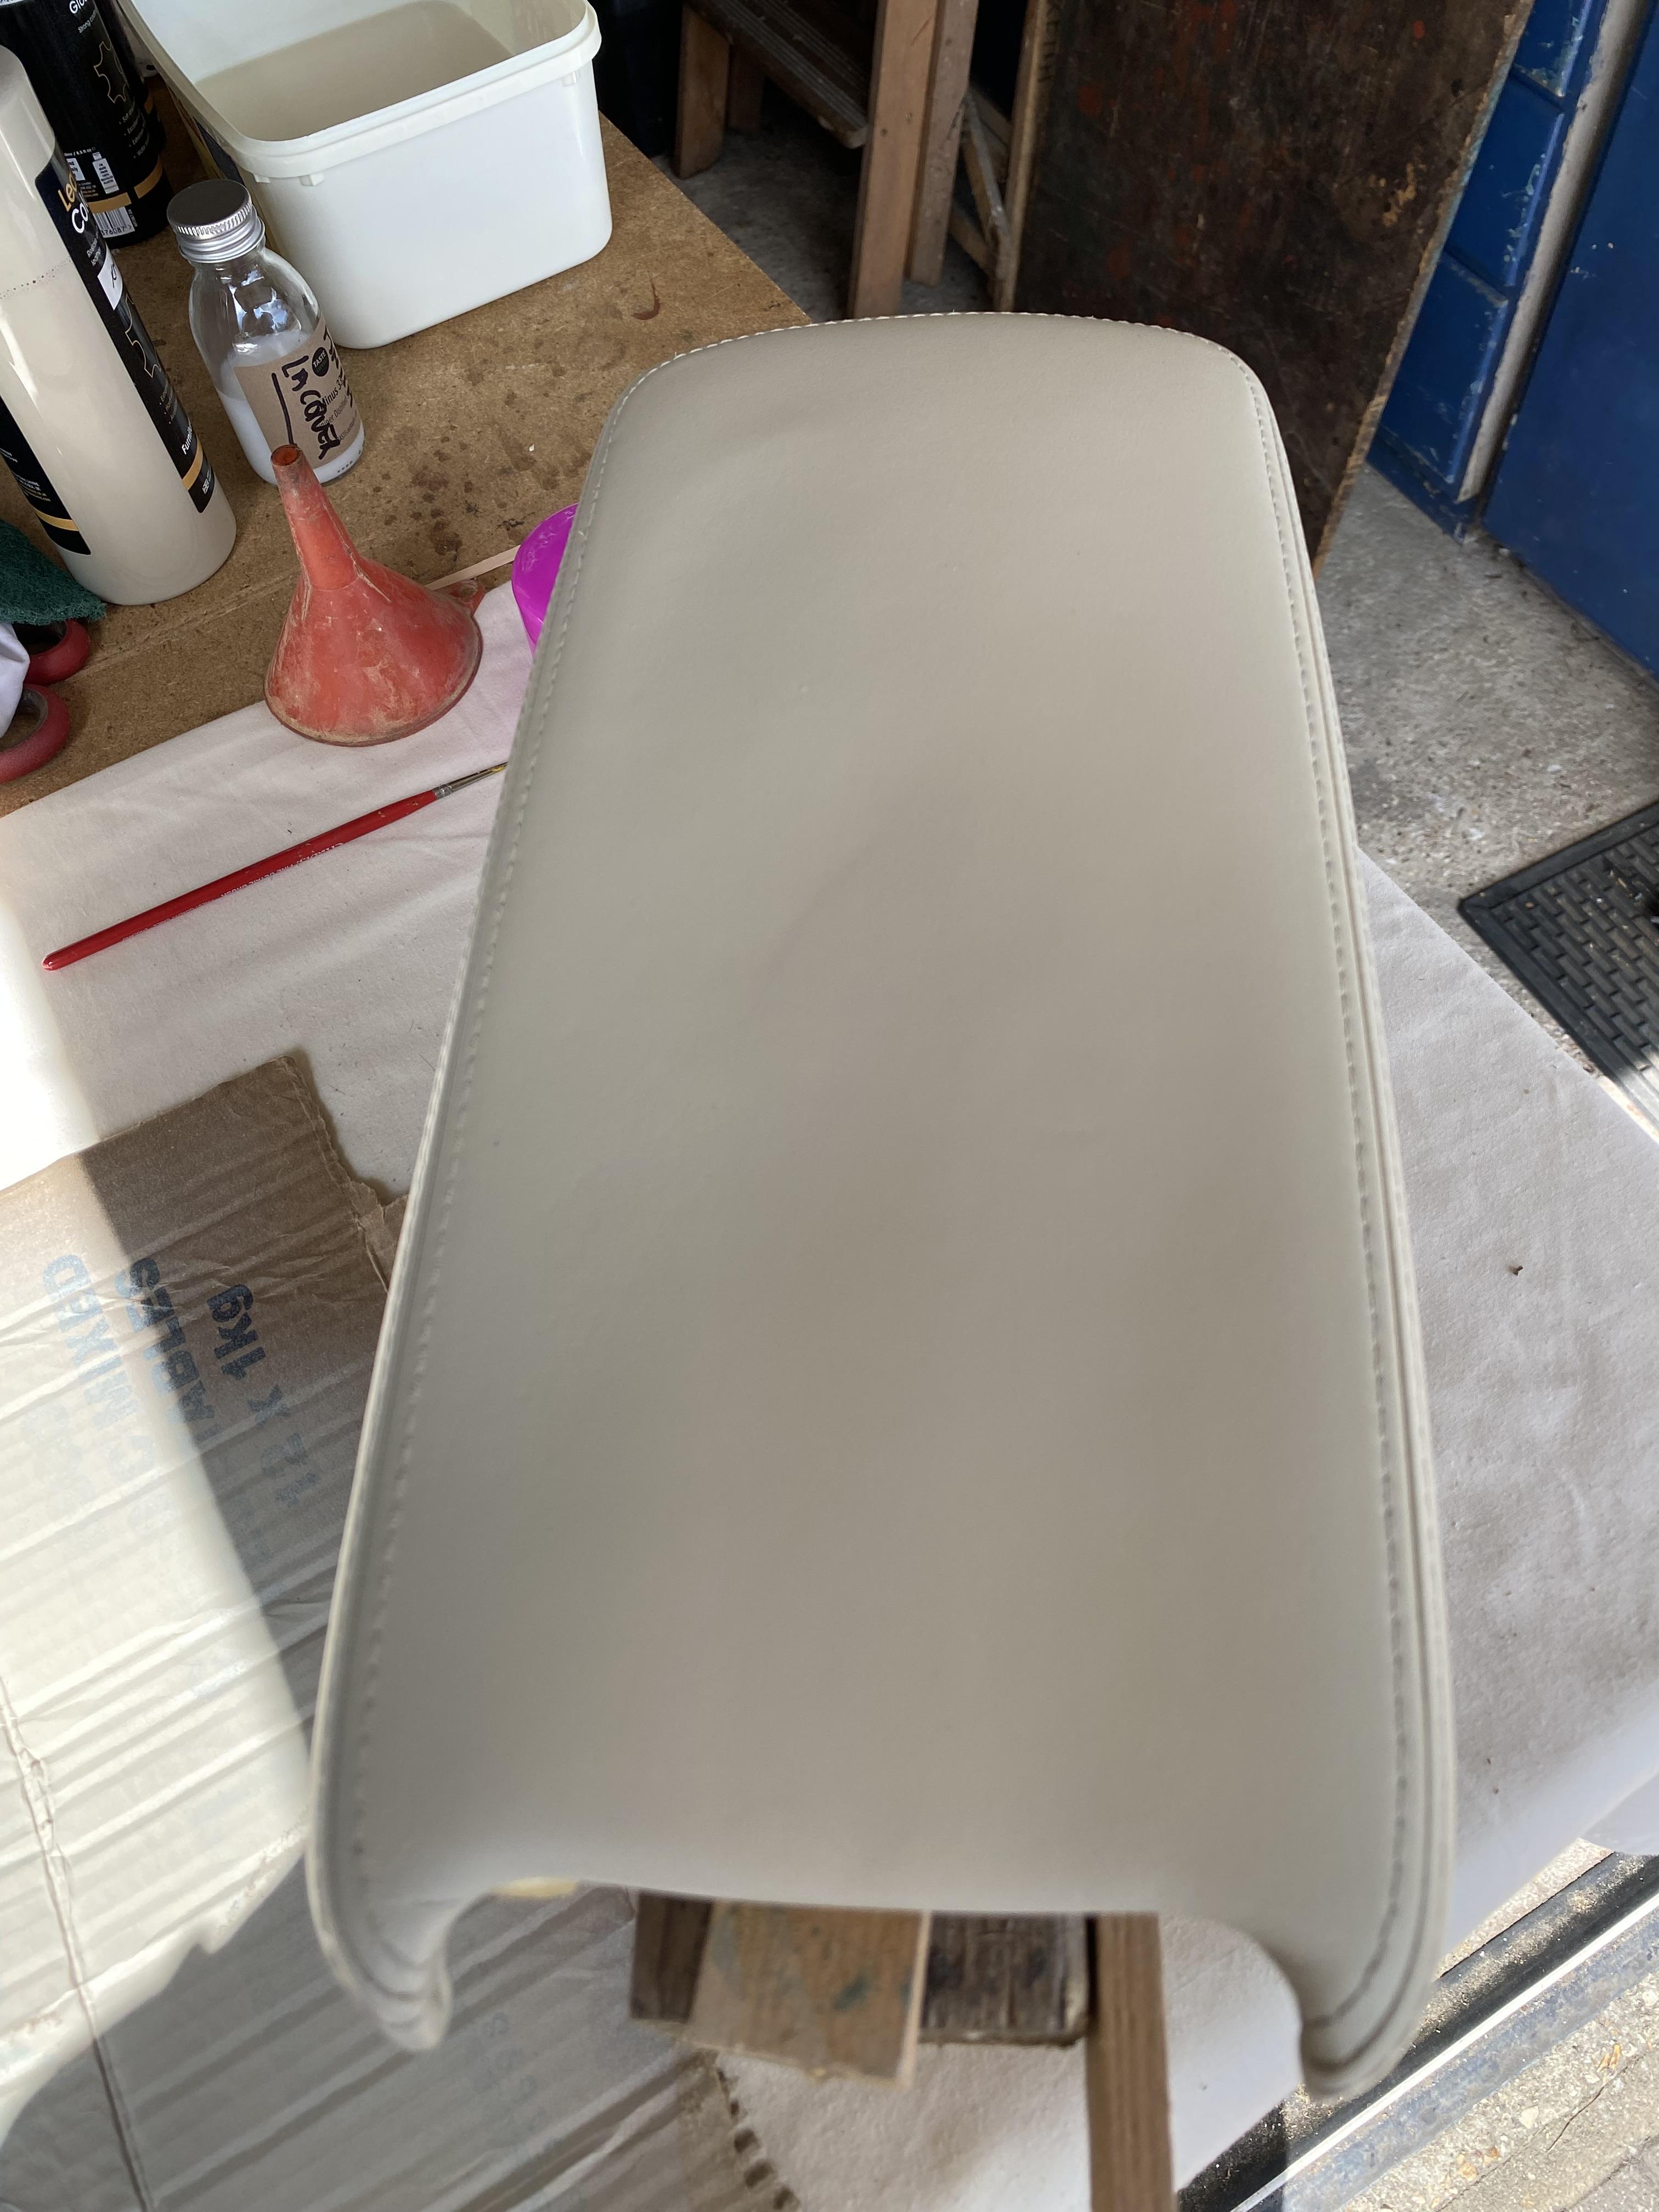
You can get the armrest out without taking out the entire centre. You just need to prise up the trim at the front of the cubby box, where it meets the wood section [on mine] enough to release the tabs and then the top U-shaped trim will pop off. The rear of the cubby box just pulls off. Then you have to move both seats forwards as far as poss to clear the beck end of the cubby box to pull out the metal tabs and its off. Two screws underneath will allow the handle to be removed. I then masked up all the underneath and mounted it on a piece of wood for spraying ... a stand if you will.
There is a useful write up here that Agent-Dess put up a while back, credit to him for this
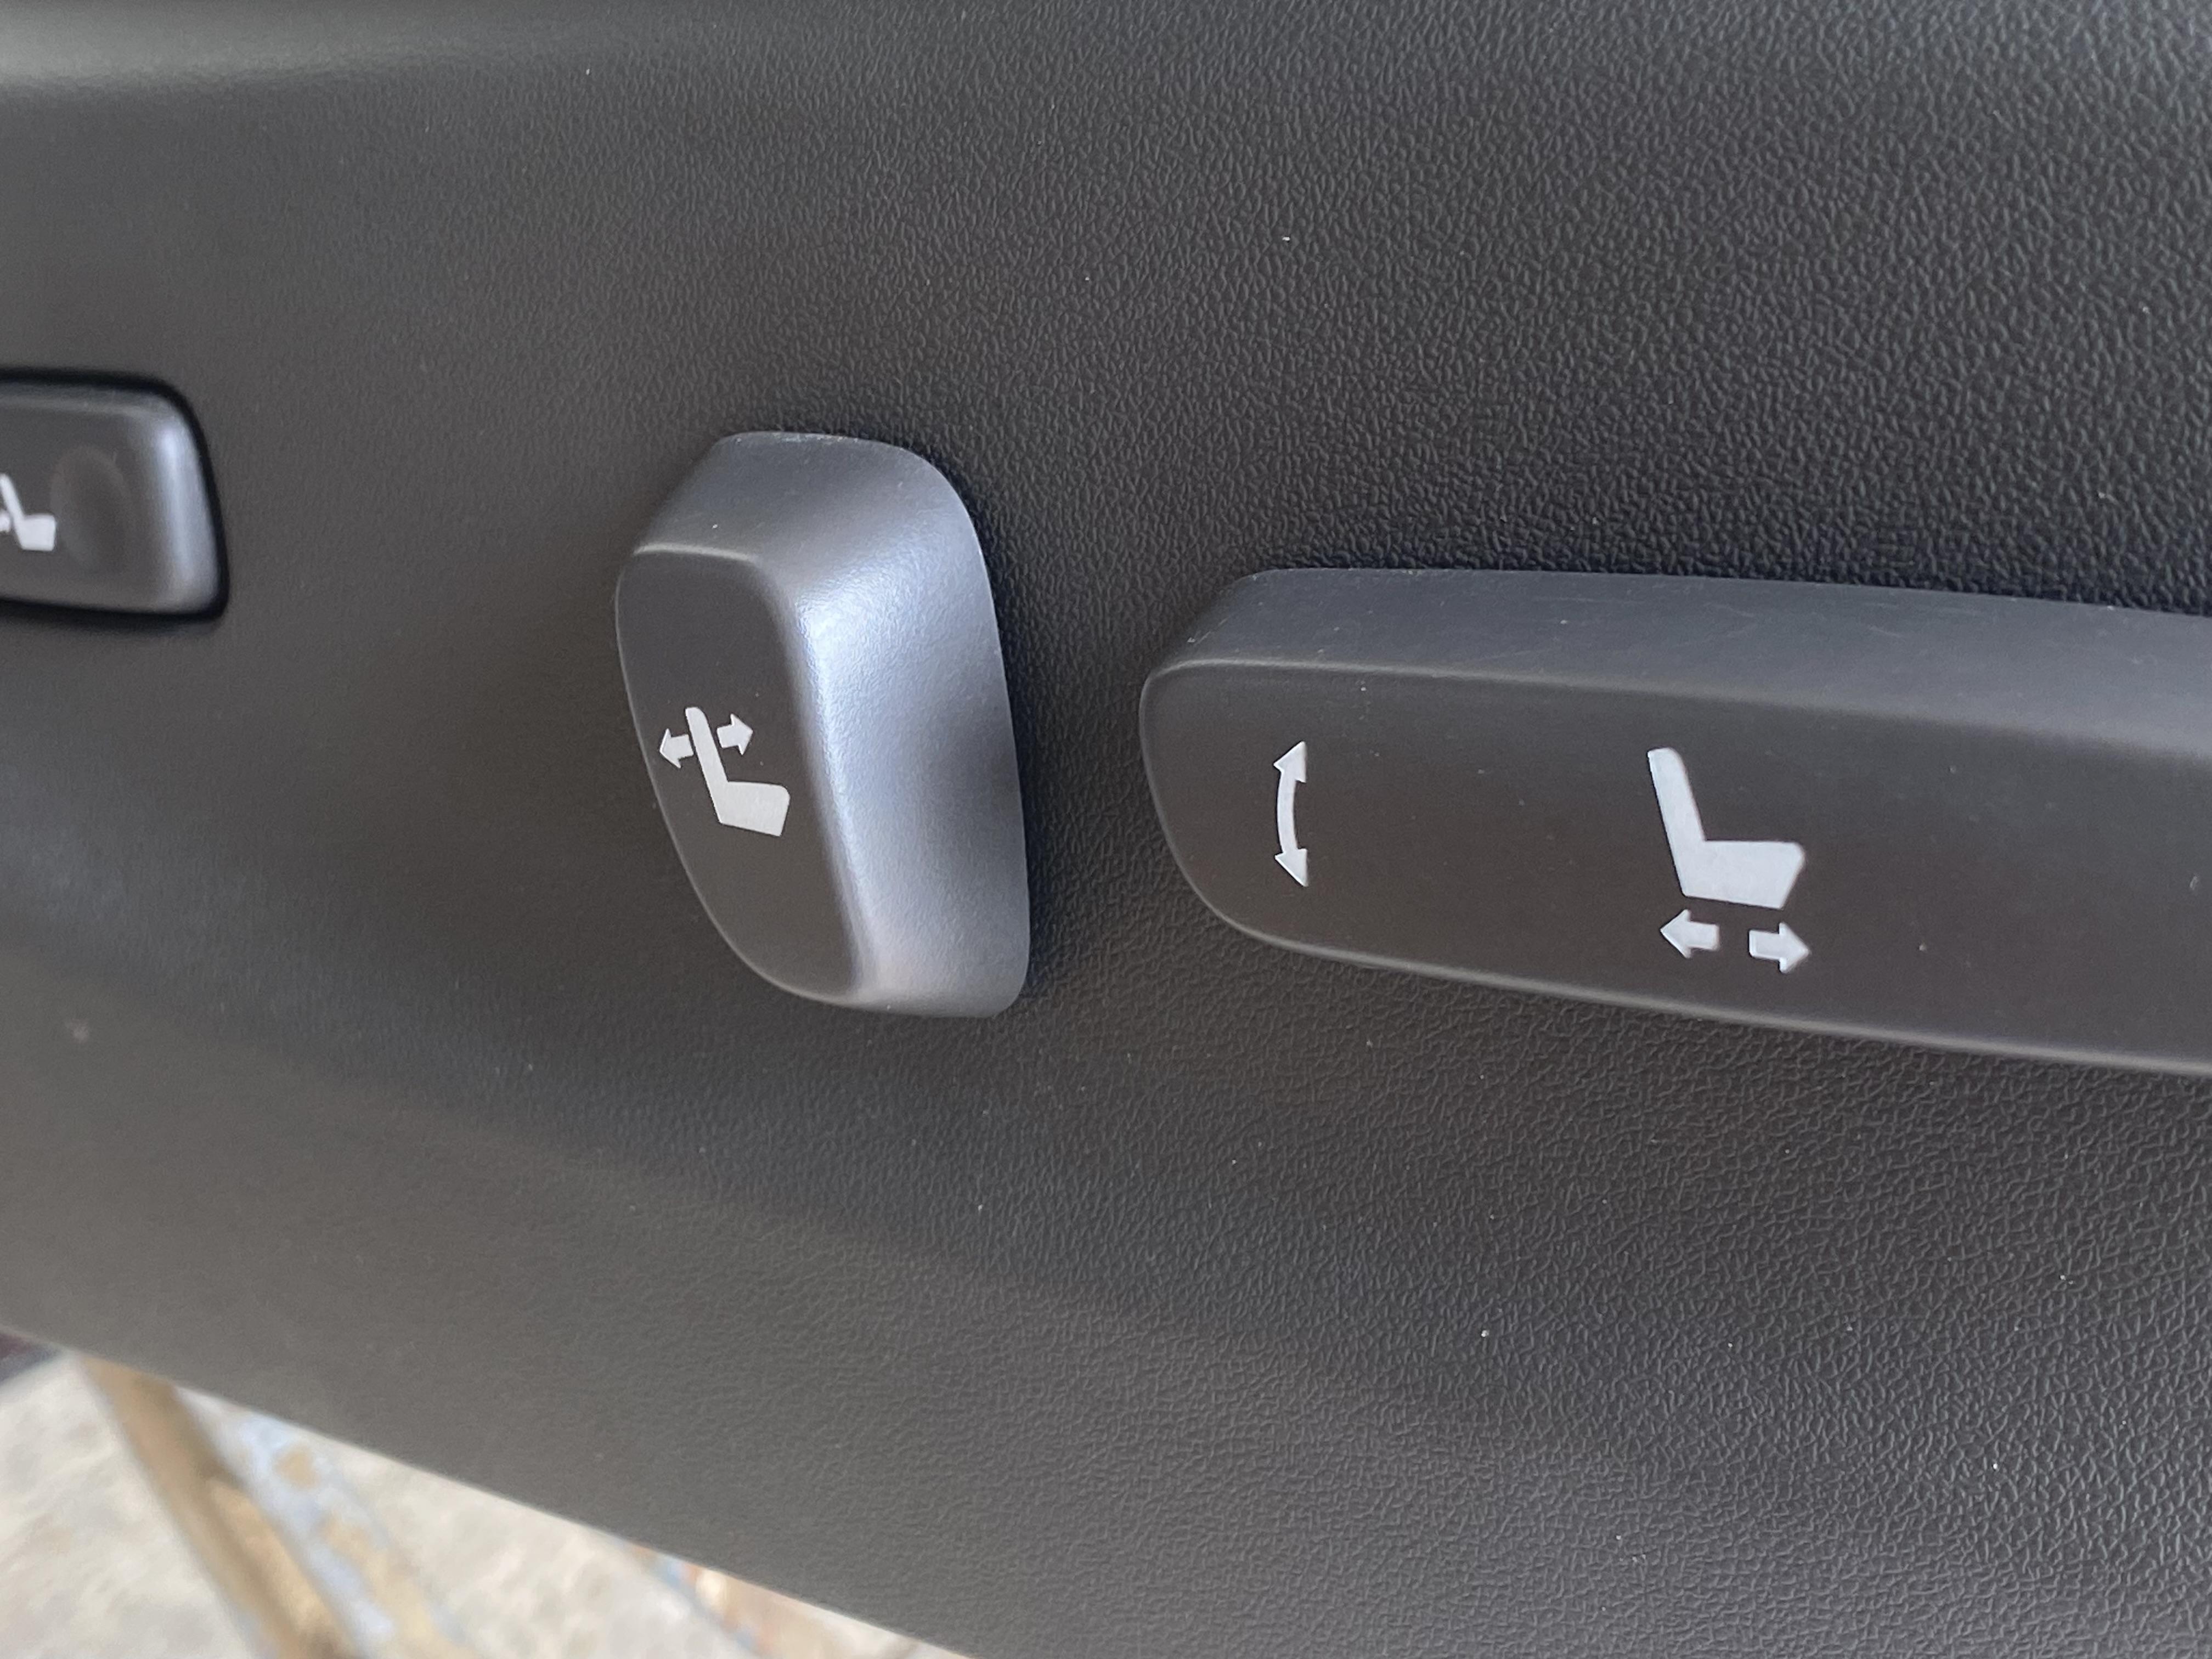
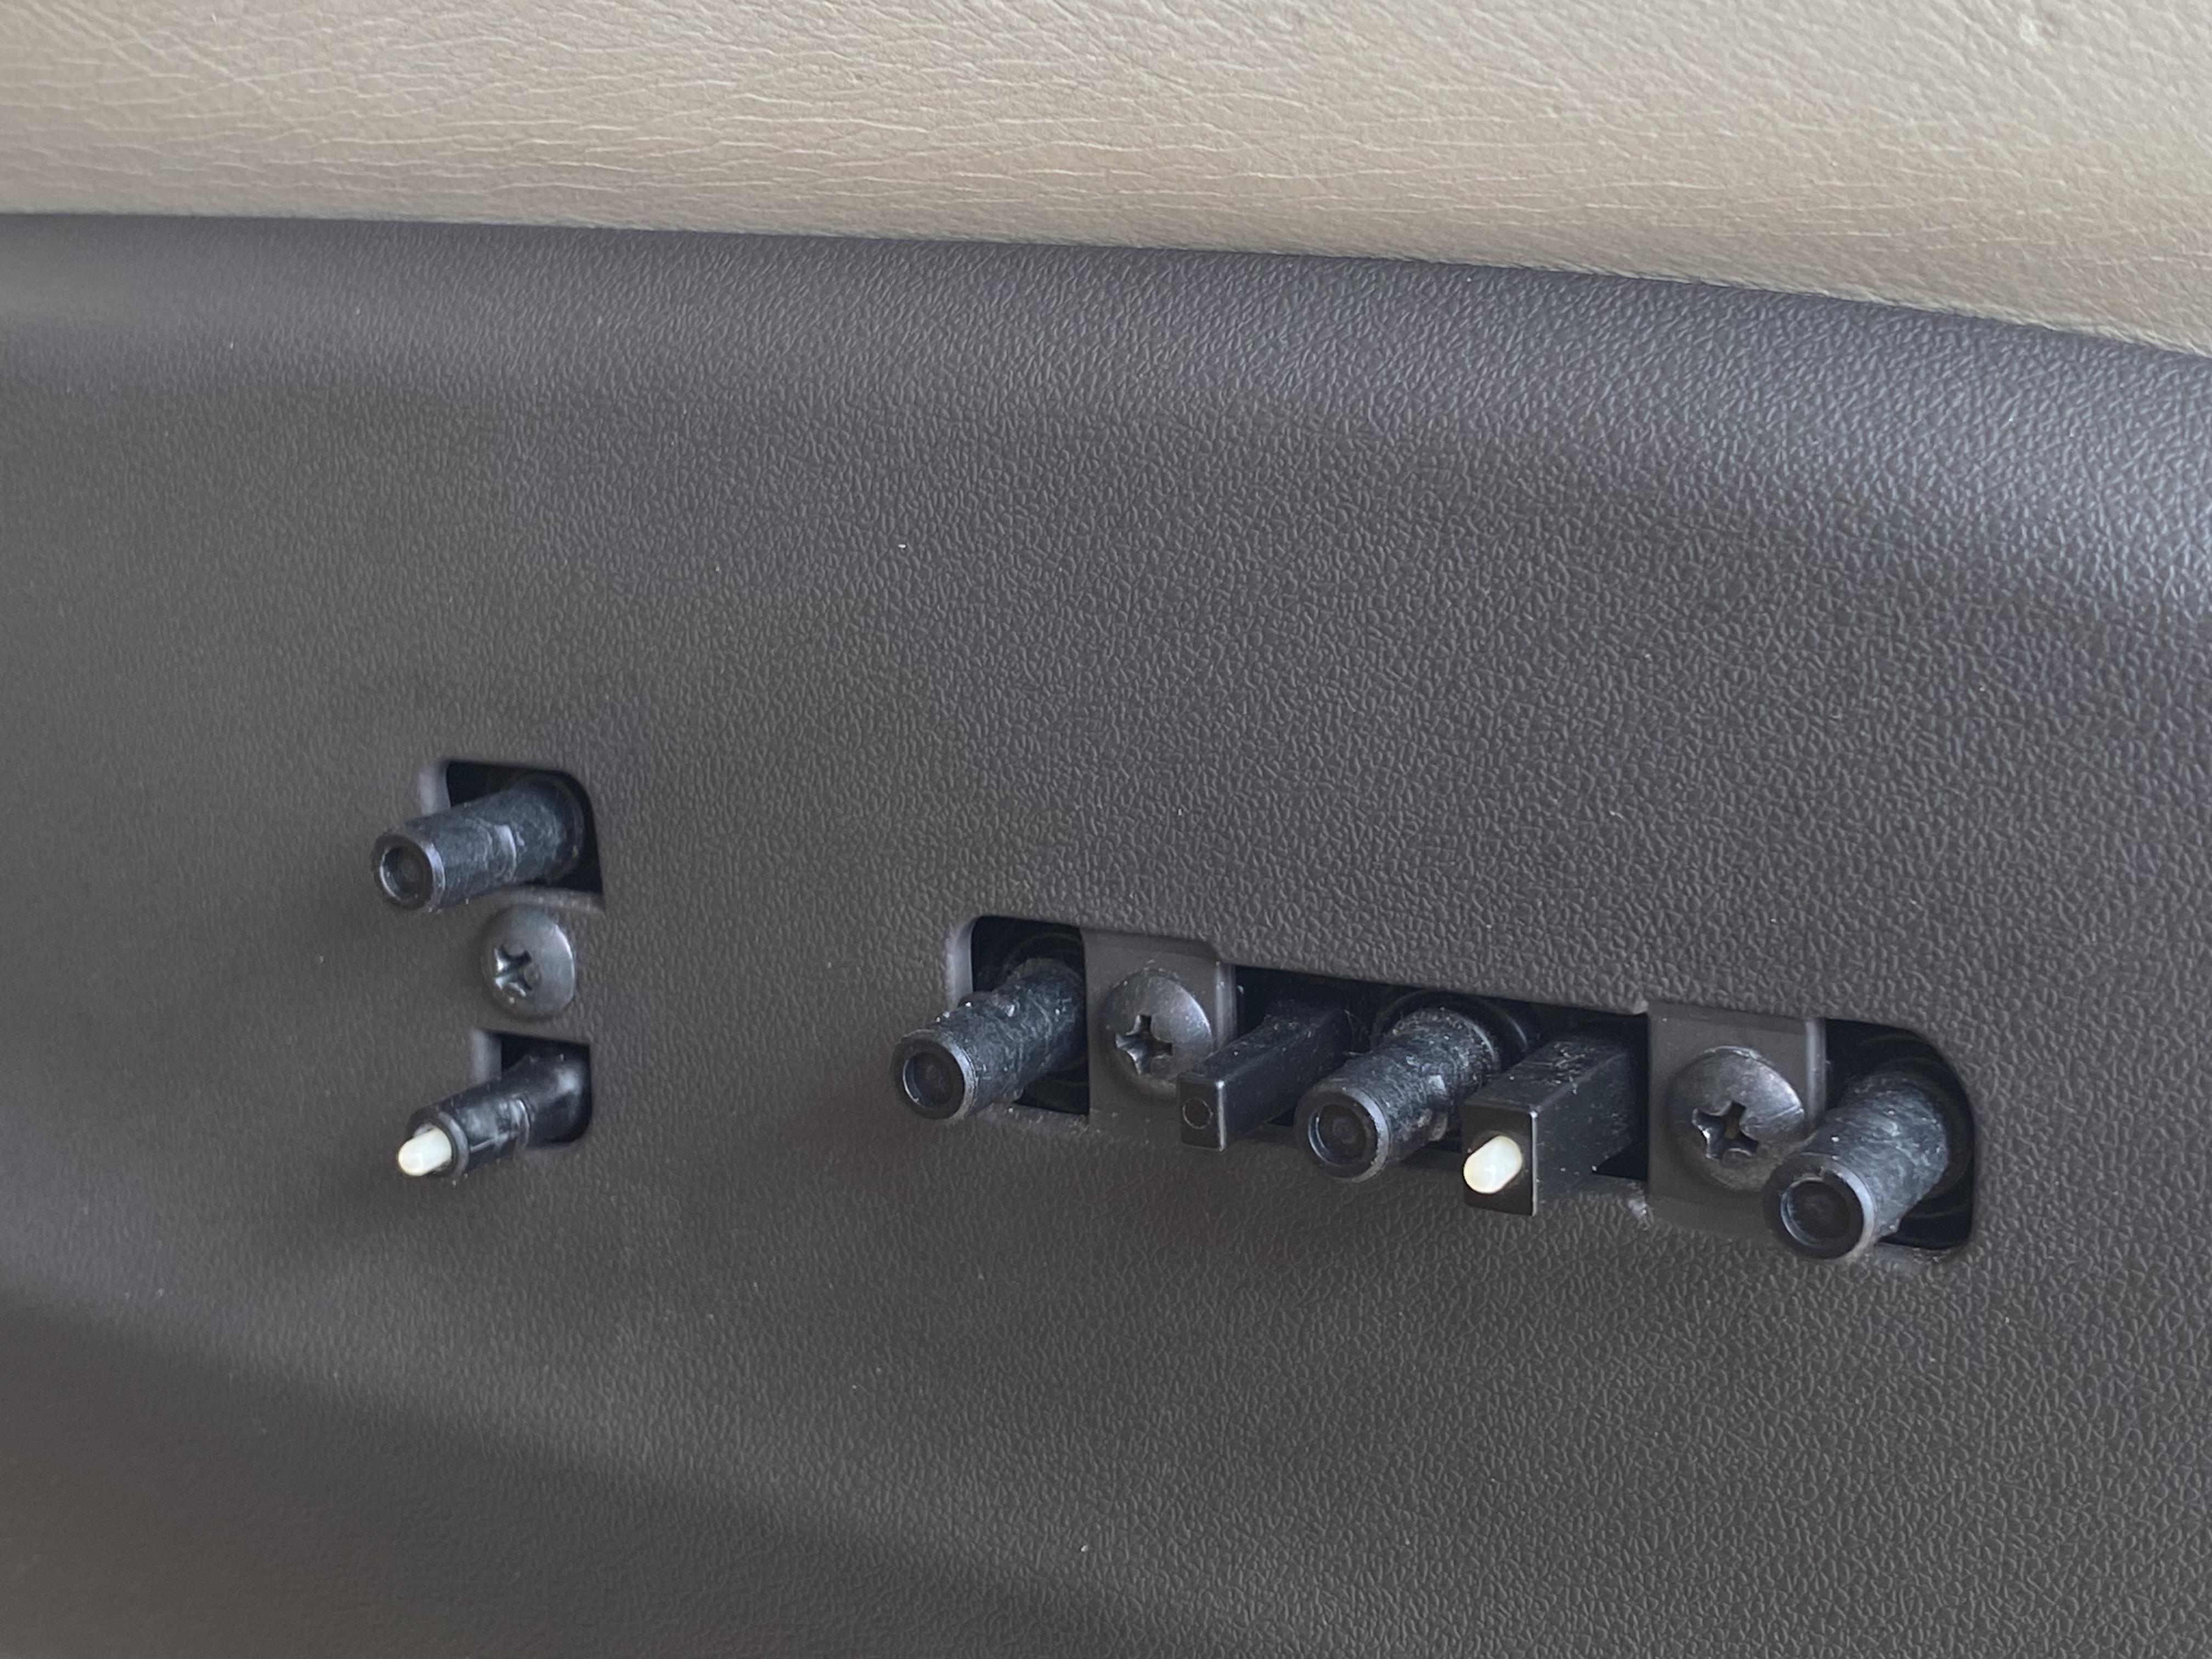
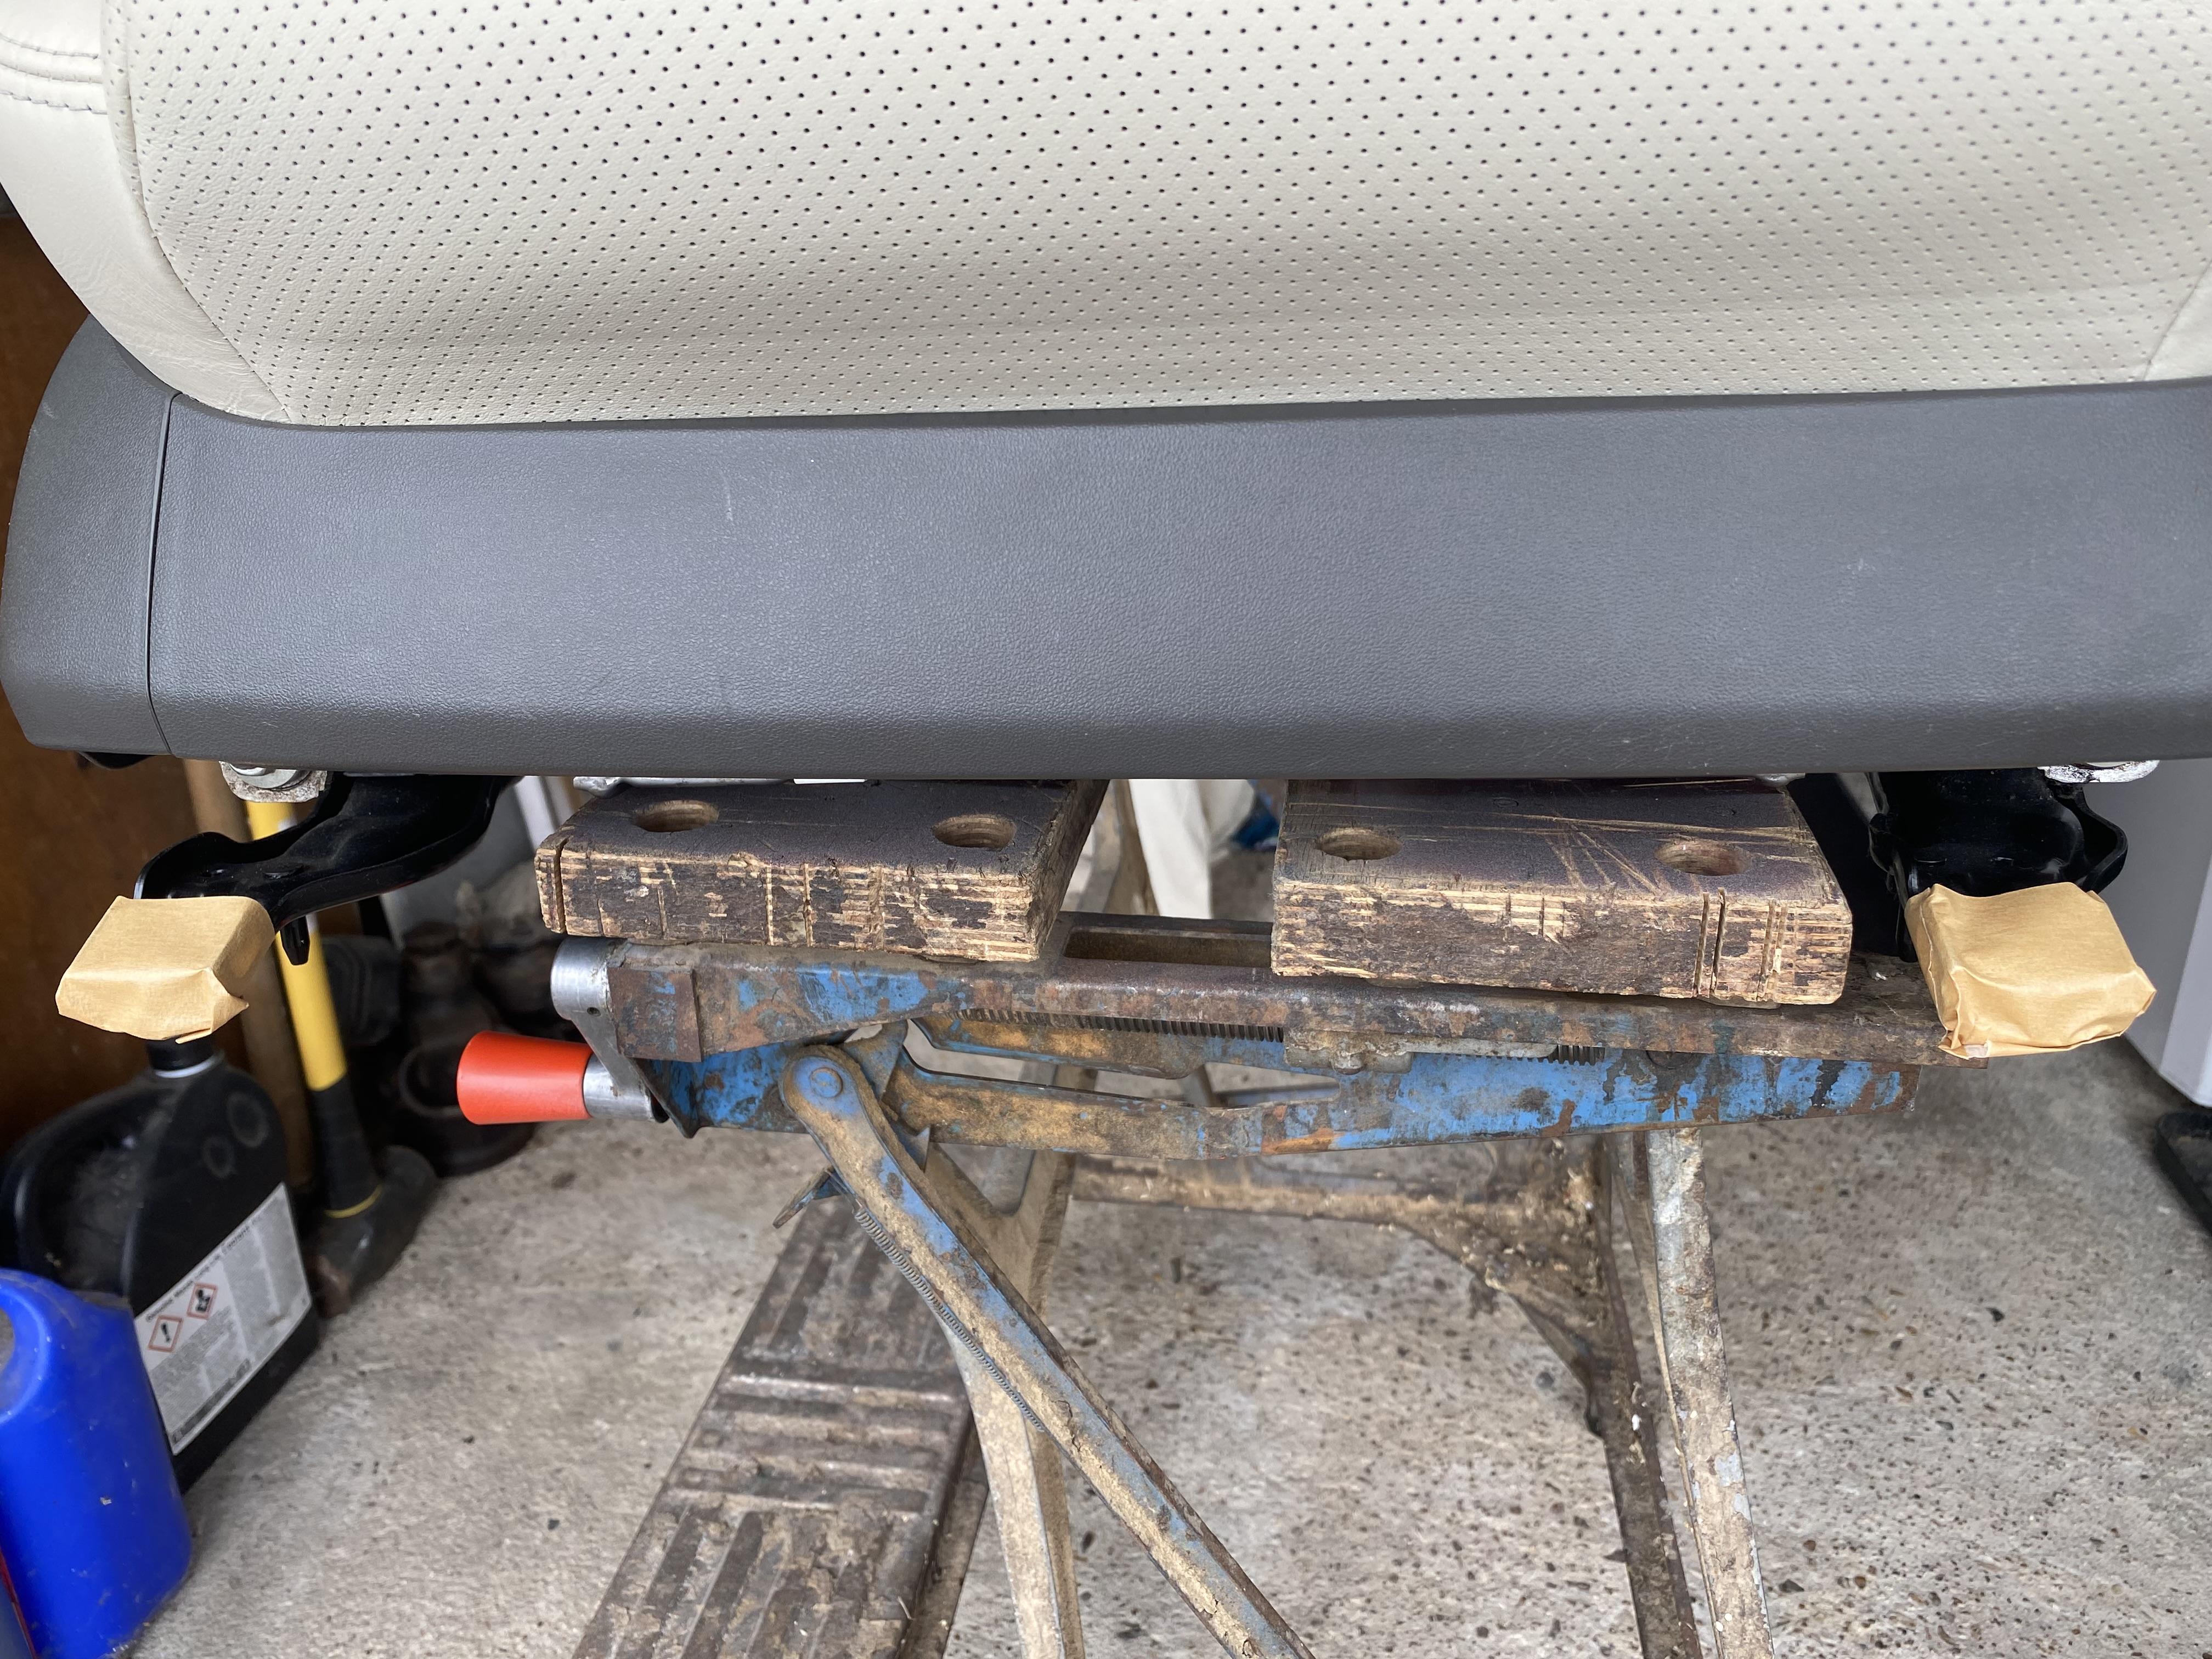
This will guide you through seat removal if you want to remove the seats. Remember to disconnect Battery and wait 10mins before unplugging the seats. I found them not too heavy but you need to be careful when removing as you don’t want to damage anything with the seat prongs [they stick out a wee bit – so be mindful!]. I wrapped masking tape around mine! The Driver’s seat is the more awkward of the two as you have the steering wheel to contend with. The three electrical plugs under the seat are a bit fiddly but not too bad.
I also removed the lower plastic trim once the seat was out and up on my workmate bench. There are three screws hidden underneath. Two at the front and one at the back. Pry off the raise/ lower knob and back tilt knob and remove the three screws that are now seen. Then unplug the electrical connector and its out of the way.
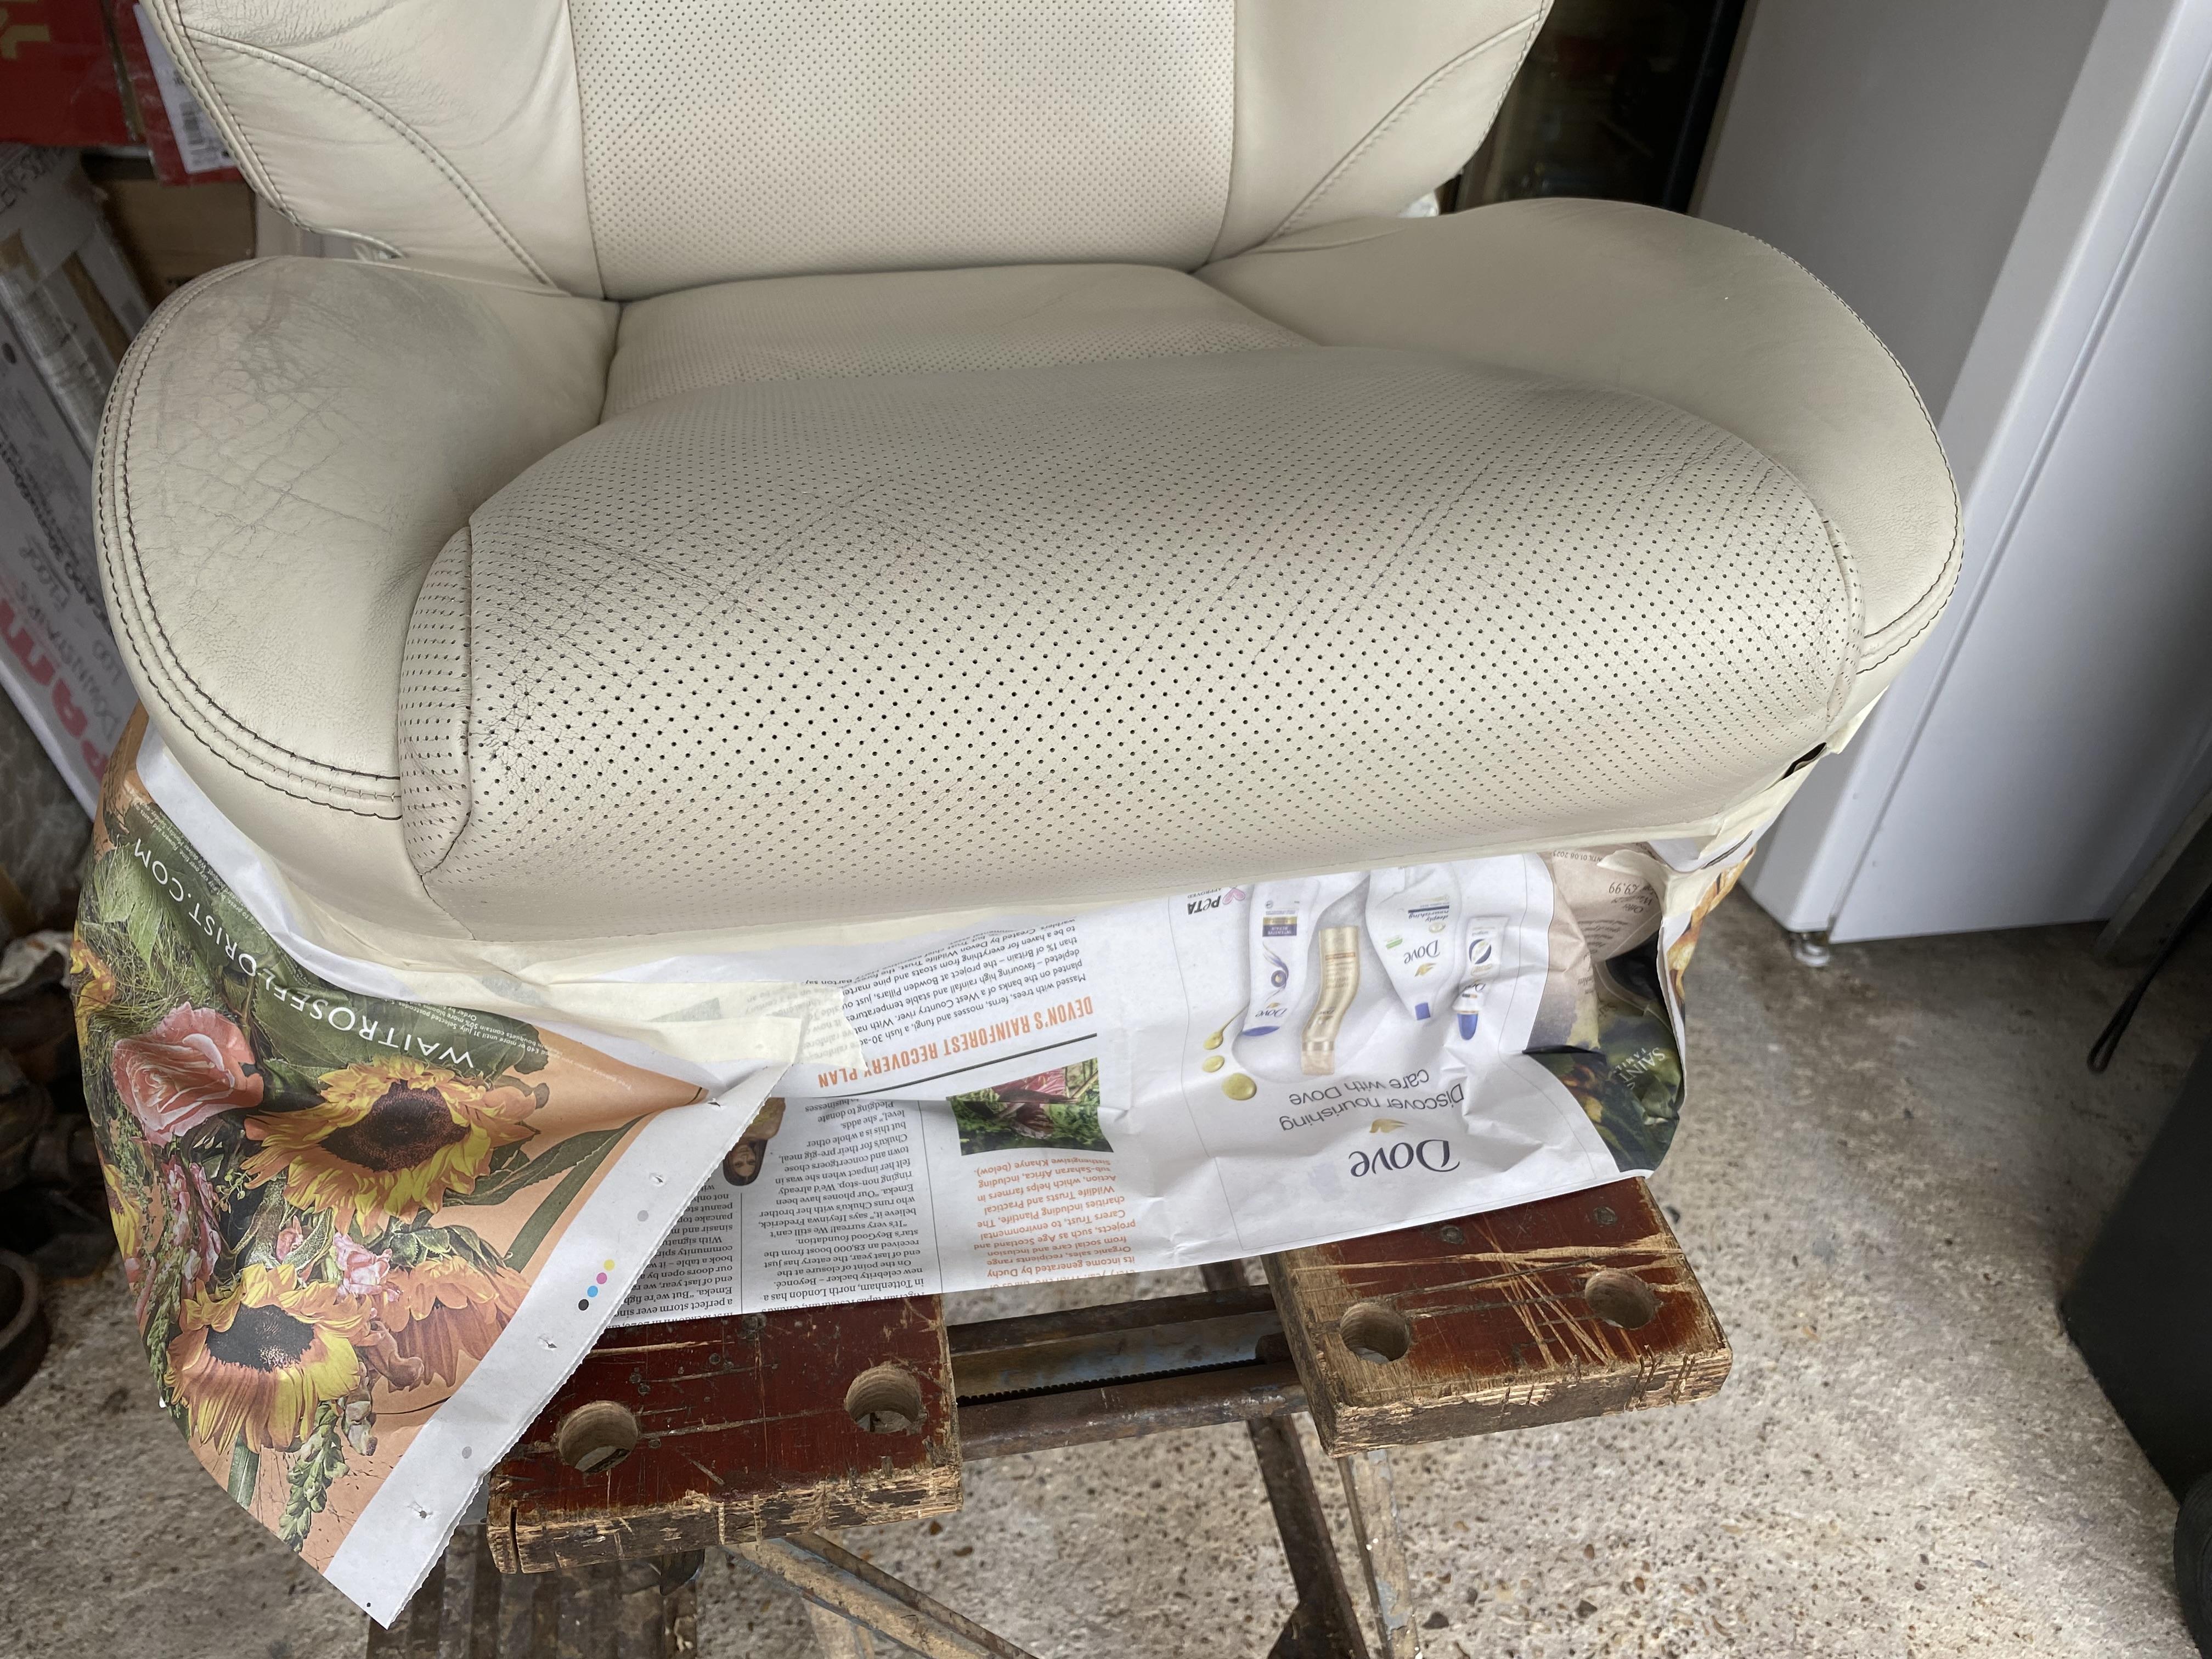
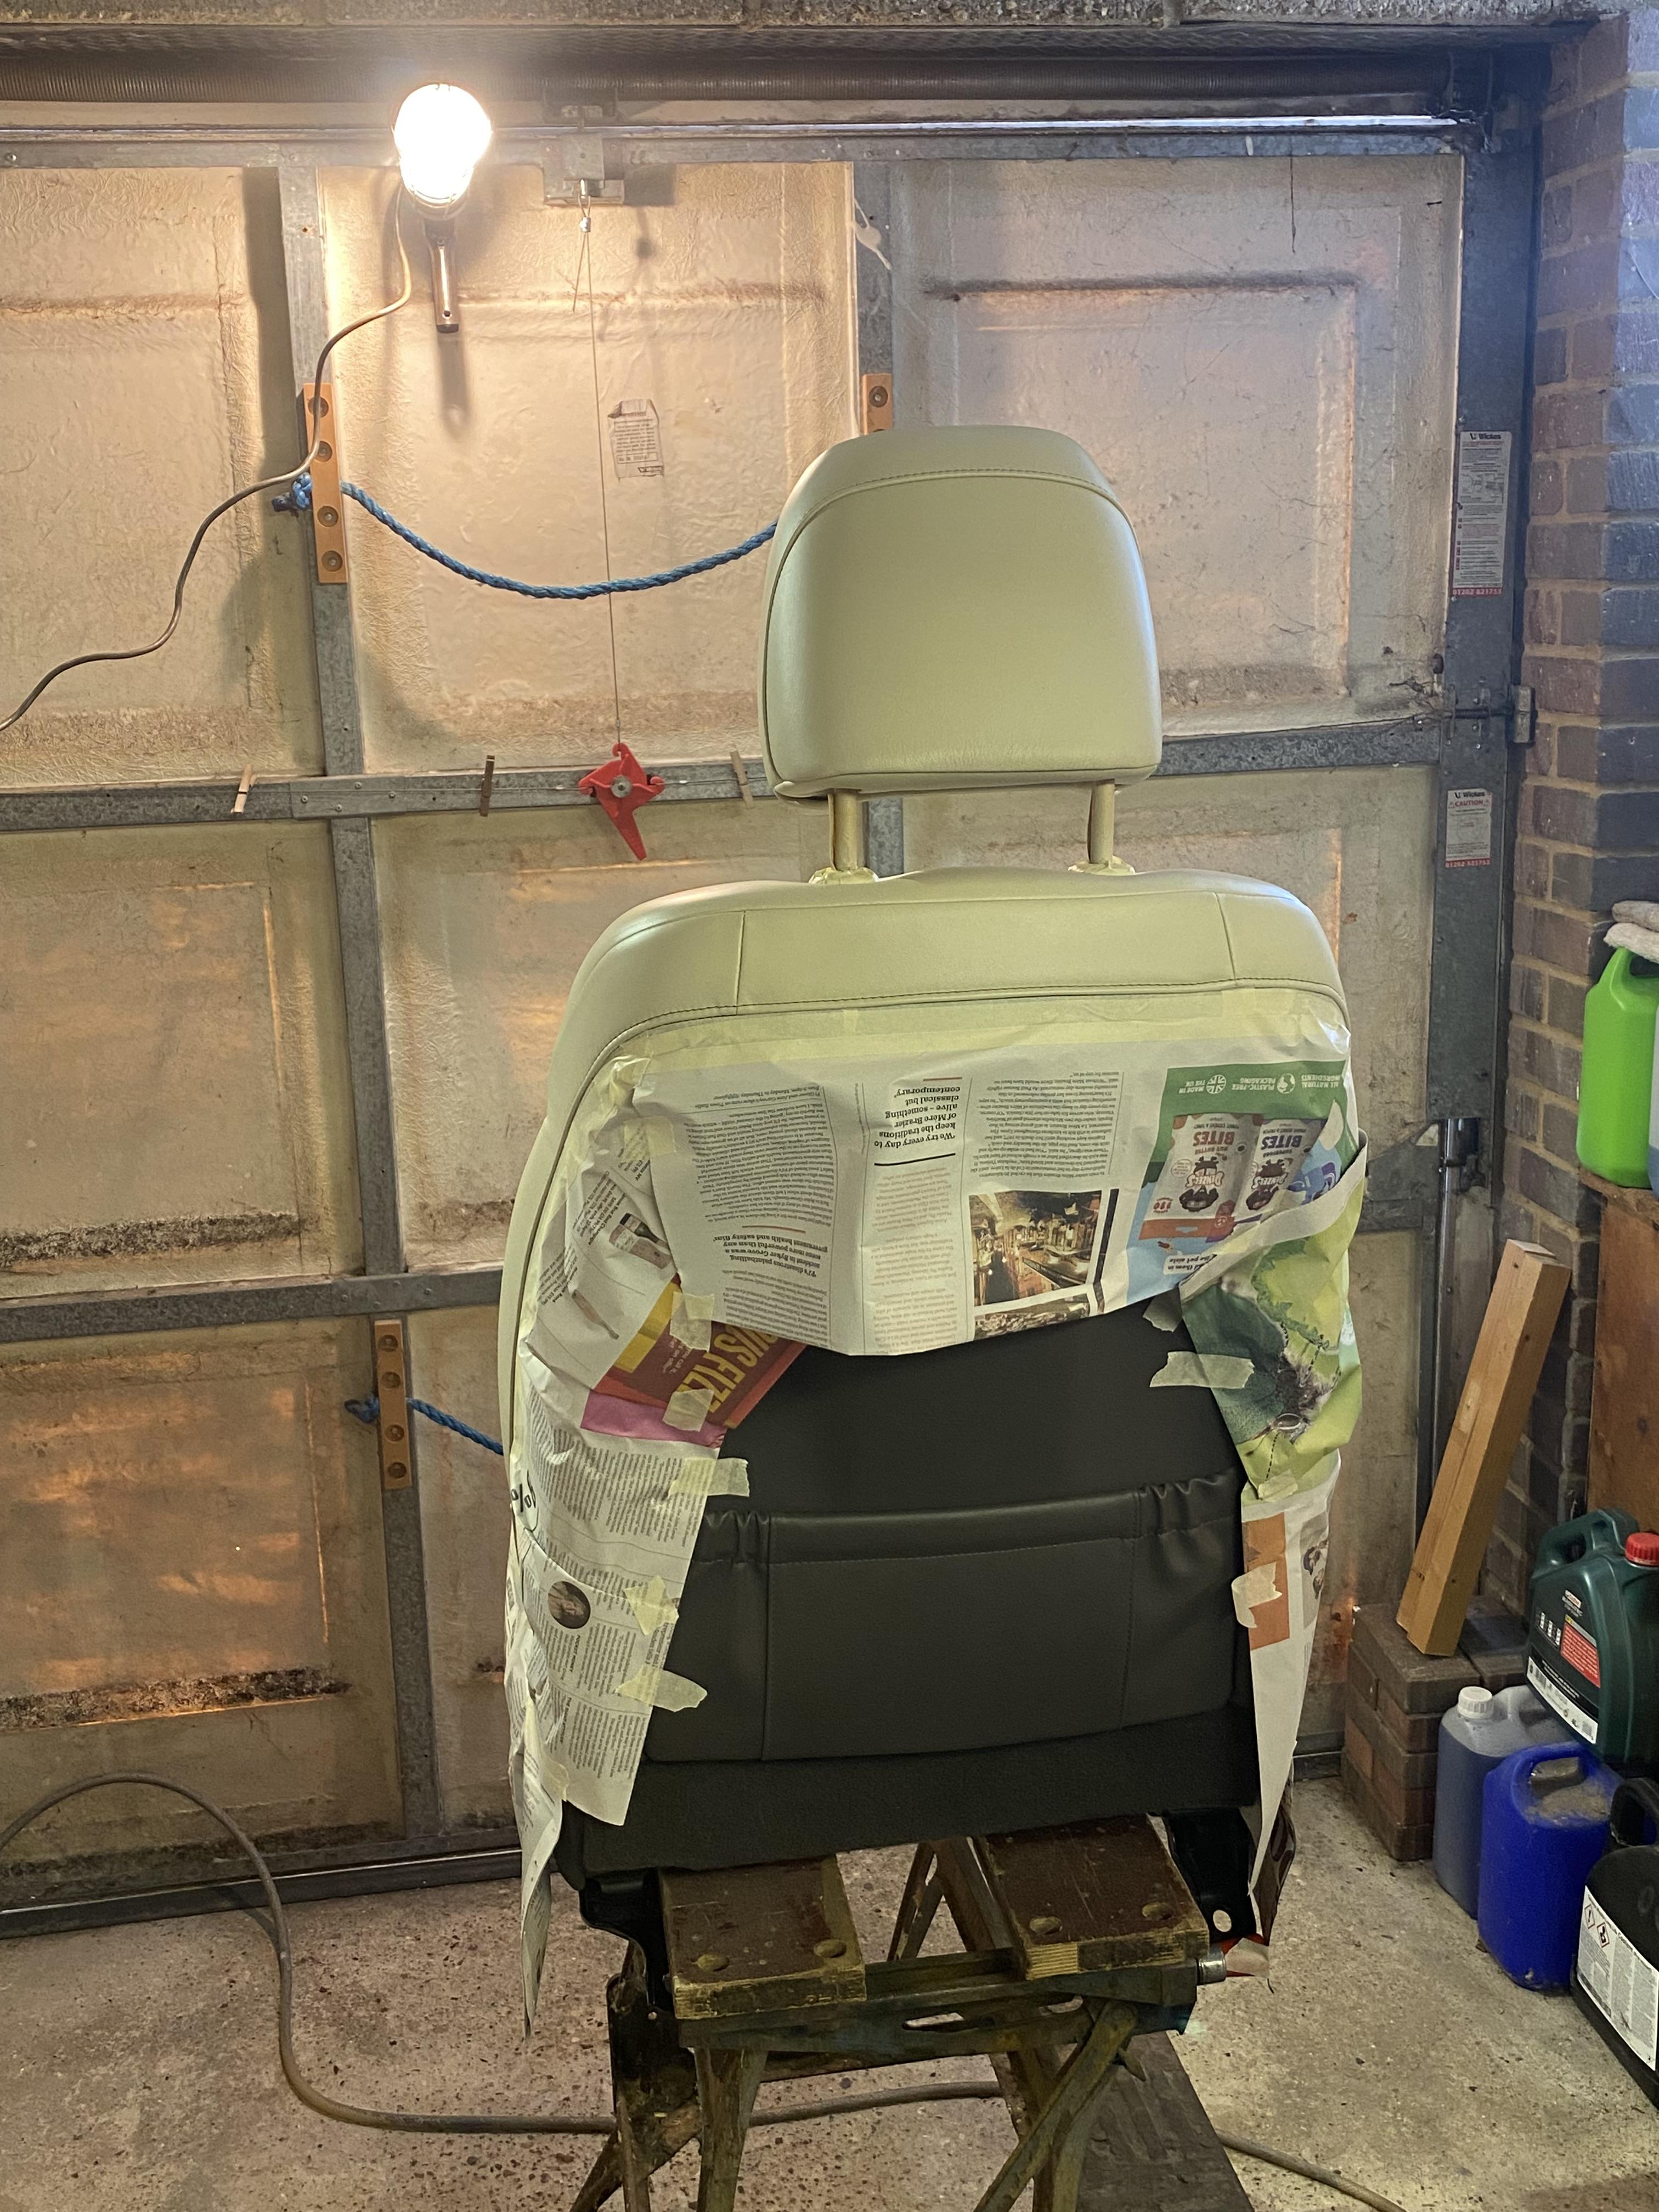
Next was masking up all the areas you want to protect from spraying. Seat back is a contrasting colour on mine so that need looking at with care. I masked the headrest collars and the stalk and the re-inserted the headrest into the seat as it’s easier for me to spray it all in situ.
I then did everything as outlined in the FC repair video. But I used my own spray gun for applying the colour and the clear two pack top finish. I have to say the colour is spot on. The Leather Binder I found to be very good indeed, that I used on the more heavily scuffed areas. The Heavy filler and Flexifill are surprisingly good, much better than I anticipated. In truth I could have put more in but that’s something you learn from experience, and I had none with this! It seems odd using a hair drier to speed up curing but it really works well and at every stage even after spraying the finishes on!! Just remember when you start scrubbing it's going to look worse...much worse on the bad areas. But then it all starts to improve.
This is the side bolster after scrub and 6 coats of filler applied with the spatula
Same bolster after dab sponging on some colourant just to see how it's looking after filler.
Colour coat [x3 with 10 mins between coats]. Colour coat is glossy/satin finish and when dry is still almost tacky to the touch.
If you sponge apply any colorant onto the pierced leather ... do not wipe it on [ you'll clog those holes!] ... just dab it gently. If you mess up and block a hole just tease it out with something like a bradawl tip. I sprayed 3 coats of the finish top coat with 10 mins between and used the hair dryer to speed it up. If go careful you can see it drying in front of your eyes. If you get a sag or run just dab it with a sponge. Pleased to report I did not get 1 ... but then I was a furniture restorer and sprayer for over 20 years.
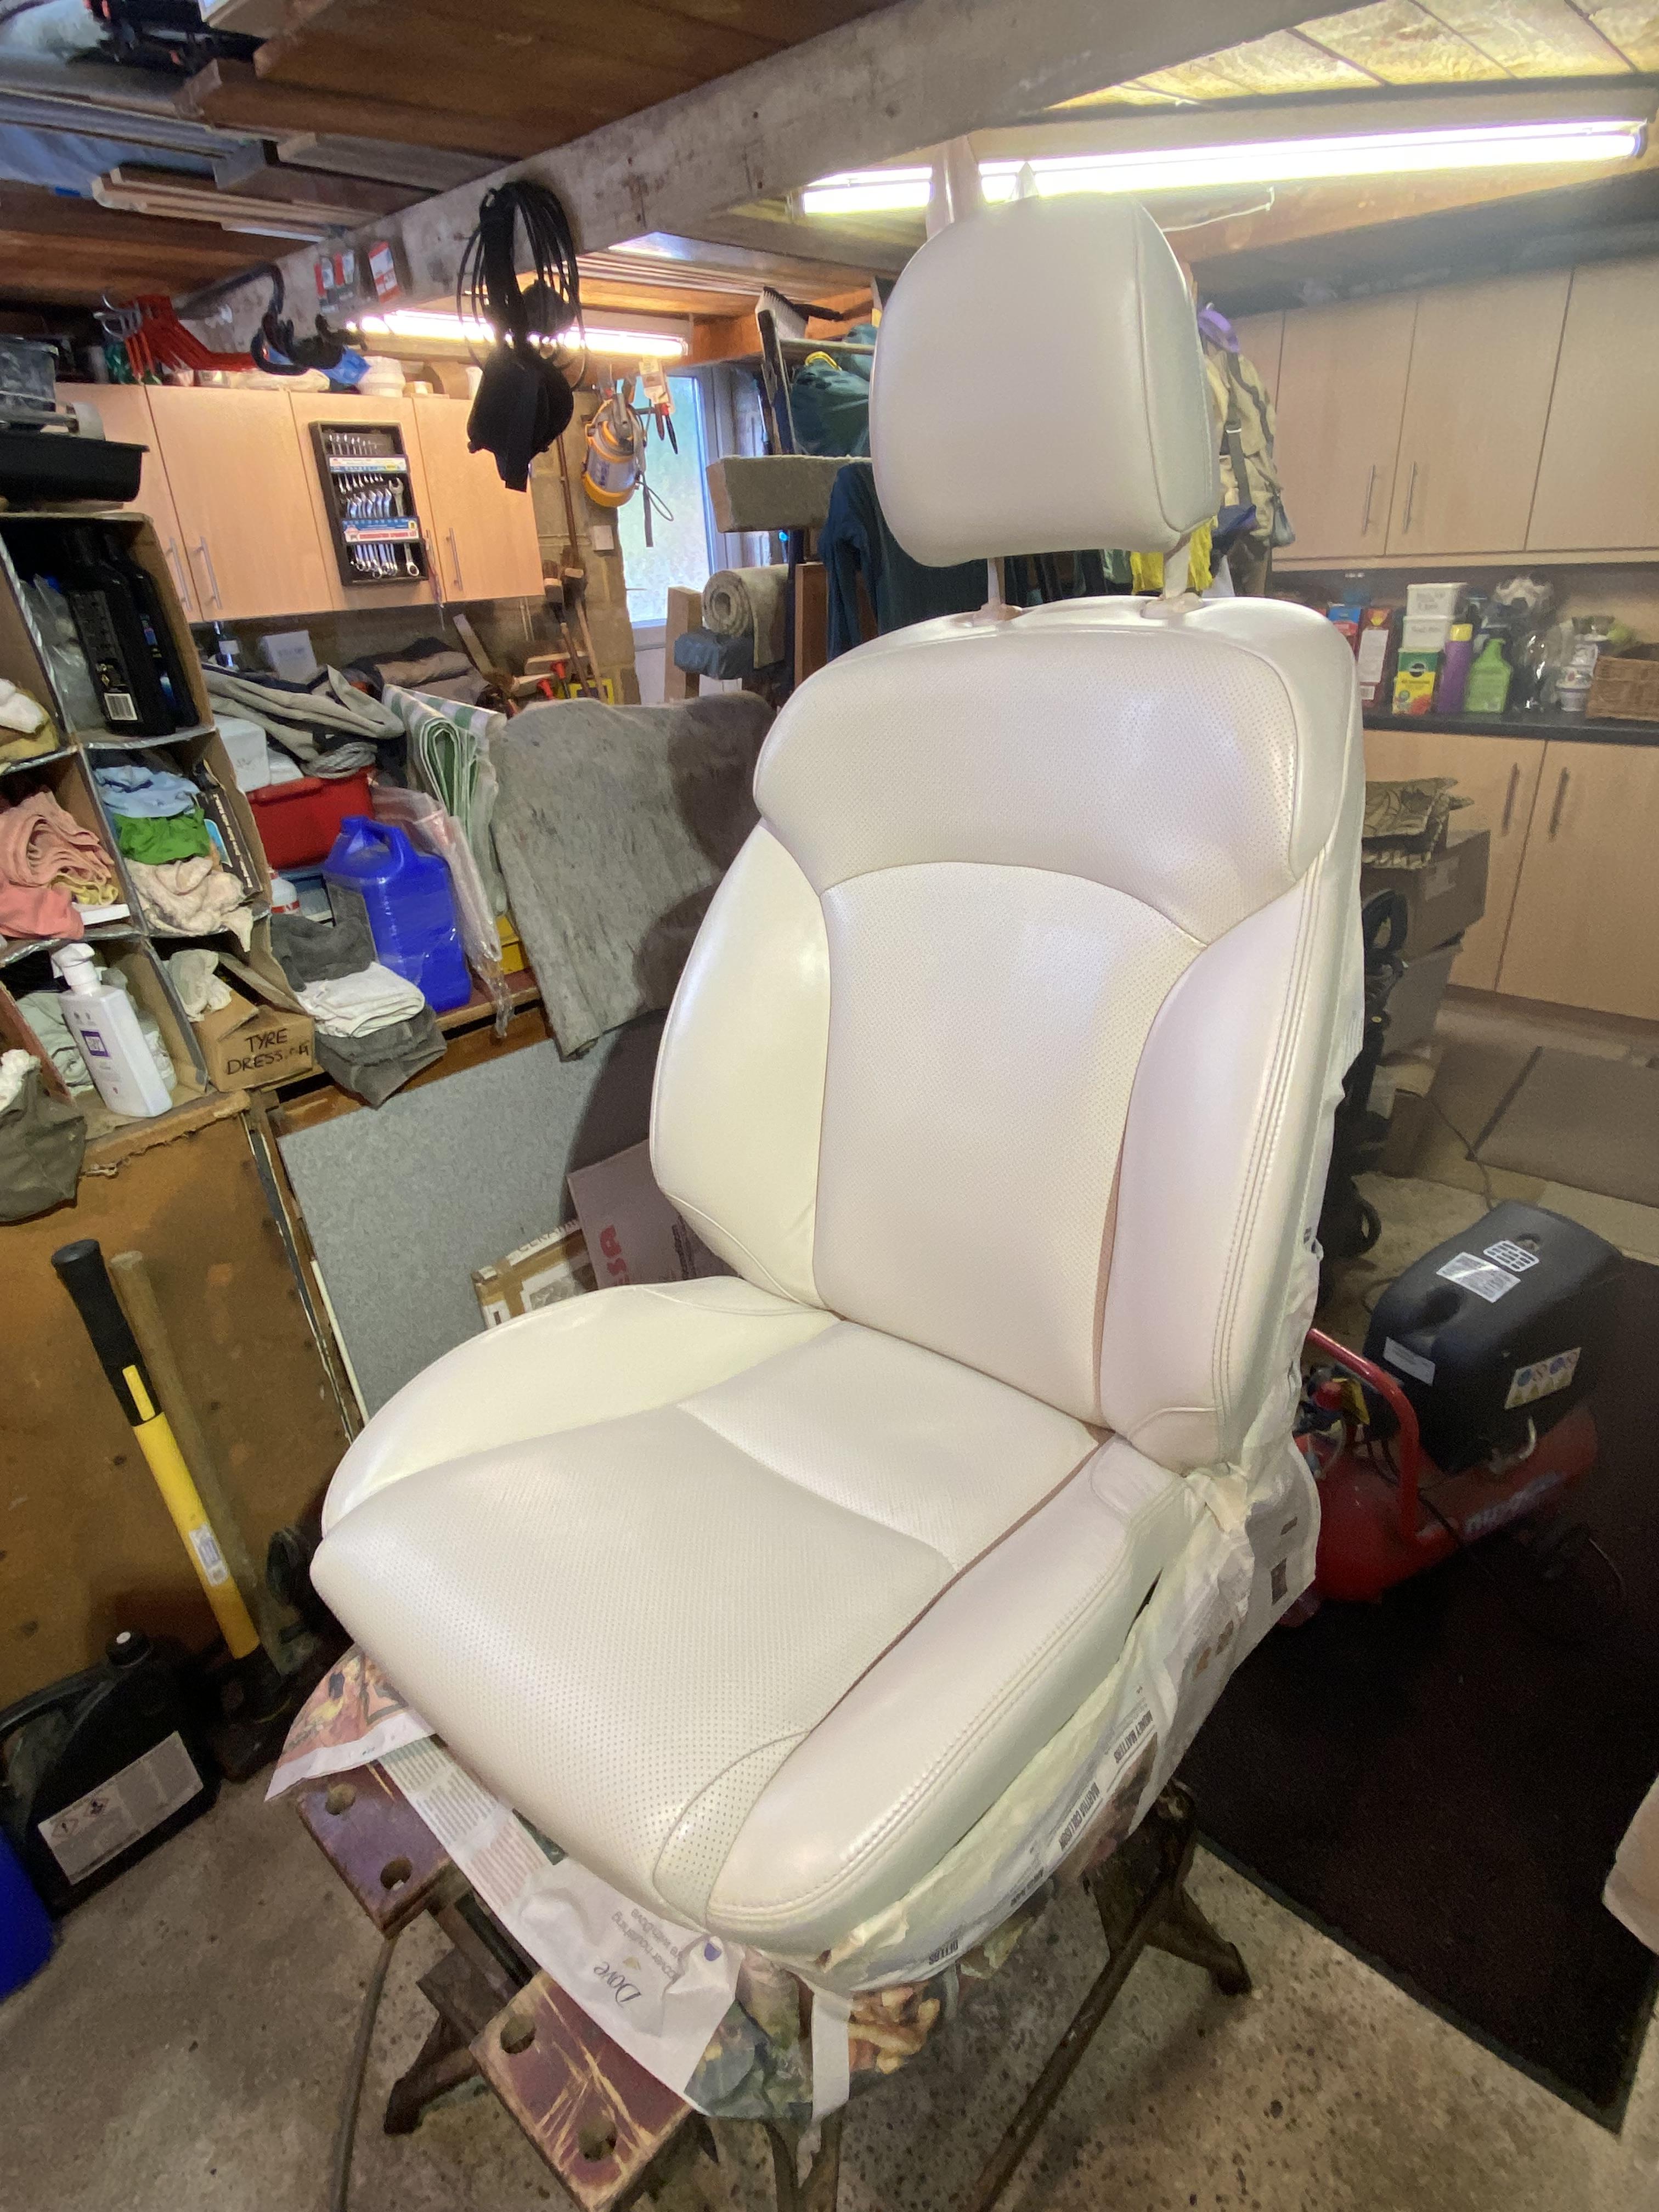
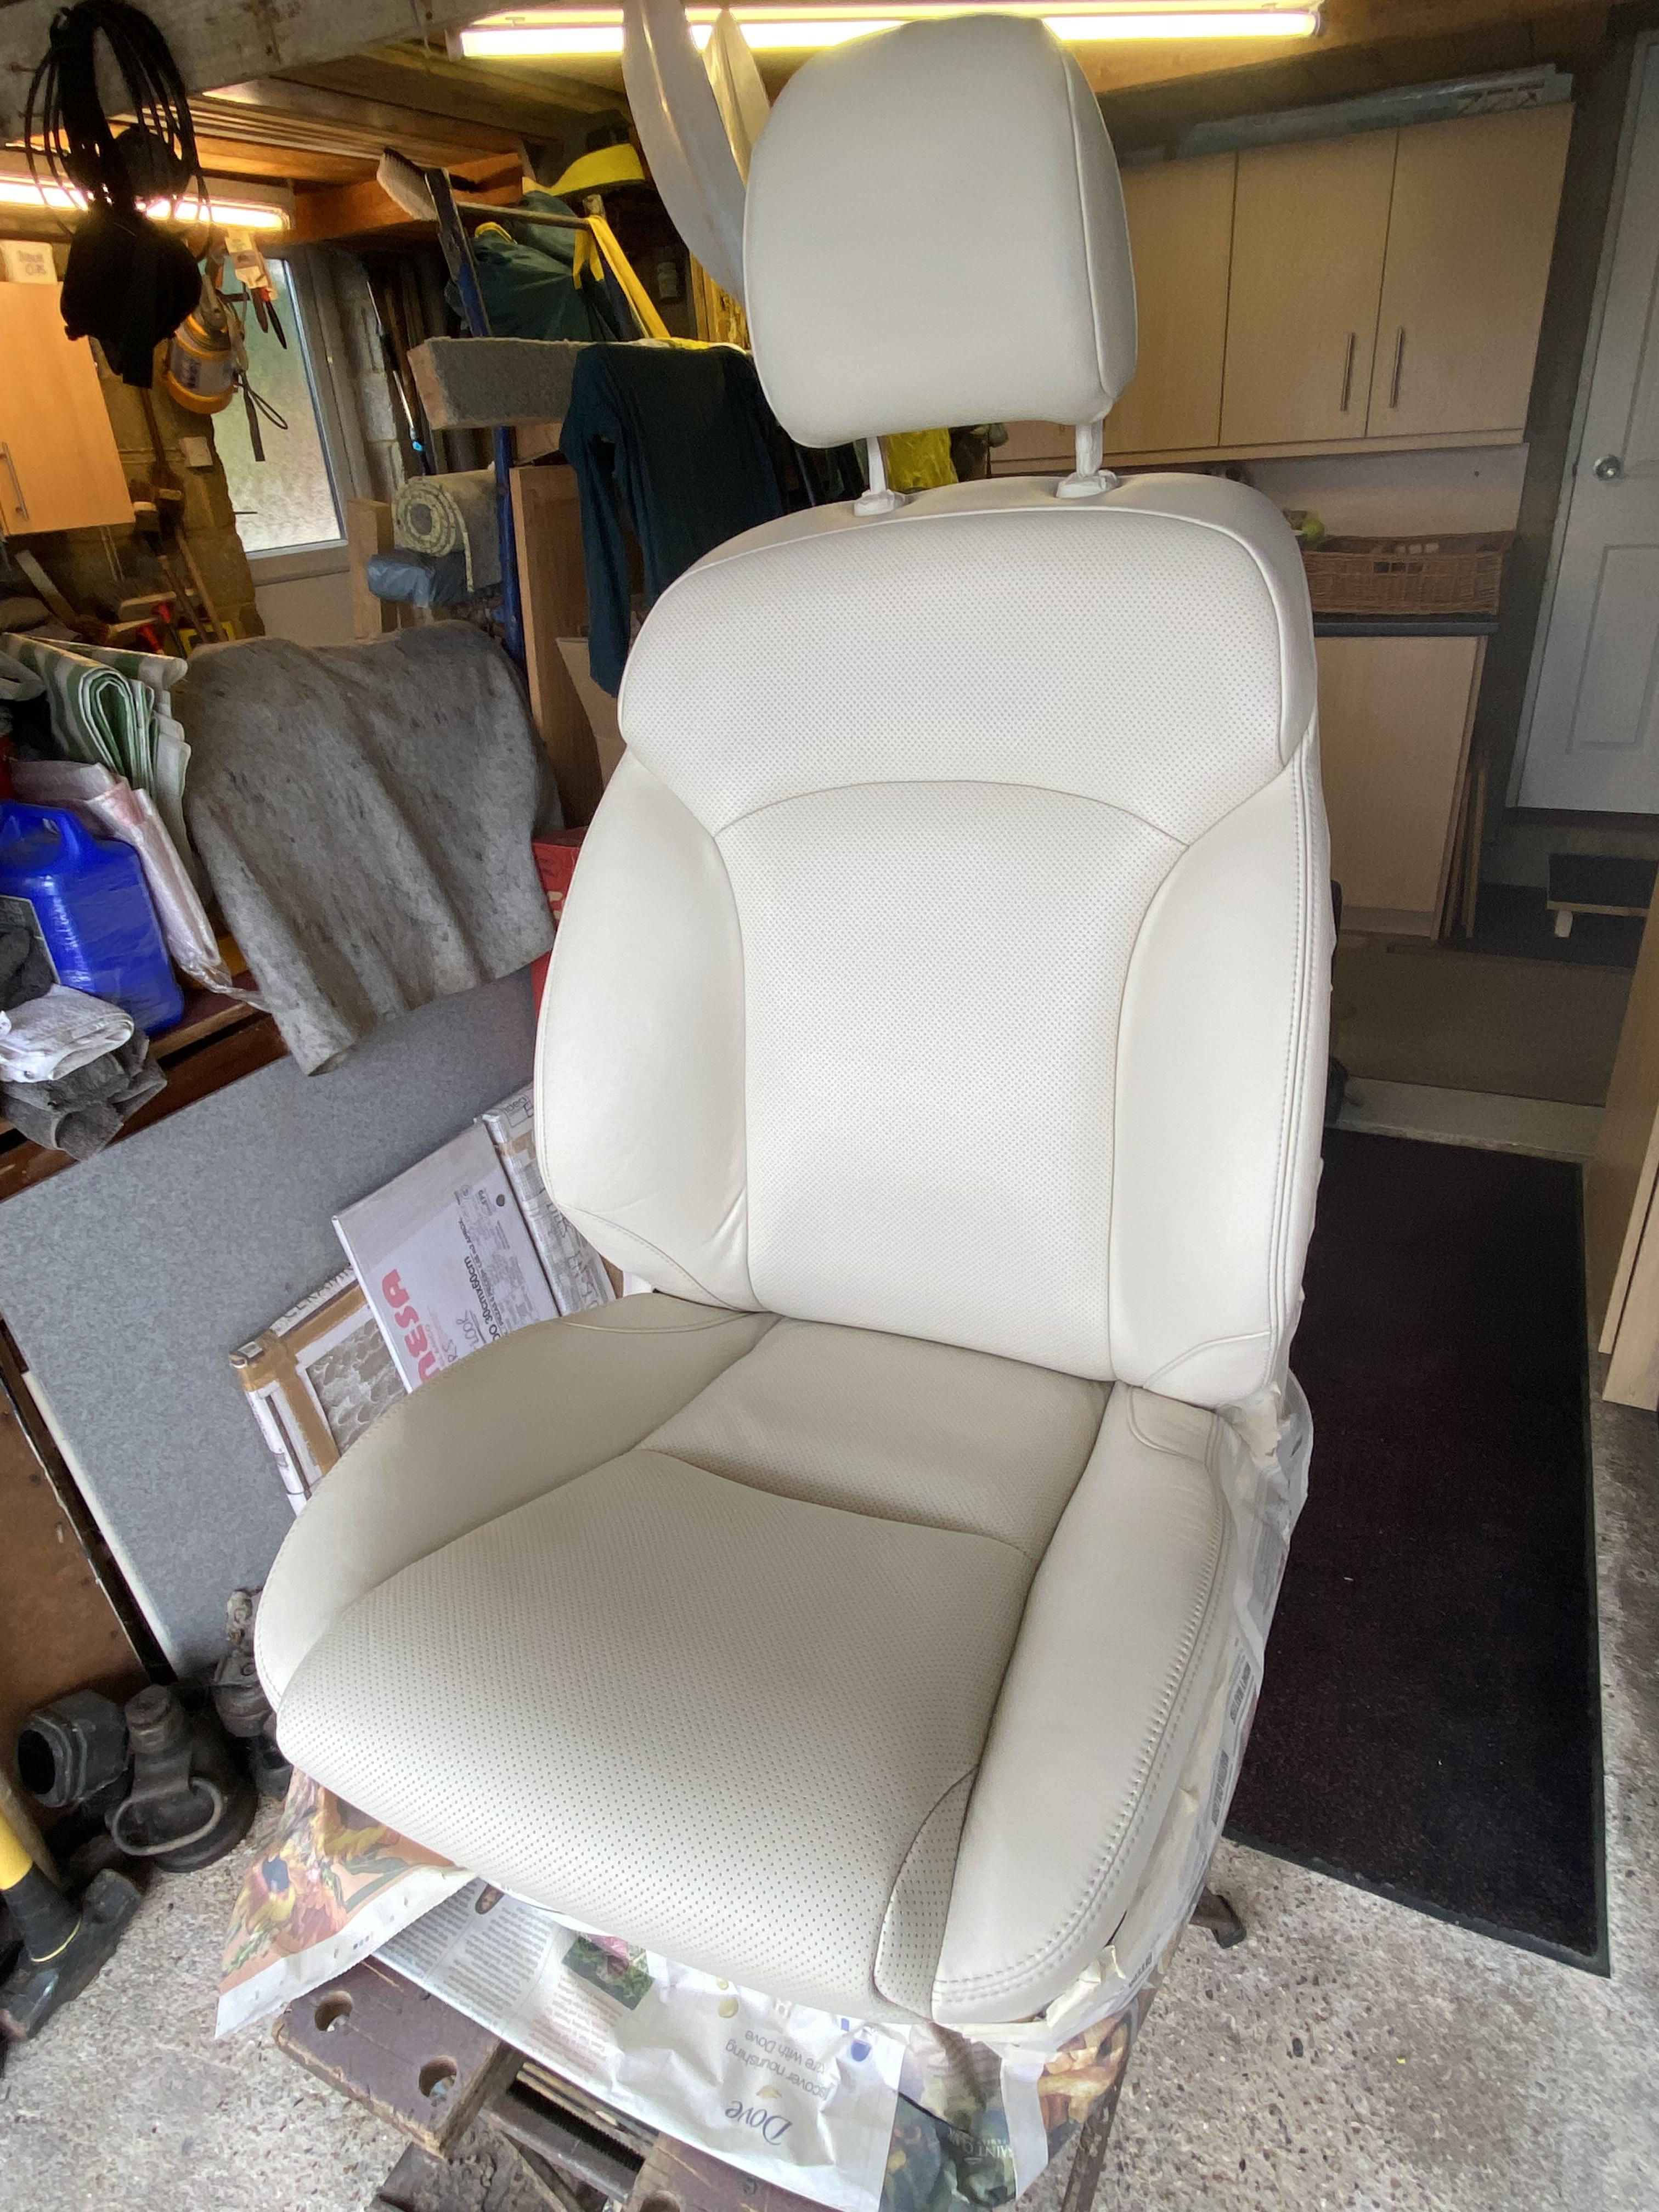
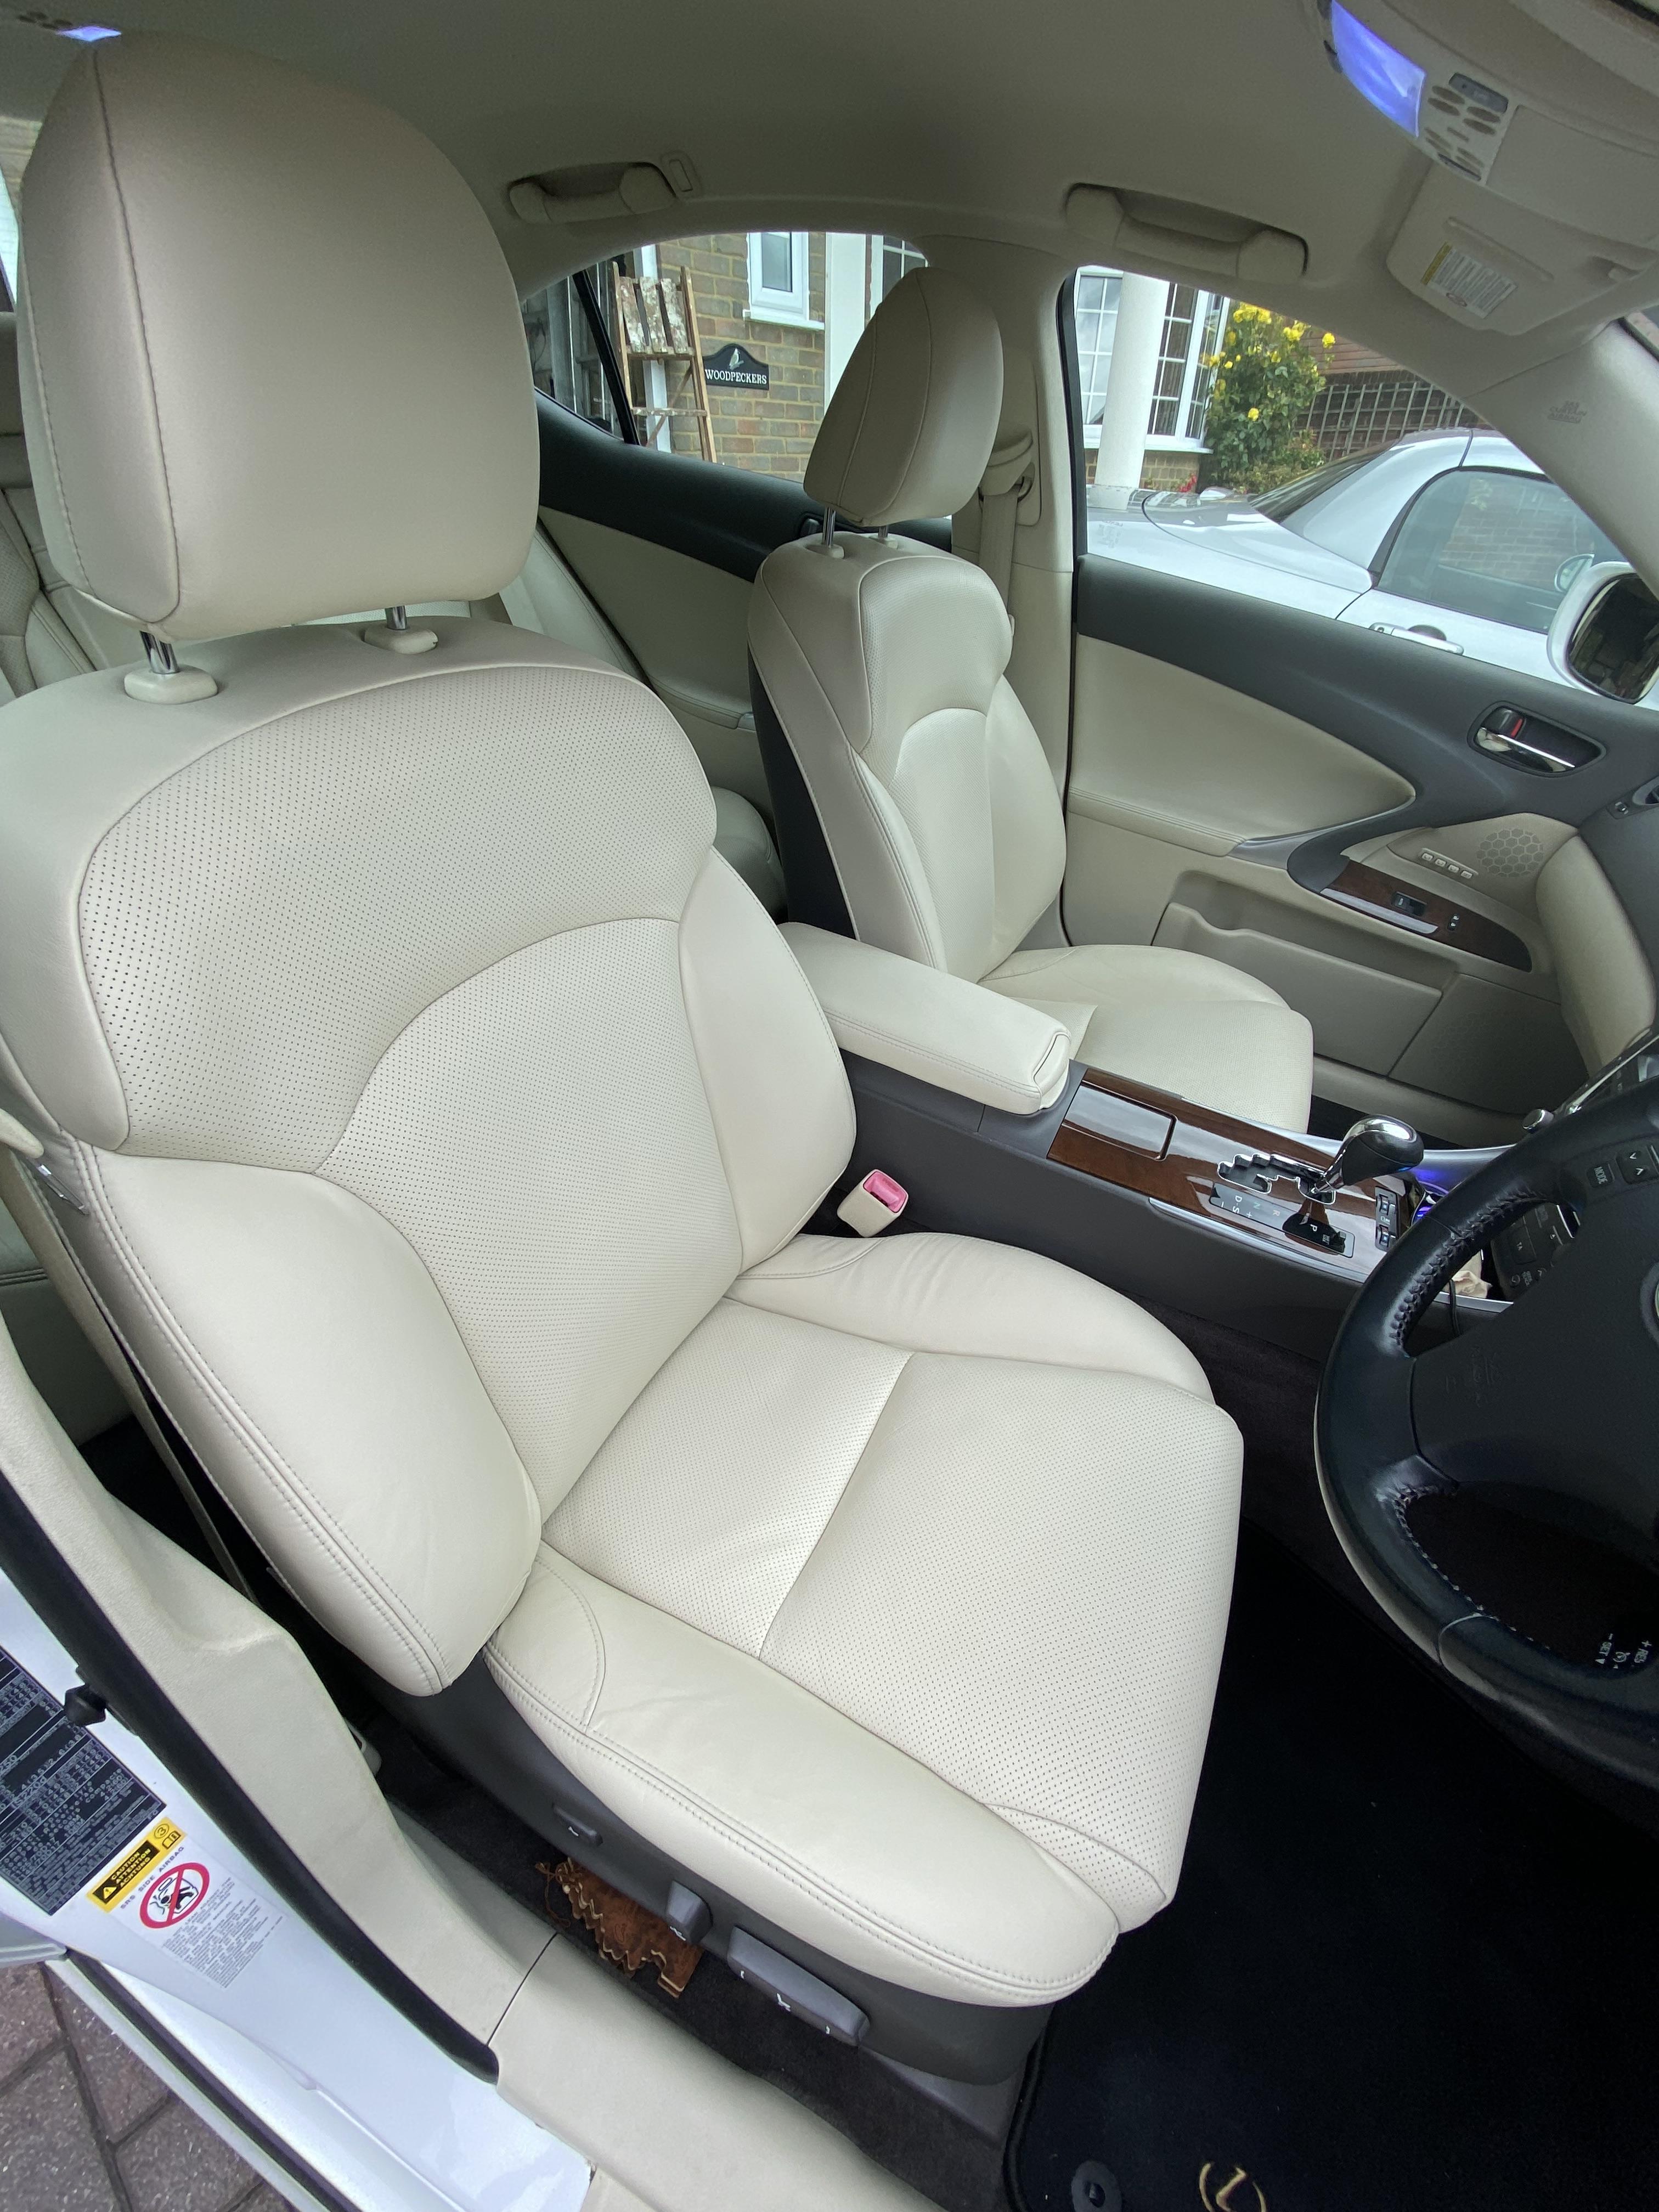
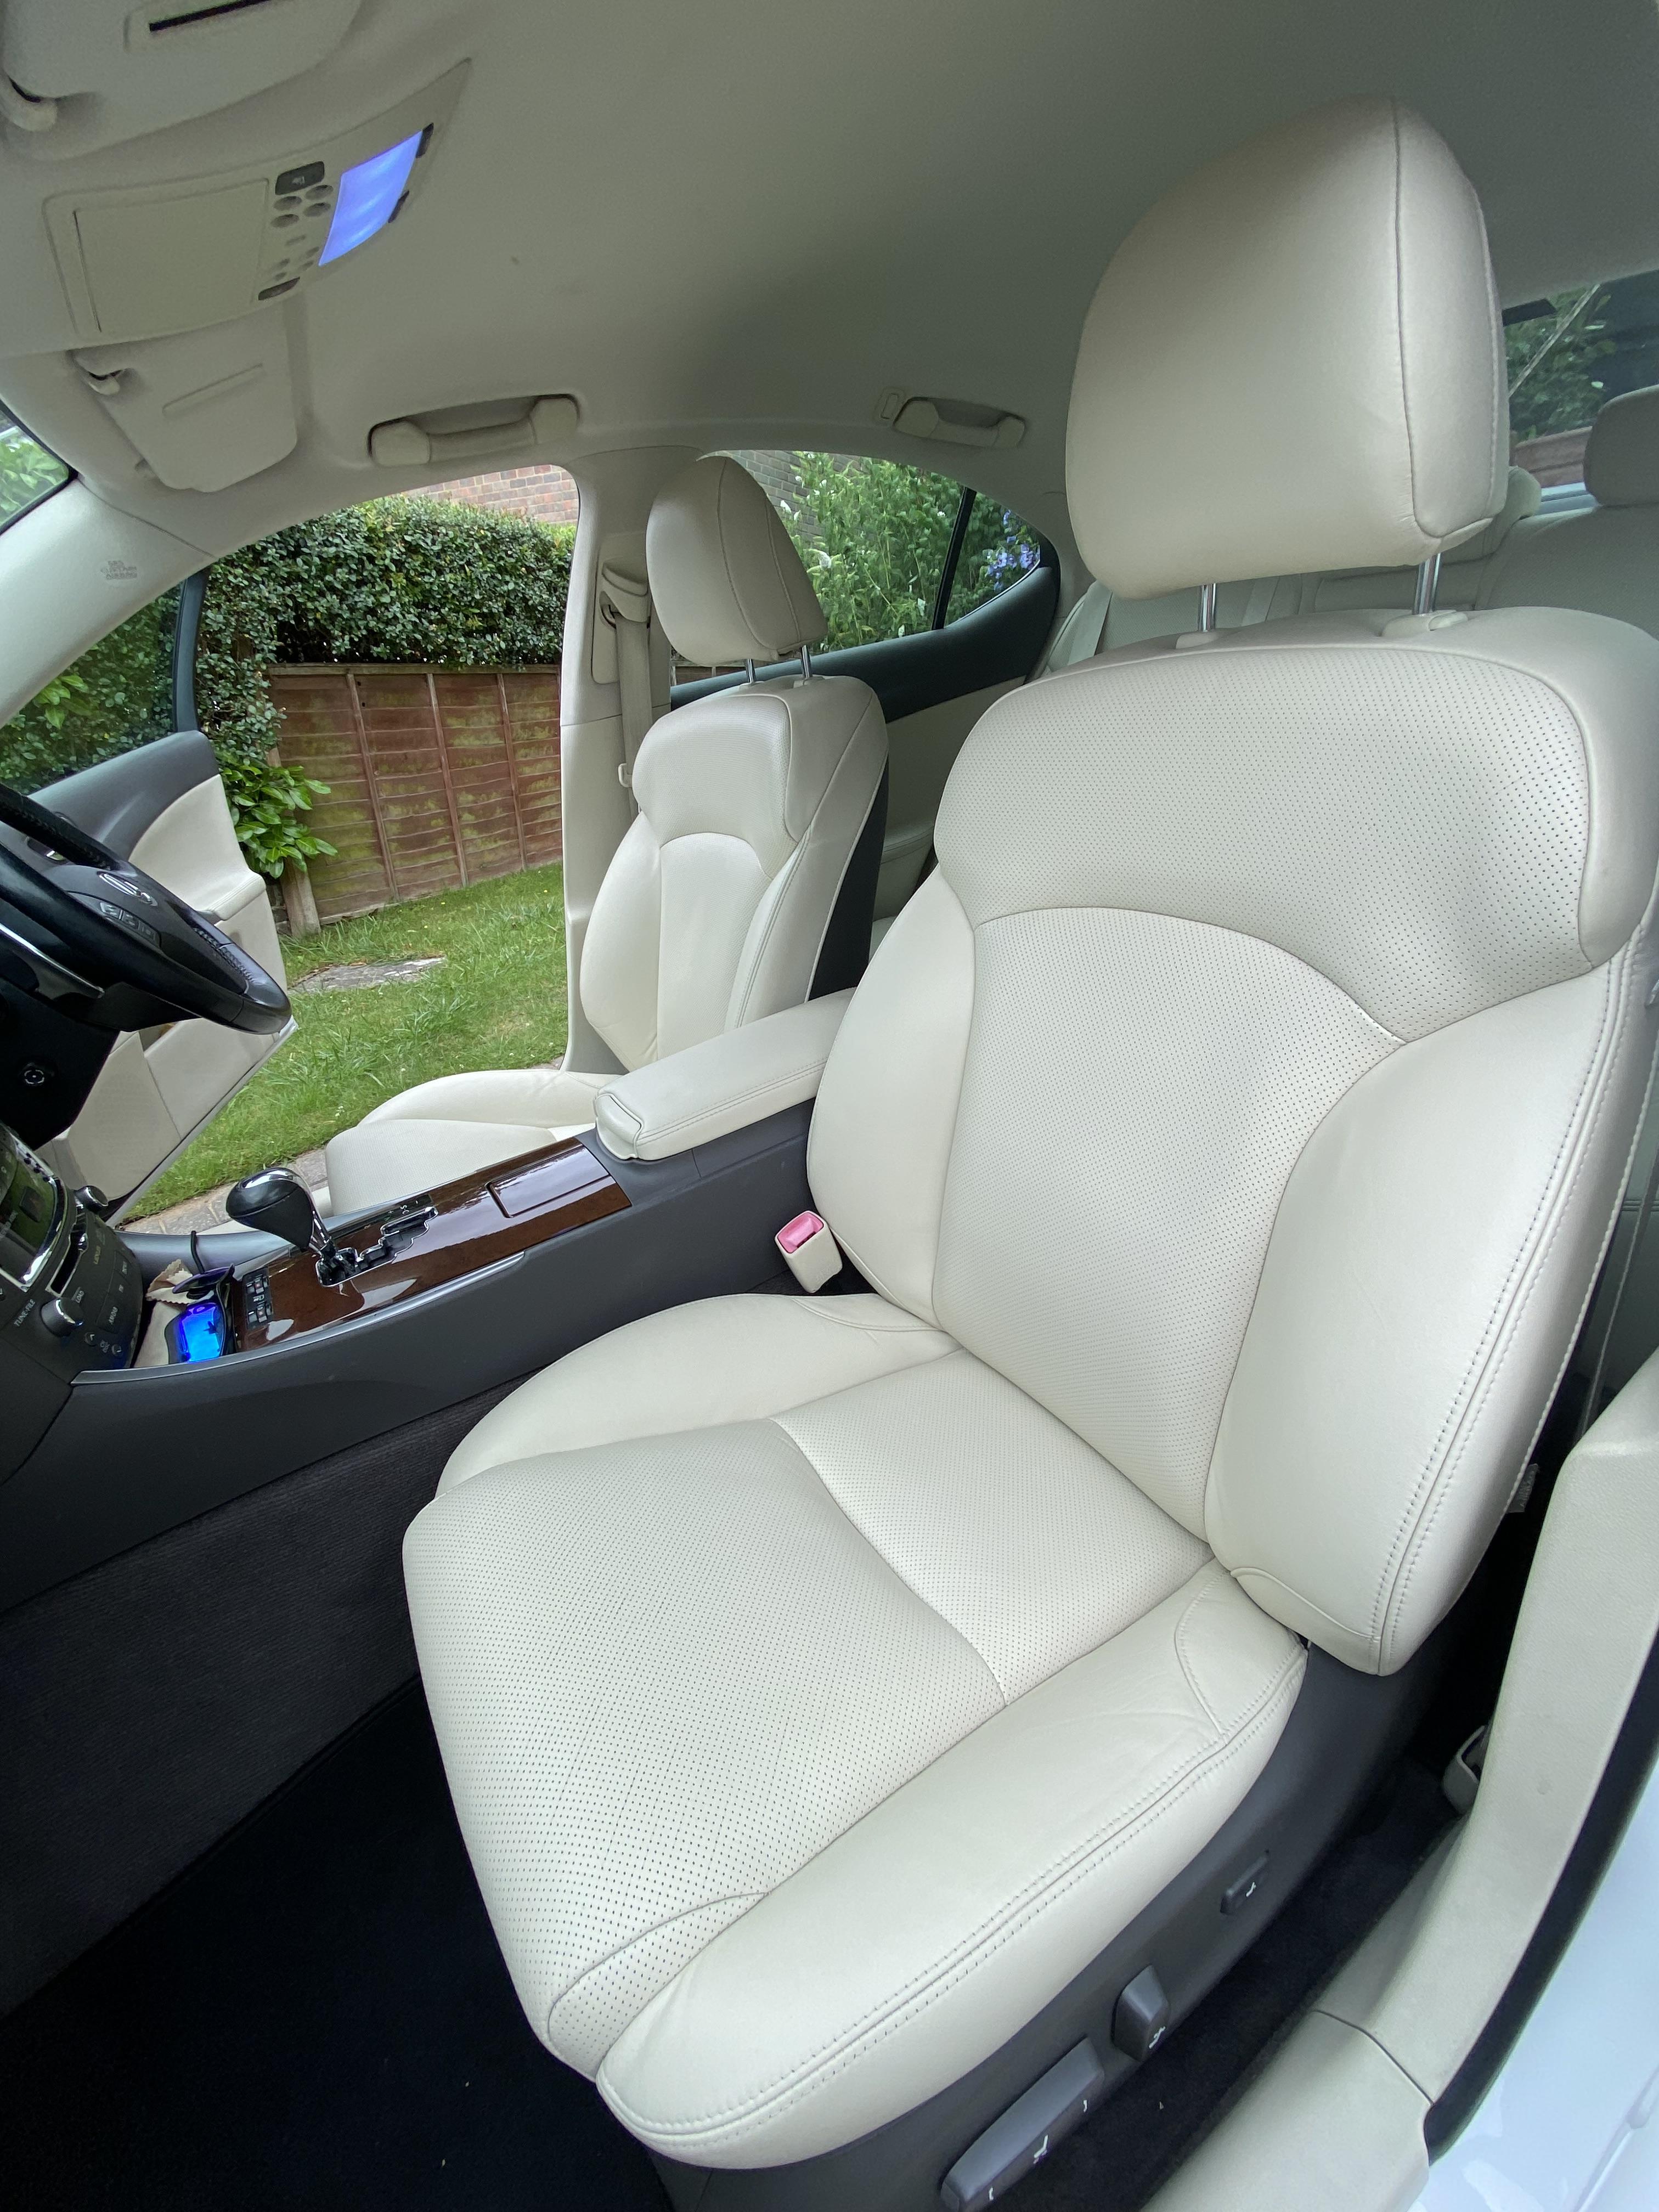
Passenger seat and armrest done ... driver's seat untouched
Everything back in the car
I am very pleased with the results and very pleasantly surprised at the flexibility of the fillers and finishes. I have been poking and prodding after 24 hrs and it’s all very impressive. My only gripe would be that FC don't supply enough crosslinker for the amount of top finish supplied at 8:1 mix!! Which to me is daft, but they claim the pack is based on 250ml ... but I have 500 ml? ... and we go round in circles on the phone getting absolutely nowhere! That's just poor in my book.
How long did it take? Firstly, I’m retired so I have plenty of free time [ I was spraying the last coat at 7pm on Thursday evening!!]. The kit arrived early on Wednesday morning and I finished putting everything back in the car at lunchtime on Friday. Oh and there is enough left over to do the whole exercise again.
The plan now is to leave it for 3 or 4 days to fully cure and then I'll give it a going over with the FC Protection Cream. I've given it a waxy paper de-nib and it all feels really good.
There you go then ... Job done ... chuffed!
I hope that will be of use to anyone considering doing this. Take your time and follow the instructions they are very comprehensive. My only reservation is that airbrush.
-
11
-
2
-
-
6 minutes ago, Bluemarlin said:
I've had good results with the leather colourants from Furniture Clinic. They'll match the leather colour, either from the code (if they have that colour) or a small leather sample, I cut off a piece of excess from the headrest. With just some cracks the seats came up like new.
That’s exactly what I’m doing right now. The only place I could find a sample was tucked up inside a headrest.
Awaiting delivery at the mo’ 🙂
-
I’m just about to enter that very route.
2010 IS250 with Ivory Leather. Not cracking as such but wear and scuffing of the bolsters and centre armrest. I’ve ordered the kit and have researched removal of various bits. The armrest lid is removed and prepped in readiness.I’ll take some photos as I go and hopefully will get a good result …. fingers crossed. If all works out I’ll try and do a detailed write up of the procedure.
-
2
-
-
Good point, if you don’t have HID headlights you won’t have levellers. I always fall into the trap of thinking they all had HID … sorry.
I’ll get my coat 😁
-
-
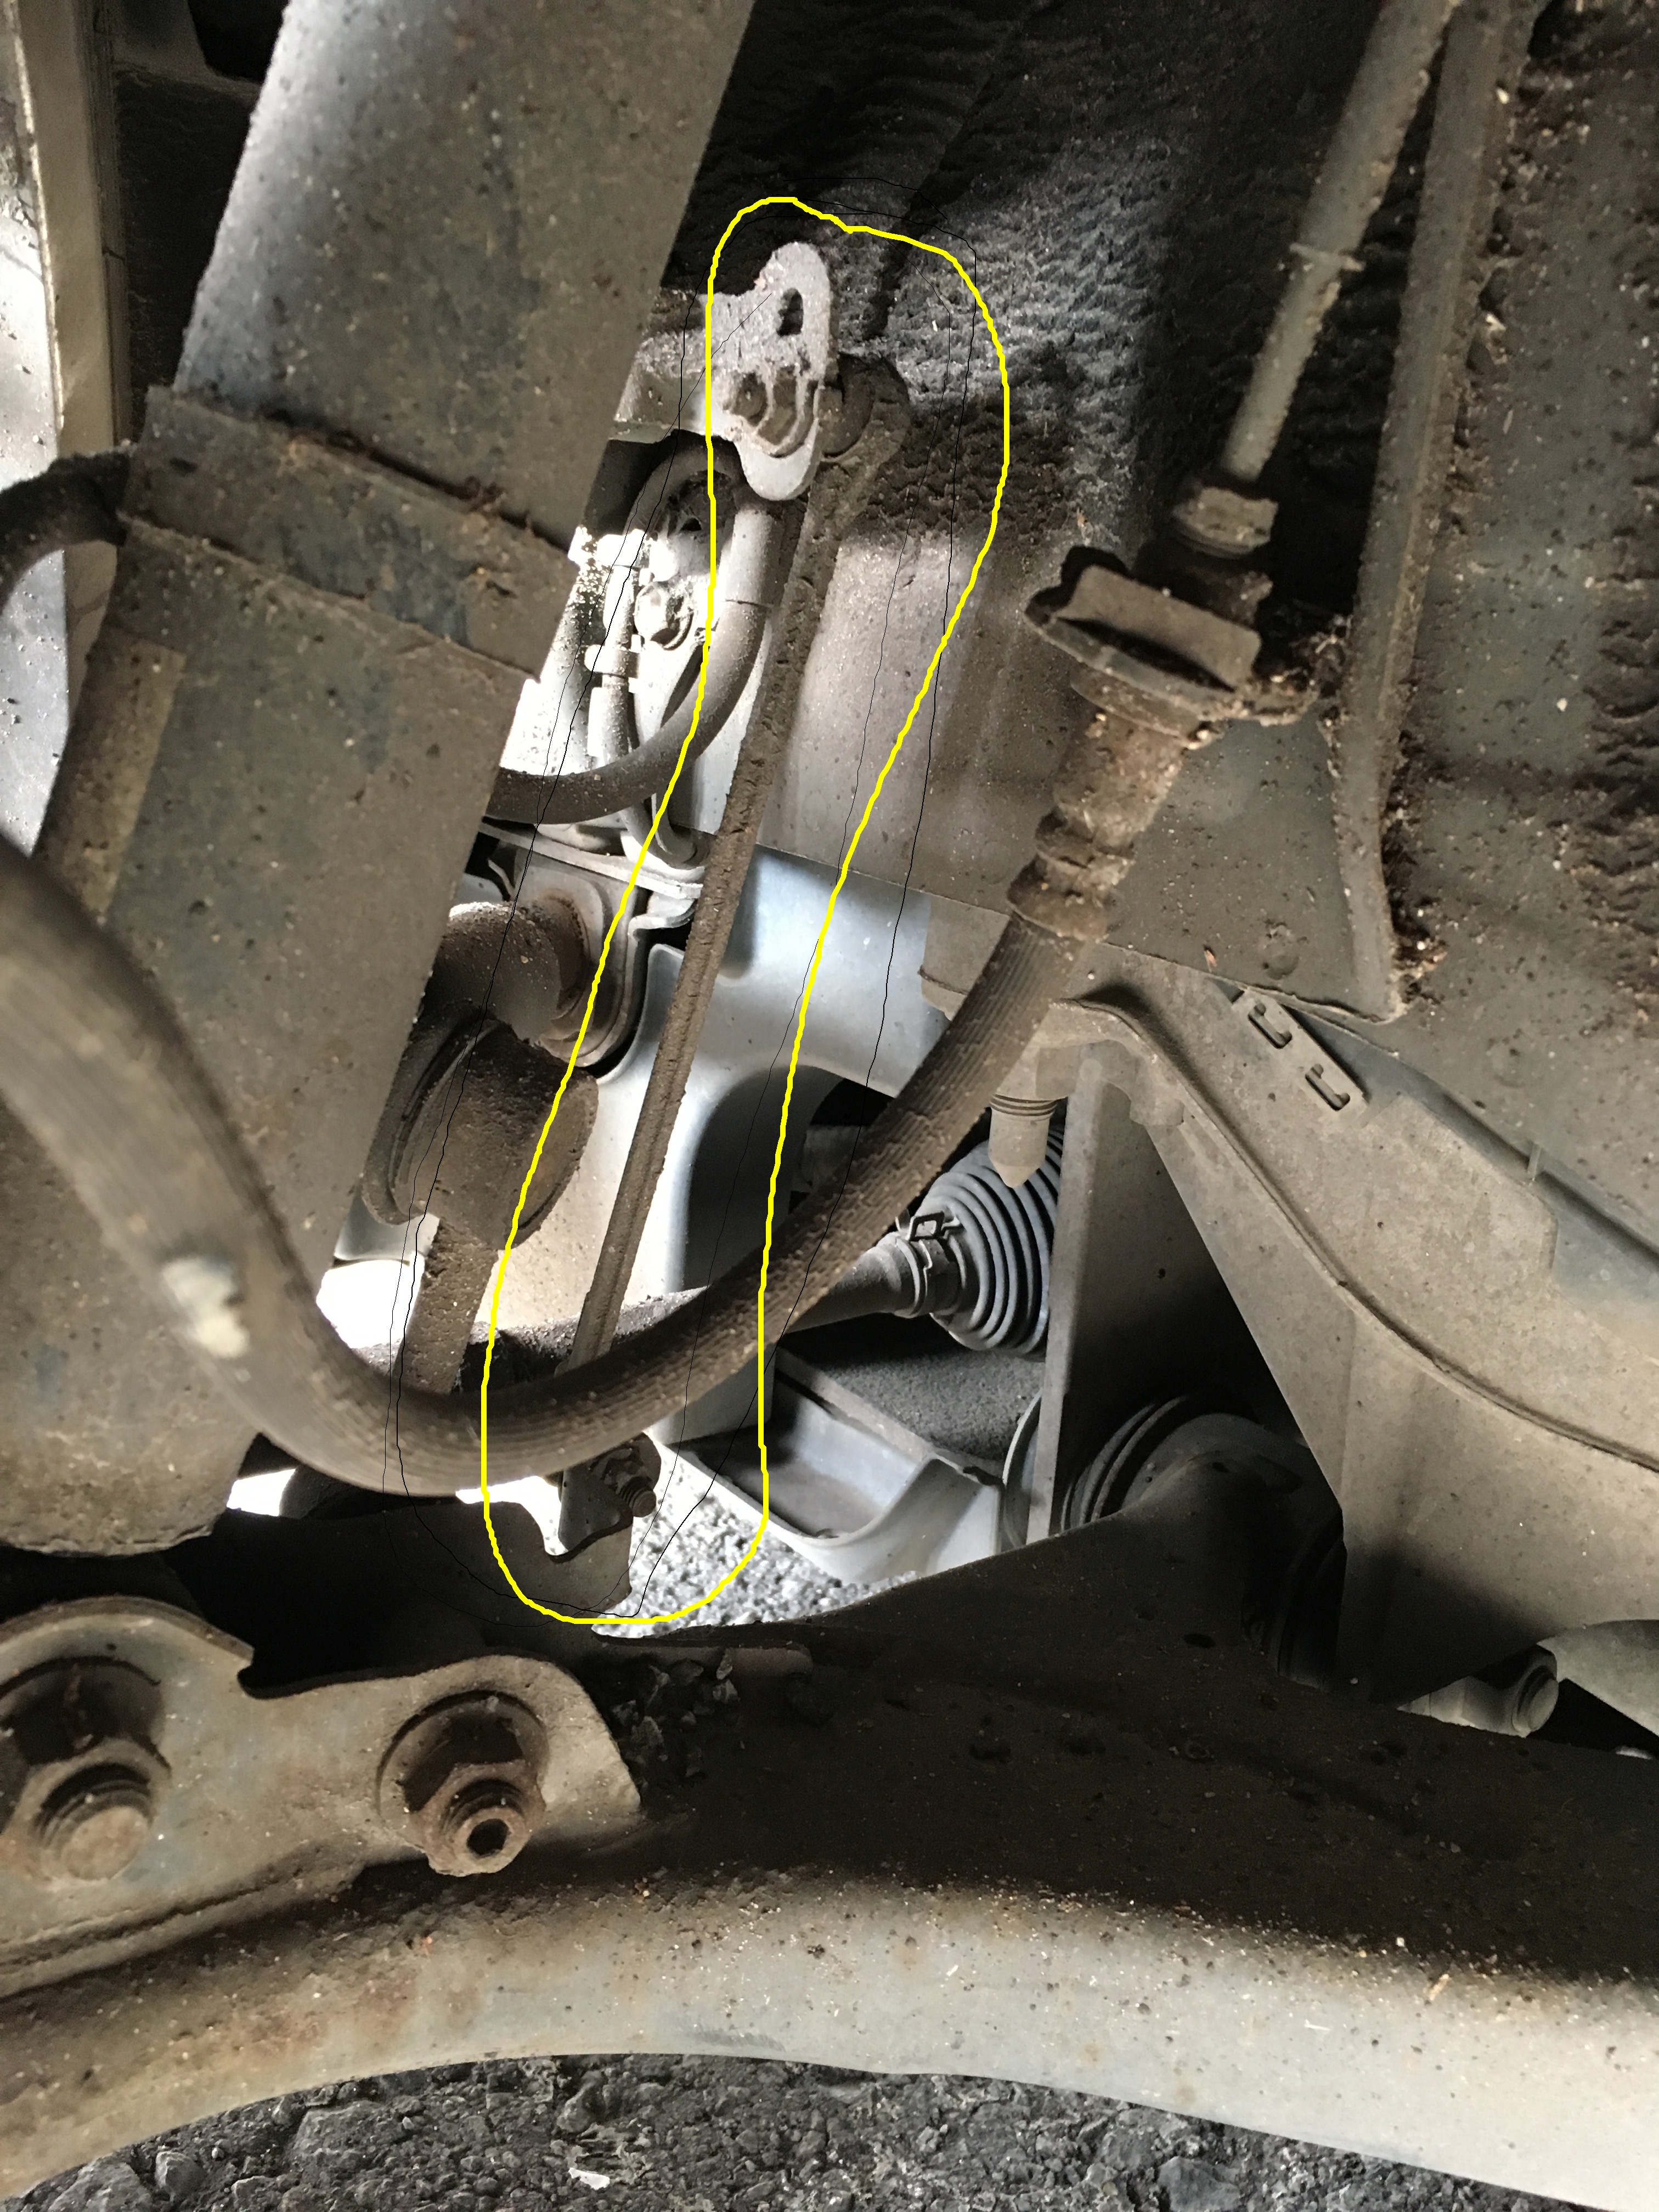
Just a thought, have you checked the headlight levelling sensor. On the front it’s located in the passenger side front wheel arch. There may be a broken arm there … it’s about 10” or so long.
A sudden impact just may have snapped the arm linkage. -
Gosh, that puts a lot of things in perspective.
Extremely glad to hear you are all OK, so to speak. That will take some time to come to terms with for all of you.
I hope you can find another 250 that you like. They are exceedingly good motors IMHO.
Wishing you all the best and a speedy recovery.
-
1
-
-
4 hours ago, Lex_utor said:
Wow. This sounds scary. How common is this/these issues?
If that happened to my car I would be at a total loss, considering how much it would cost to have it put right and the time or even finding out the problem. But I have invested too much in the car at this point to just drop it.
But electric/electronic problems scare me. Specially that my car seems to do some funky stuff related to that sometimes. Like now I can't open any windows from the driver's door, apart from the driver's window. But the universal lock is not ON. I figured maybe a fuse. But didn't look yet. But I had a couple of electronic niggles along the way. So the topic in this thread scares me. 😳
Take a look here
-
1
-
-
The Ring charger and leads was about £45
-
1
-
-
I think Len is on the right track with this.
My wife and I both retired a while back and both cars were no longer being used on a daily basis.We first encountered the problem as we moved into the winter months. Both batteries are reasonably new (2-3 years old). Came out one morning to take out Sal’s mx5 and the Battery was pretty dead. Once I’d thought about it I was aware we had not been out in the mx5 for nearly three weeks! I put my old school charger on it and got it going in a short while.
Then I got myself a new smart charger. Mine was a Ring model and very good it is too. I have a permanent attachment to each Battery on each car. So I can then connect up to each Battery ( one at a time ) very quickly with a fly lead and maintain them in tip top condition. This model, as pretty much all smart chargers do, has a conditioning program within the charge sequence that, hopefully, will prevent sulphating of the cells within the Battery.
18 months in and both batteries are behaving perfectly. Just been away for a break in Spain and the airport park up was no problem. The trusty Lexus fired up first time.
-
1
-
1
-
-
That's jolly helpful.
Thanks Ahmed 👍
-
1
-
-
Nice one Ahmed.
Have ordered a pair.
Hopefully pop them on before our French trip. 🙂👍
-
1
-
-
Each to their own I guess.
I have always used Red Rubber Grease for the slide pins. You can find it most places as 'Toyota Red Rubber Grease'. I found nothing else worked as well over time. You don't want the grease you use to have an adverse effect on the rubber boot on the slide pin.
For the pad shims and piston to shim contact area I use Copper Grease.
Having said that I do re-grease and check them every year. In fact I've just done them on wifey's MX5
-
2
-


Staining under wing mirror, corroded aluminium?
in Lexus IS 250 / Lexus IS 250C Club / Lexus IS 220D & IS 200D Club
Posted
This should help you with removing the door card. It's not too difficult really.
I think I would try a good wire brushing of the powdery surface followed by a careful application of etching primer from a rattle can and then a top coat to lock it in