

Description
I purchasd a set of really goosed Aero 18" alloys from the web a few weeks ago with the intention of refurbing them myself - i thought how hard can it be. Tyres on these were excellent but the alloy wheels themselves were all in a very bad way full of bubbles from the corroding alloy under the paint.
I have documented how i done this below - to be honest - i am not a mechanic at all and i would class this as a fairly easy repair - just a bit of time and hard work and a few beers while you are doing it.! - pictures of the stages are below ...
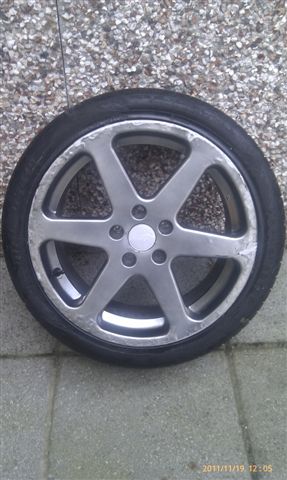
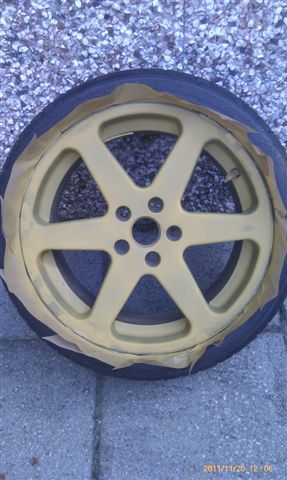
This is a picture of the wheel as i recieved it - no work done to it yet but you can see the state the alloy is in - personally i would not let my wheels to get into this state in the first place..
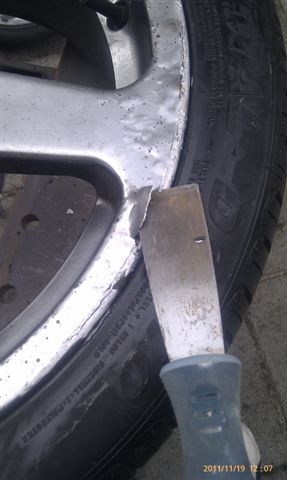
First job i took to was to remove all the old paint and laquer that had bubbled - using a paint scraper (sharpened enough to get under the laquer) i scraped all of the bad paint off the wheel leaving the good paint and laquer on. This took roughly 10 minutes per wheel. Being careful not to dig into the alloy although at this stage but it really doesn't matter that much but gives you more work later on - see below
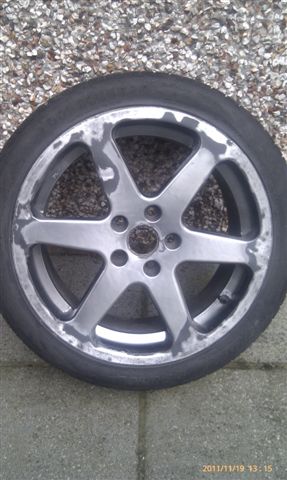
The picture below is after taking all the corrosion off with the scraper
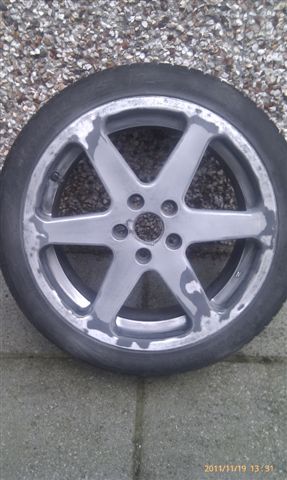
Next job was to give the wheel a really good sanding down to get it smooth - especially to get the edges of the corroded paint that i had just removed smoothed down to the alloy level. This stage is by far the most depressing as it seems that the wheel is totally destroyed after you have done this but stick with it as from this point it gets better. Having got all the wheel sanded down and feeling smooth to the touch and making sure all the bubbled corrosion has gone it is time to move to the next level. - I used course 60 grit paper to do this first sanding and done it by hand so i could judge how much to take off - i thought using a machine would be too aggressive. picture below is after the 60 grit sanding. This took about 20 mins per wheel
Next job was to sand the whole wheel smooth with fine sanding paper for which i used 120 grit - making sure i got the whole wheel smooth and again i done this by hand to judge how much i was taking off the wheel. this took about 20 mins to to per wheel. picture below is after the wheel had been fine sanded down - this is the final process for the sanding so take some time in putting that bit more effort into getting it smooth.
Next - i cleaned the wheel with a soft brush making sure it was free of dust - i masked the tyre with tape - didn't go to town and do the whole tyre as i thought with what i put on that would be enough. I coated the alloy with filler primer - a thin coat at first as i thought this would show any blemished that needed to be sanded down a bit more or ones i had missed. pic below of first coat.
With this first coat dry - after about 20 mins i inspected the alloy for bits i had missed and could not see any glaringly bad bits - with the second coat this was again put on as a thin coat and this coat covered all the dark spots that were showing through the first layer of primer. Alloy was looking good at this stage. I dont think it was nessesary but i put a final coat of the fller primer on the wheels as i have enough left to do so and just to make sure i had covered all the blemishes
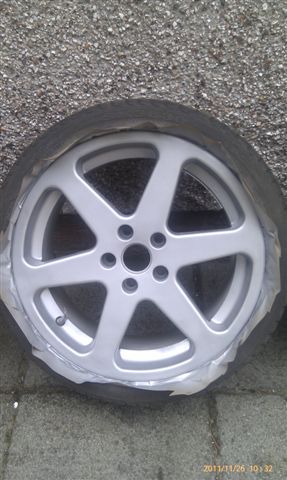
The last primer coat was a standard grey primer - applied as above with 3 thin coats until all of the filler primer color had been covered. I left the wheels for a week and came back to them the following weekend to do the final coats. I gave them a good clean with a soft brush once more - i considered doing a fine sand of them before the painting but decided not to. With the sun out and another botle of beer i started the coats of paint for the wheel - i chose silver as the colour. After applying this colour in again 3 thin layers - leaving each layer to dry for approx 15mins between coats i applied the final laquer - 3 coats of this in a bit of a thicker coat from before and the picture below shows the wheel done.
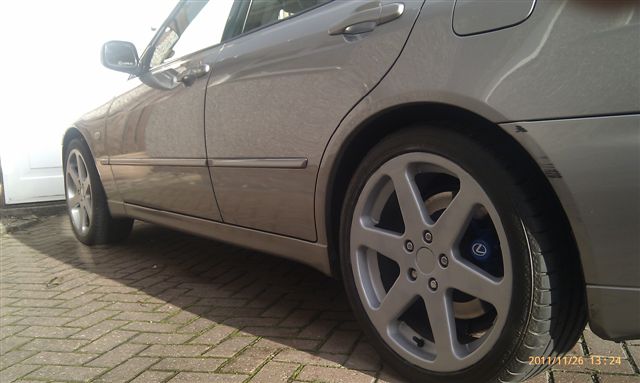
All that was left to do now was to fit on the car and to find some centre caps - i have still to find some so put plain blanks on for now - picture of the wheels on the car is below
Job Done - It took a bit of time and hard work but the outcome was brilliant - there are a couple of areas that you can see an edge on under the paint but to be honest not that obvious - i know they are there so the next time they need a refurb and lets face it they will in a year or so's time then i will get rid of these areas. Other than that a top job and they look spot on on the car - i am happy with the time i spent doing these - took me a few hours - i spend around £20 on paint and around £4 on the beer so overall it was cheaper than the 50 pound per wheel that you would pay to have done in a specialist.

Recommended Comments
Join the conversation
You can post now and register later. If you have an account, sign in now to post with your account.