rob_clio172
-
Posts
366 -
Joined
-
Last visited
-
Days Won
11
Content Type
Profiles
Forums
Events
Store
Gallery
Tutorials
Lexus Owners Club
Gold Membership Discounts
Lexus Owners Club Video
News & Articles
Everything posted by rob_clio172
-
Sorry matey i posted this after seeing just the 1st page!! Still getting use to the forum. MIJ is not far from me, the next 3 pages was very interesting!! What a build, alot of time and effort ploughed into this, love it
-
Great build what a transformation! You are right they are a wolf in sheeps clothing, i bet that sounds amazing now with that exhaust, where in the midlands did you get it done? Headunit install looks good too!
-
Nice to hear of your purchase, what age and mileage is she? Haha yeh sometimes its nice to sit back and watch what people do with cars this is the beauty of the project section. Im still a member on loads of different forums for different make cars and always enjoy reading build threads
-
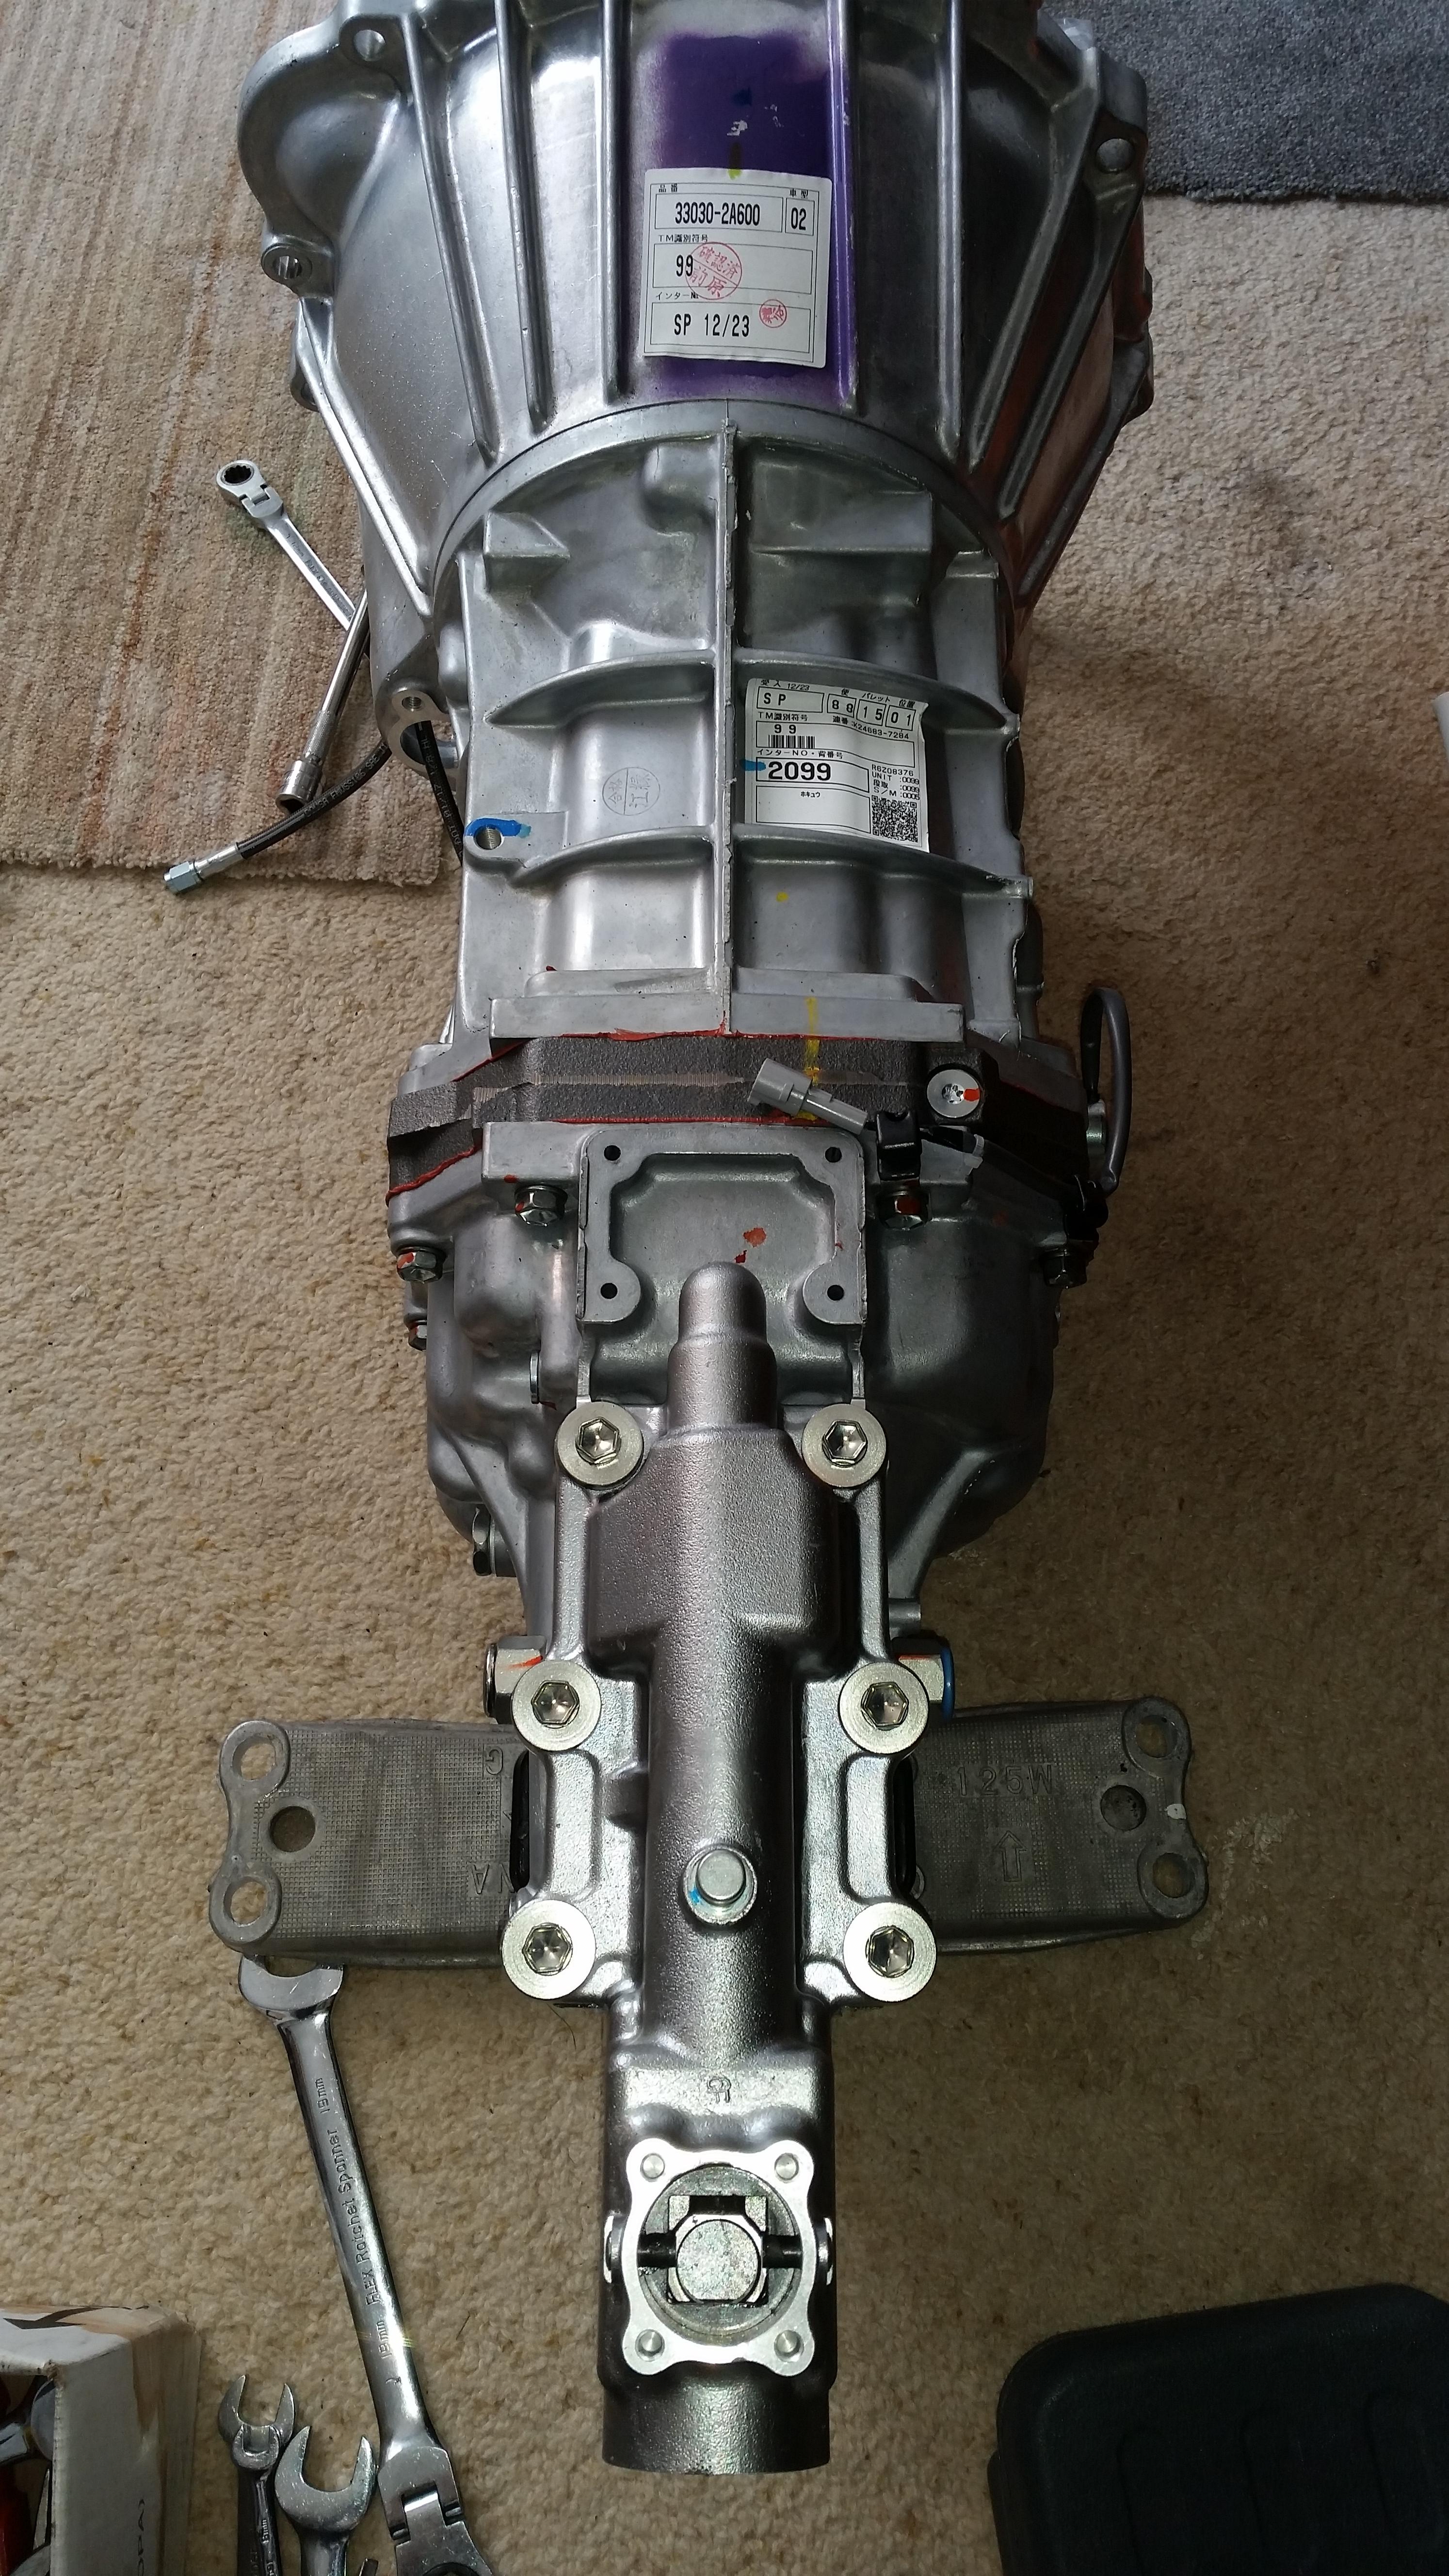
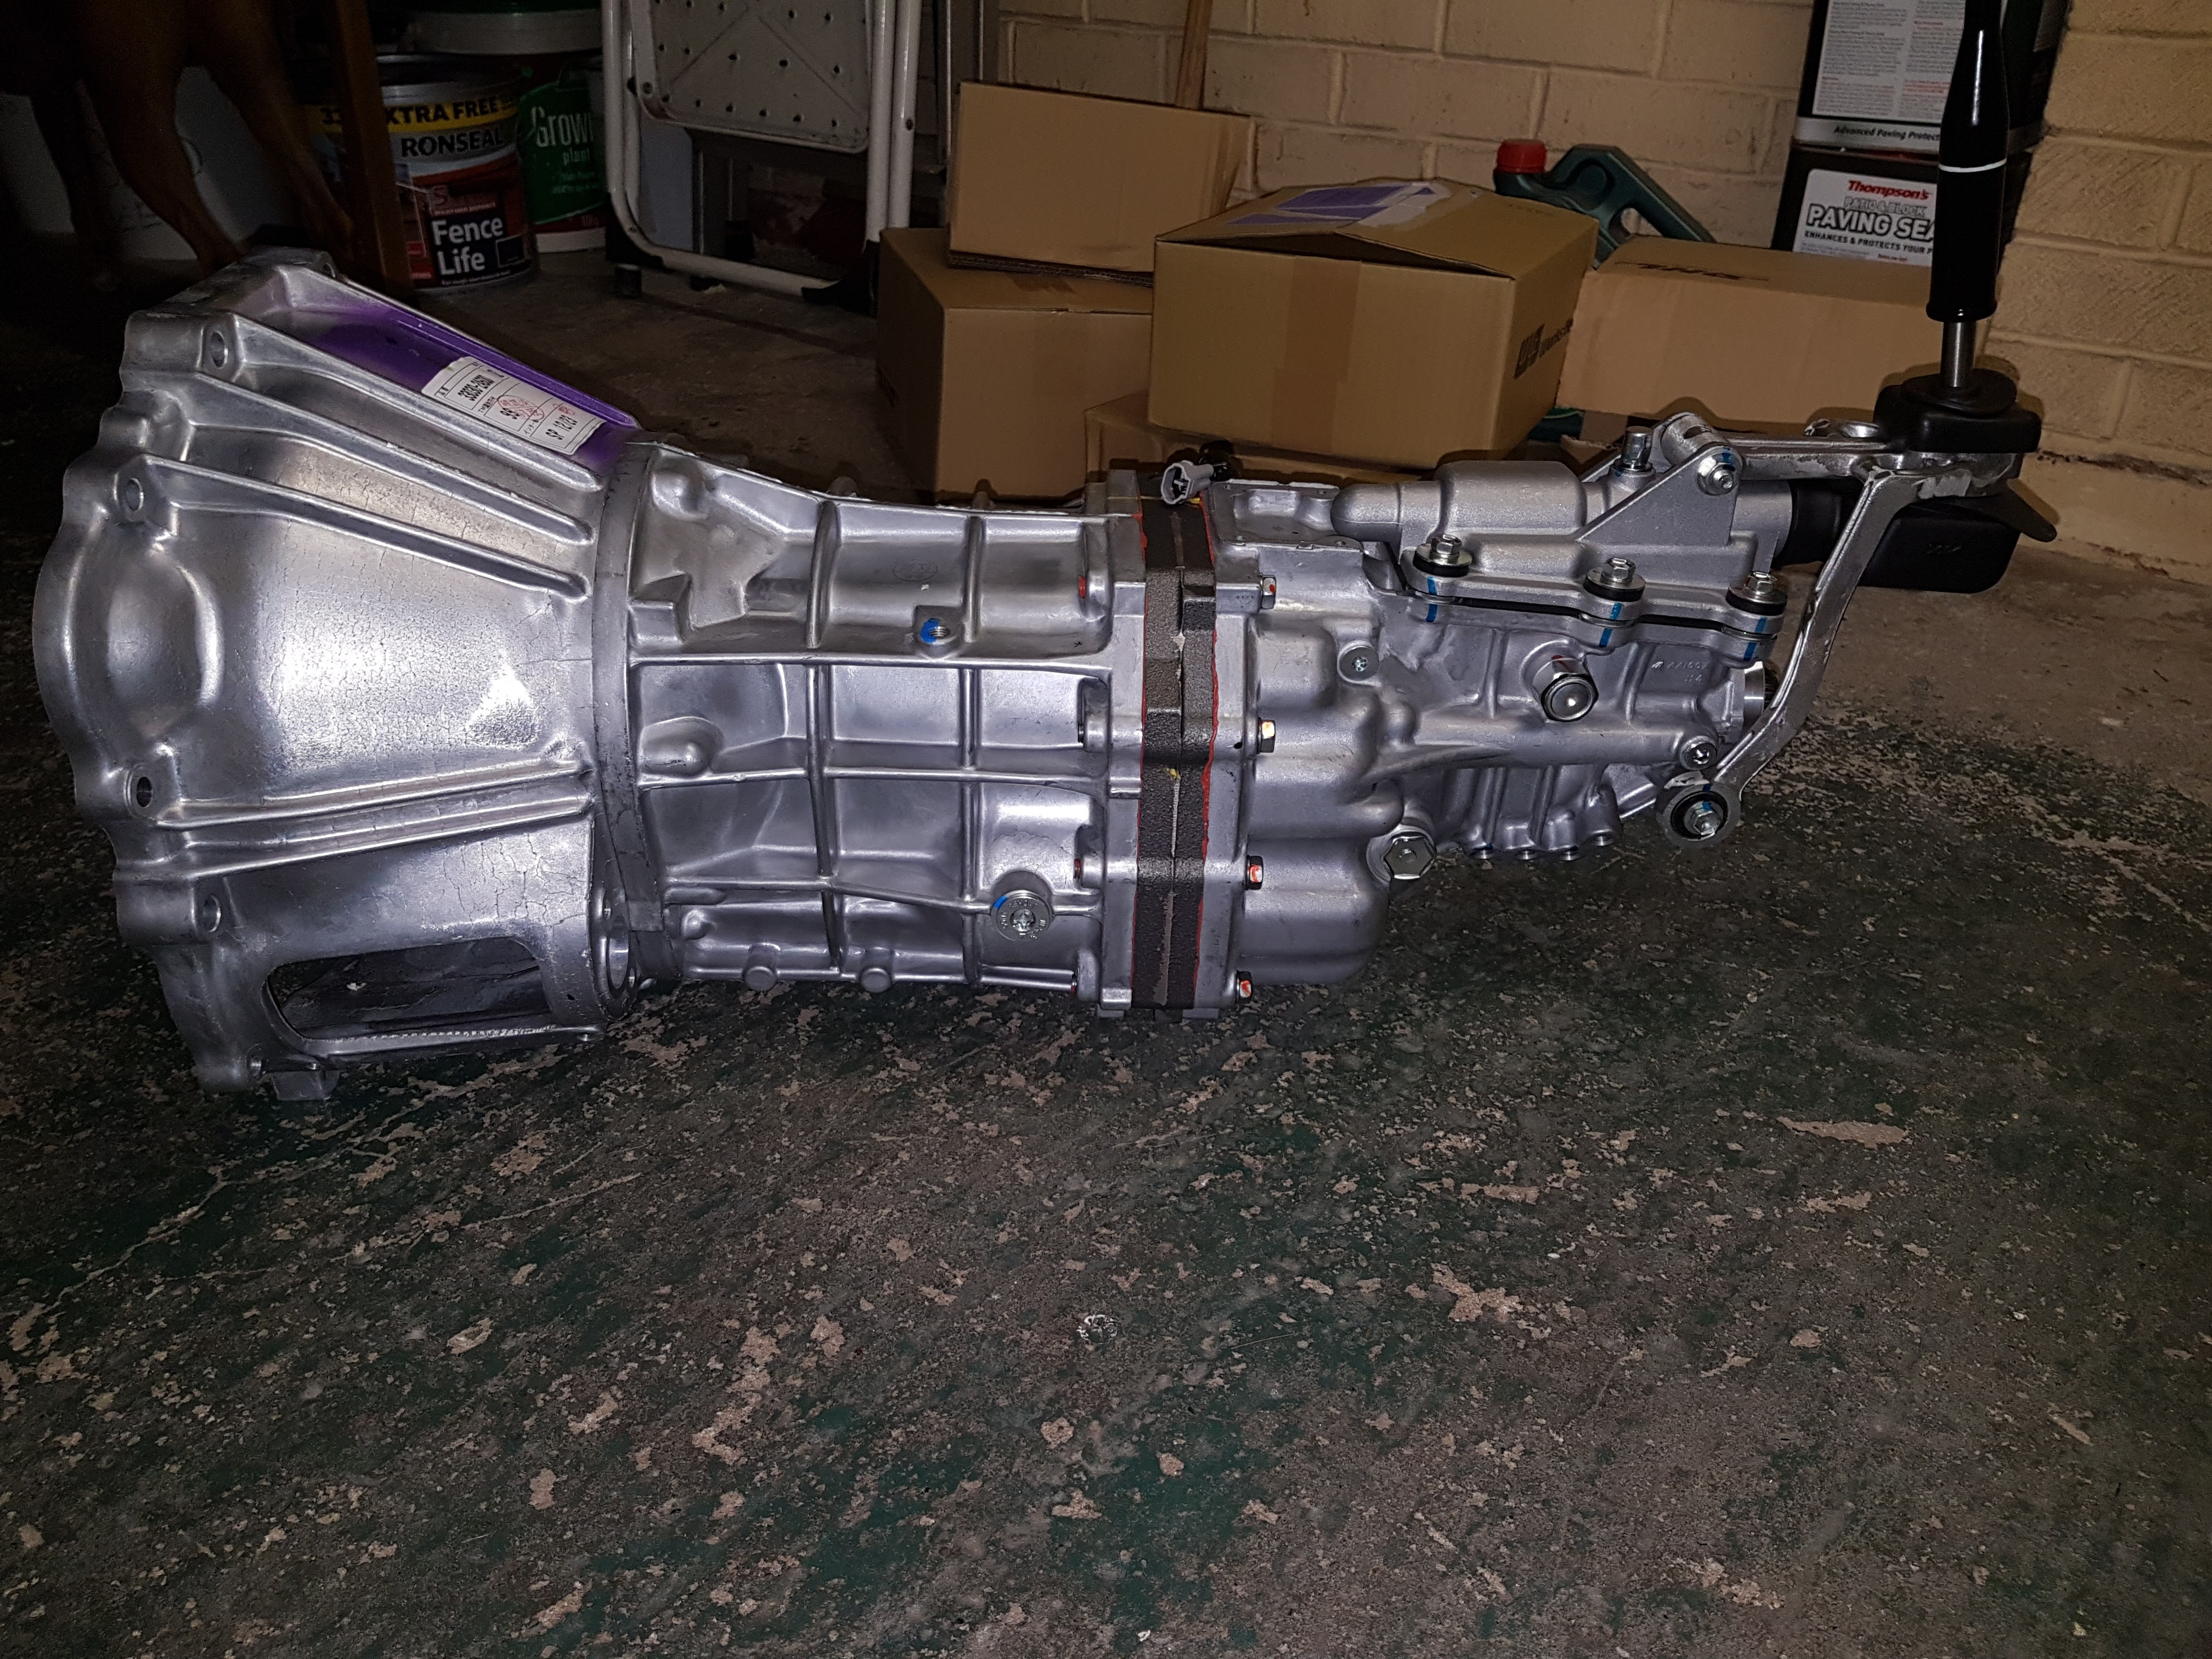
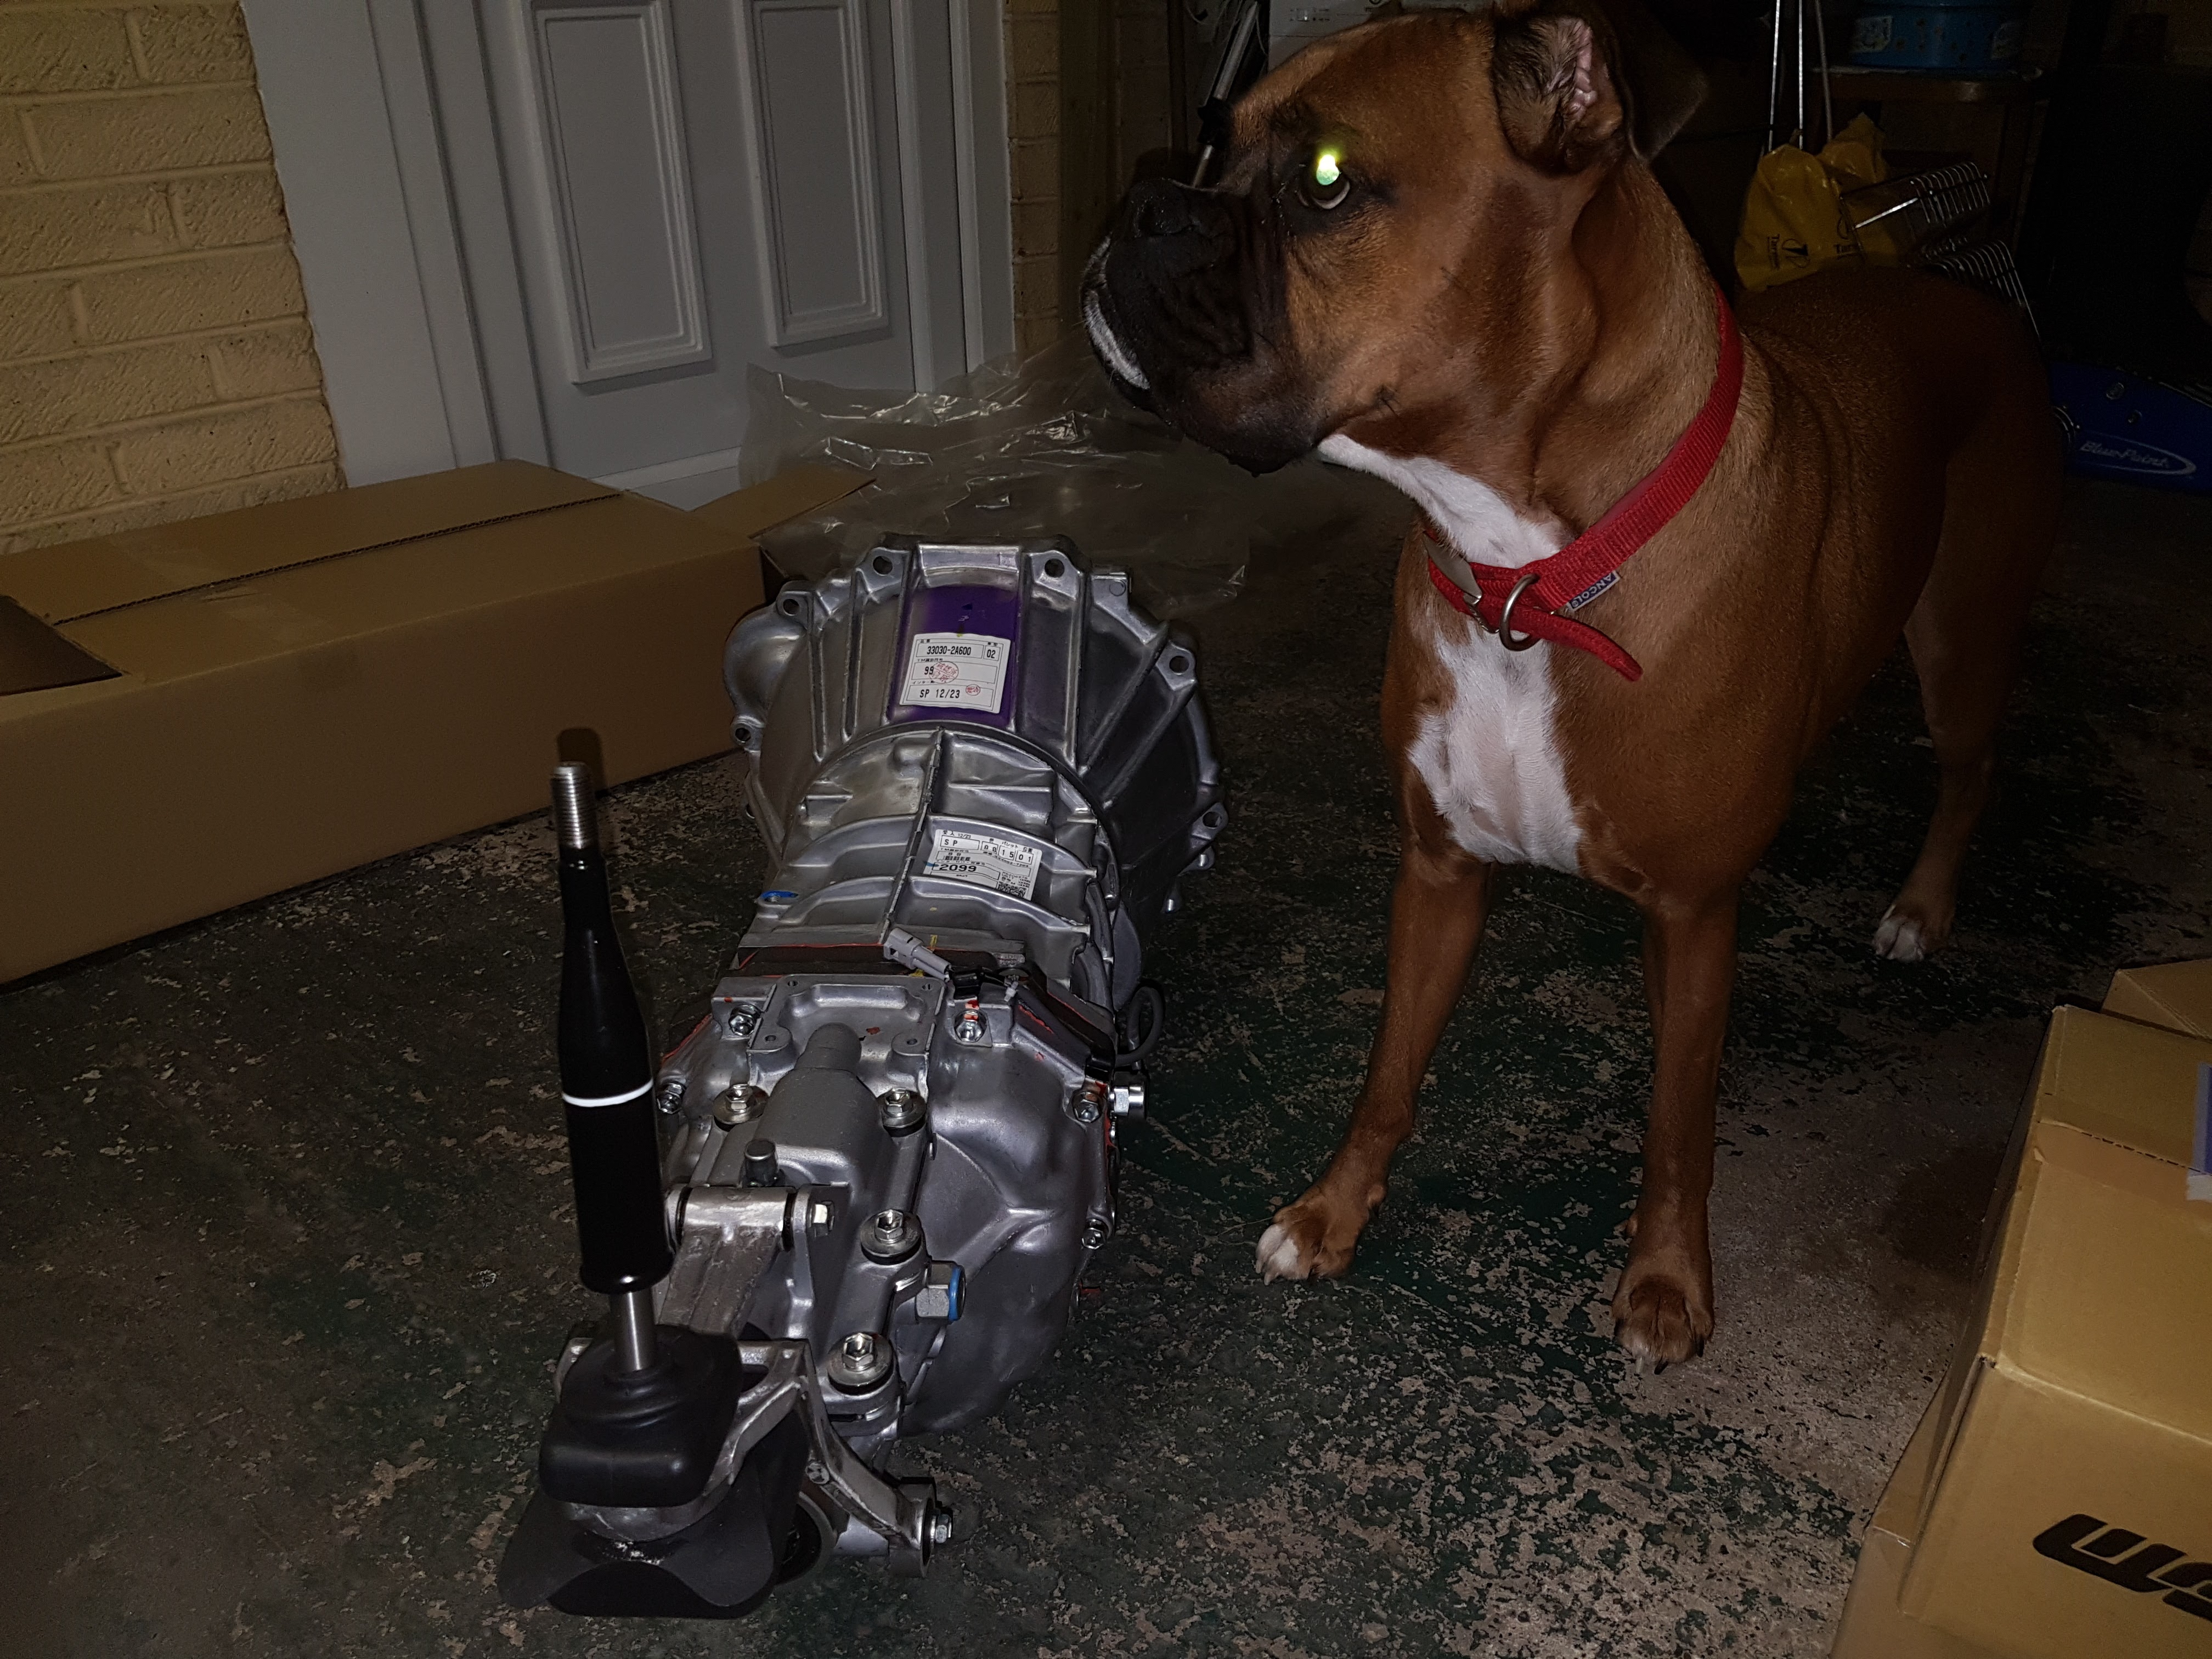
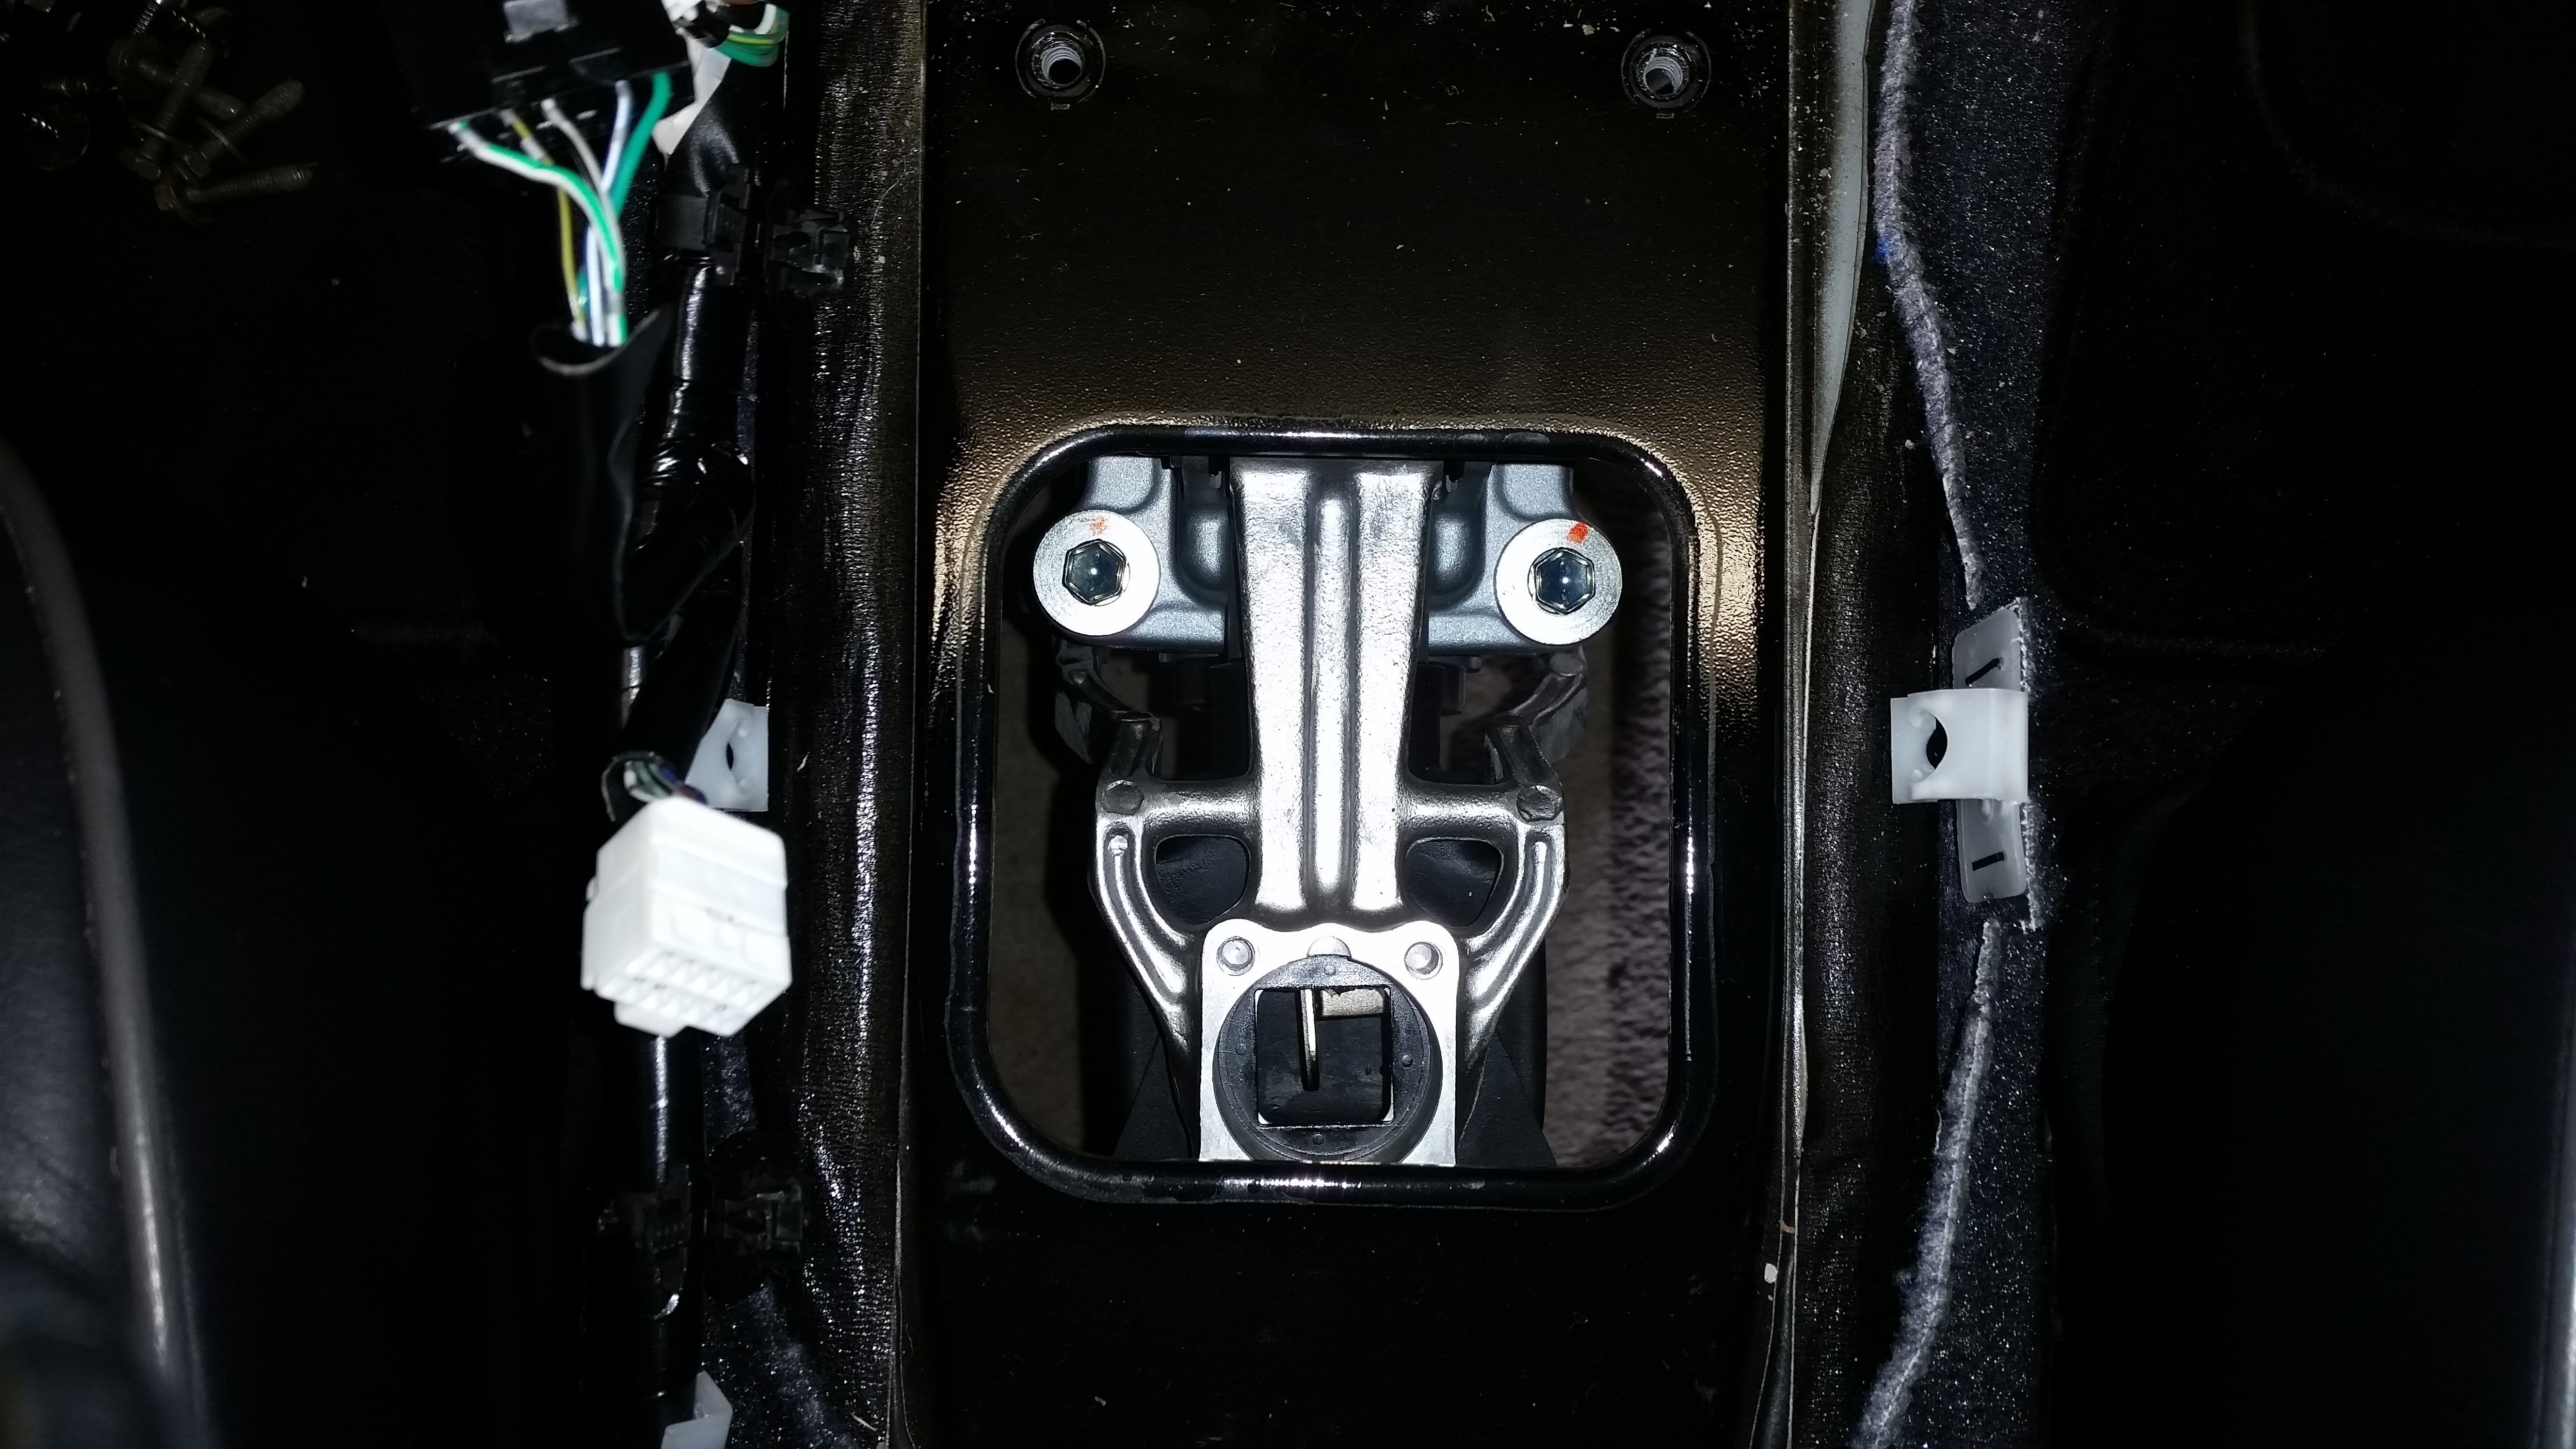
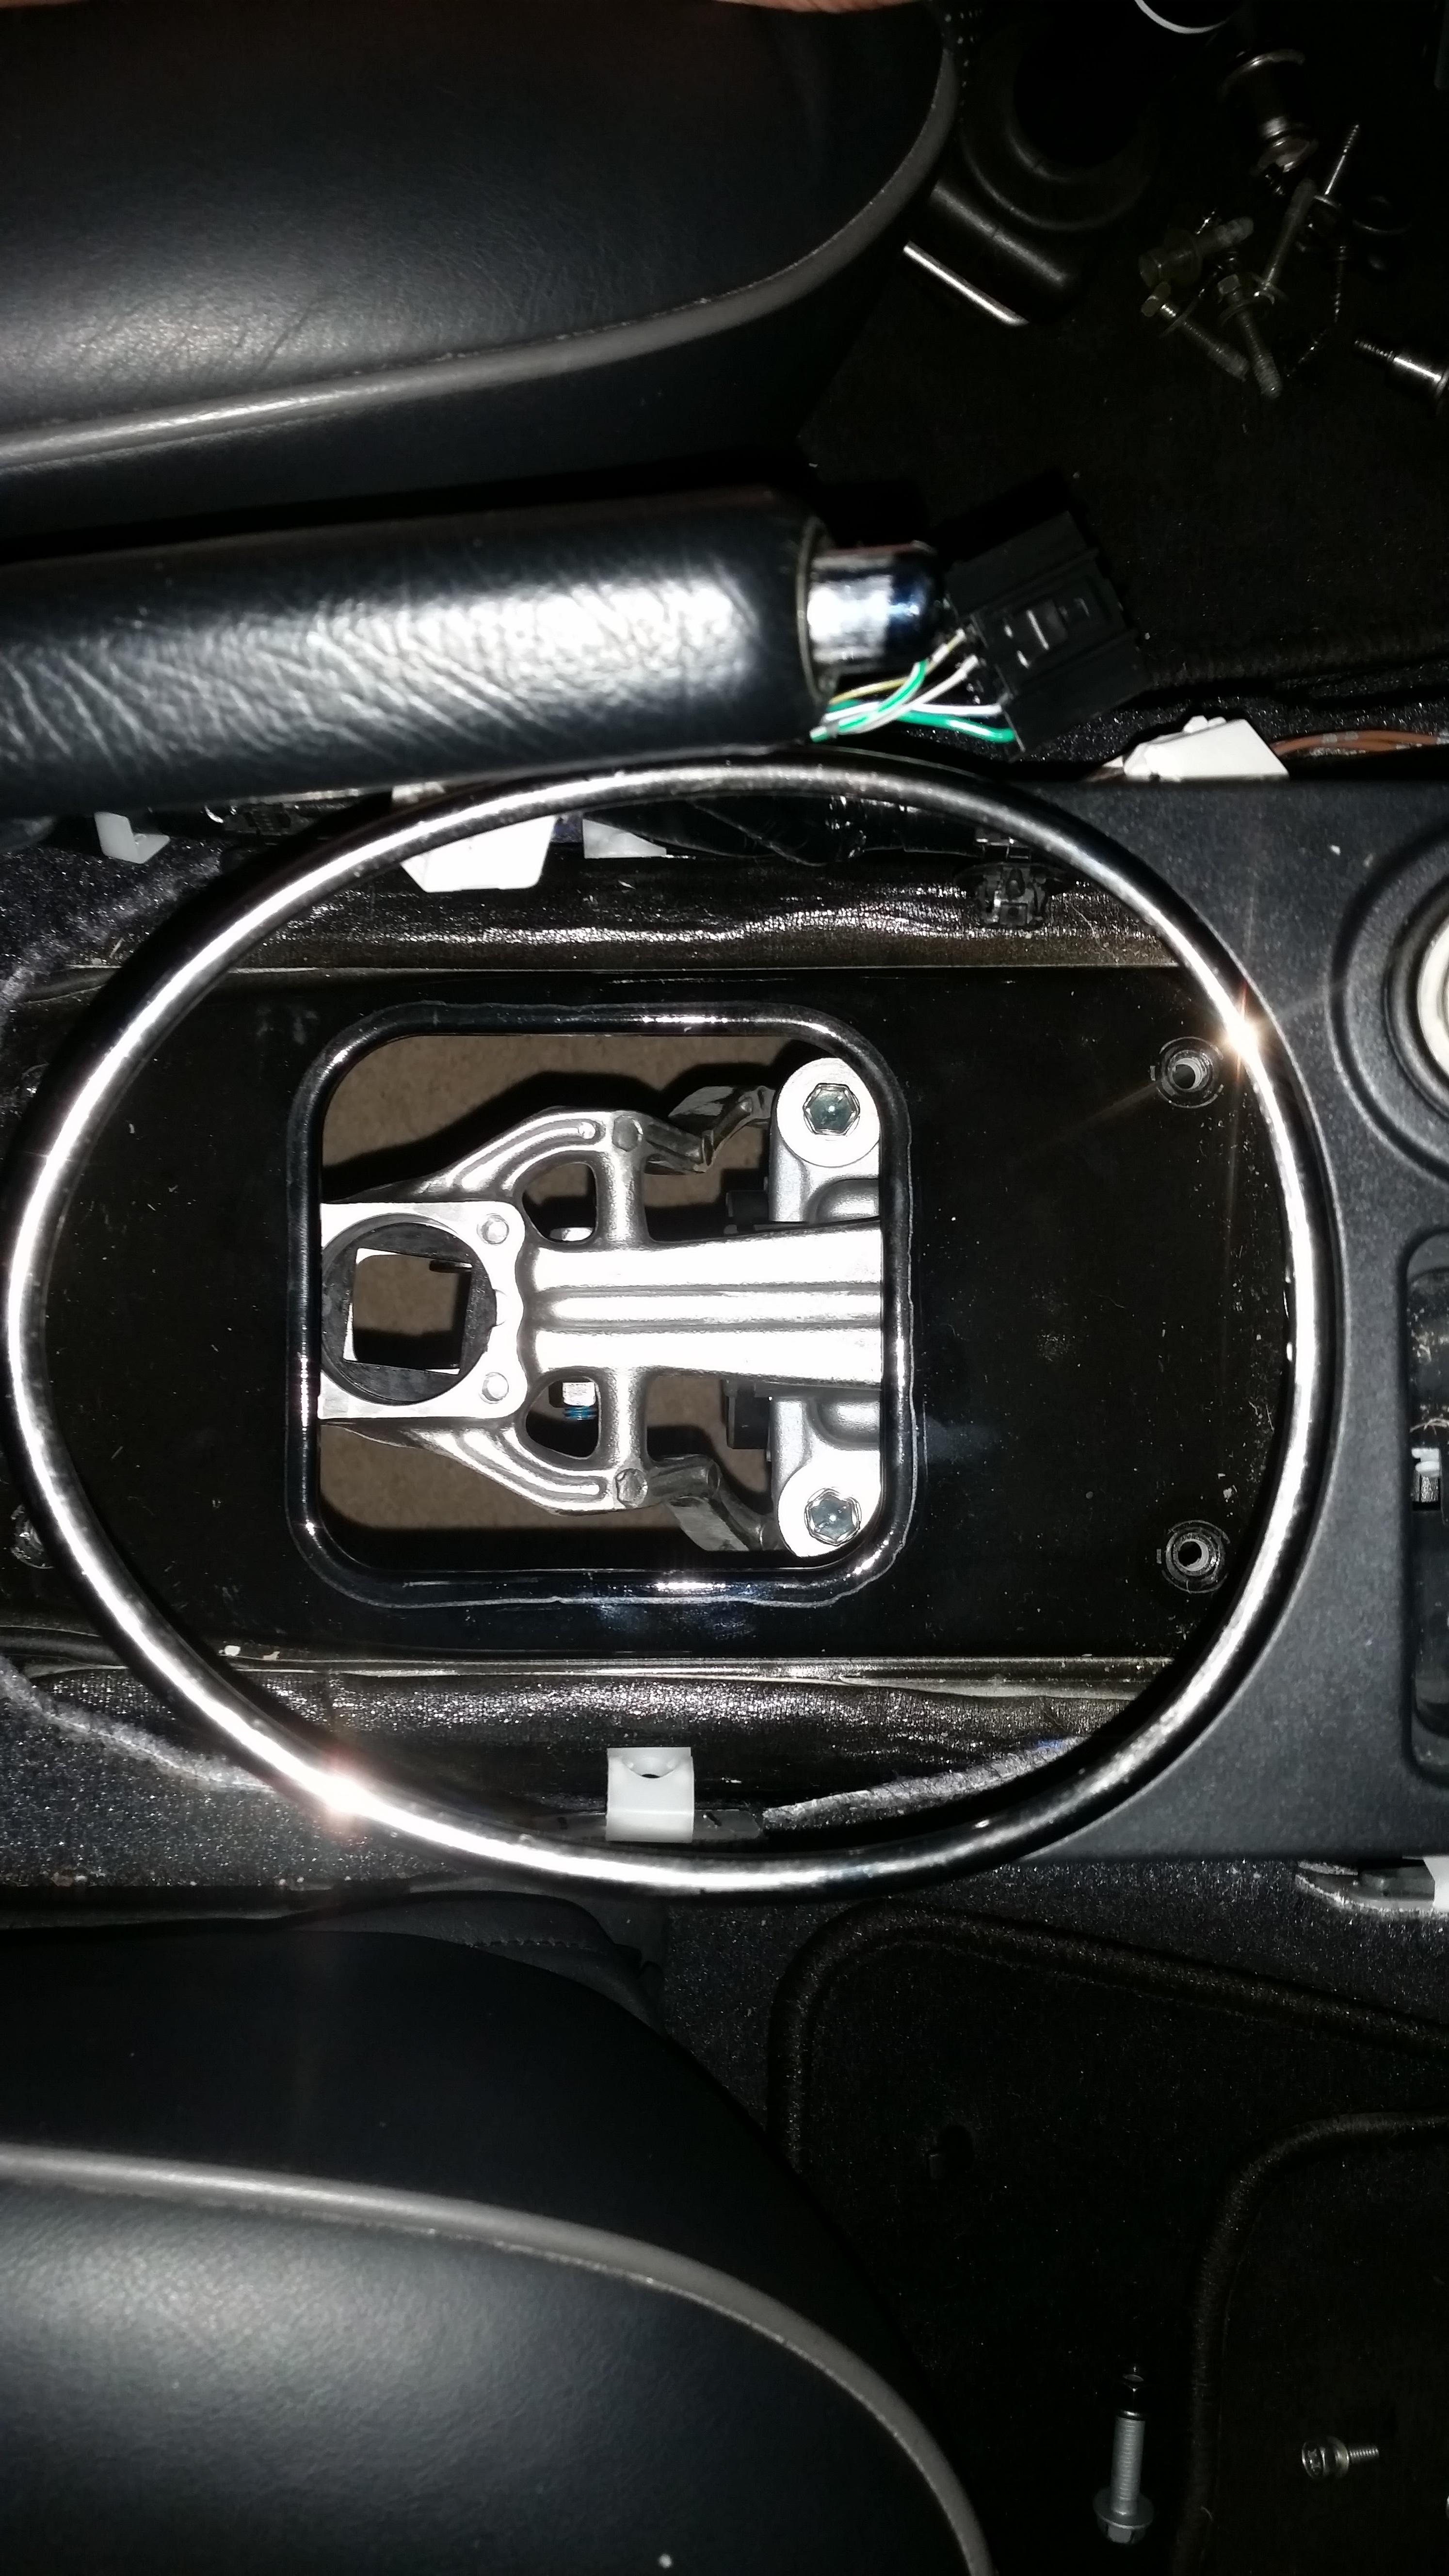
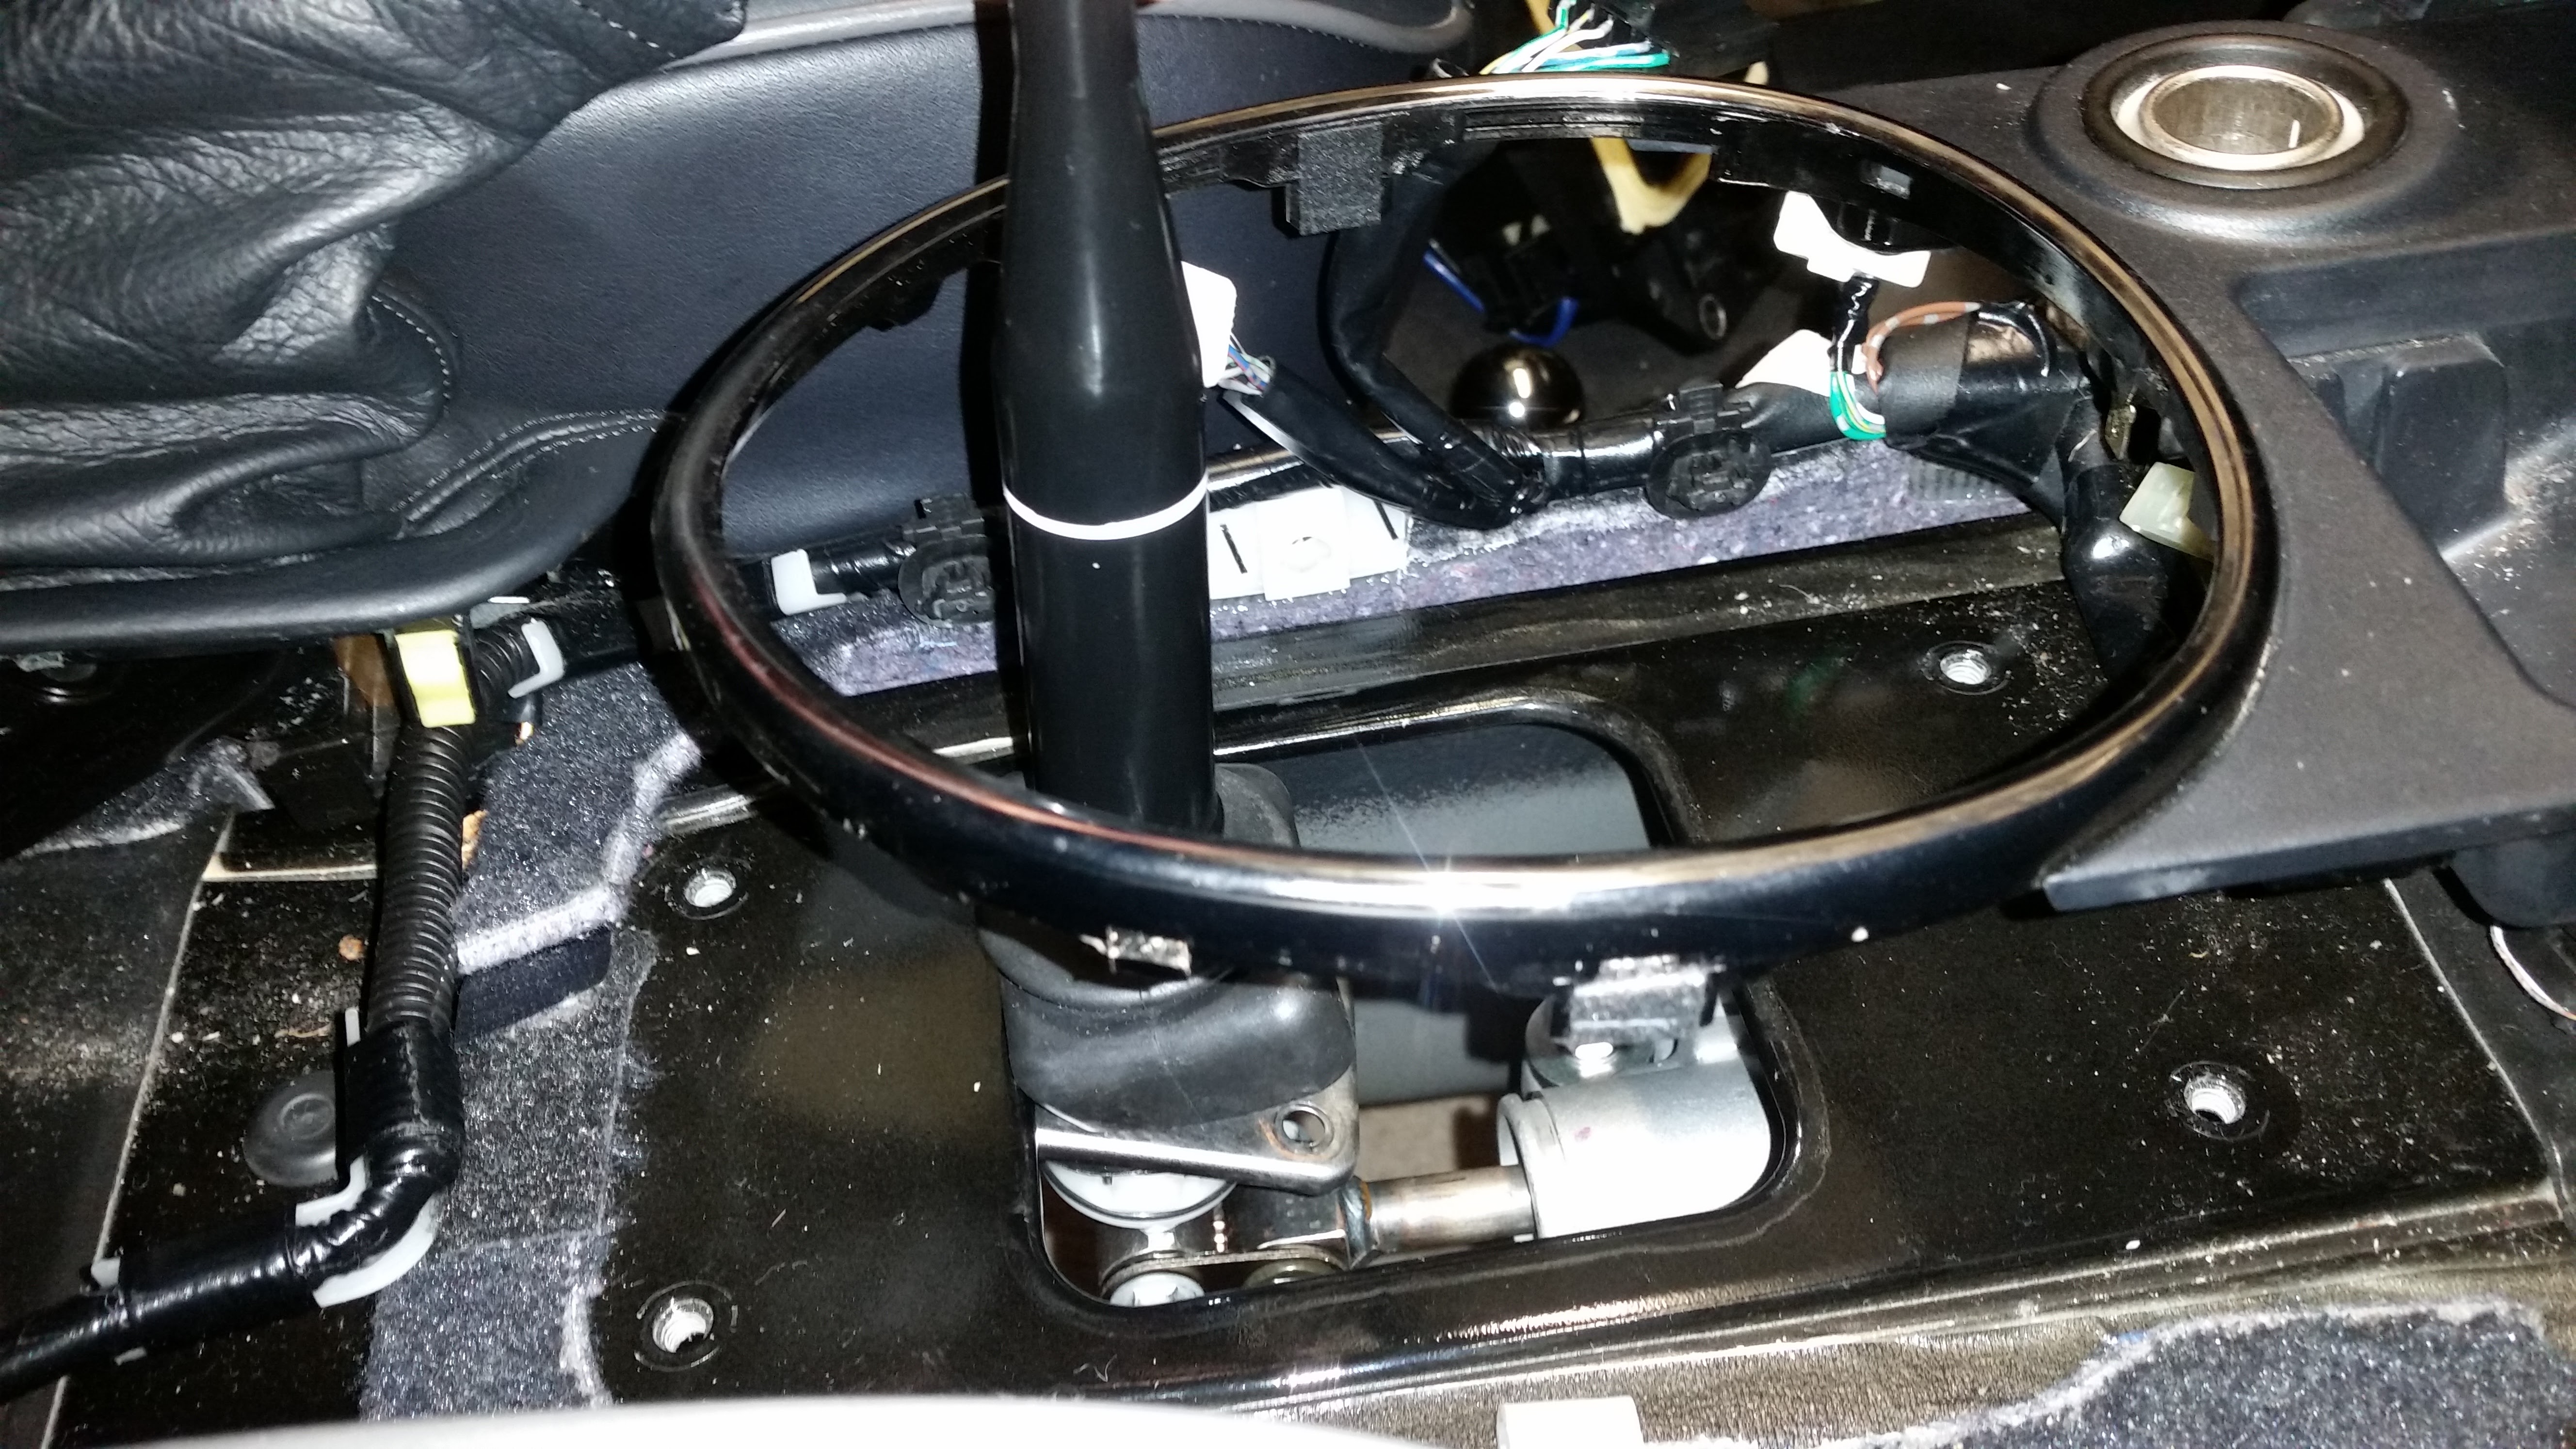
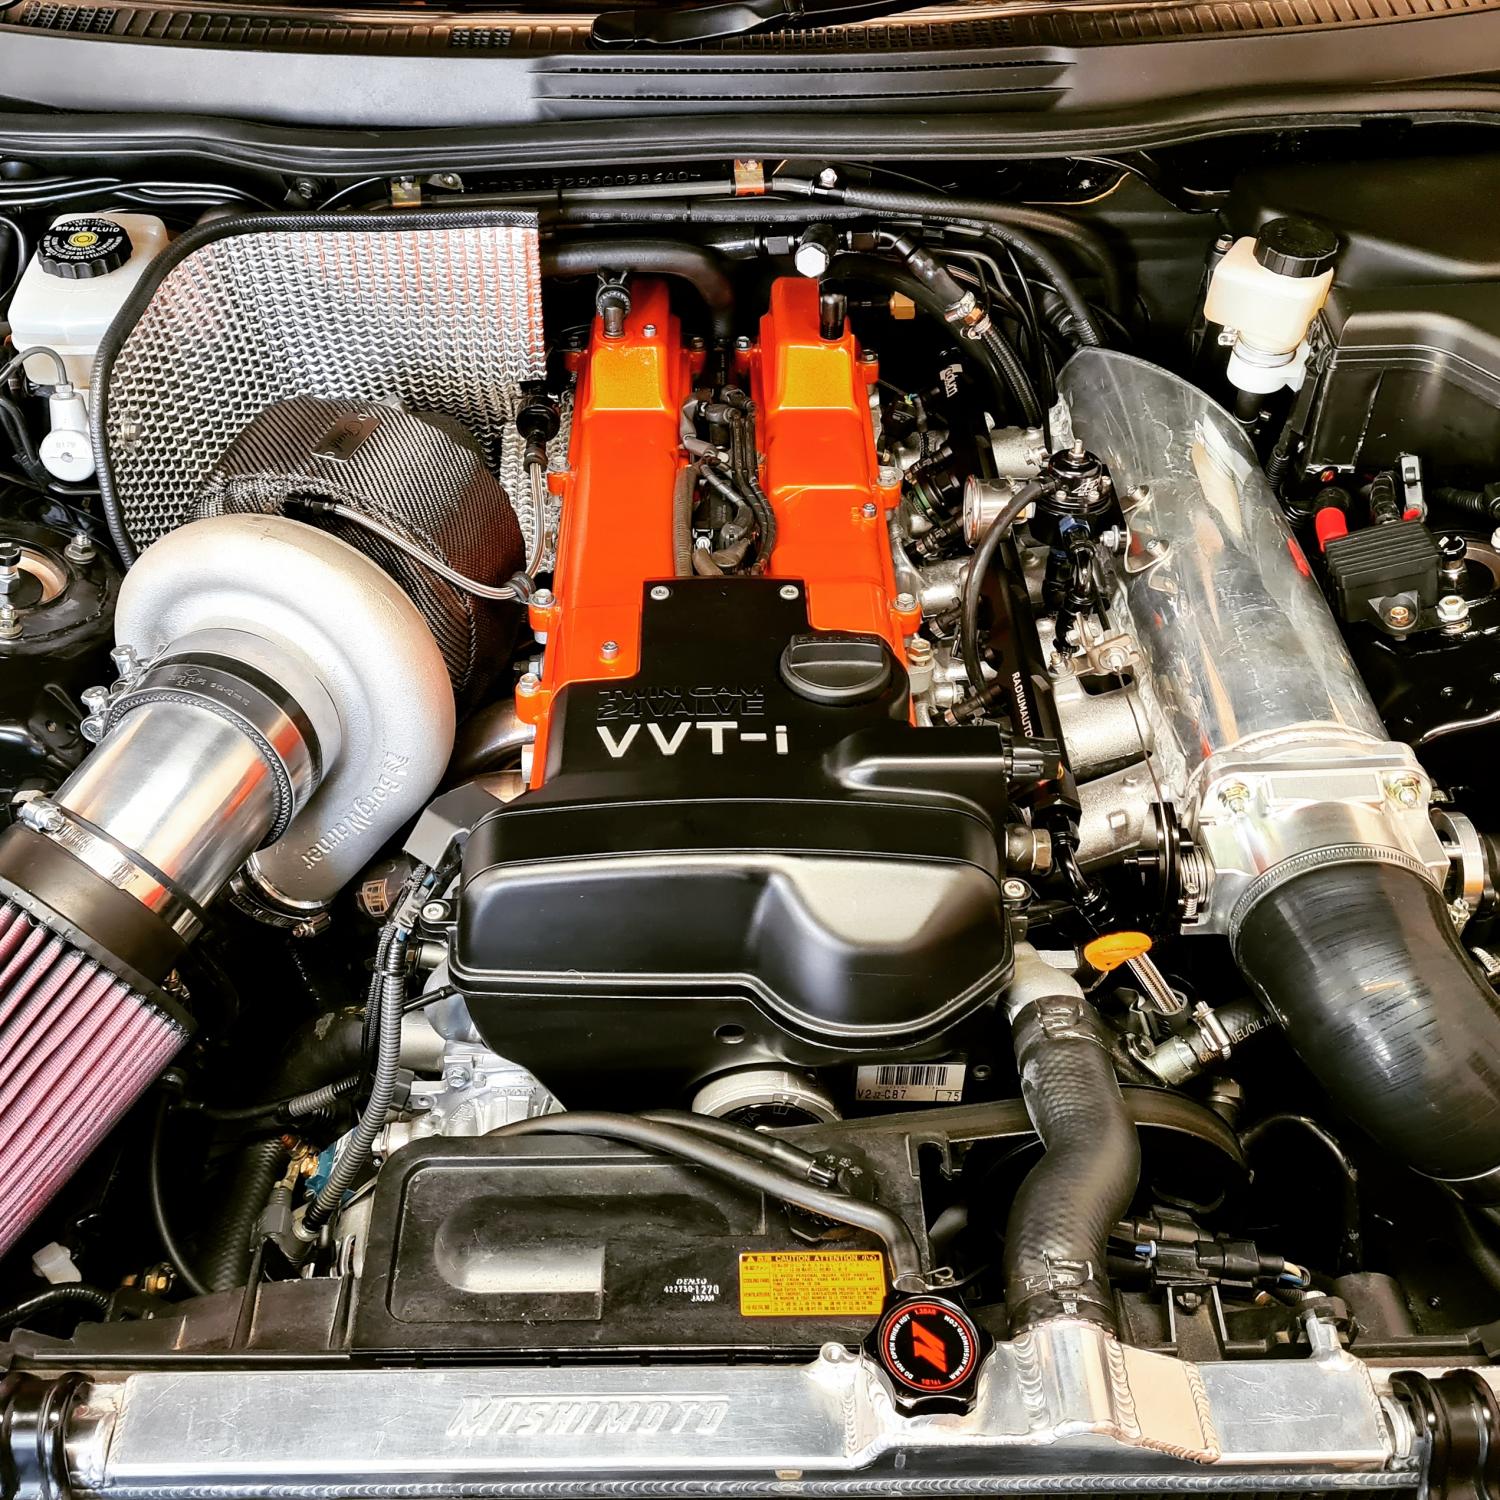
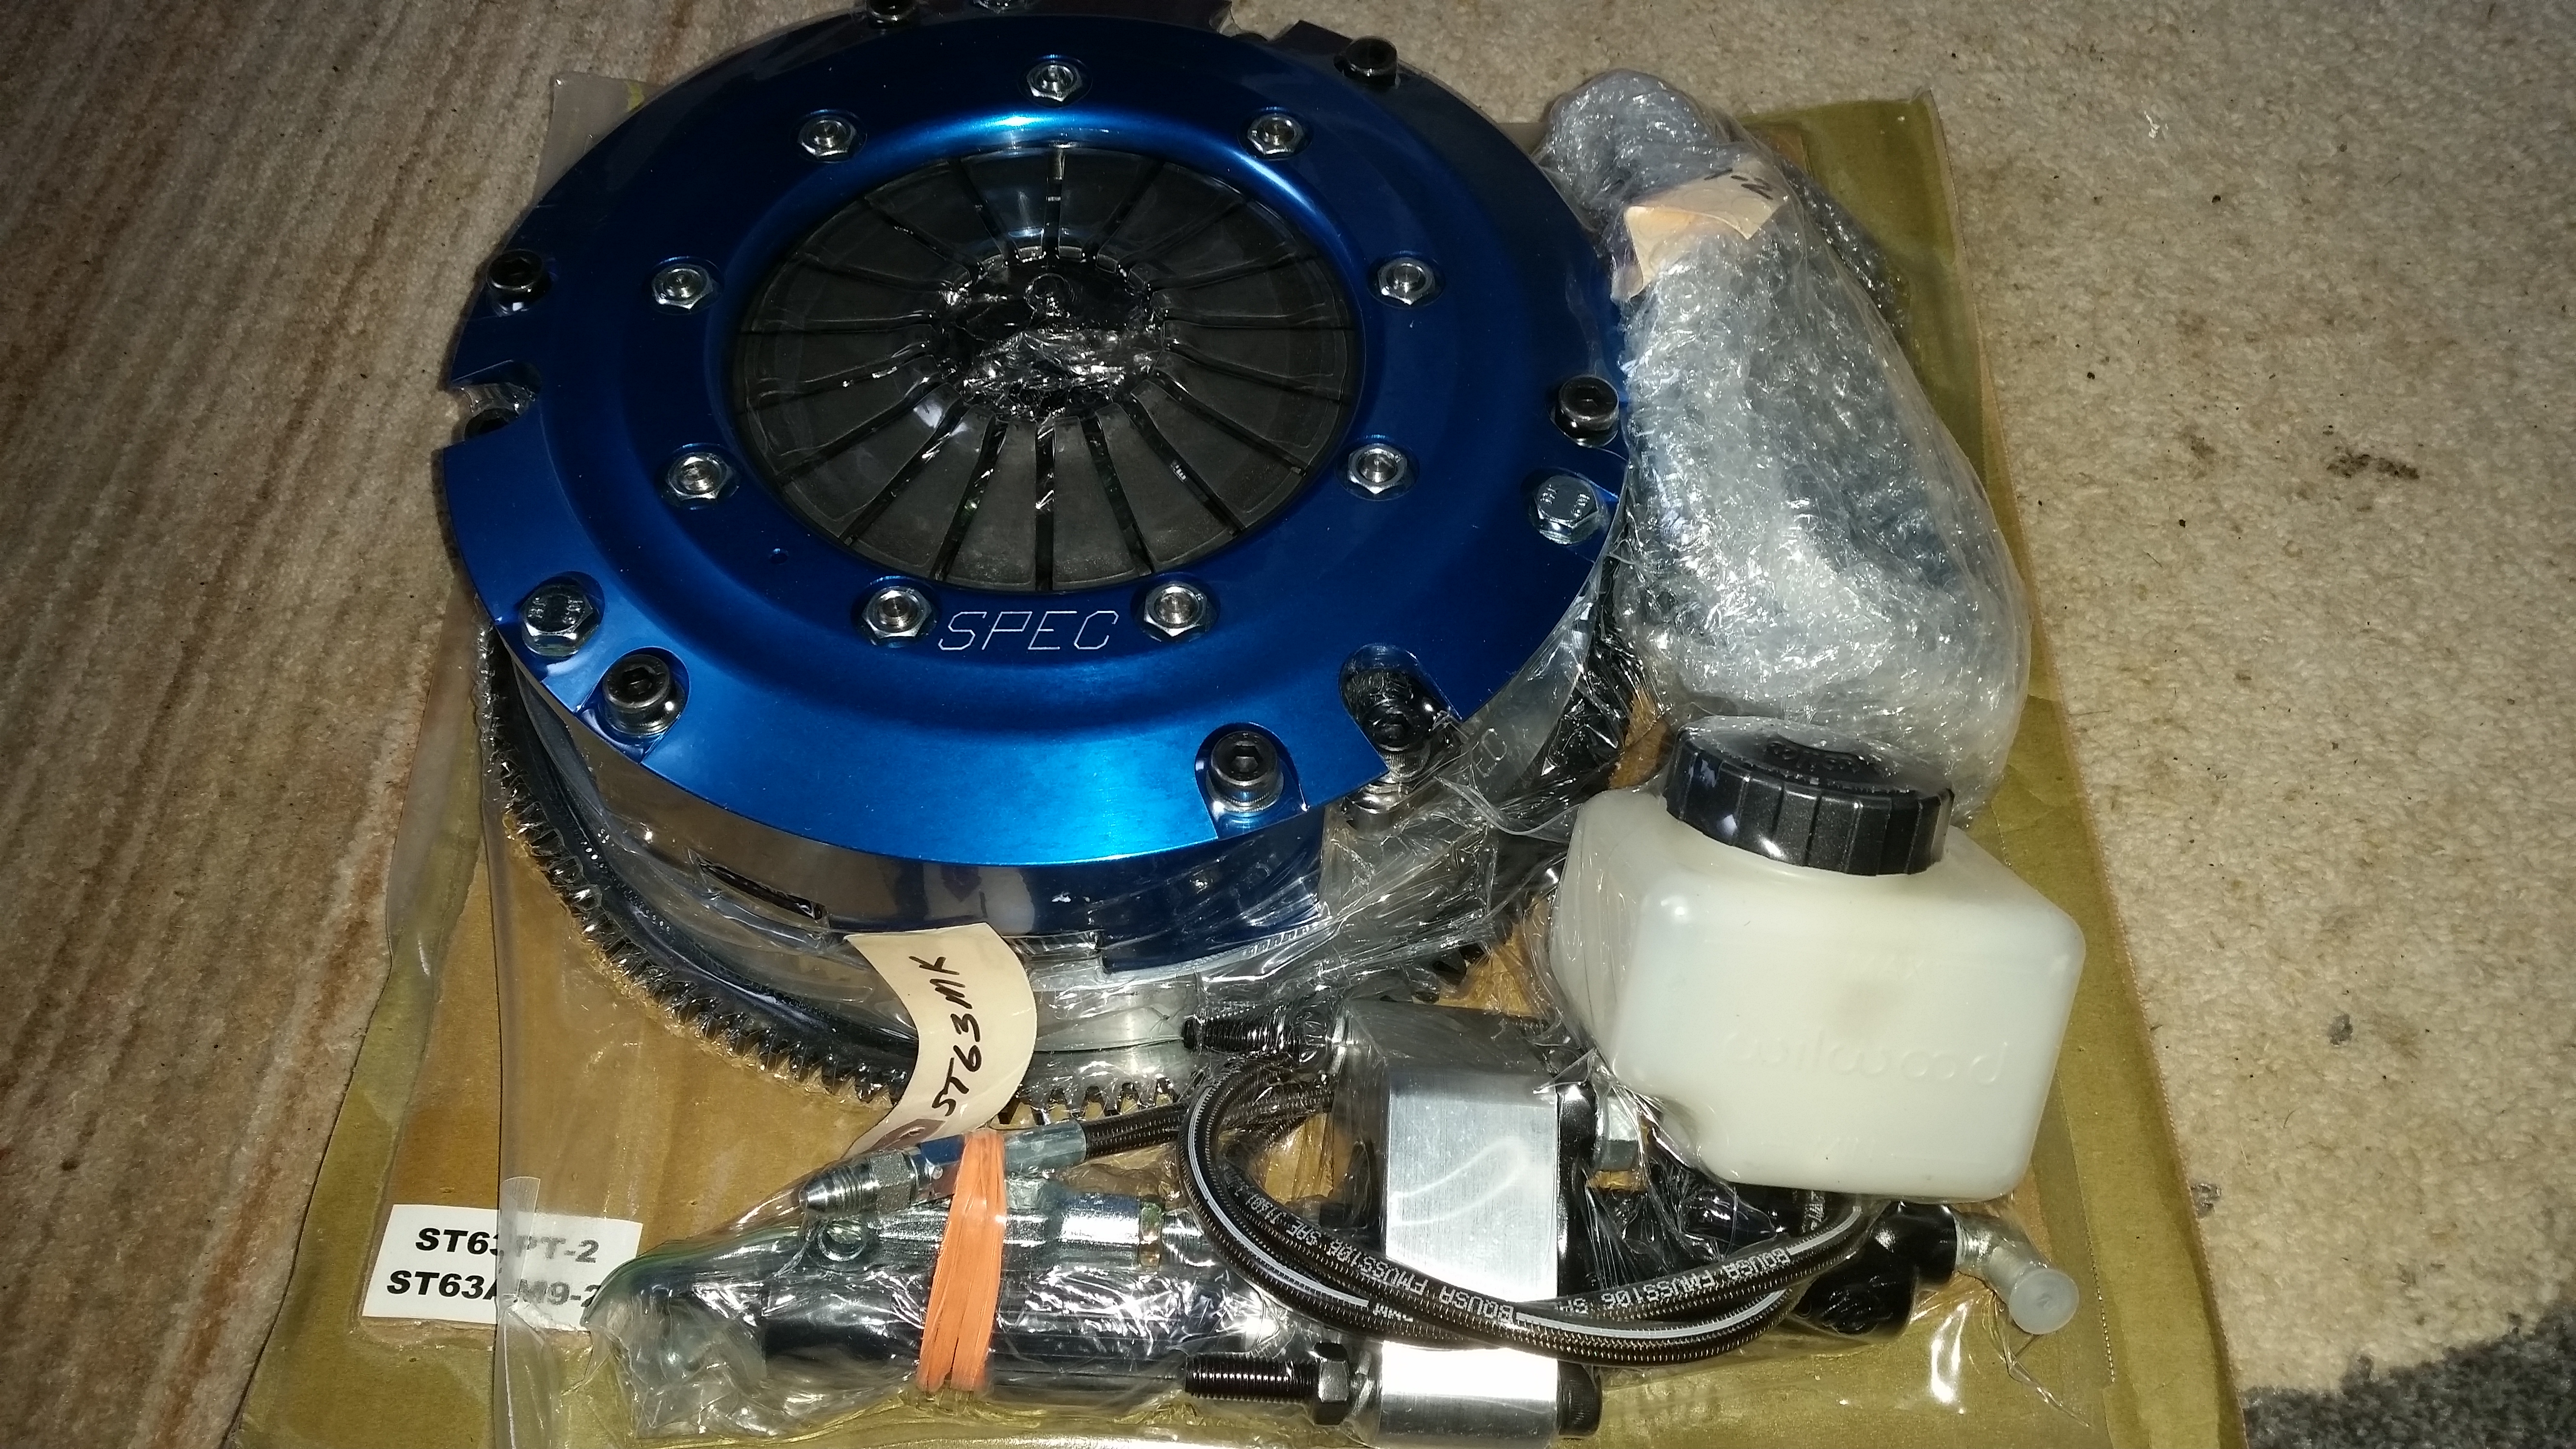
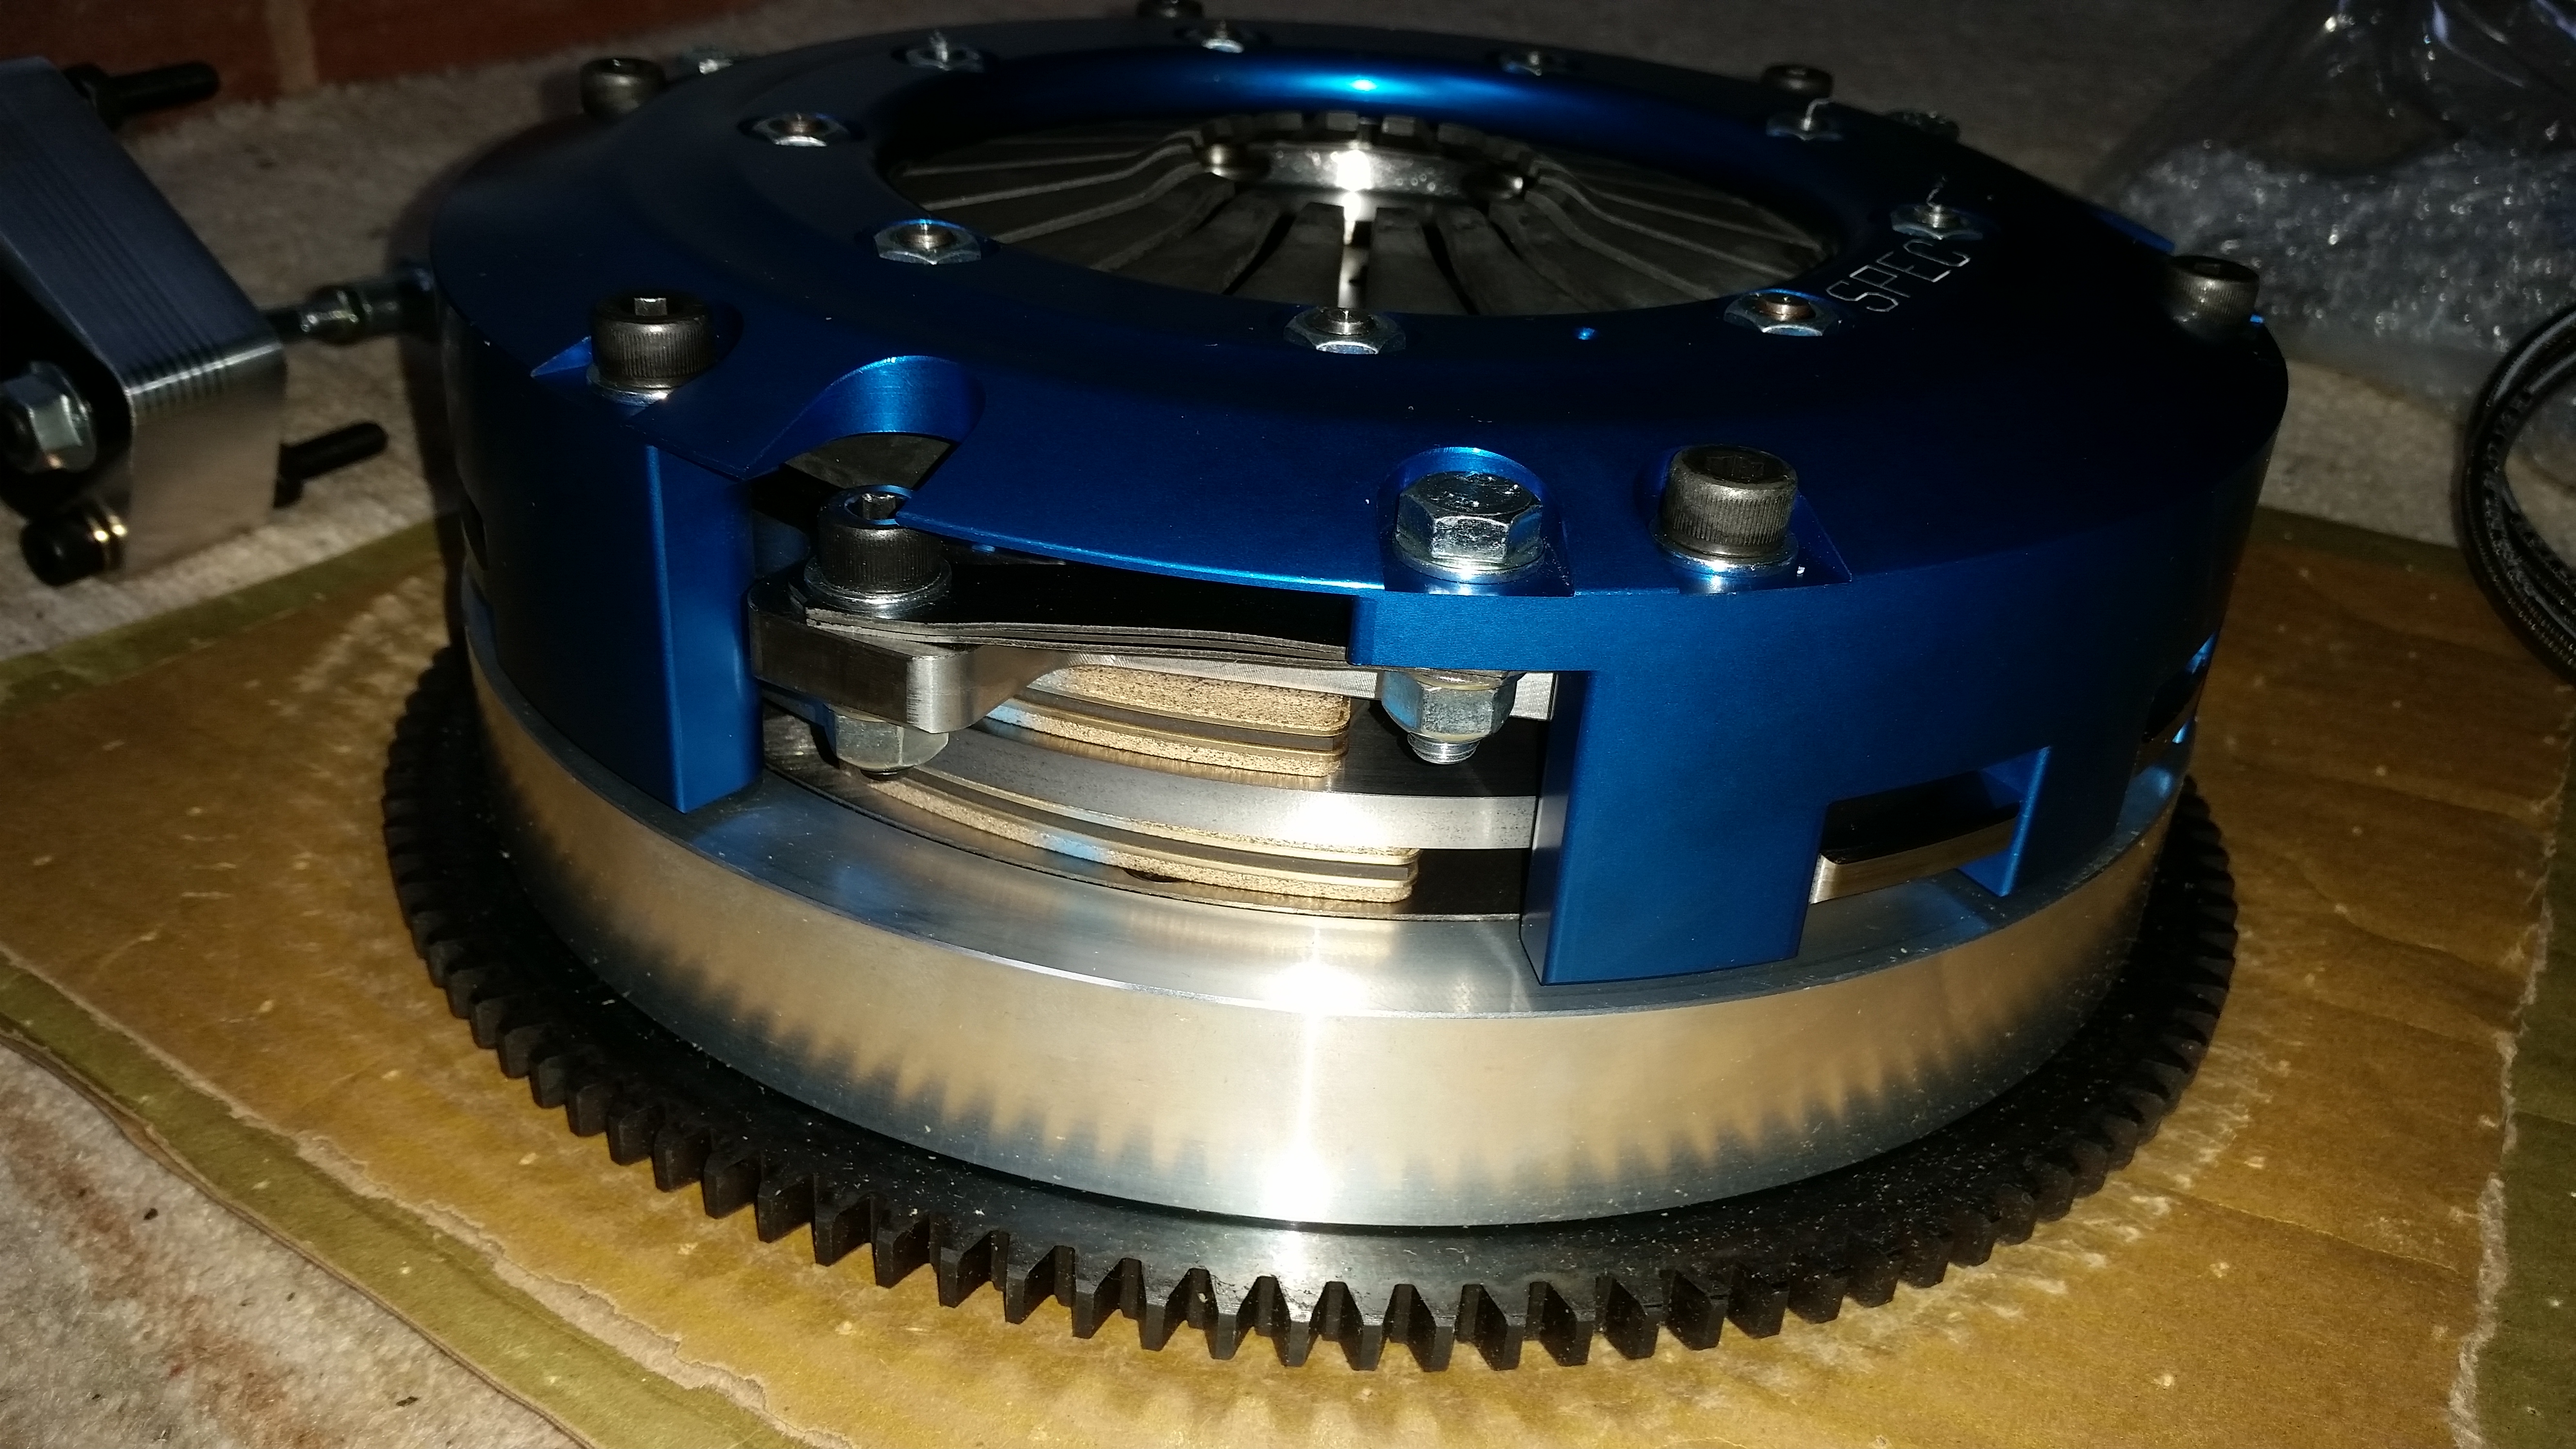
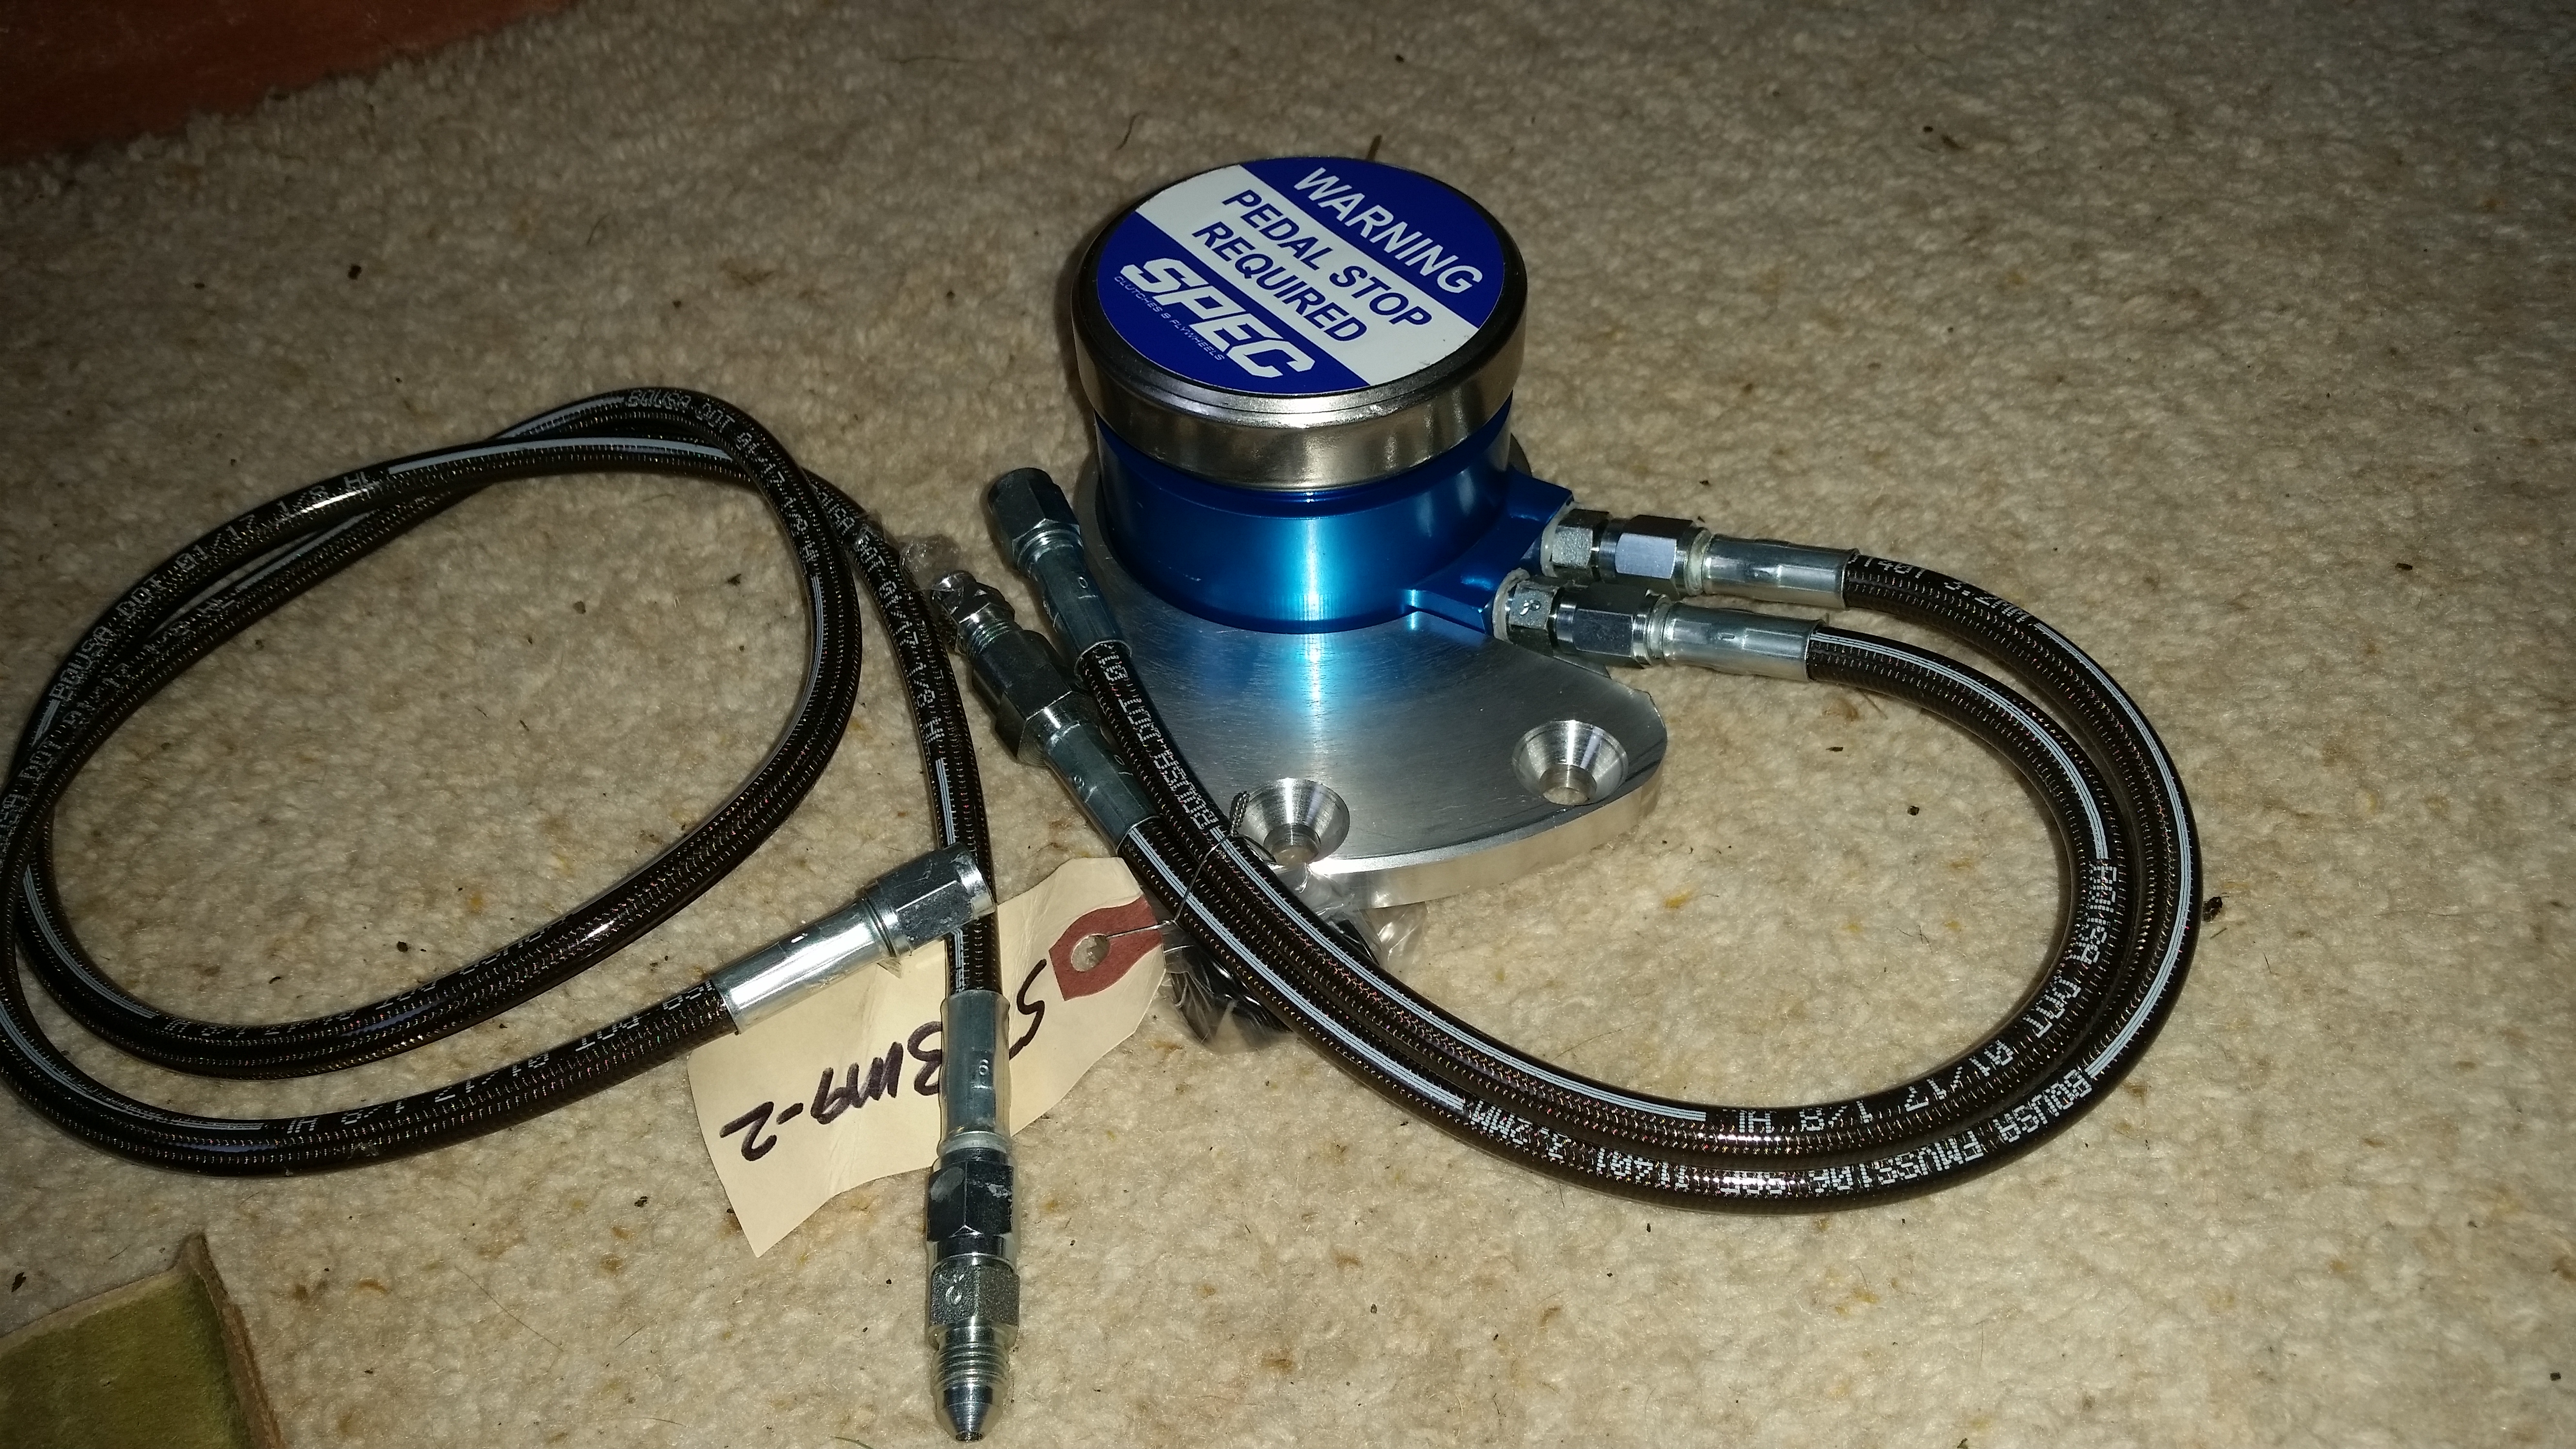
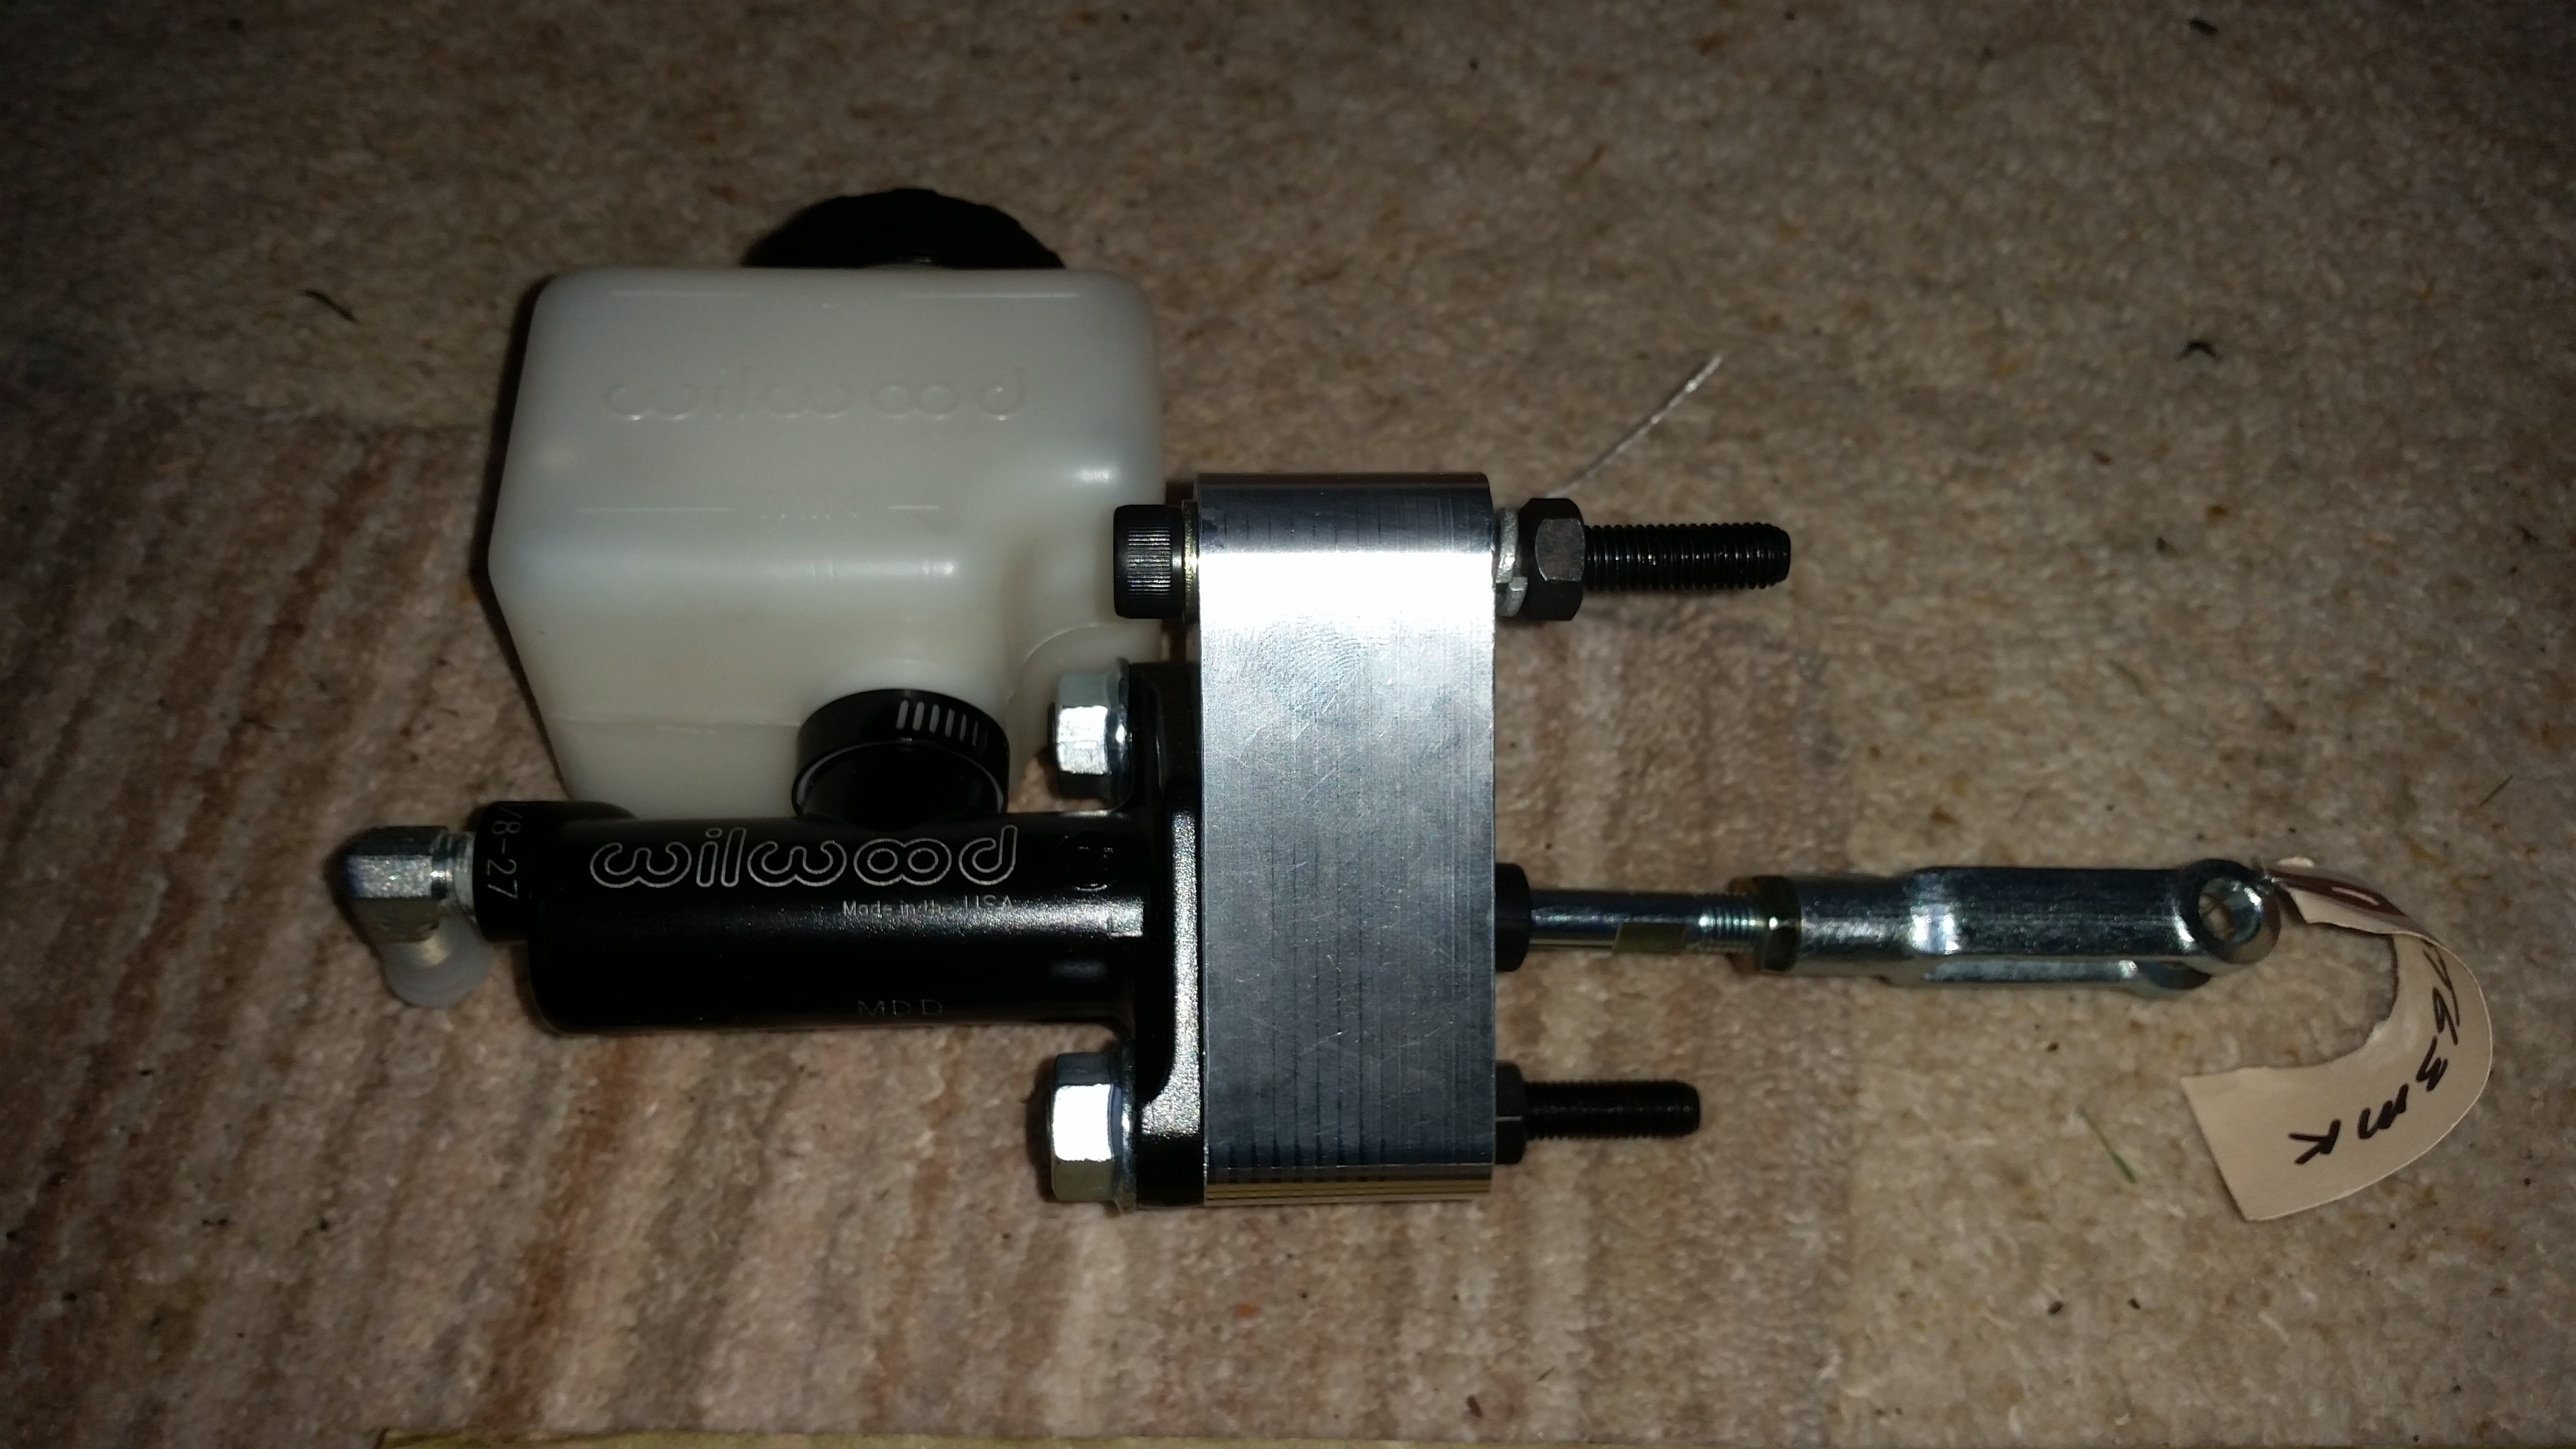
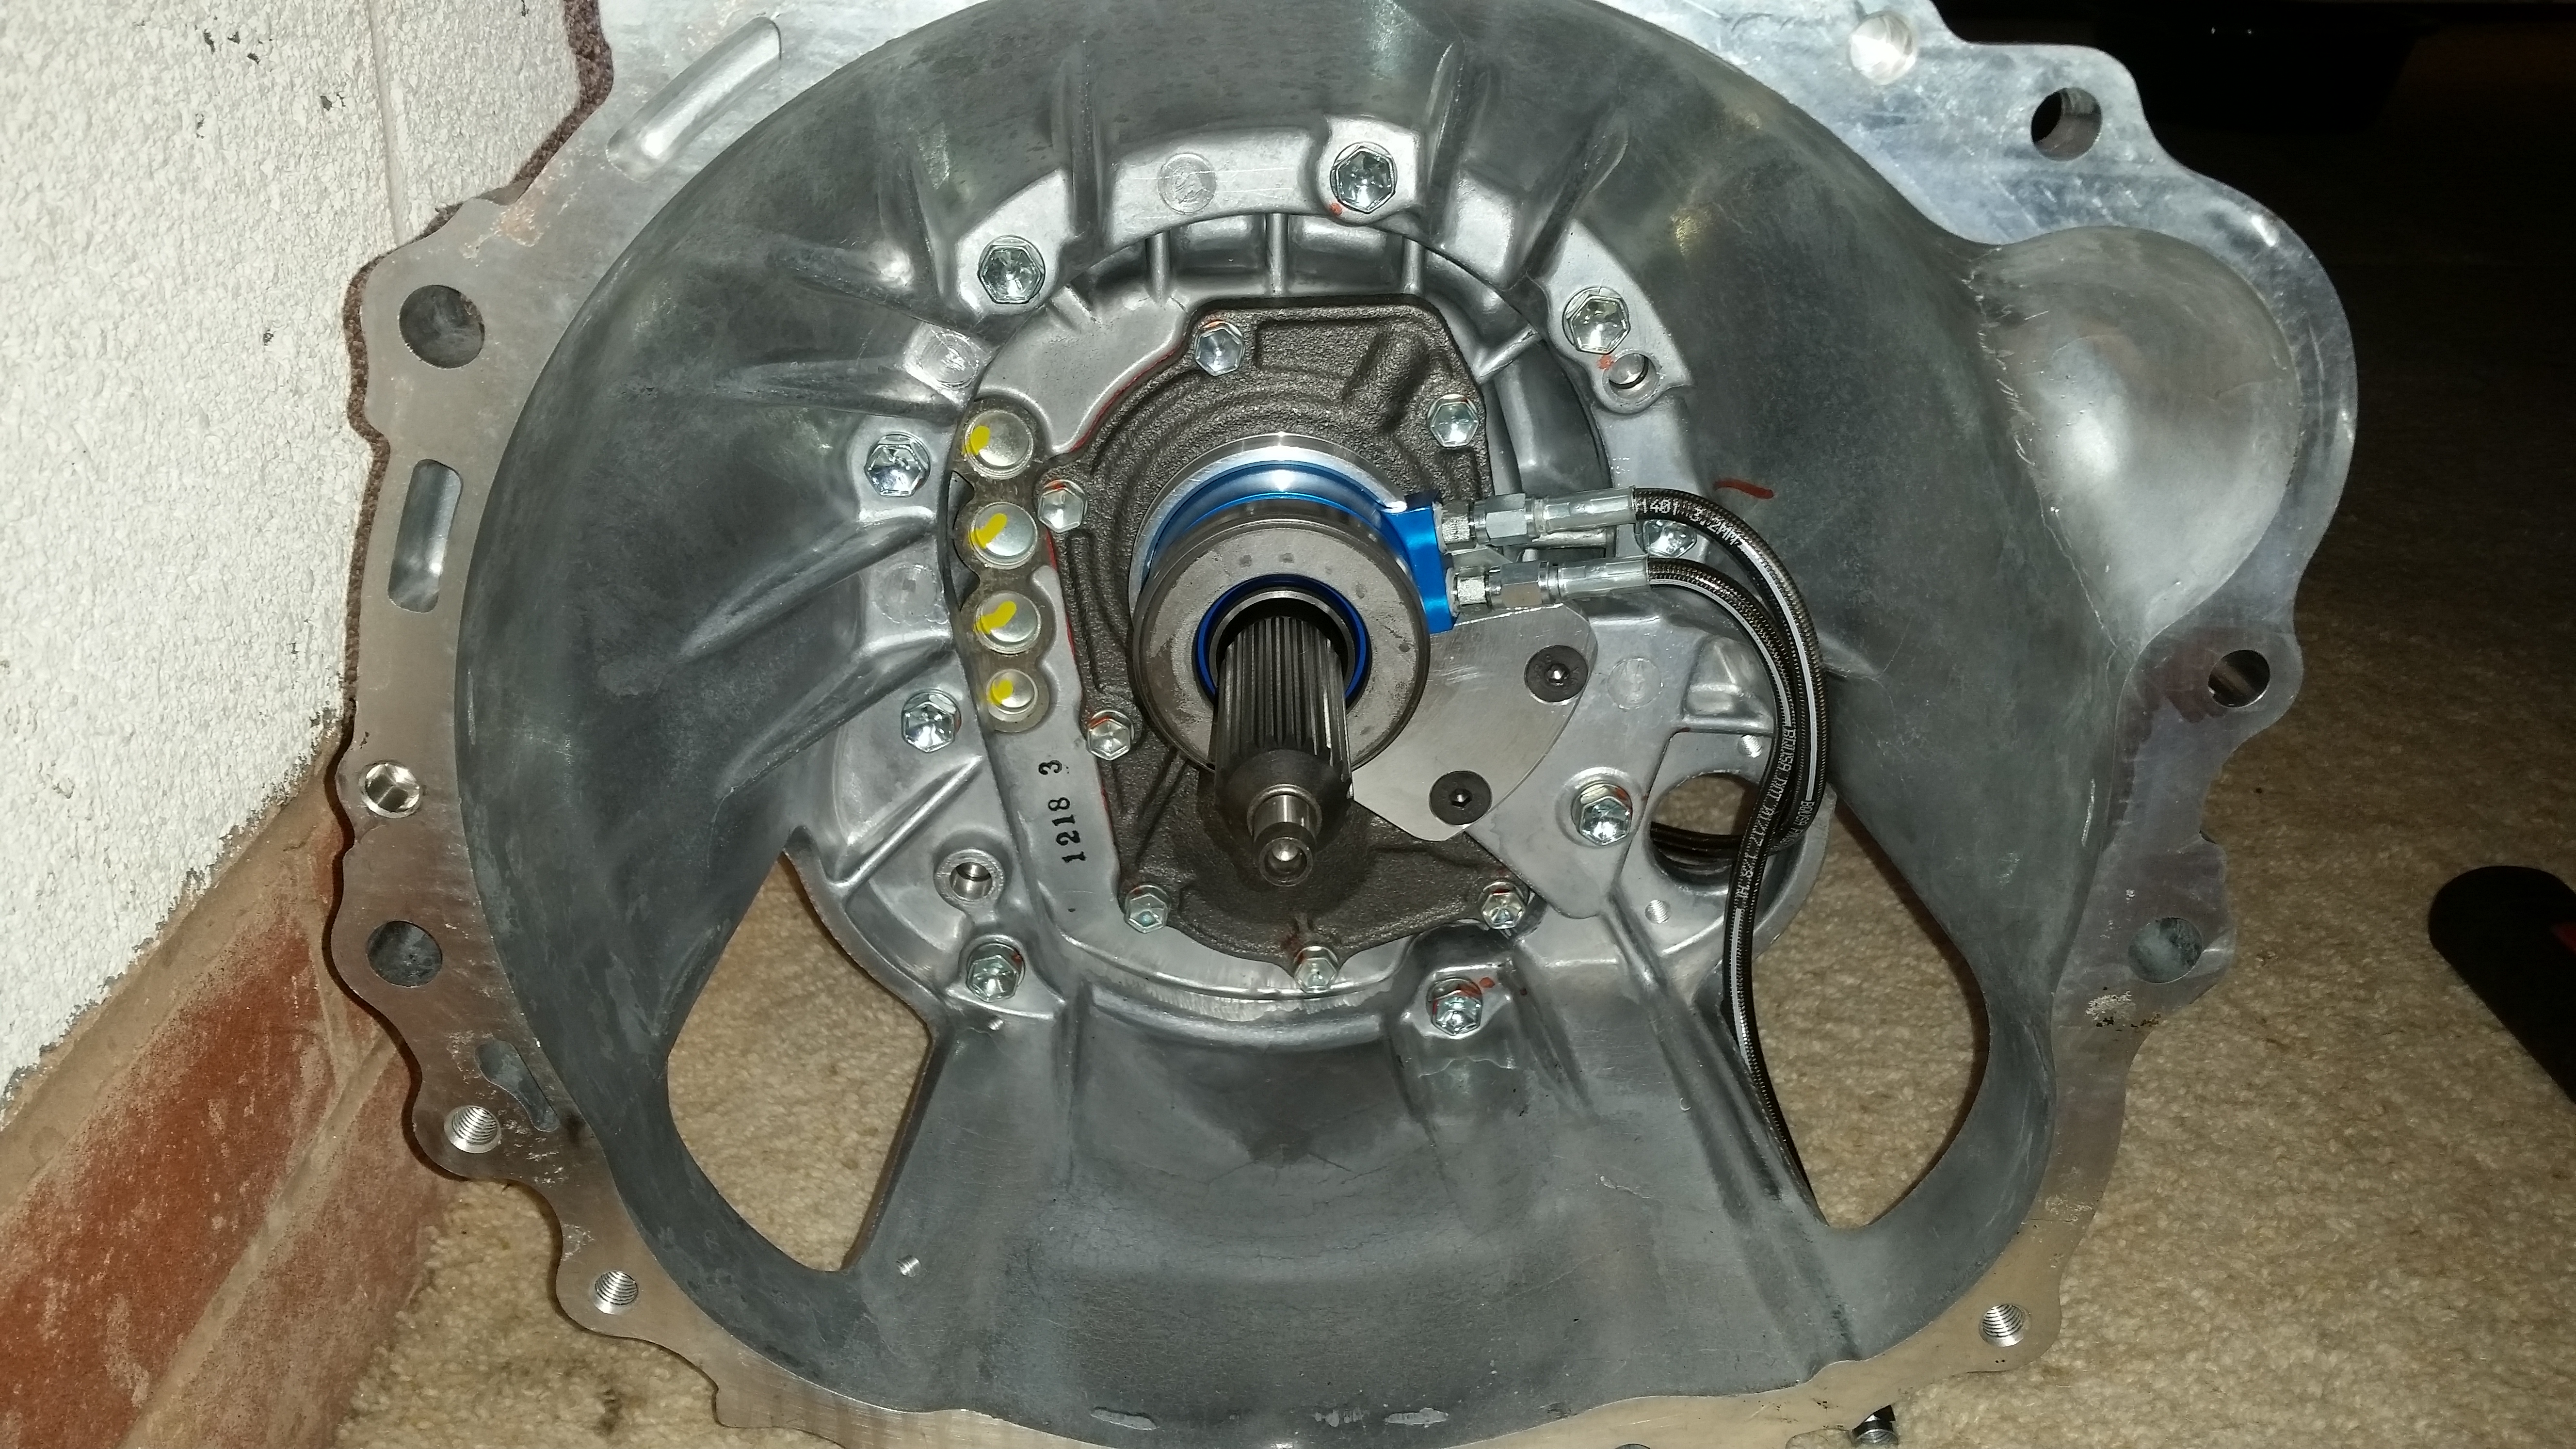
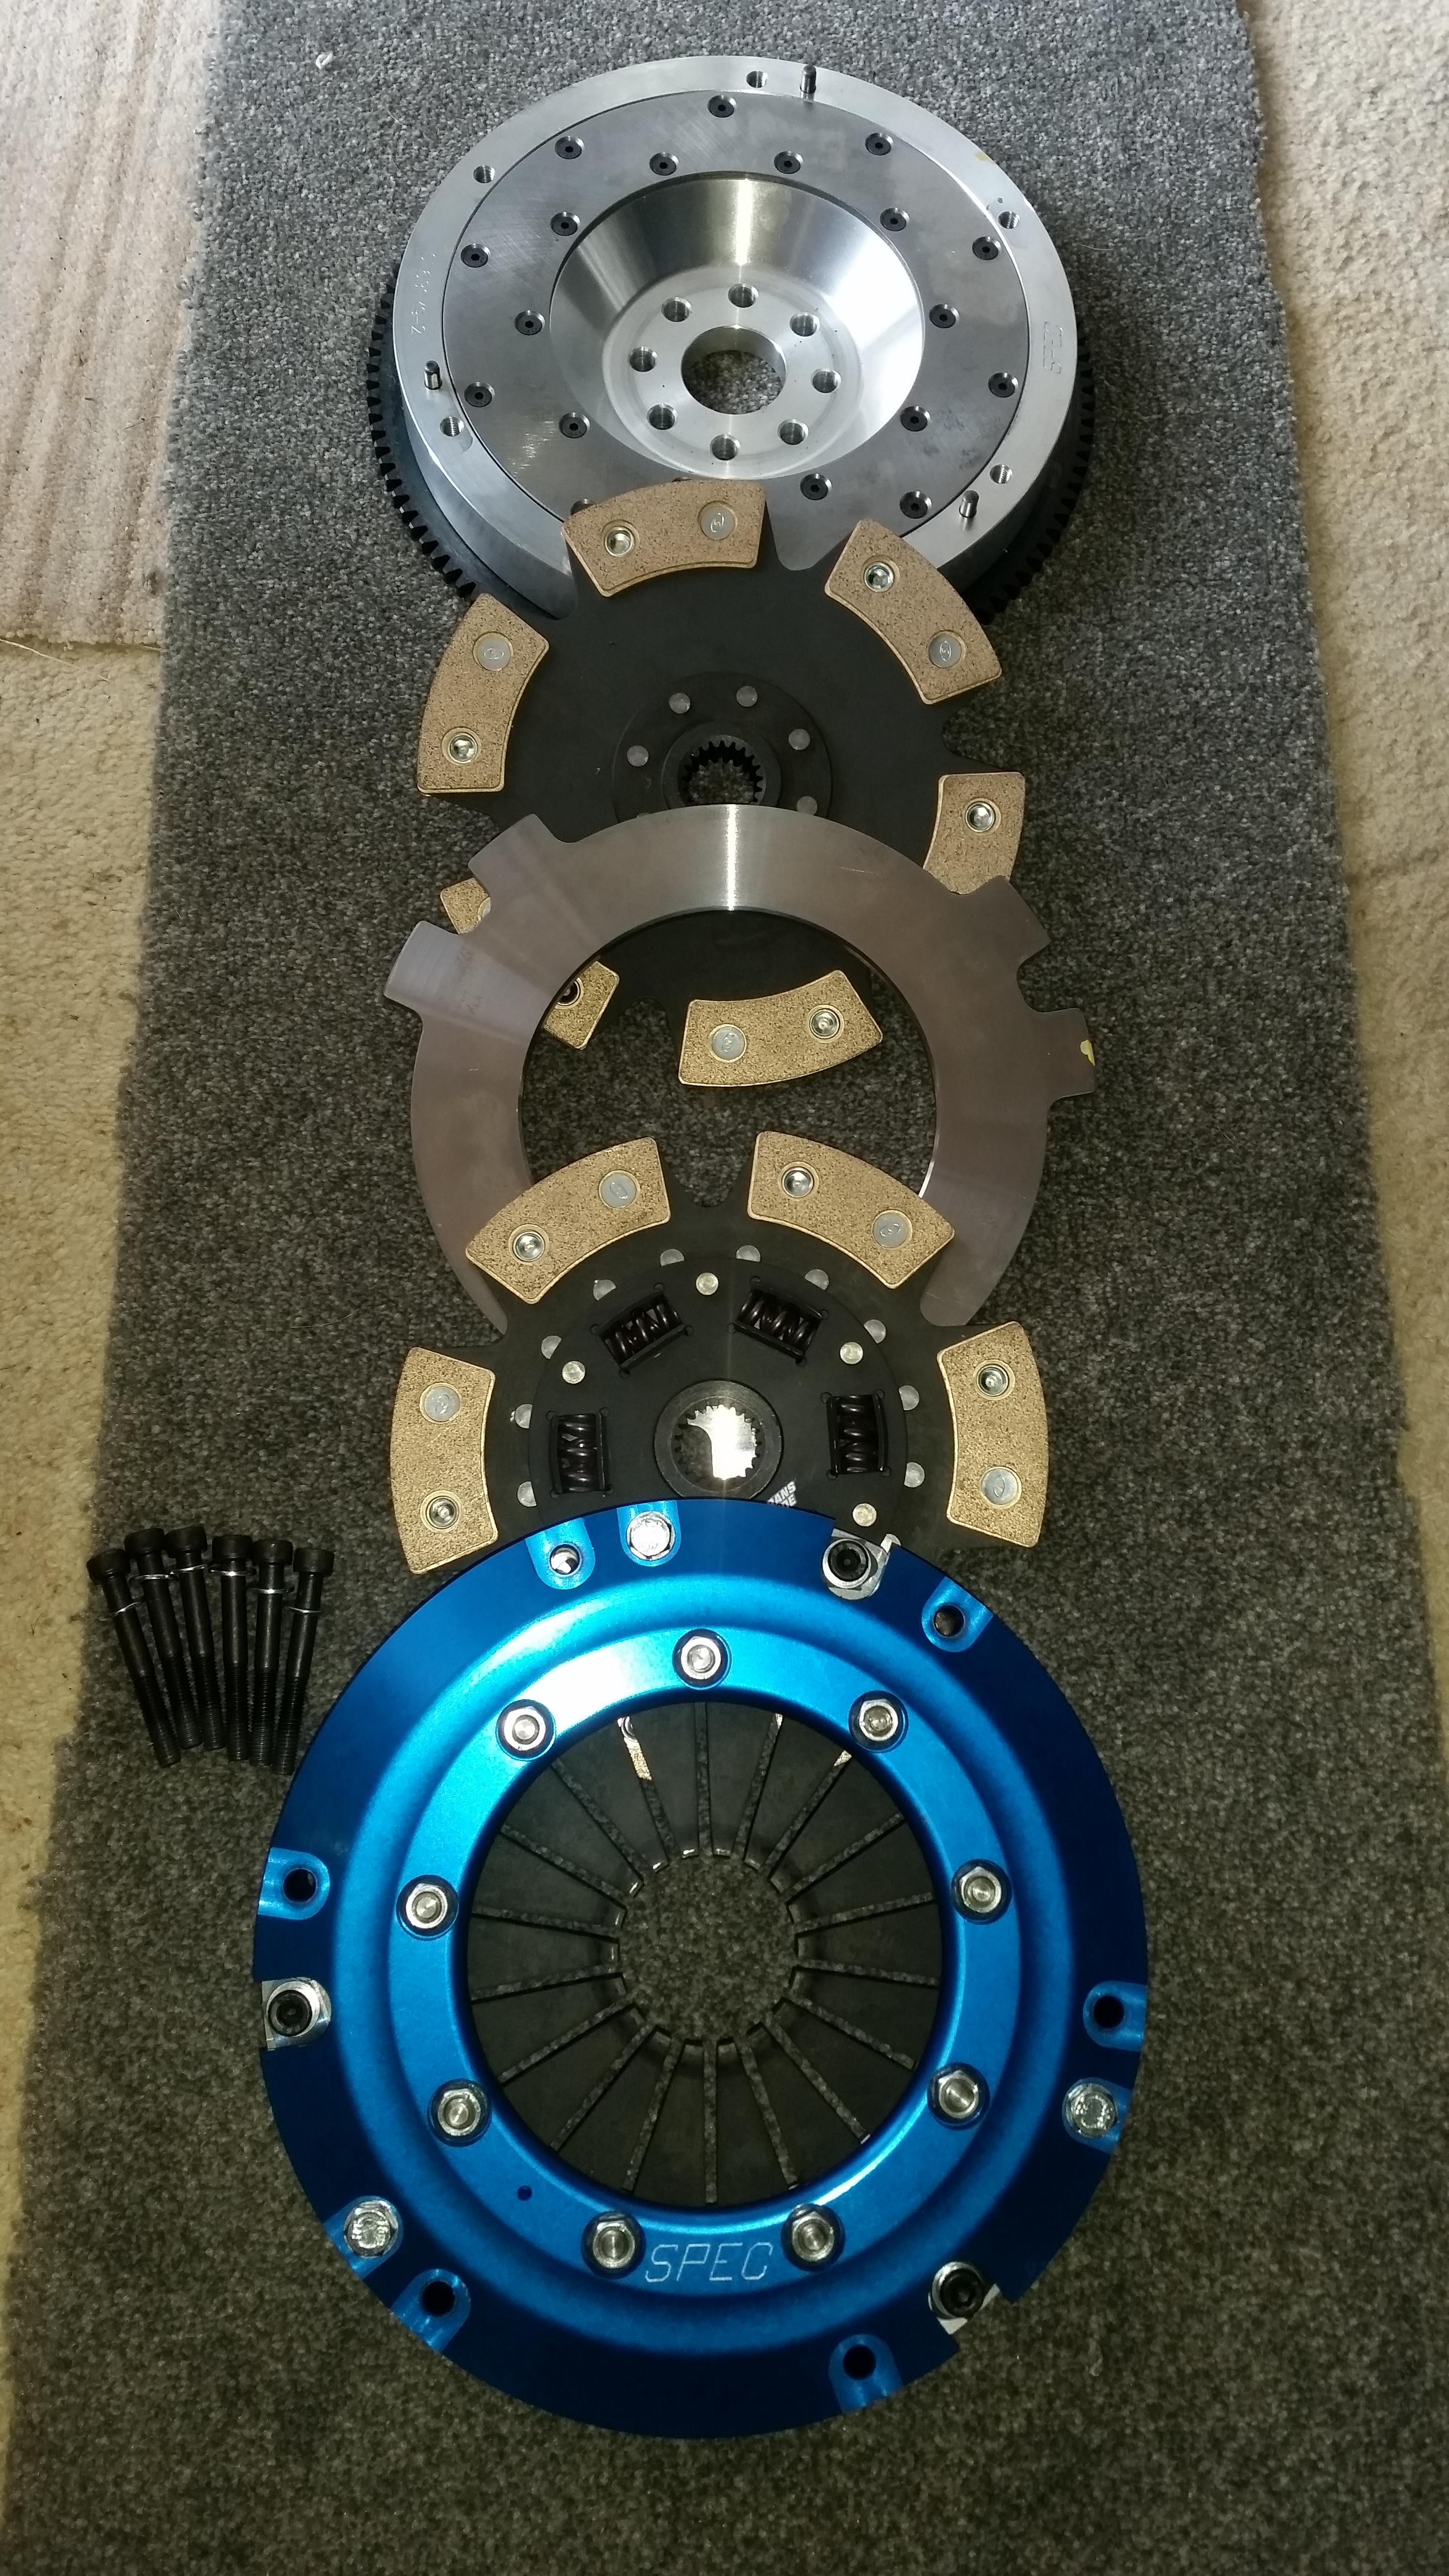
So the journey continues, once i confirmed the prop was good to go i pulled the box back out. Now it was time to decide on a clutch setup. I have been watching alot of vlogs on youtube of people running supras and IS300s and 1 guy in particular his chanel is "garage project motorsports" now this guy has pretty much done exactly what my intentions are, very informative, attention to detail is amazing and an interesting chanel to watch. This guy did use a single disc setup clutch but he blew this to pieces and wiped out the bell housing in the process, he is running slightly less bhp and torque to what my goal is. So he swapped it out for a clutch masters twin disc setup and said its the best decision hes made............... Ding dong delivery 😂 i had considered at clutch masters fx850 but it was very very expensive!! I went with the spec twin disc, ive had to use a 1jz kit because of the fitment to the gearbox and it all still bolts straight up to the 2jz (good old toyota again 👍). in this kit it includes a rebuildable very lightweight flywheel, the hydraulic throw out bearing (so converting it from pull type clutch), braided clutch lines and a wilwood clutch master cynider. None of these extra bits come with the clutch masters fx850 and its cheaper. It will handle near enough 1500NM of torque ............... (i know i had to read this twice too) which is over kill but as we all know toyota over manufactured everything in this era which made them so reliable so why should i stop that tradition. Few more pics to admire its beauty ....... There it is in all its glory, 1 6puck sprung disc, 1 6puck unsprung disc, center plate, pressure cover and that buildable flywheel. Once this was trial fitted to the gearbox to confirm the spline fitment i was back on the mission to sort the gearstick issue. This bit is going to be tricky, this being the 3rd revision of the box means the shifter housing extension has a slightly different bolt spacing. Everywhere i looked just seemed to get me to a extension housing that was the early style fitments. There are places that do custom billet made housings but you also need the rod that goes inside which you cannot seem to by anywhere 2nd hand. The 1 i needed for mine i had no idea where to even get the correct part number and because its not the standard housing for the box i have toyota could not even try to look it up on there system. Every project thread i found for an r154 swap was using the early box so i was on my own. I thought i was stuck untill just randomly searching on google images i came across a housing that is very close to what i need. This housing is from a very strange looking car called a Toyota Verossa... This you probably guessed is fitted with a 1jz which uses the r154 (good old toyota 👍..... again) . So i got hold of the part number for the housing and got 1 ordered up ........ fast and furious style "overnight parts from japan" this comes with that rod inside too. Old tripod setup....^^^ New setup ....^^^ this sits around 1inch further forward which now puts the stick in a decent position, coupled with a short shifter it should be perfect with plenty room from the trim surround. The added bonus of its original toyota part too. More to come .............

-
Haha you are right it is a huge slippery slope 😂 cheers for the support. Now thats an idea for the is200 badge, would be fun if i could use original is200 wheels to, could probably suprise a few people! The v160 would be a dream as these will handle 1000bhp aswell as being 6speed. There is something about the soarer that keeps me looking at them, i had considered that but the smaller size of the IS swung my decision. This was the good thing about the Focus RS mk1 is that they just kept going up in value, so the money ive made off the Focus i have just ploughed straight into this. By the time its done i would have input very little extra money to build this and ive got a car way more reliable, way more driveable, hell of alot quicker, sounds nicer, better place to sit in and something easy and cheap enough to fix if it ever has a little bump not like the Focus.
-
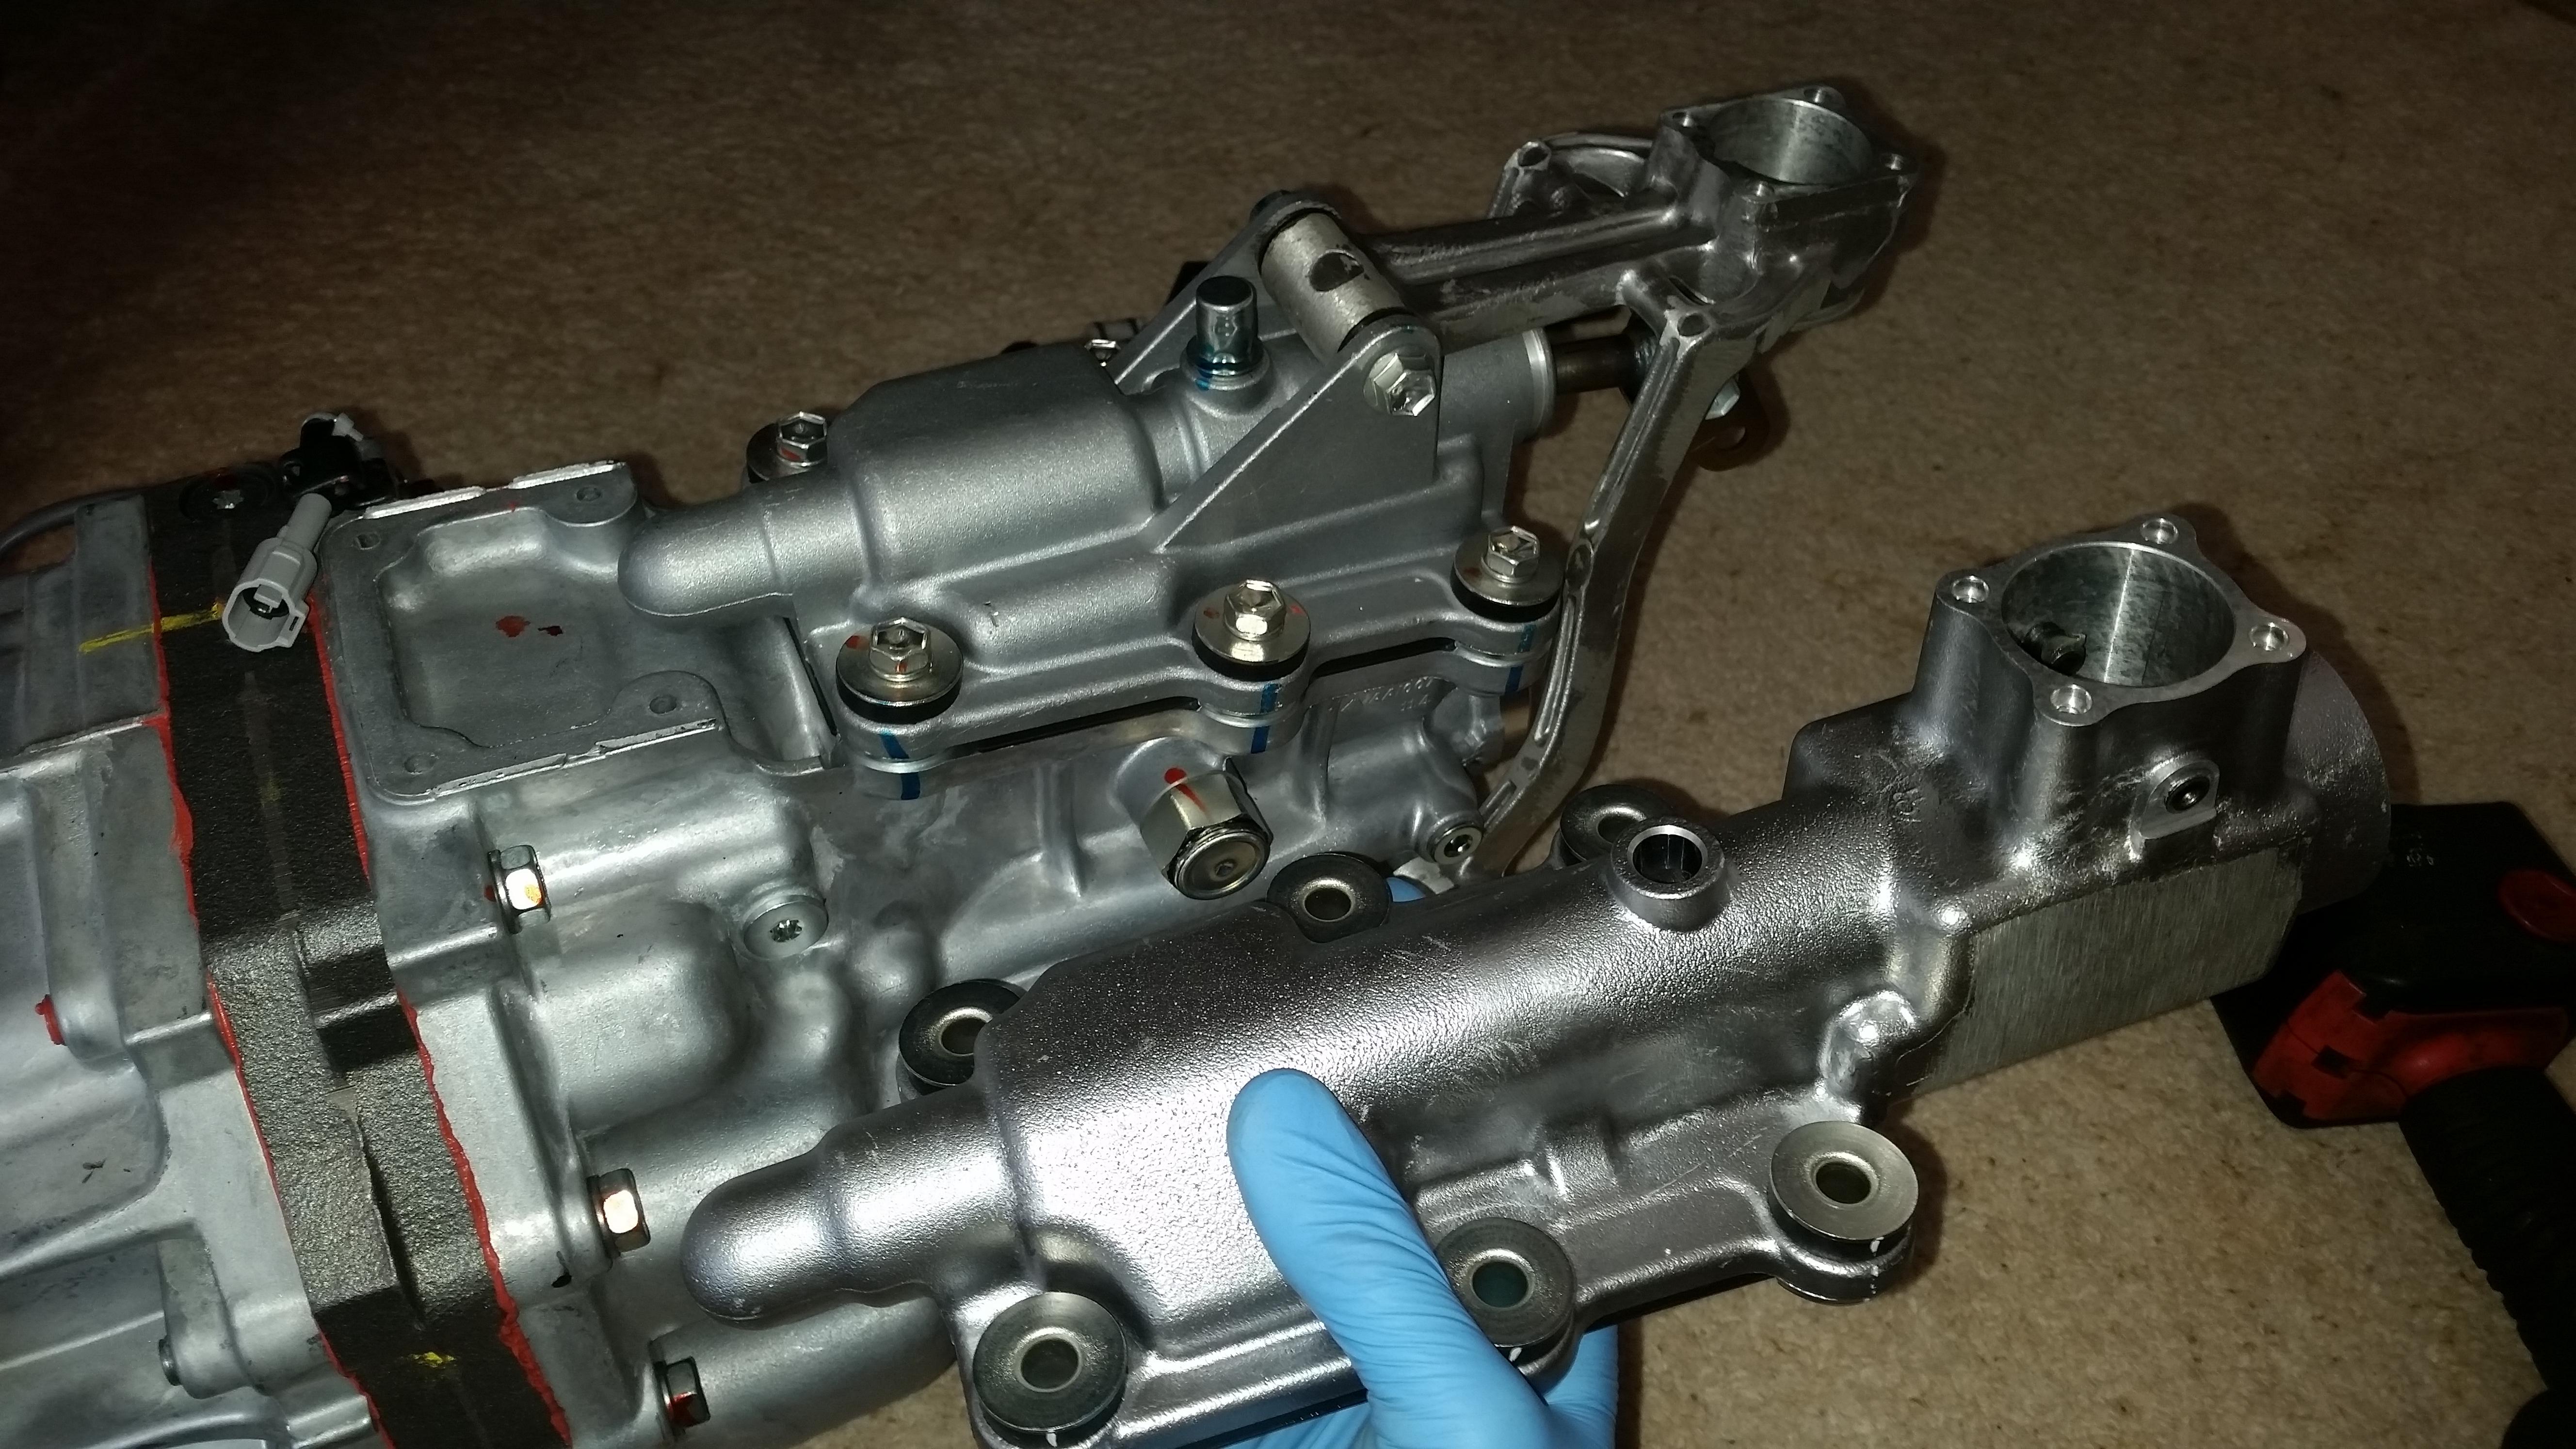
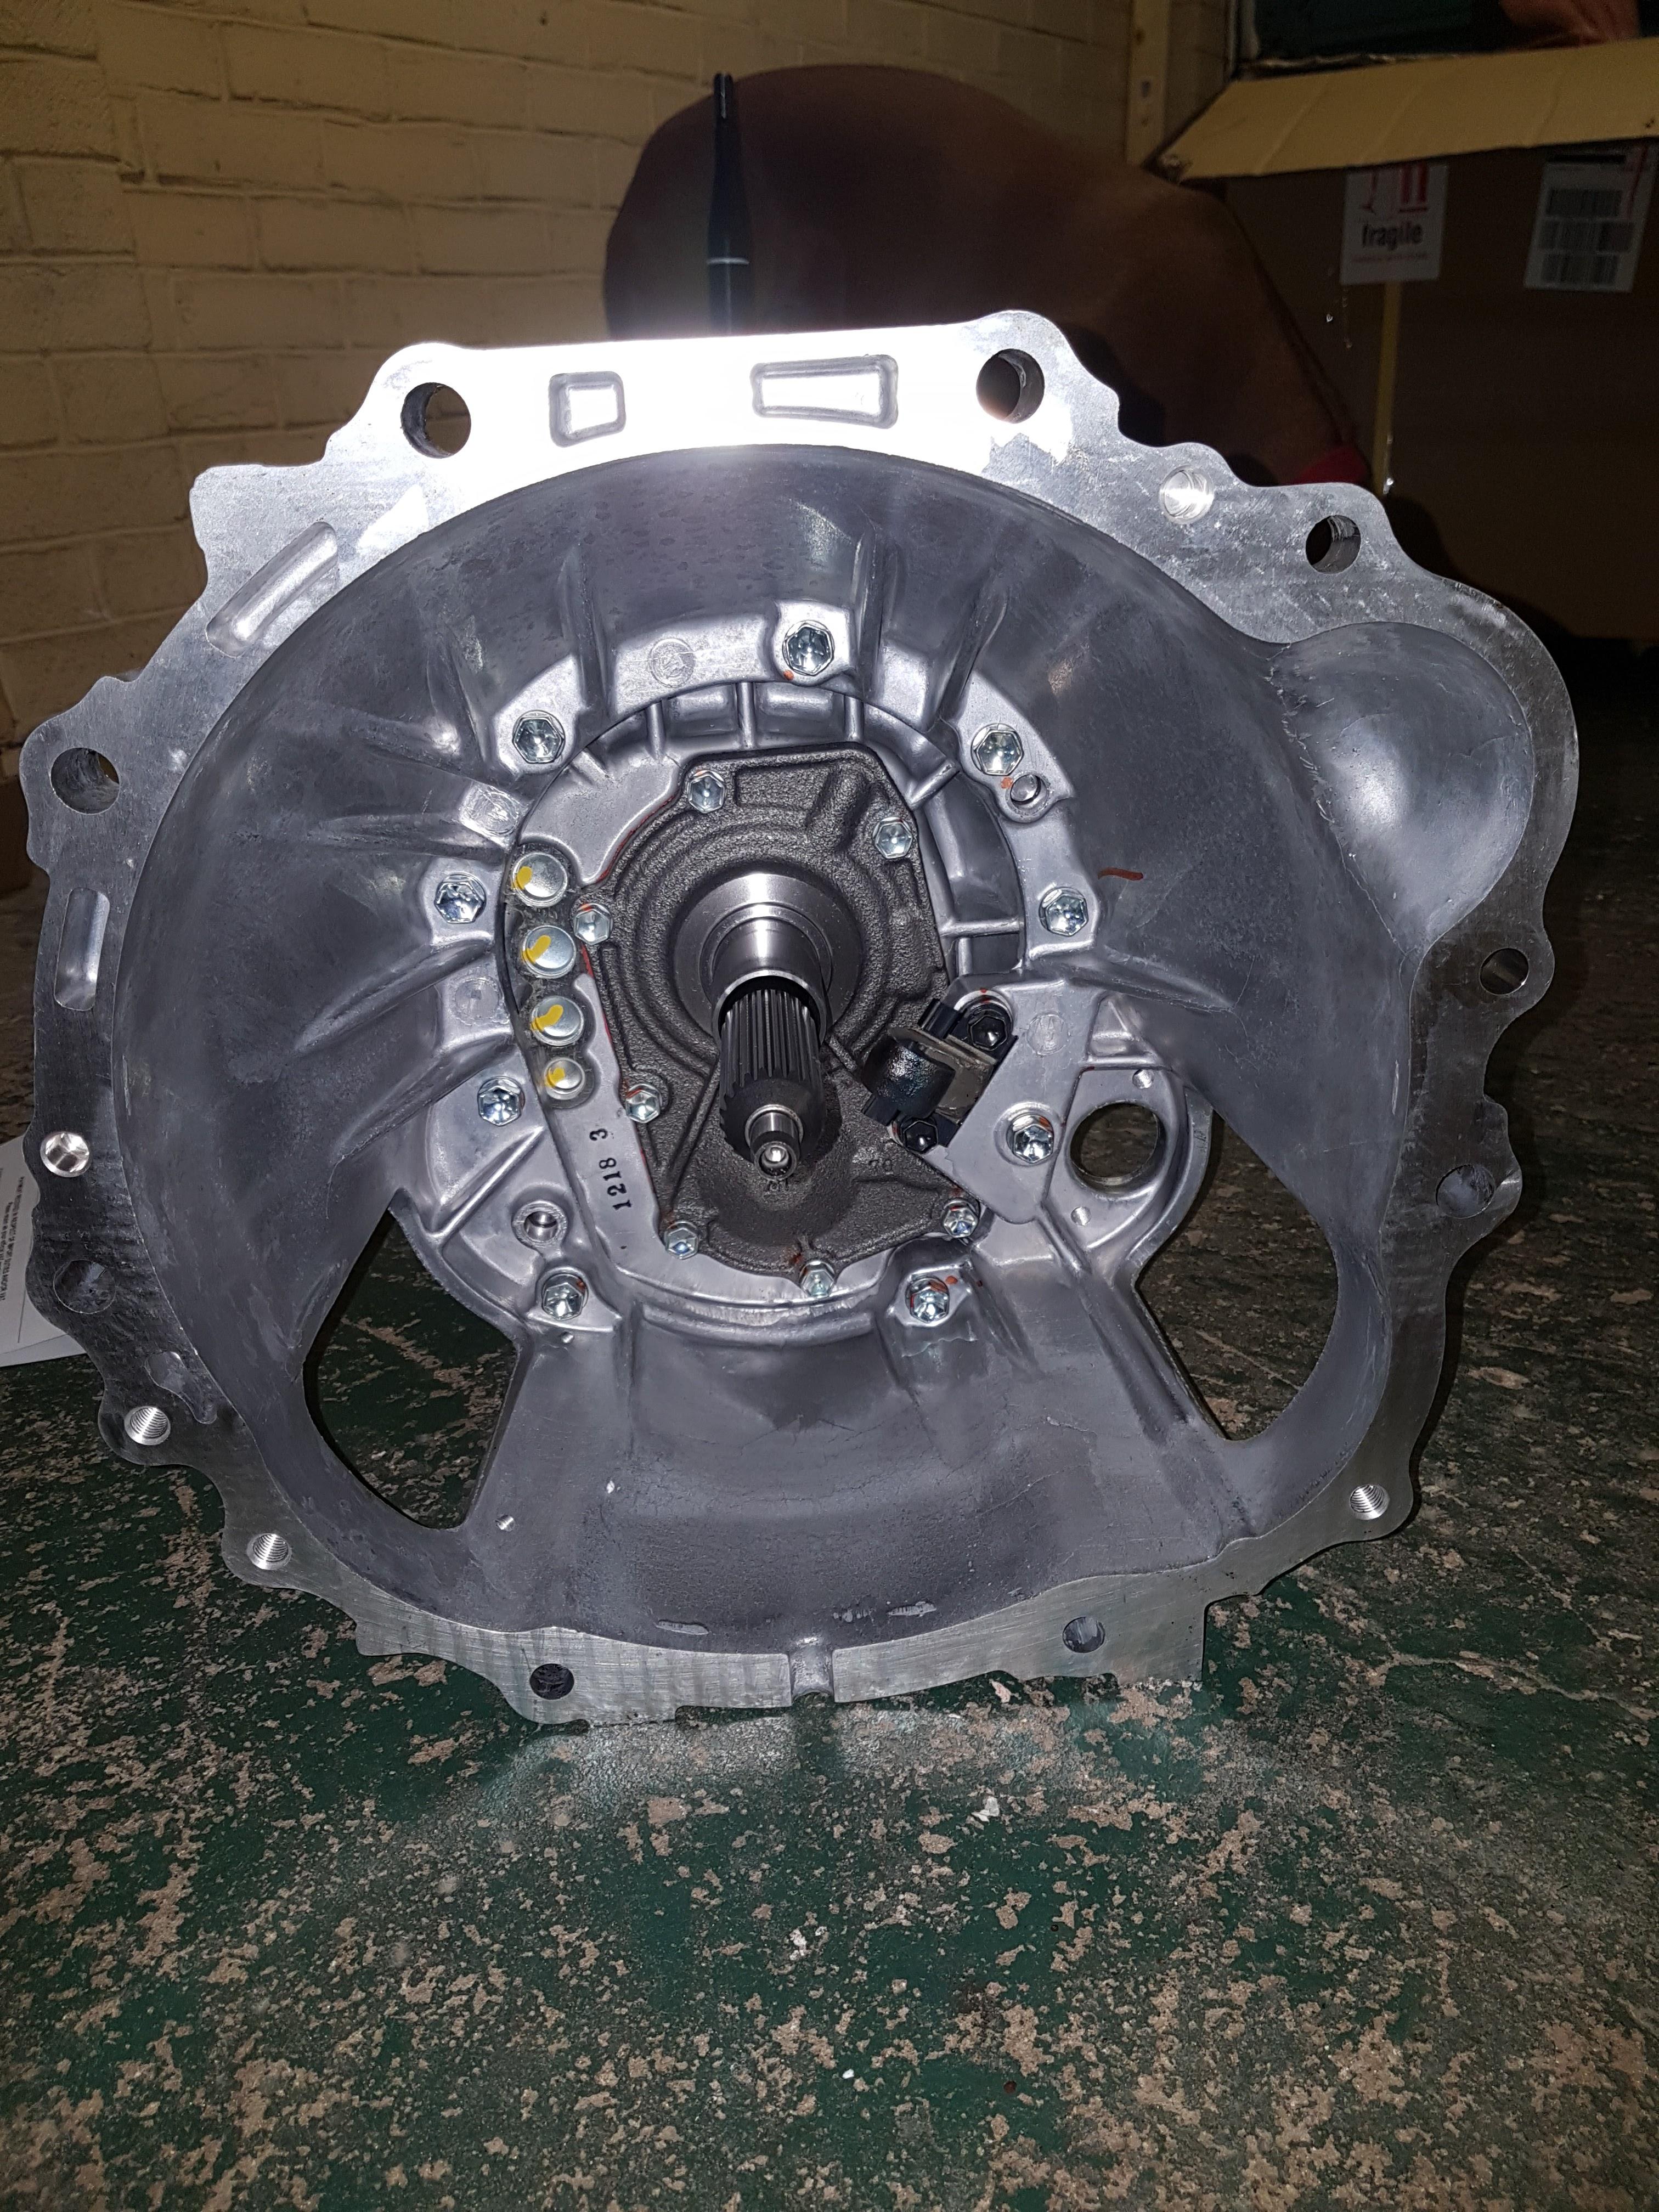
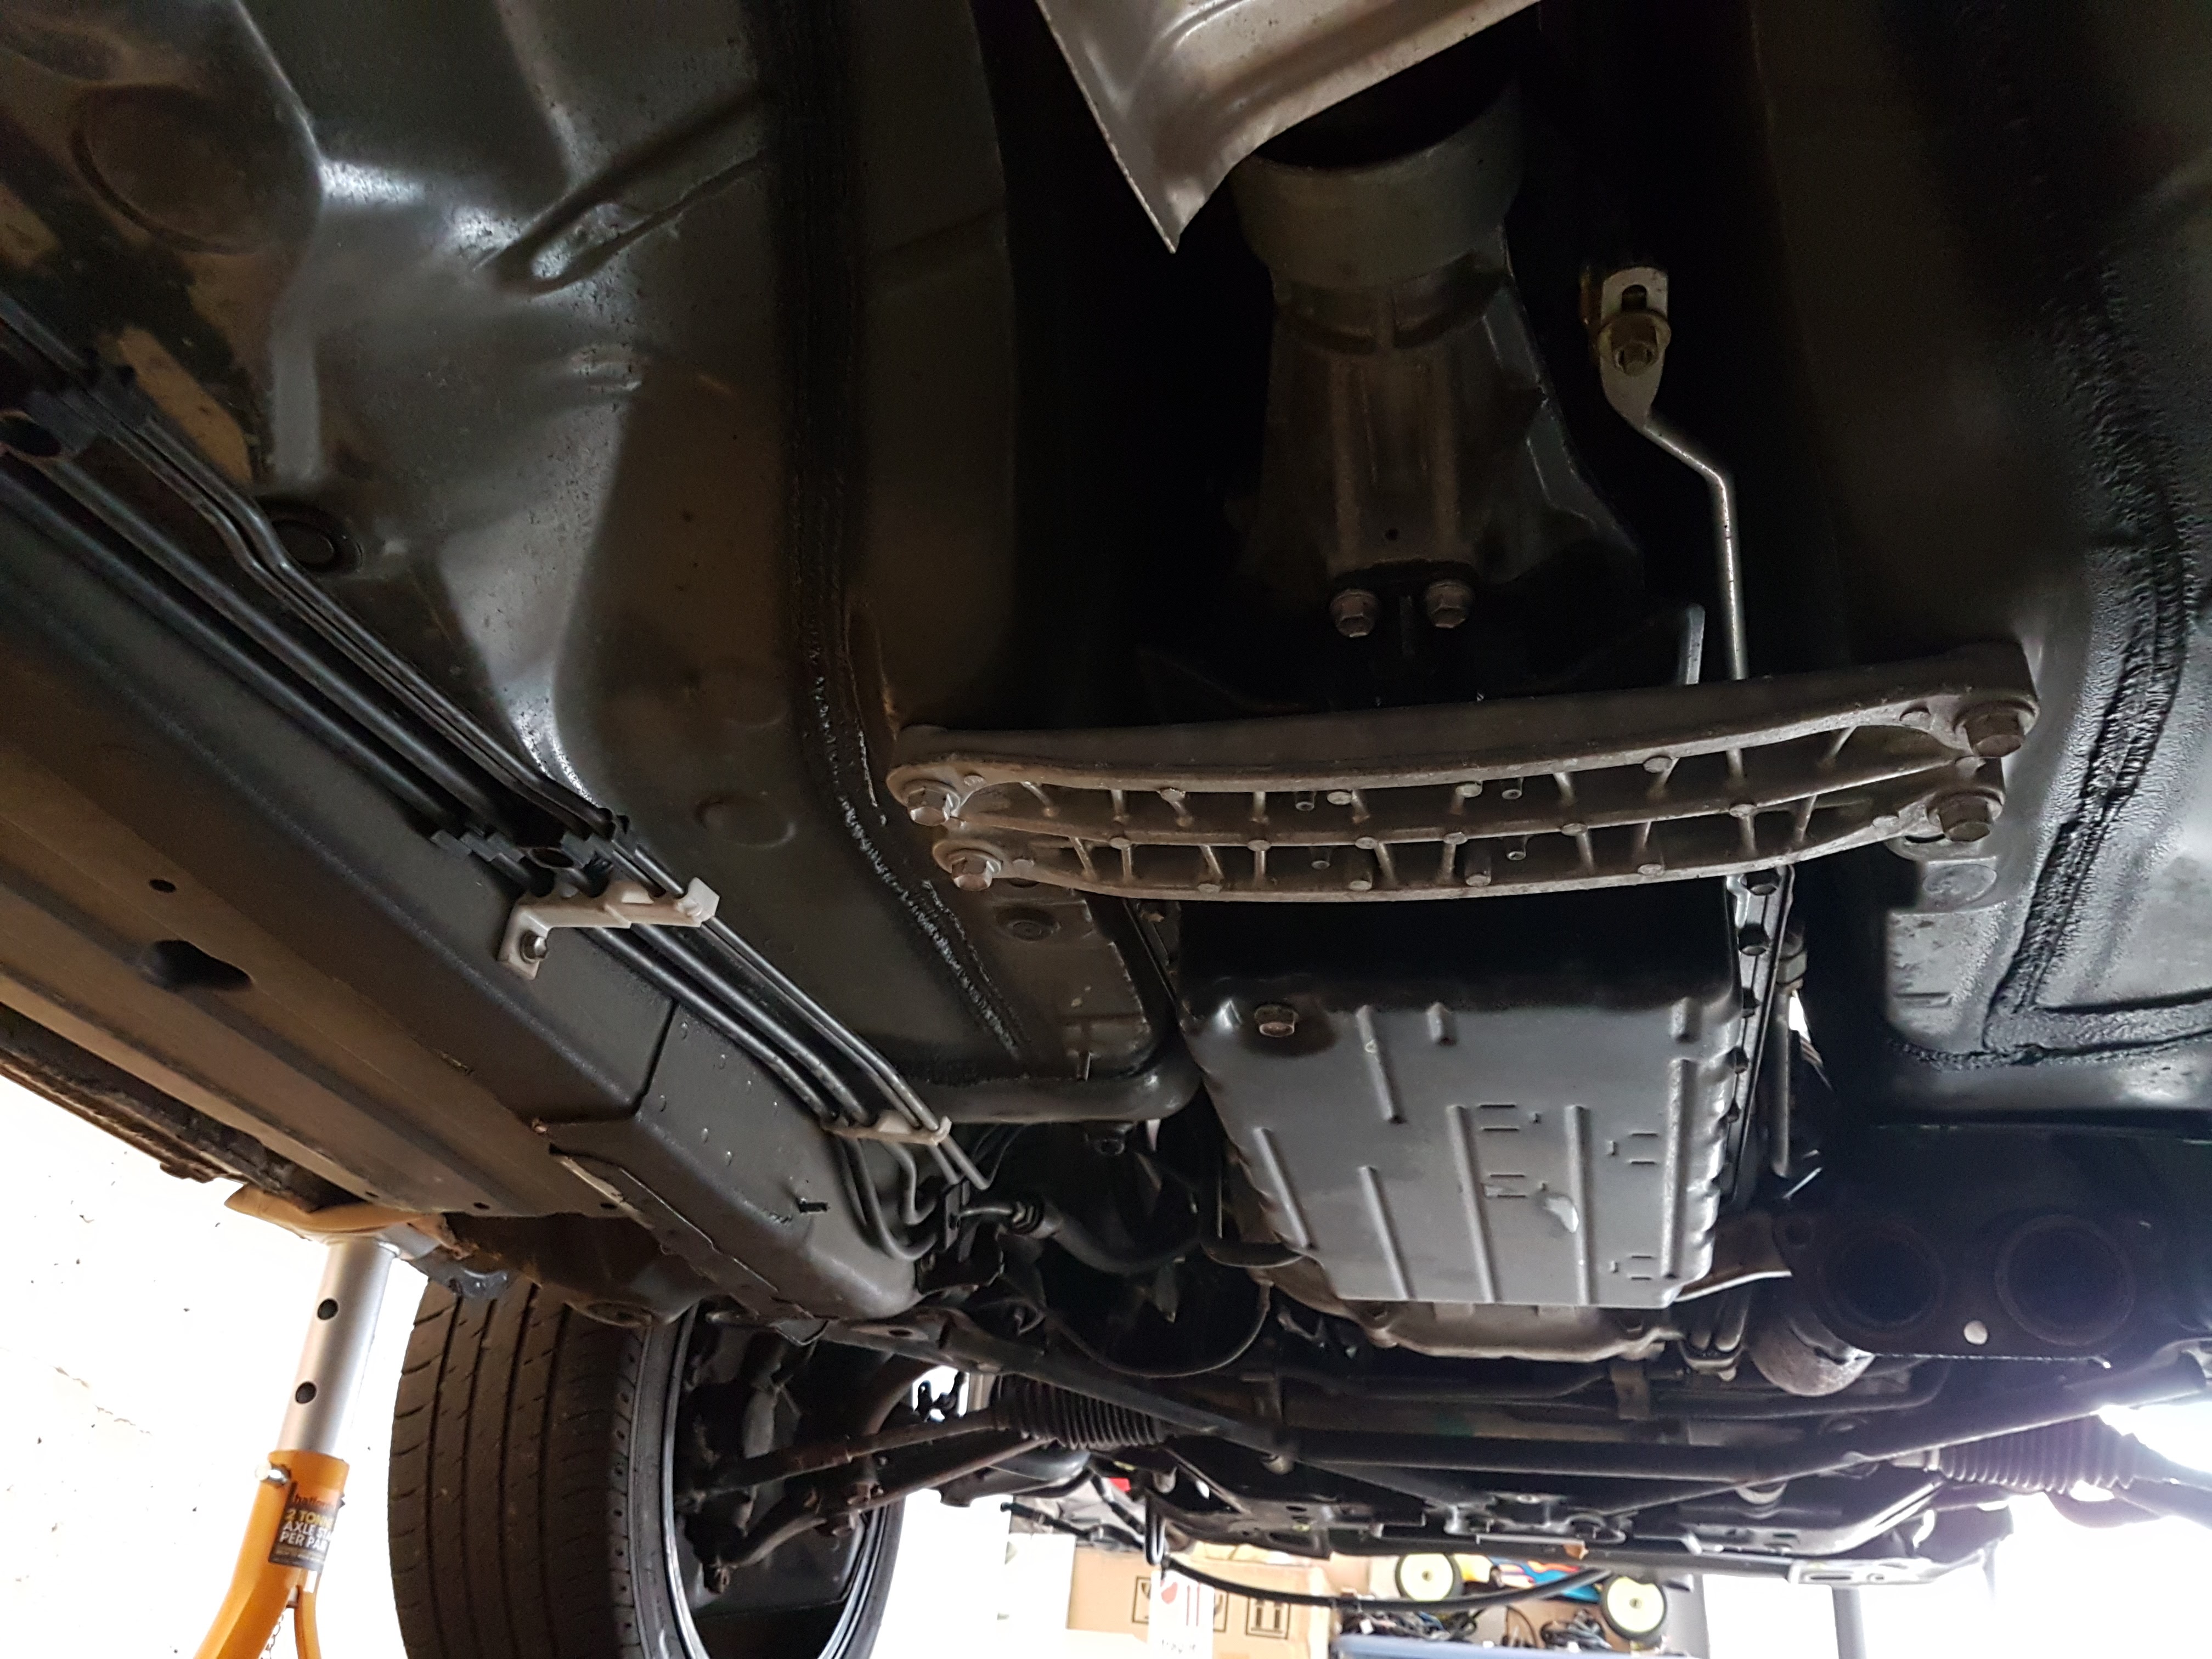
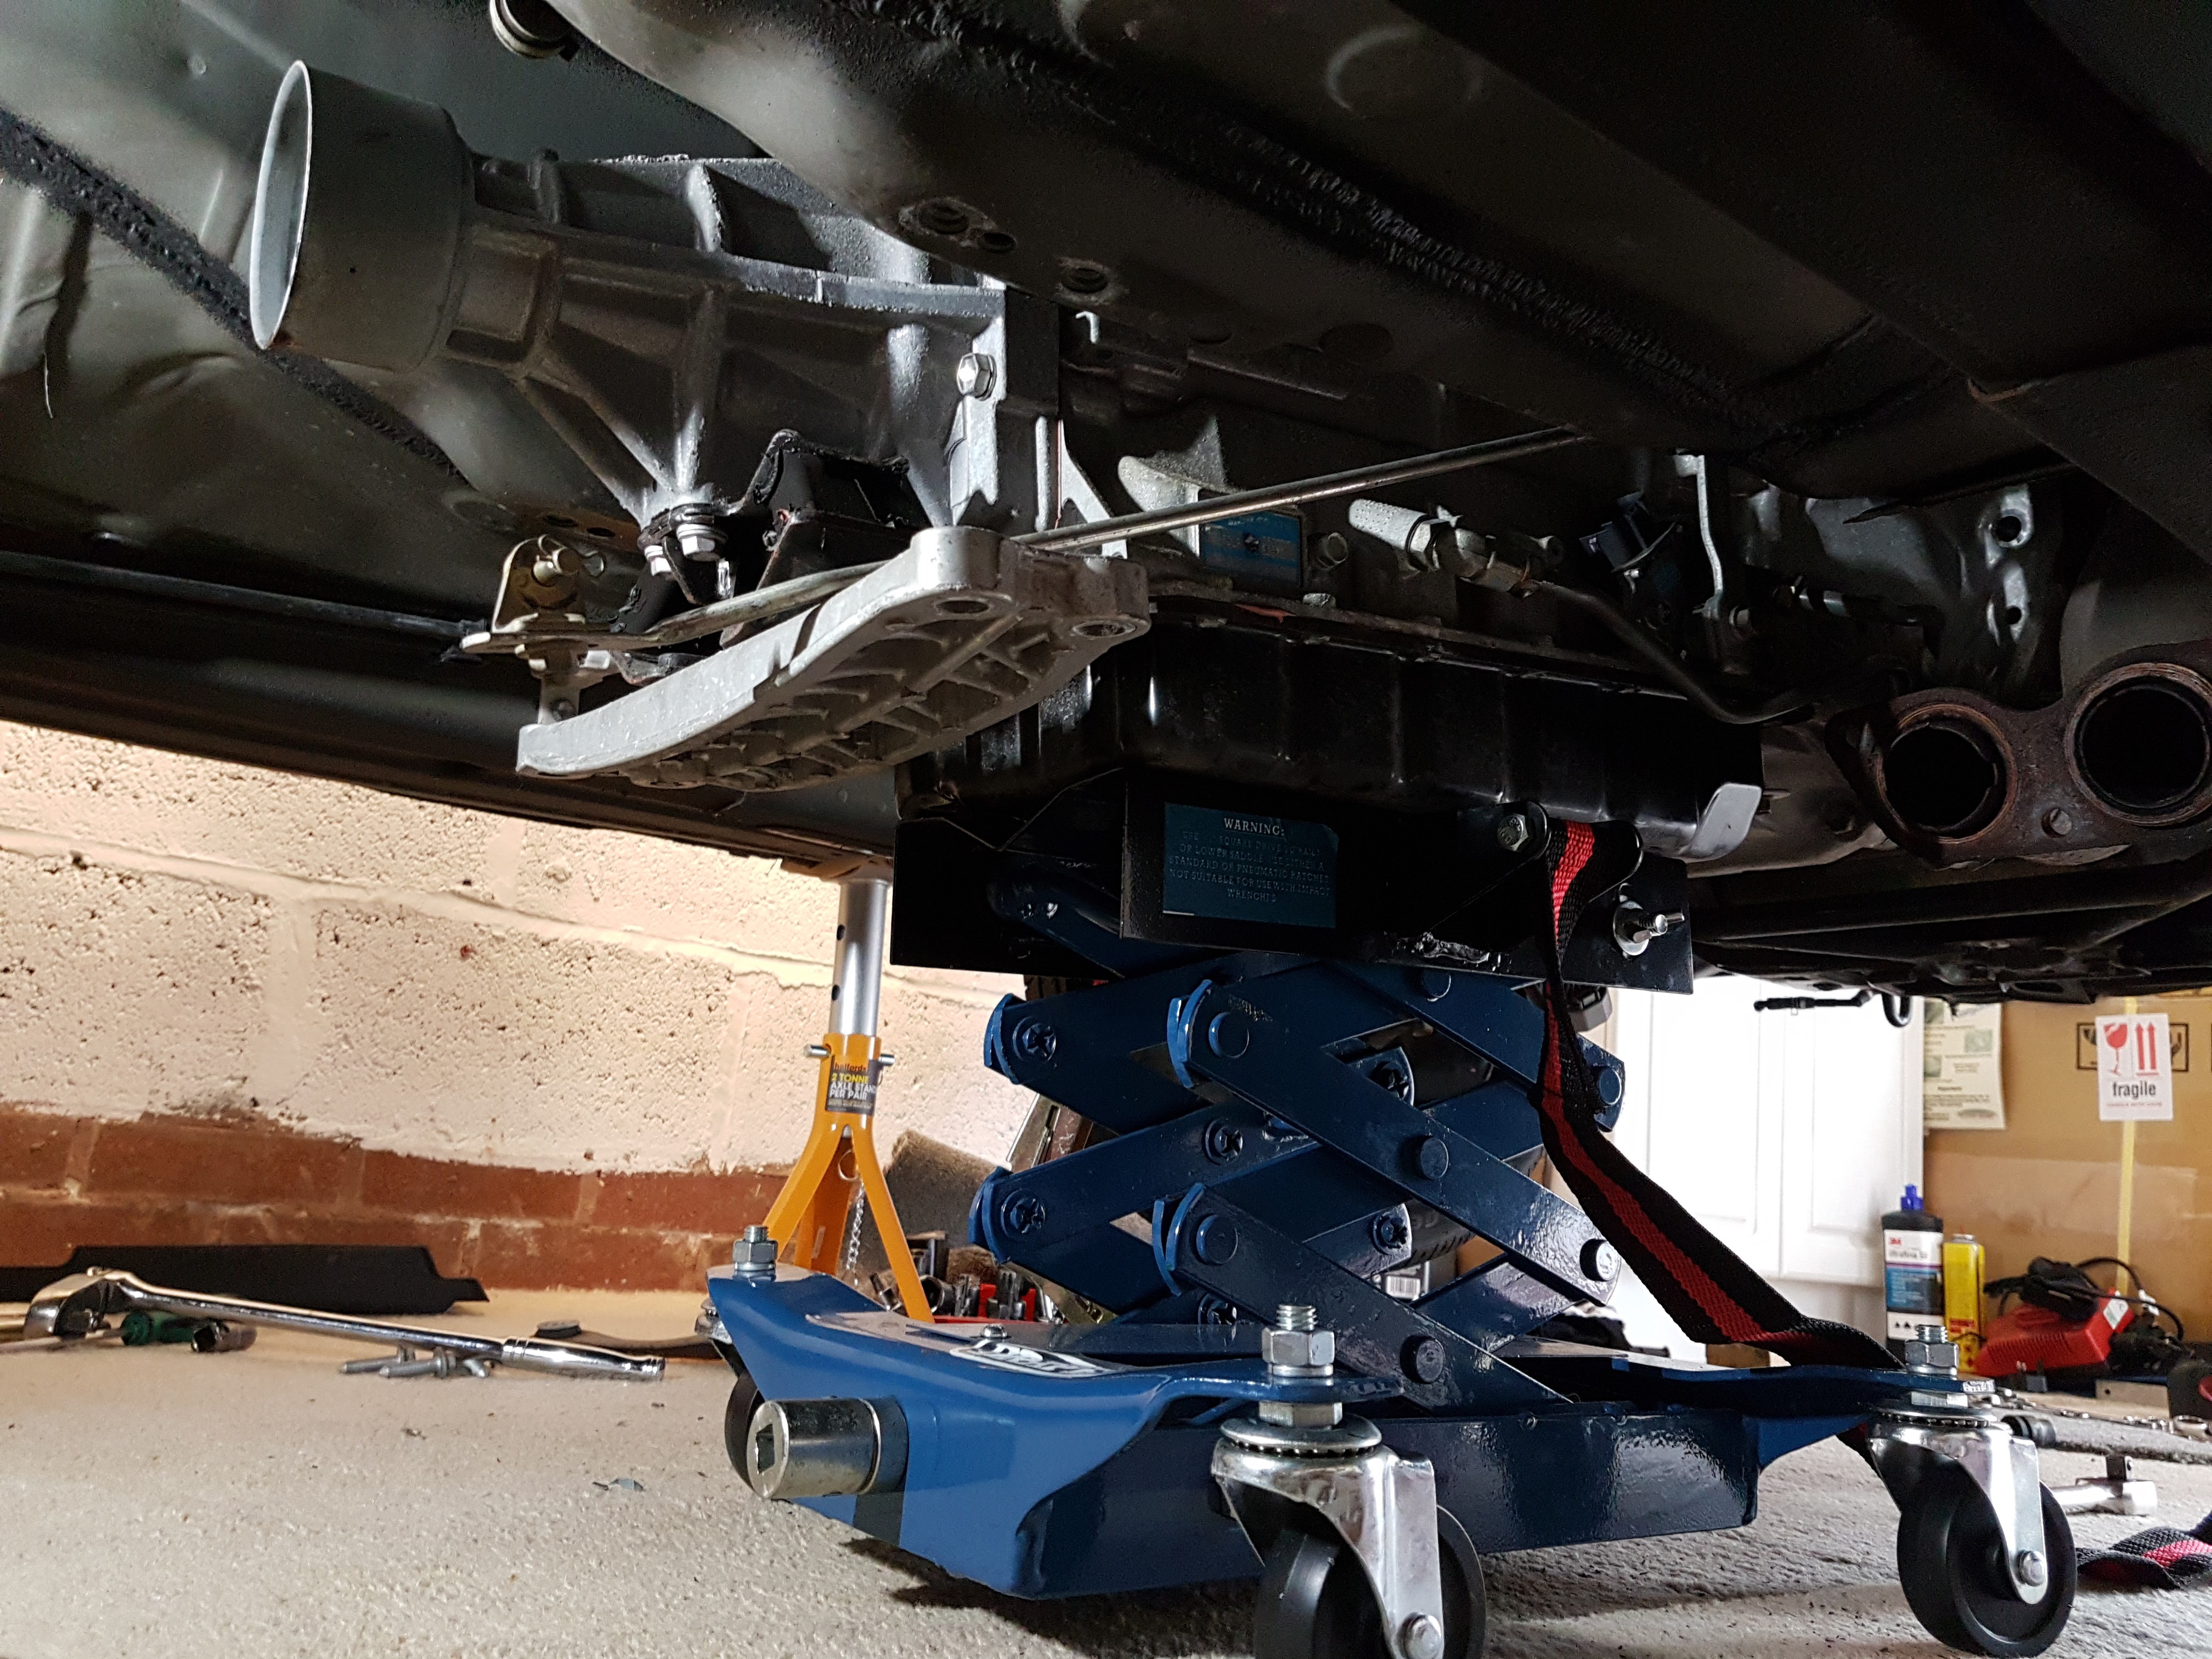
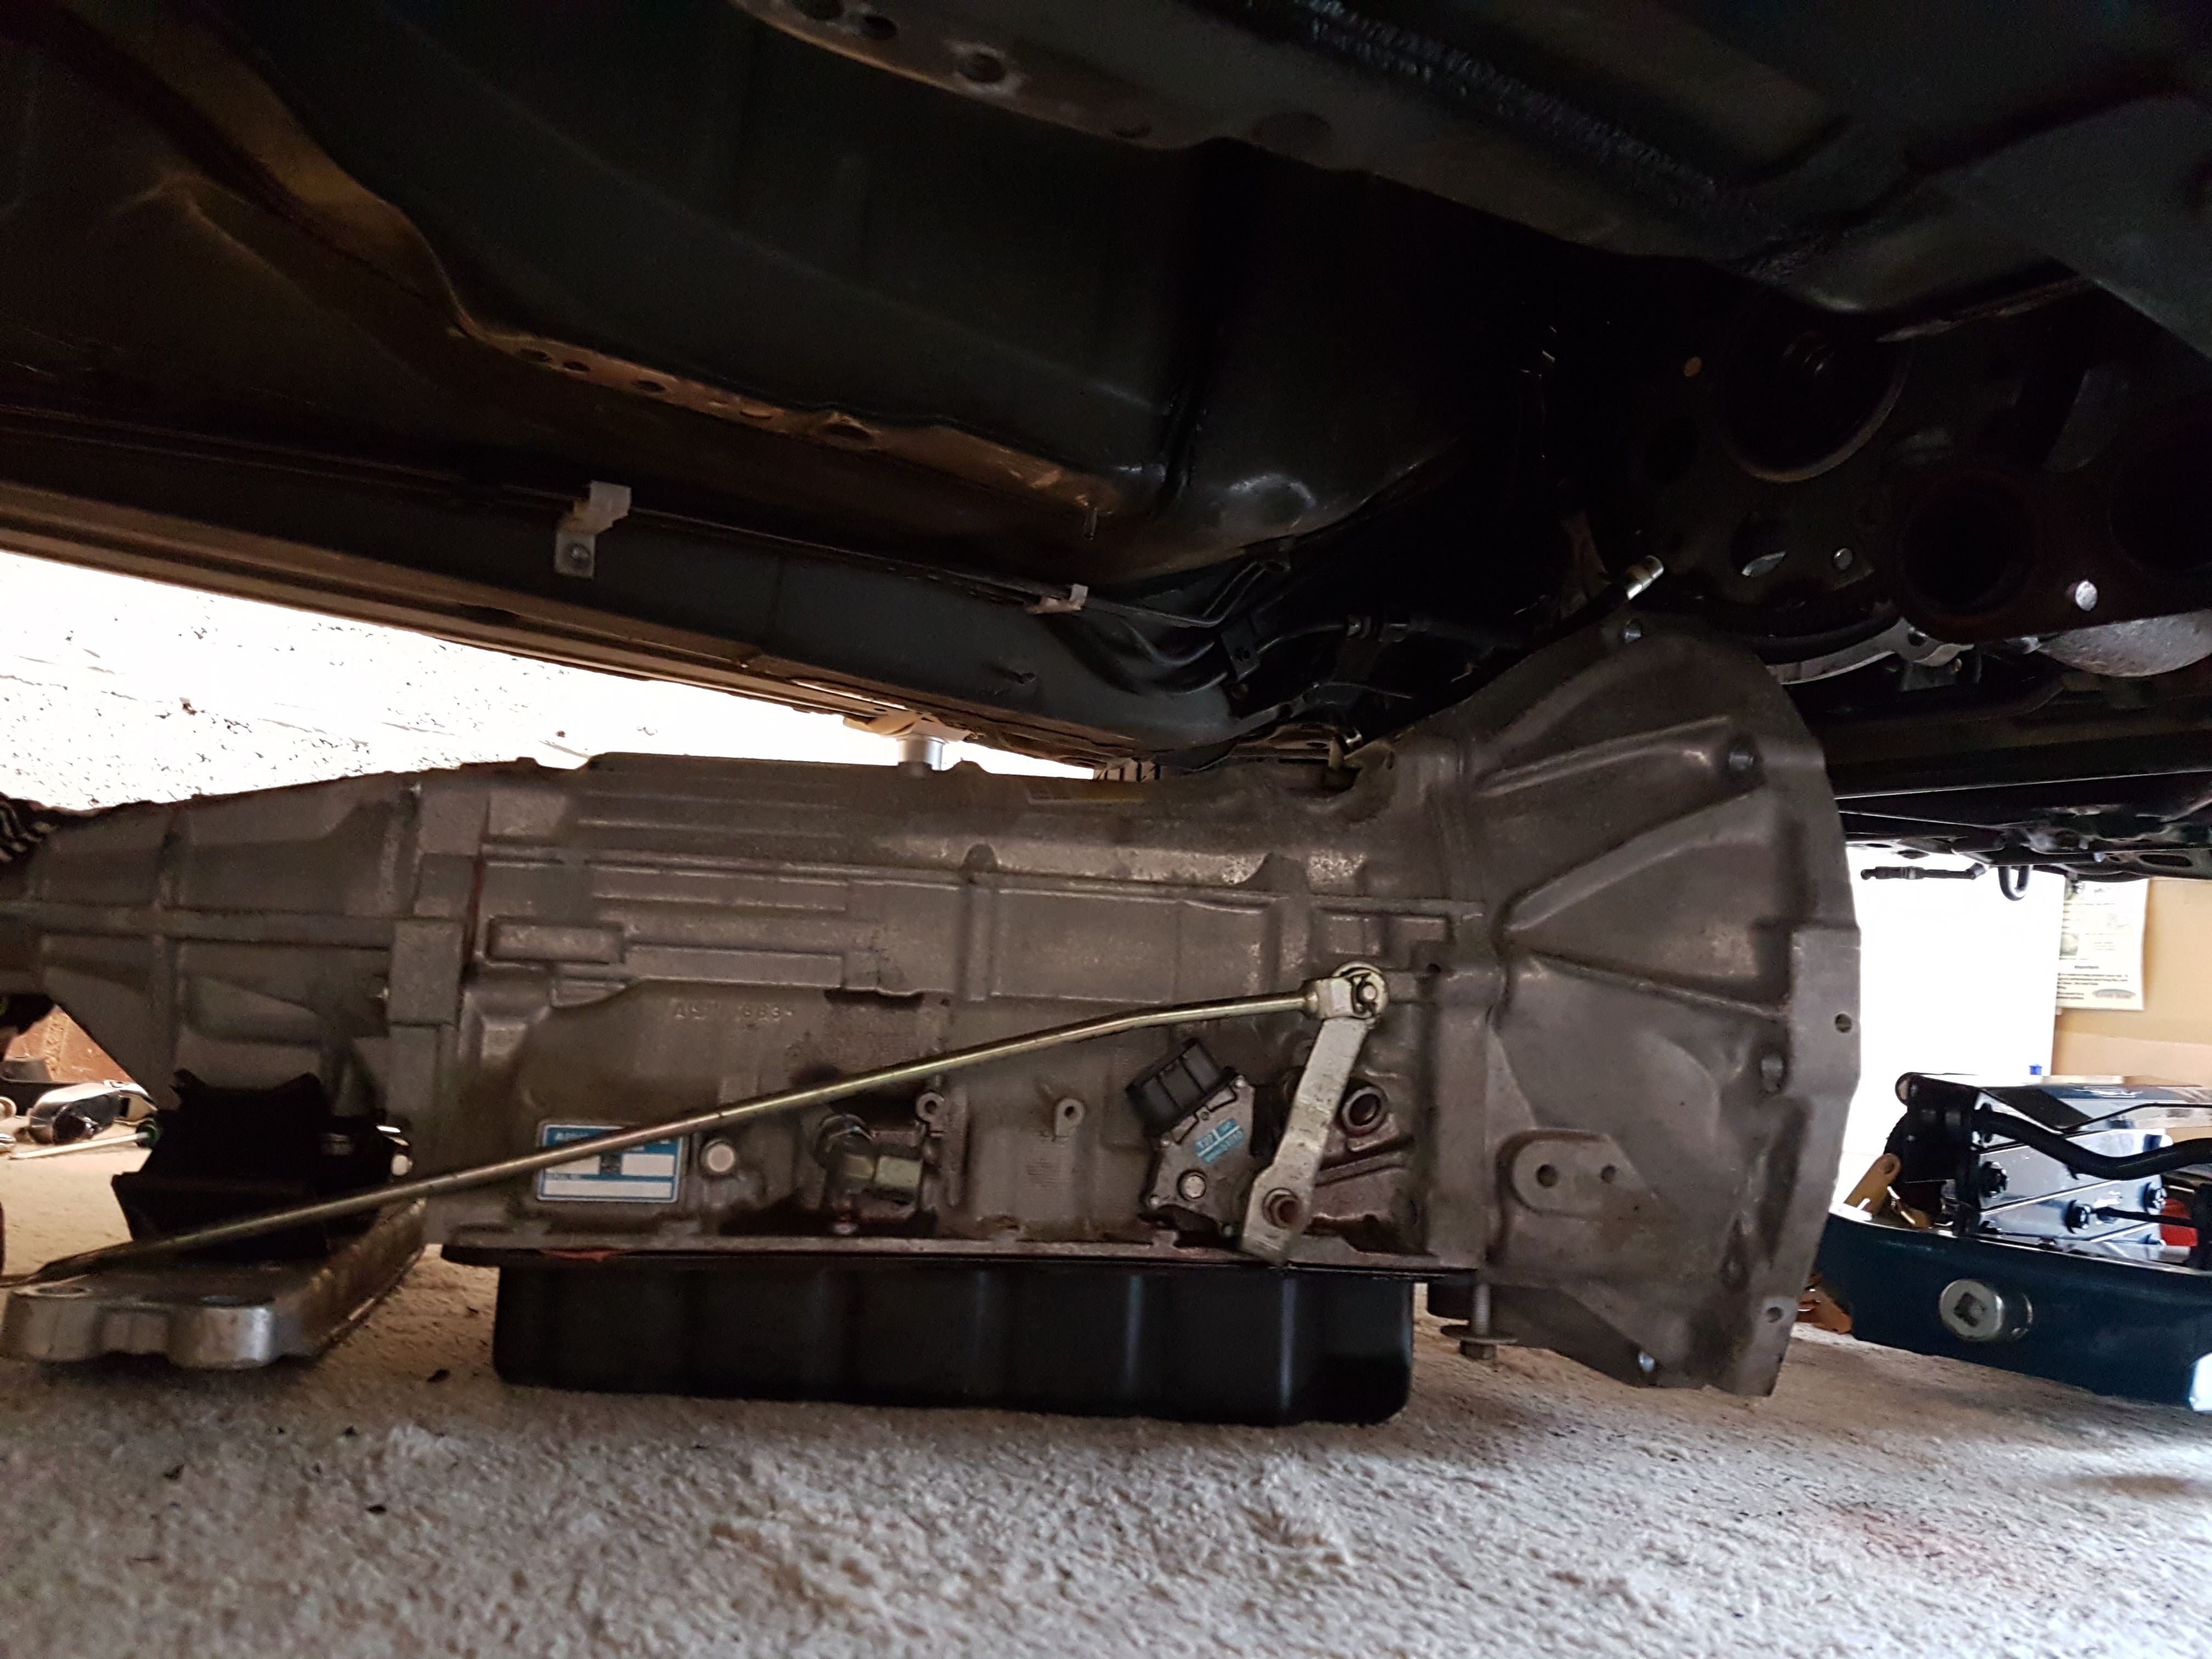
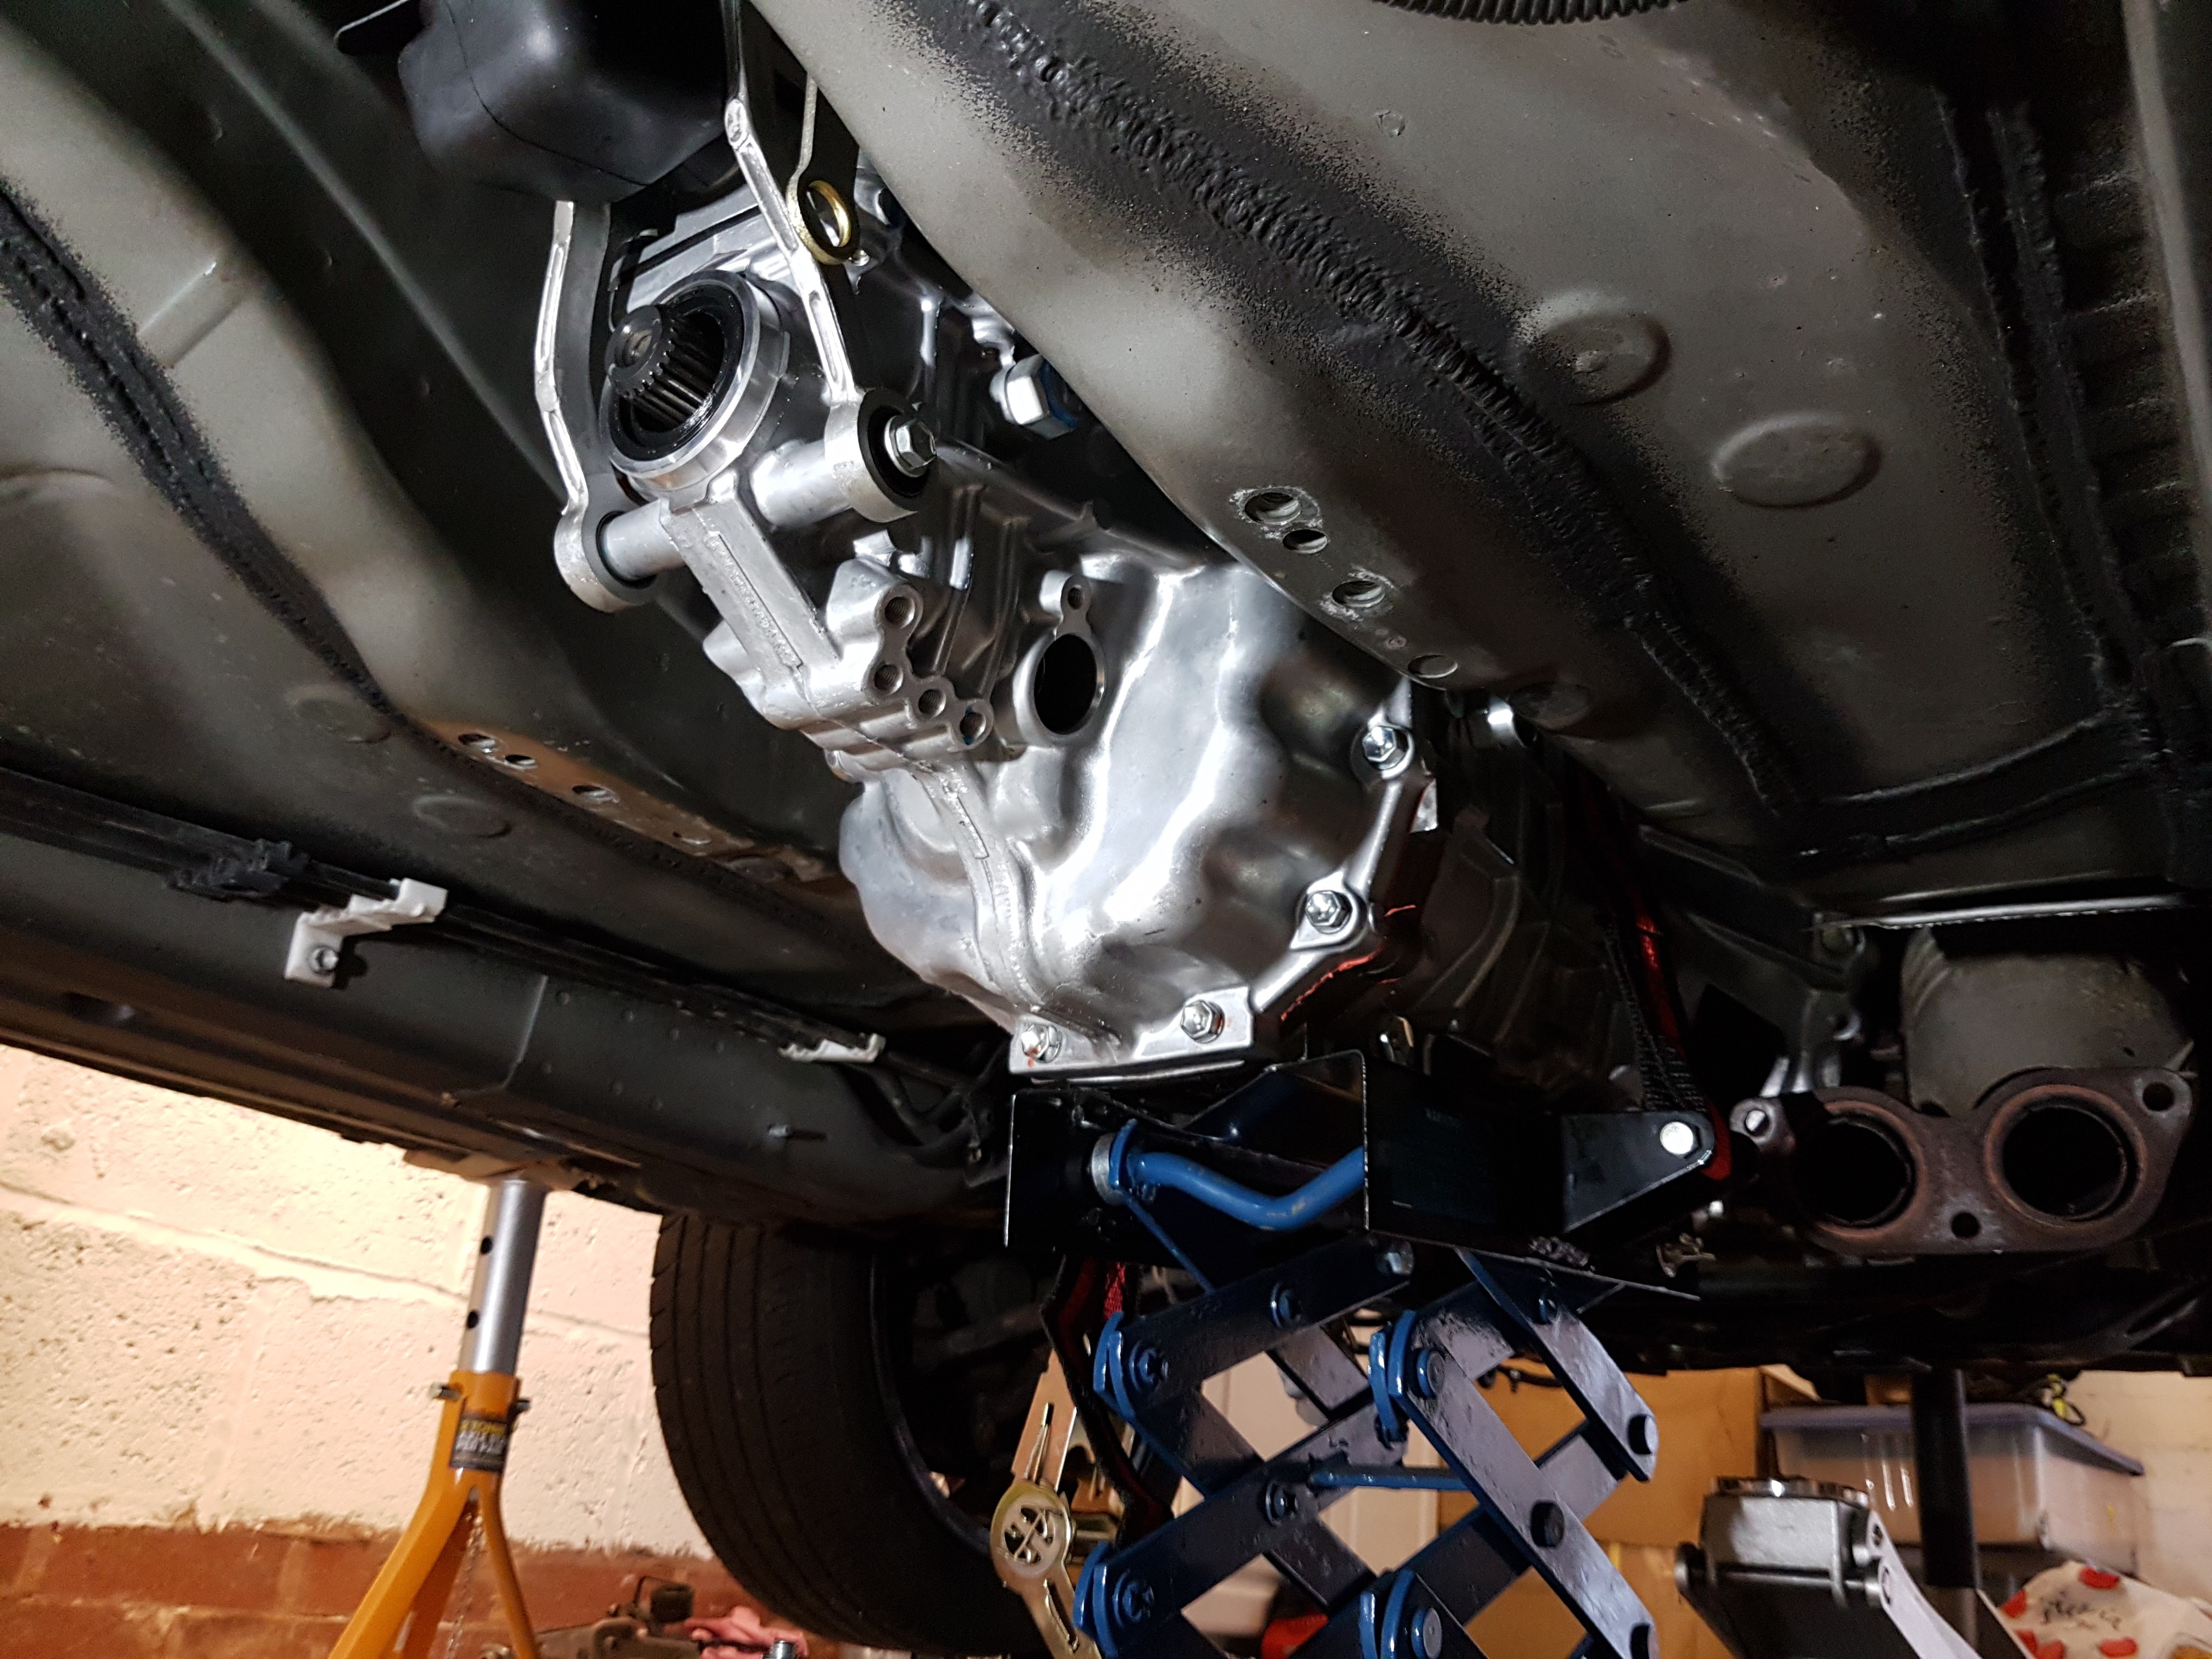
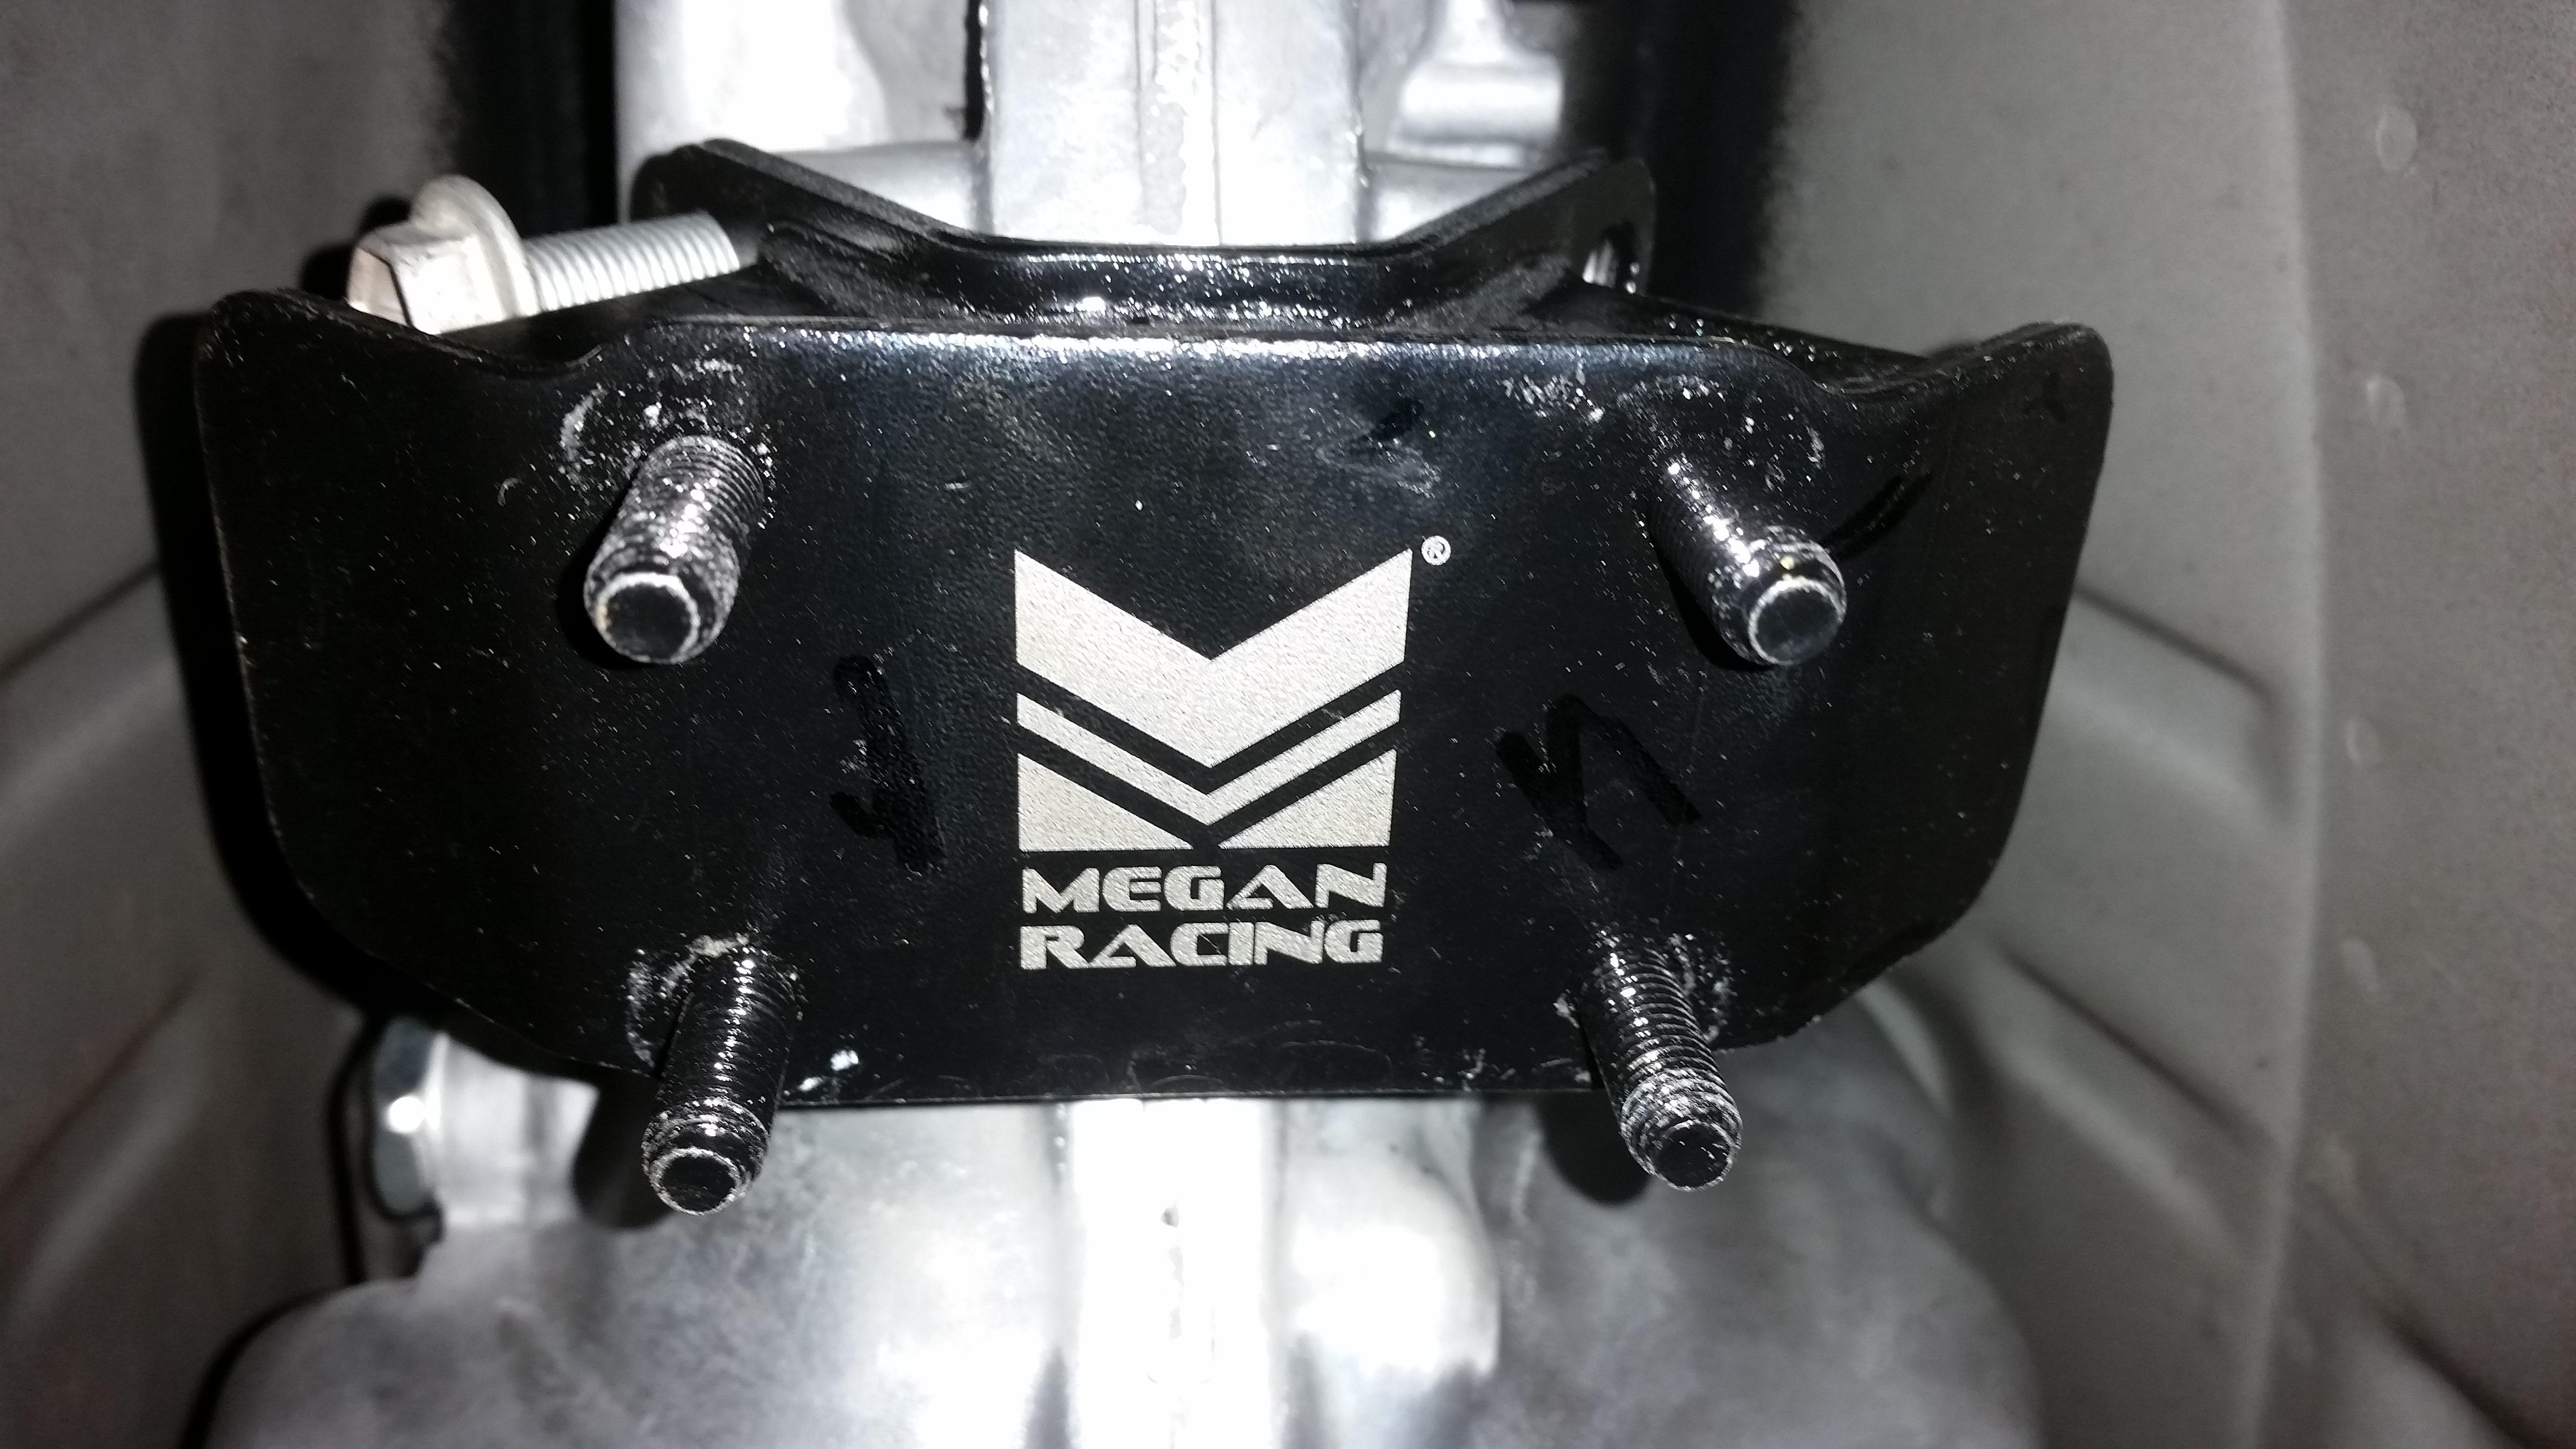
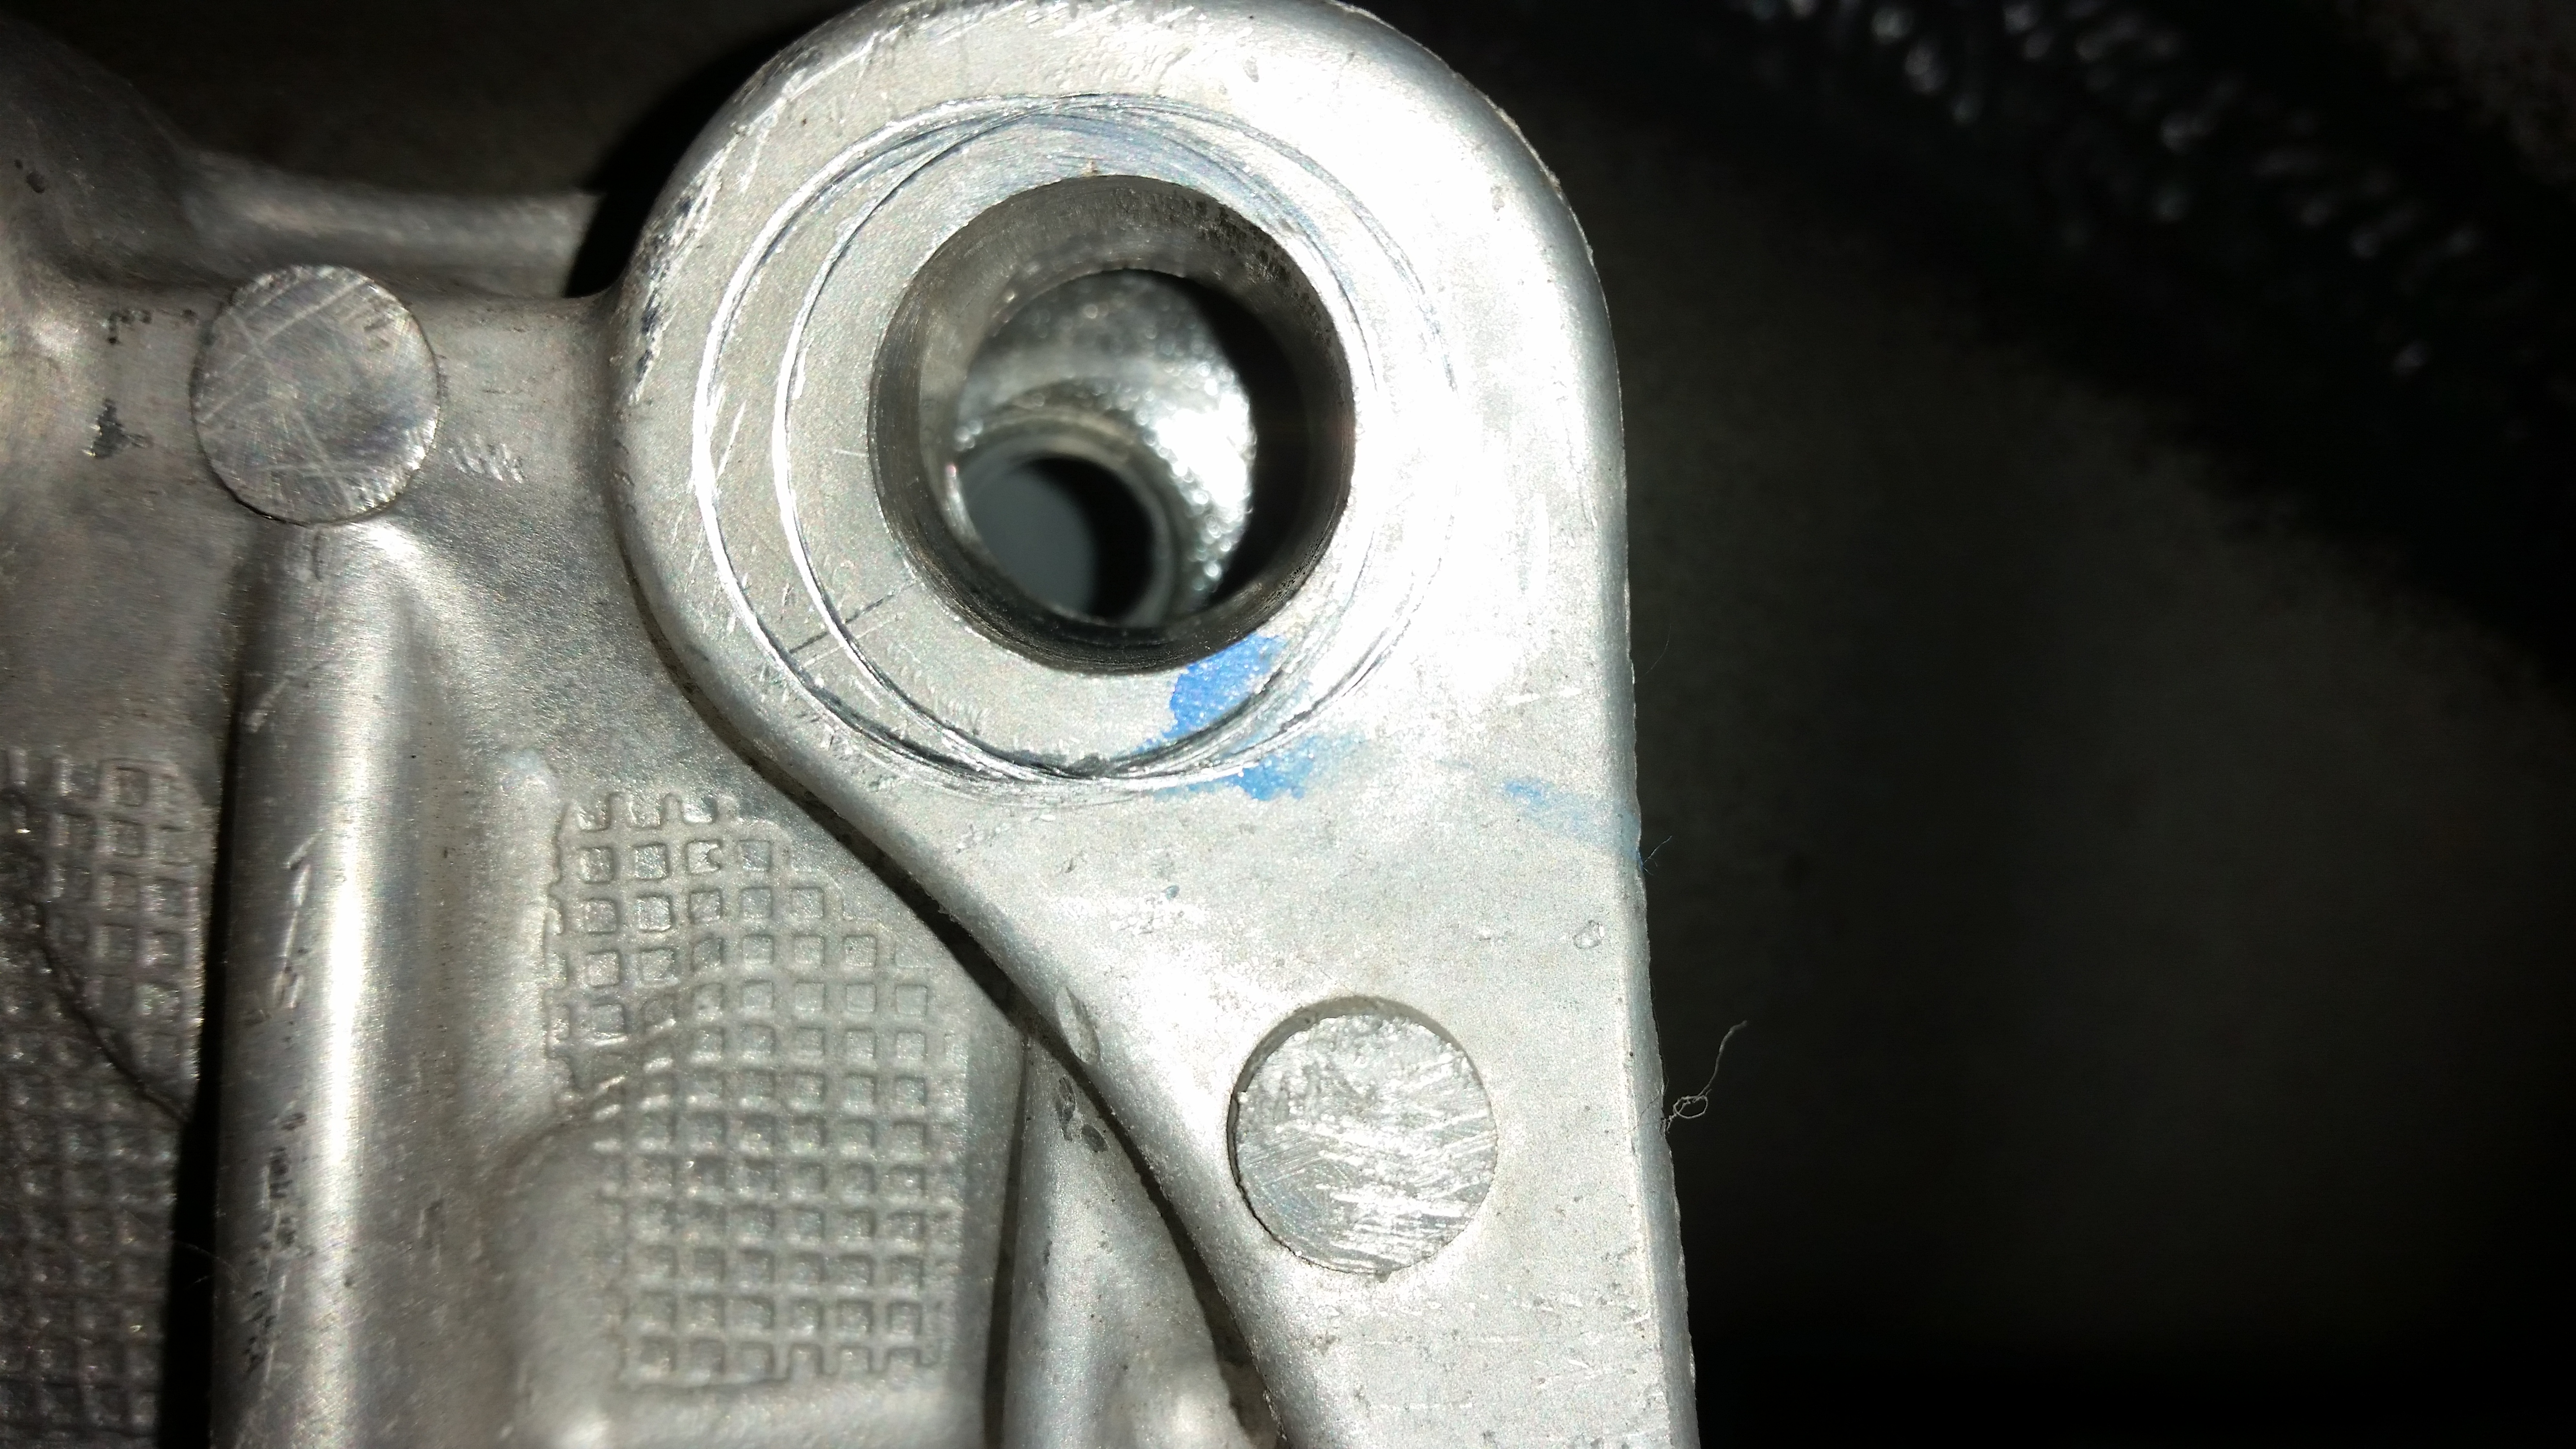
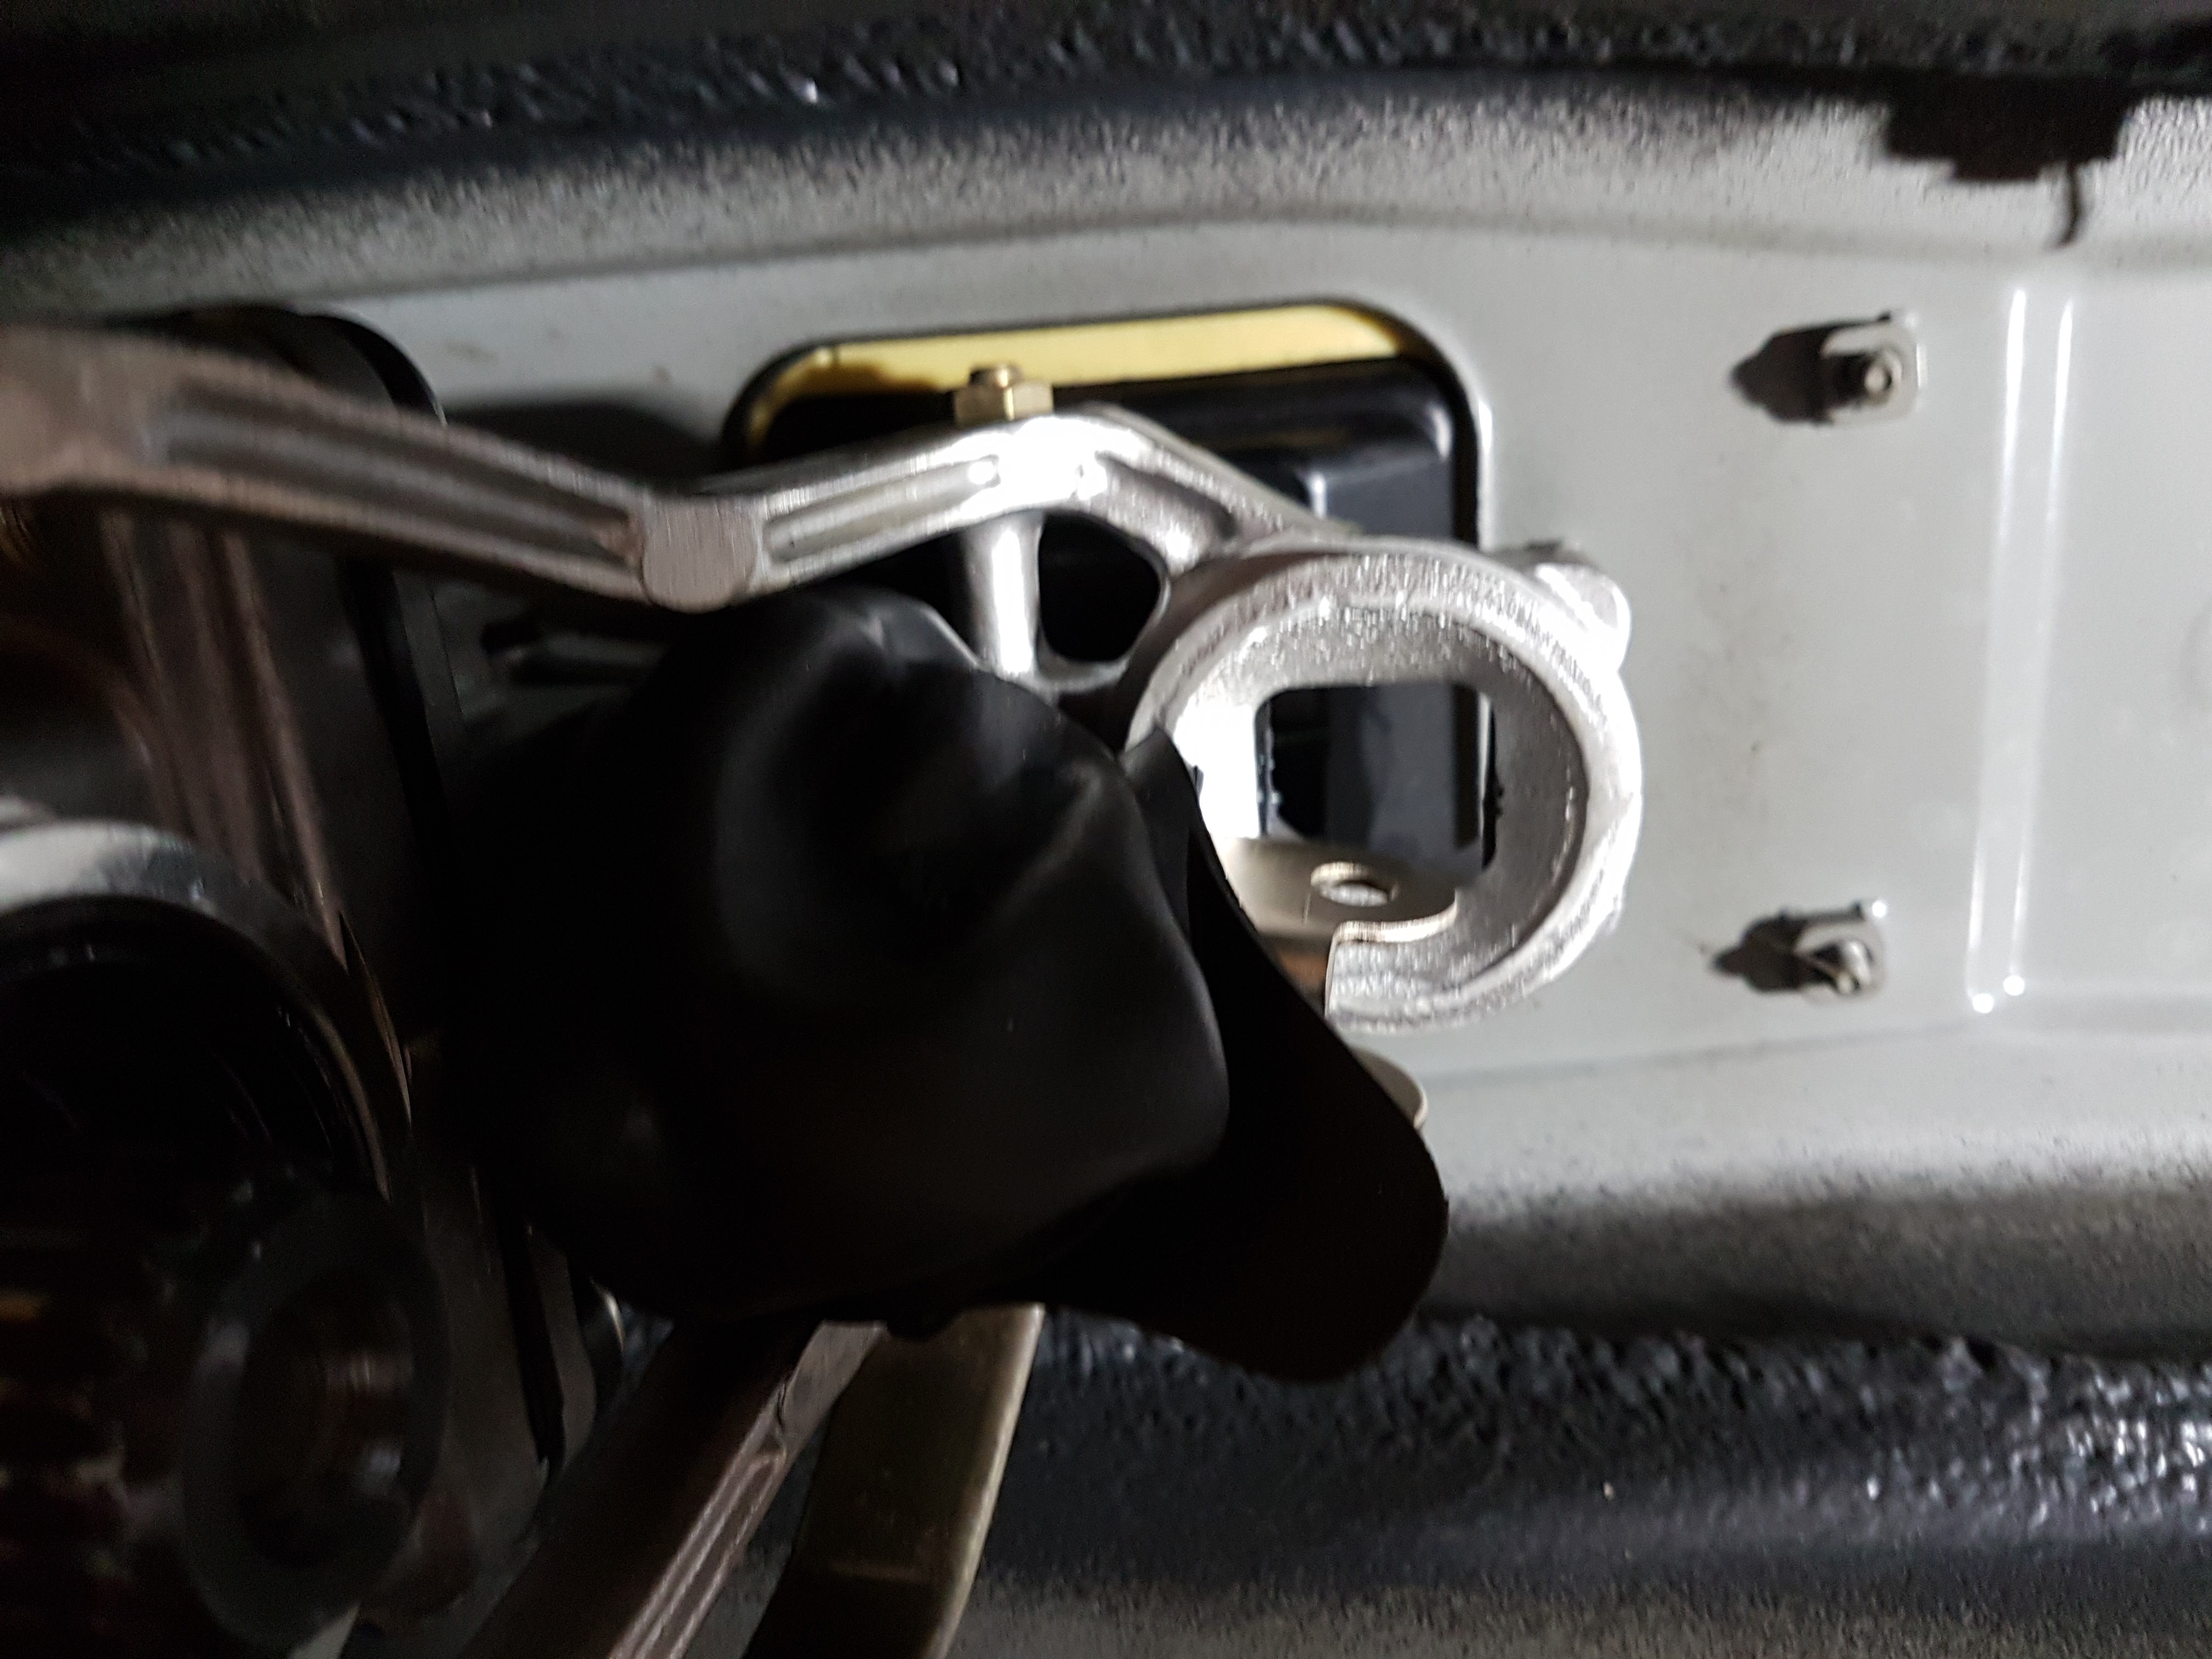
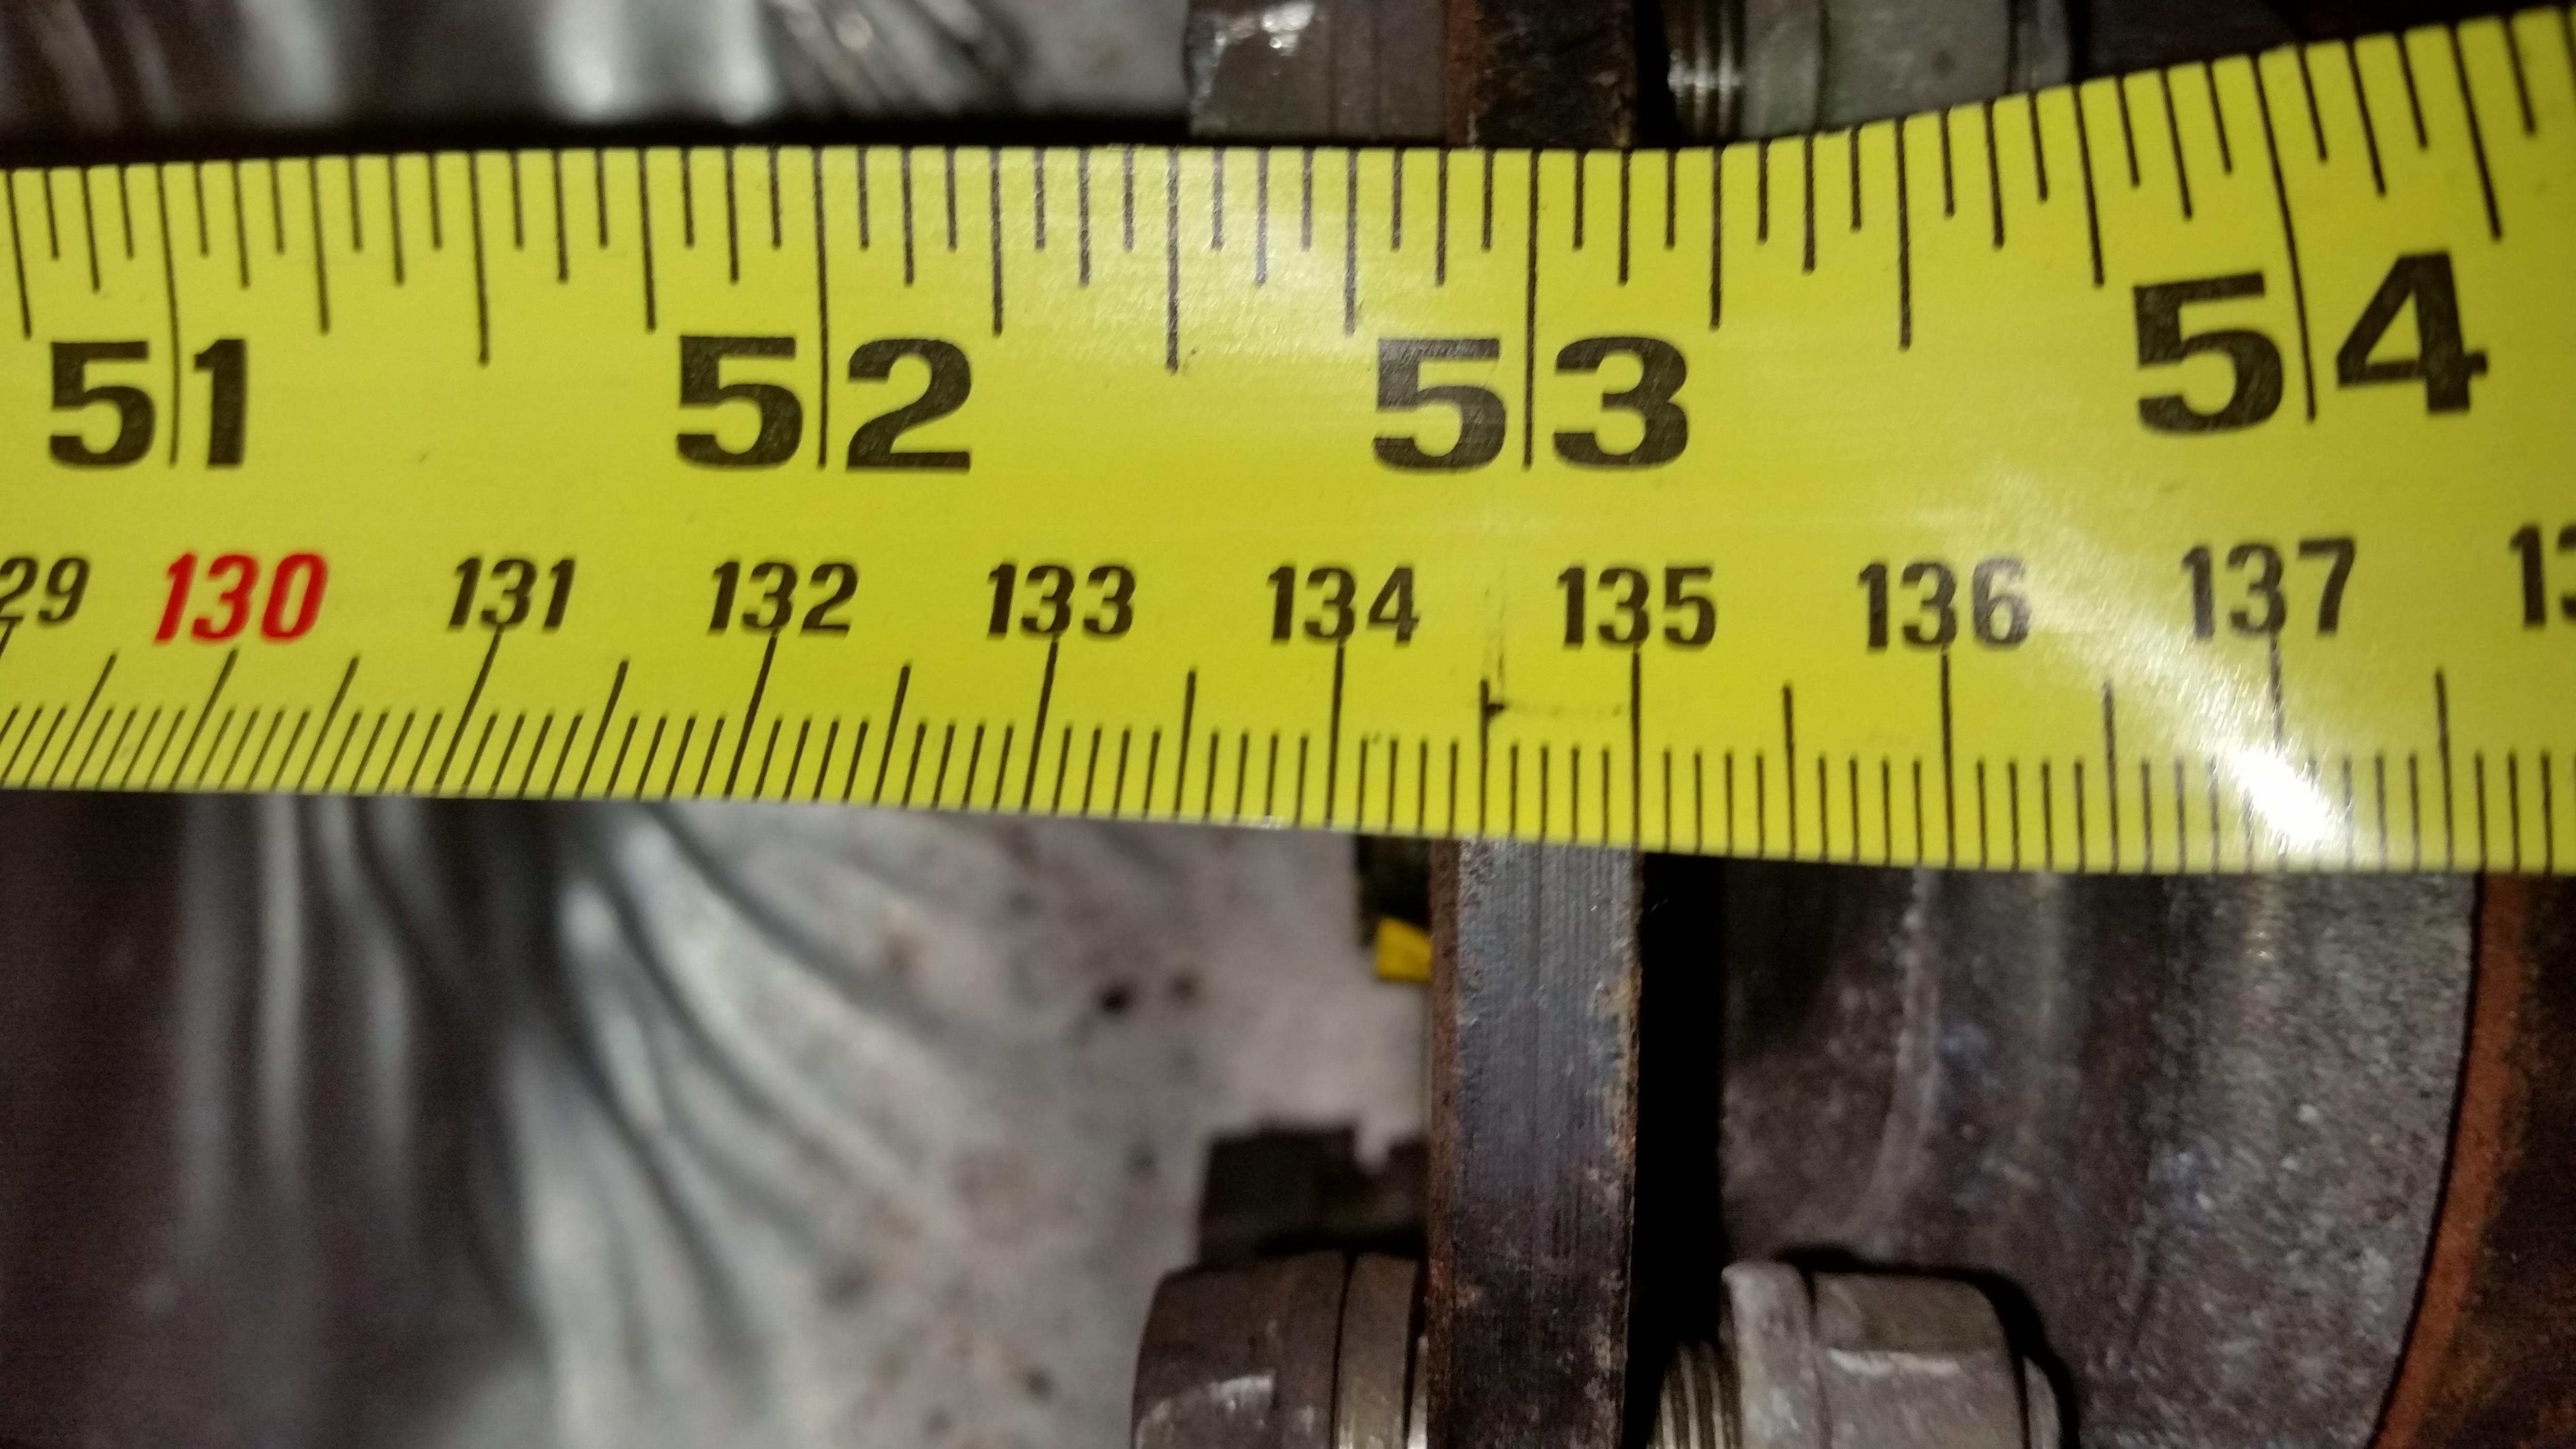
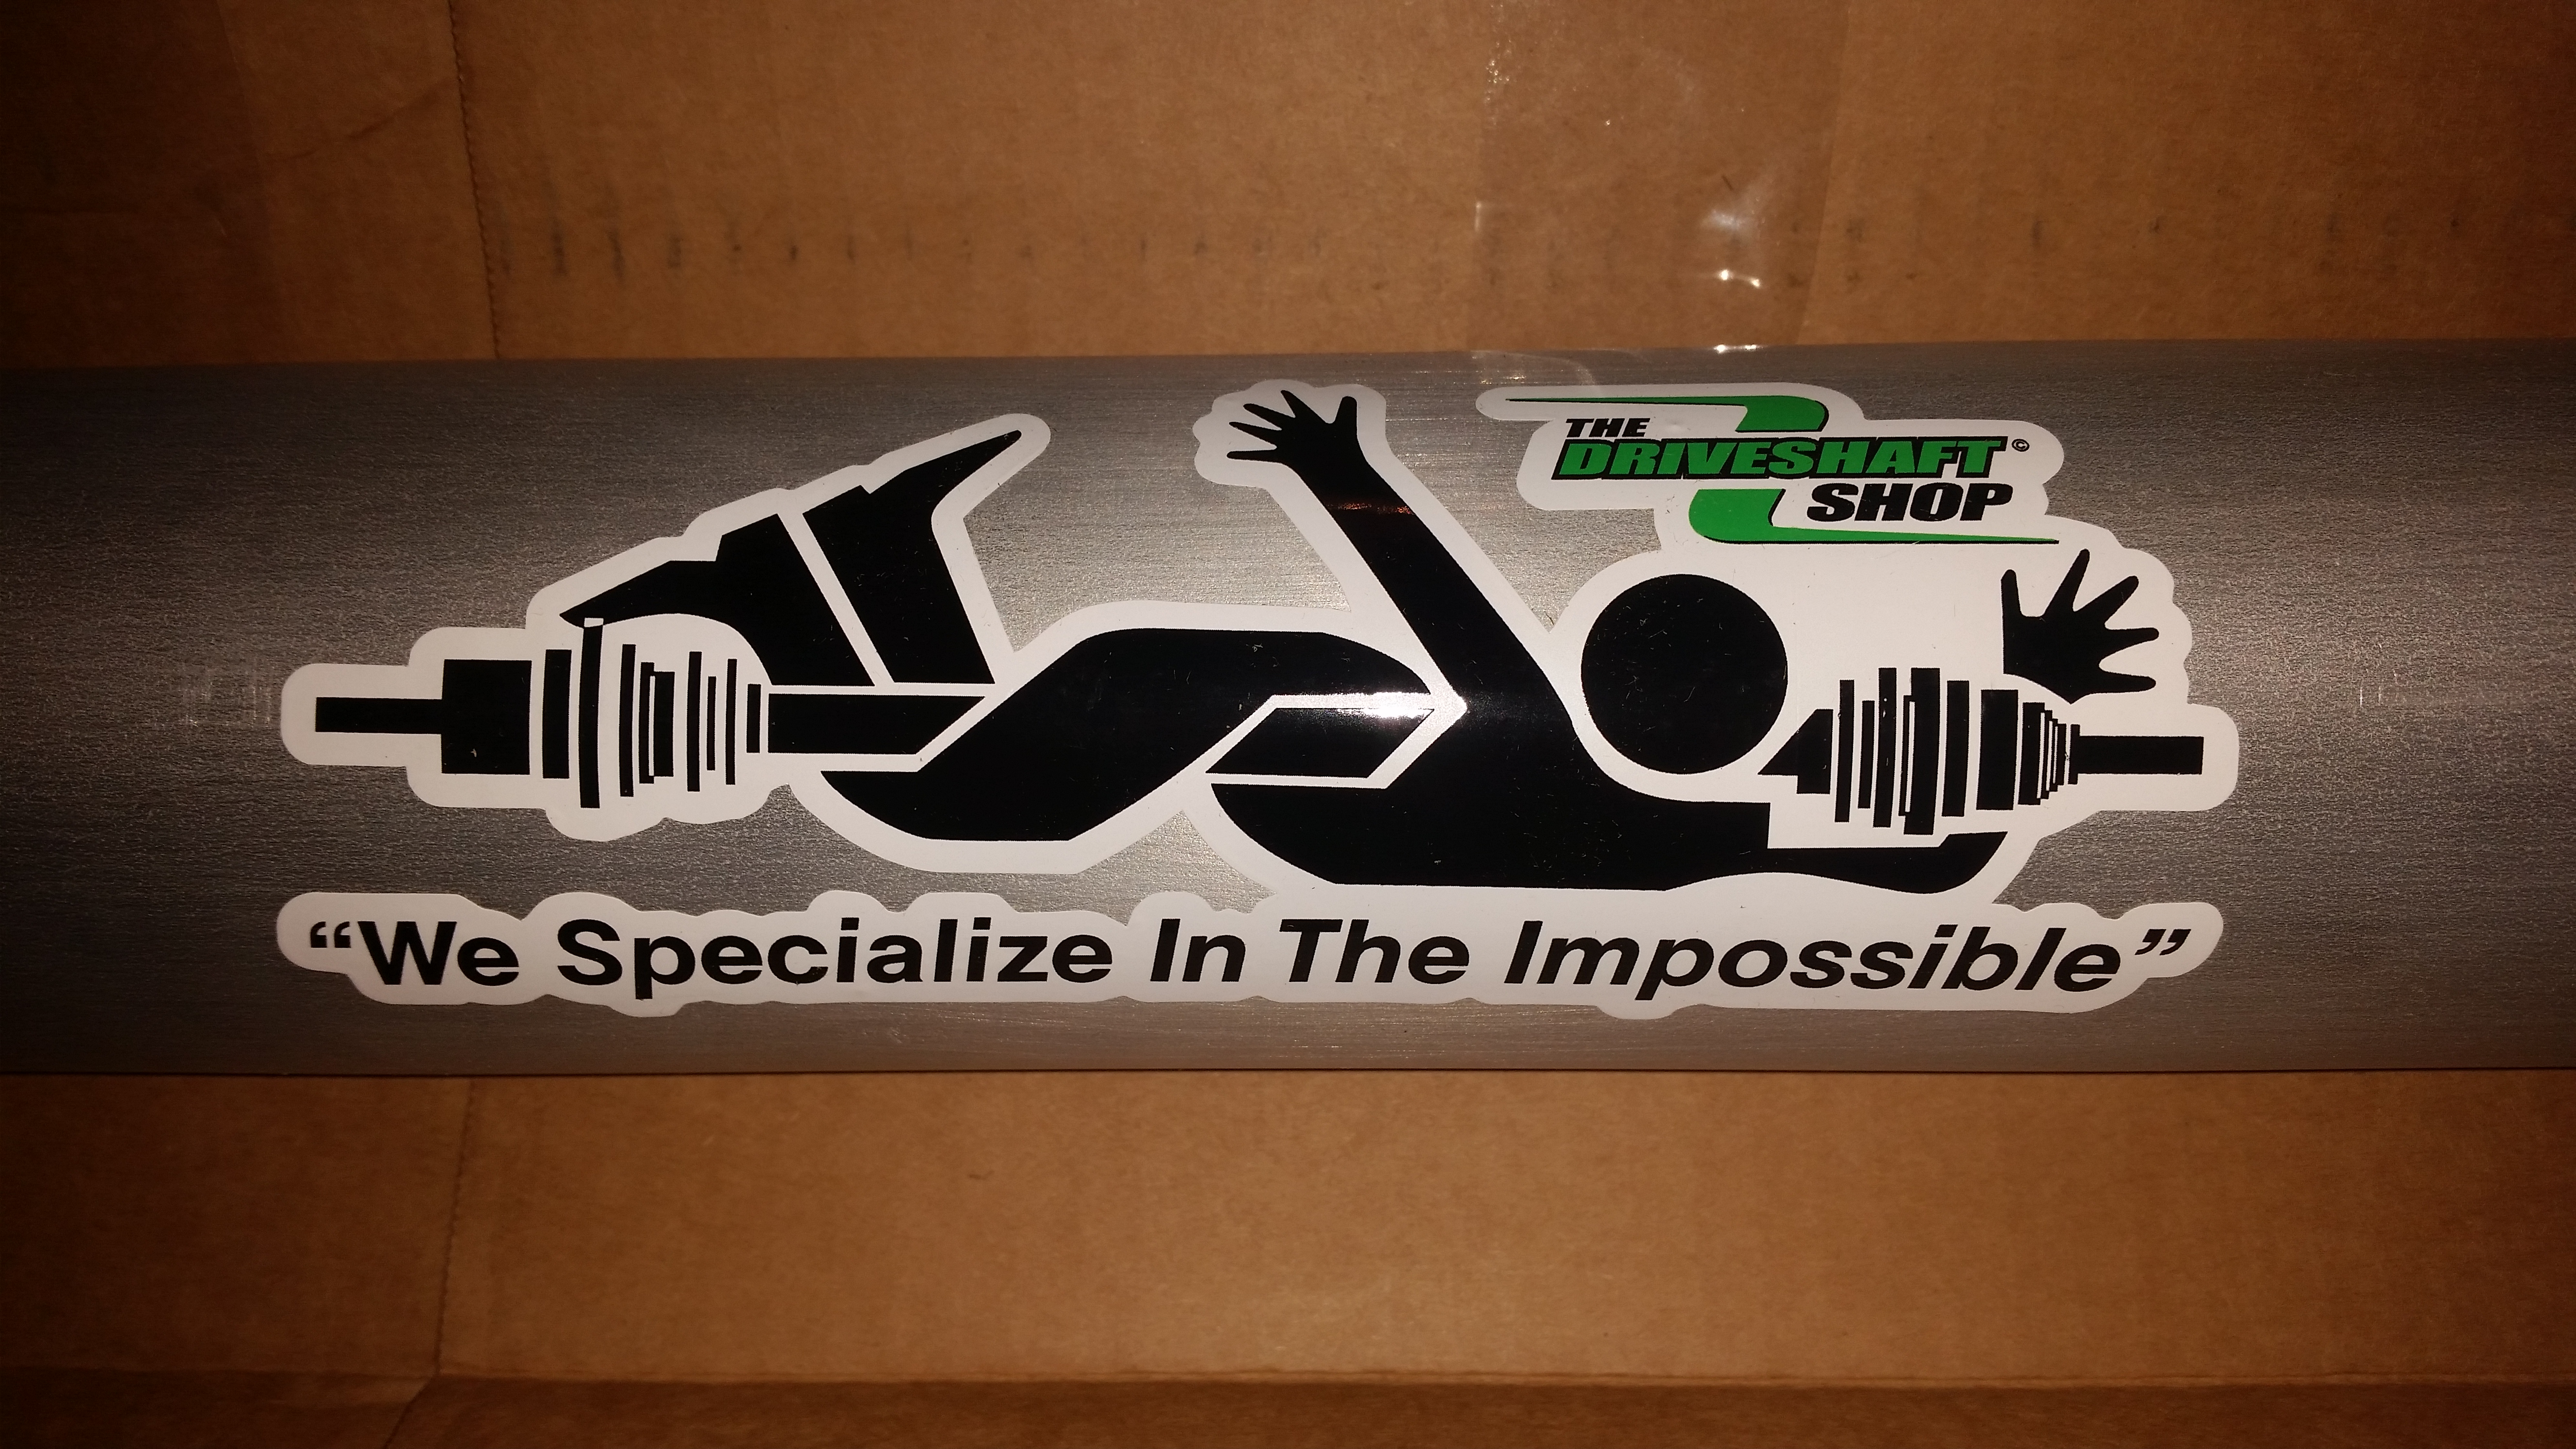
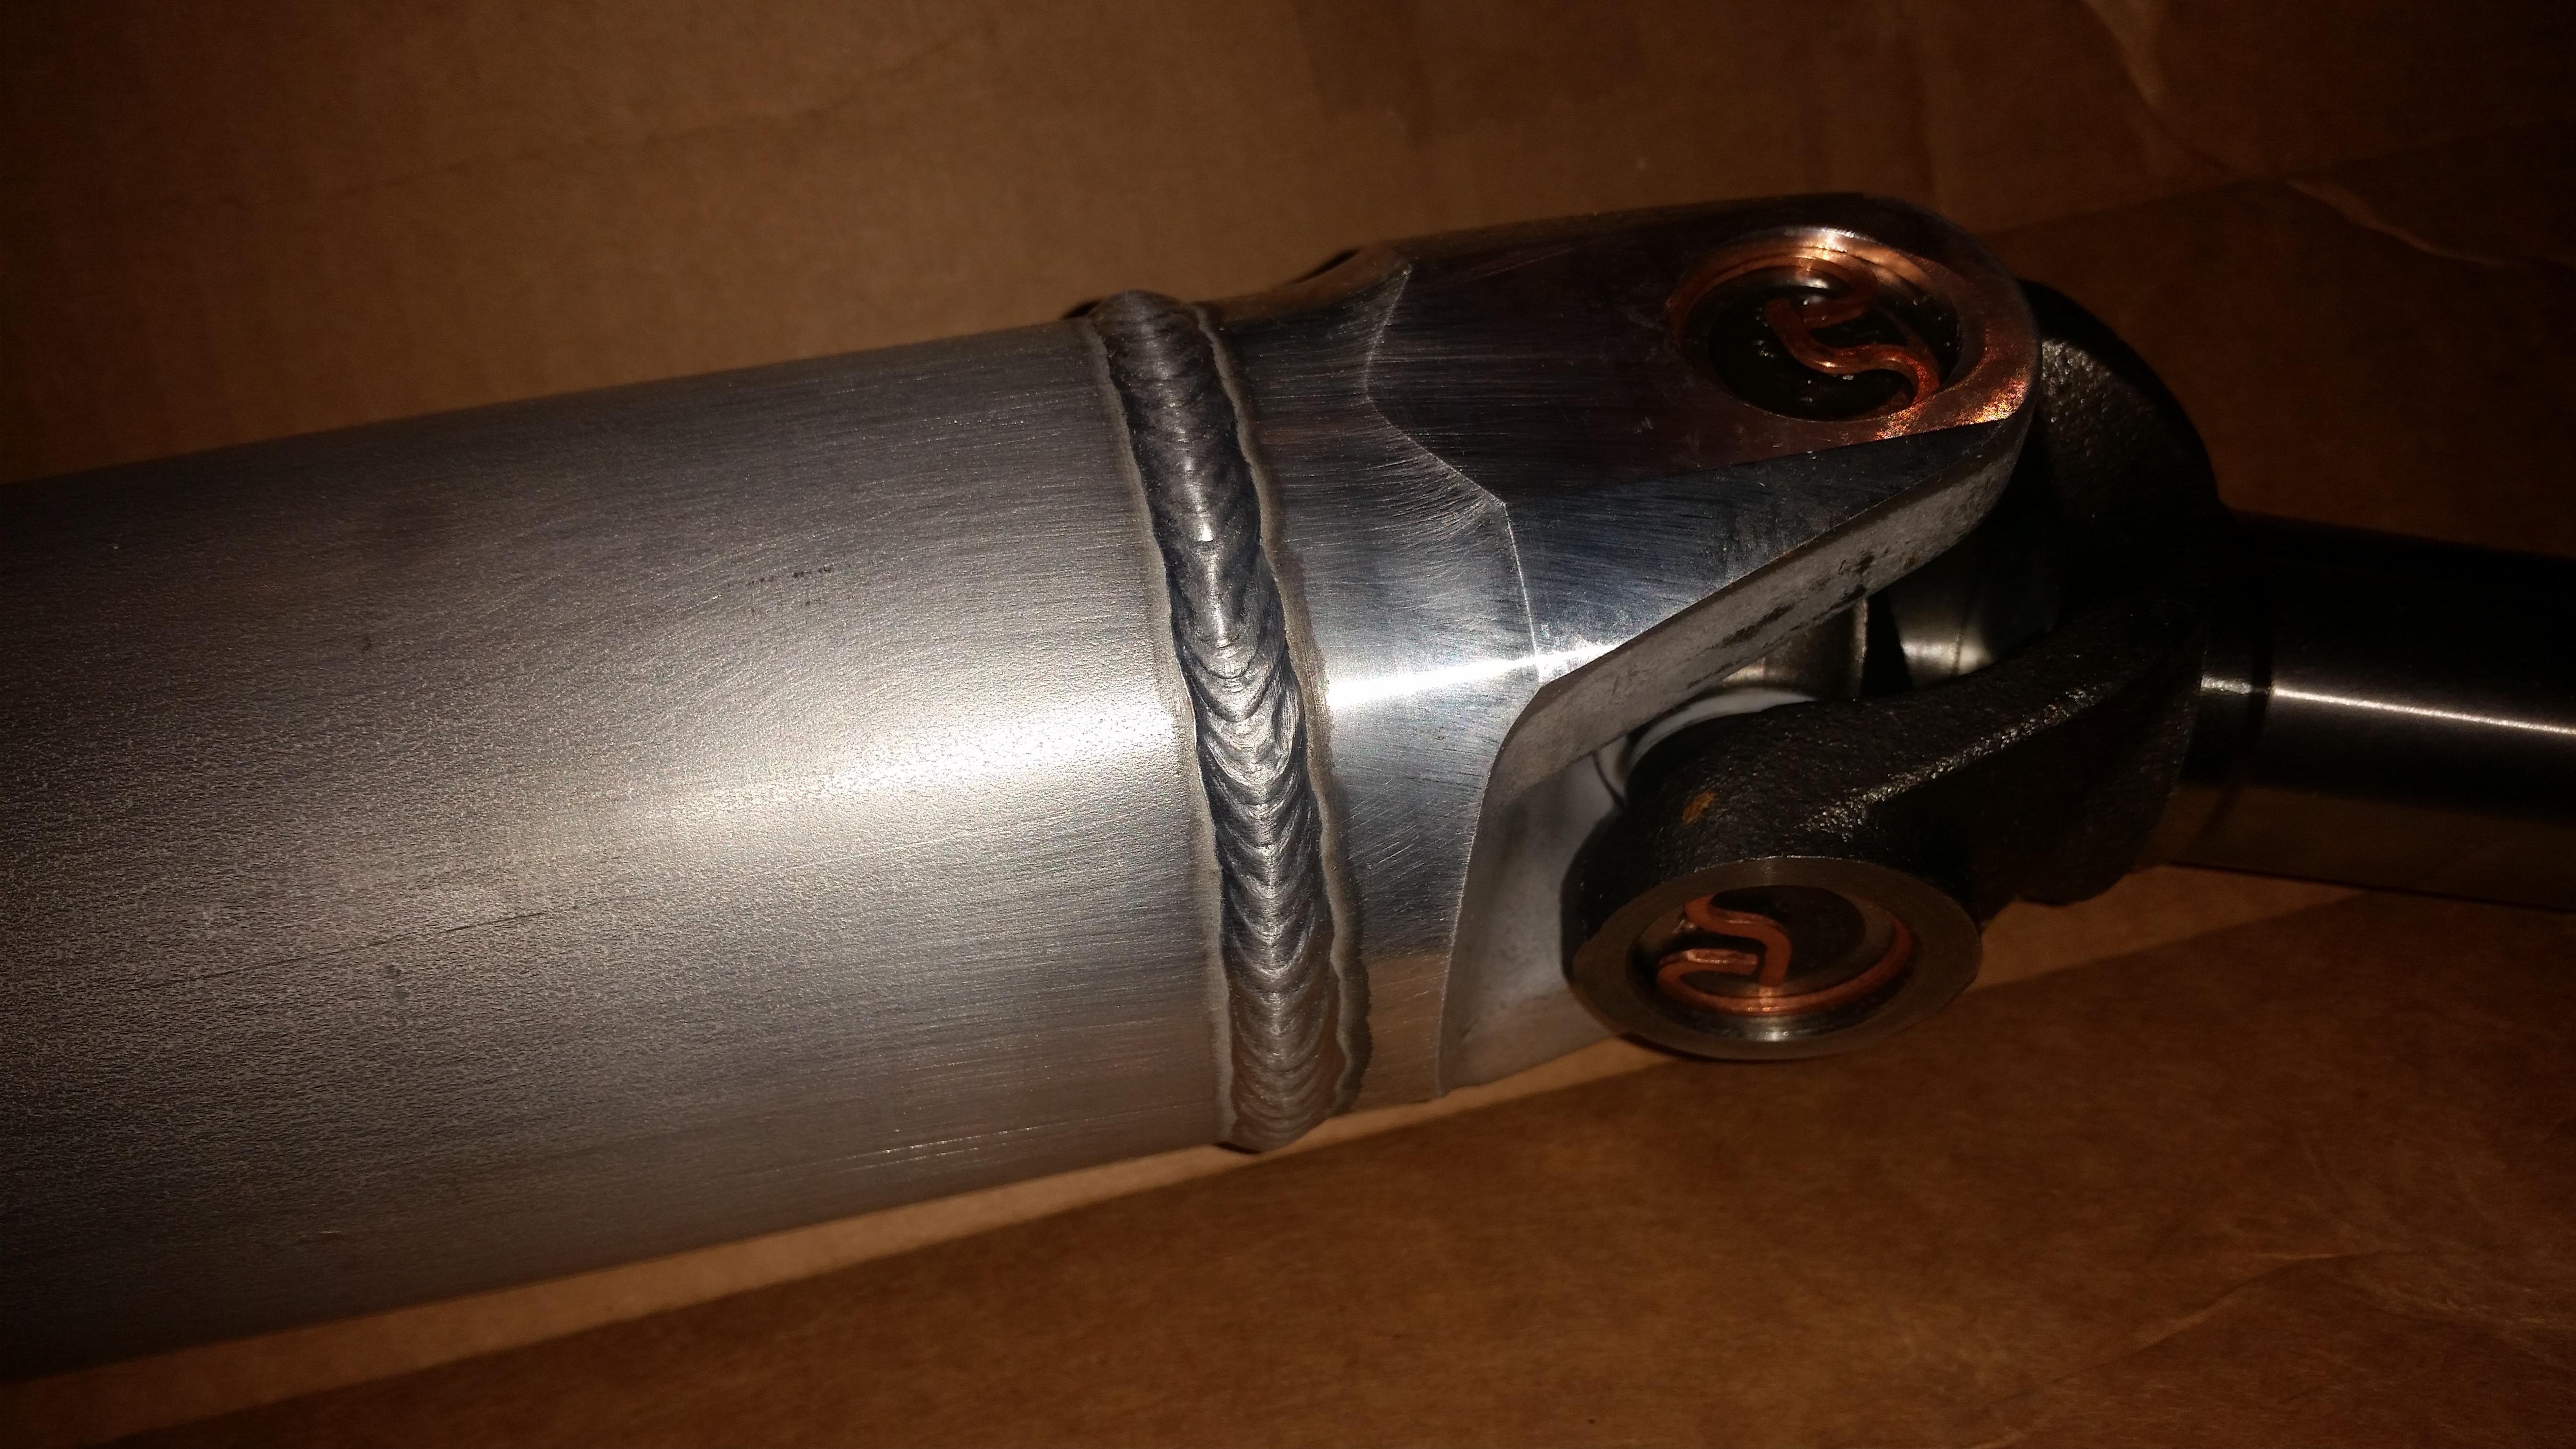
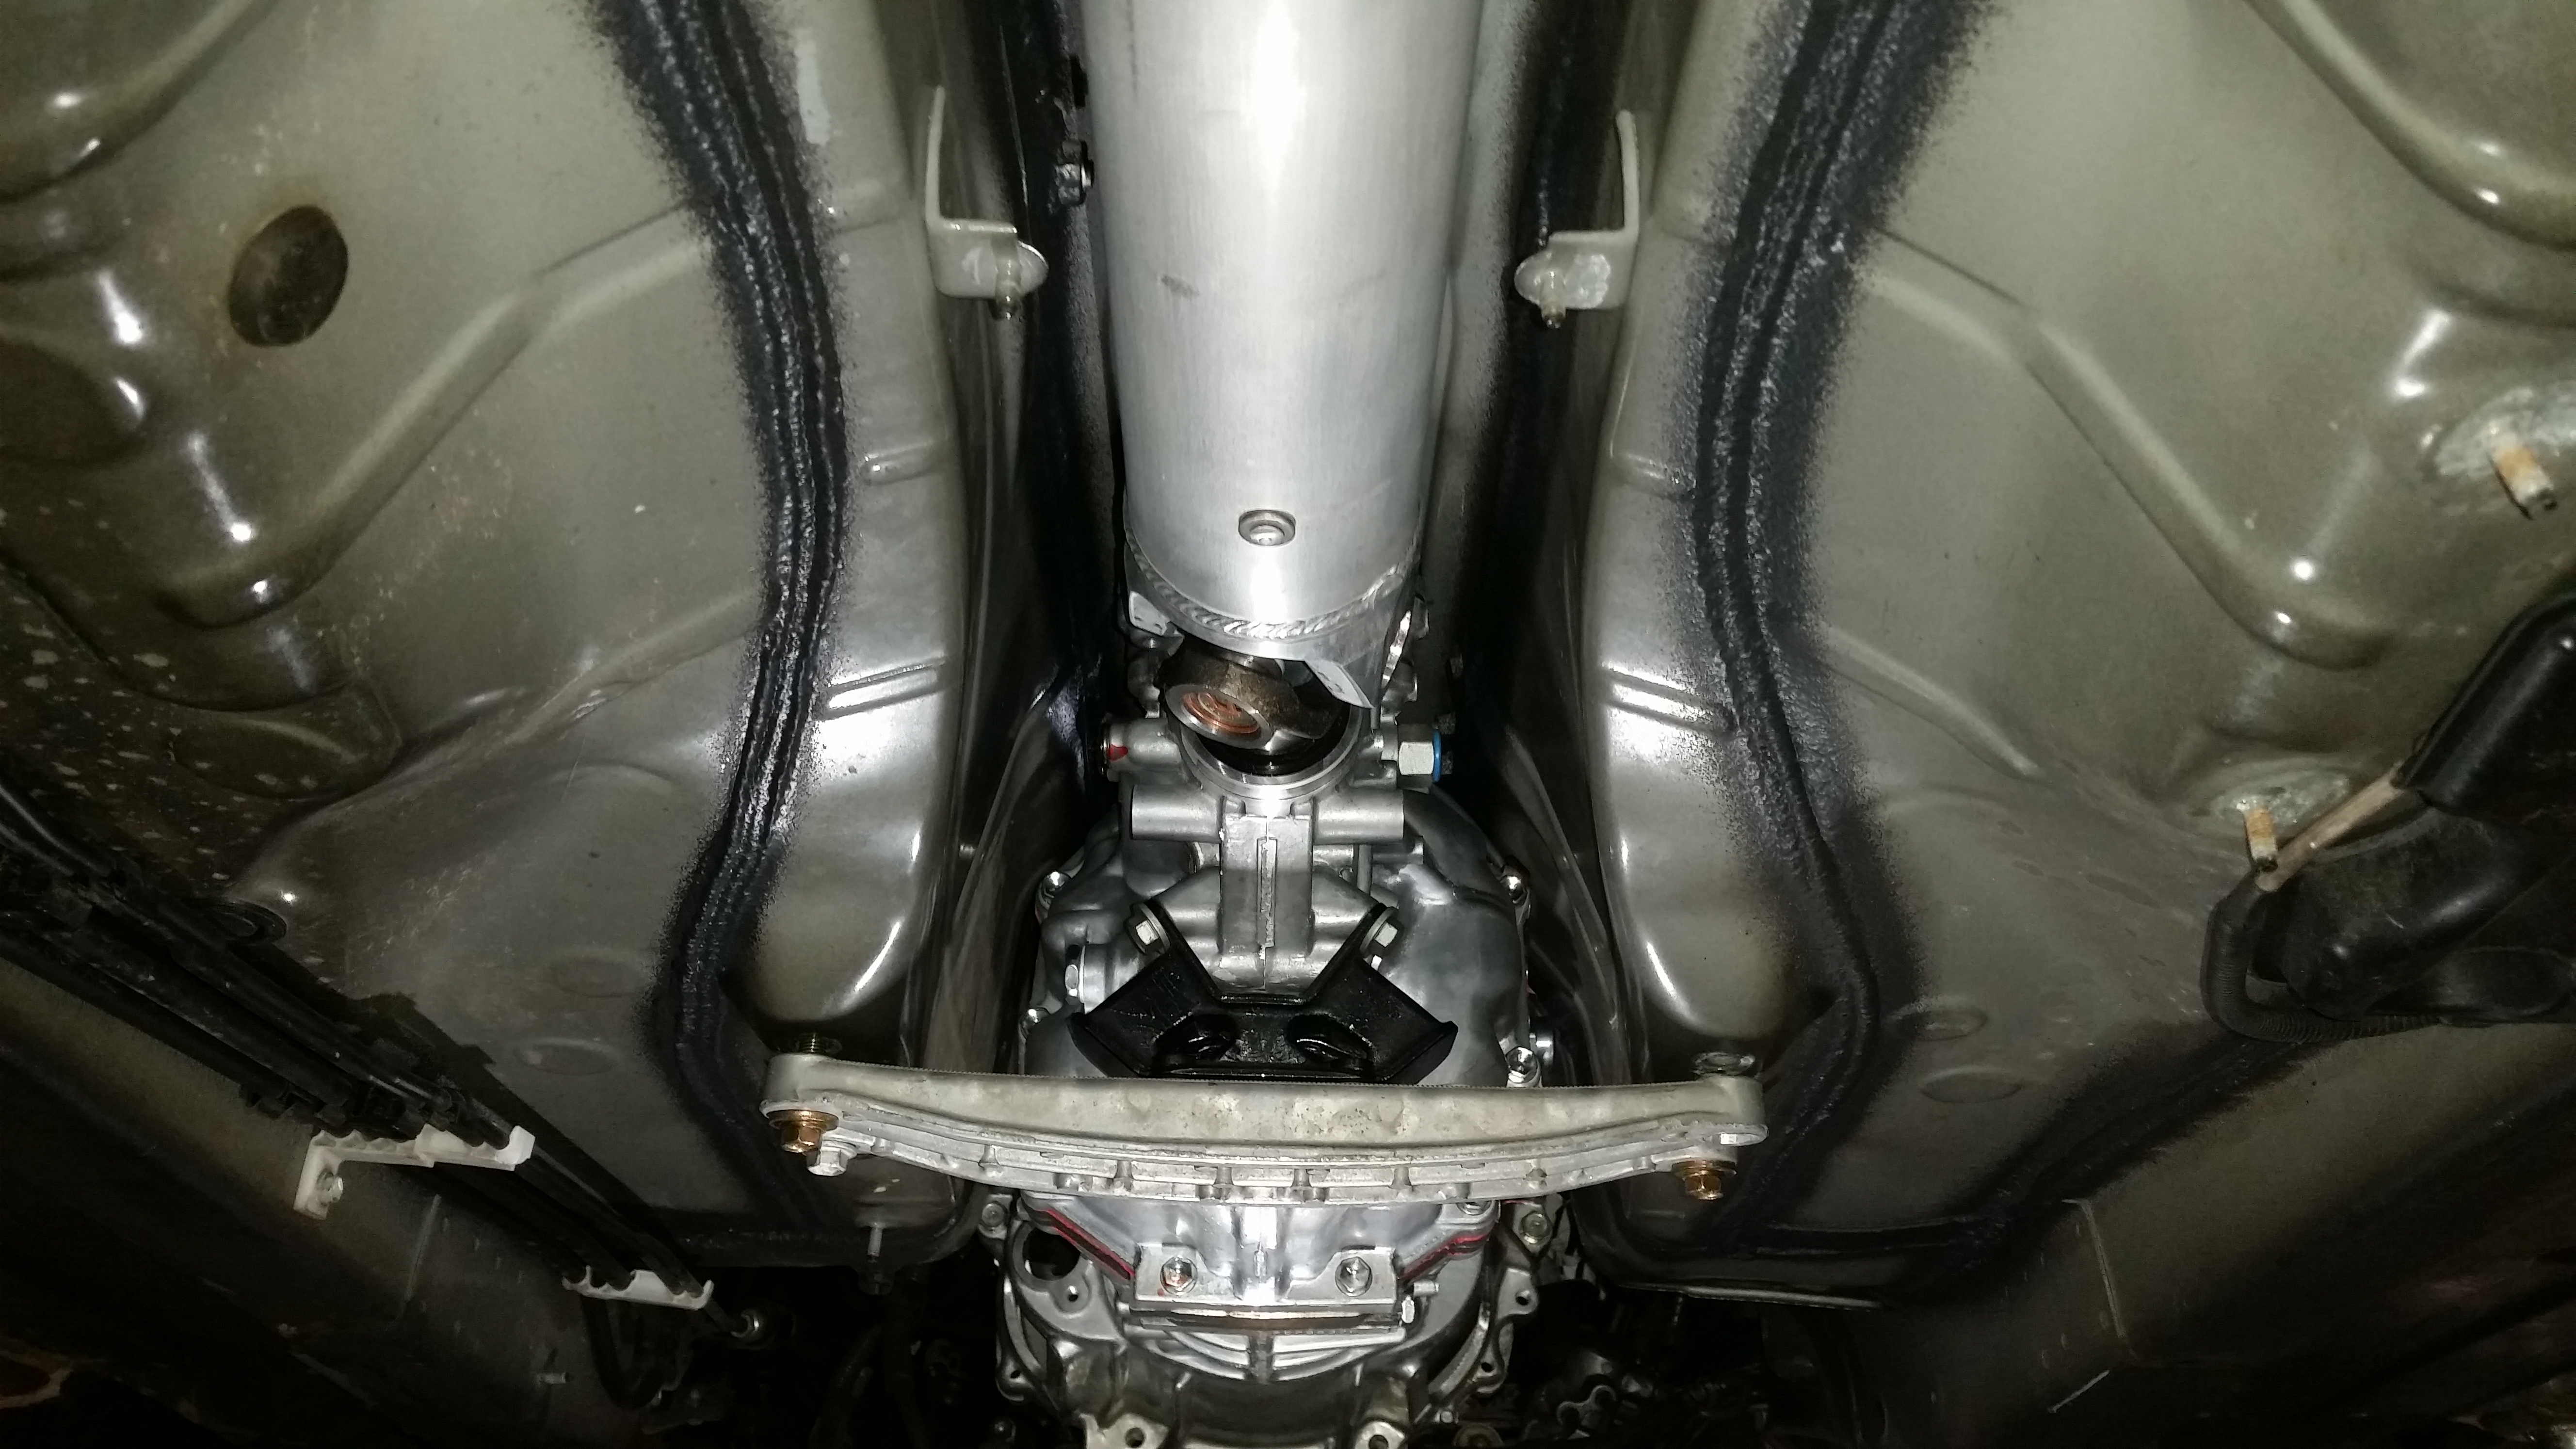
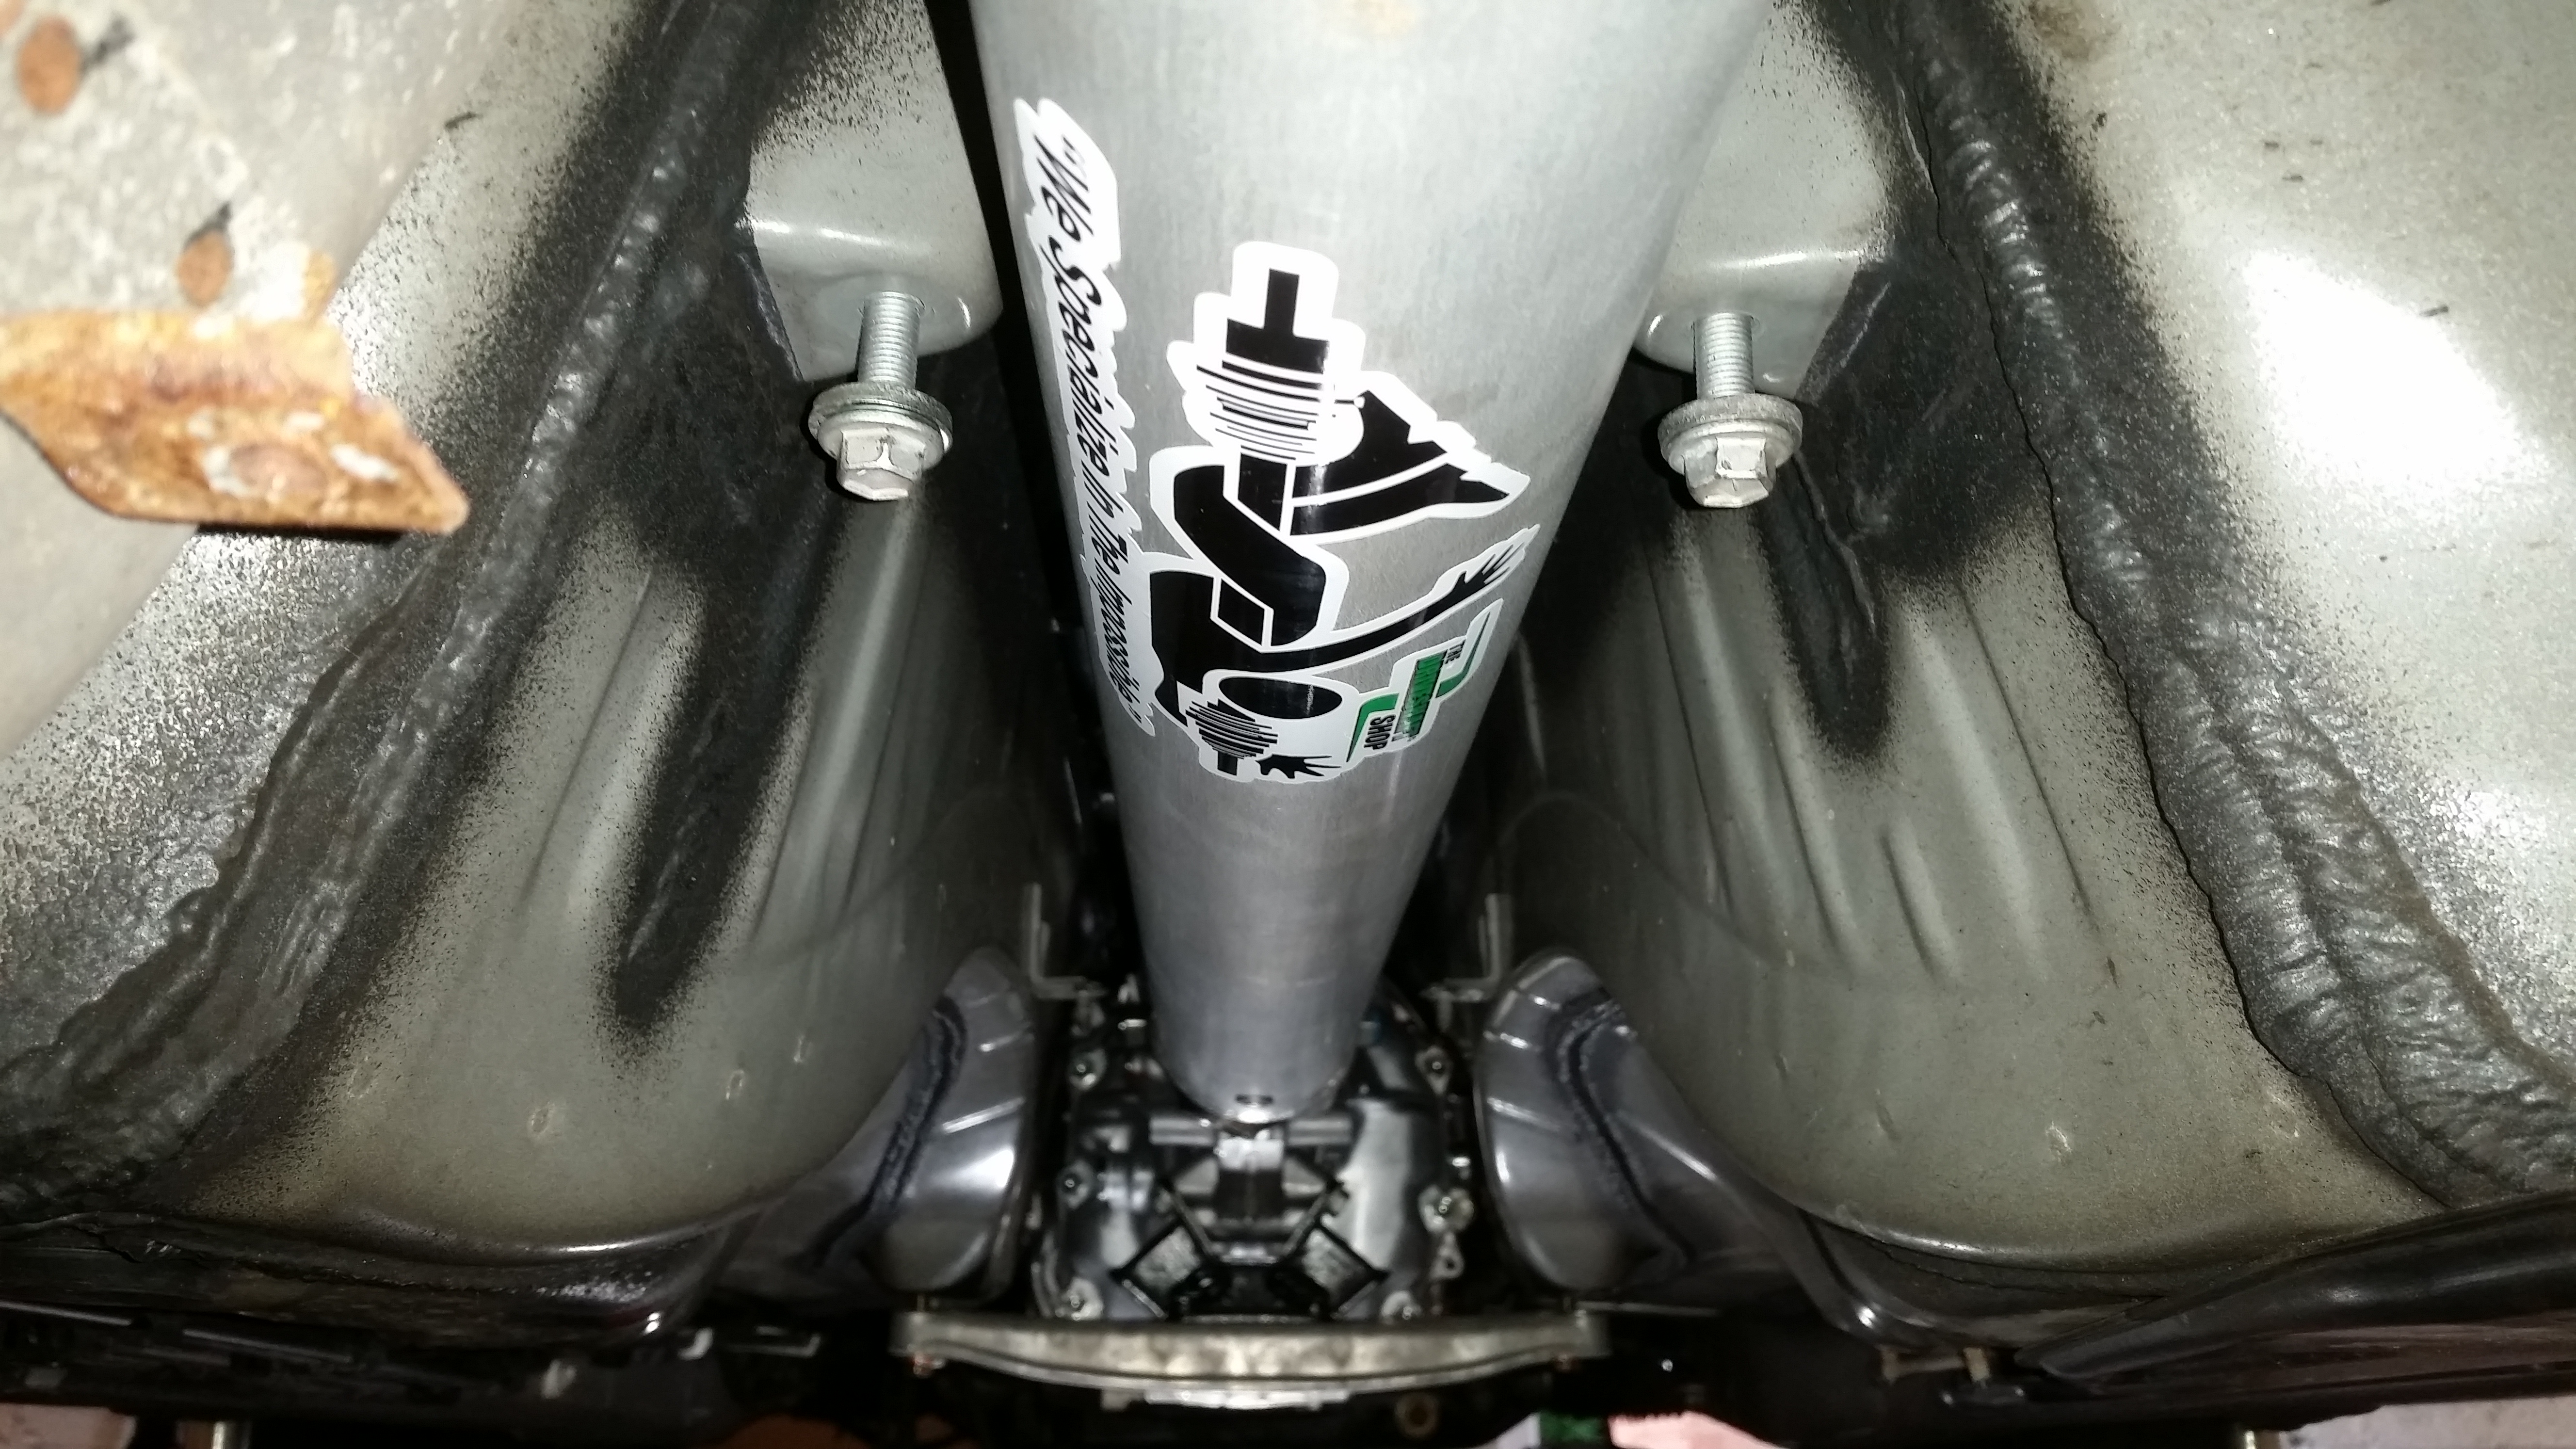
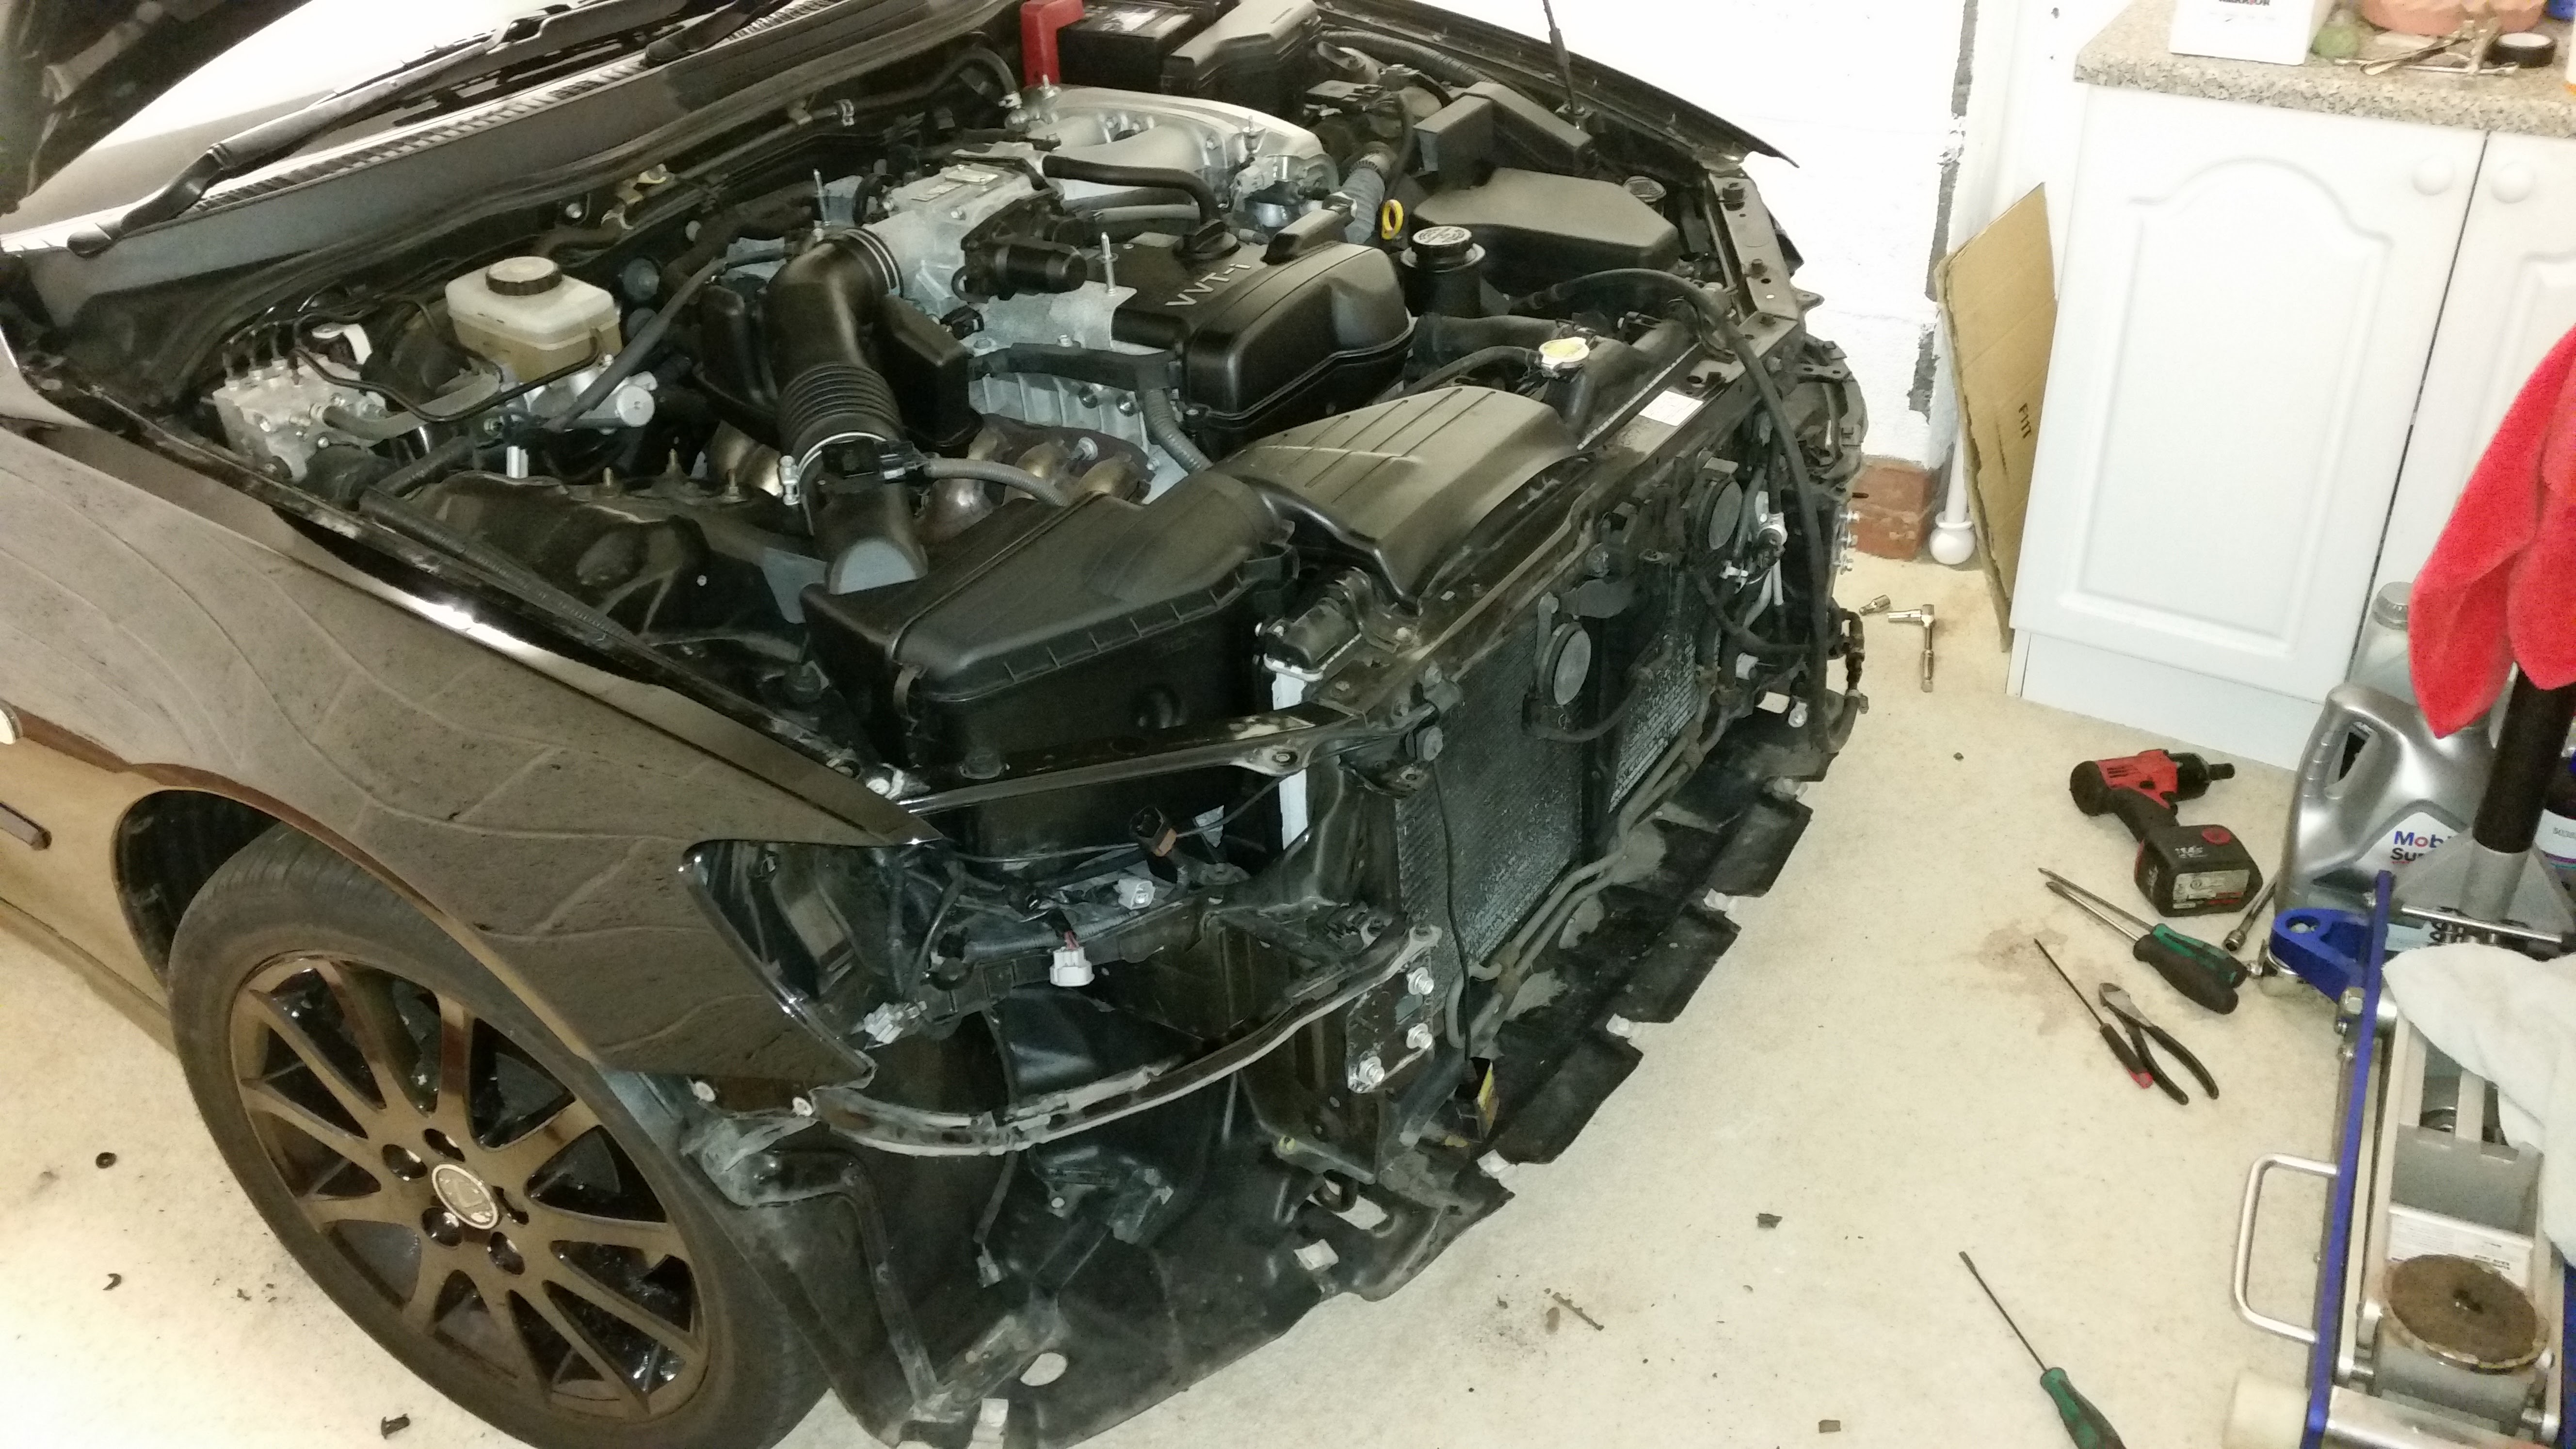
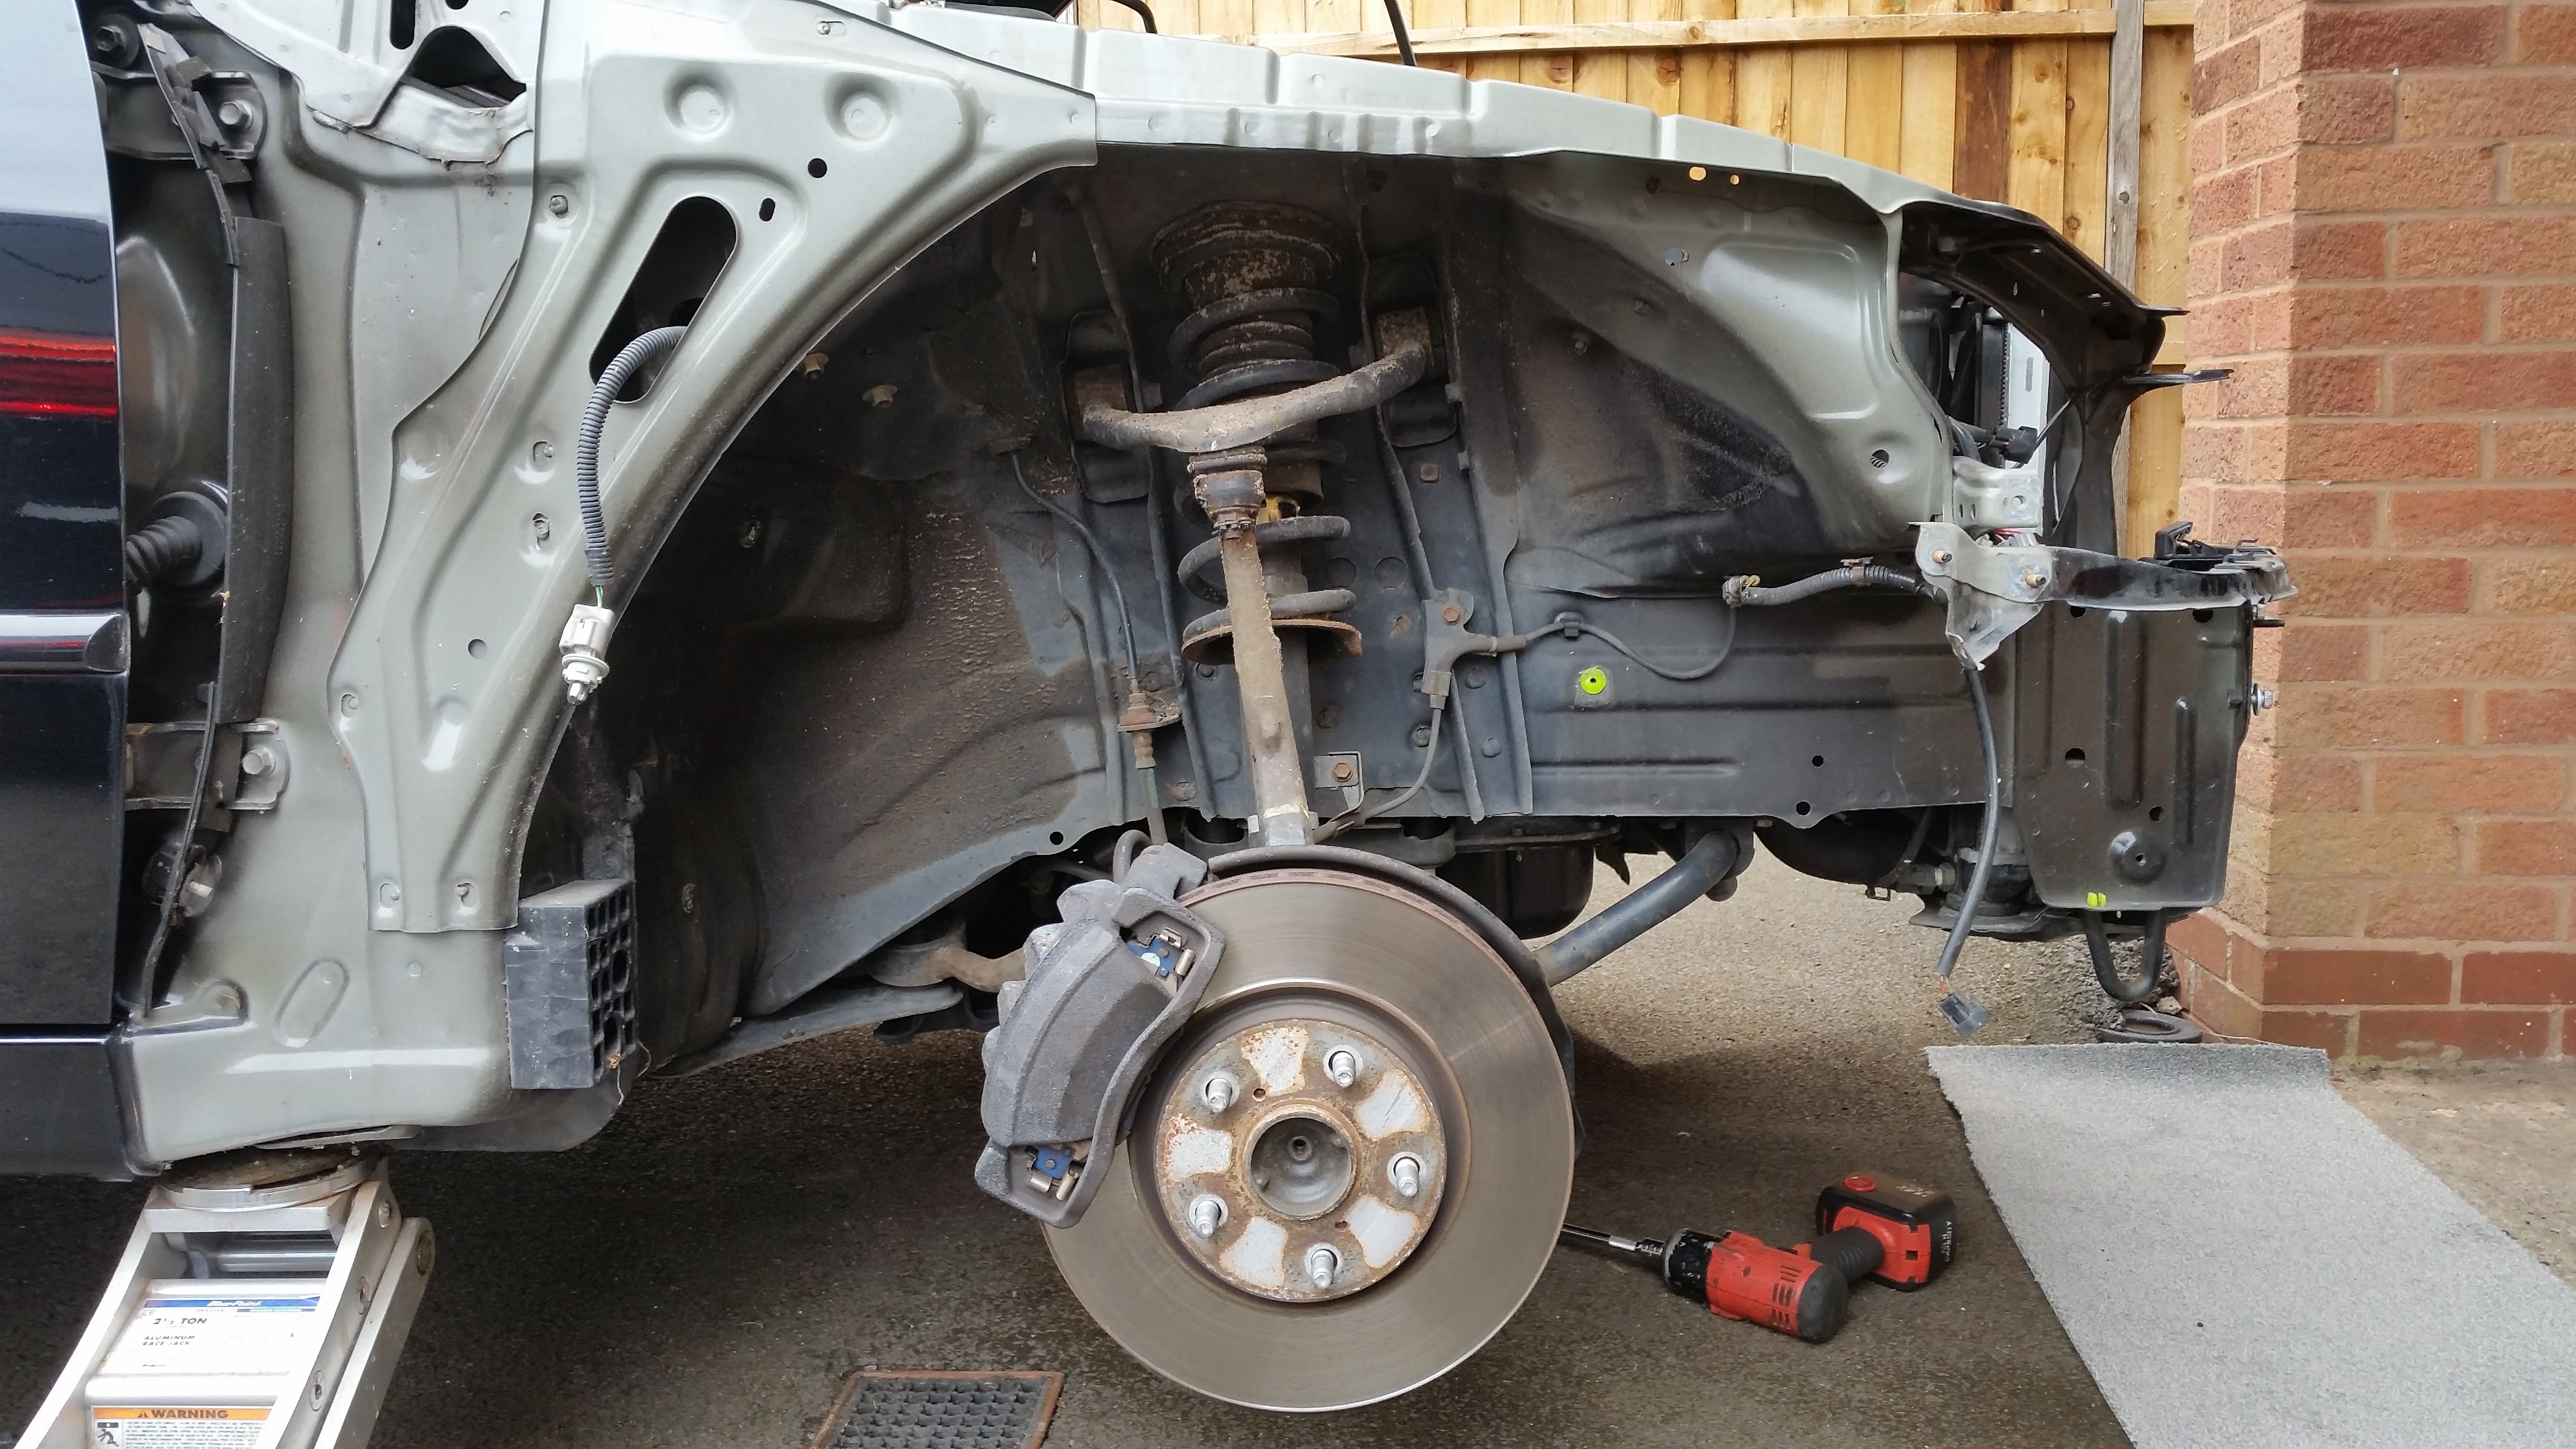
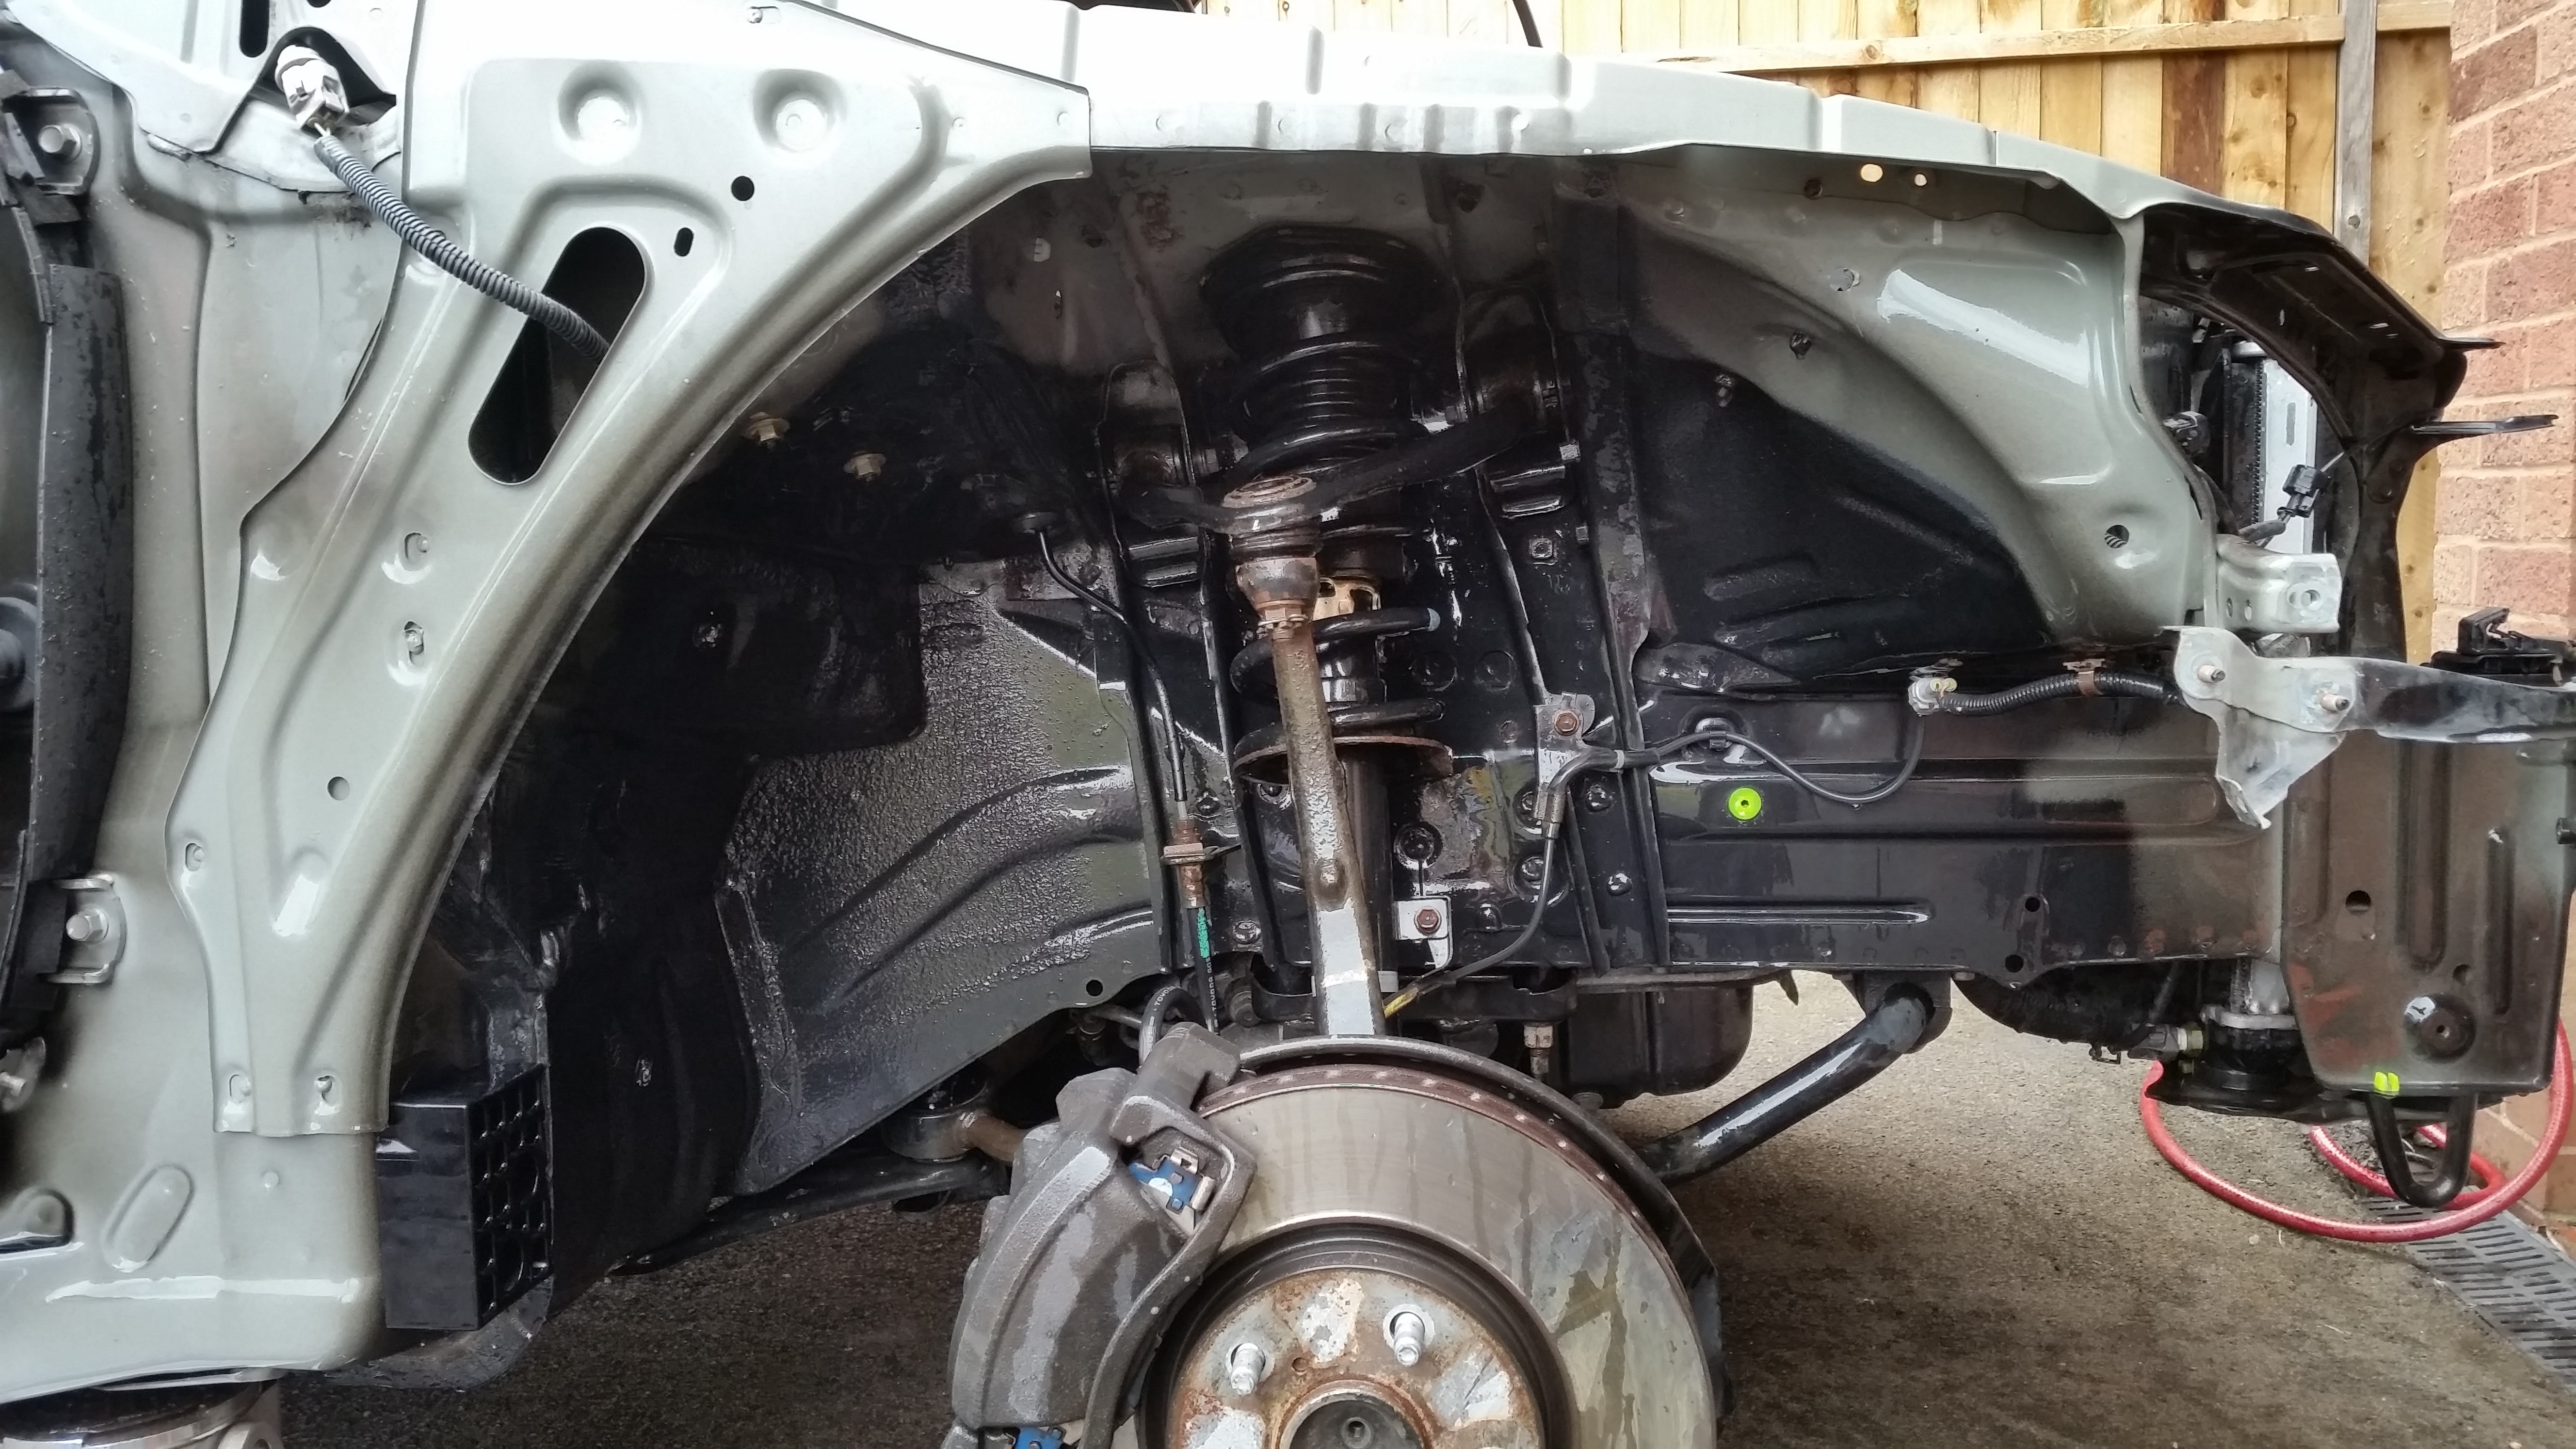
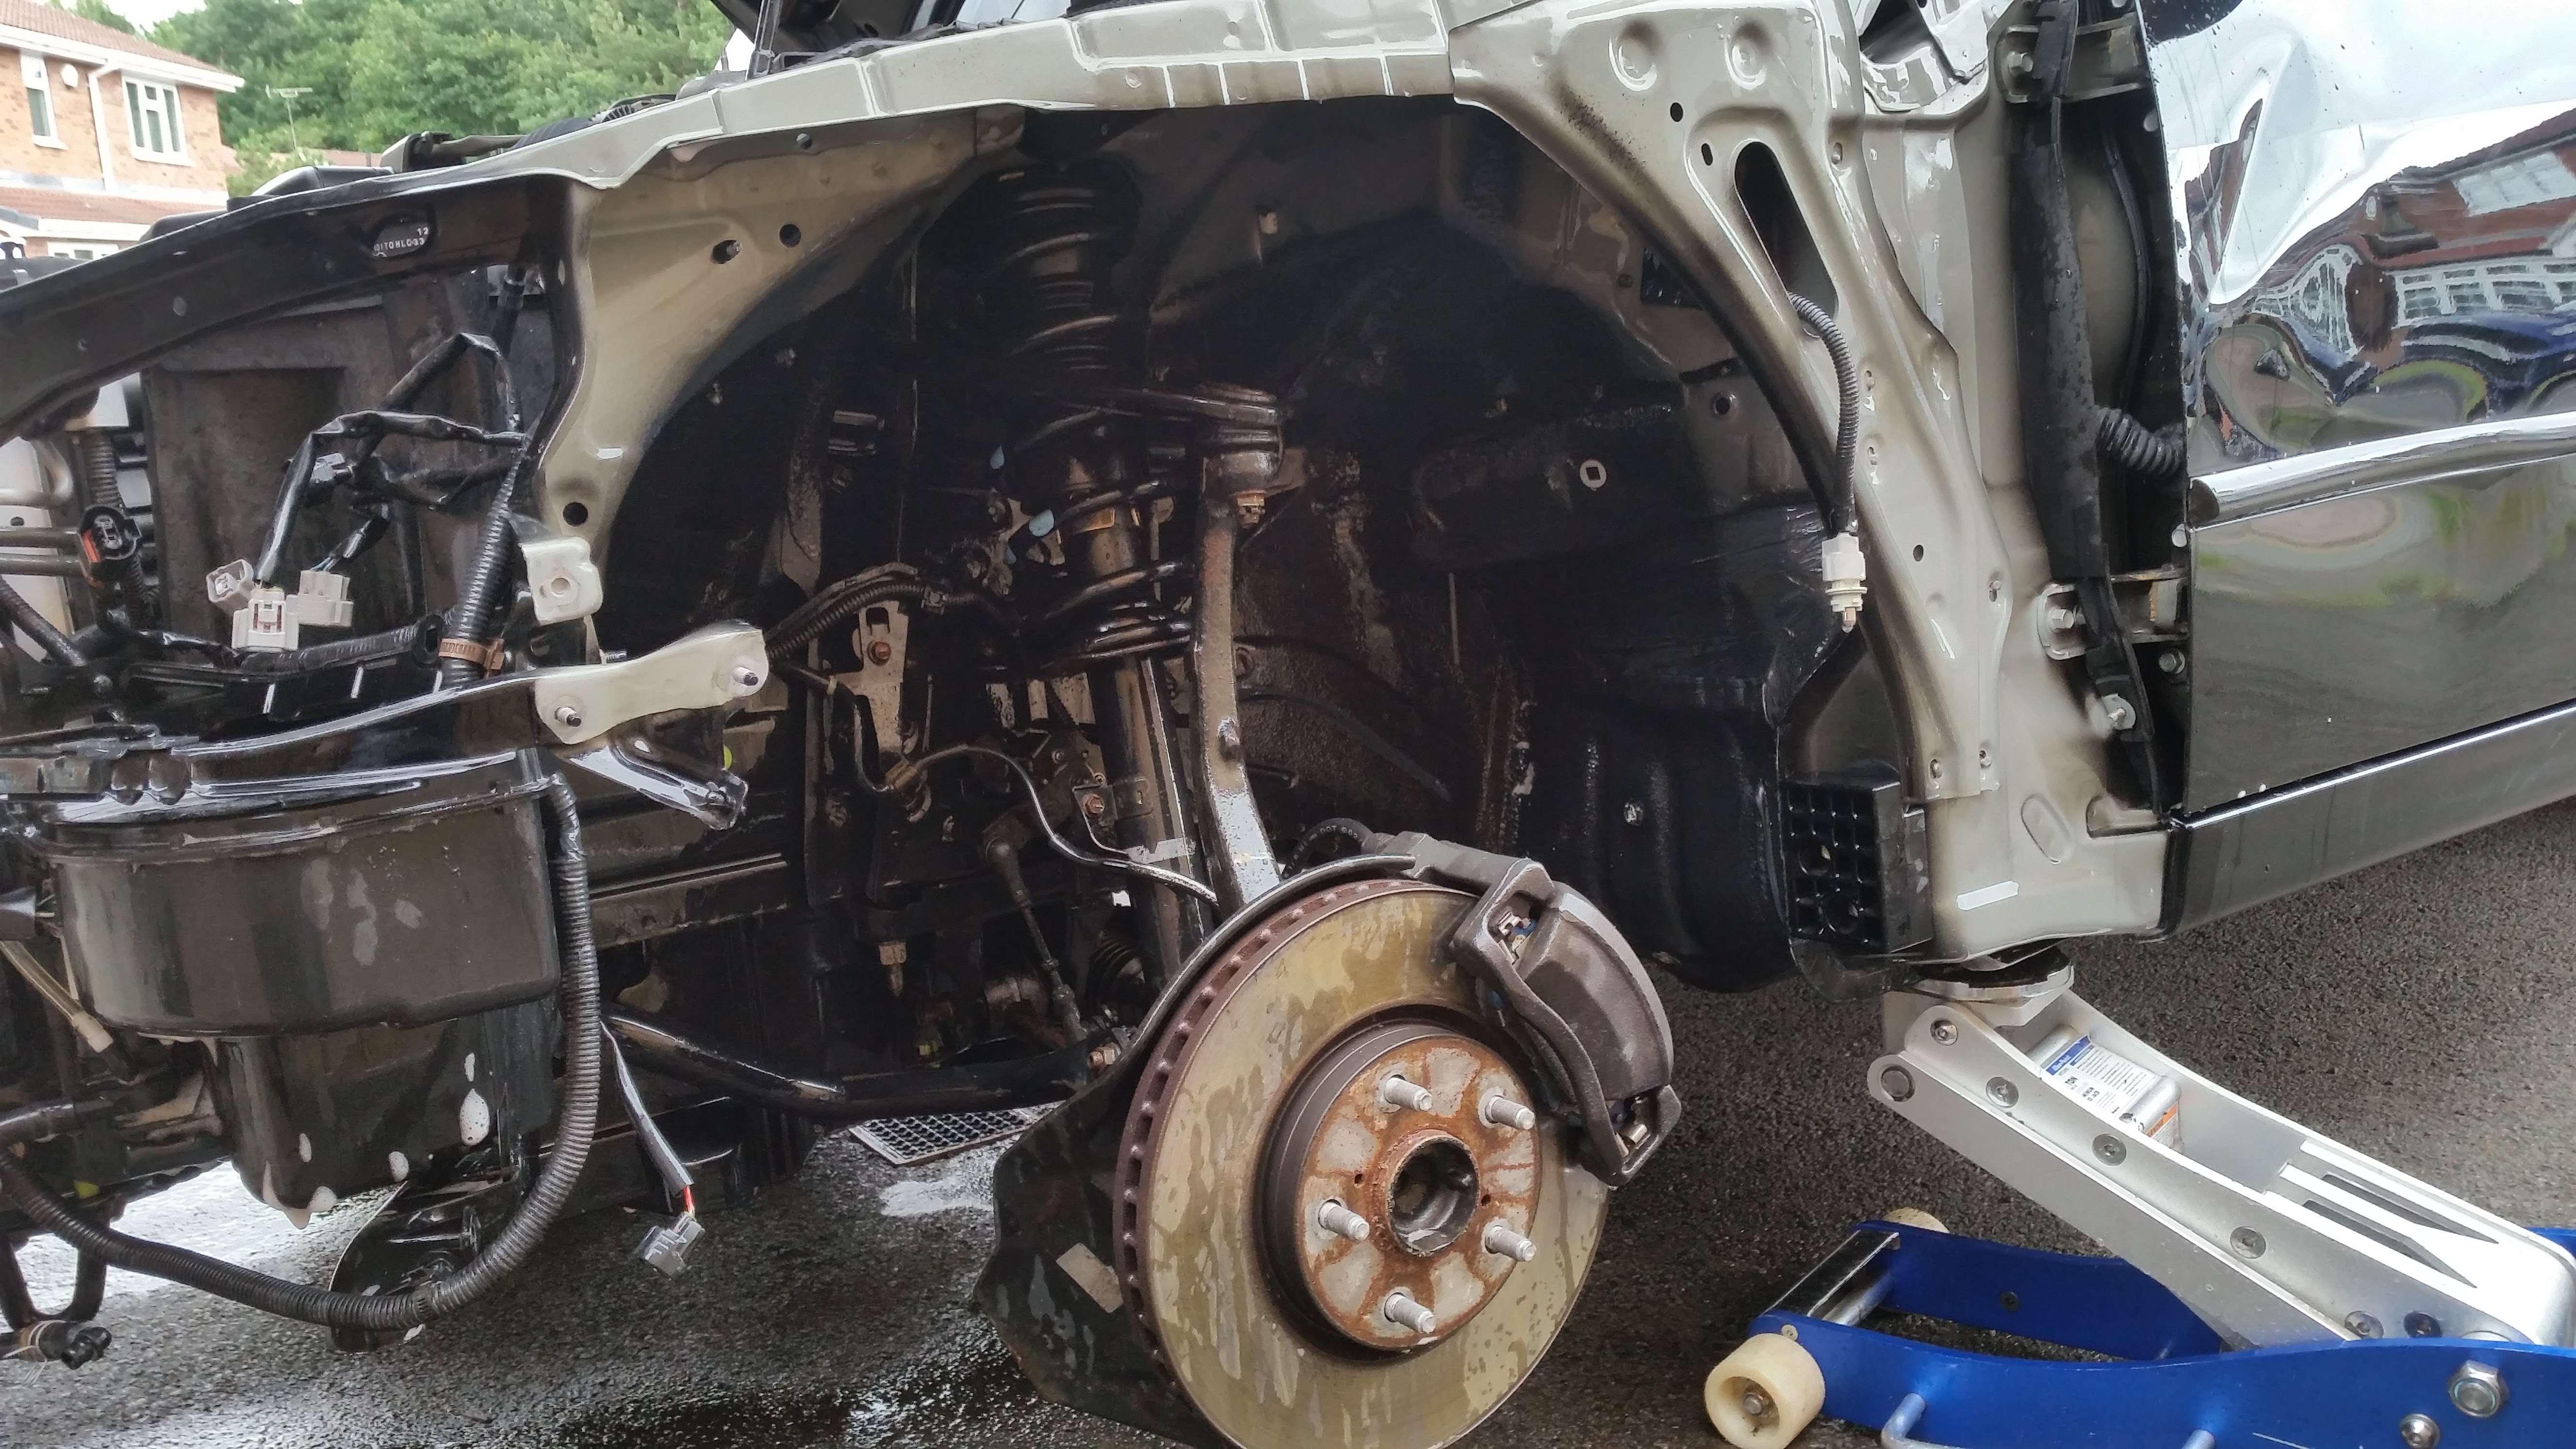
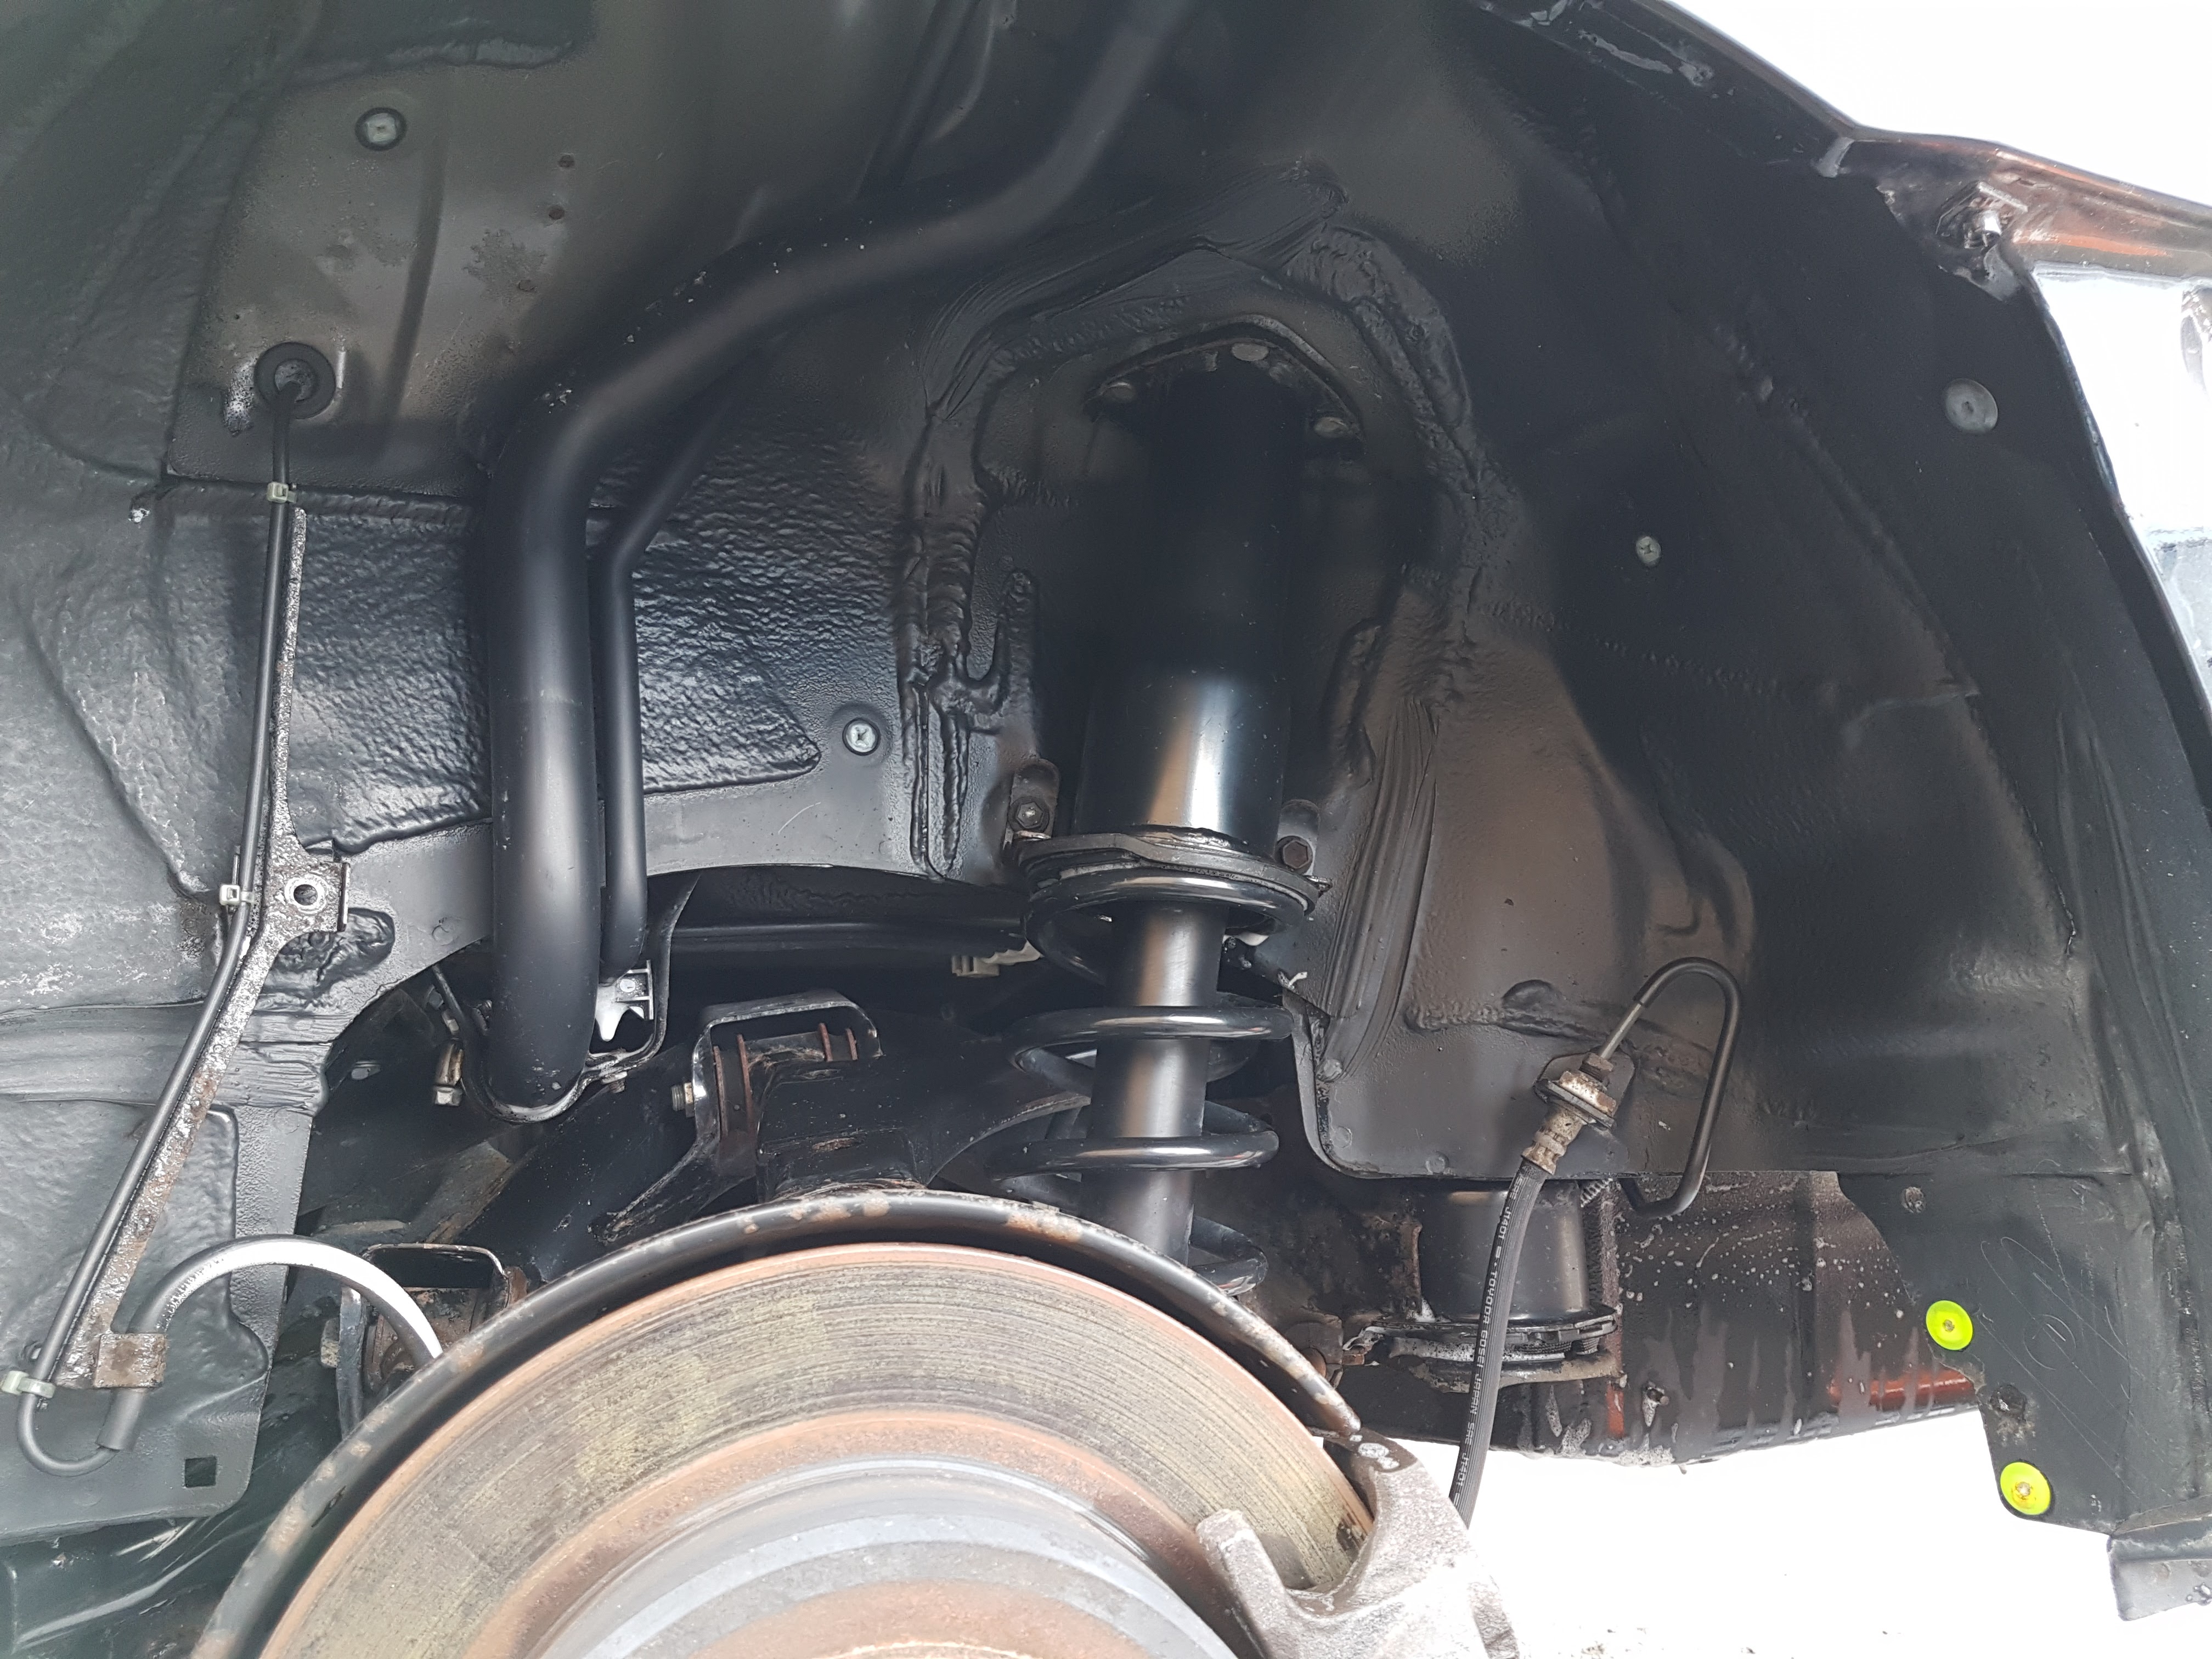
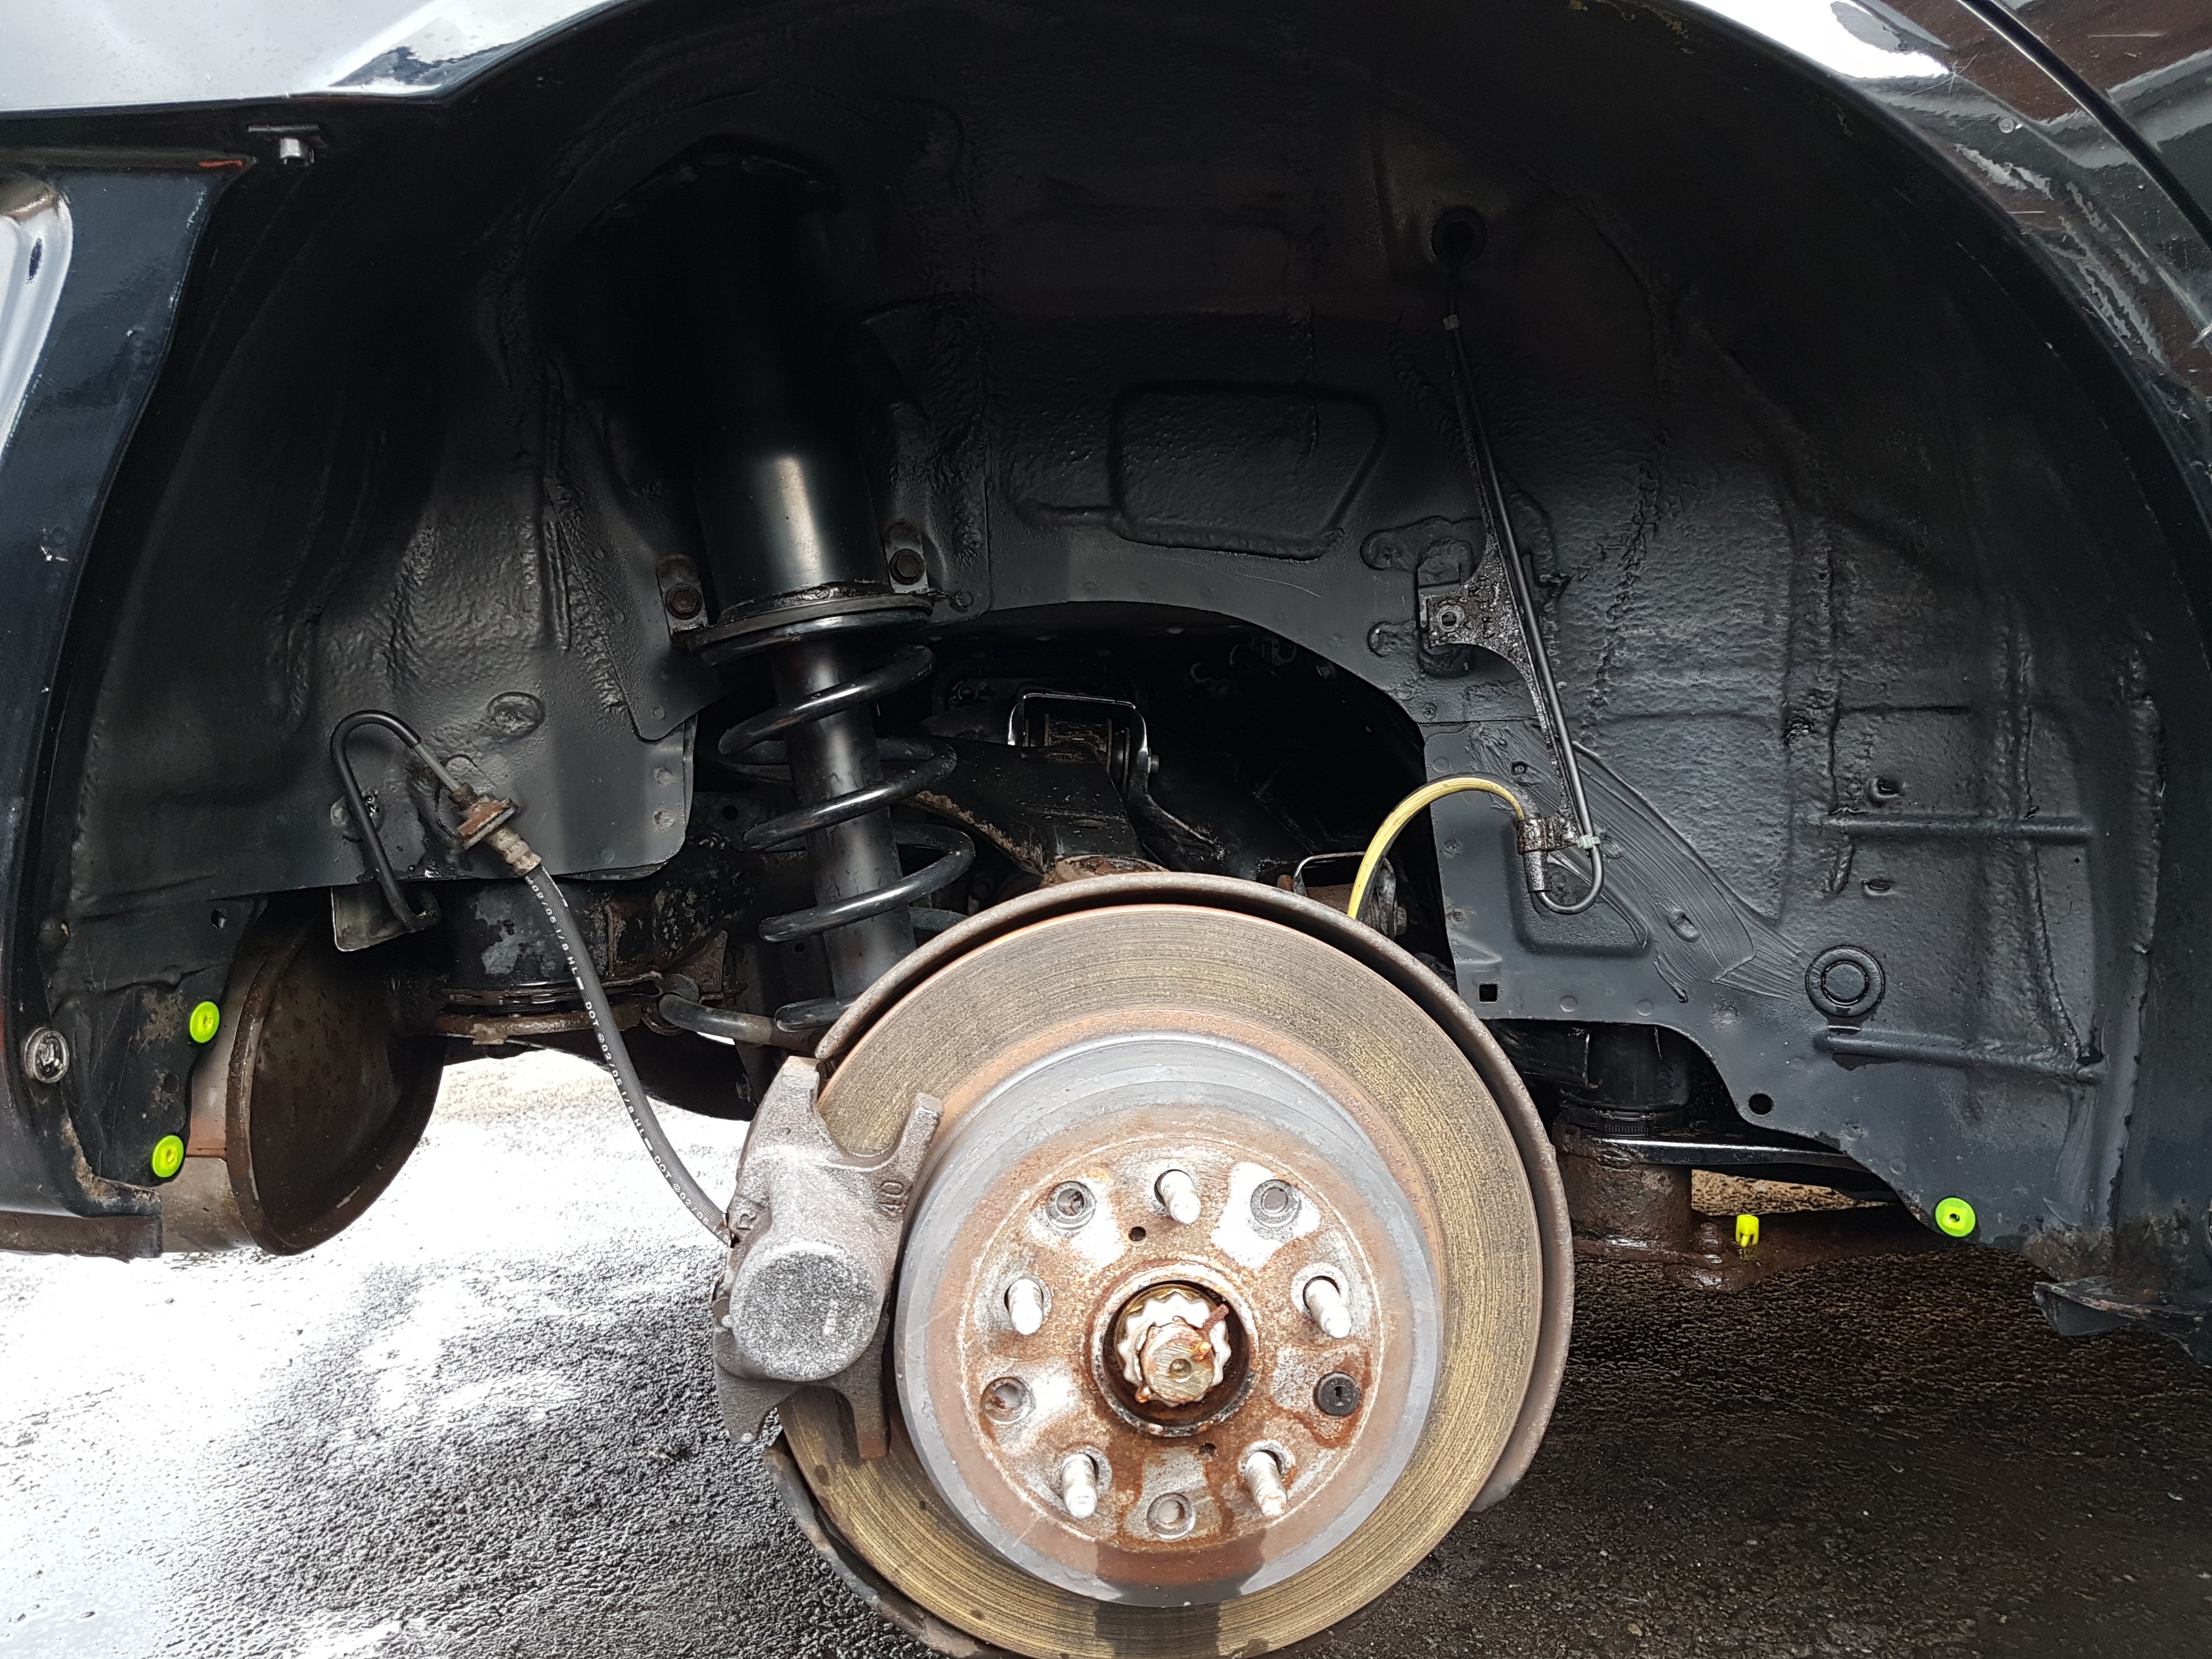
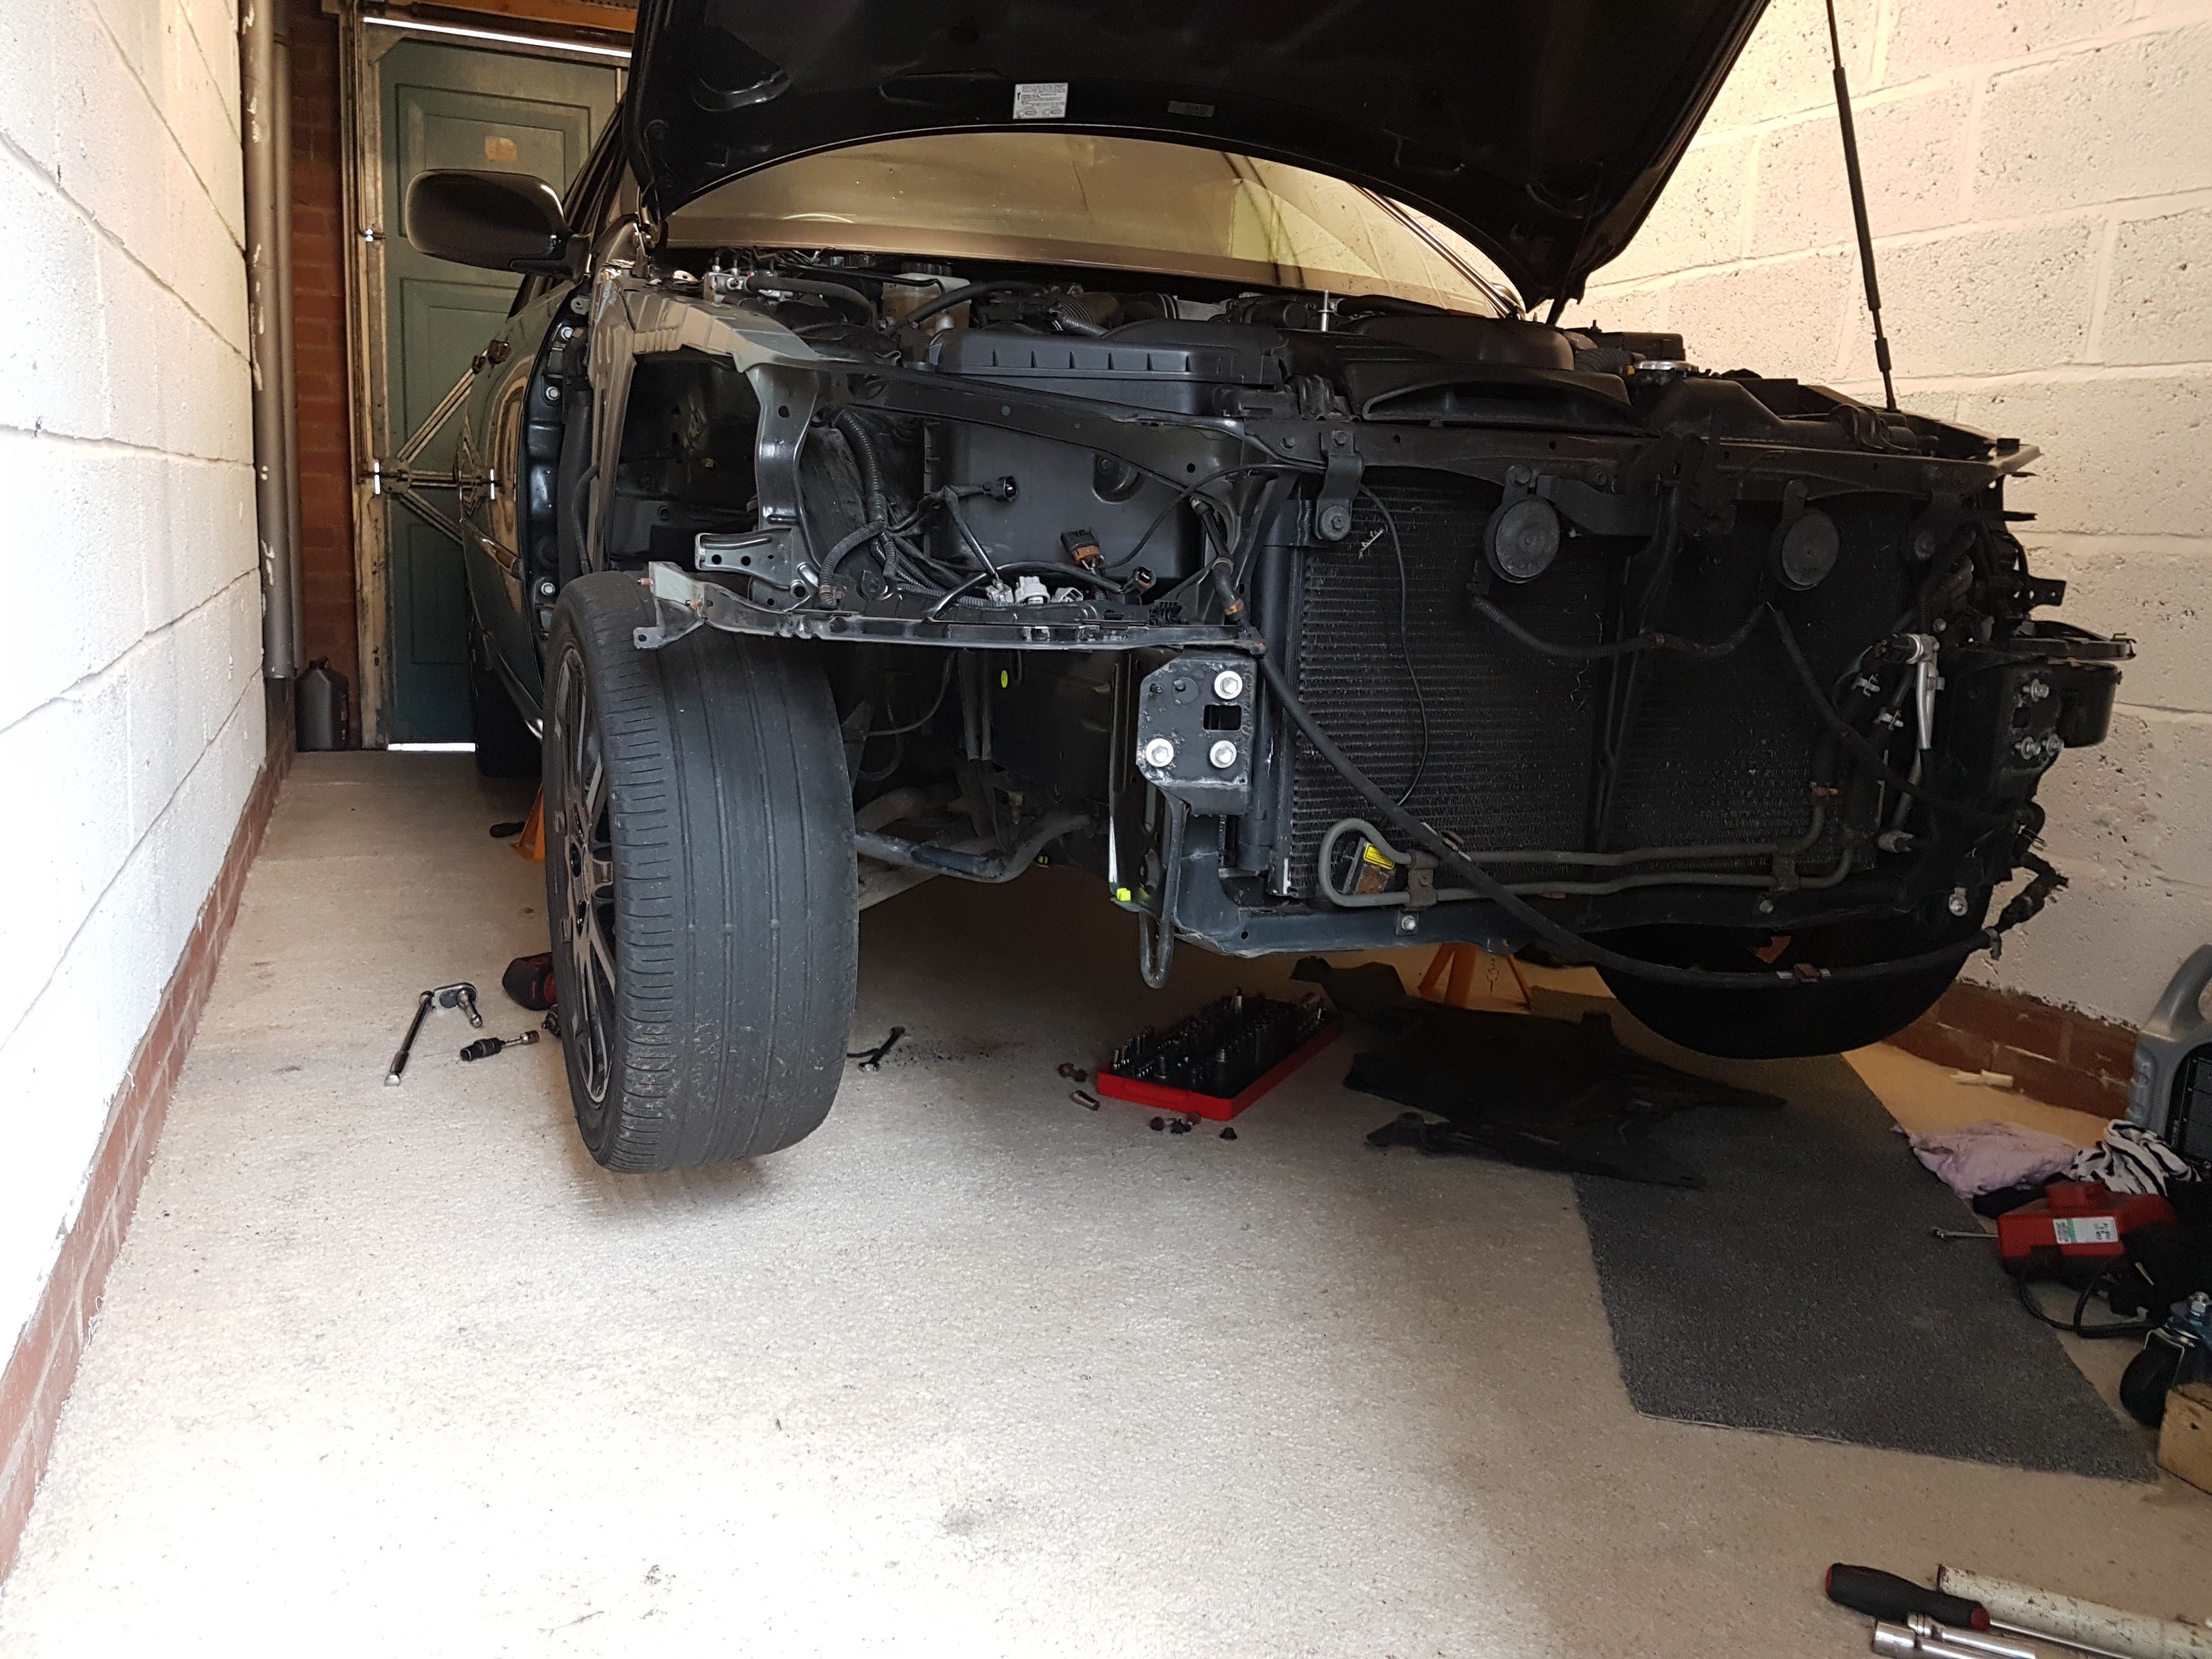
So once it was back in the garage i got it up on the stands ready to remove the gearbox. The power goals i have in mind would blow the standard tranny to pieces so the best option for me and what i want it for was to convert to manual transmission. This modification over in "merica" is very comon amongst the IS comunity, this is where i have got all my research, plans and ideas from. The best choice would be the v160 from mk4 supra but these are very rare and eye watering in price!! Other option was to used the cd009 from the nissan 350z with and adaptor plate but i wanted to keep this original with a toyota transmission. So this led me to use the r154 found in jzx10, chaser, mk3 supra....... list goes on. Very robust, proven to take big power, bit clonky and noisey but its good for the job and bolts straight up to the 2jz! So i didnt mess around, instead of going 2nd hand i just brought a brand new 1. I figured trying to get hold of a 2nd hand 1 and the price of a 2nd hand 1 just would not be worth it, it would need a refurb and even worse it coud be a completly shot gearbox. The dogs not to bothered 😂 Gearbox coming out.... Clap of the hands and this happens....... Once this was out i just trial fitted the r154 to see what would have to be done to make it work, this is when i hit a few road blocks. Firstly the rubber mount from the auto box on the cross memeber does not fit the r154. So i got myself an uprated megan racing rubber mount designed for the w58 gearbox this bolts straight up to the r154 and the original auto transmission cross memeber (good old toyota 👌). This now makes the cross member sit too far back! Then i noticed the gearstick is to far back to come through the body. This is the 3rd revision of the r154 and this particular 1 is for a jzx10 so its using the tripod style gear stick support. This would need changing to center the stick up This is what it would look like in relation to the trims when fitted... Not to worry as i have another option for this. Another reason why i trial fitted the r154 was to get the measurments for the prop shaft. Measured from gearbox rear seal to diff flange. The auto prop will not fit and the only real option is a custom made jobby. This part i ordered from america from a company called the driveshaft shop. Great customer service and did not have to wait long either. This work of art turned up..... Fits absolutly perfect, its alloy and weighs about 7kg, and can handle over 650whp! Game on, more to come shortly.
-
Thank you 👍 yeh i was shocked when i saw it on the advert i thought it was a typo so i checked the MOT history and it all adds up.
-
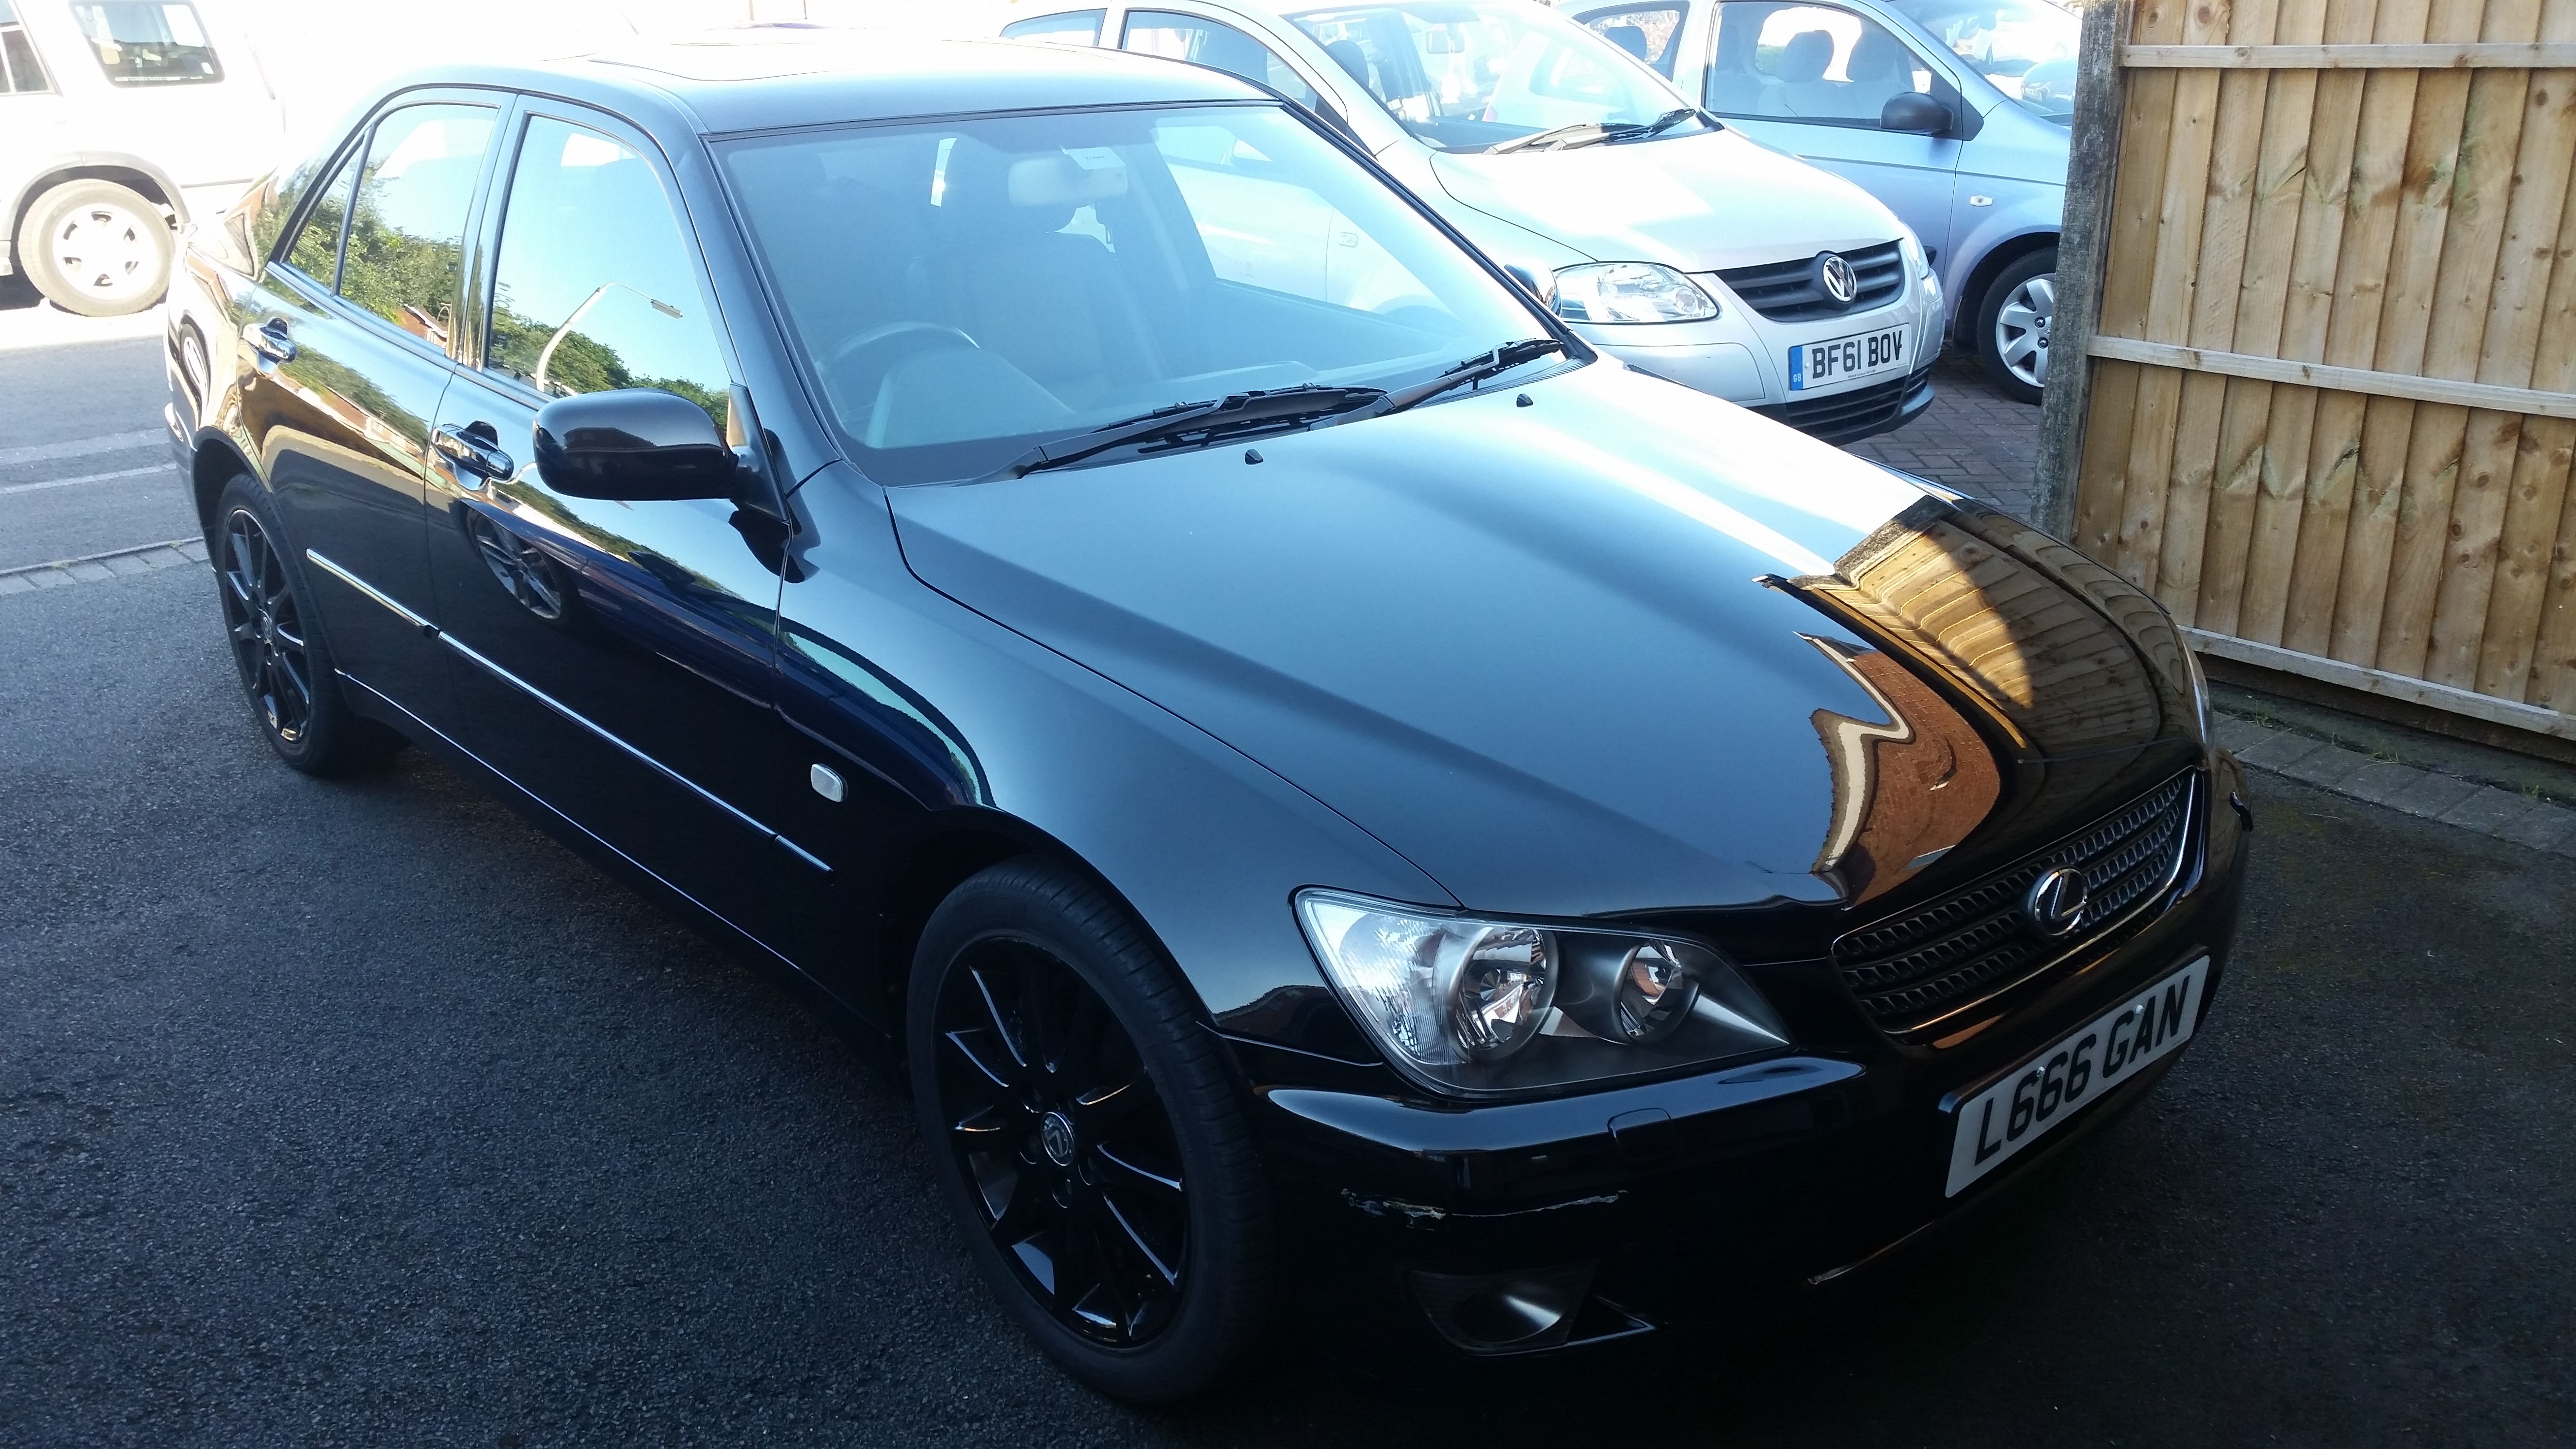
Cheers matey, I only attacked the bonnet, roof and boot lid with the clay bar and DA. I could have done the complete drivers side and n/s/r wing but as its in a tight garage and im walking up and down so it probably going to be picking up some swirl marks and light scratches, that will be done once im finishing this off. I just wanted to see if i could save the paint if anything as these 3 places was the worst areas not including the stoved in panels
-
Cheers guys, another big uodate to come today as i am quite far into this project. The interior is immaculate, no wear on the seats or carpet, it has never been smoked inside so no nasty burn marks or stale smoke smell and seat look like they have never been sat in, no sagging, scratches or marks on the leather. Will grab some pictures of this too 👍
-
Cheers guys, yeh ive been out of lexus now for almost 5 years and there cars and model range has changed quite a bit. Yeh there is loads more to post on the project as im kinda well into it now so i will update that again in a little bit. I just wana help people who maybe doing the same thing or get help off others if i beckme stuck. Ive always loved the project sections on forums its interesting see everythng that people are up to. Does anyone know how to change you user name? I registered with this back in my clio days 😂
-
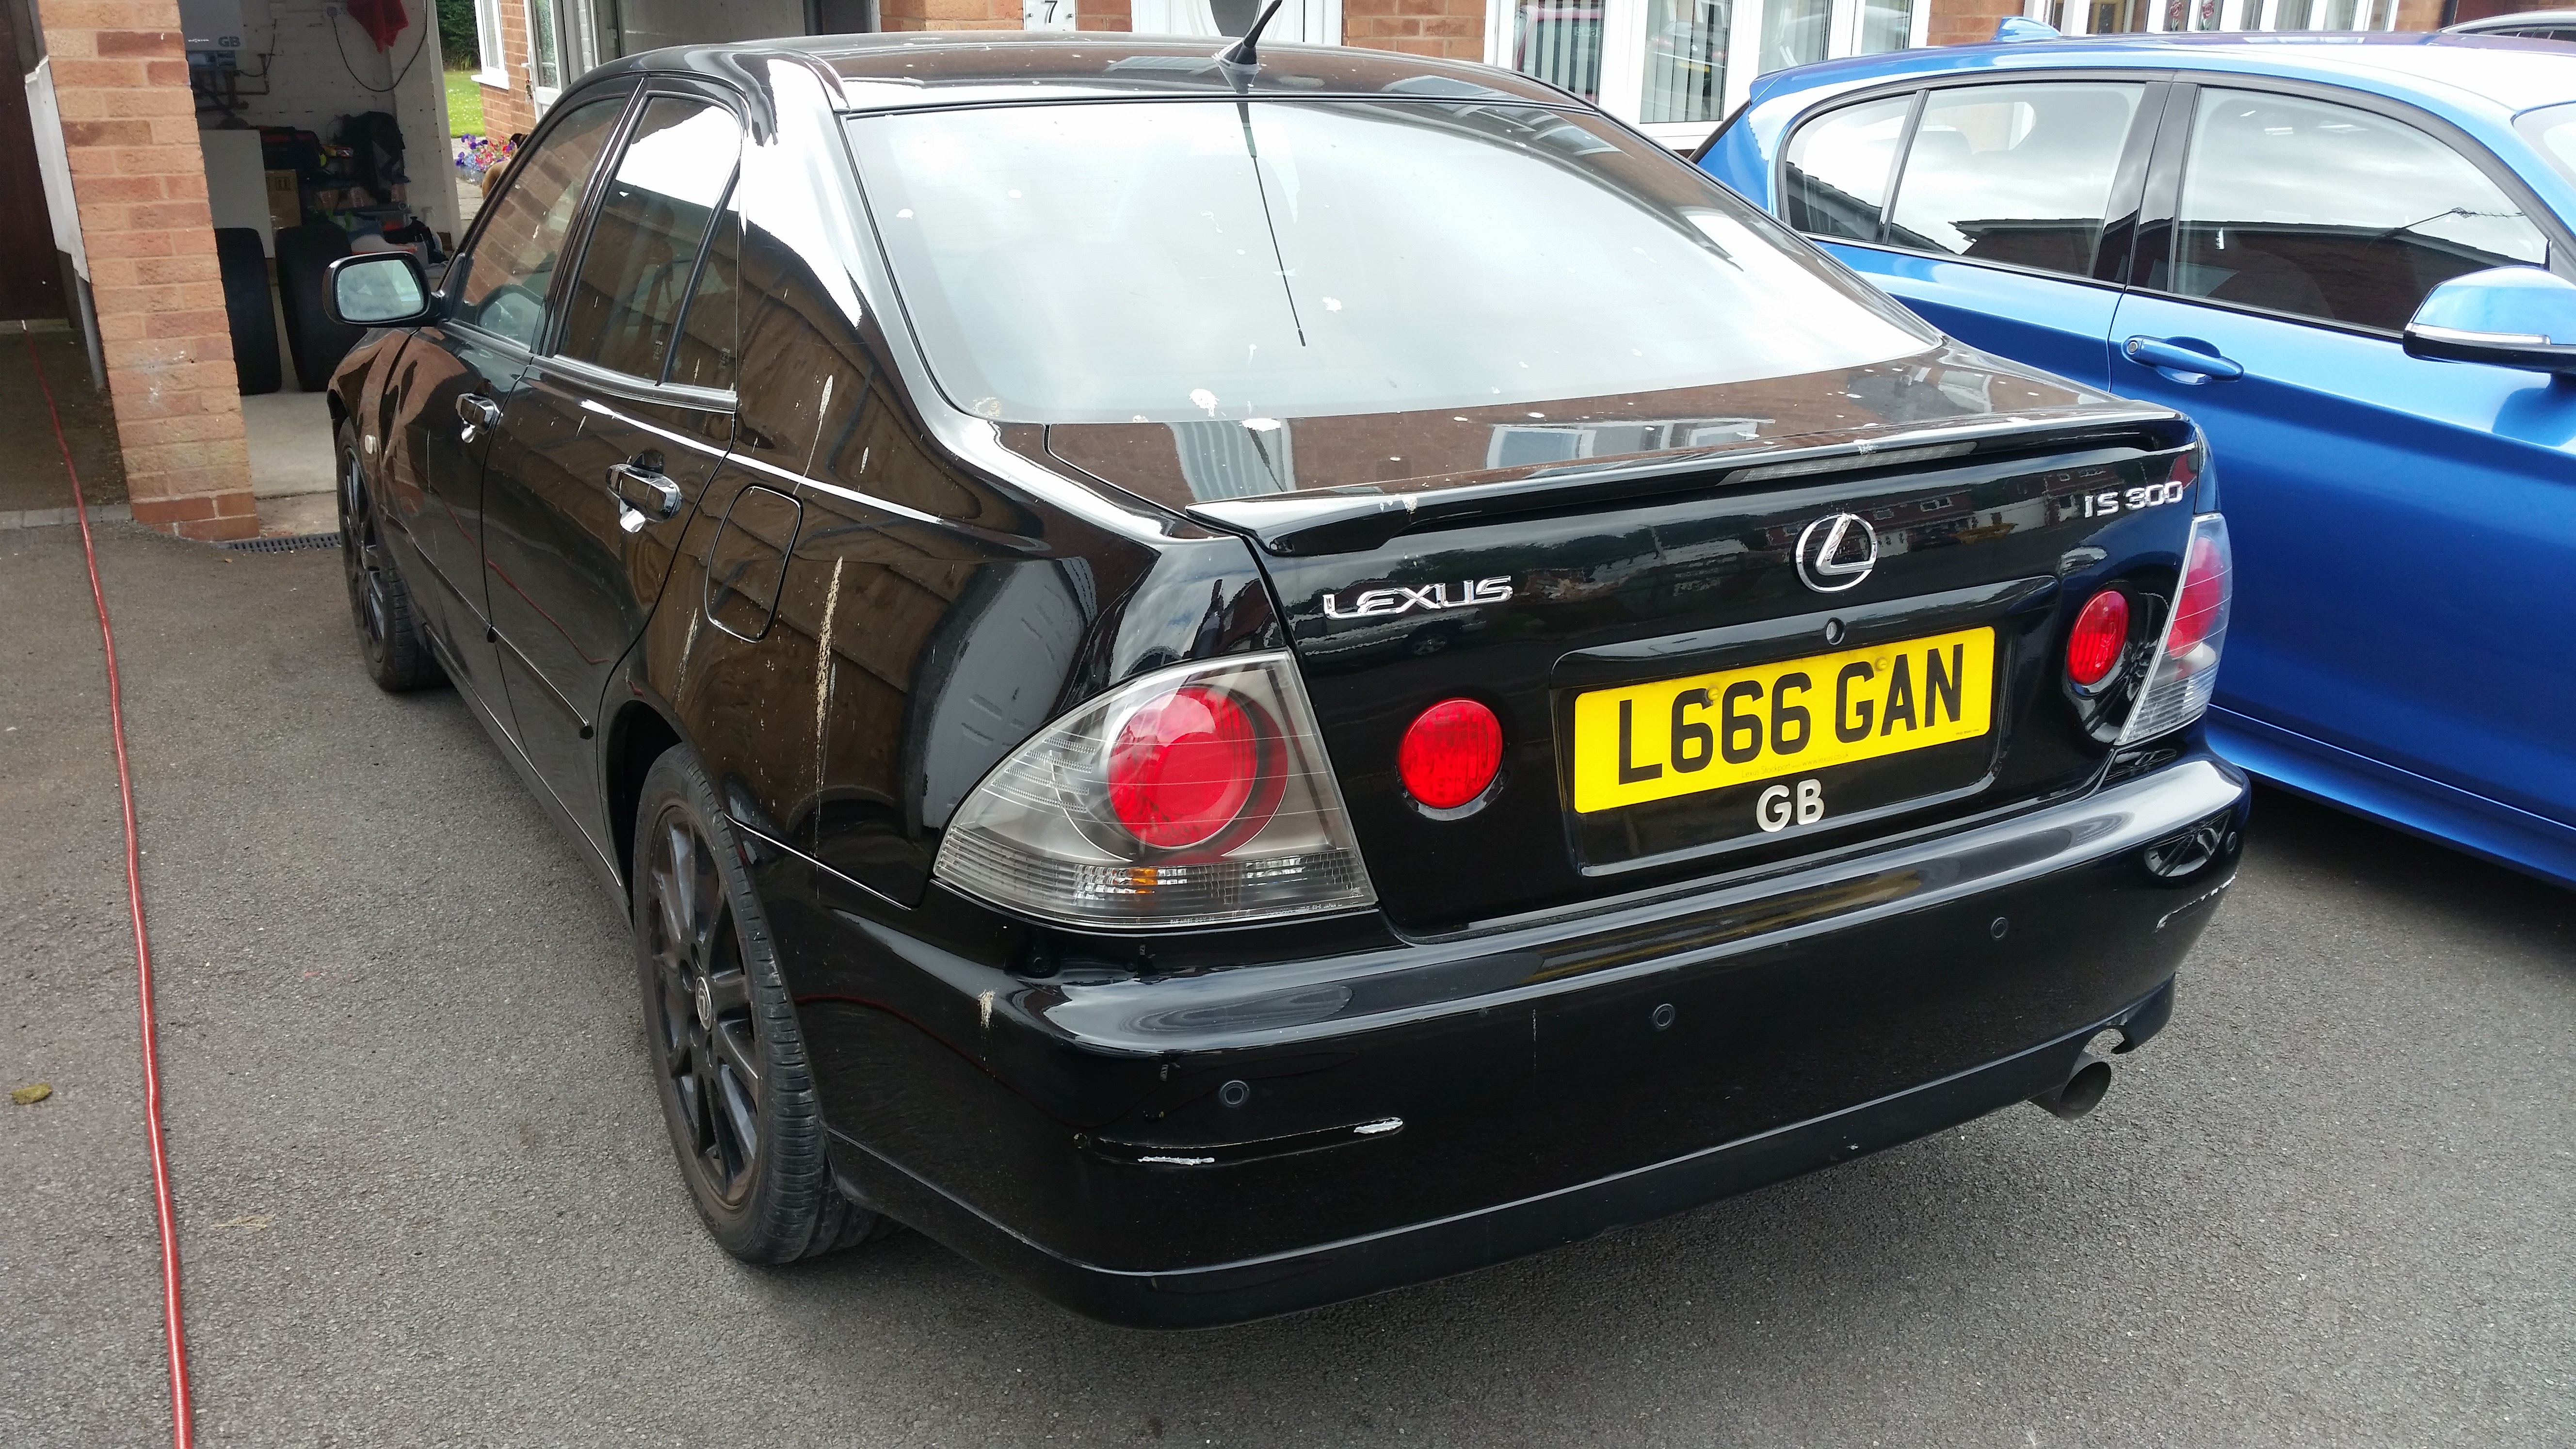
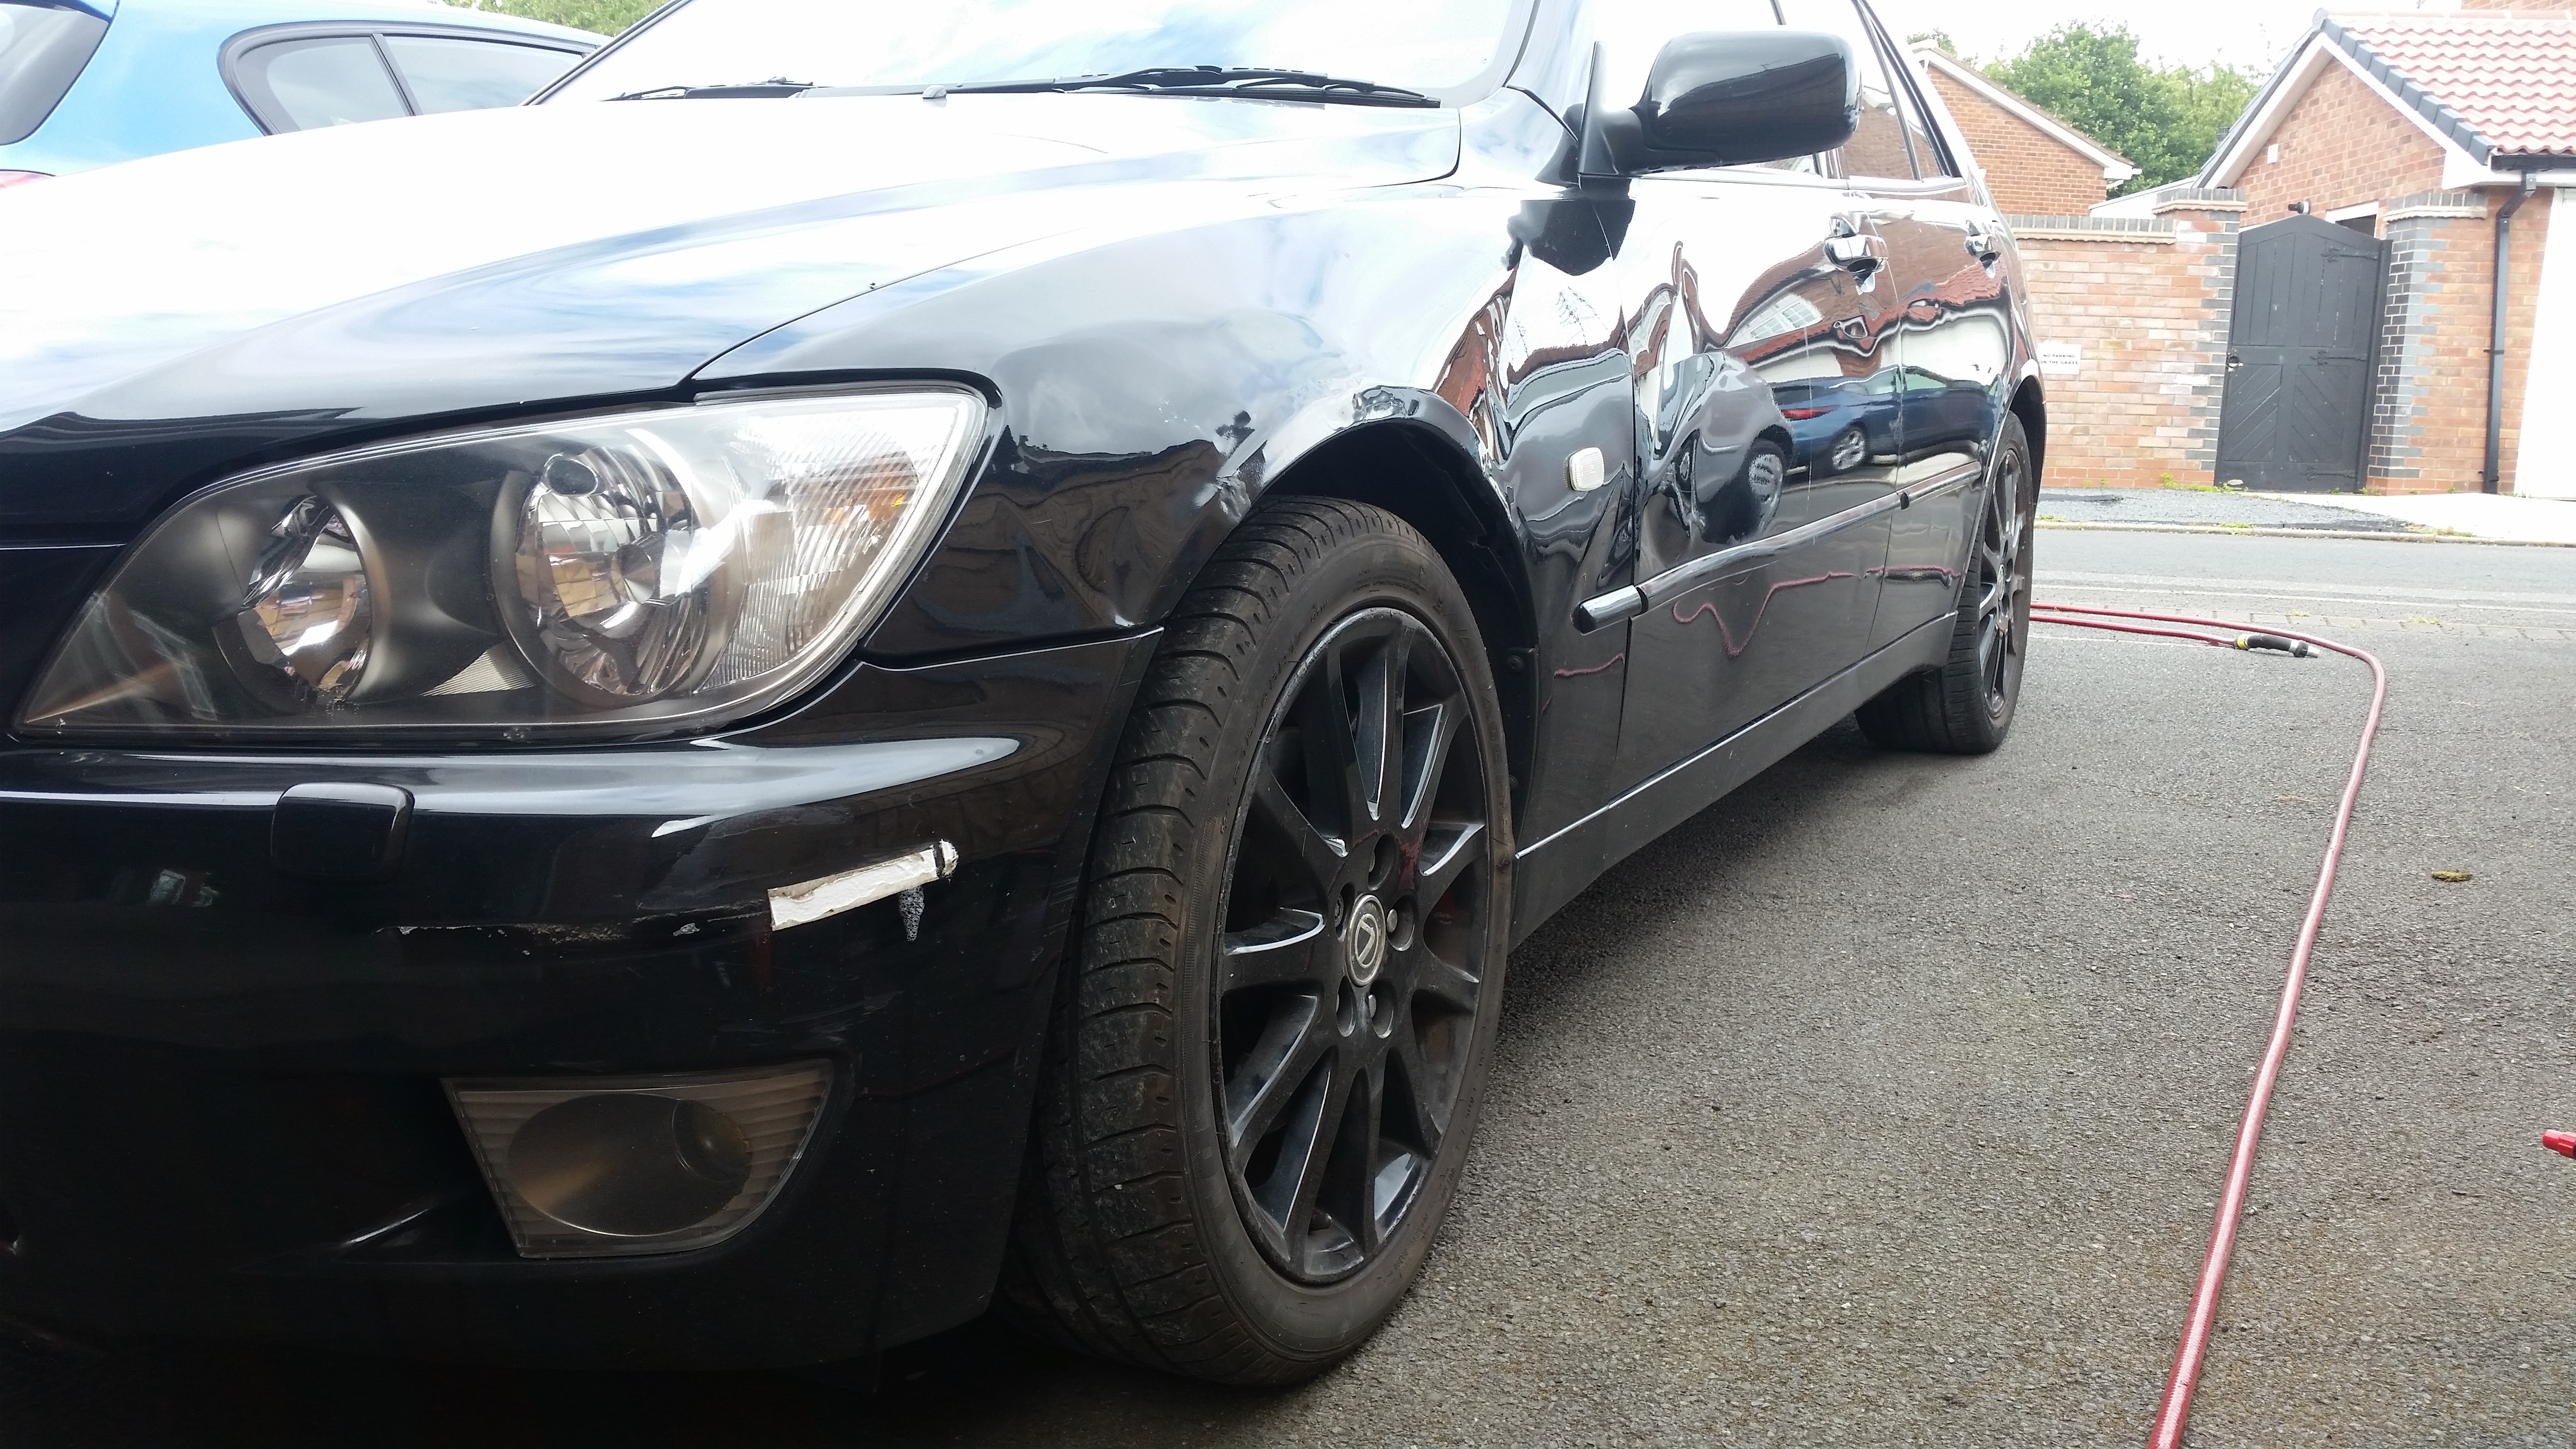
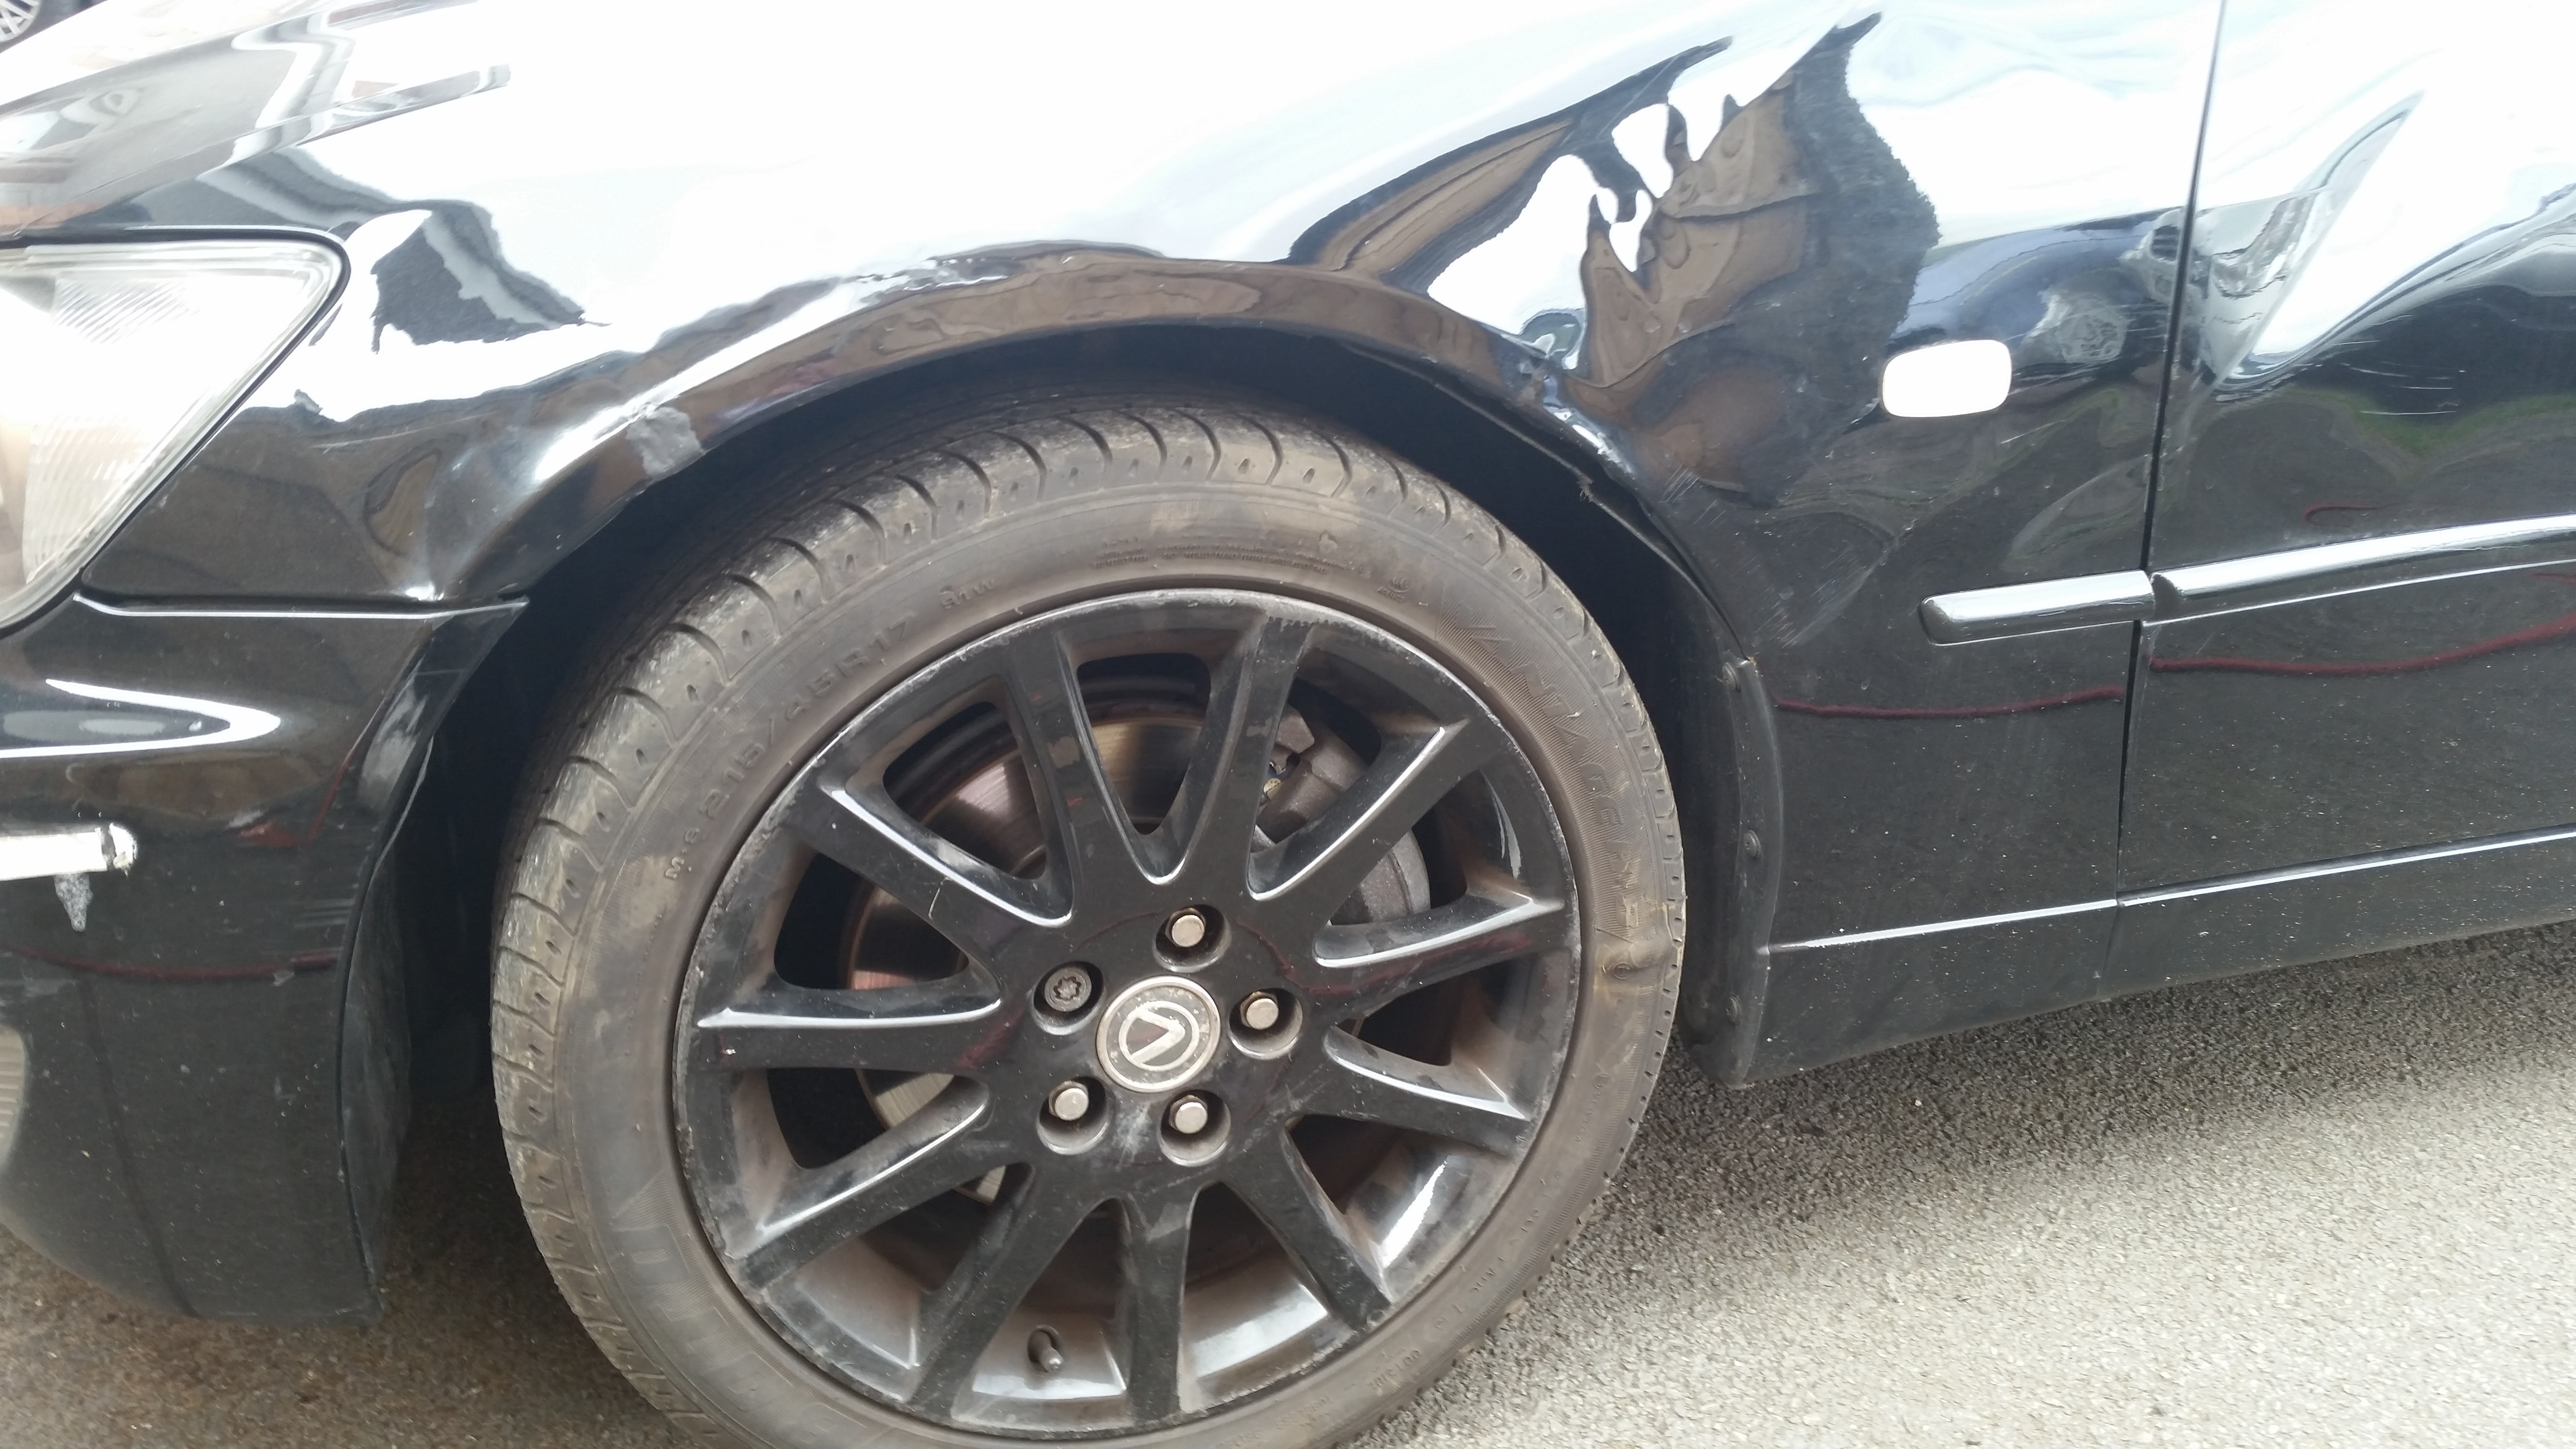
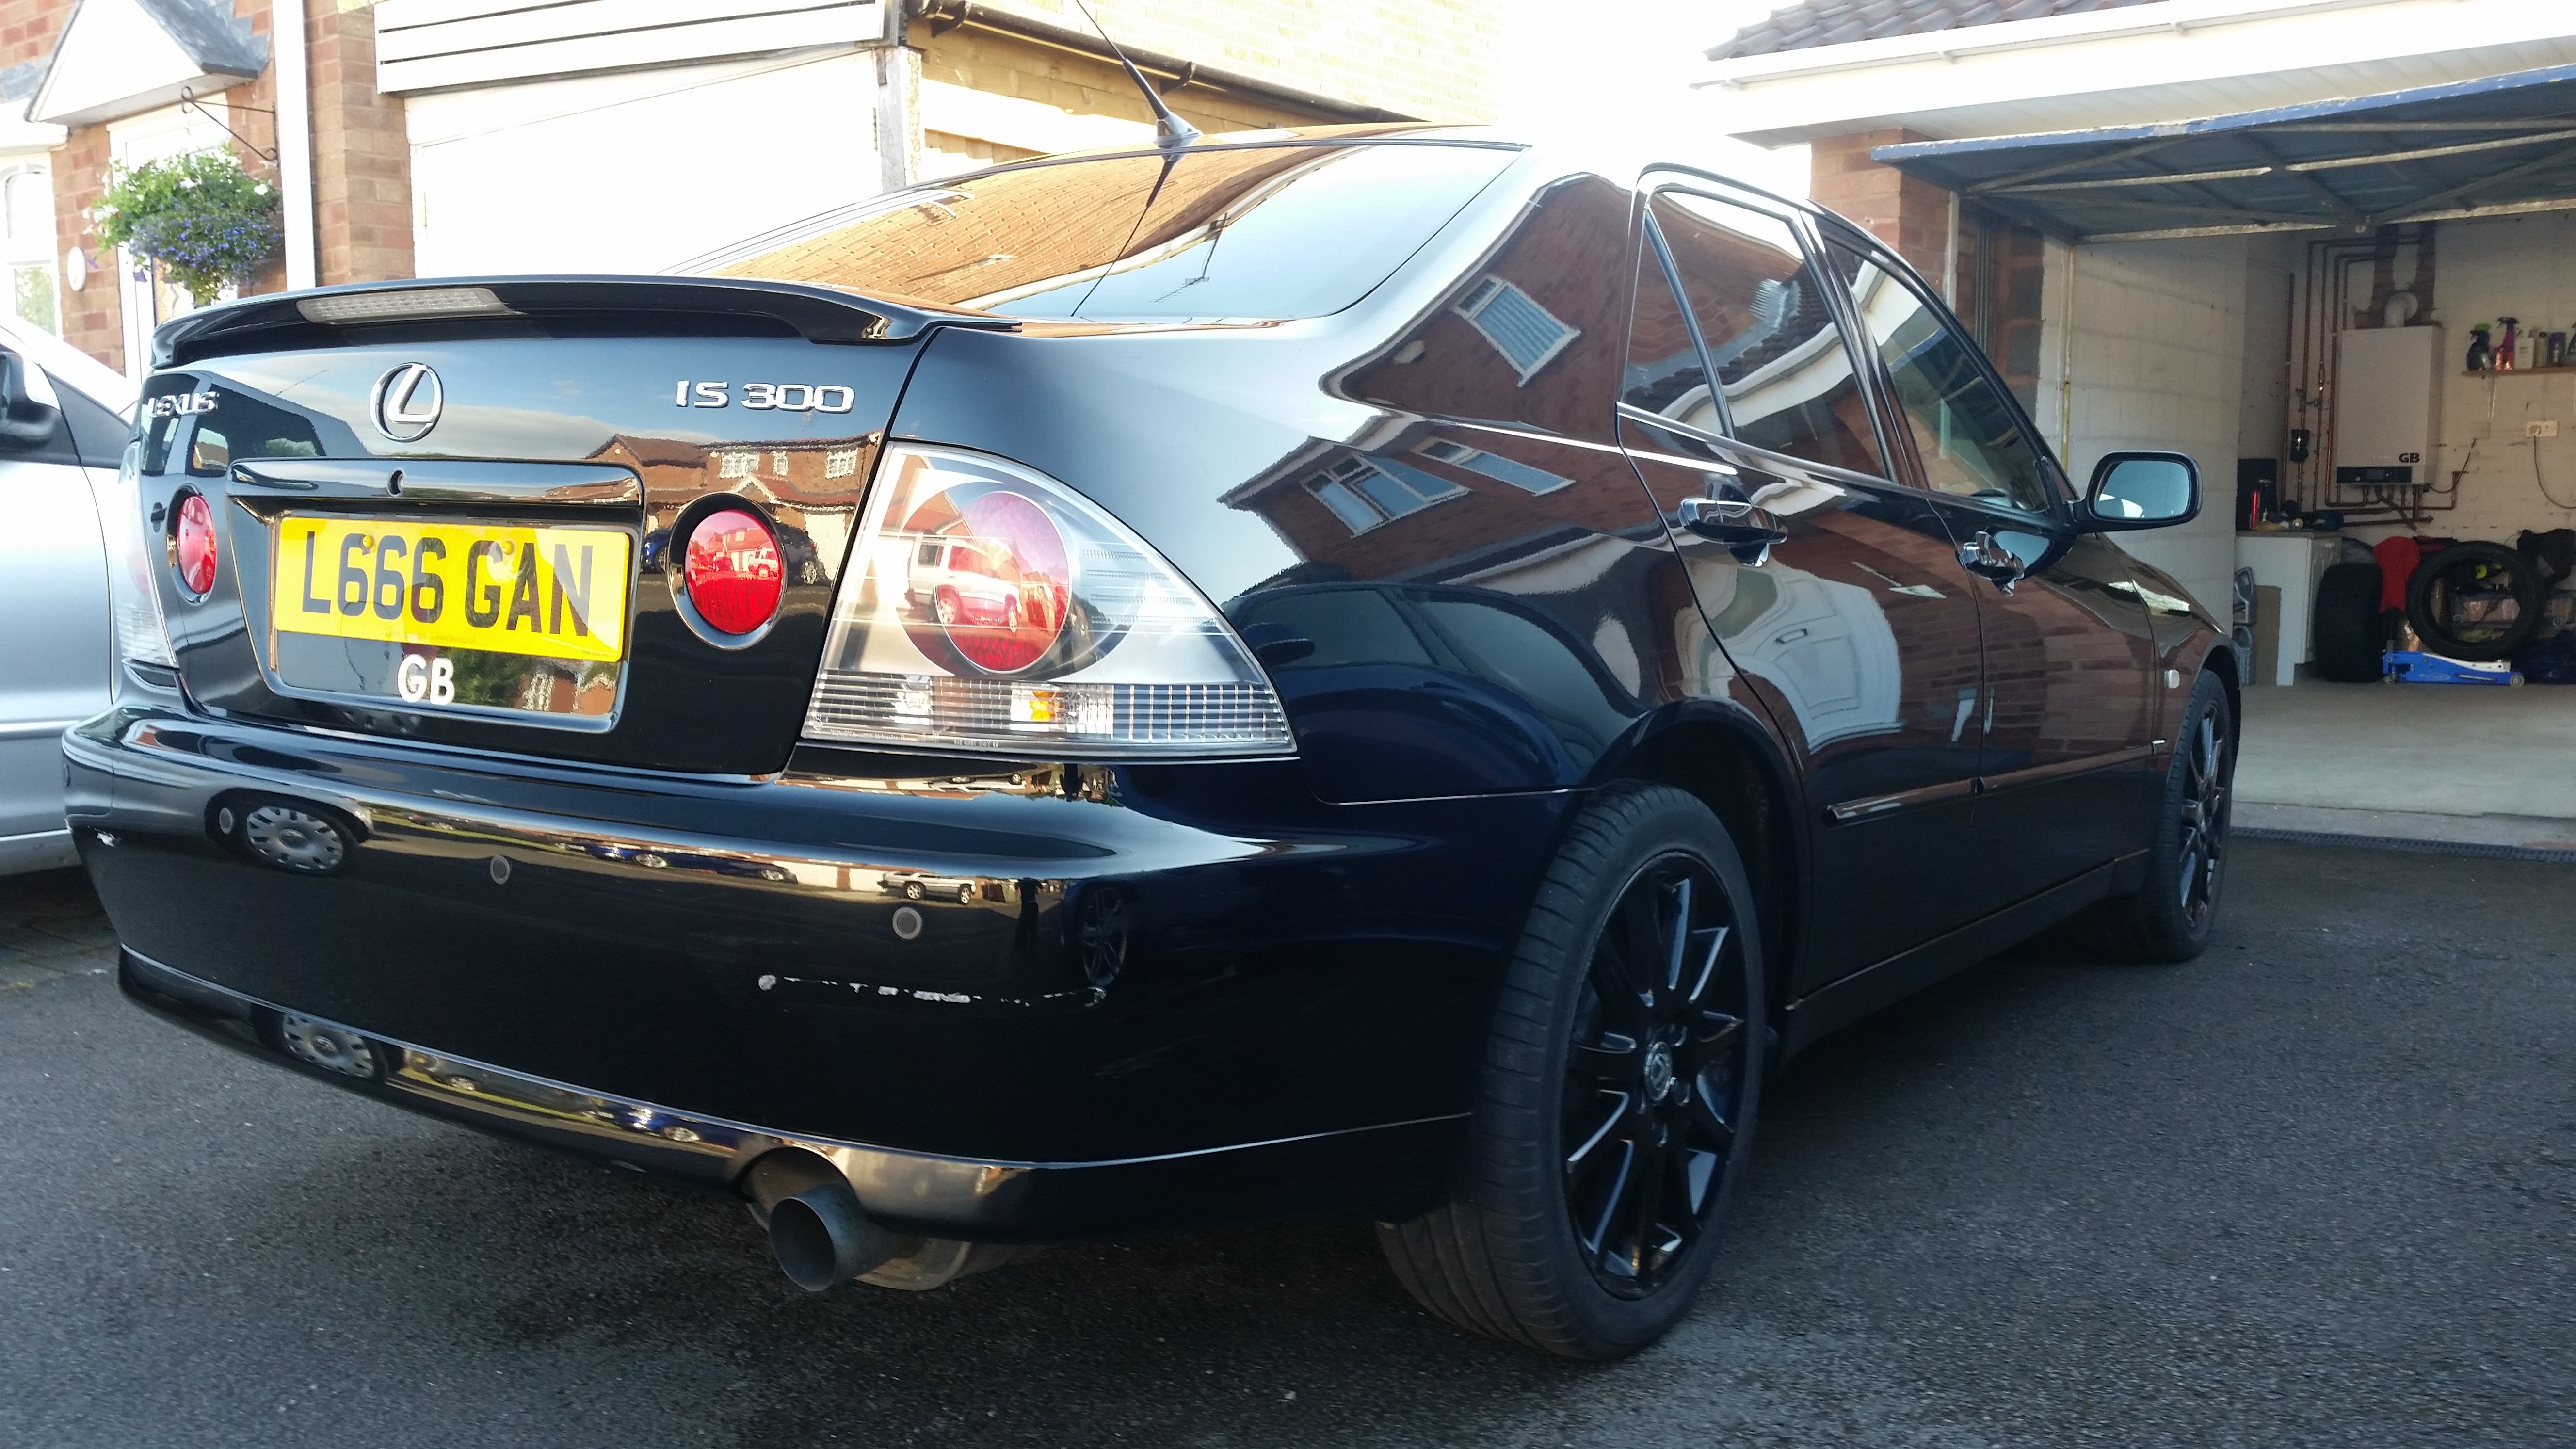
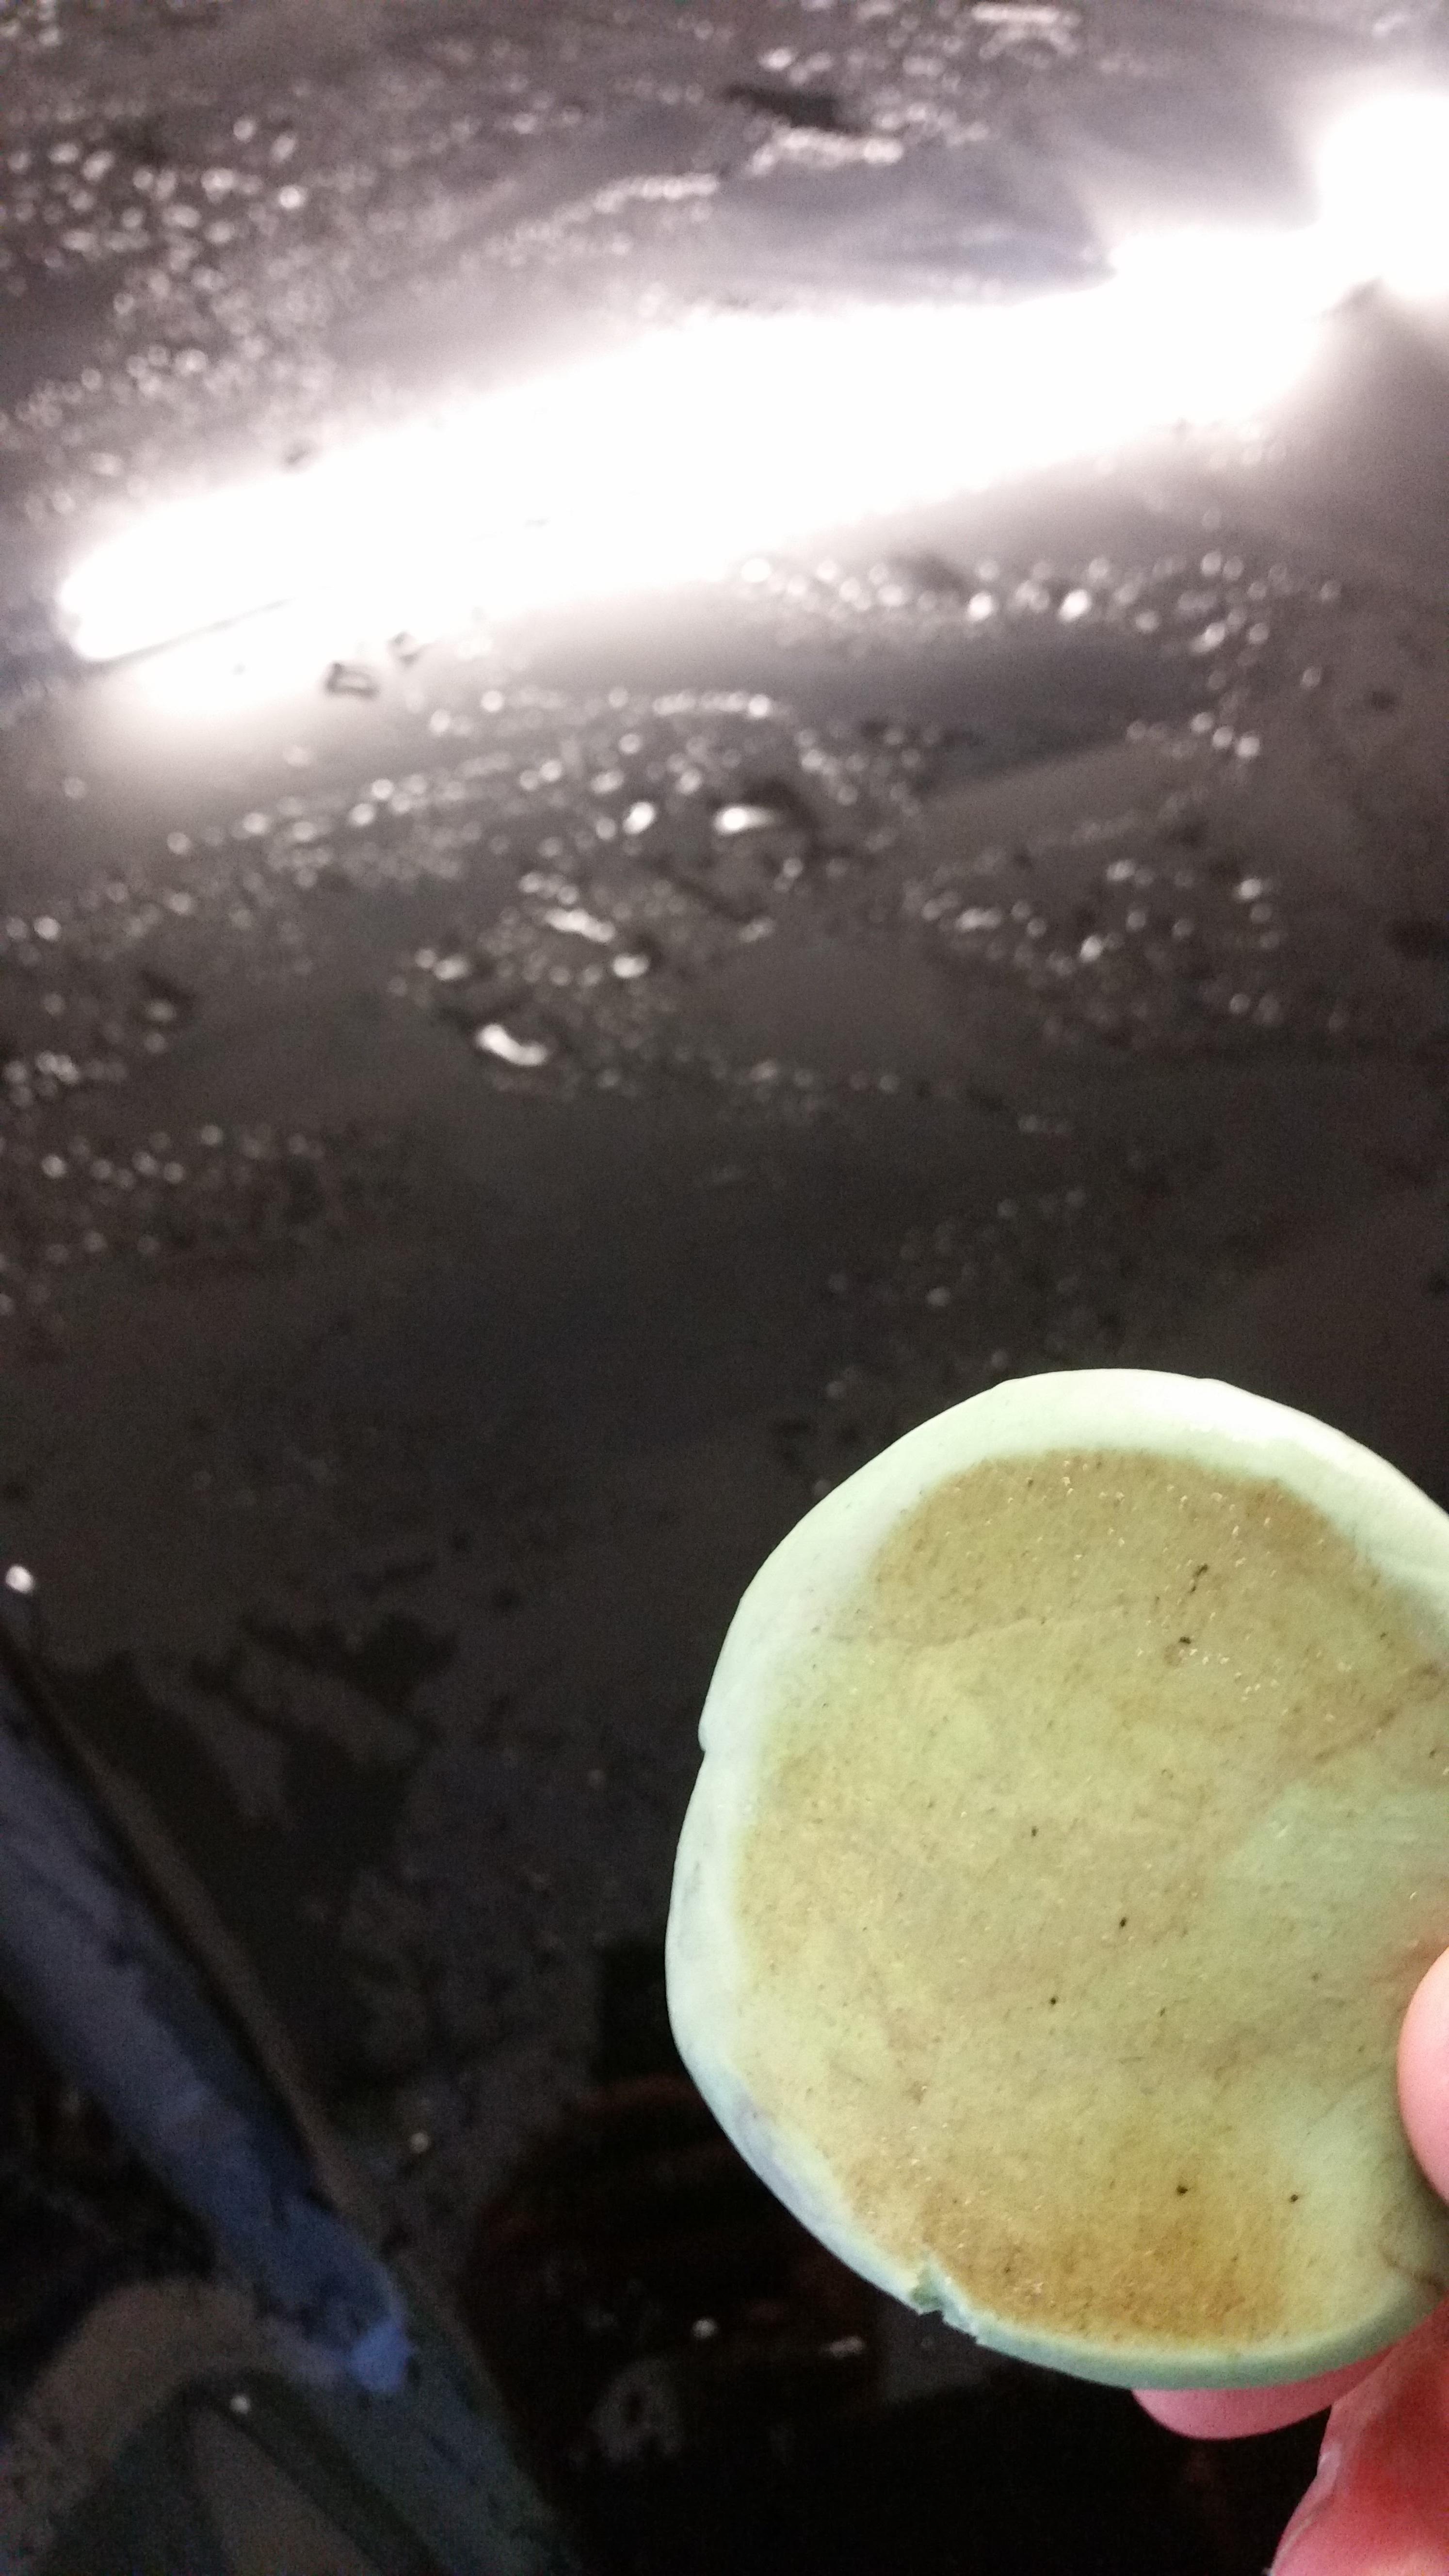
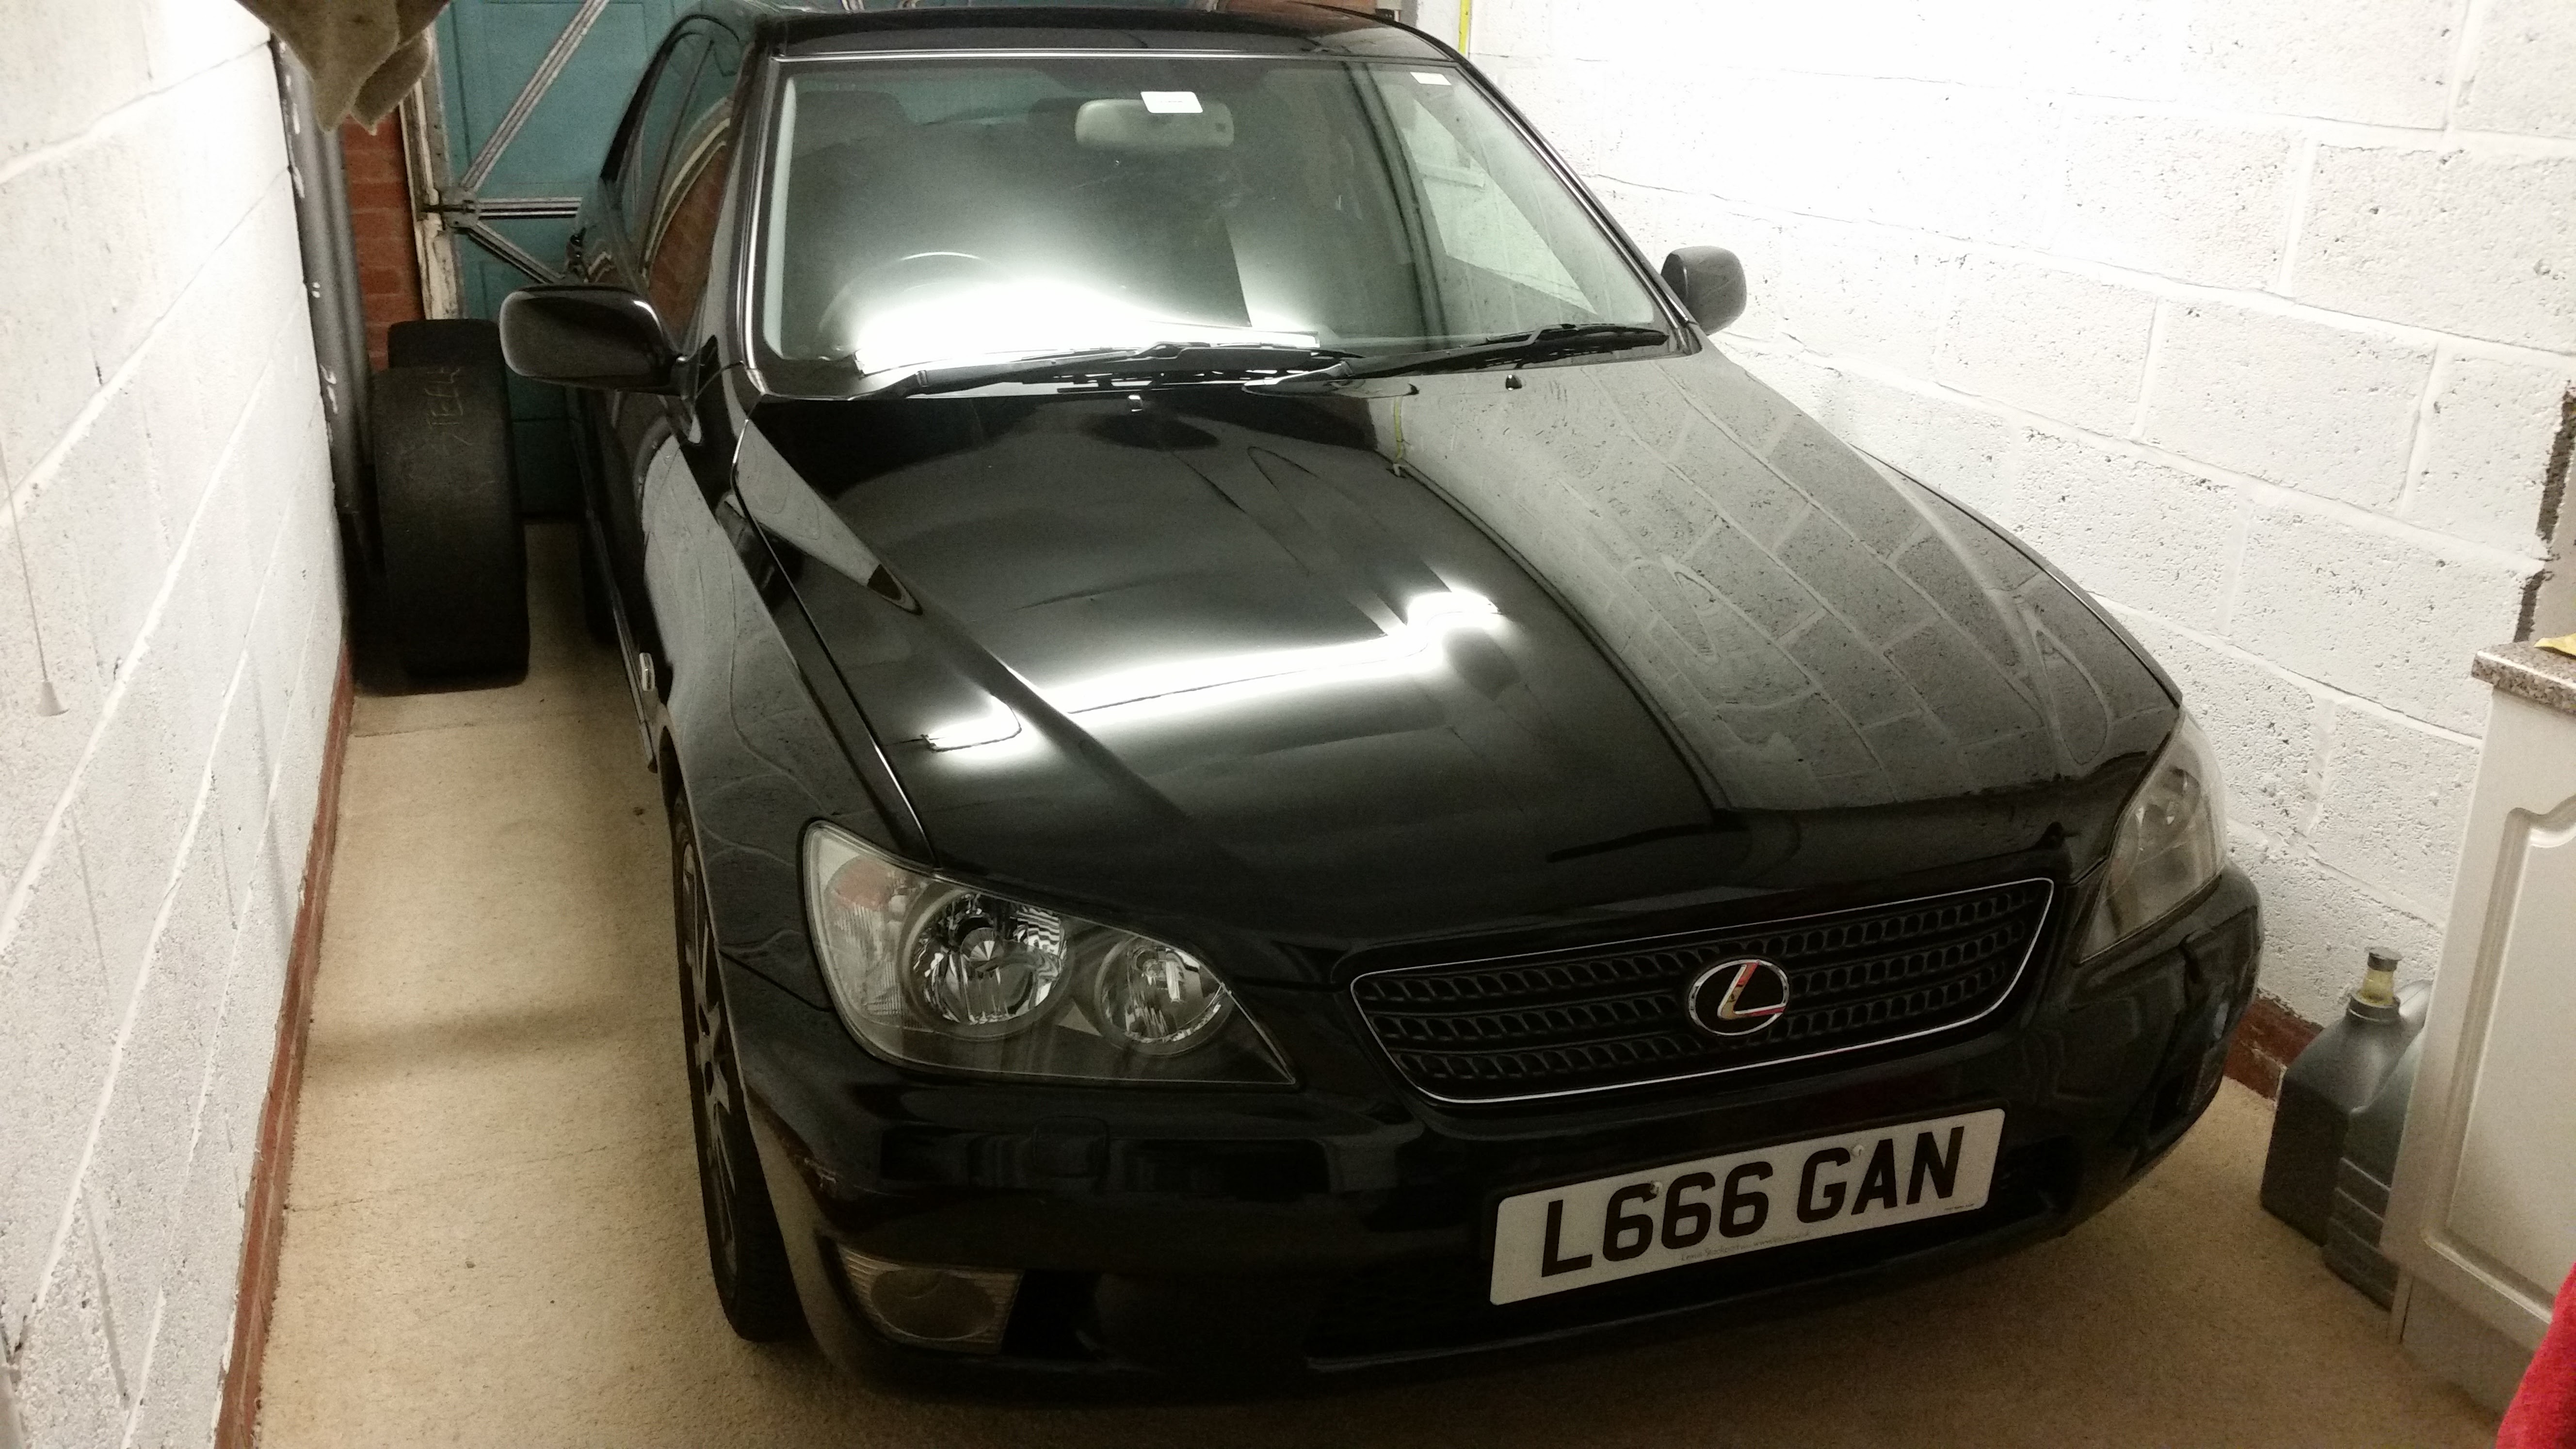
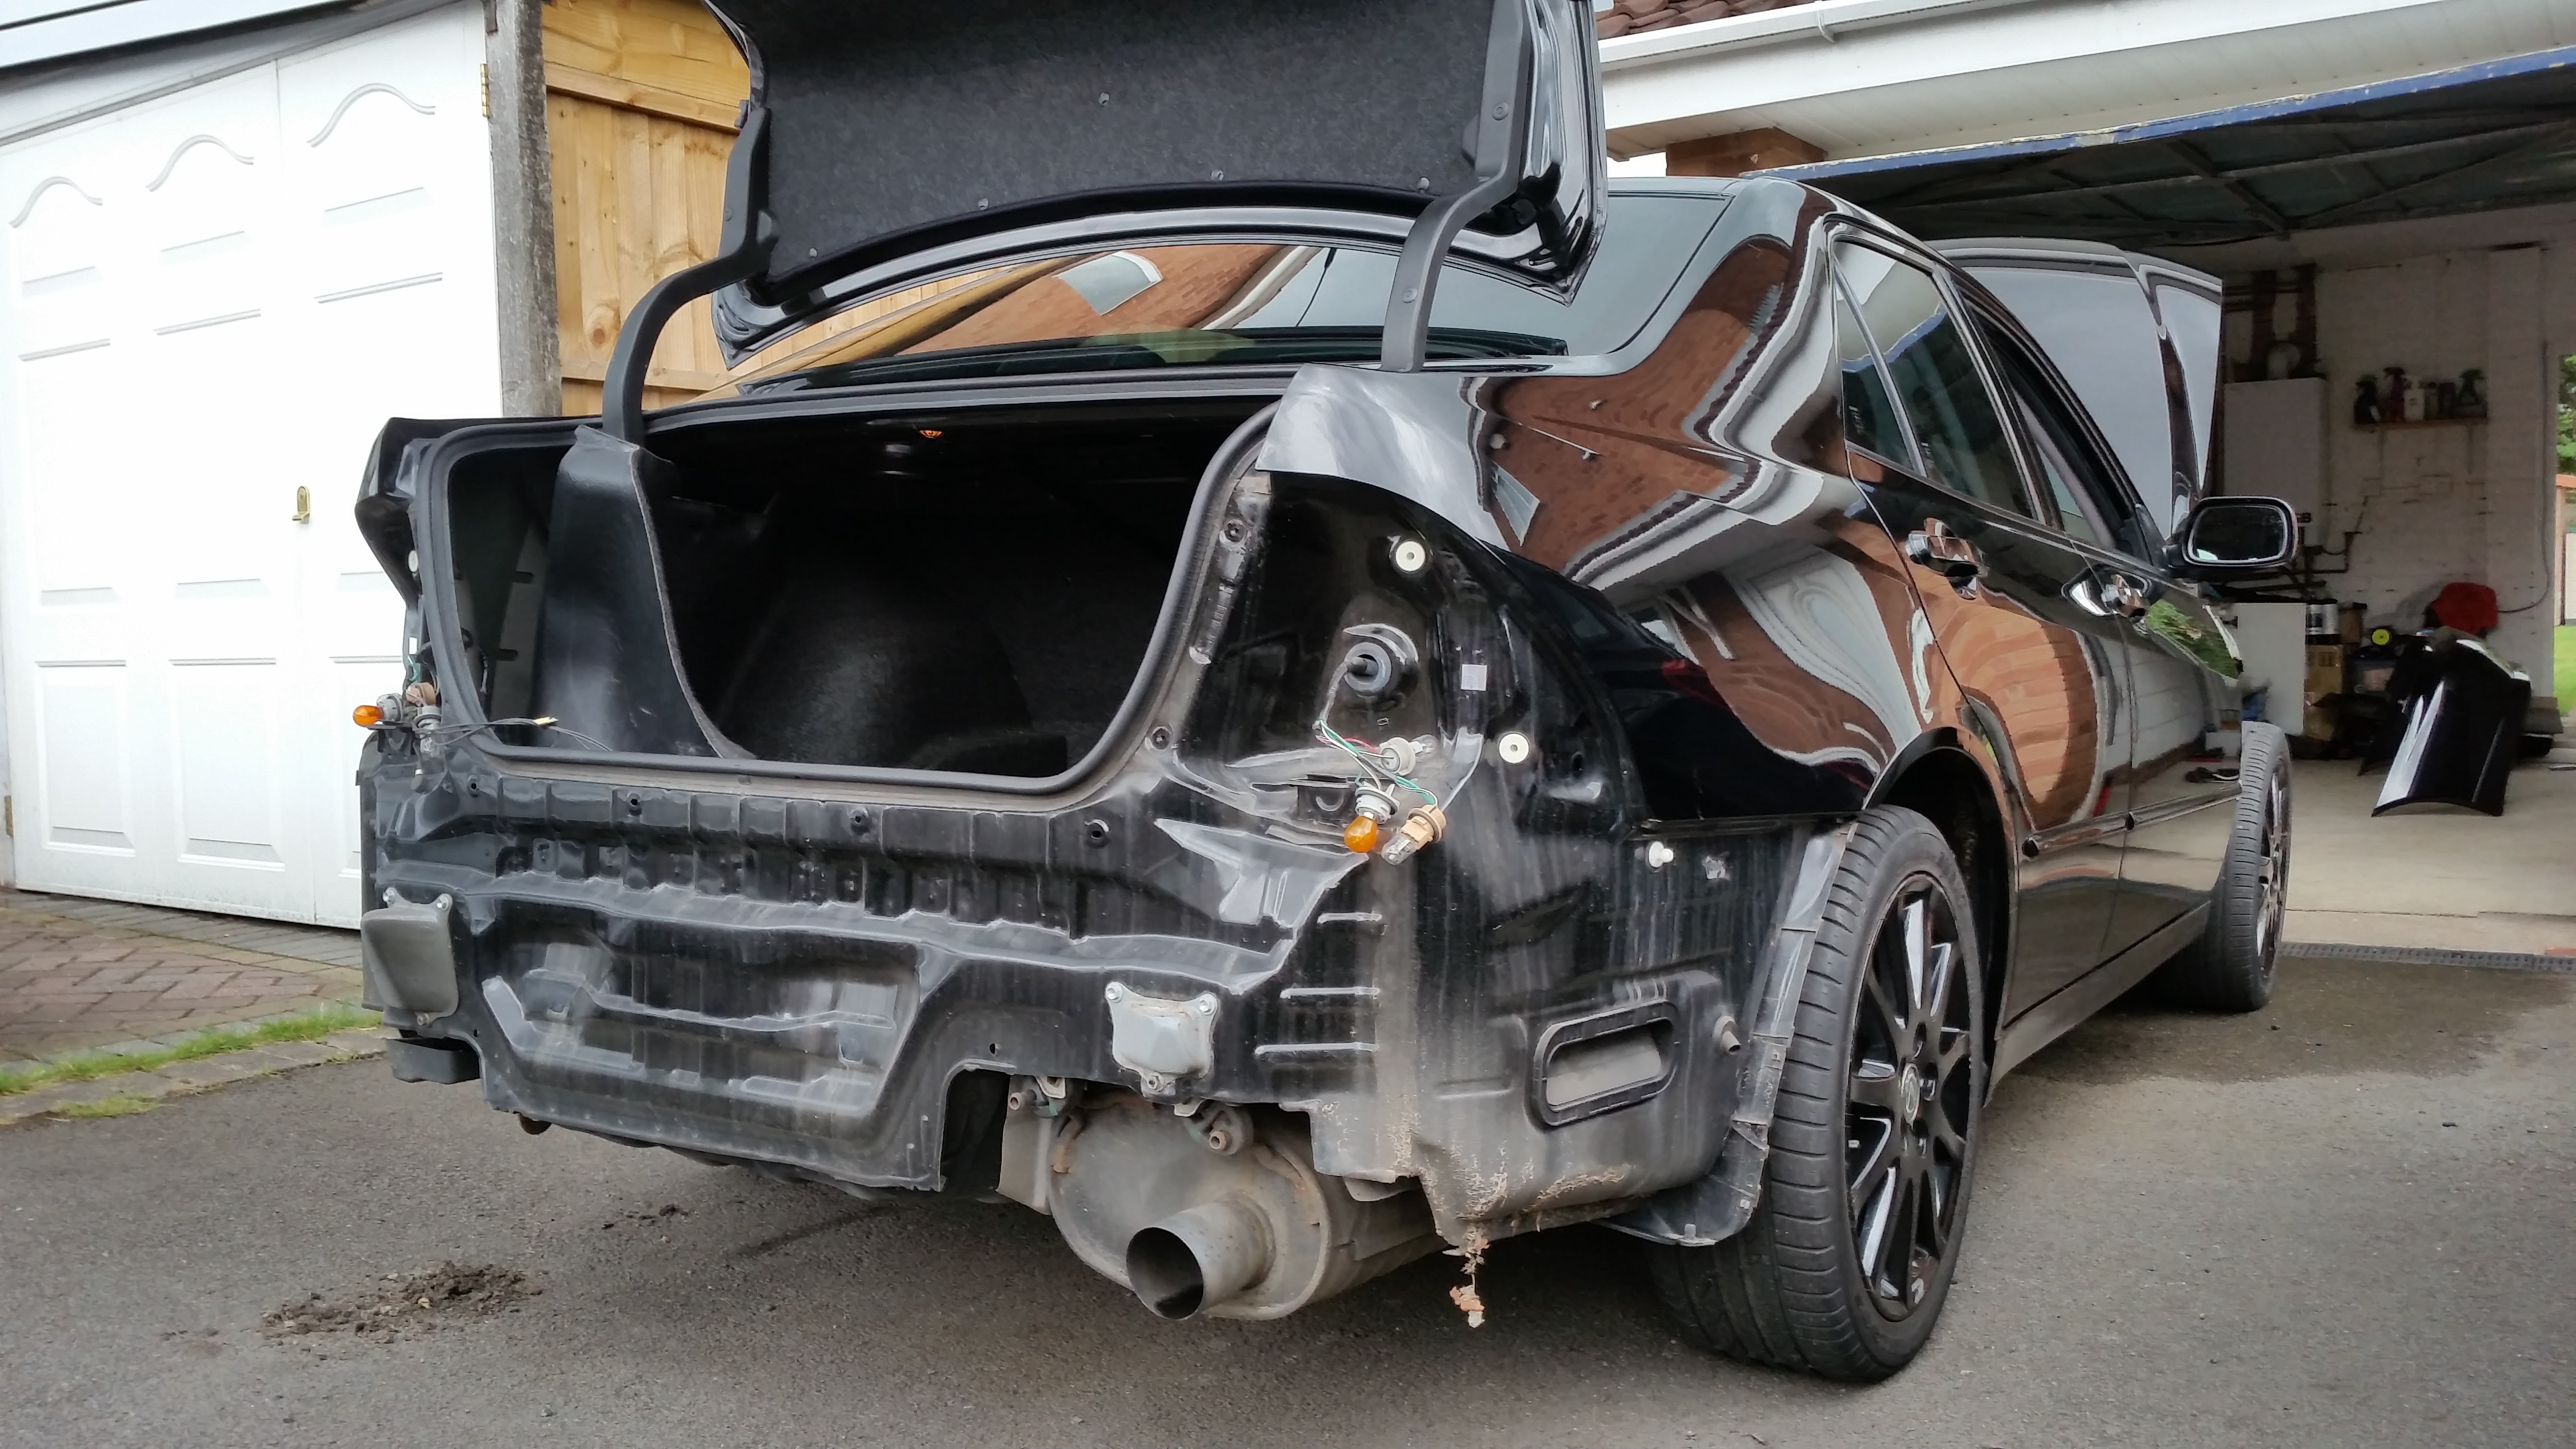
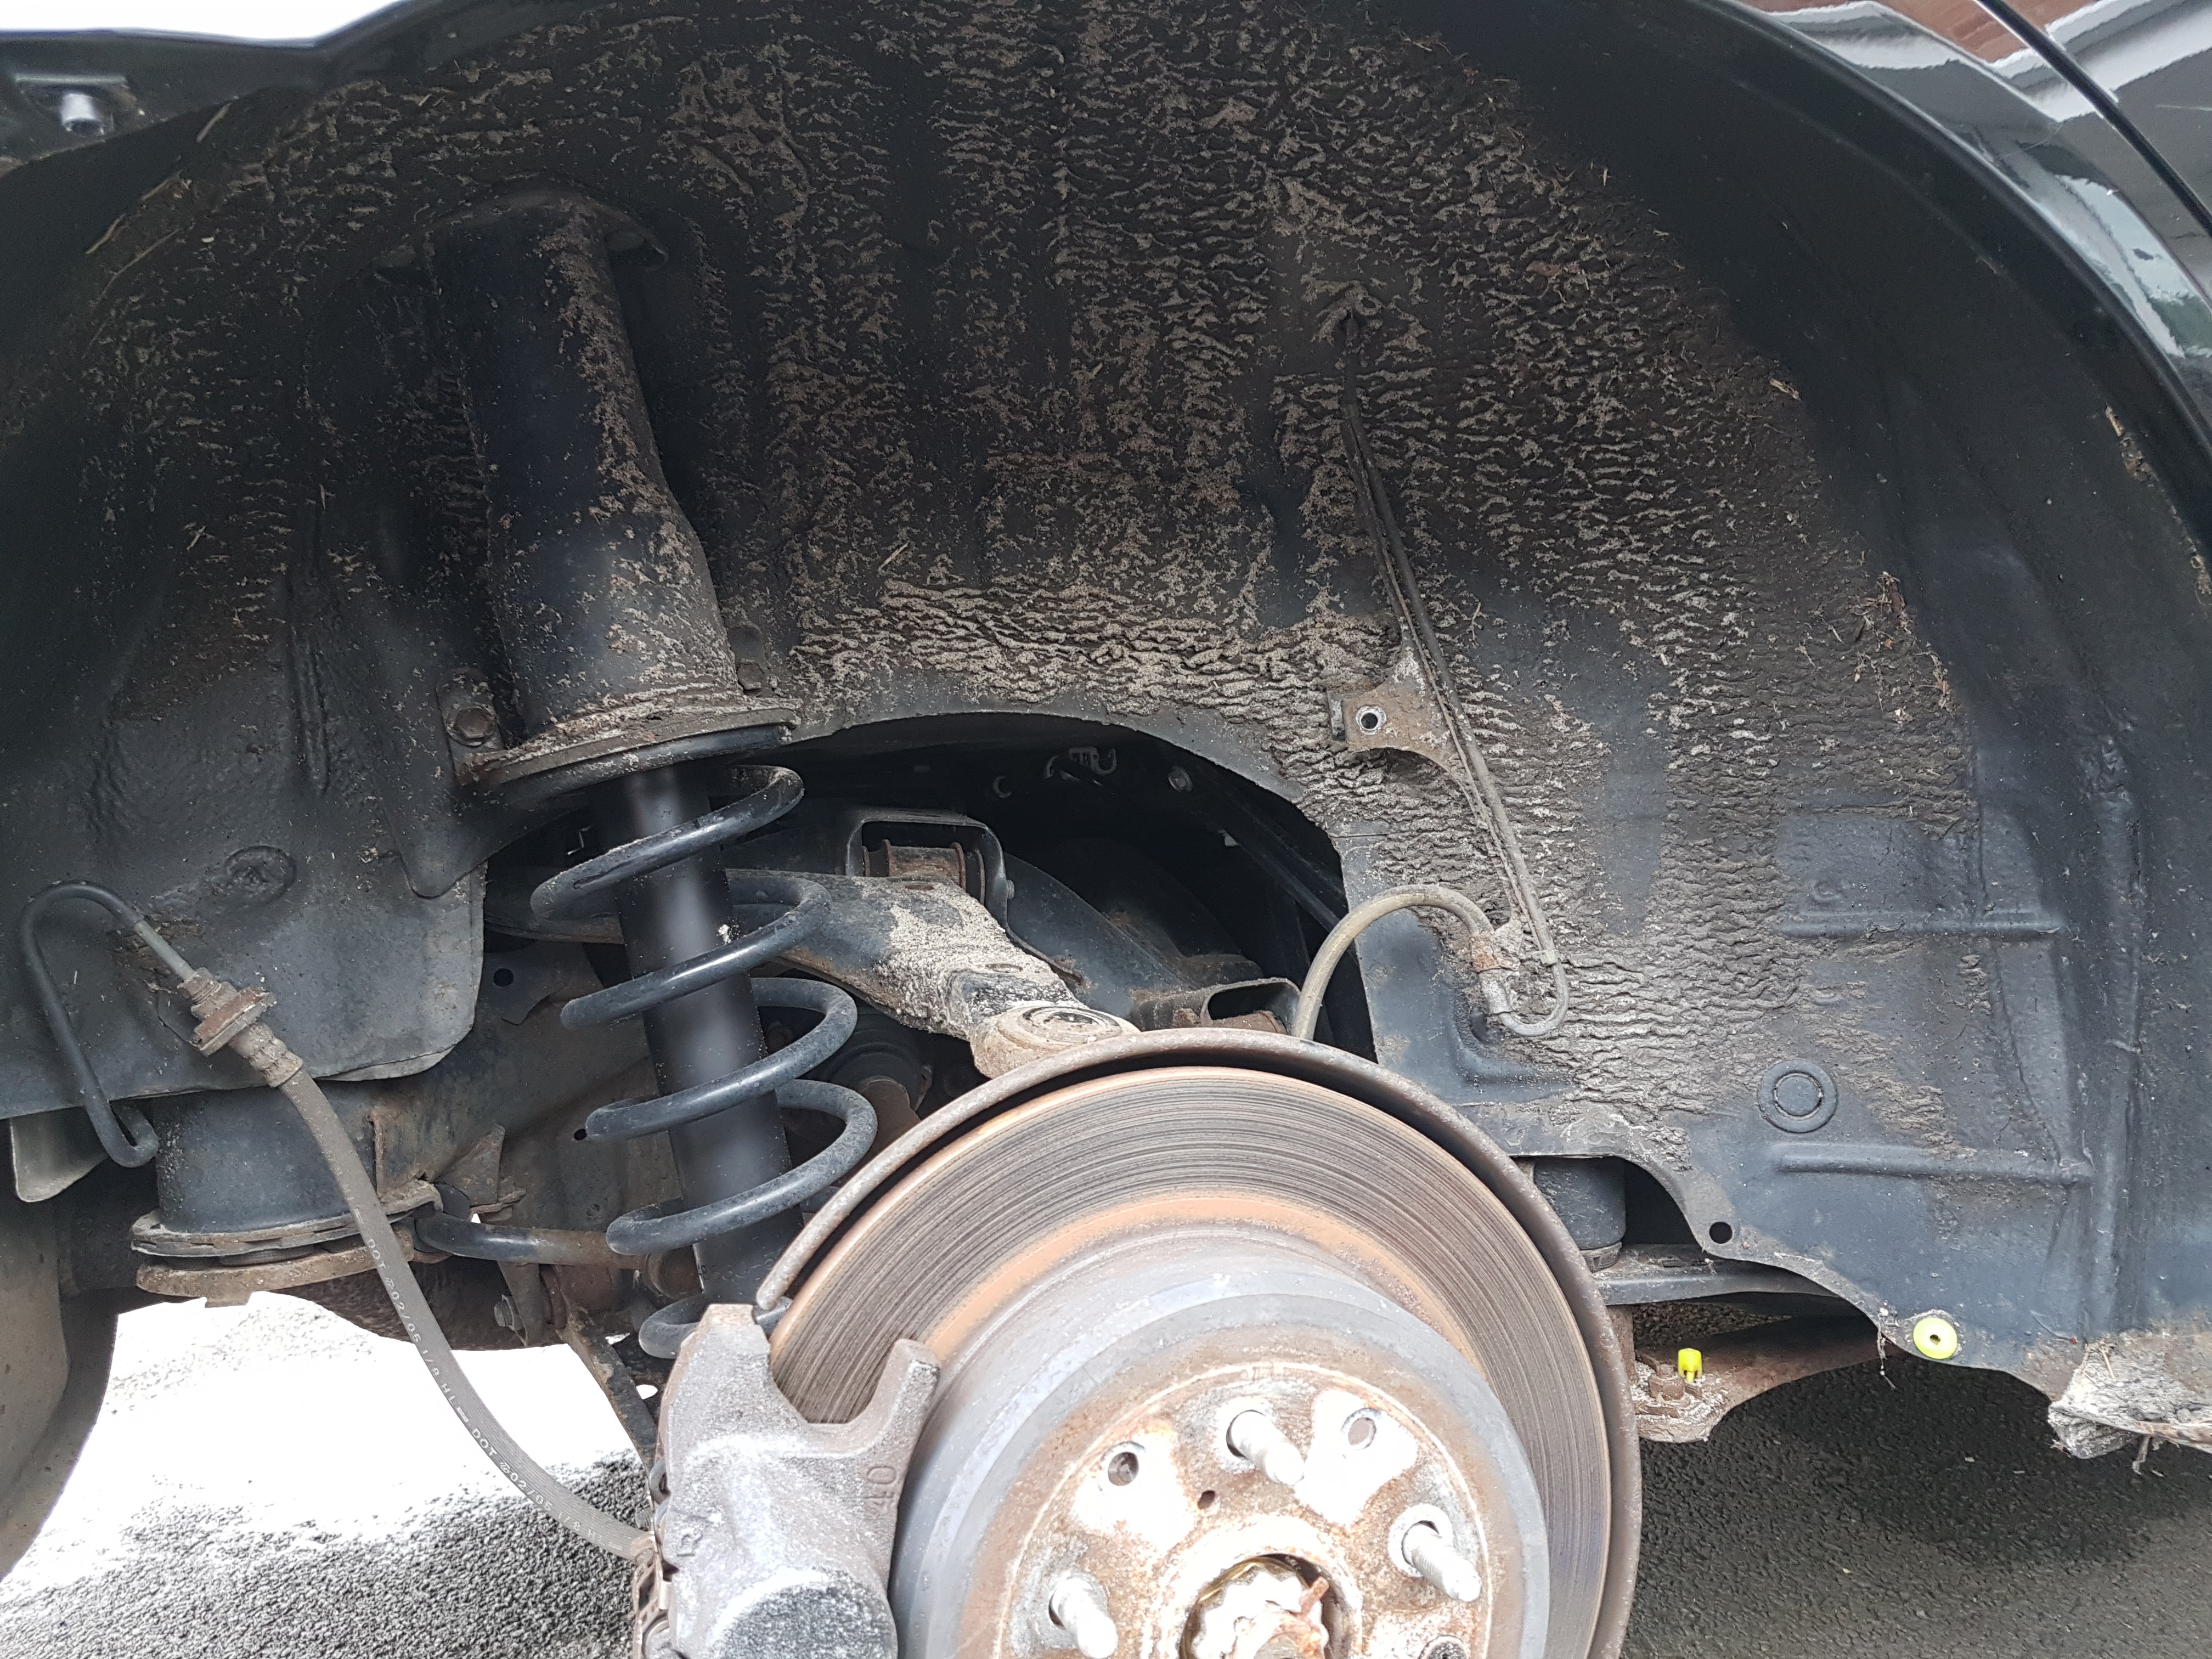
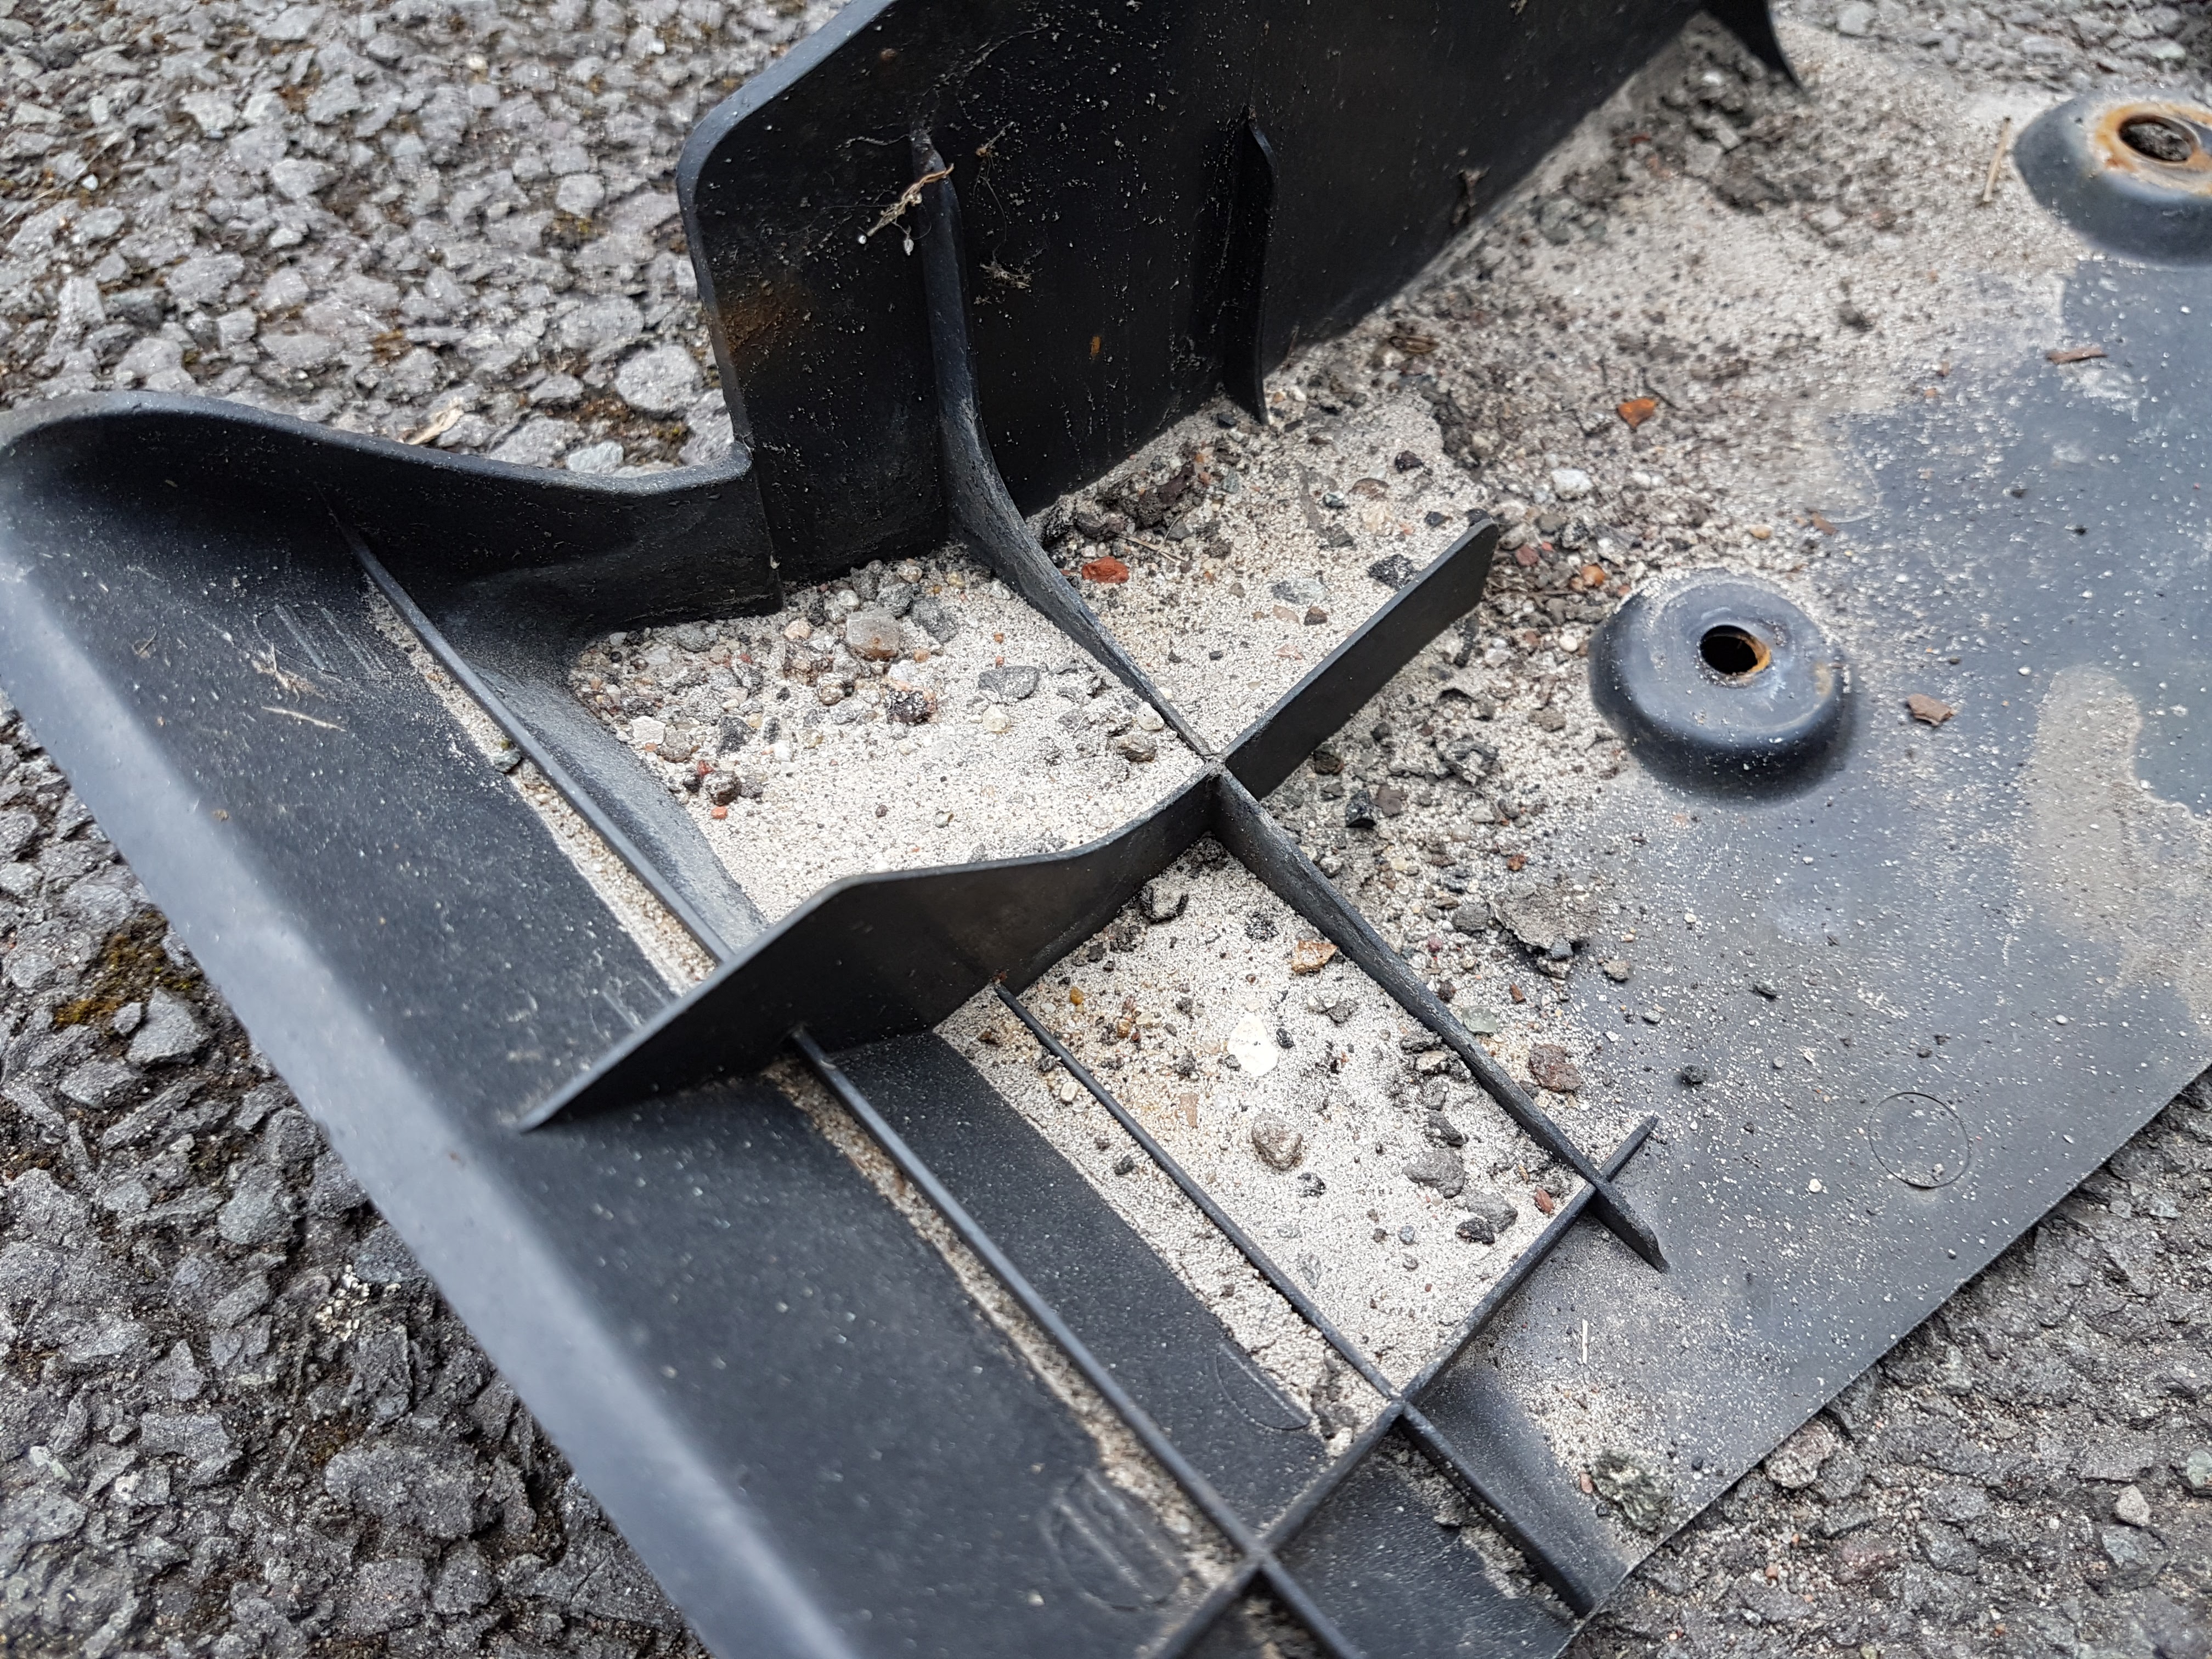
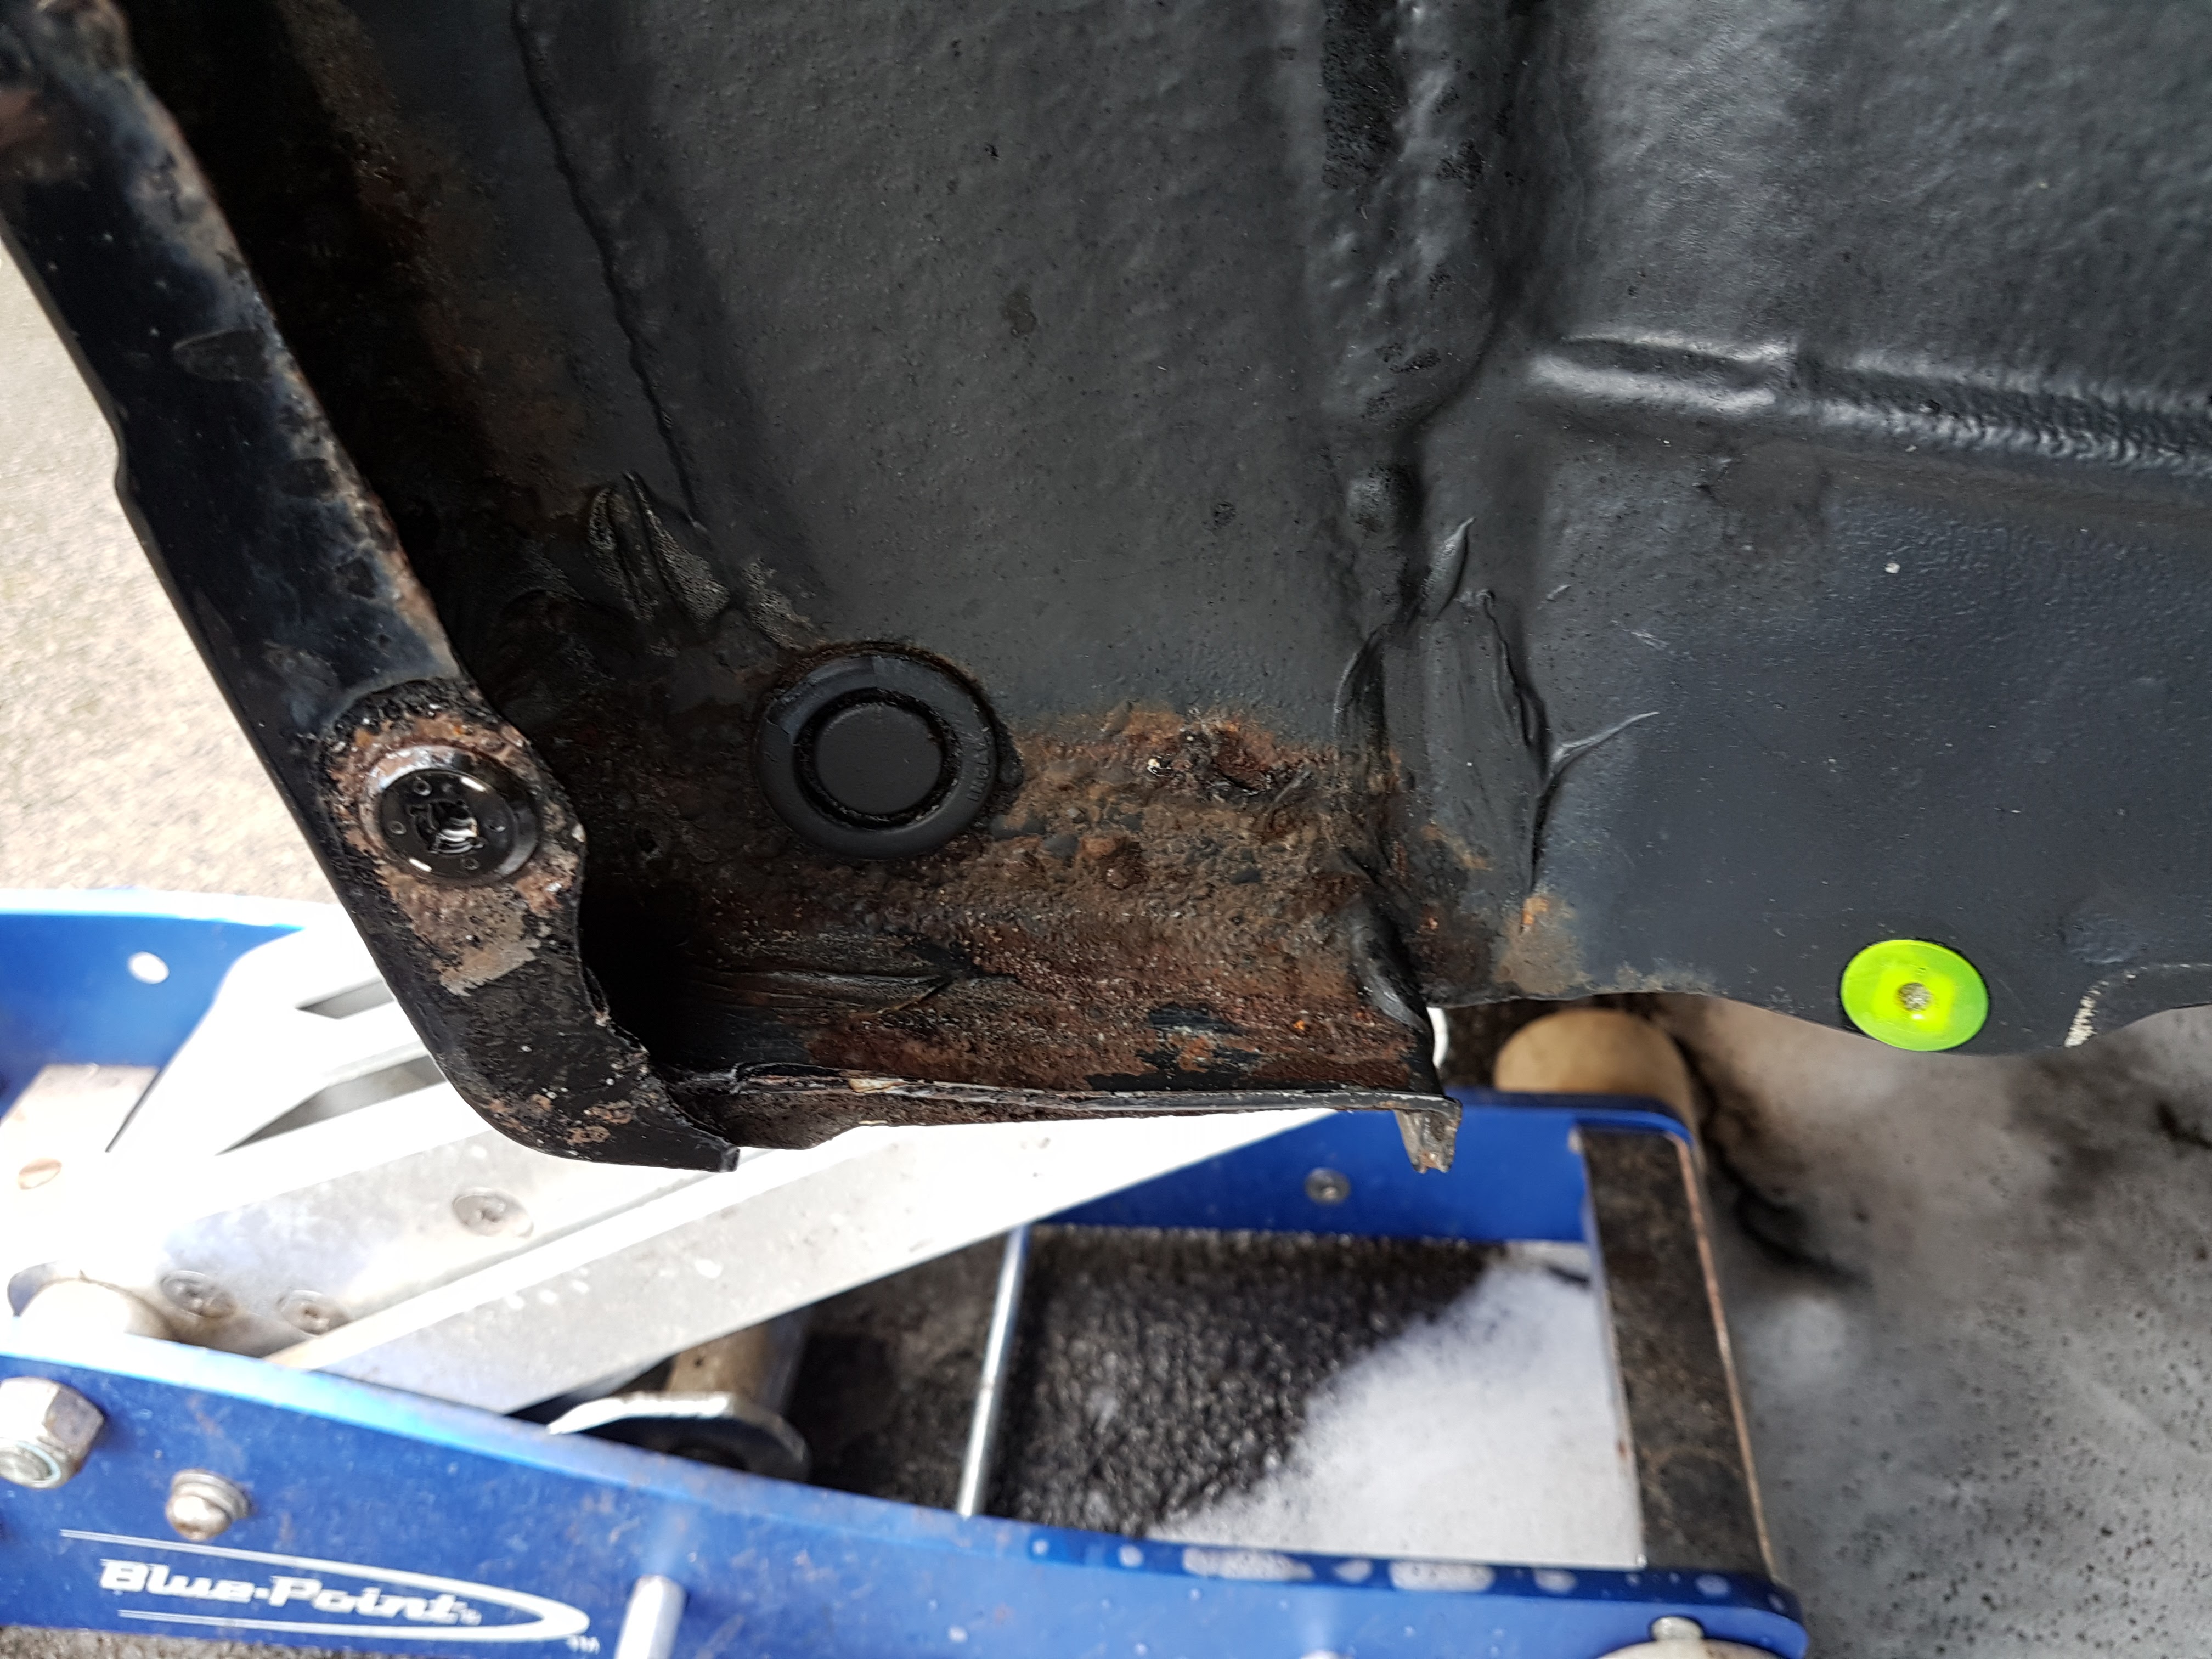
Hey everyone, so my old car has gone creating the way for my dream project! Always wanted to do this build its had to wait its turn and now is the perfect timing for it! My old car was a MK1 Focus RS for anyone interested, i was pretty big into the ford scene going to nearly all the main ford shows in the calender. The Focus was running a healthy 411bhp, i had this for around 5yrs and once i completed a trip to he nurburgring it was time to sell. I took my time looking for an IS300, i wanted 1 which was solid with no rust. It had to be lowish miles and clean. I met almost all the plans....... i found an IS300 with just 28k geniune miles on it but .................. it was a cat c. The car itself wasnt too bad, the damage making it a cat c was front bumper, n/s/f wing, door and n/s/r door all dented from a drunk driver managing to smash every car is this poor blokes street. Not wanting to loose this car i drove 2hrs to rhyl the day it went up for sale. Quick scoot round it checking that the damage was limited to just panels and not suspension and sills, no signs of any rust and interior was absolutly immaculate. Gave it a very short drive up and down this guys street and i was happy so deposit was left. There was no way i was doing a long road test or driving this thing back though as it had 3 nakered tyres and all different tyre sizes! Got my mate to stick it on his trailor and dragged her home. From the pictures you can this thing was peppered with bird sh!t, paintwork ropey, damage on the n/s, stupid rubber strip things stuck to the bumpers, bulge in the tyre...... this would have put most people off but i could see past all this as that low miles factor was the key. So a quick wash later and now i could see what im dealing with Didnt scrub up too bad tbh i was suprised. Paintwork up close was heavily stained with bird crap and water marks. Sooooo off i went again, cleaned up the bonnet, roof and boot lid 1st with a claybar and quick detailer, after just doing a small section of the bonnet i knew i had my work cut out.... But i carried on finishing off 2 clay bars in the process! I then hit it with the DA and 3m fast cut just 2 passes and 1 pass with the ultrafina and i was amazed.... Now down to the fun stuff...... I stripped it down, both bumpers, front wings, all 4 wheels and arch liners out and all undertrays removed. I must have pulled out 14lbs worth of sand off all the trays! Needless to say if this was left on the coast and not cleaned up it would have been a rust bucket! I then gave it a good deep clean of the wheel arches unfortunatly the car did not escape the dreaded tin worm, but it is just surface rust so shouldnt be a problem to clean up! I dried her off and tucked her away back in the garage.
-
Hey guys, as the title says i am kinda new on here. Registered back in 2010 but its only now that i have got my 1st Lexus. Just got myself A 2005 is300 with just 28k on the clock. I will be starting a project thread pretty soon as i have huge plans for this. I have just sold a mk1 Focus RS to fund this project so it has alot to live up to performance wise but rips seven colours out of it in terms of build quality. I used to work at Lexus dealer for over 10 yrs as a tech so these things was always going to suck me into ownership. Looking forward to sharing the project with everyone. Cheers, Rob
-
 i would put money on it being a faulty intrusion sensor :winky: , its located next to the front interior light
 -
The drain hole for the heater box is directly under the heater box itself. The water leaves through 2 small flaps and is directly above the gearbox. This is most certainly blocked, the weight of the water should force the flaps apart allowing the heater box to drain but yours must be stuck together. This is also a major cause of smelly A/C as the the trapped water then becomes stale. The only way to cure this is to get the heater box removed which is a pretty big job and you will see the black sticky patch which has the problem flaps. You could modify the flaps (cut them out or larger). If its out of warranty it could be costly.


_front.JPG.2e82ad7389401bf828e0f91673c67264.JPG)