


RoadRash
-
Posts
883 -
Joined
-
Last visited
Content Type
Profiles
Forums
Events
Store
Gallery
Tutorials
Lexus Owners Club
Gold Membership Discounts
Lexus Owners Club Video
News & Articles
Posts posted by RoadRash
-
-
Selling my RPS MAX Flywheel & clutch kit for 2JZ engine and Getrag V160 gearbox - 6-paddle unsprung (motorsport)(up to max. 825ftlb = 1,100NM torque)Condition: used approx. 3,000km (mainly wet drifting, hardly any stress or wear - see pictures))Clutch set incl. swing and screws - €450.-- RPS swing with screwed wear pad- RPS clutch disc (friction lining undamped)- RPS pressure plate- 6 pcs. M8x1.25 screws (mounting clutch on flywheel)- 8 pcs M10x1.25 ARP 12pt swing bolts (HF bolts, not stretch bolts, are reusable!)Optional V160 conversion kit for pull clutch - add +€150.-- Toyota pull fork- Toyota hook with screws- Toyota stocking input shaft with screws- Toyota V160 hydr. Ejection cylinder with screws
Location Austria/Europe --> Worldwide Shipping (additional)

-
-
4 pcs. Injectors DENSO 250cc (Toyota / Lexus)
* out of my IS300
- top feed
- high imp
- inlet / outlet á 11mm Diameter
- Middle Diameter 24mm
Toyota Part No.: 23250-46090
Price: €60/pcs. (or take 4 pcs. and get package price)

-
Eagle connecting rods 4340 H-Beam 2JZ (Toyota / Lexus; -GE & -GTE; 6 pieces)
- Screws: 3/8" ARP 2000
- Material: forged 4340 steel
- Center to Center Length: 5.59"
- Pin Size: 0.866"
- Pen End Width: 1.02"
- Rod End: 2.047"
- Housing Bore: 2.1667"
- Big End Width: 1.02"
- Typical weight: 590 g
- Bushing for floating gudgeon pin
- up to approx. 900BHP (linear torque)
- Ship world wide
€350.- (or €400.- shipped worldwide) -
Mike's Lexus IS200 IS300 Parts
-
Sorry, won't be there
-
Great job Mike!
Belgrade is proud of you ;)))
HAHA, THANK YOU! *gg*
And I'm missing BEO so much since I'm sitting here in Germany.
Beograd nedostaje mi puno....
If everything is fine with the Lexus this year I will do a ride down to Belgrade with it.
Much time got wasted in the workshop so I need some KMs on it, I'll let you know. :winky:
-
OK here we go to continue my RaceCar-Project
Well, my brakelines look like this right now
Got some new valves for higher temparatures,
SUPERTECH - 12 EXH. VALVES & 12 INT. VALVES B)
Received 6x 870cc injectors from dooderek (Thank You!)
Exchanging the radiator frame in the front
Fitting the new one in place
Spraying some Zinc-Spray and color on the welding places
Finish! :)
Preparing the engine block for getting a new color
After some grinding, sand-blasting and brushing process
New black color
To be continued..... ;)
-
Stopping posting on the internet and get one with it then lol
would like to do mate, but I have to wait for a whole container of engine parts from the states...
....
...
.... JUST FOR ME
-
Just to let you know how my "RaceCar - Project" is going on...
Last weekend we could go on with some small jobs
put some body filler into the holes in the engine bay,
where could get water and dirt inside
Also added some zinc-spray on open metal areas
And I decided to turn the engine bay into silver-metalic colour B)
And we took care of the brake system, my plan was to remove the ABS block on some other place
about 10-15cm toward the front, so we had to cut that ugly brake-line-salad :duh:
special care on the order of brakeline-numbers
Getting the ABS bracket into the same colour
...fitted on new place
installing new connector-fittings
pre-fitting the new brake lines
bending them into shape
Before importing my IS300 from USA to Europe it must have had some terrible accident in the states
and got repaired pretty awful in some lazy workshop, so there is still the old radiator-frame inside,
that's why my radiator was sitting pretty crooked in place
So during this build-up process we will fix that bug also ;)
To be continued...
-
Yes mate get yourself there!!
I'll do my best bud, meanwhile it looks like this
...but I'm looking forward to be there, until September shouldn't be impossible. :winky:
-
If I can fix everything on my IS300 T (meanwhile it's disassembled into pieces
)then I'm playing thoughts to come to JAE 2010. B)
-
Well, that's the actual condition right now...
:P
got the block back from honing process
Some new goodies.... B)
+ new throttlebody 80mm ;)
-
OK, we have removed all devices from the engine (oil pump, water pump, alternator and stuff).
In the same run we removed the crank shaft and it looks like that I will
need a new one.
0,1mm of material is missing at the Conrod #2 eye at the crankshaft
,so they would need to grind and polish, harden and reshaping everything,
in the second step I would need thicker bearings for the #2 conrod and I don't know if this is possible.
In the end I will need a new crank shaft. ;)
The engine builder told me that the cylinder walls look pretty good
just slightly honing is required.
And he was agreeing that the wasted oil I had inside in the beginning after
engine build in 2008 was the main reason for the engine damage. :(
The block is already honed, new valves should arrive soon, I will regrind the valve seats
and put on the new valves in the cylinder head.
Parts for engine rebuild are already ordered and should come here soon...
-
Well, so we had to grow deeper..... to the source of my problem....
that is some bad news
Engine remove
There is nothing to say any more :shutit:
I think that rod was short before getting glowing
crankshaft @ Cyl 2
crankshaft @ Cyl 4 (normal)
-
OK there is some pause needed to do an engine rebuild....
I was on a drift track, but the fun didn't last very long,
after 5-6 turns of fun some strange noise accured outa the engine bay.
it was sounding this like
:shutit:
OK, we had to remove the head from the block and found something strange...
We have tested the compression on all 6 cylinders and it had been fine.
Removing everything in the front
removing valve covers
cam shafts removed
ARP head bolts removing
cylinder head removed and....
in cylinder chamber 3 must be something wrong,
it seems to be some fuel problem, maybe due to failed injector
or something else, or maybe because of the 10:1 problem i had once (caused by the TPS)
watch the edges of the valve seat pockets
they're broken or melted away
As for the engine noise we noticed..... watch the edges of the piston (up and down side) they seem pretty clean as like touching something (red arrows)
Also notice the small cuts in the exhaust valve seat pockets (yellow arrows)
we reassembled the cam shafts to check valve train
but it seemed to be OK, nothing stucked or anything
But watch here cylinder 2 on the head, the piston definately comes in touch with it!
NOTE:
We have tested this case, so we have turned the crankshaft until piston #2 goes downway (pulling process), we took some rubber hammer and pressed on the piston *klack*
it really went down another 1mm :o so it seems to be loosen somewhere in the conrod area.
So we have to find out another problem after removing oil pan and take another look...
Maybe somebody of you can give some comment what he is thinking about those problems how they can happen or anything!?
-
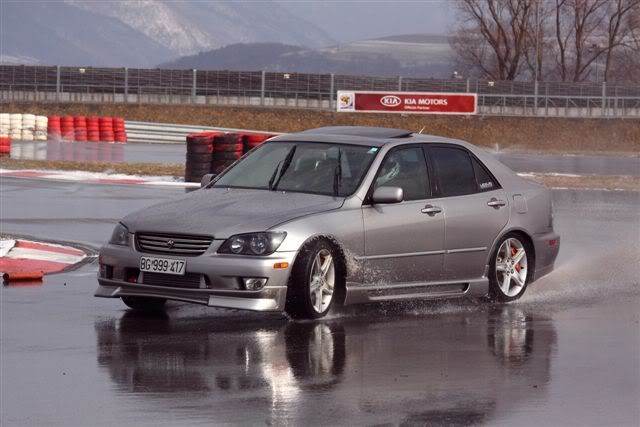
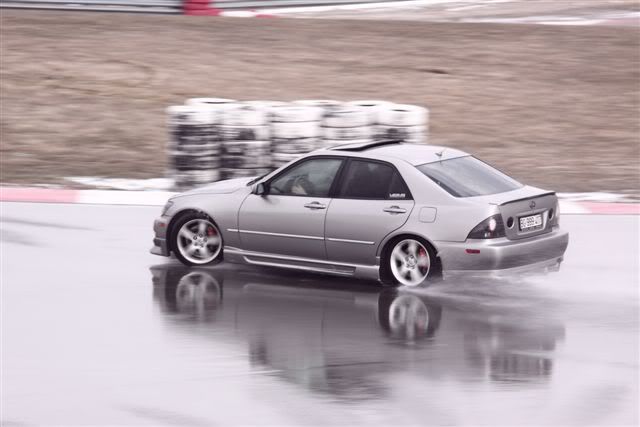
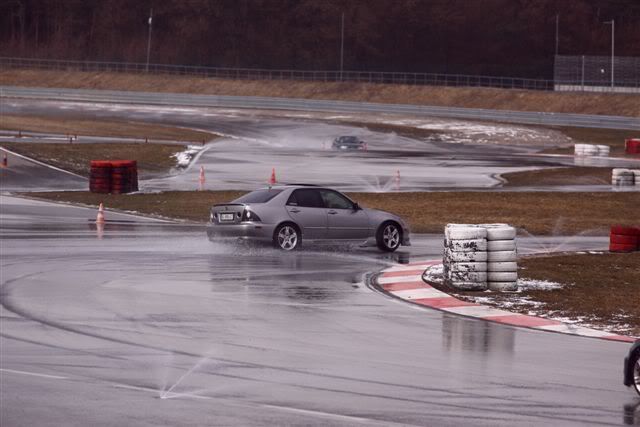
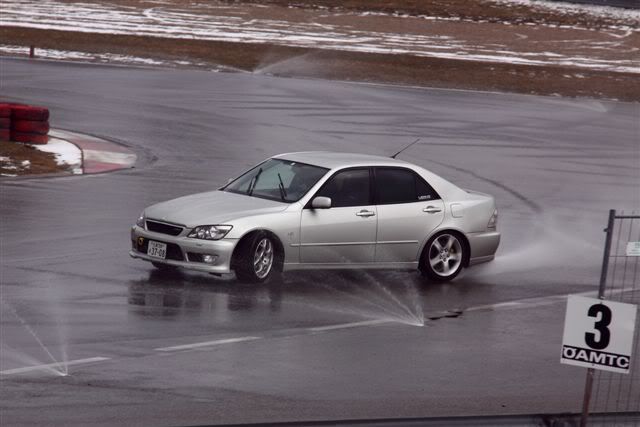
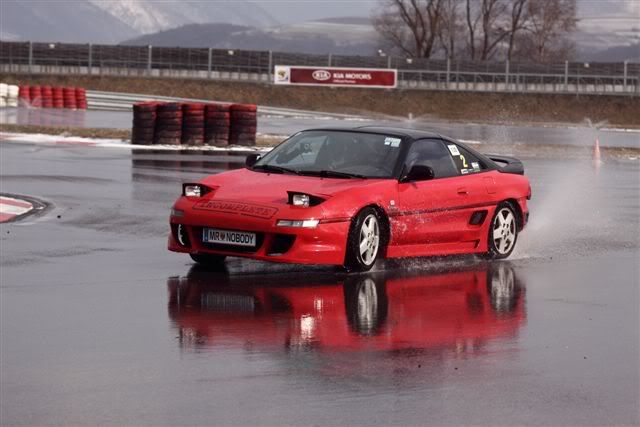
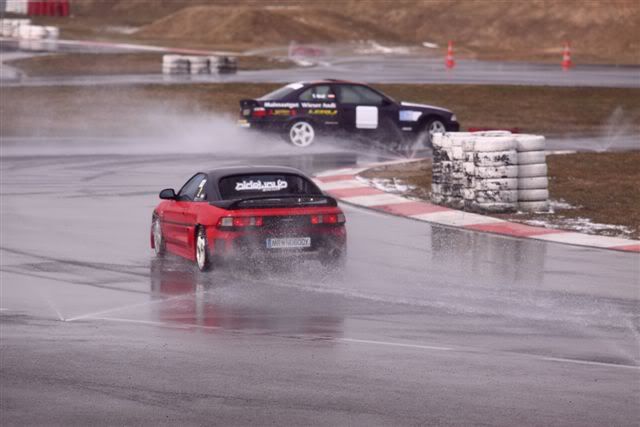
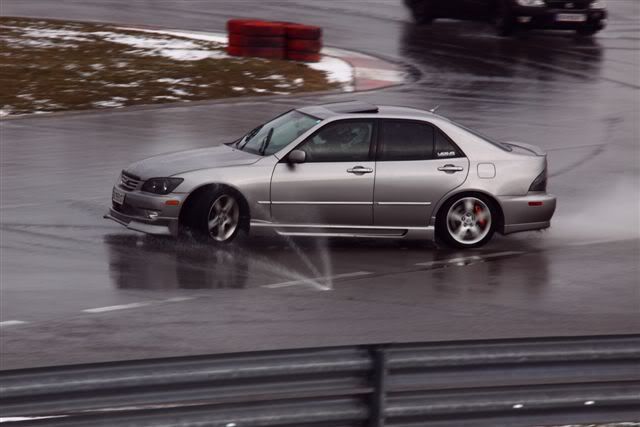
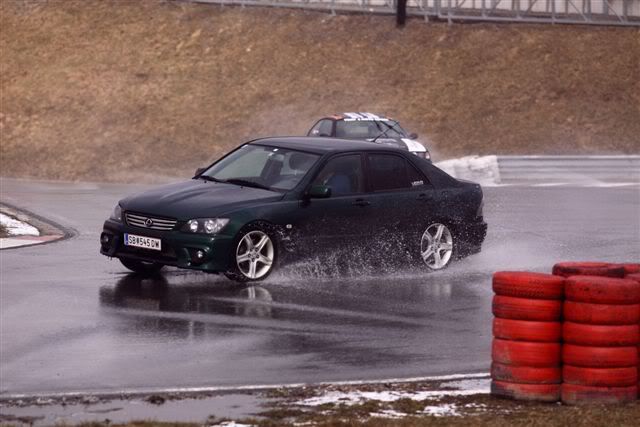
And the Euro-LOC had some fun last weekend.... we were having a small meeting on
a small race track in Austria for some kind of "race training on wet track" :)
a friend of mine chasing me in his MR2 B)
-
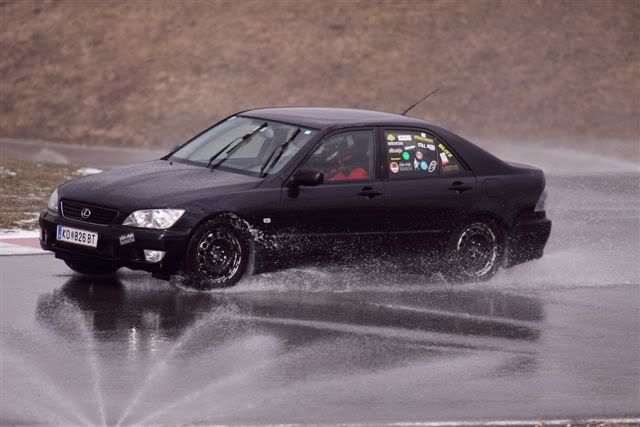
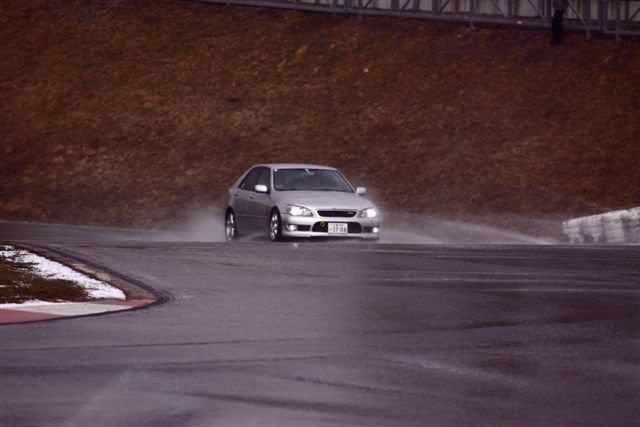
Having some fun during the Driftsession on Hockenheim Ring in Germany :)
After some practice....
....it got better ;)
-
Well the stock 5-speed shifter leather sack couldn't be fittet on
the C's V160 shifter, so I had to do something
before...
I have brought the stock leather sack to some saddler to create some new custom shifter sack fitting on the V160 stick
black with silver seames B)
Well, it really looks like a "Very Short Shifter" but it it OK and very nice to drive
Once a time I will have to renew the chrome ball on the top
-
Differential Installation
some words to it: I have brought it to my Lexus Dealer to install
the Euro spec IS300 A/T final gearing (1:3,58) in my US spec IS300 M/T (1:3,72) diff housing, including measuring and stuff...
It is soooo awsome!!
The gears of the V160 feeling now like the 5-speed, simply PERFECT GEARING!!
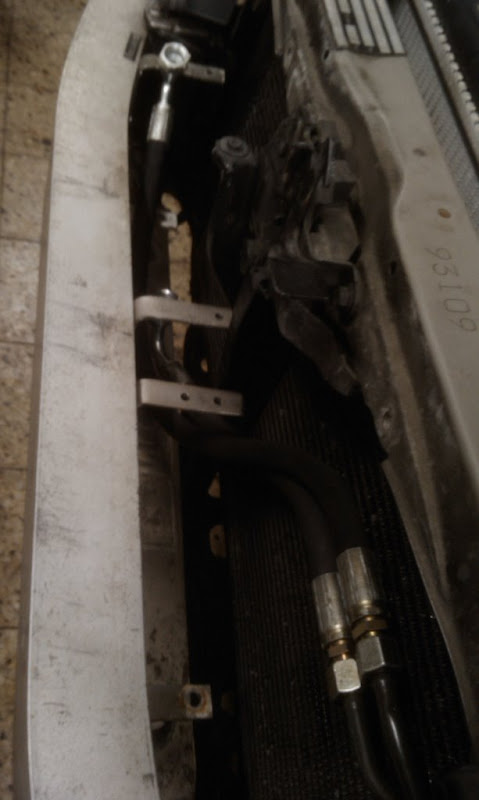
Oil & Servo Cooling System
Custom, Custom, Custom...... building clamps....
Connectors for the Servo Cooling
Clamps got fitted to the crash bar
Finish..... but it was a bloody job, since there is no space to work with :suspiciou
in the front: feft side --> Servo Cooler / right side --> Oil Cooler
...and everything is sealed, there is no leaking :)
-
3" exhaust system (non-cat)
This time we had some better tools than for my old exhaust system
Remove weld residues
step by step we're going backward
Once I had some steel catalytic converter.... seems it got shredded...
coming to an end
The last piece of exhaust has to be created to fit correctly
Here we go
Installed... :)
Videos:
:)
-
Hi mates... just want to let you know what happened to my IS300 Turbo meanwhile...
Our Workshop...
The Crew.... (they don't even have a driving licence *haha*) :P
(those just were some kids hanging around, working on their motocross bikes, helping out a little on race car modifications and stuff)
Our Shop has been in perfect situation
Down there was a professional machine-shop, they can do everything
out of a piece of metal, next to it some supermarket to buy food
Another Tools-Market on the other side!
Preparing everything for the removing of the W55 and the Torsen Diff
First off, to remove the exhaust section
W55 & drive shaft removing
Same with the Diff
Differential Disassembling
OS Giken vs. Torsen
Well OK, some of my crew members didn't even have the size to get upward
the car's height
longer wire required
Clutch assembling
It's a sport's clutch *gg*
everything into the tranny
We had to widen the upper left hole, to make the bolt fitting
It was much easier to lift it up and put it to the engine than the W55
bolting on the clutch
Slavecylinder install & covers
Adapter brackets for the tranny cross member
Placing the differential
1-piece driveshaft
fits
That's what I call a ShortShifter
ALL IN ALL.... B)
-
hi there the 1gfe std engine will take more than 0.9bar spc project 550bhp car is running 1bar @ 330bhp thats been running for 5000 miles also has been bounced off the rev limiter.i think the plan is to get 350bhp probally with about 1.2bar.then i think the boost is going to be turned up till the engine dies.
thanks jamie
Yes that is correct it was SPC that finally got the car right around 350 was the final , That turbo is not able to go any futher , Think they have seen pretty much every Turbo IS there and never had a bad one yet also have two of there ownAs one of the first few guys in the world who has done a turbo conversion on the IS200,
I can wish you good luck blowing 1.2bar of boost on the stock engine which is running 10:1 compression ratio,
especially when using pump gas.
But when reading your posts I'm wondering if everybody else as like TDI, Prolex and others has done
big mistakes to the setups on their IS200T projects since they couldn't hold 0,9bar of boost, didn't they?
Several people have tried to go for higher boost on stock internals and they all have destroyed their engines.... so I'm wondering,
why there is just one out there which can make it?!? ;)
Sorry for being pessimistic, but this sounds for me like "Yes we know that cars are built for driving, but OURs CAN FLY!"
-
I can remember to sbd. ( I think it was Adie) who has blown his engine on his way to JAE2006,
holes in the block due to broken conrods had been the result of 0.9bar of boost.
He has it rebuilt with my custom forged internals and has blown it a second time due to wrong head bolts.
After 2 years I think he was finally able to show us a 380-400BHP dynograph when his car was set up completely.
And doing 50 dyno pulls doesn't say anything, you can do 1000 pulls and it will be fine,
since on the dyno there are far not such straining conditions as on the road, during to weight of car, steep roads,
air resistance and other things.
But if it's fine although then we all are happy to be wrong thinking this engine can't take more than 0,7bar of boost.
So let's put that monster on the Dragstrip, doing 1/4 miles and other races on the track and we will see.
;)


 it really went down another 1mm :o
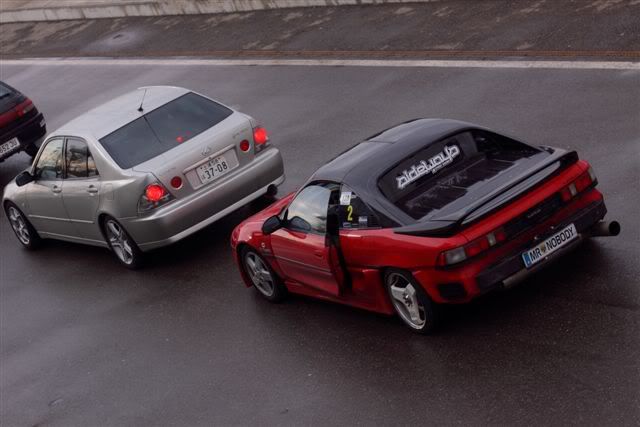


More Work Being Done
in Supercharging & Turbo Modifications
Posted
Adie, long time ago, but I wanted to awake this thread. 🙂
Are you still owning it, or did you really made it to sell this unique car?
Let me know some update please. 🙂