Coxy
-
Posts
53 -
Joined
-
Last visited
Content Type
Profiles
Forums
Events
Store
Gallery
Tutorials
Lexus Owners Club
Gold Membership Discounts
Lexus Owners Club Video
News & Articles
Everything posted by Coxy
-
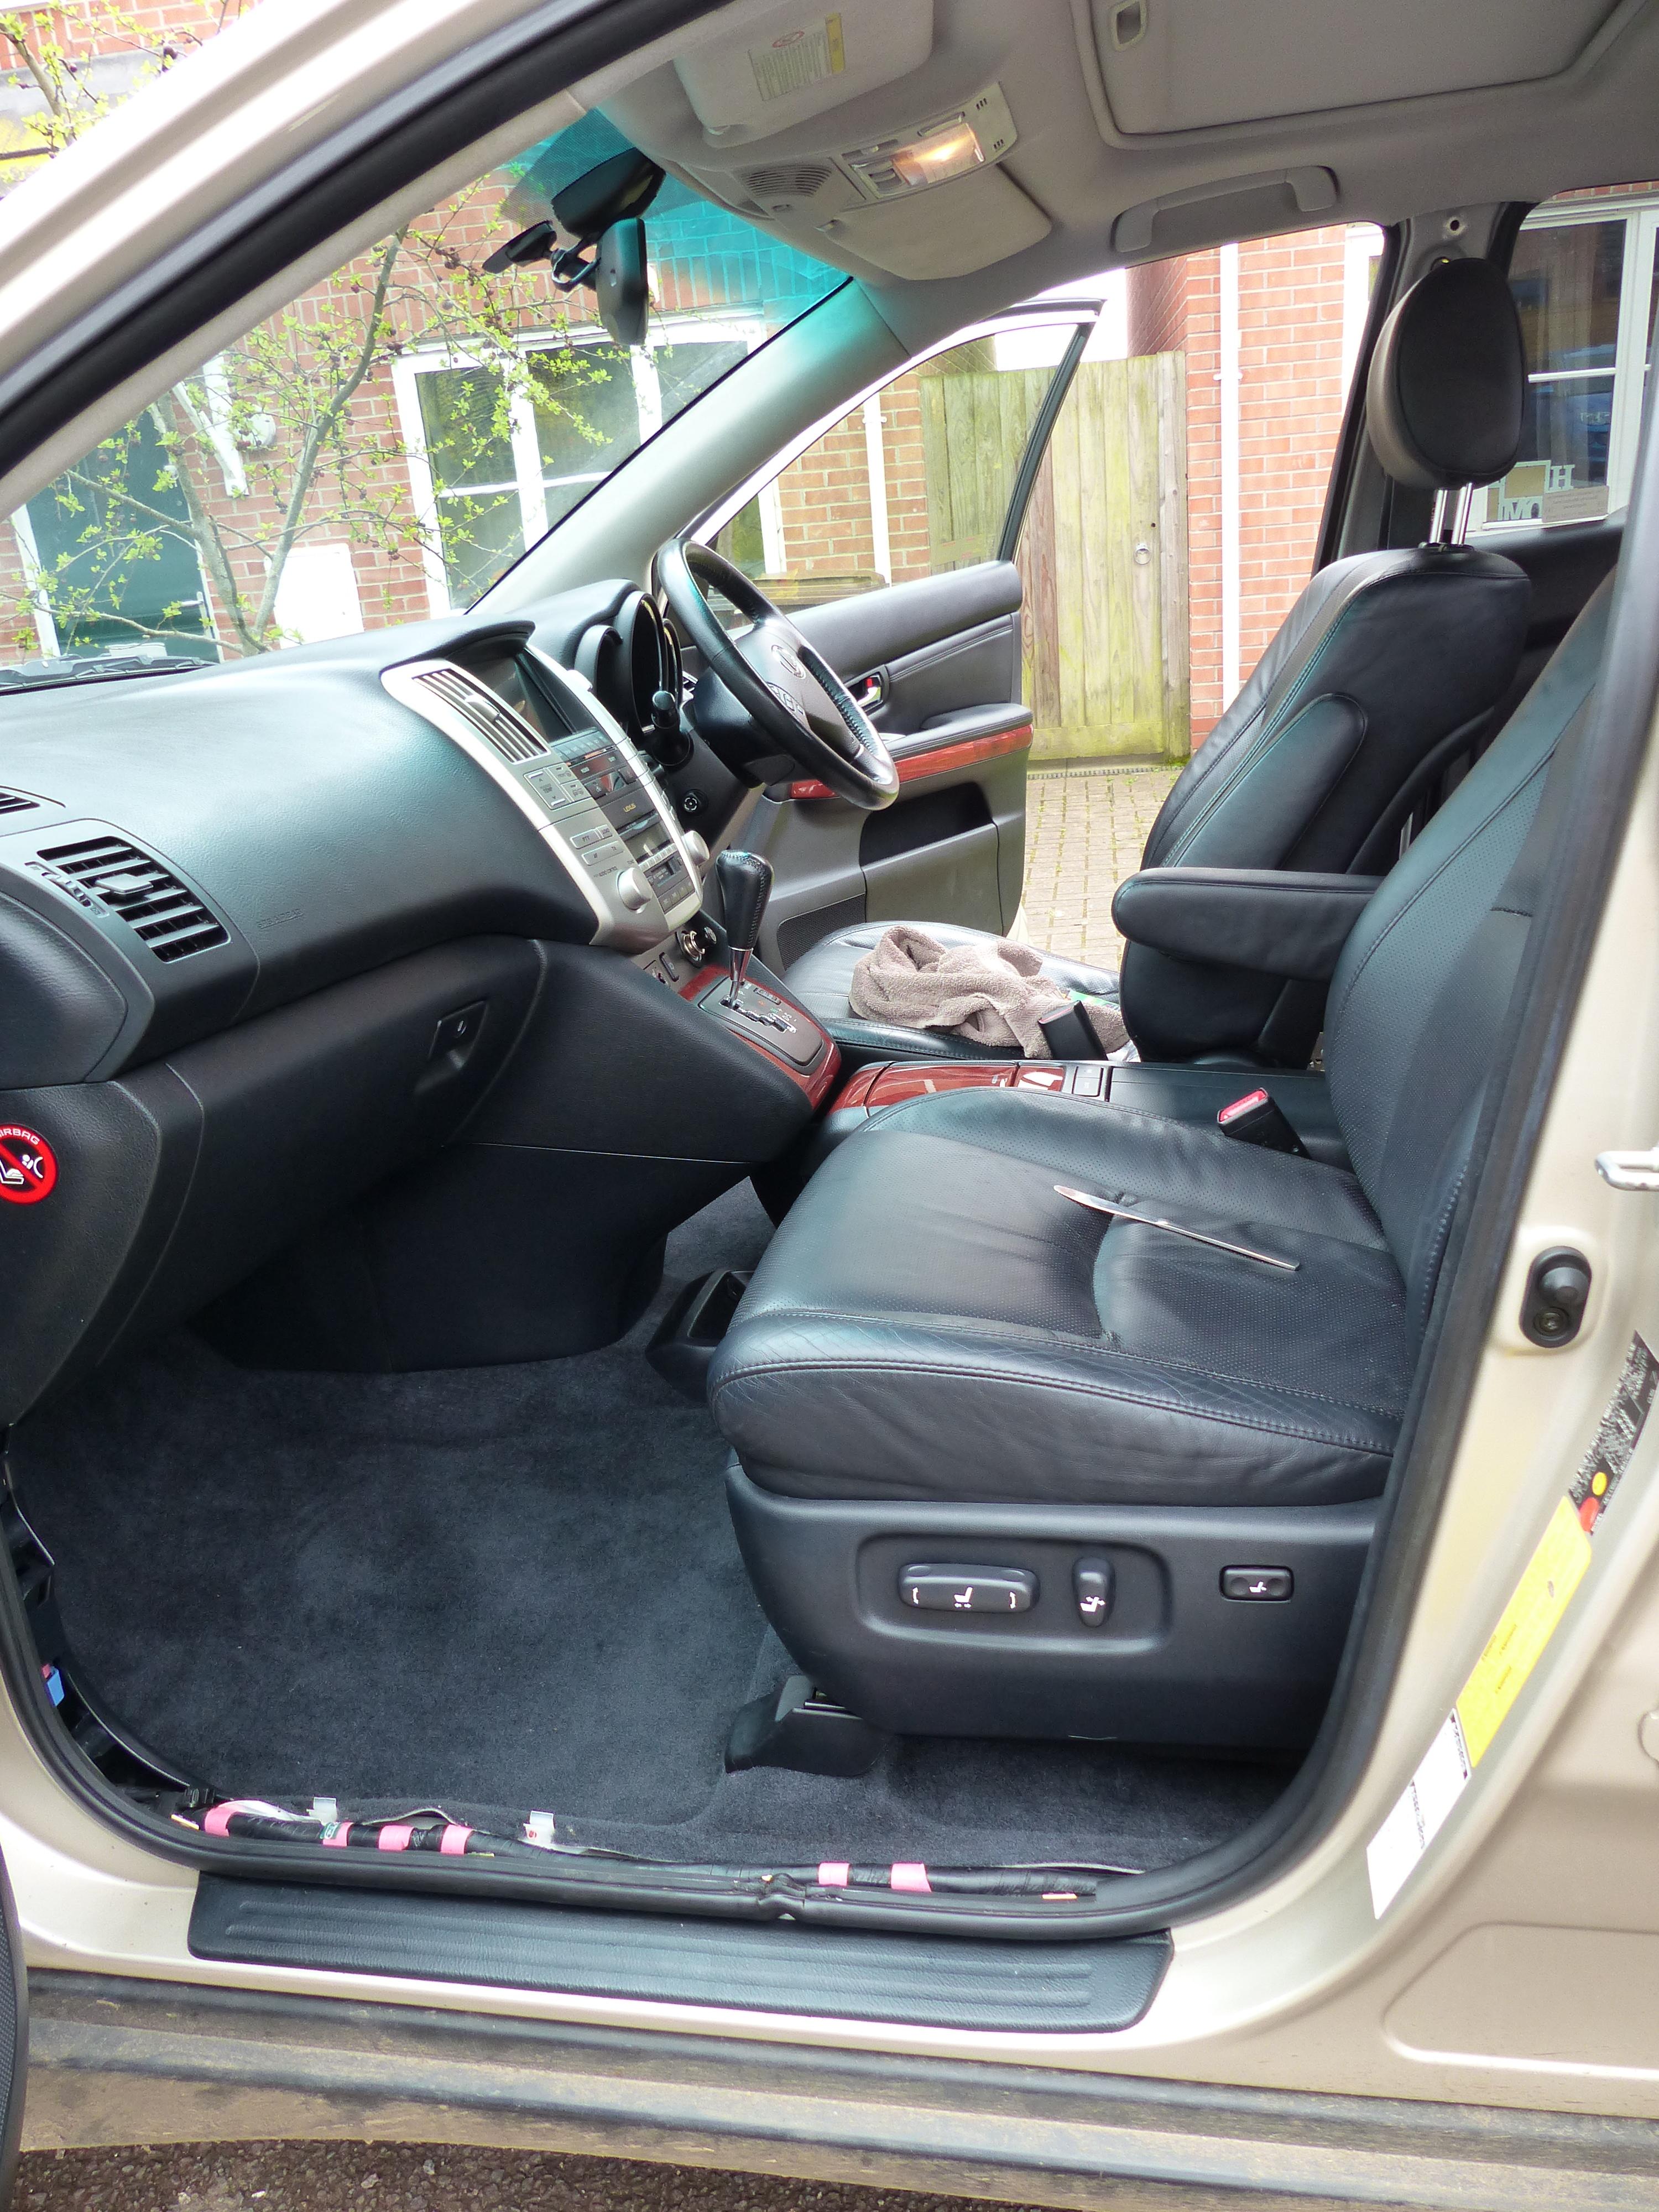
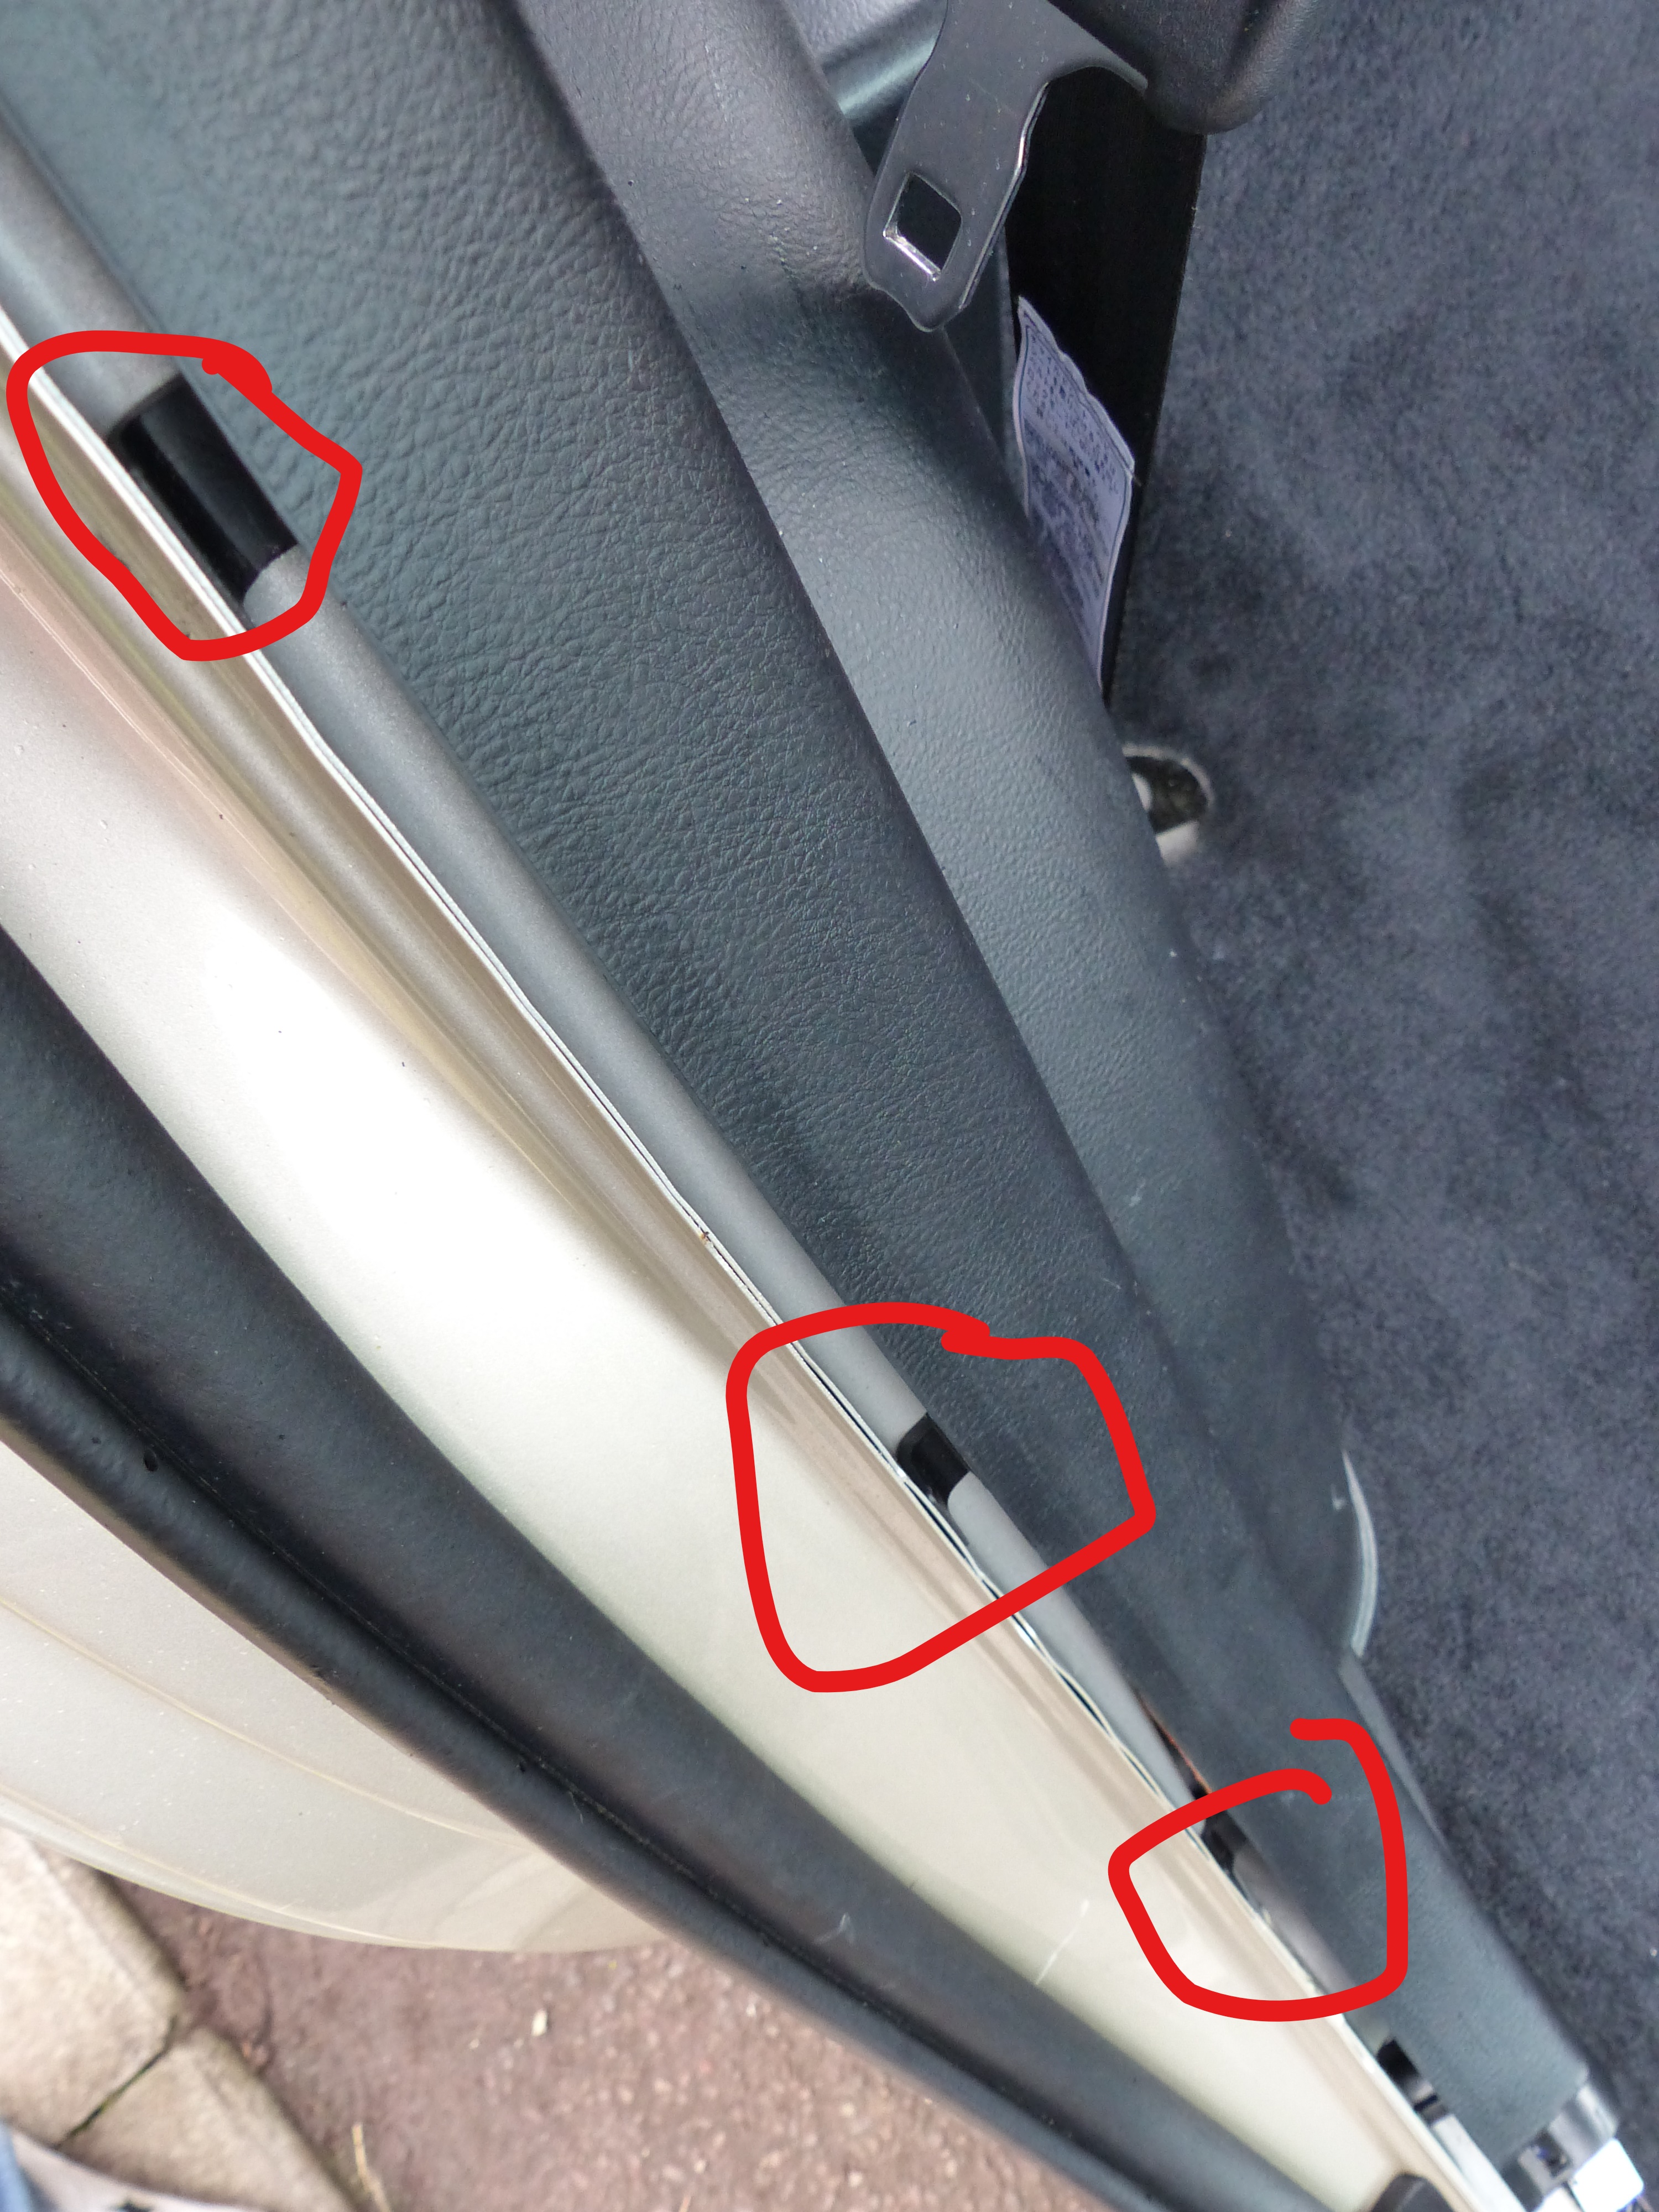
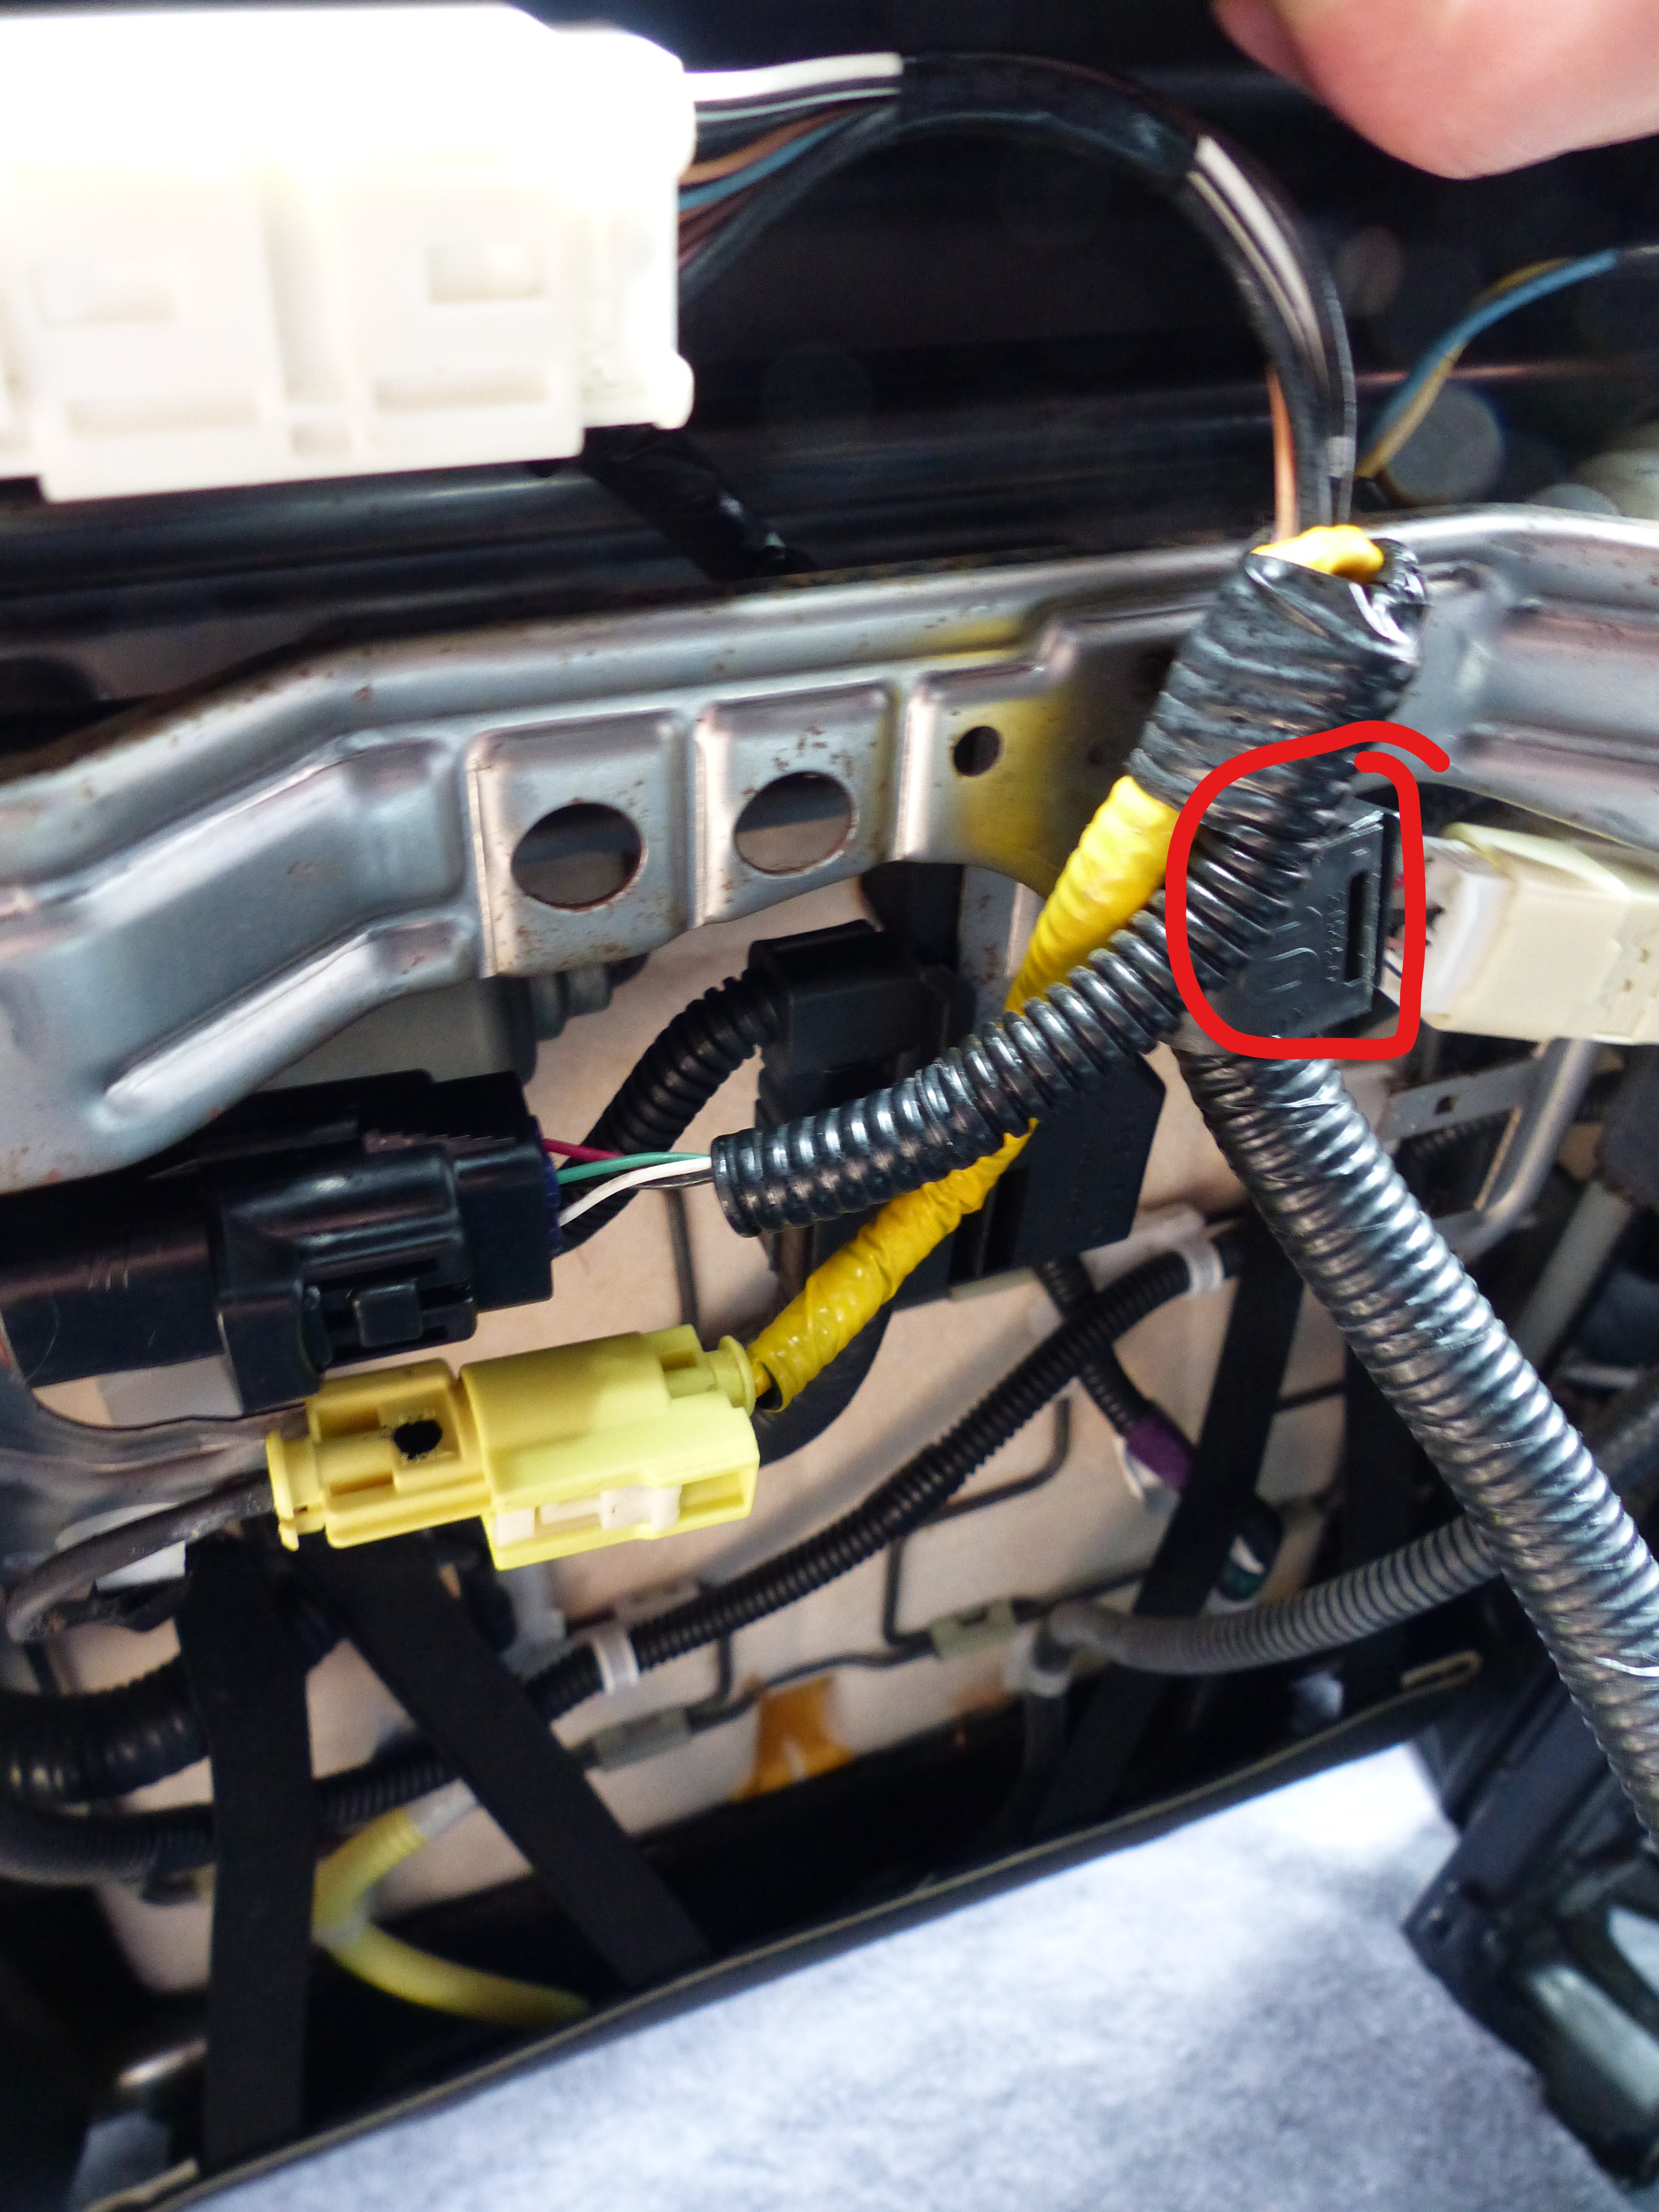
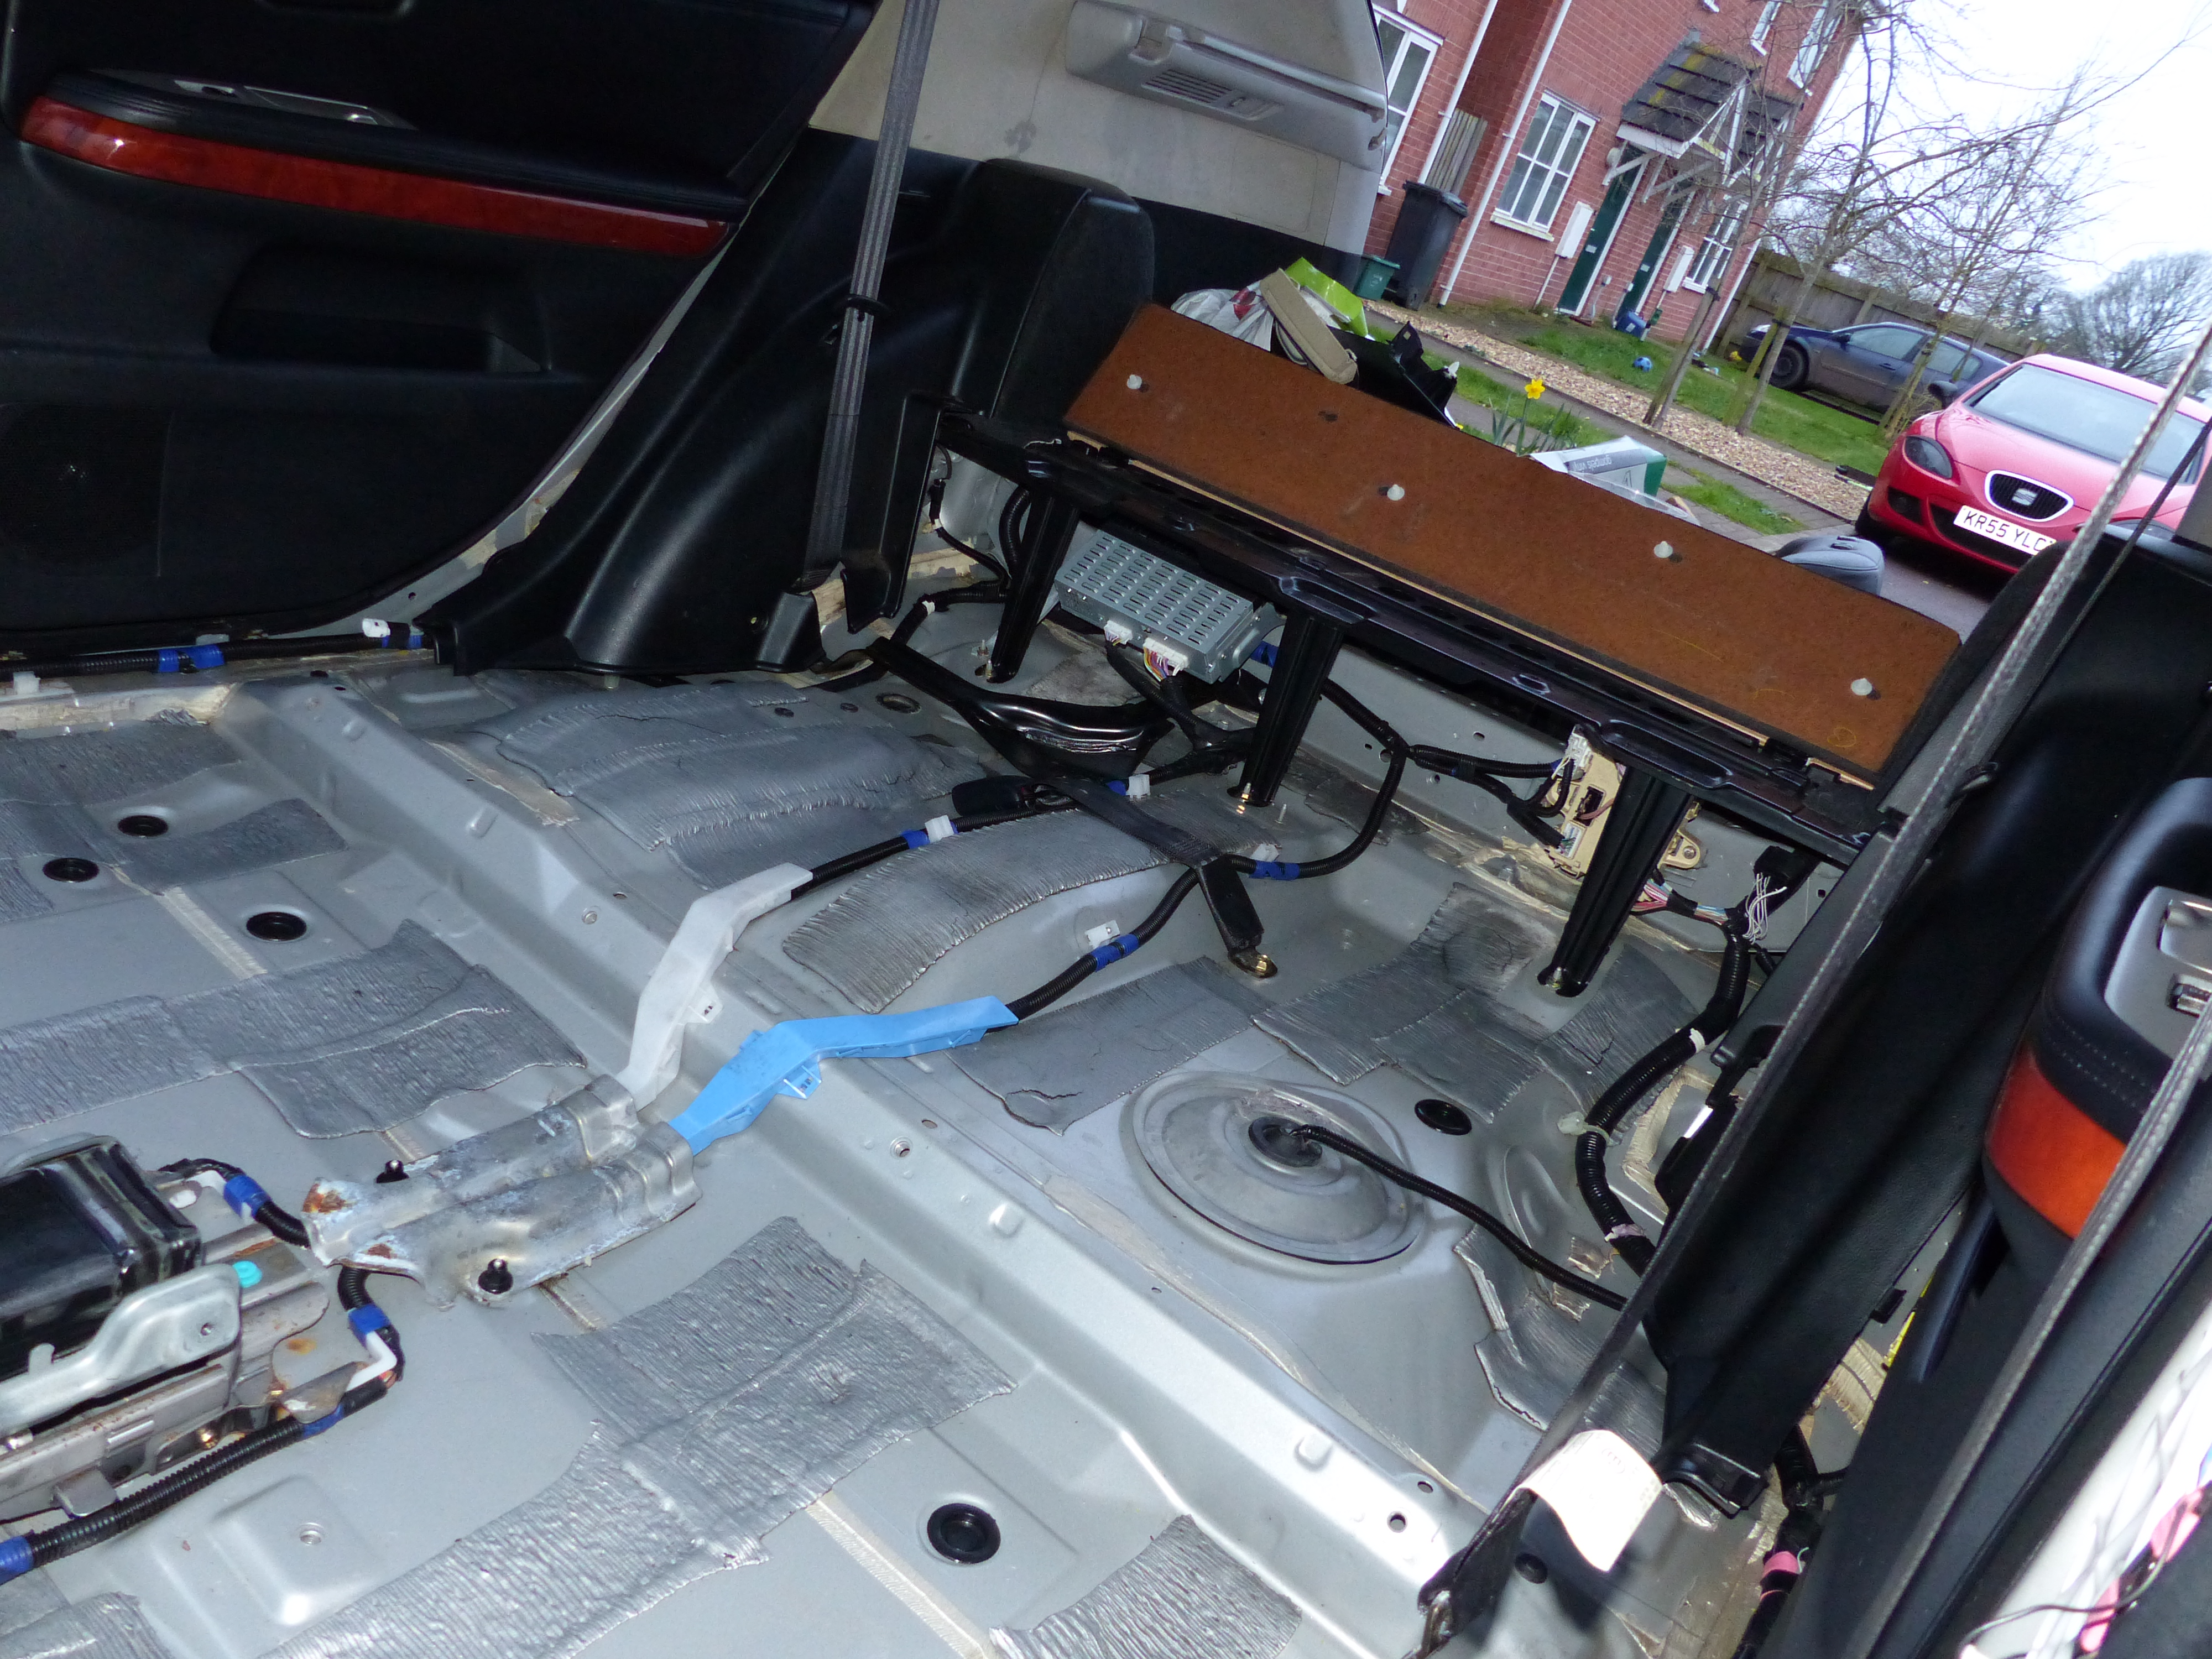
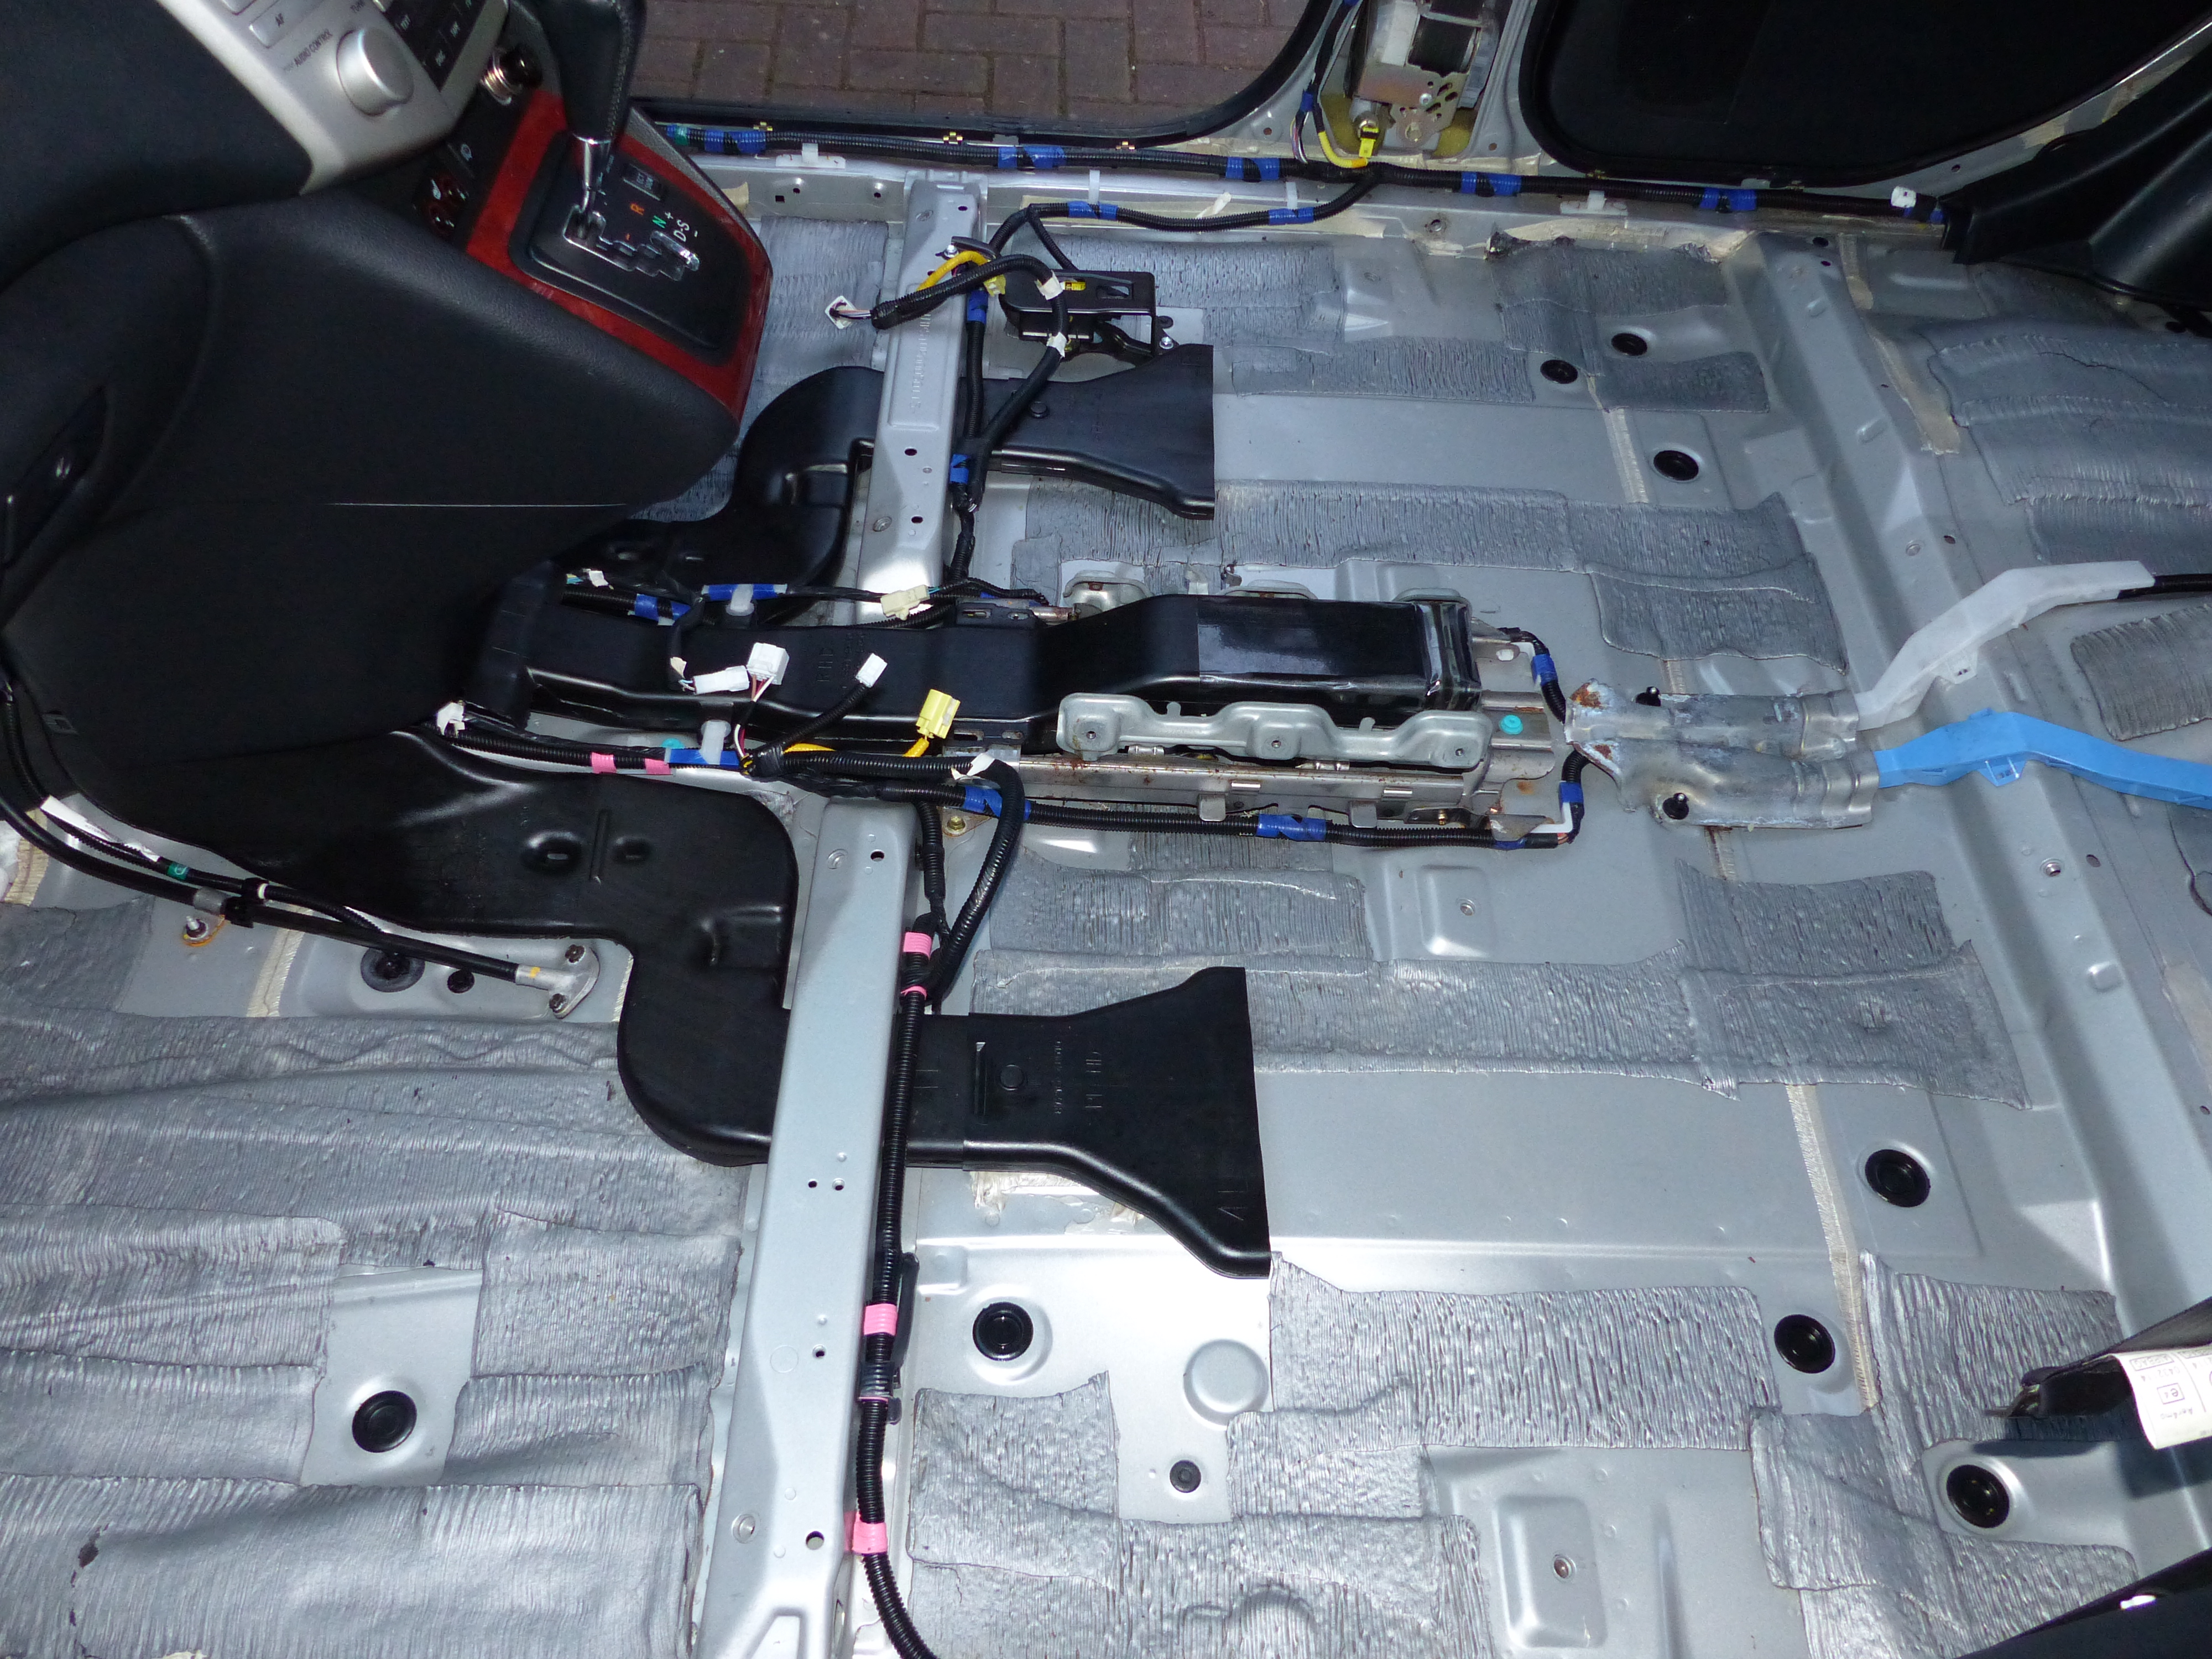
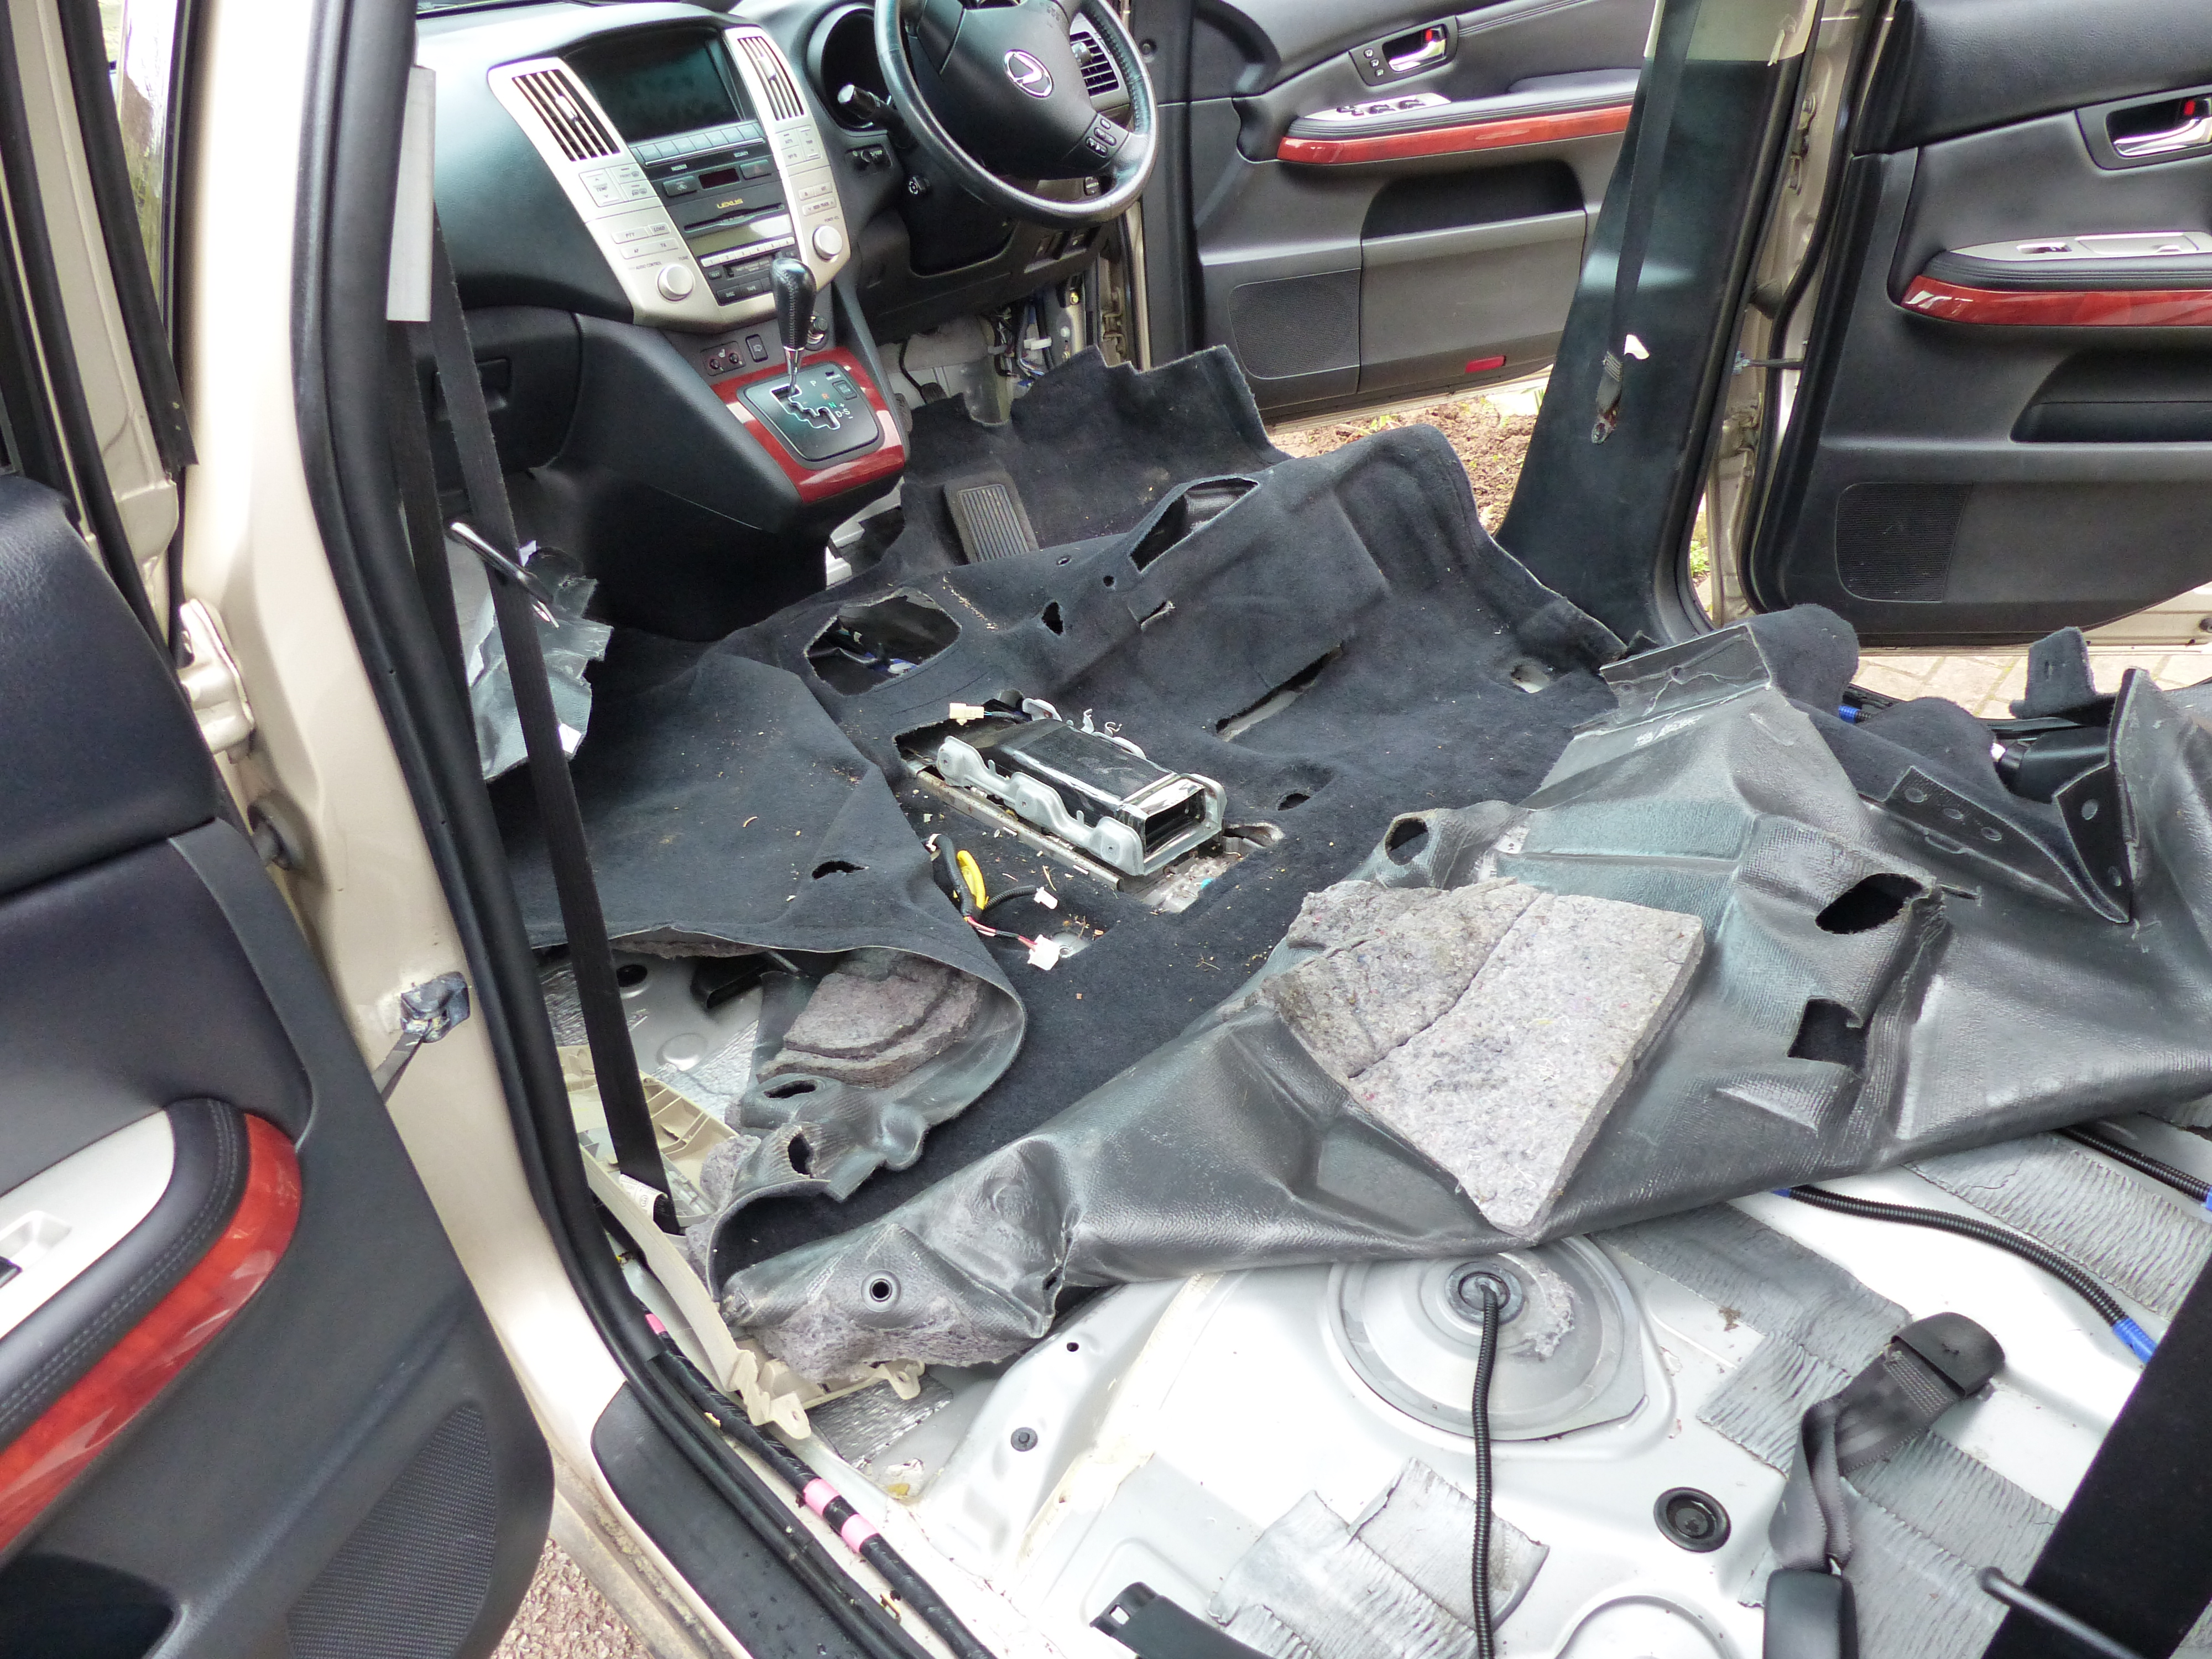
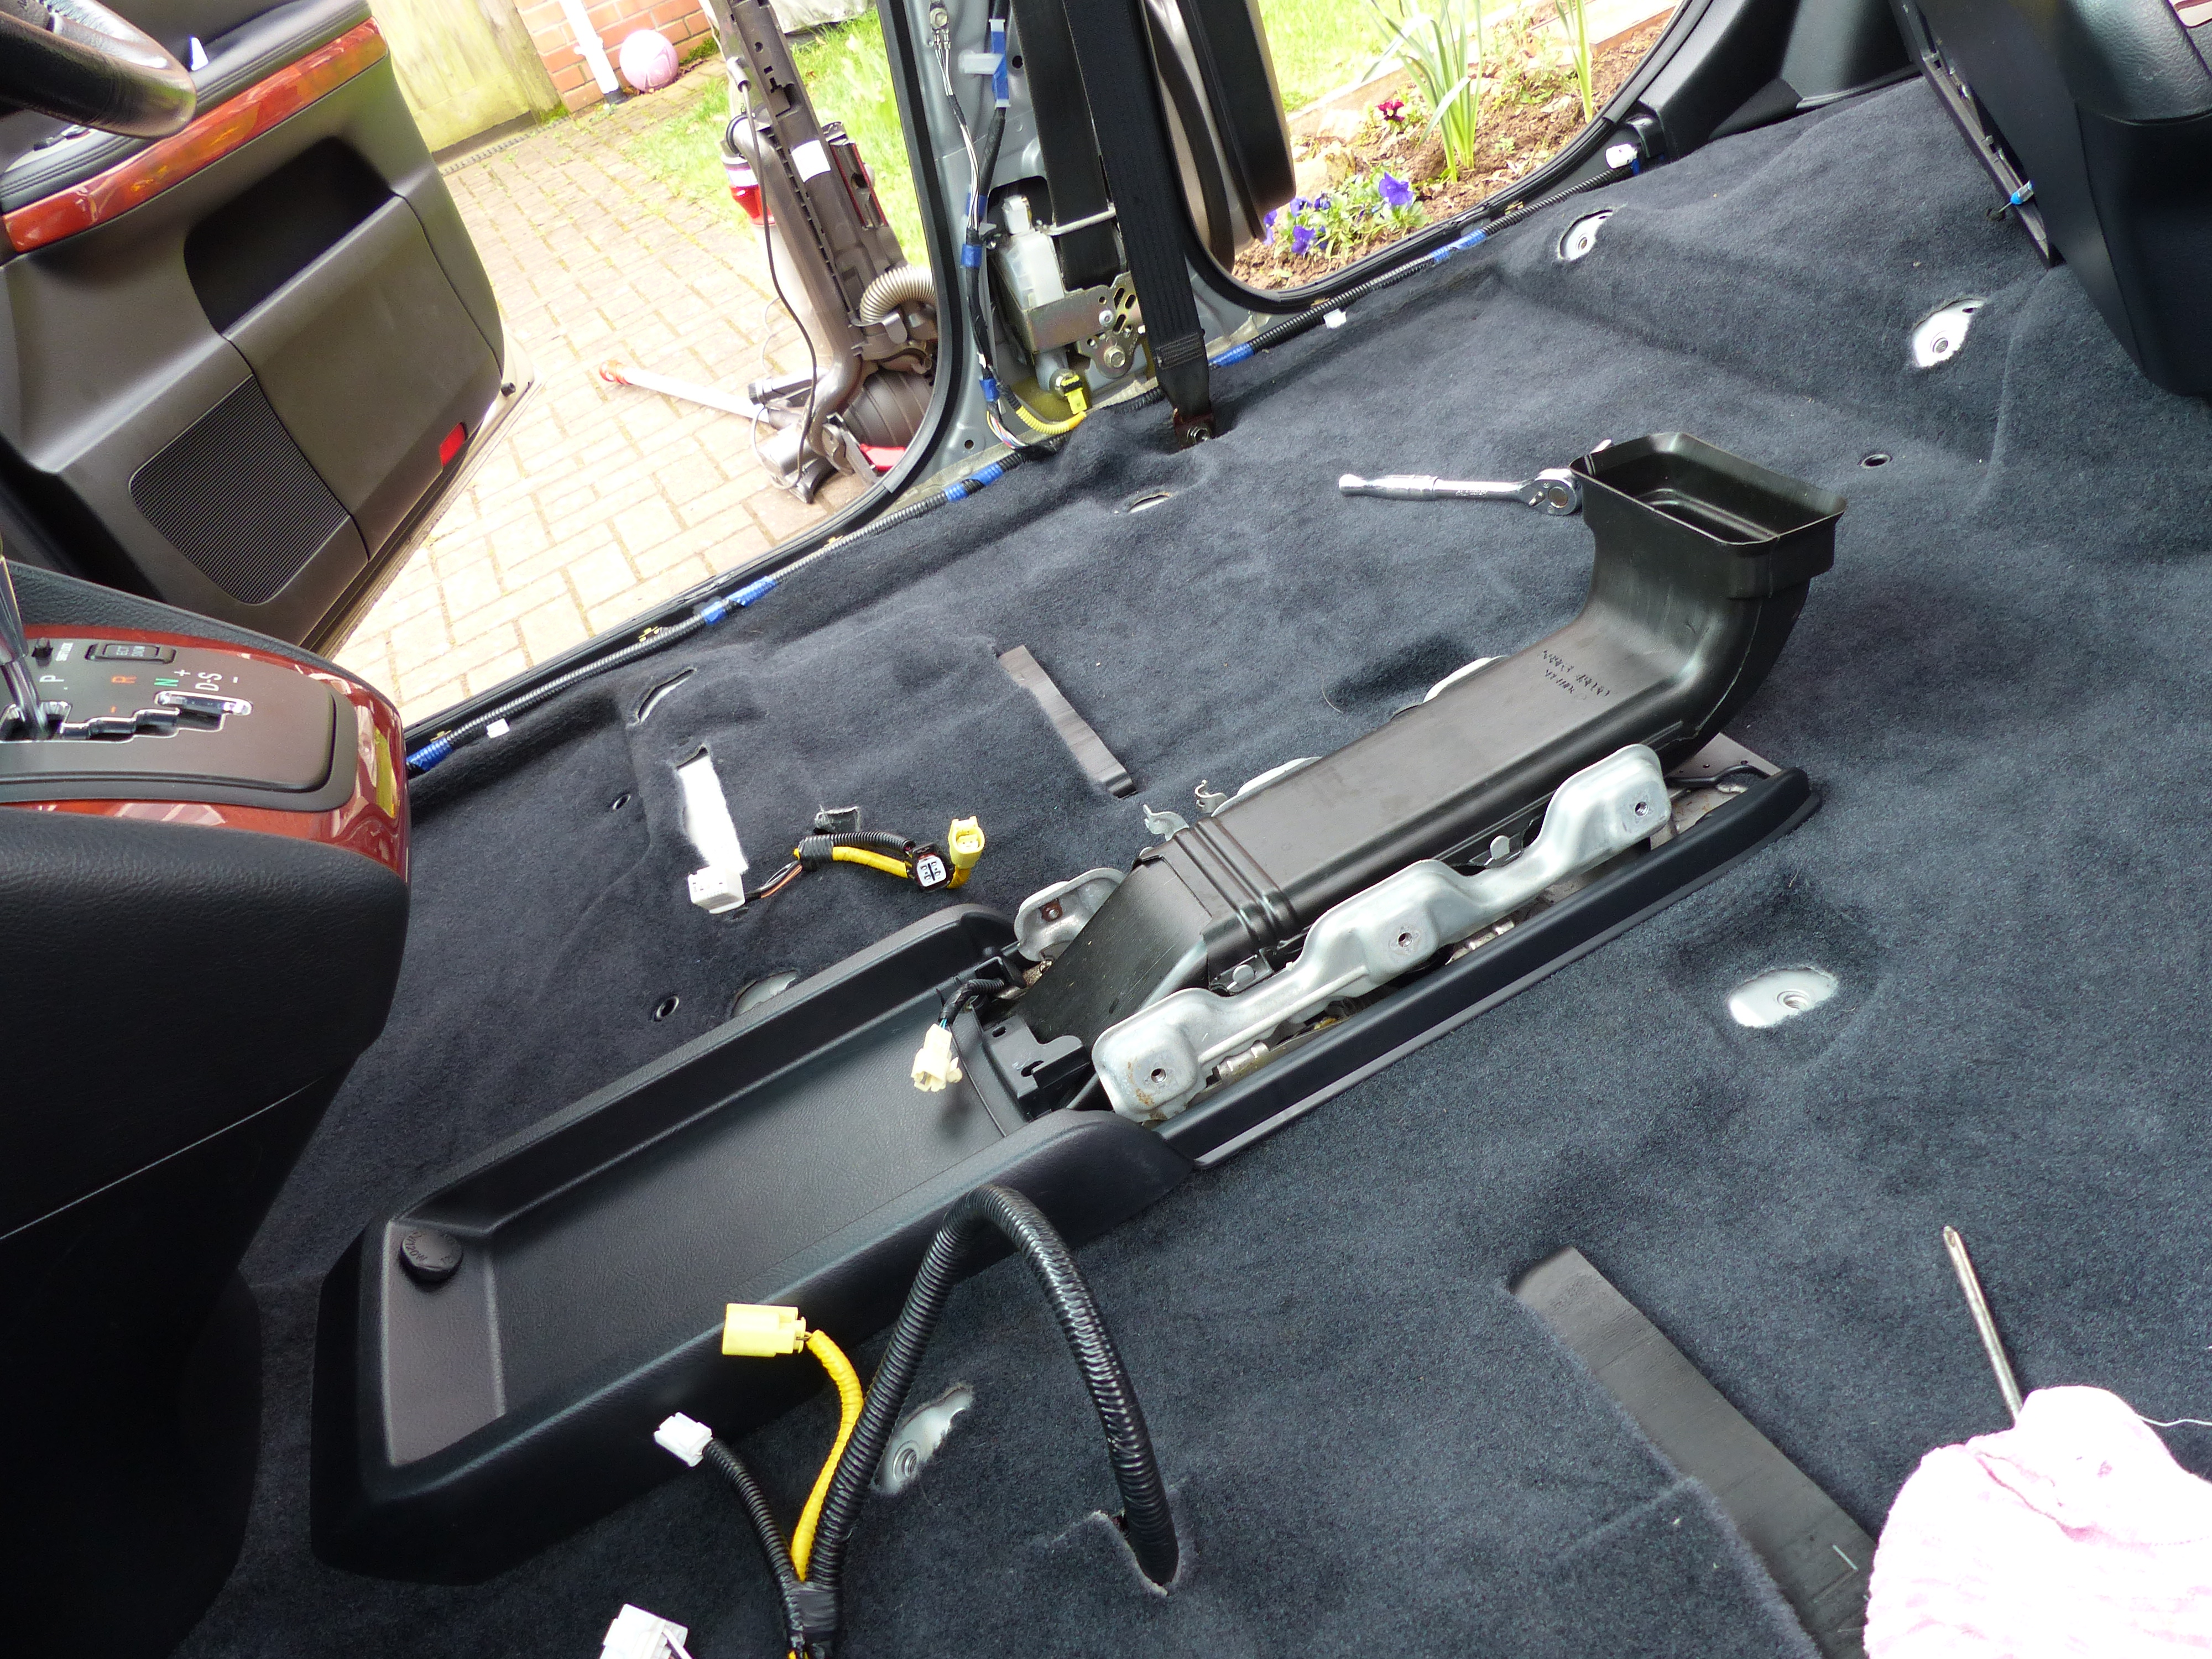
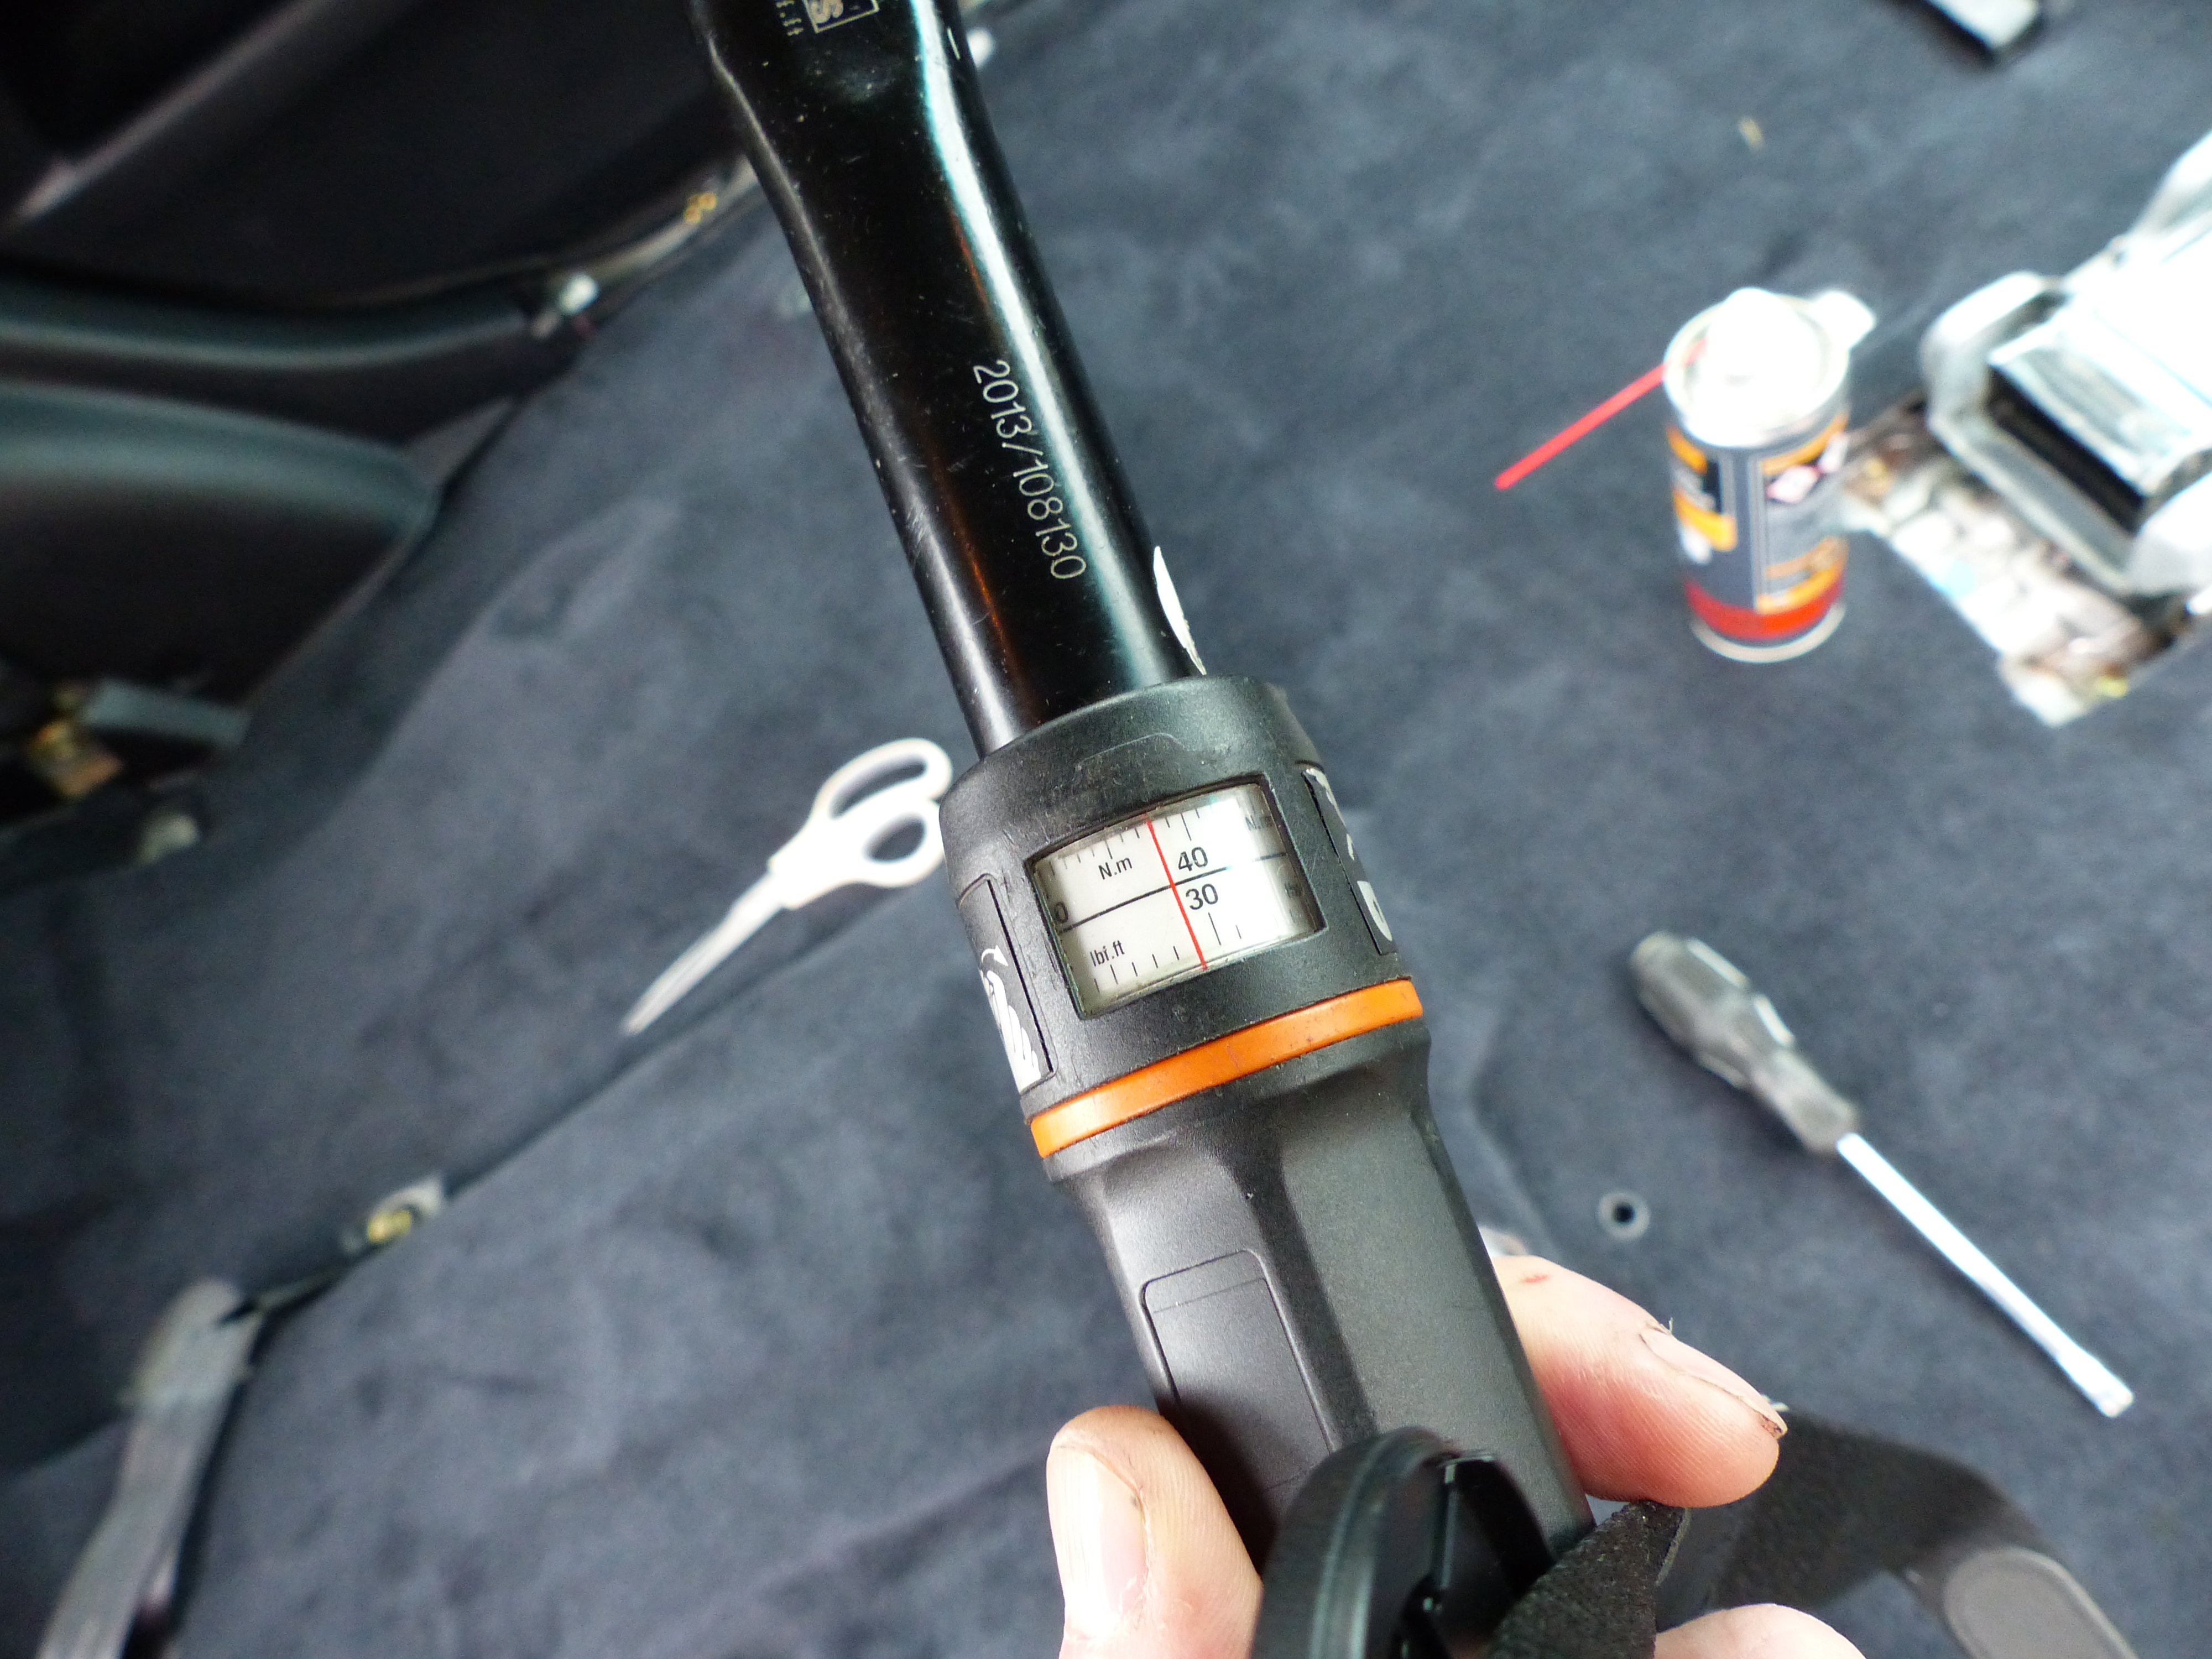
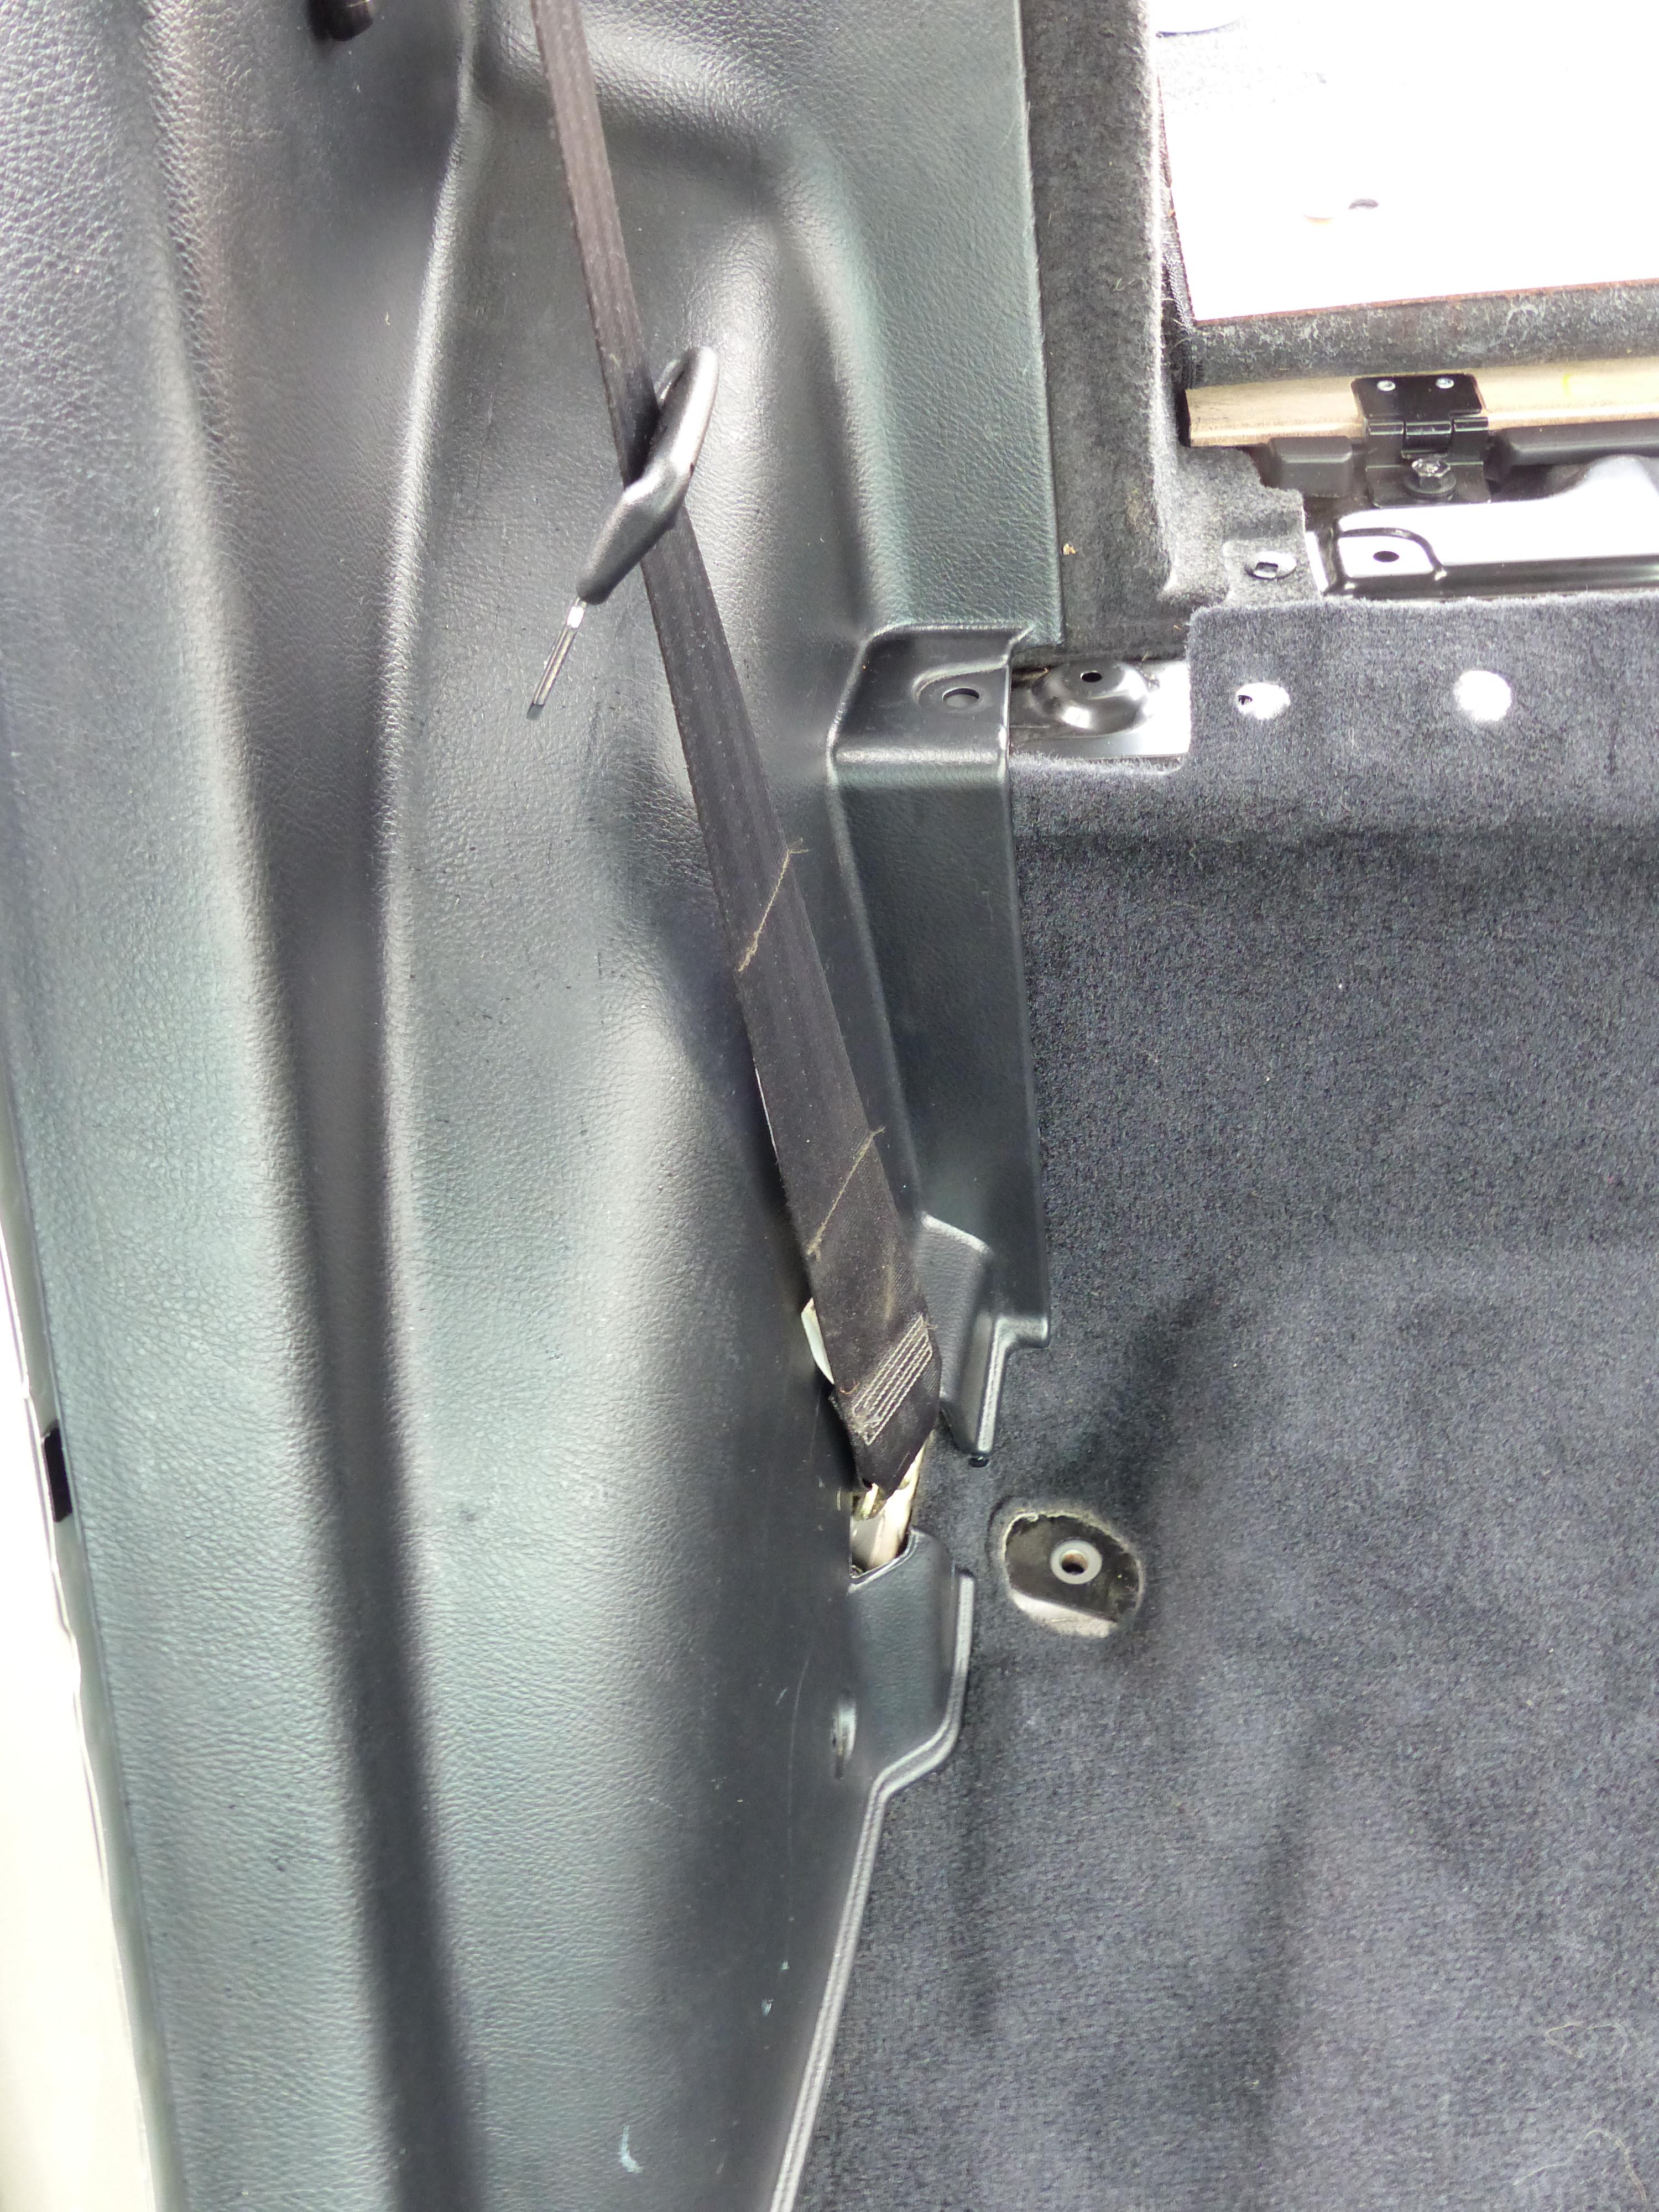
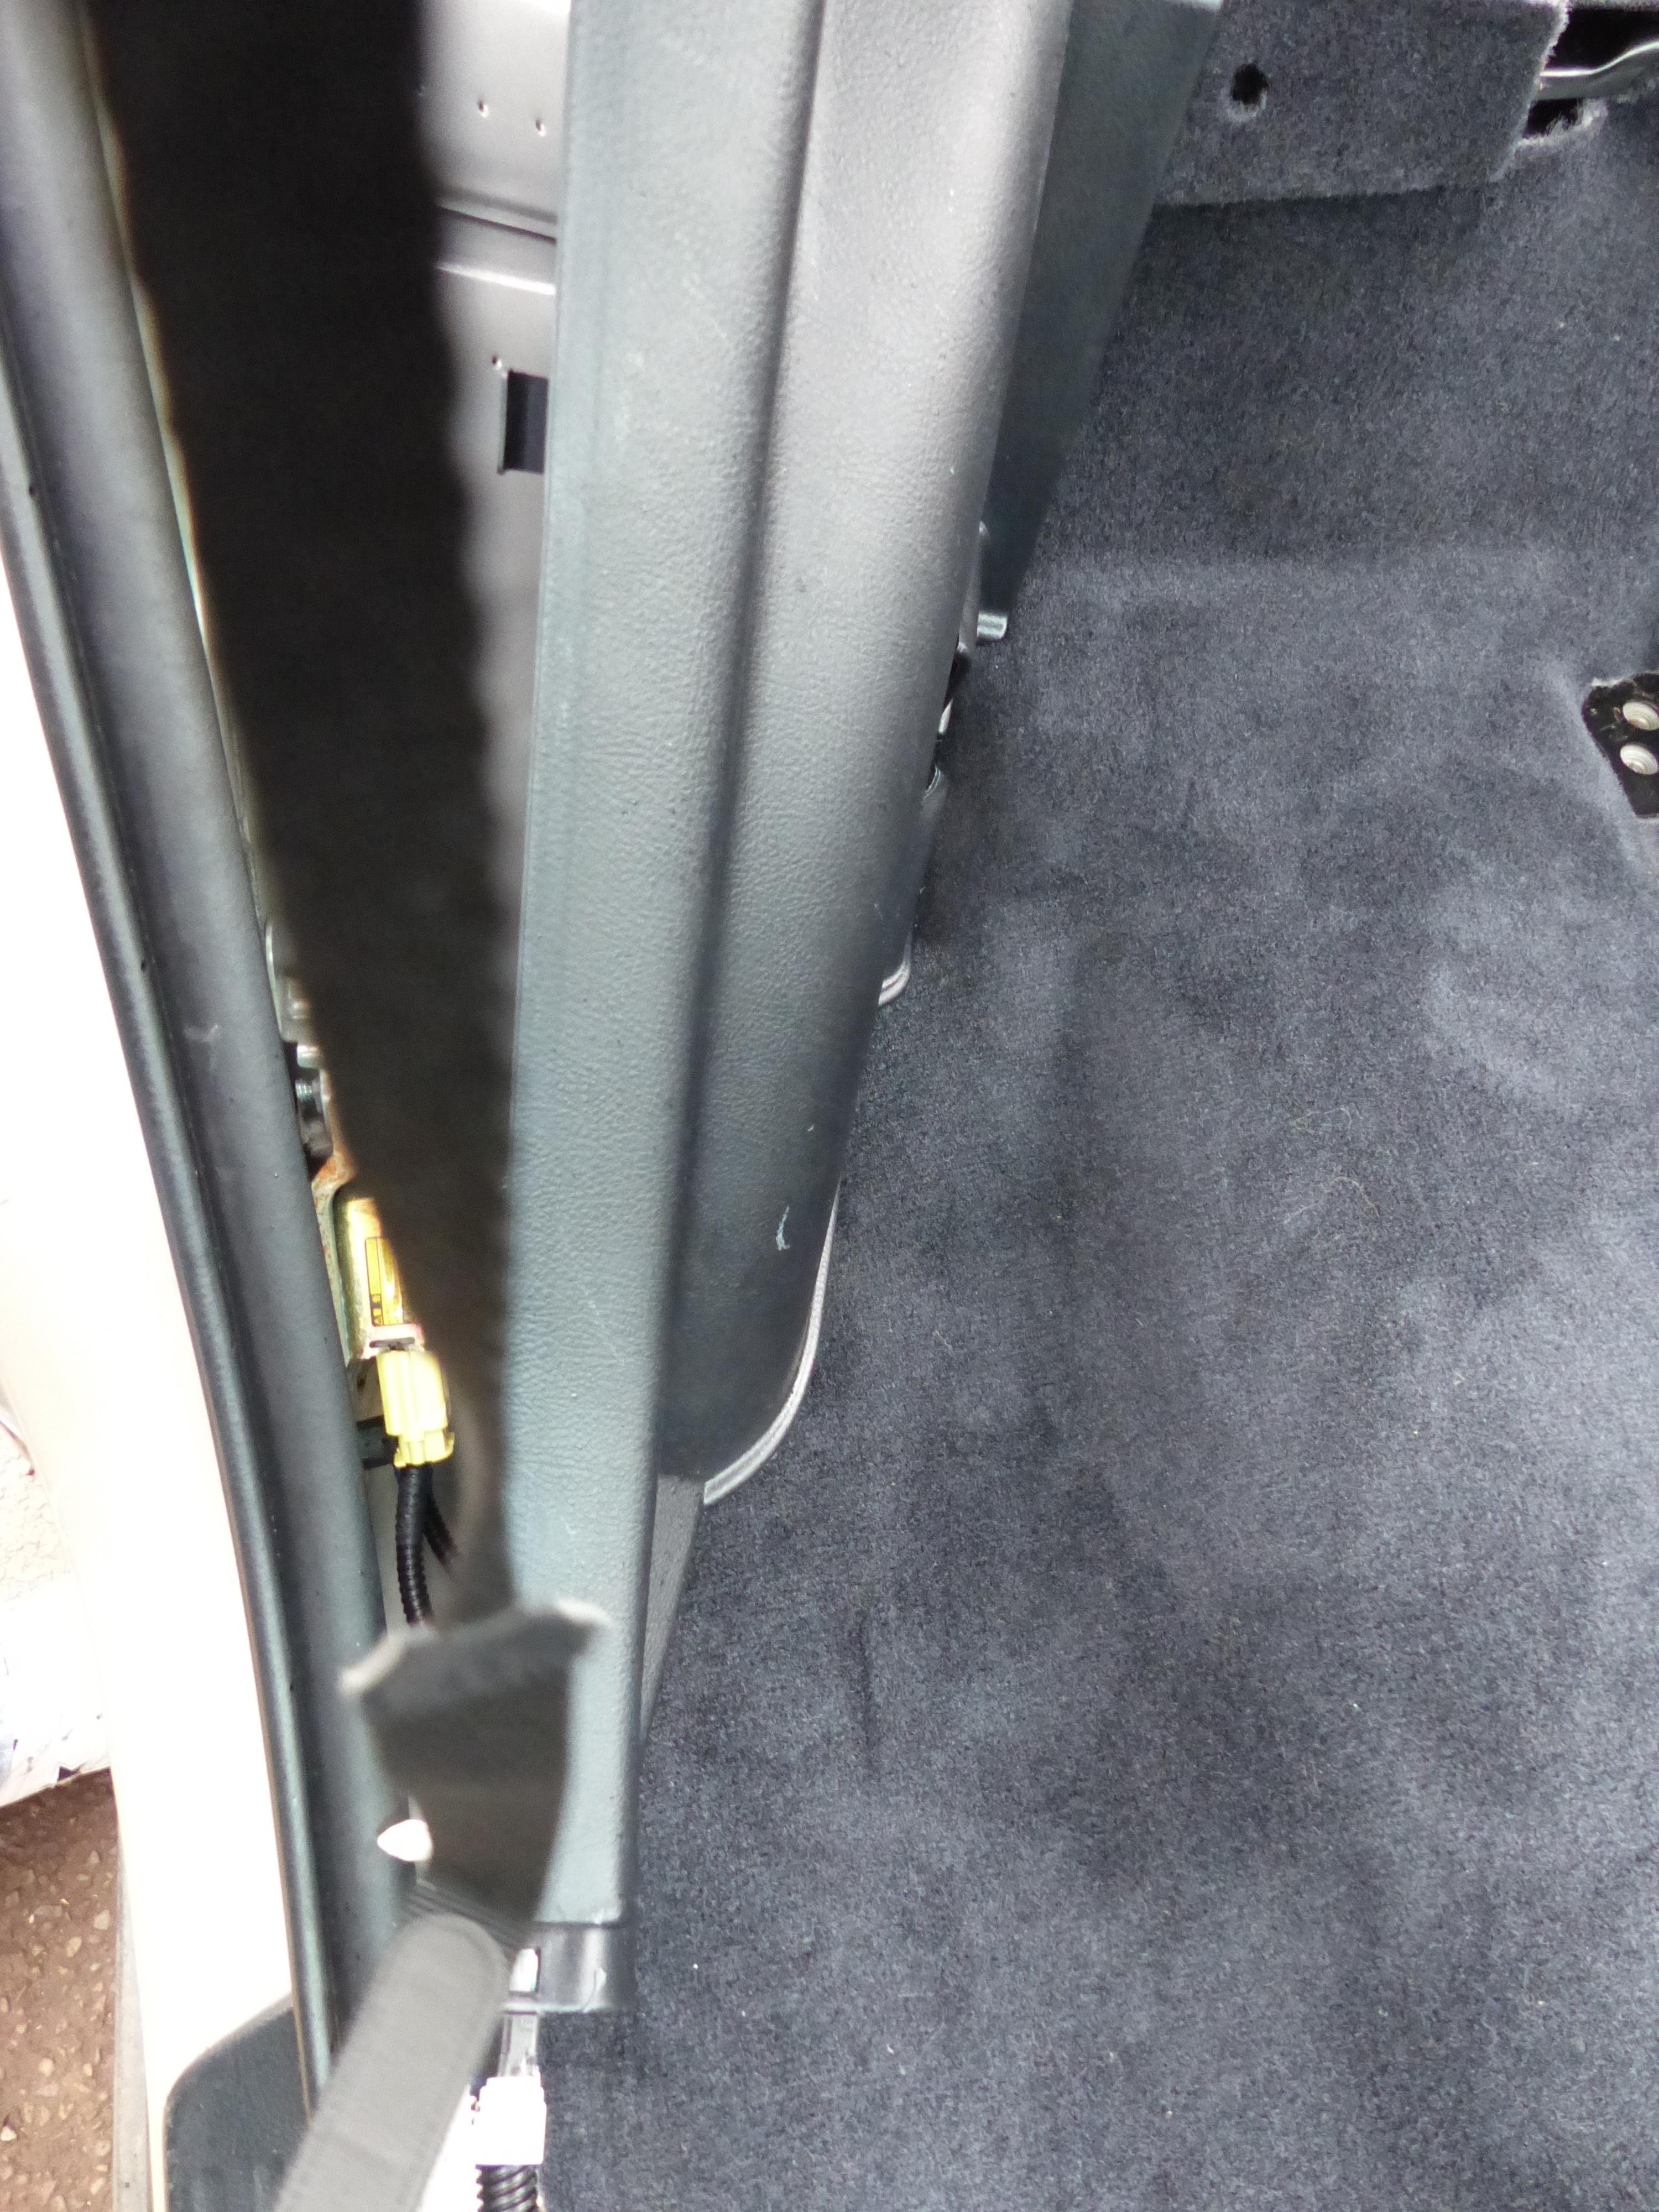
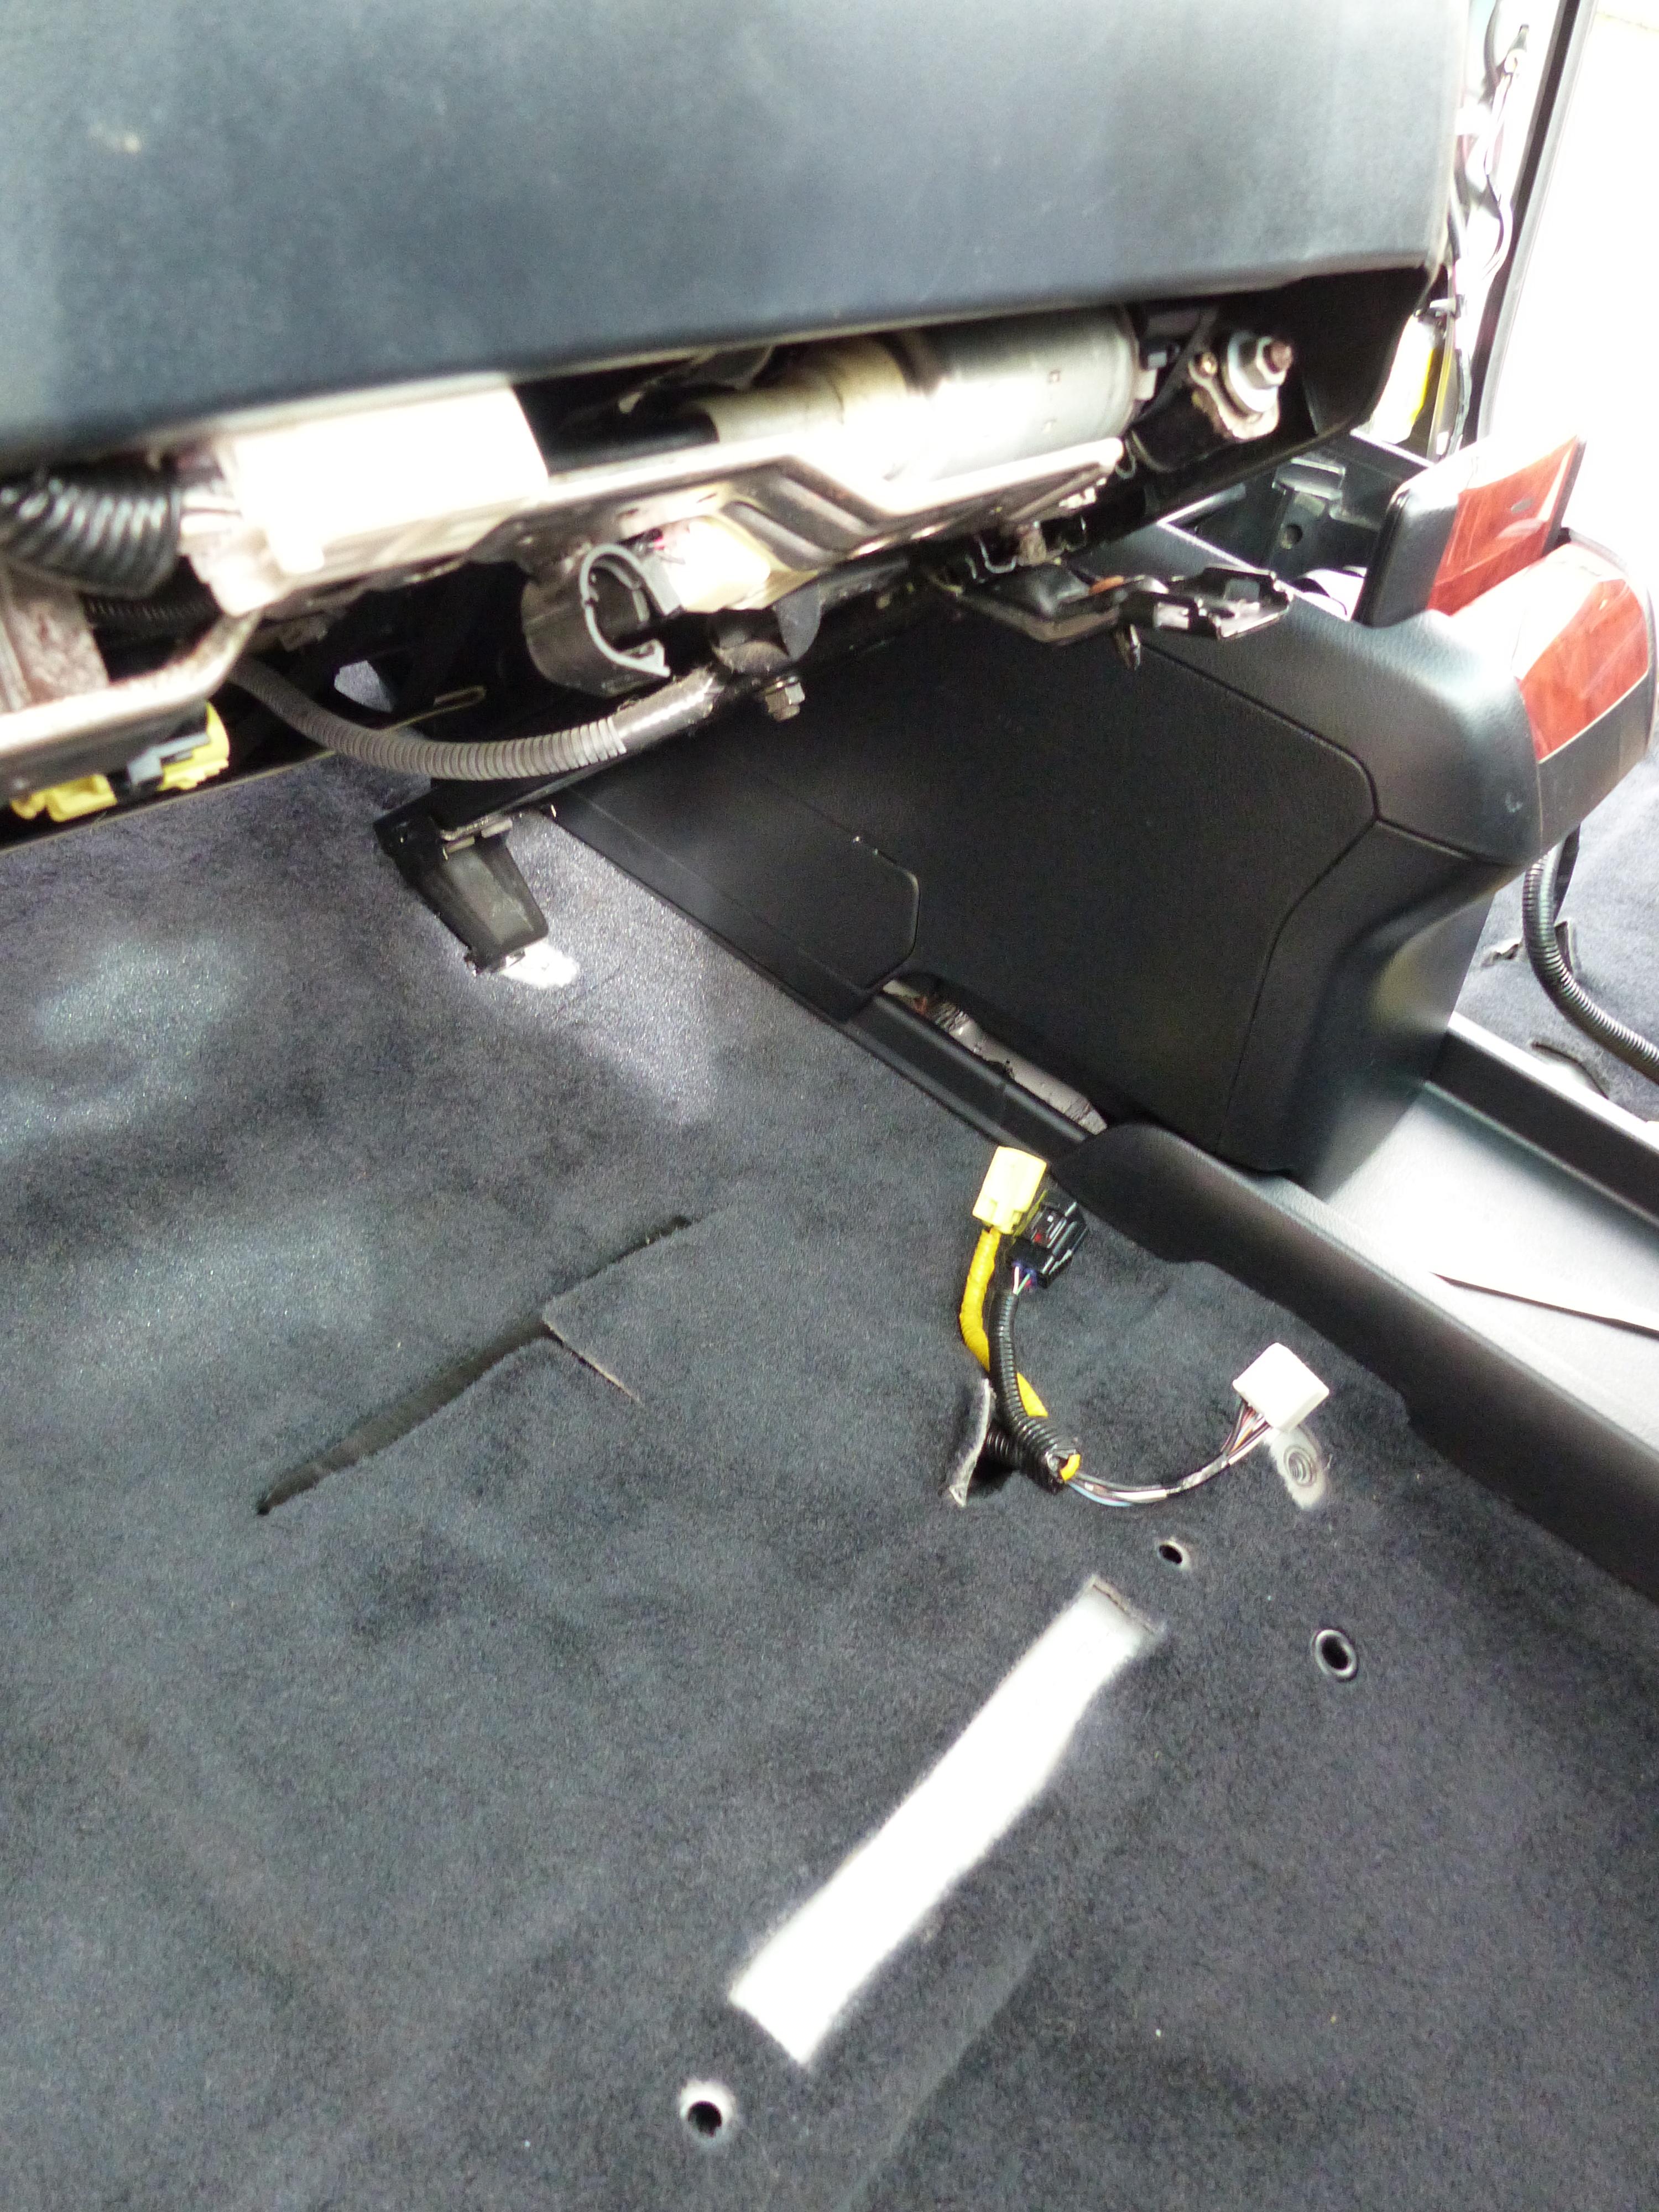
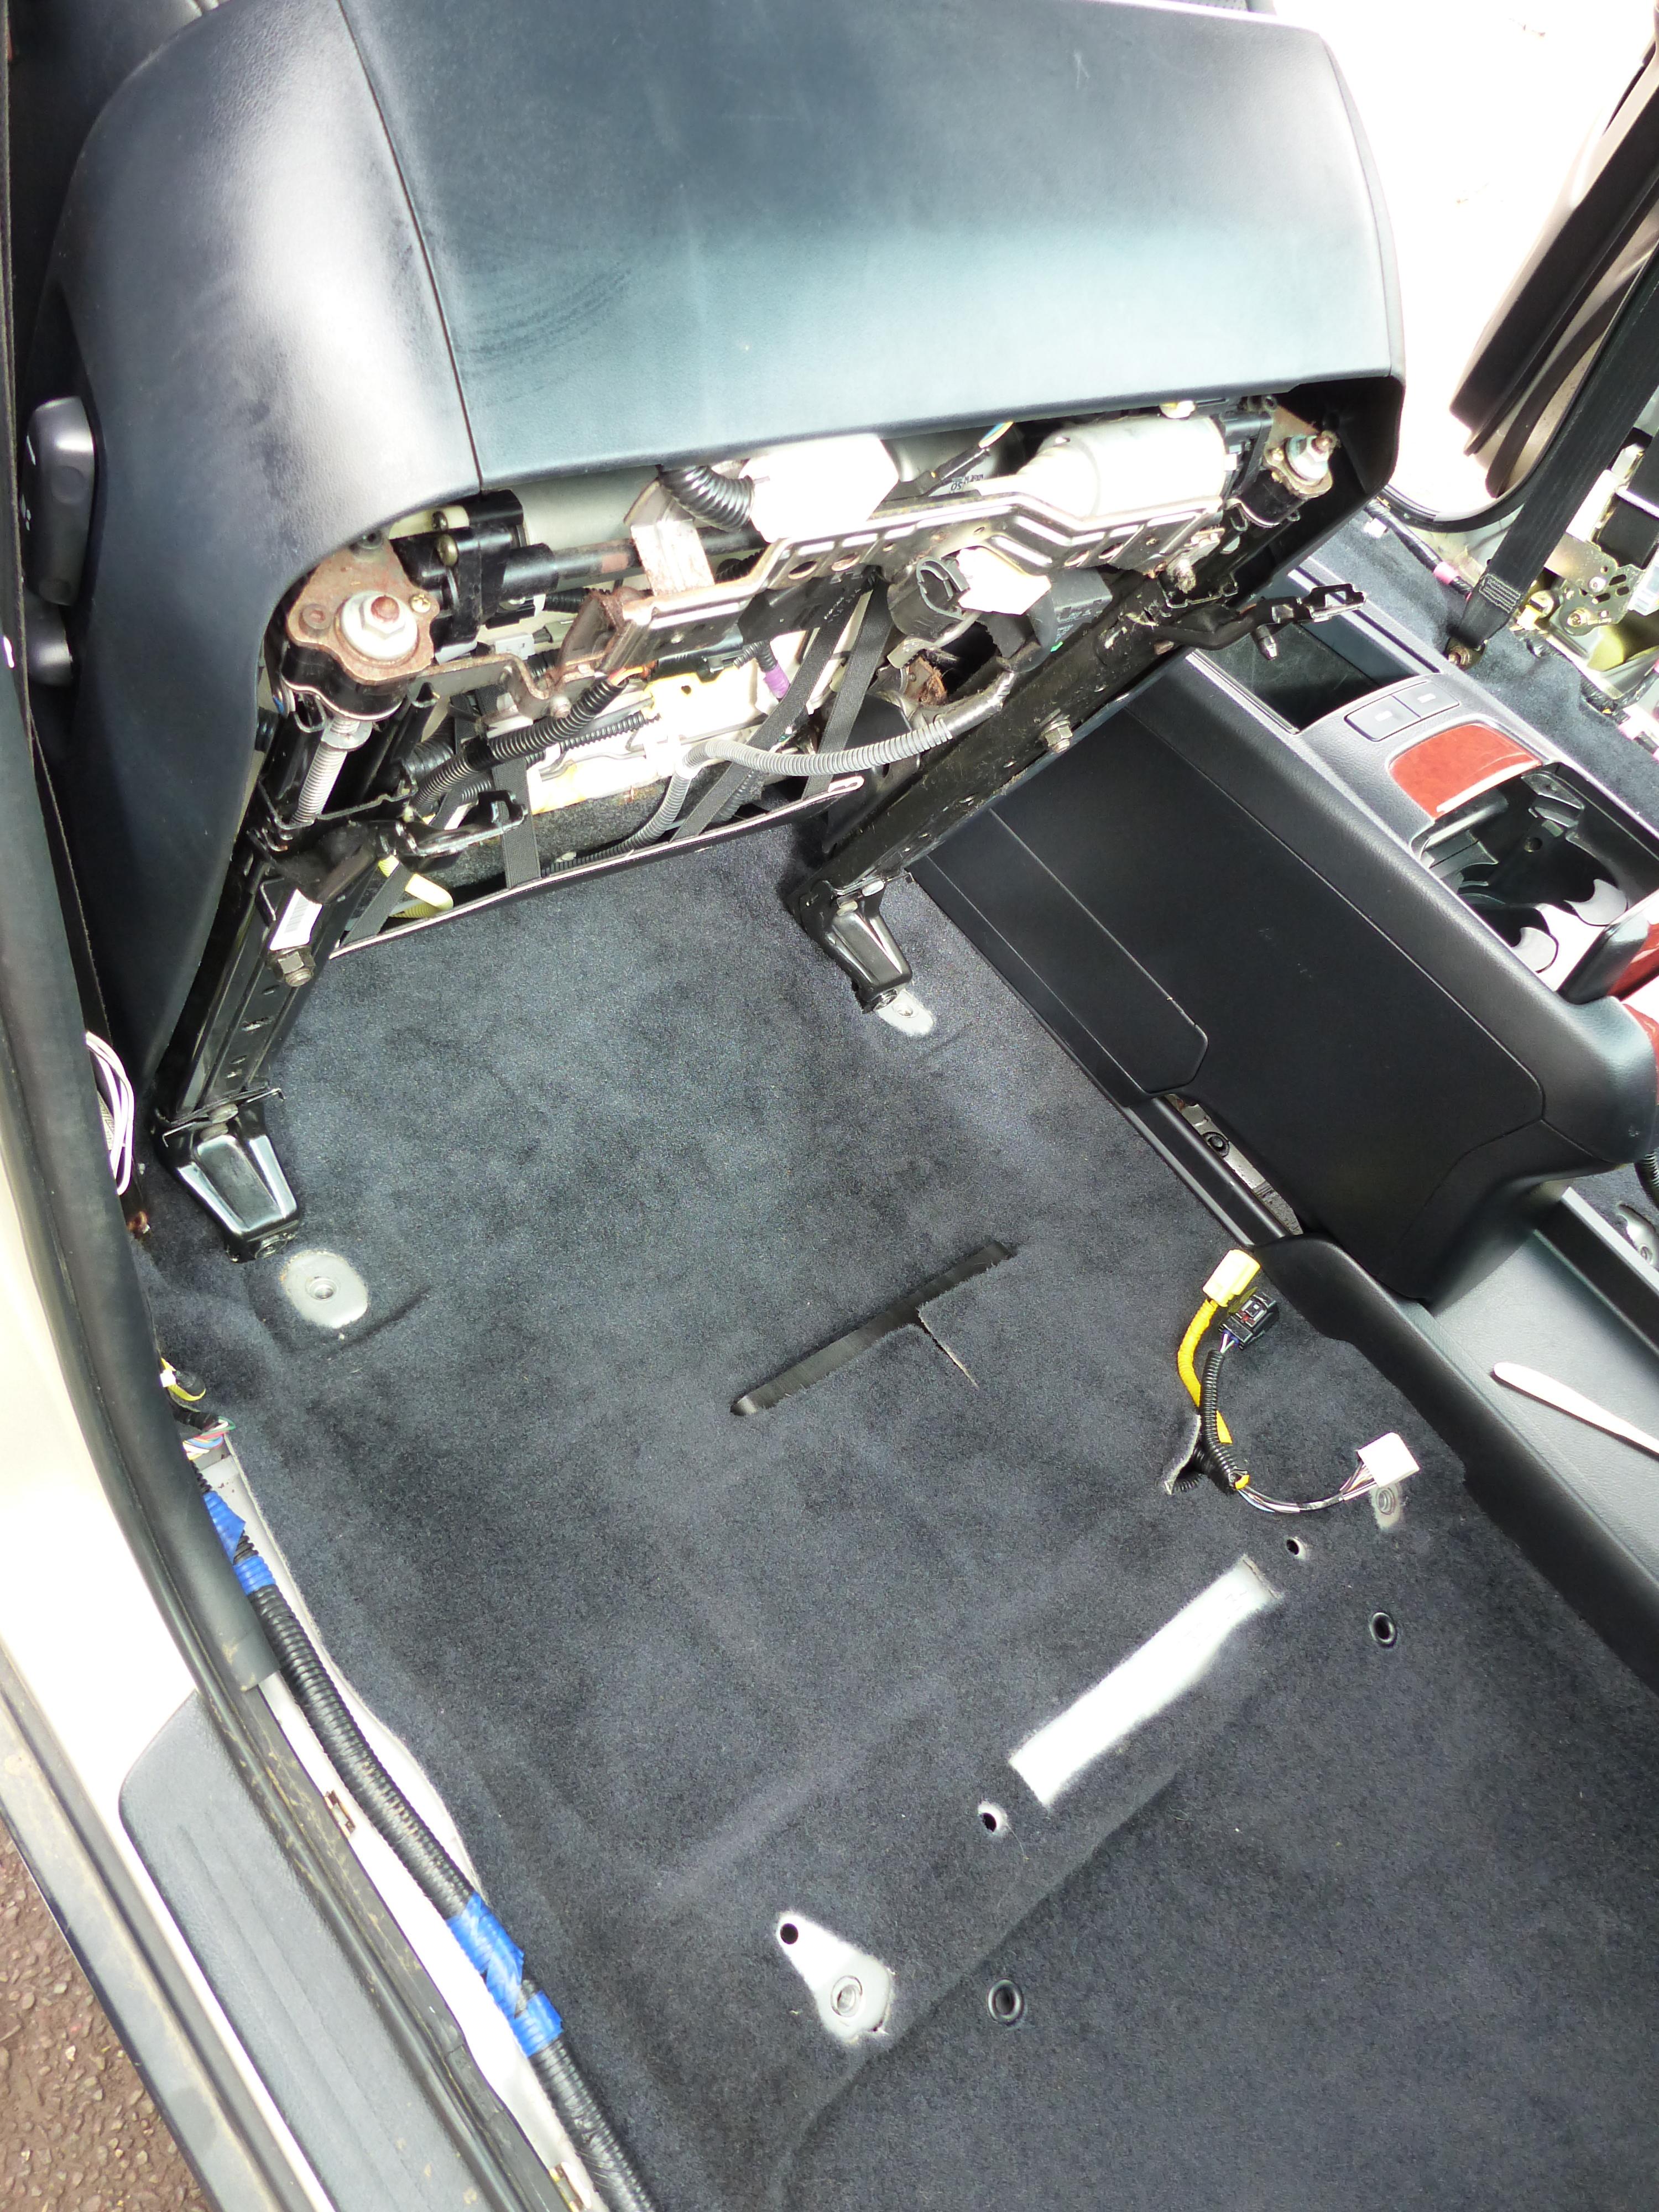
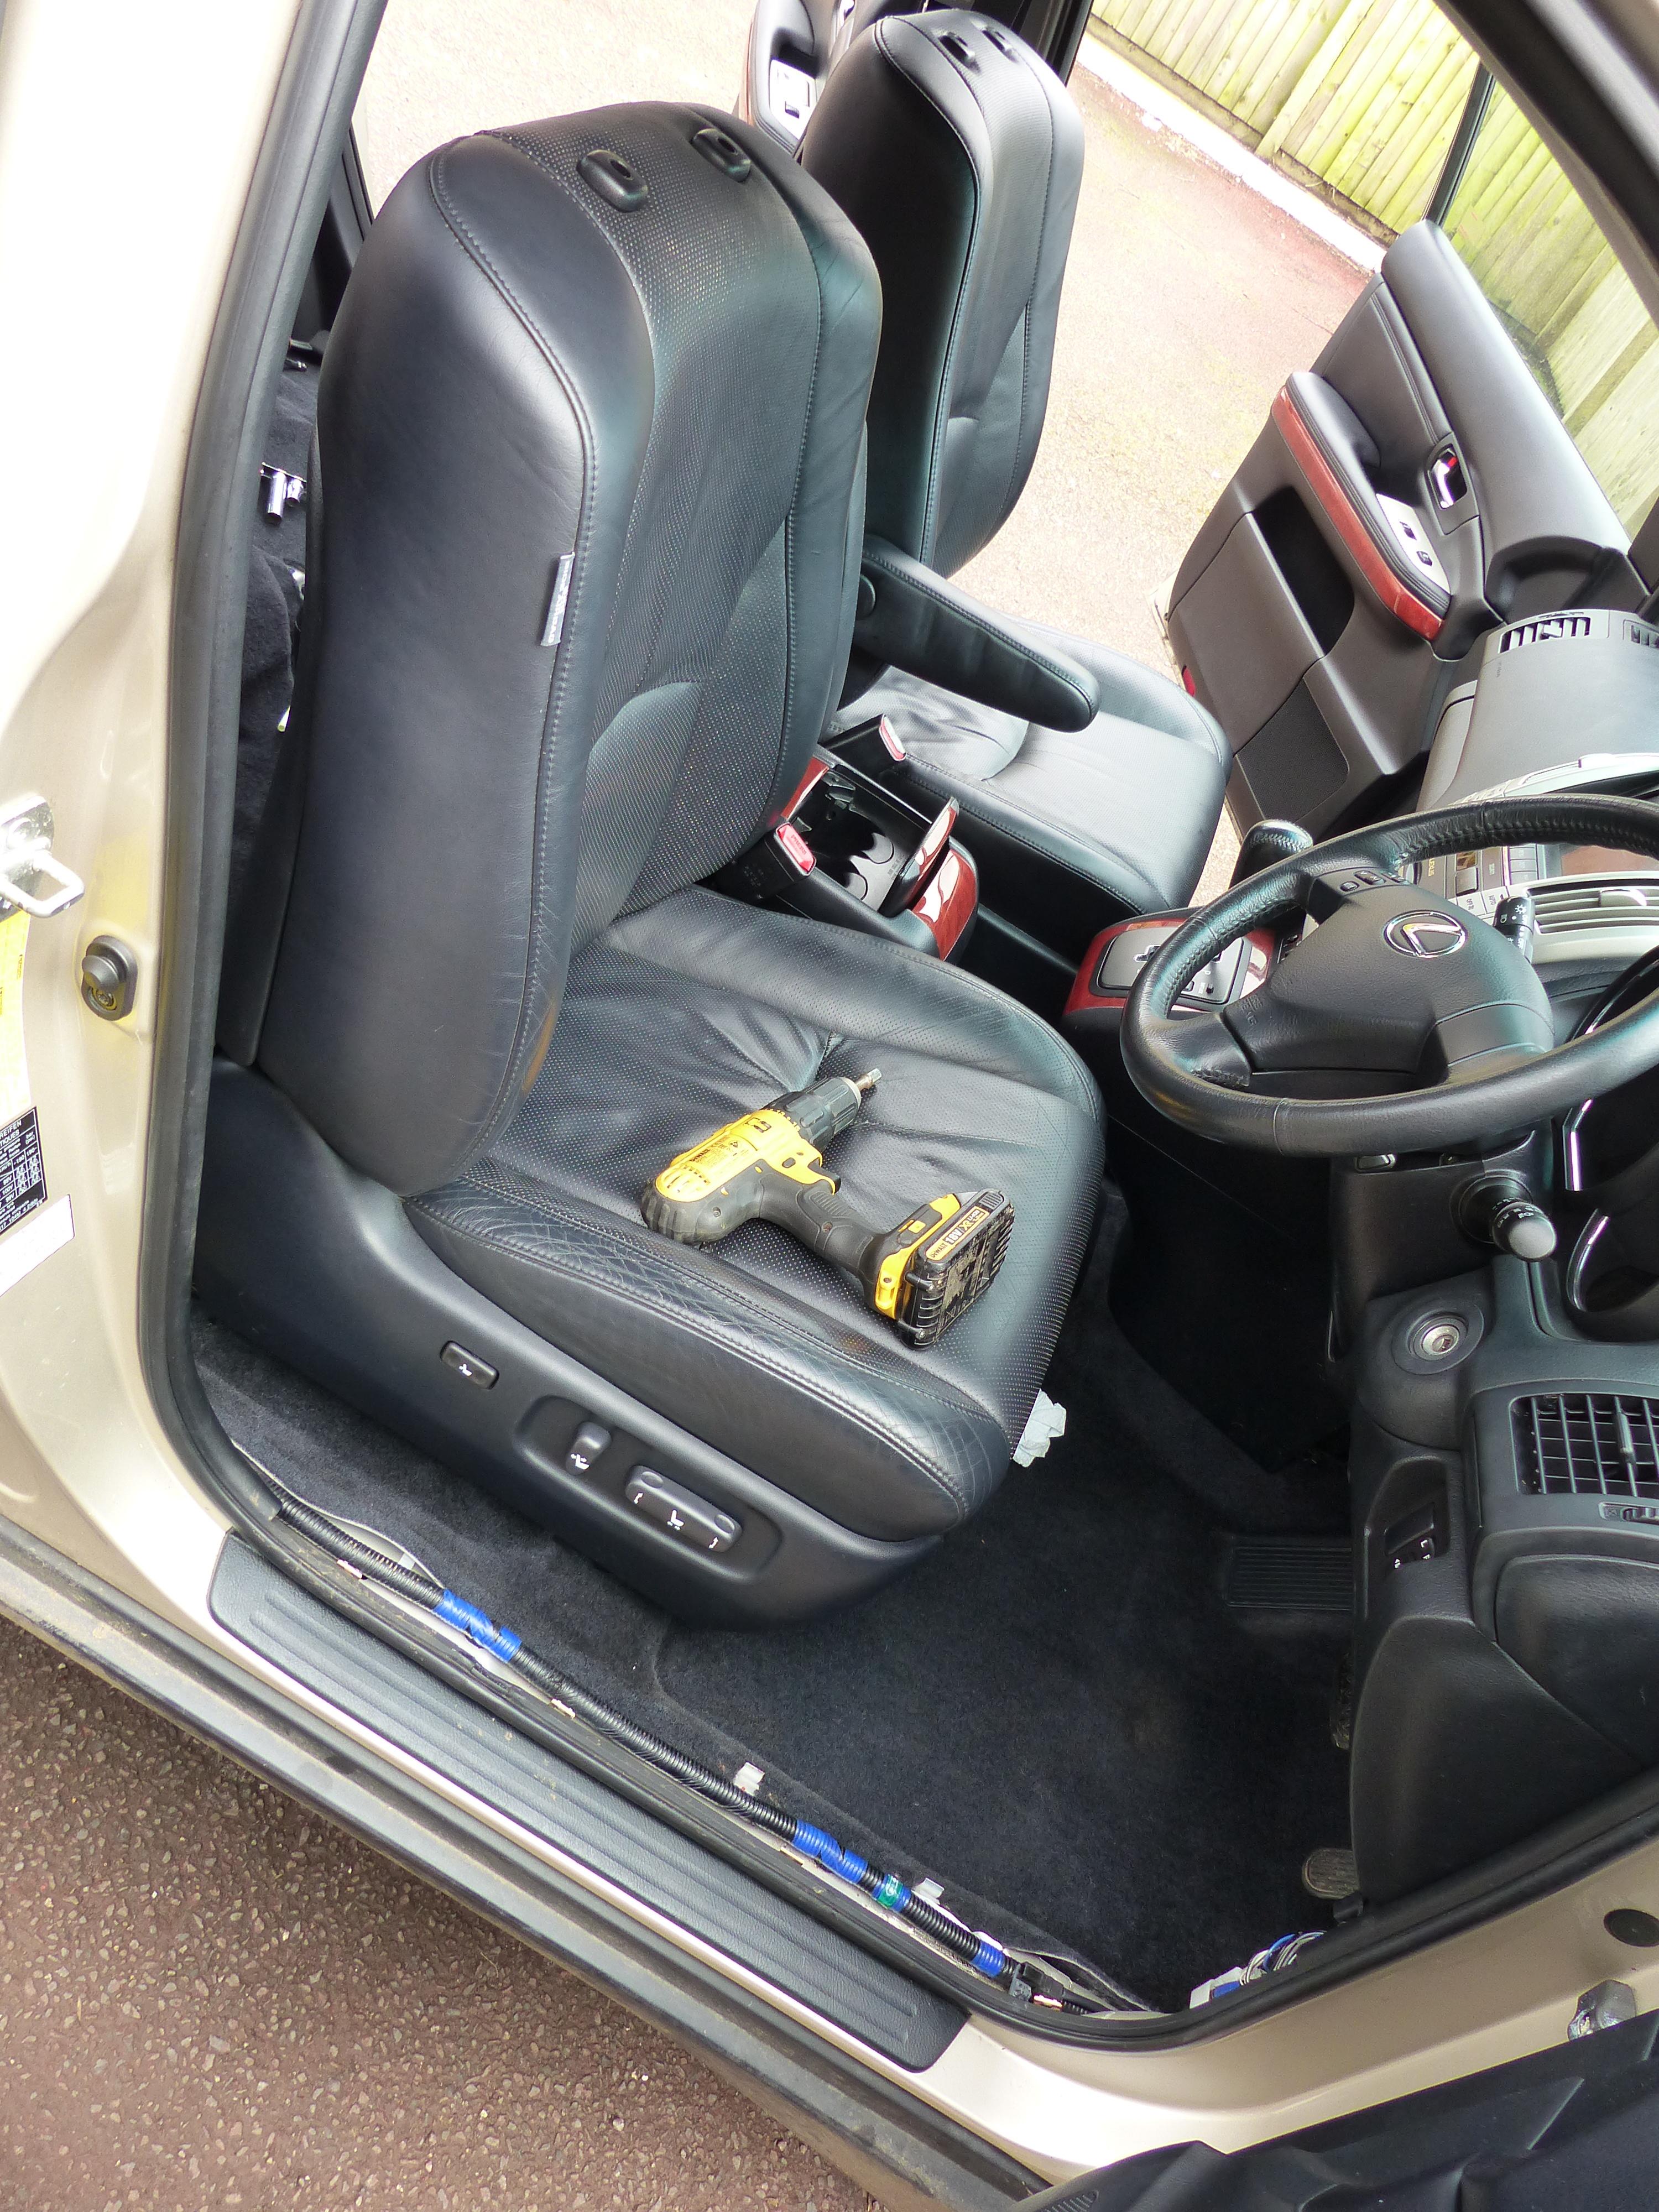
 The rebuild First up with the floor pan out it's a good time to make sure the floor pan is clear of ANYTHING that is not part of the pan. Nothing like laying the whole carpet down to find later on you left a rogue socket in the middle or whatnot. First off treated a bit of rust from a bracket - whilst I can. Next up carpet offered up via the boot and loosely sized up to it's appropriate areas and making sure to pull the electric seal harnesses through the correct holes as pictured. Then the carpet staple edge clips. These twist 90 degrees to come out but can be tricky due to the loom being in the way so I left them in and just pried the staples up. This mean I just fed the staples back through the original points and peened them over tight with the back of a screwdriver handle. By this point I had shoved the carpet into it's corners and crevices as much as possible including tucking the edges under the loom at each edge as per original. Then I tackled the rear arch trim as this plays a good part in holding the carpet edges down at the rear half. This was also a good opportunity to clean each trim piece in isolation before fitting Note the door seal currently in place here, this needs to be pulled back to allow proper fitting of trim panel. Door seal needs to be removed for these panels to fit correctly as circled in the red they need to be flush with the door body lip as the seal holds them in place with a couple internal trim push fasteners. Fitted. Just need to pop some trim fastens in at the rear but leave that till later as some trim panels overlap and only use the one fastener and they are a bitch to get out in one piece sometimes. Next up was the seatbelt bolts - note I have put these back in before fitting the B pillar trim which the seatbelt needs to go through you would refit the B pillar trim in this section - reason am not is the velour/fuzzy coating on my b panel trims each side has peeled very badly so I've ordered two new ones but didn't want that to stop the rebuild today as they are easy to fit so I just cracked on without for the moment. Set torque to factory 42nm - note please check your own torque settings, I found a tech manual for RX300 1st Gen but I am happy to take my own life in my hands but would urge everyone to check and double check their own torque requirements for bolts as important as the seat belt and chairs. Next up center console tray - make sure the wiring is correctly routed, don't forget the 12v socket connector It's largely sat on 3 green clips and 2 screws confirm fitment on top. Also don't forget the rear blower vent at this stage. Then just installed centre console on top - very easy, 6 10mm bolts. Again remember the connectors for and the one for the cubby hole & cup holder light. Also don't forget the pull cable on the otherside of the bracket that enables the centre console to move forward and back! Drivers chair in Tilted back to aid re-connecting the connectors. Note I disconnected the battery at this stage due to the airbags, I don't know if it makes a different or not but why take the risk Connected plugs. Don't forget to clip up the loom to the under chair clip circled. This avoids your loom being eaten or caught up by the chair mechanics underneath, I dropped two bots in at the rear as that rail was exposed from last position I left the seat. You have to reconnect the battery move the seat back and drop in the other two bots - I hand tightened after all in before torquing to correct spec once all in. Then rinse and repeat for passenger side. Then the rears - easier to get in when folded. Sorry crap pic here. Don't forget a little white stretchy harness for each L and R rear seat, it helps support the seat when folded and screws in with a 10mm bolt - there are two of them in total. No pictured sorry. Once all torqued up - check and double check, don't take chances with seats! Now's a good time to push those rear trim fasteners in. Now you can see the overlap. Flip that MDF panel back down and you can now seat it properly with those clips That's largely it! Few more pieces like those B Pillars that I'll do when the new ones arrive, front kick panels that are a piece of cake and the scuff plates I'll do when the b pillars are in as would only have to take it off again otherwise to fit. Voila. Rains due this evening... I hope this worked cause the car smells and looks as fresh as a daisy now!
-
Sub woofer Graham.
-
Thanks Graham. What I also note is these "seals" for the roof rack are very thin, when I think seal and with all my exposure of various cars and motorcycles I normally see some good quality rubber gasket. Regrettebly what I've seen on the Lexus are literally paper thin seals for the roof rack bolts, and foam seals for the rear tail light gaskets. It's just compromises I've not seen on other vehicles. Perhaps it was engineering choice to save overall weight or cost? My 1995 (read: over 20 years old) Mitsubishi Pajero has not shed a leak from the day I've had her (5 years) and as far as I know is on all original seals. Even the sun roof one and it's twice the size of the lexus sun roof!
-
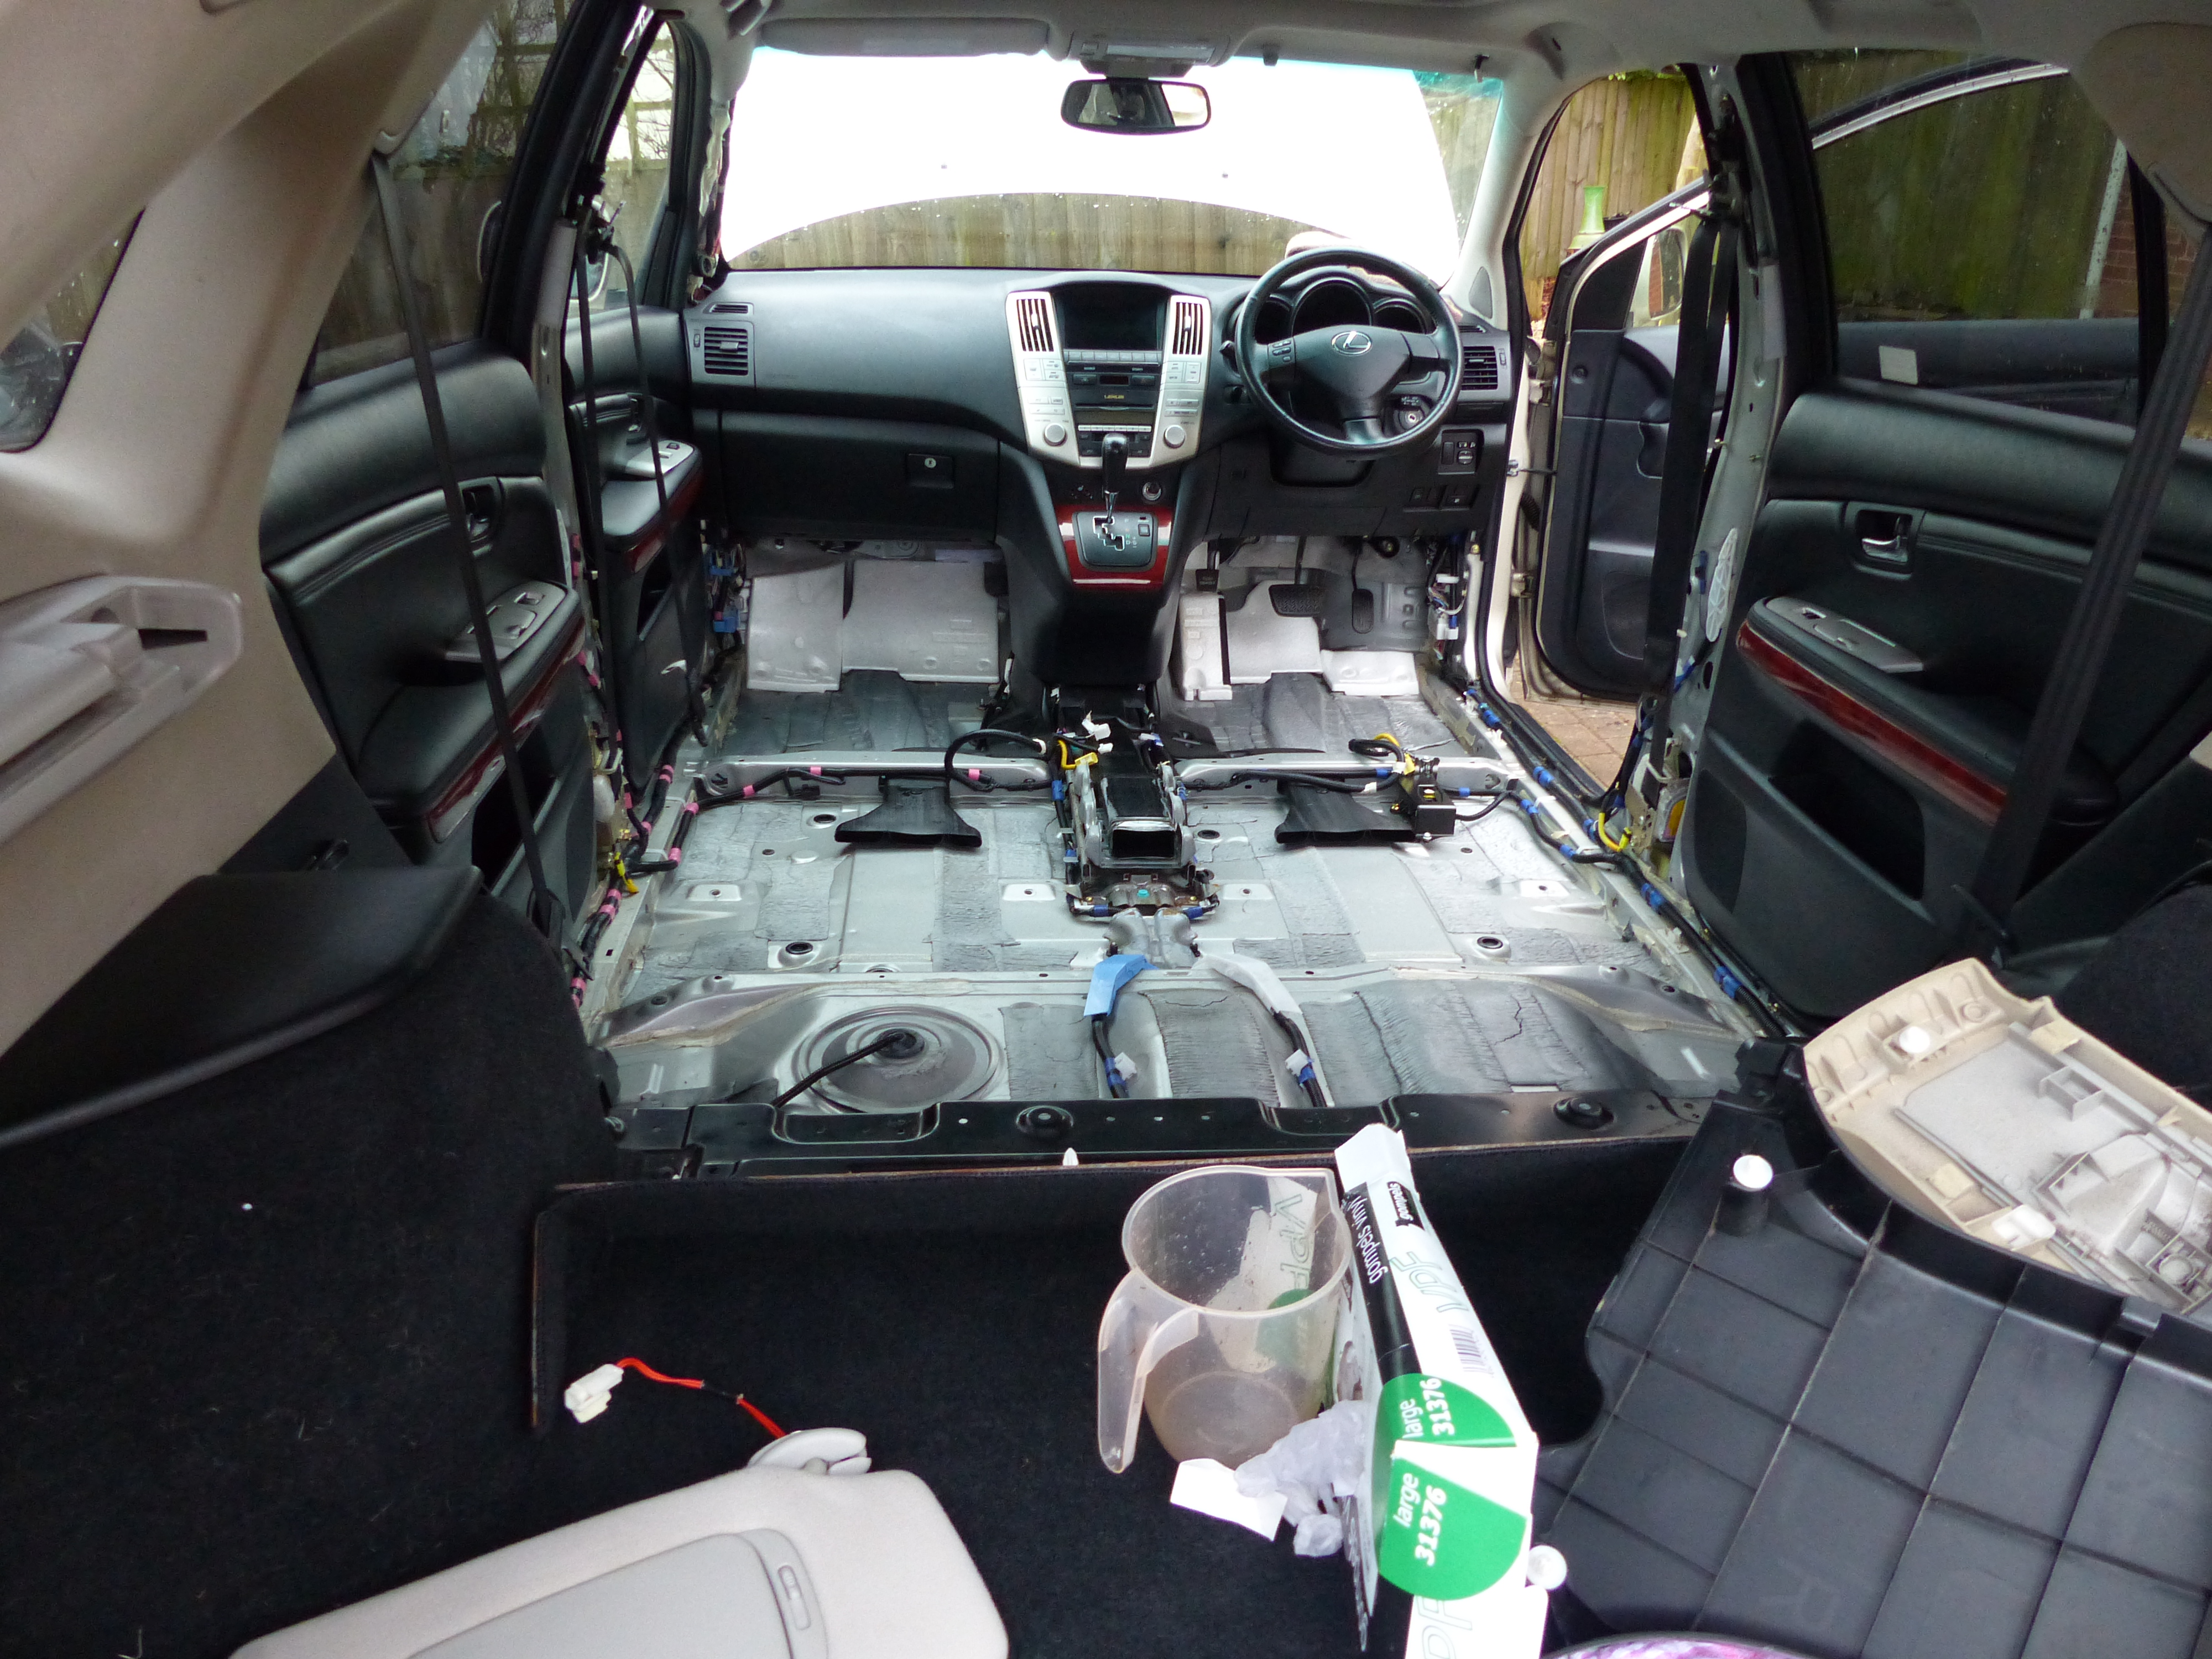
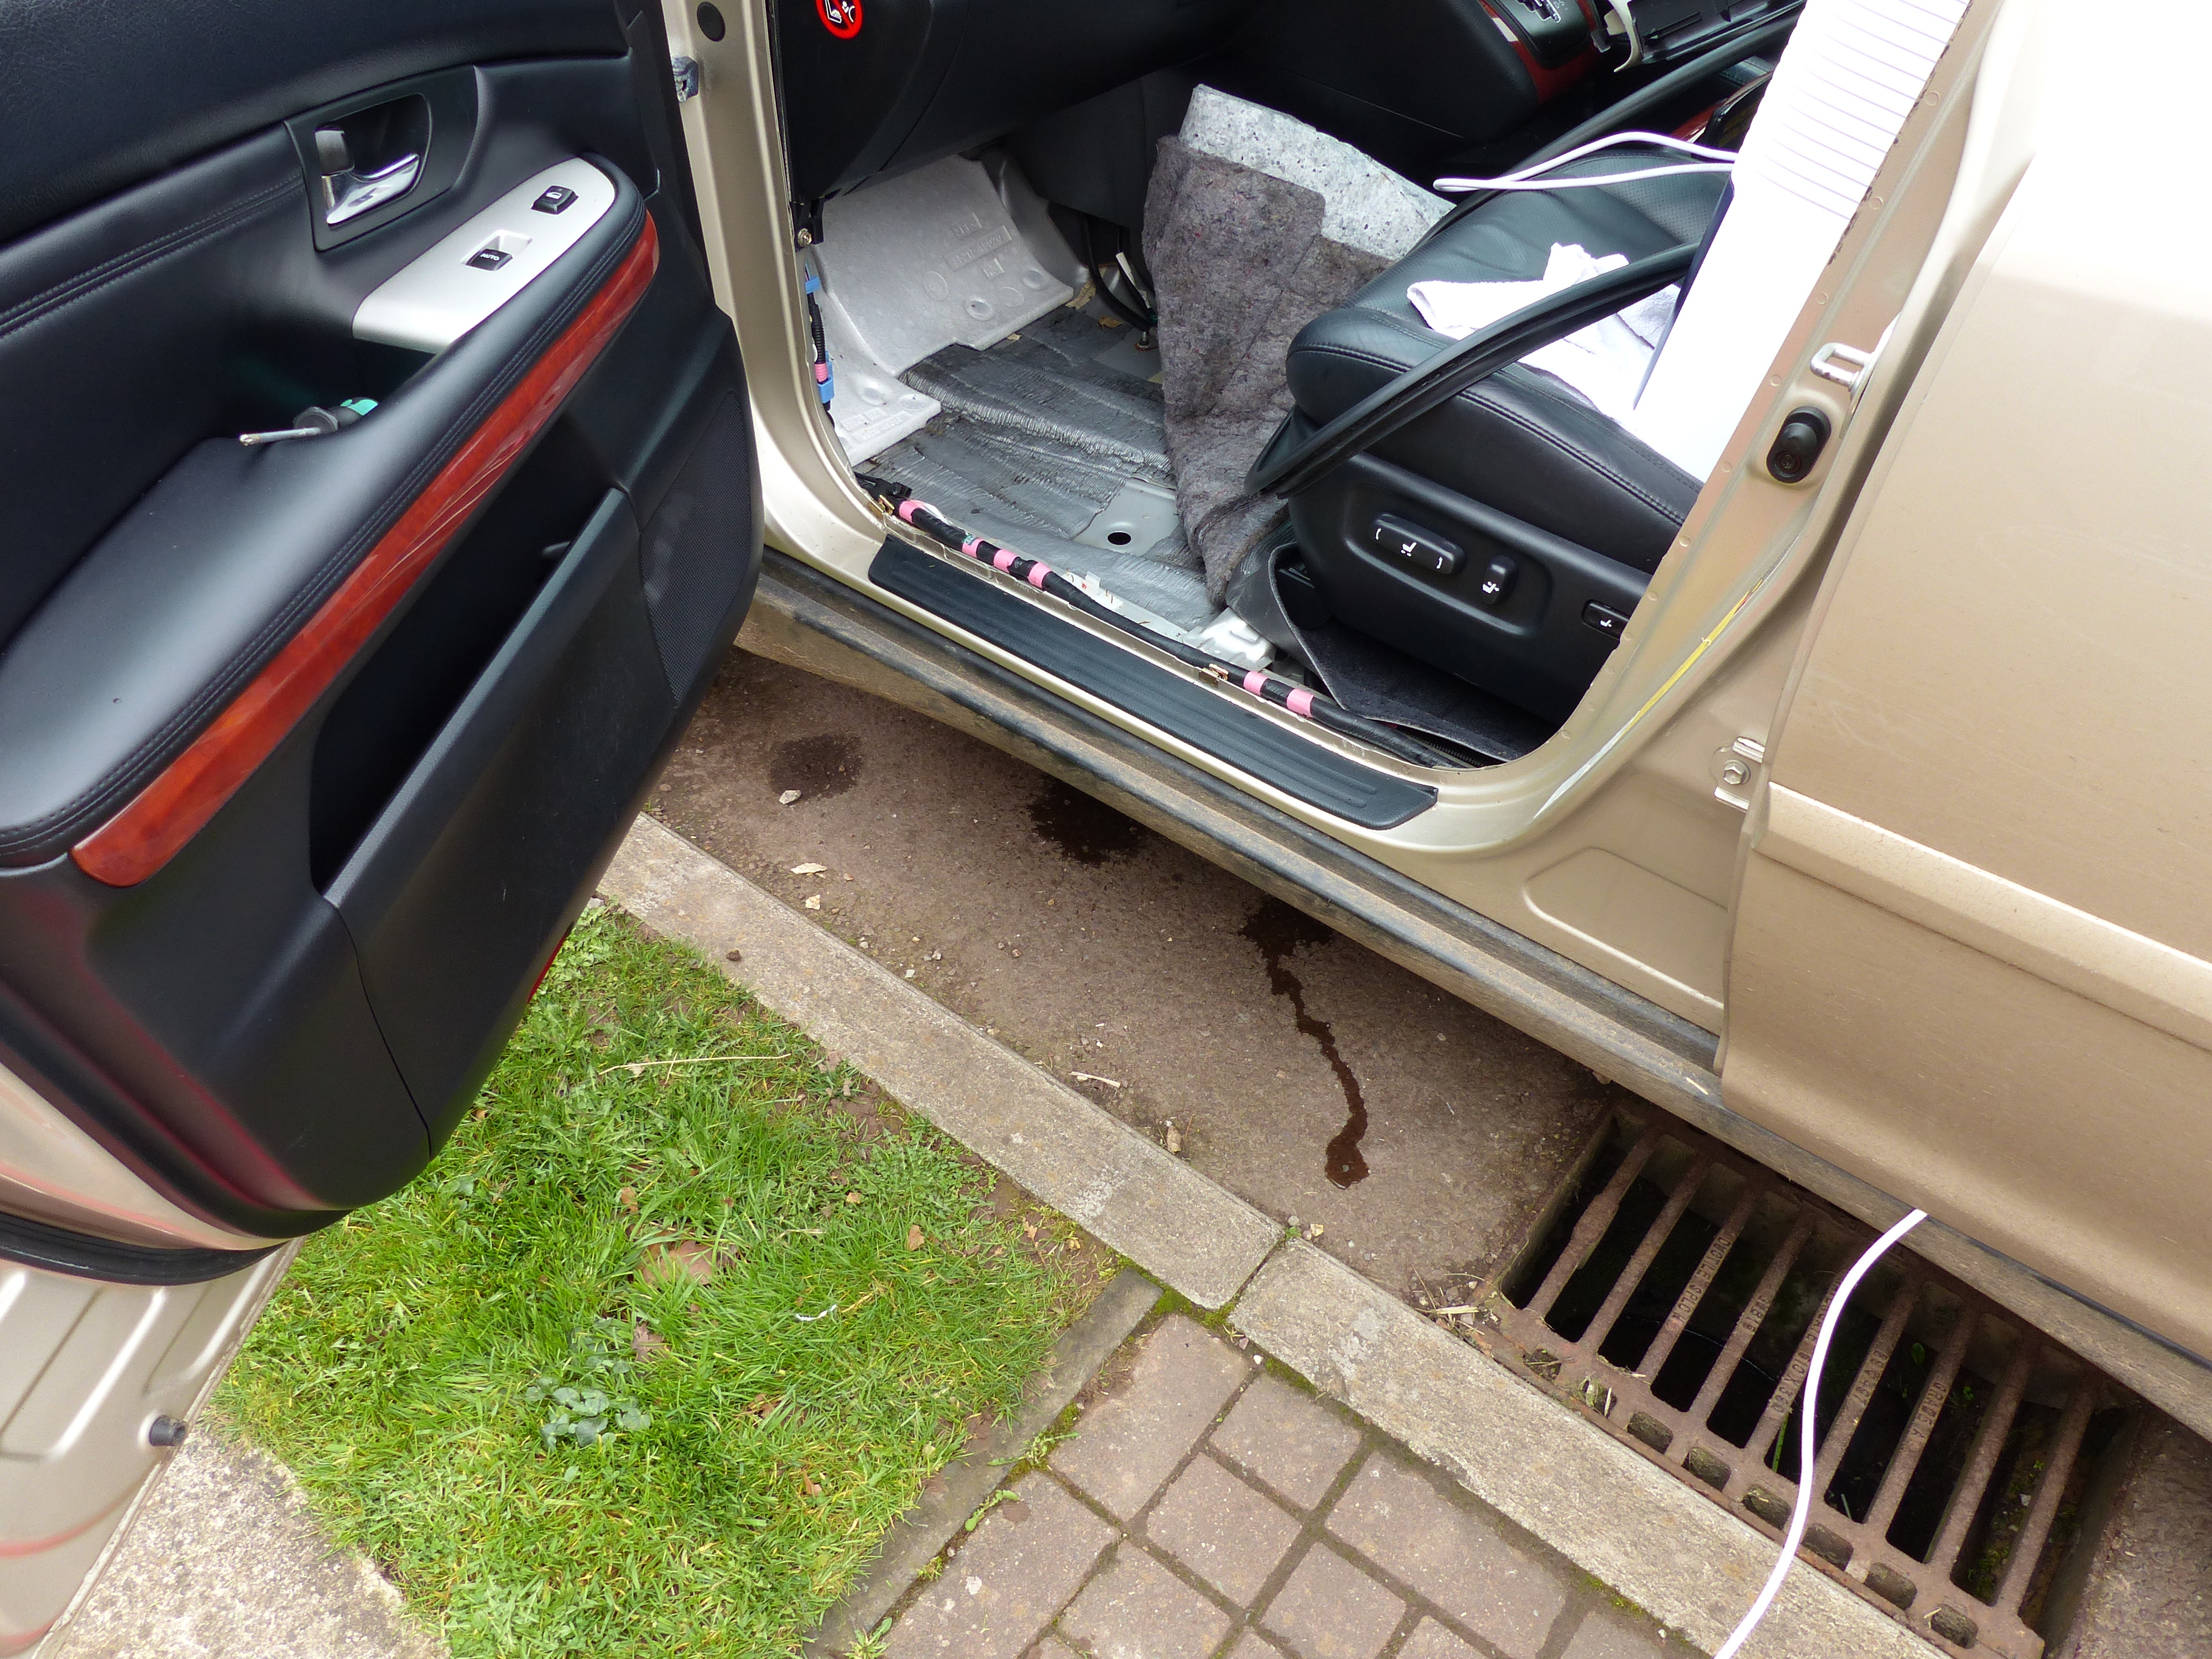
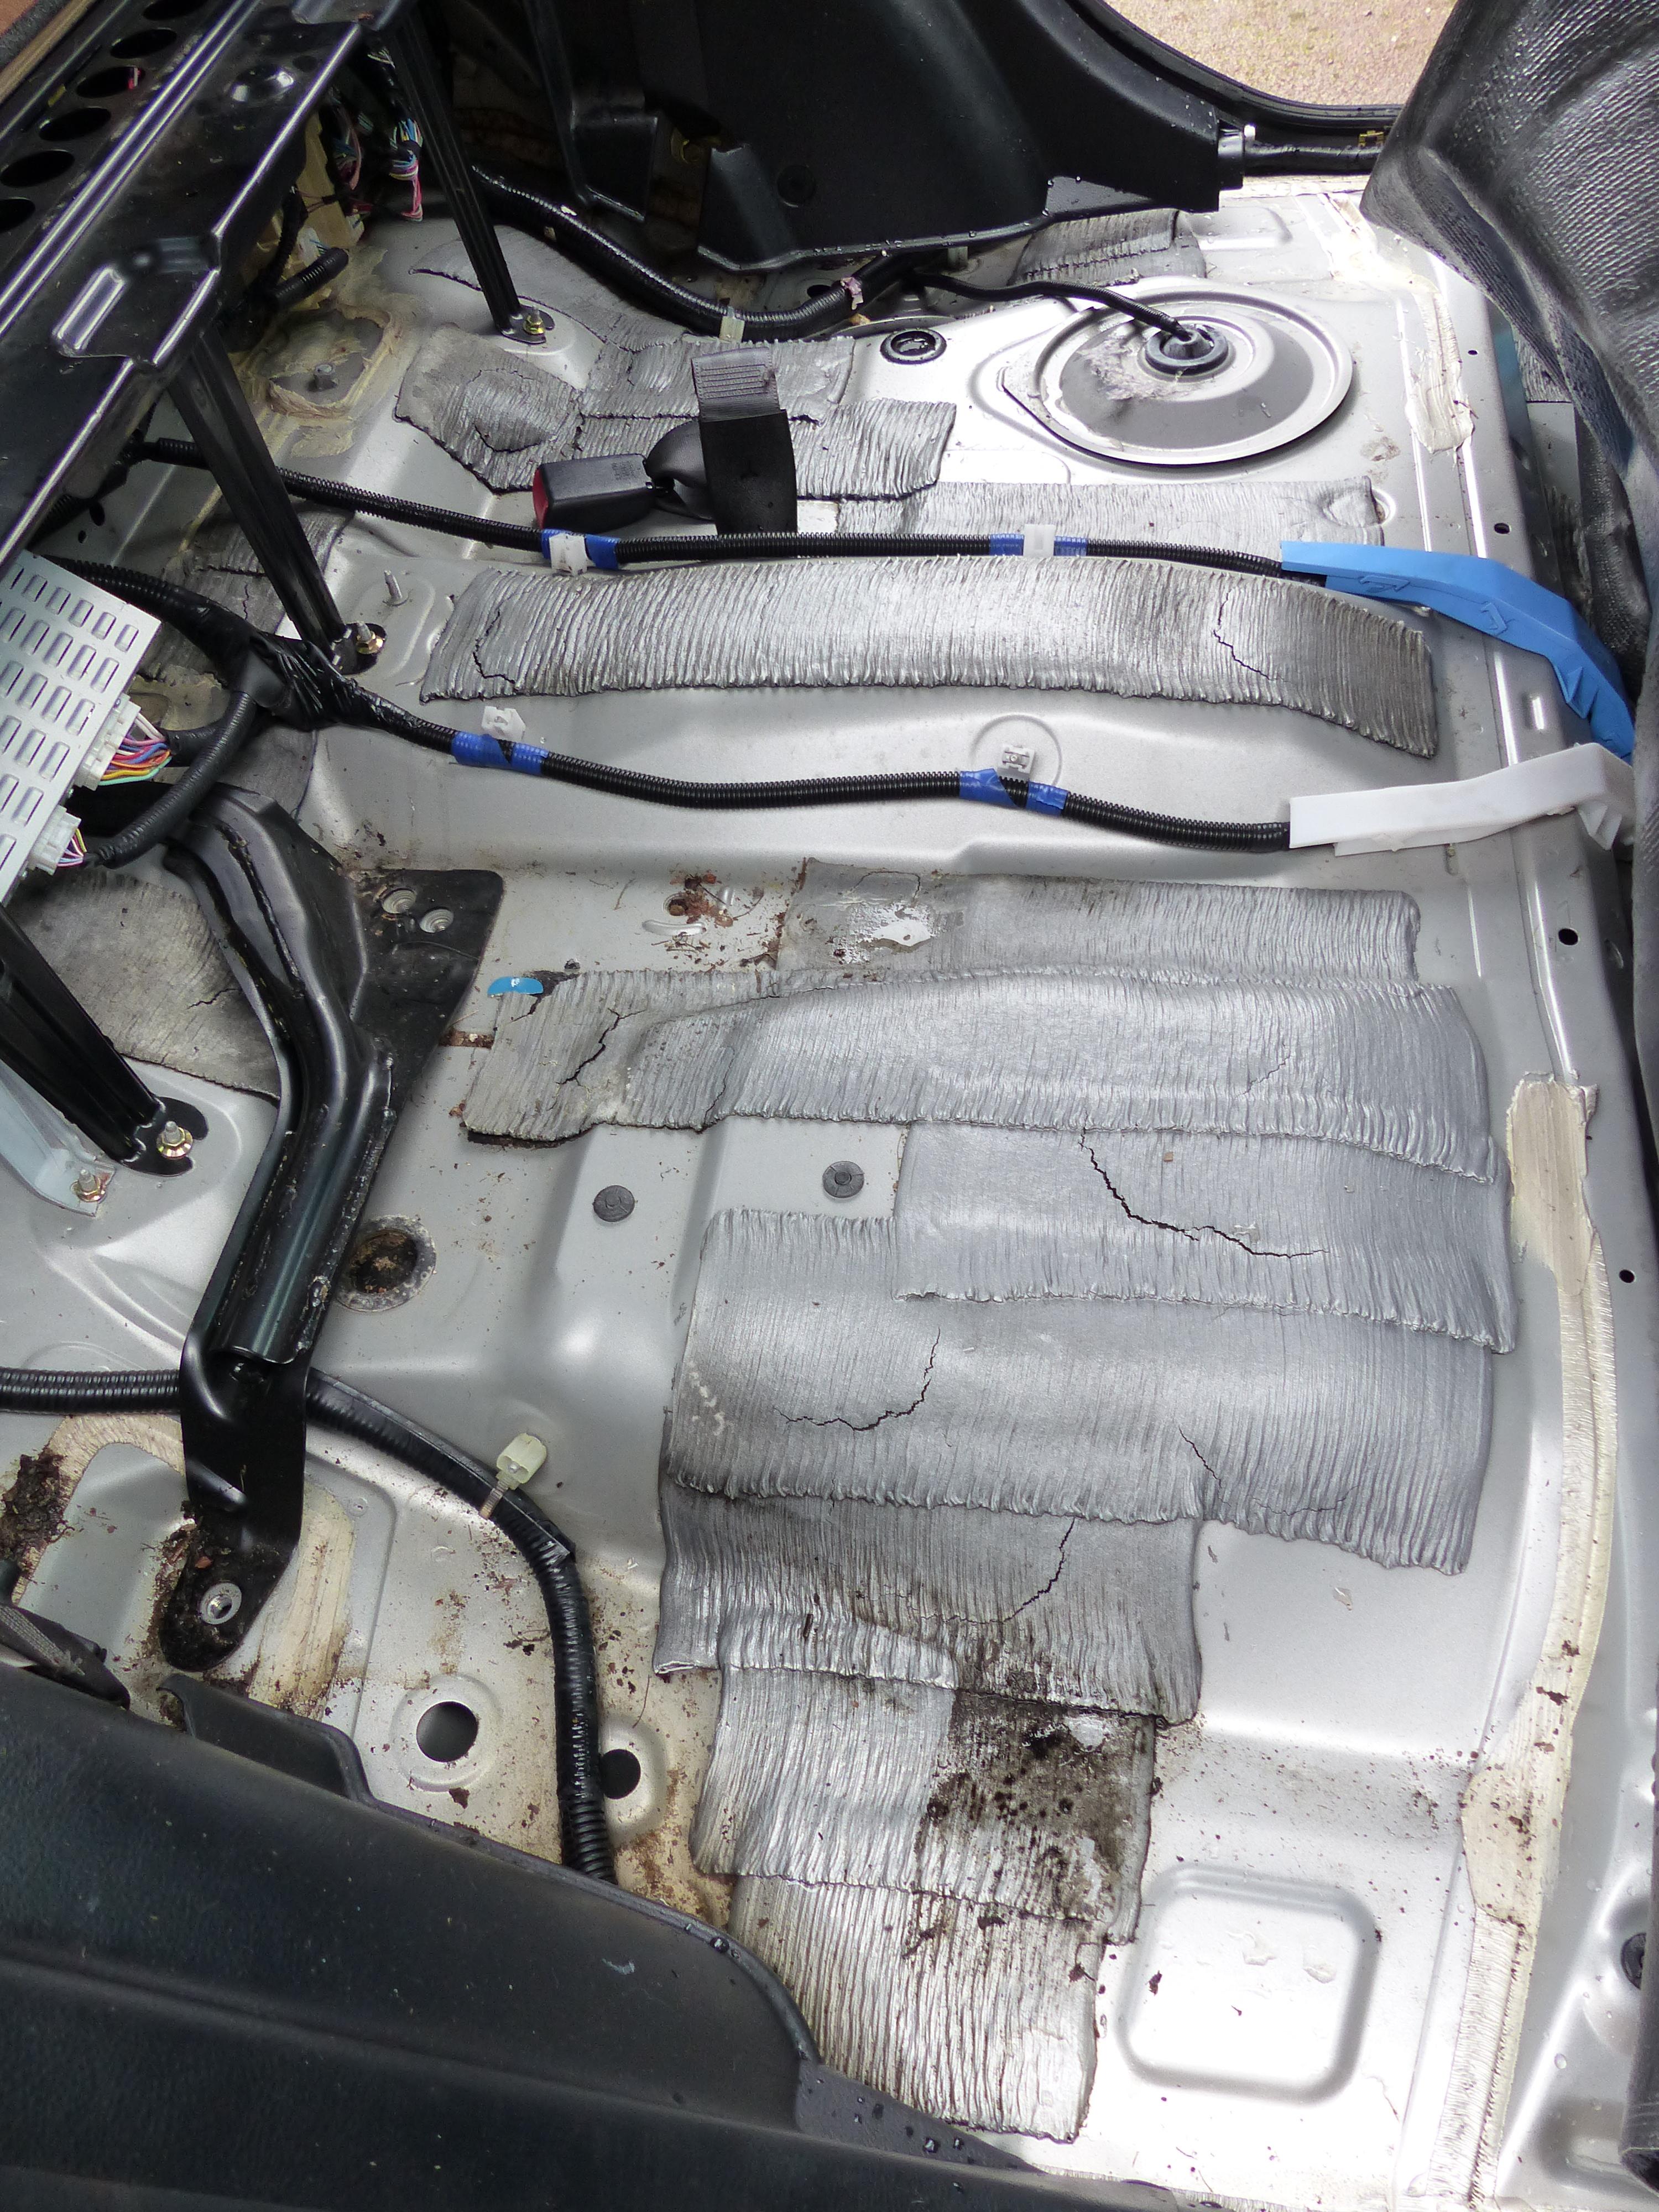
After I believe I have now fixed a surprise and hopefully final leak (alt thread here) I've prepared the car for a good return to it's better self tomorrow and will start getting the carpet in and then putting everything else back in. Floor pan has been washed and scrubbed then once dry I went over it with some freshening deodorising spray. It didn't smell but I wanted to get it fresh from the ground up. The drain plugs dotted around were all pulled and washed in warm soapy water then dried and touched up with a spot of silicone lubricant to help longevity and avoid them drying out. Will post more pics as I go hopefully. Now is that a good looking floor pan or what..?!
-
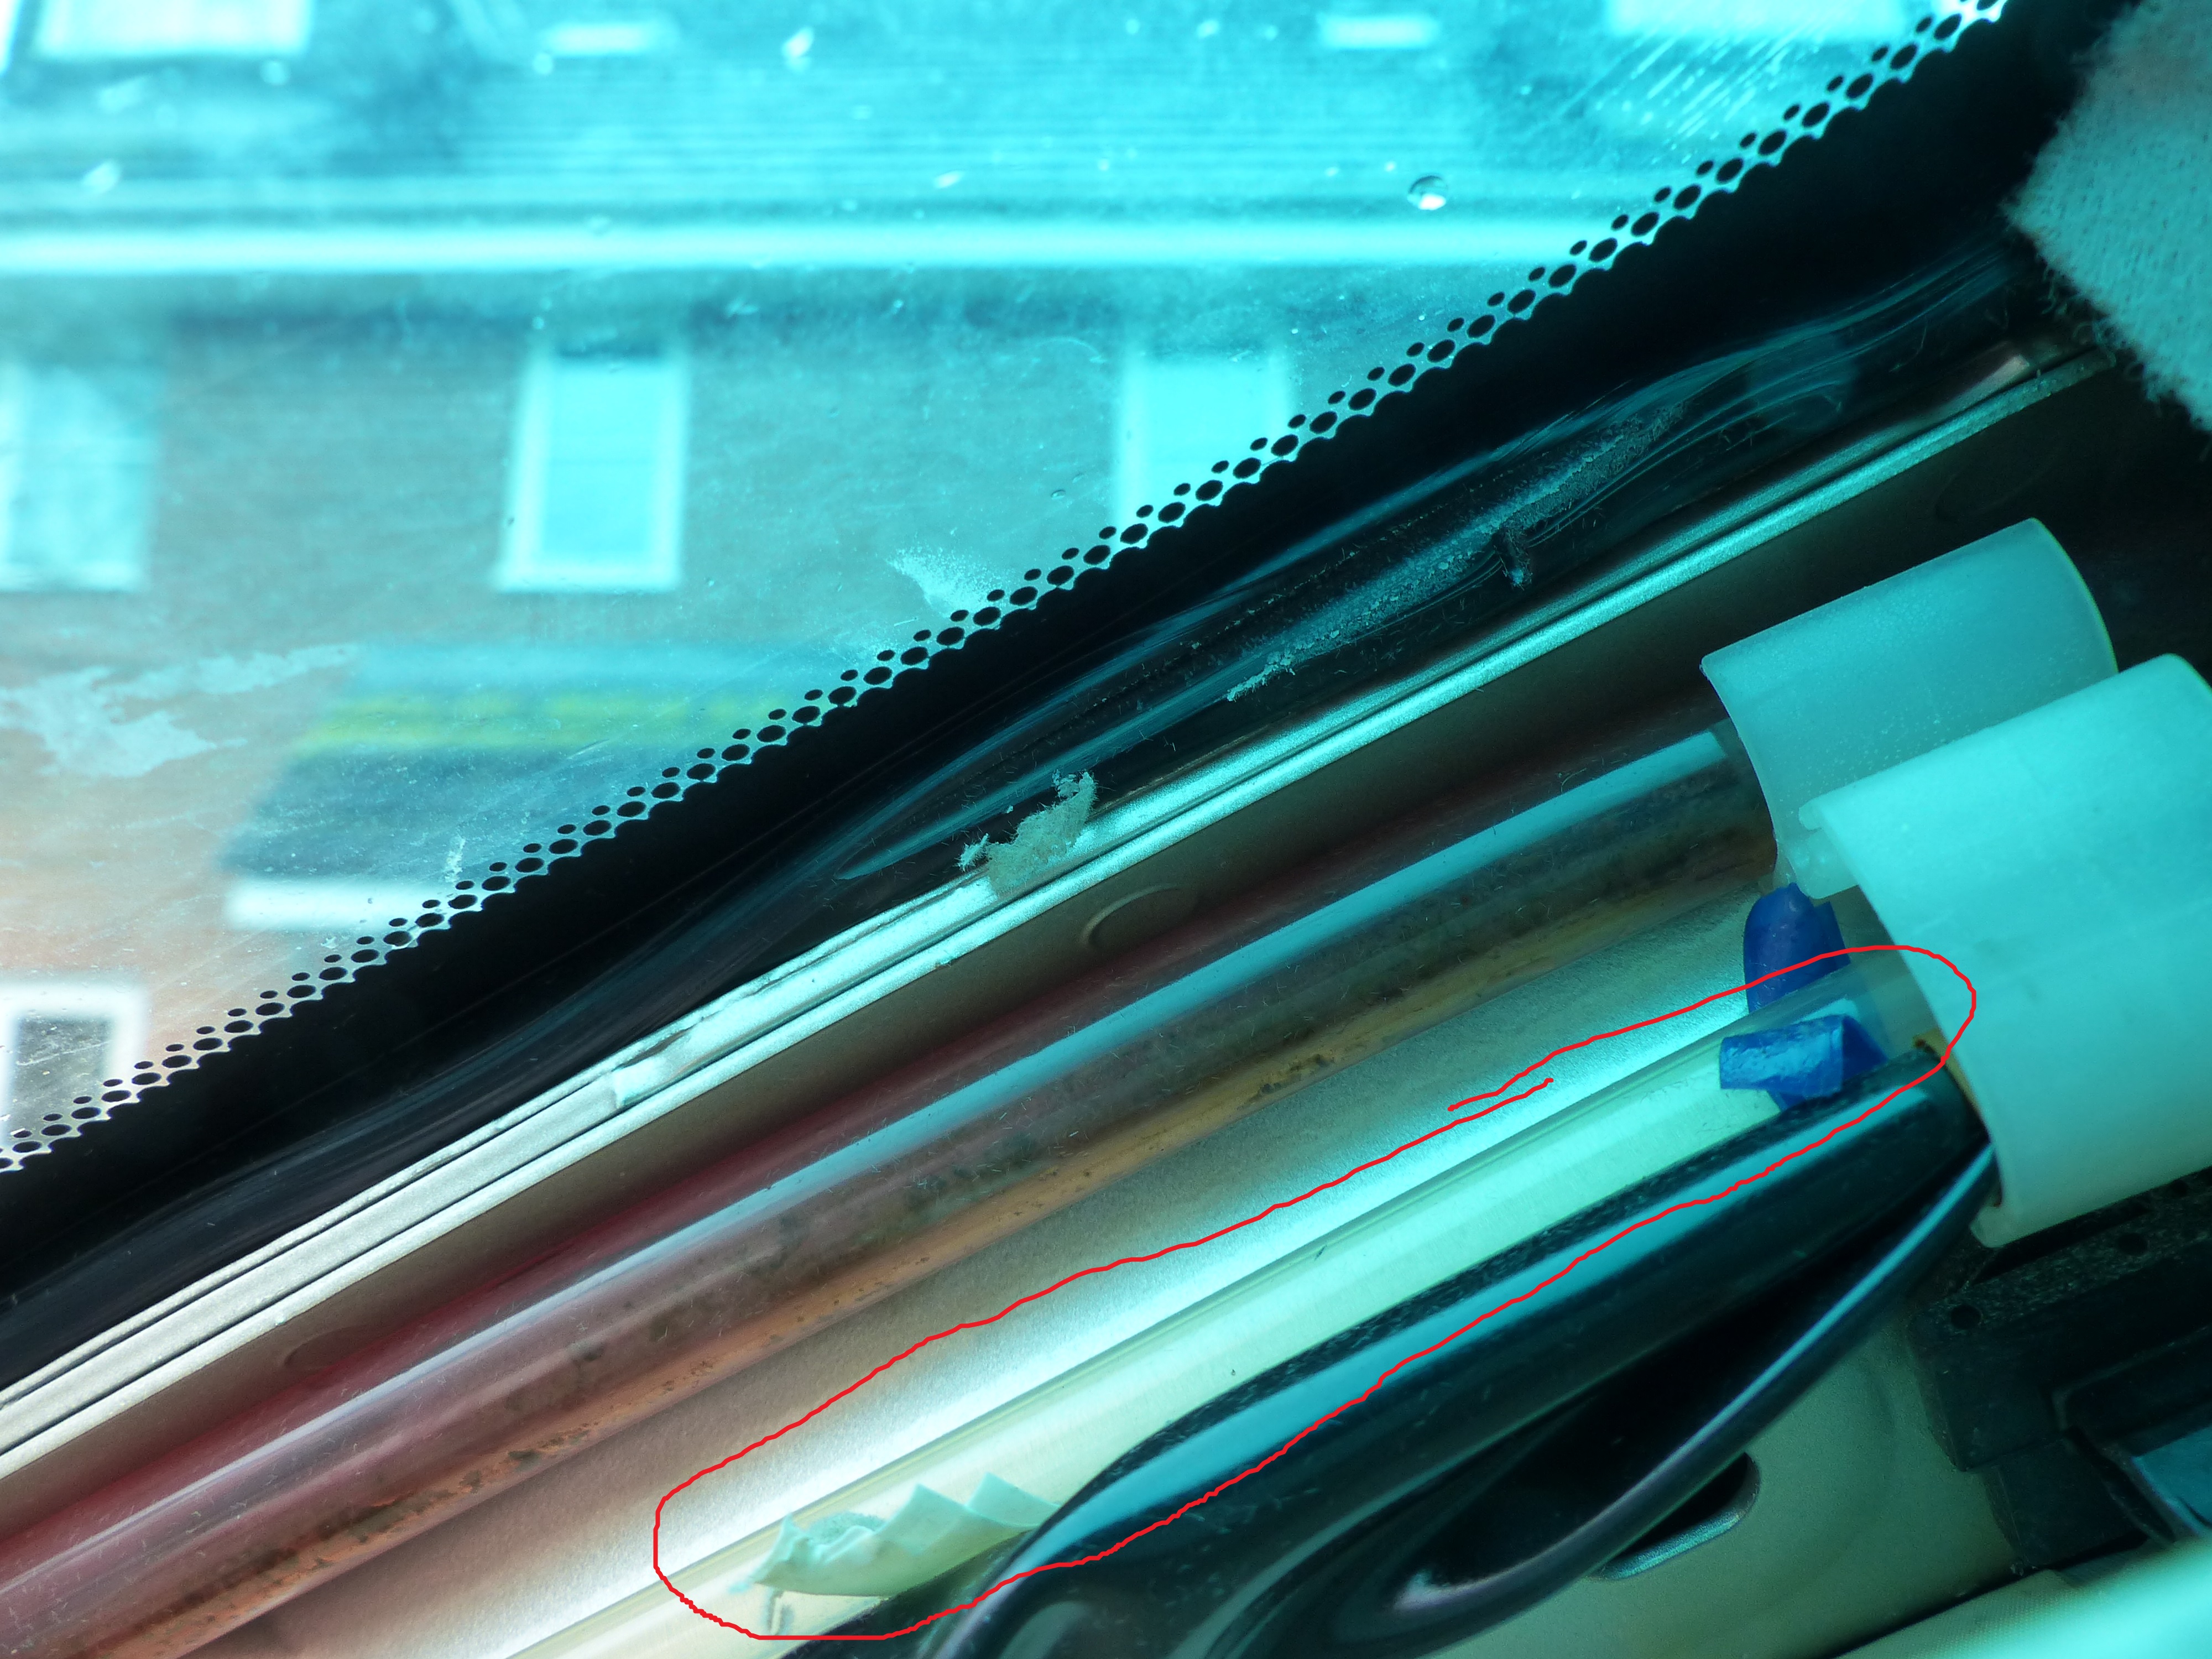
Hi Chesterman Thanks, do you know if the scuttle has specific drain tubes? I can't seem to locate any, it just seems to empty itself out around arches/body in a mildly controlled fashion. Further, after extensive experimenting today I am more inclined to believe it was the rack seals. I pulled a bit of the headliner and it was wet right under the front rack seal area. Thing is the car is parked in an incline so the drivers side was sitting lower than the passenger side if that makes sense. I feel the water may have tracked from the front rack seal down the A-pillar, down side of the dash and dripped where pictured above. Since doing the seals I have had the garden hose on every extremity possible, paying major attention to the windscreen seal areas, front scuttle (filled it up so much it was like a swimming pool) front door seals, front wing, sunroof, newly done rack seals etc etc and not a drop inside now. Really hoping it was the seals - as whole lotta work getting this car & carpet spick and span that I don't wanna put the carpet back in with a known leak and be back to square one again!
-
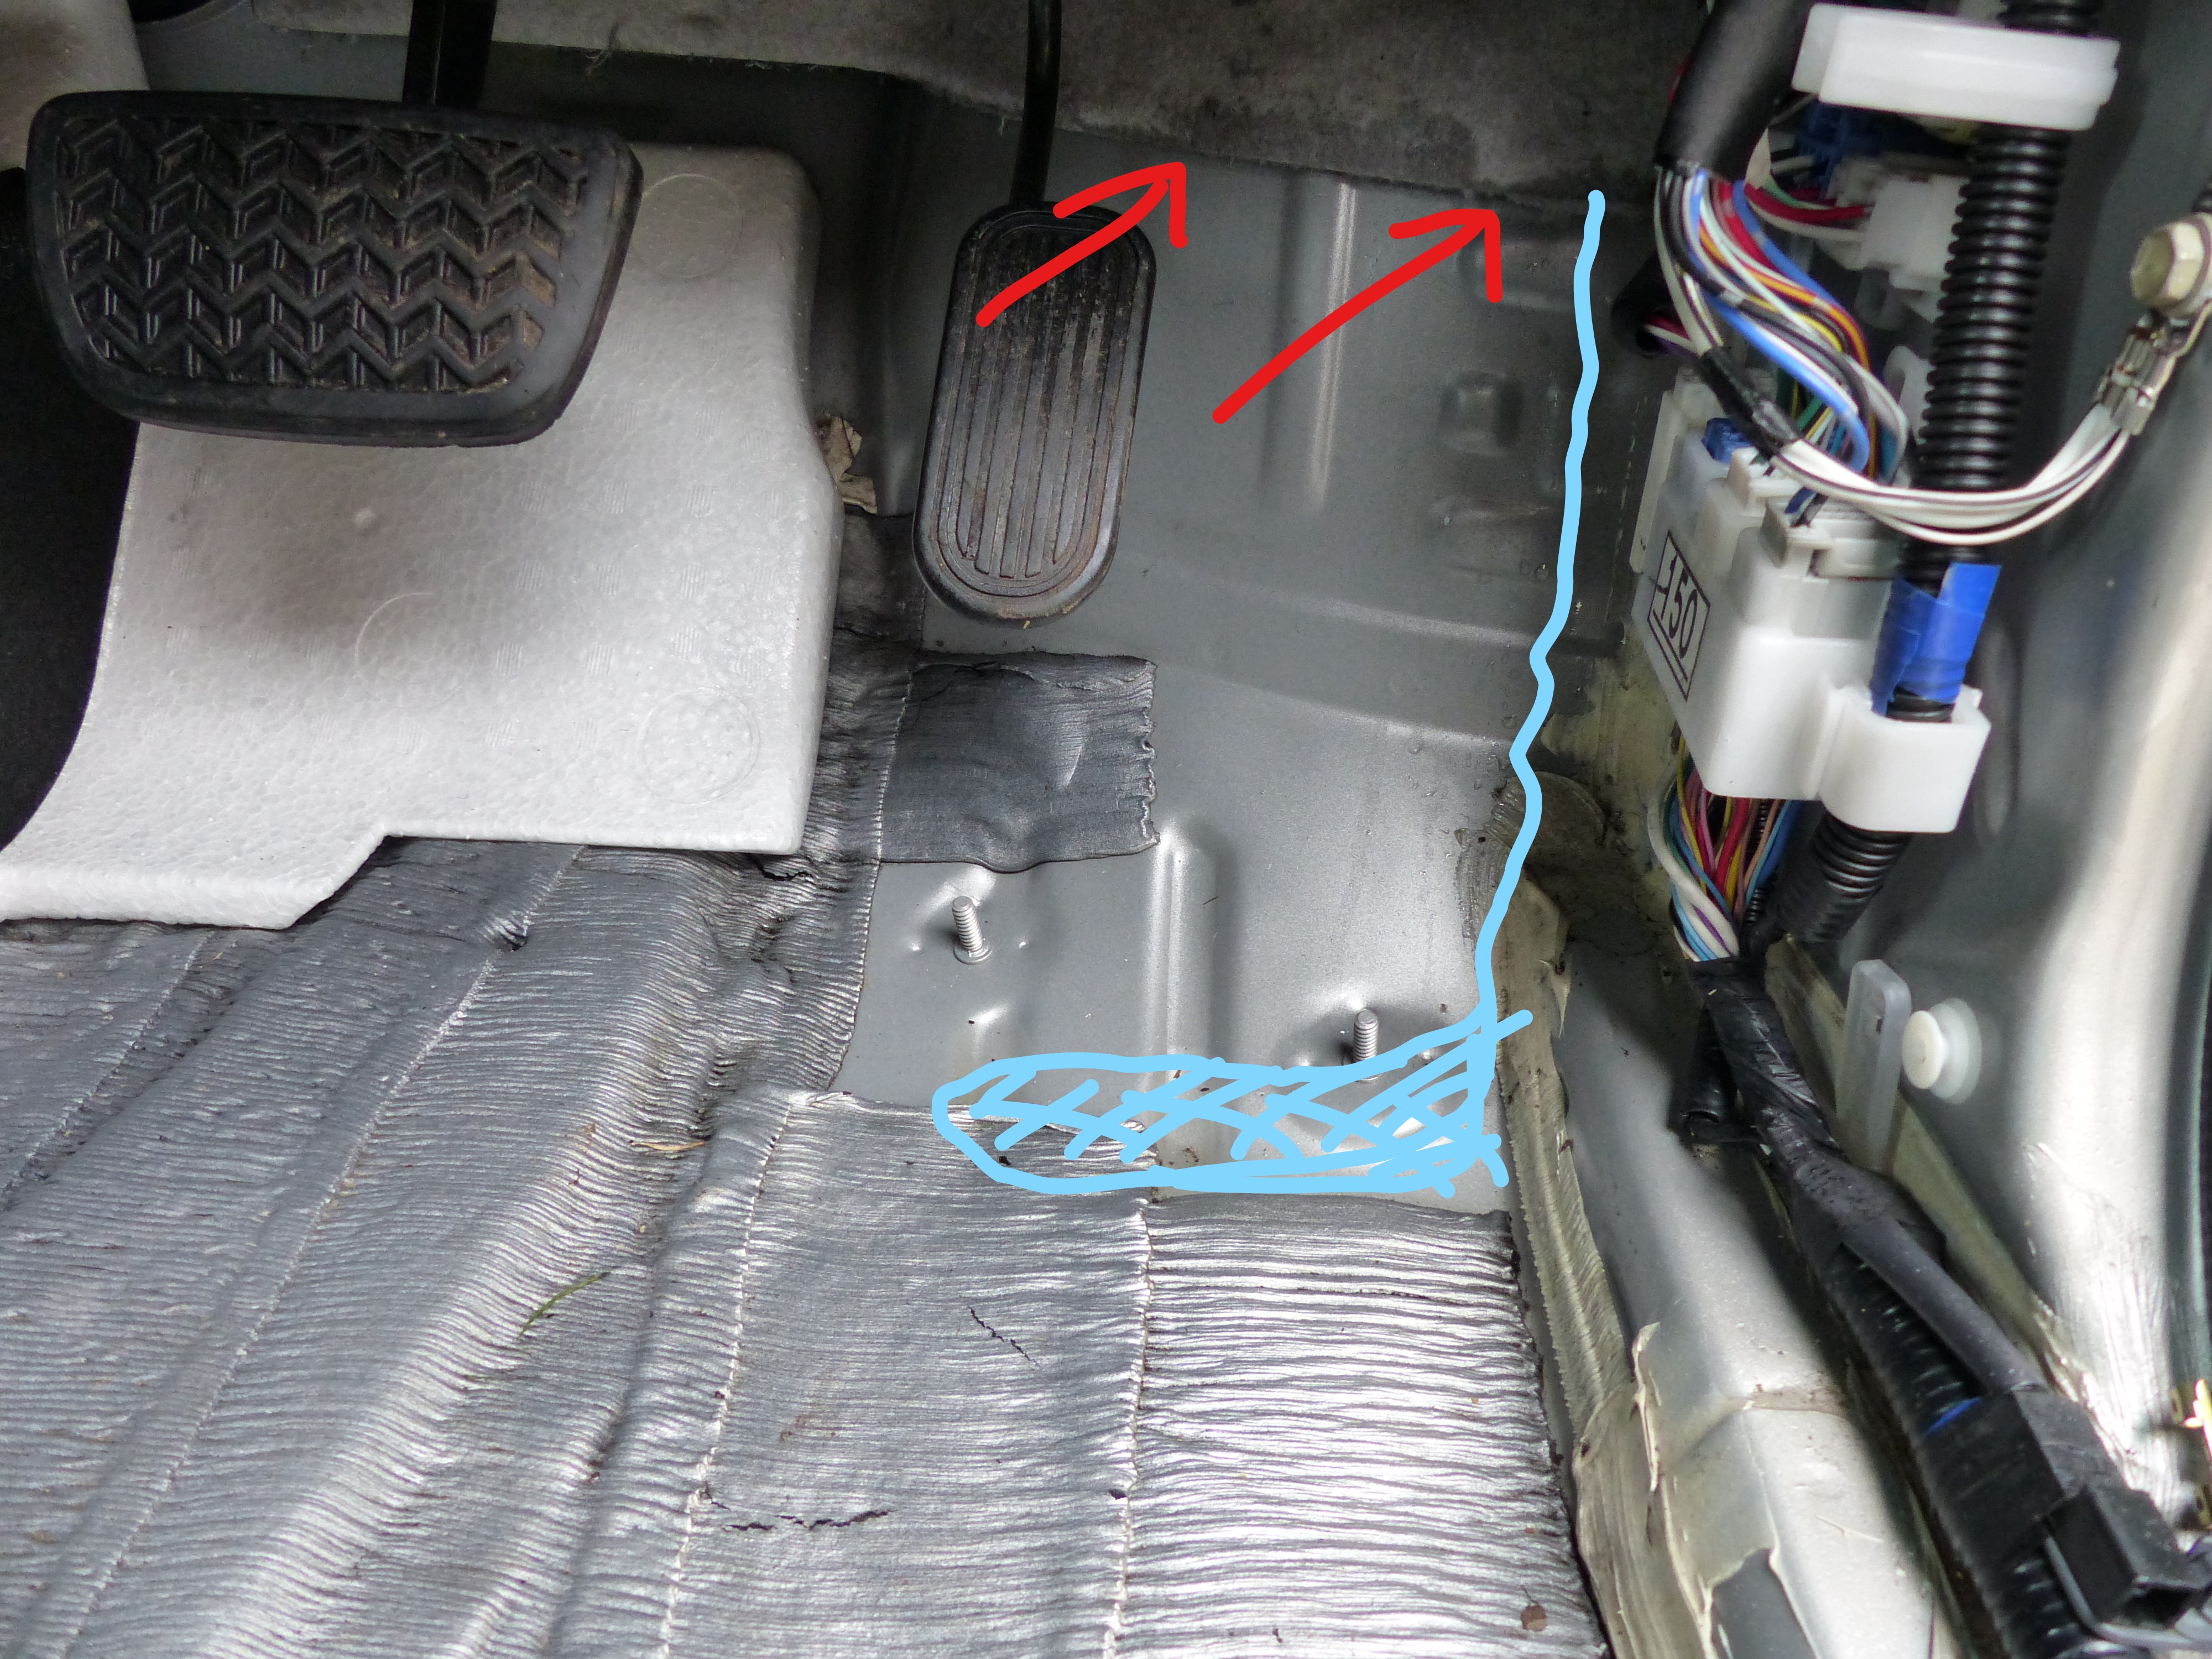
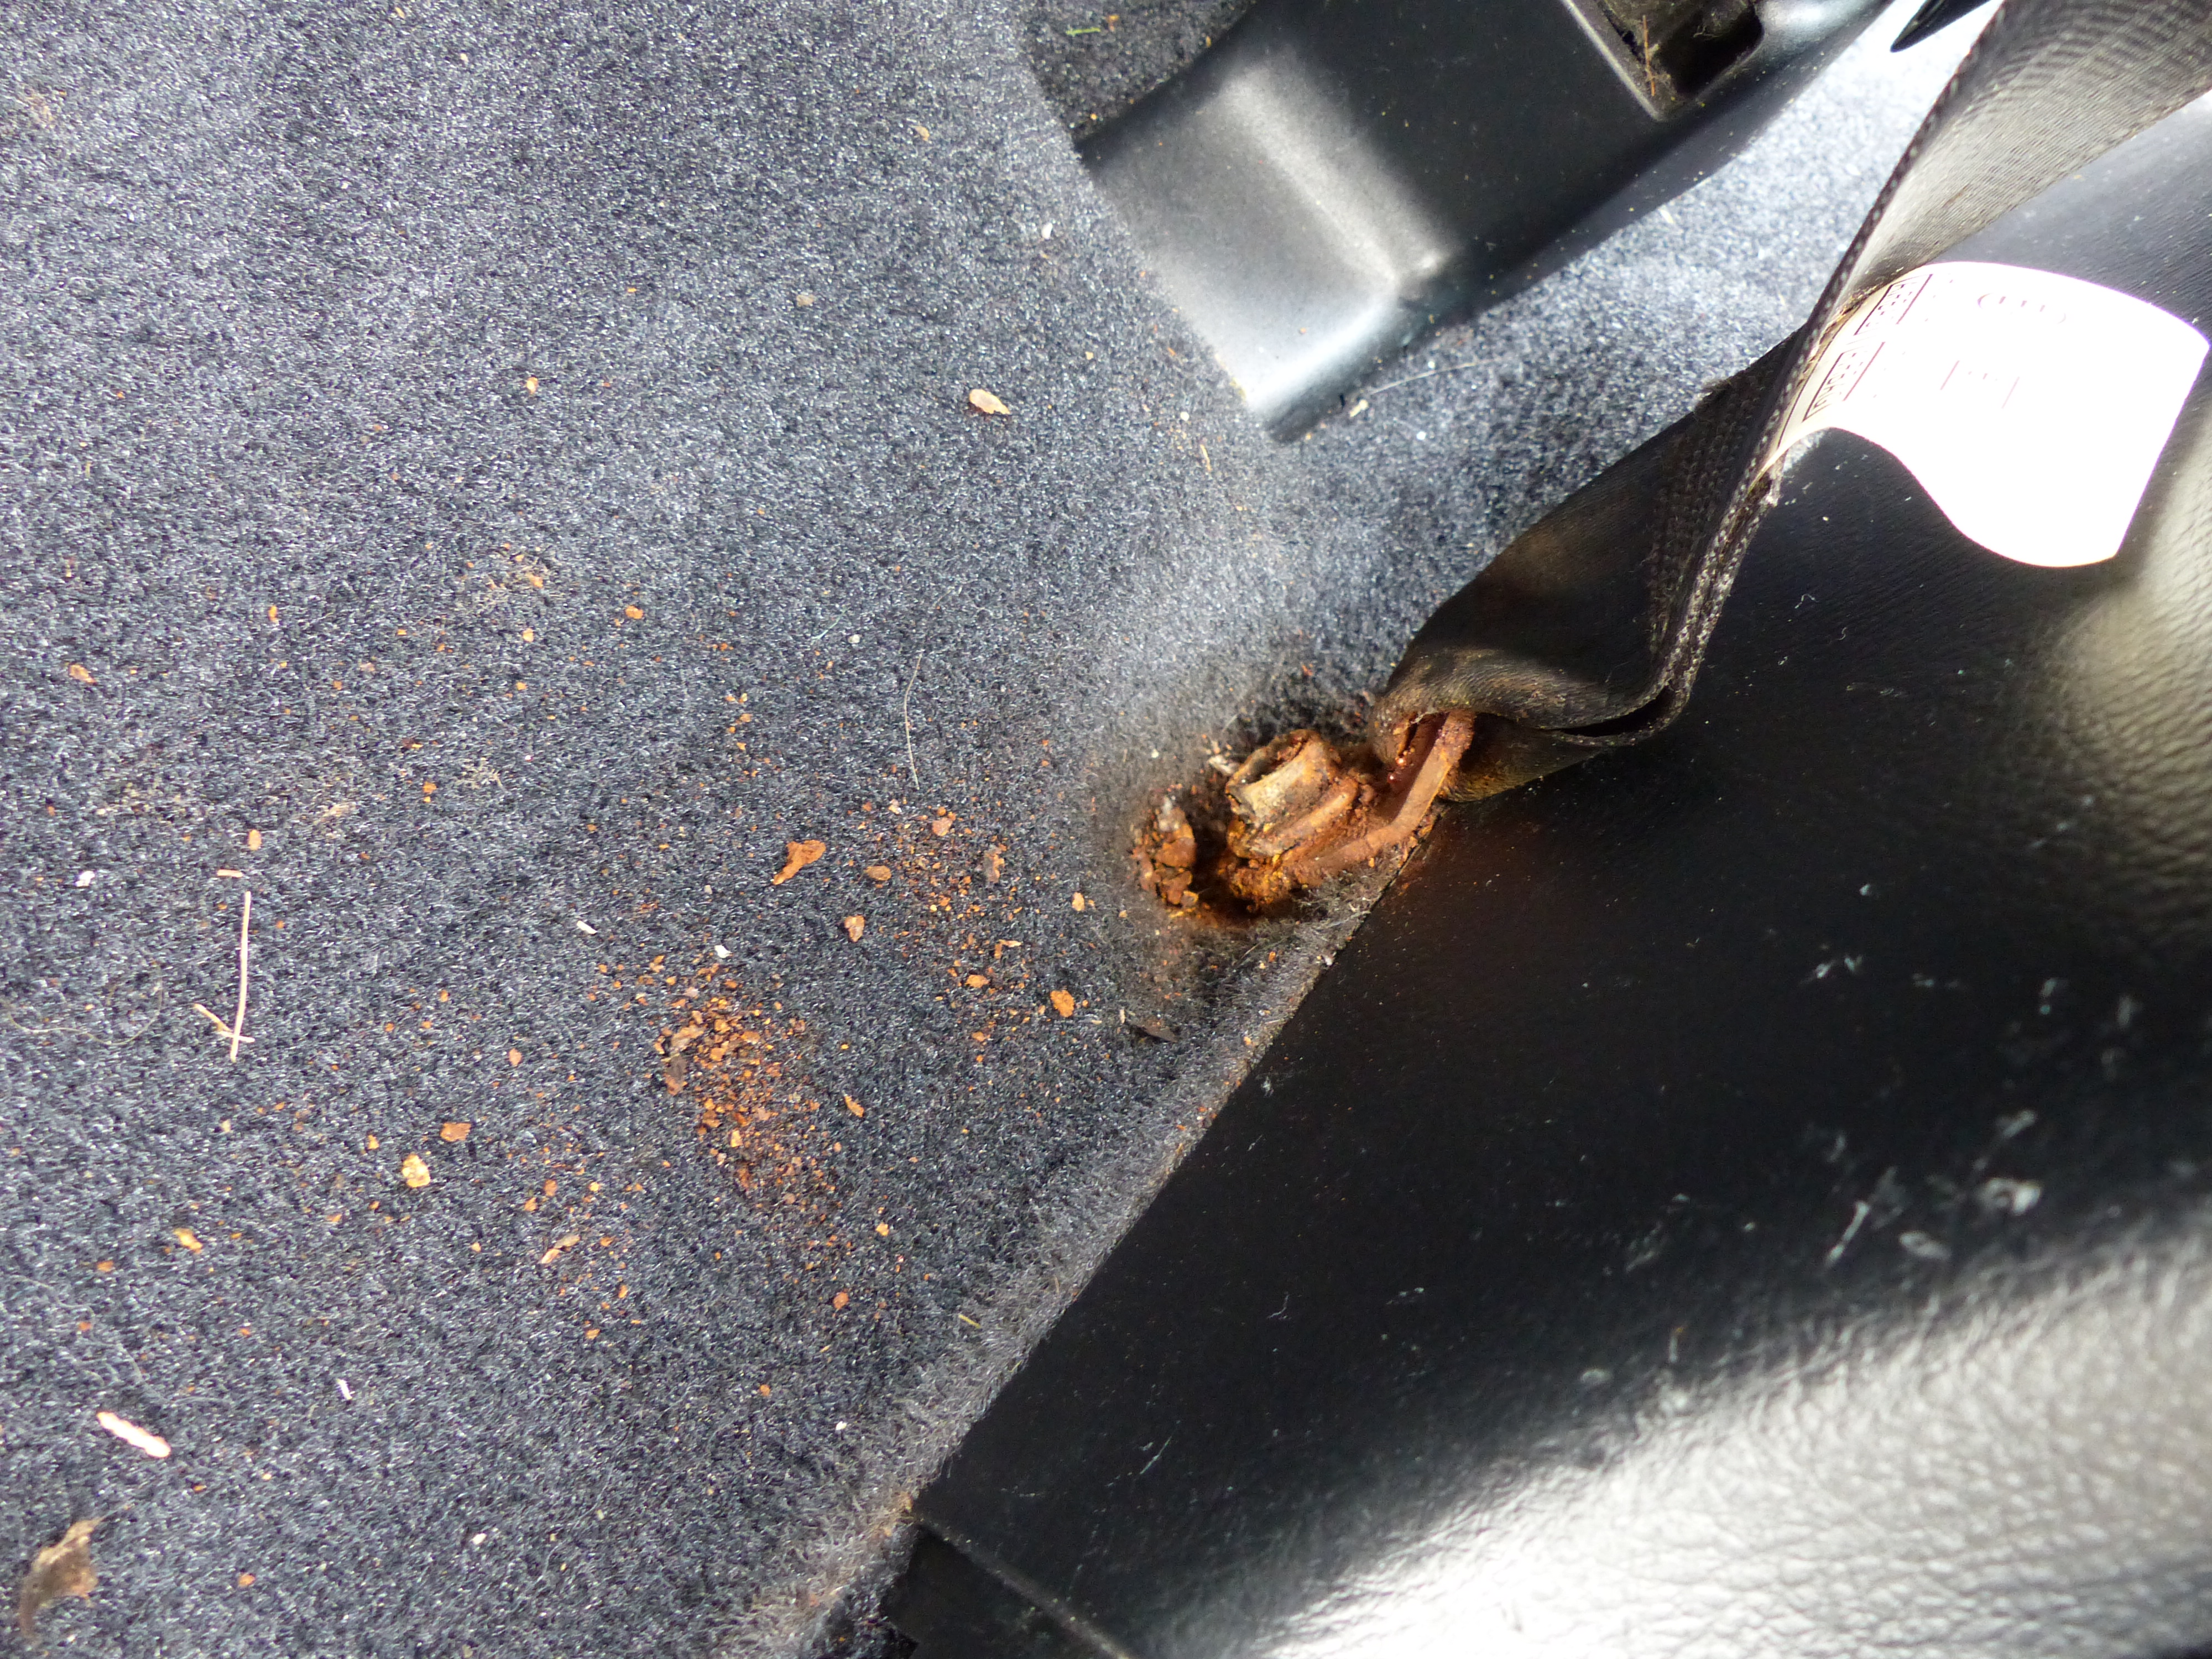
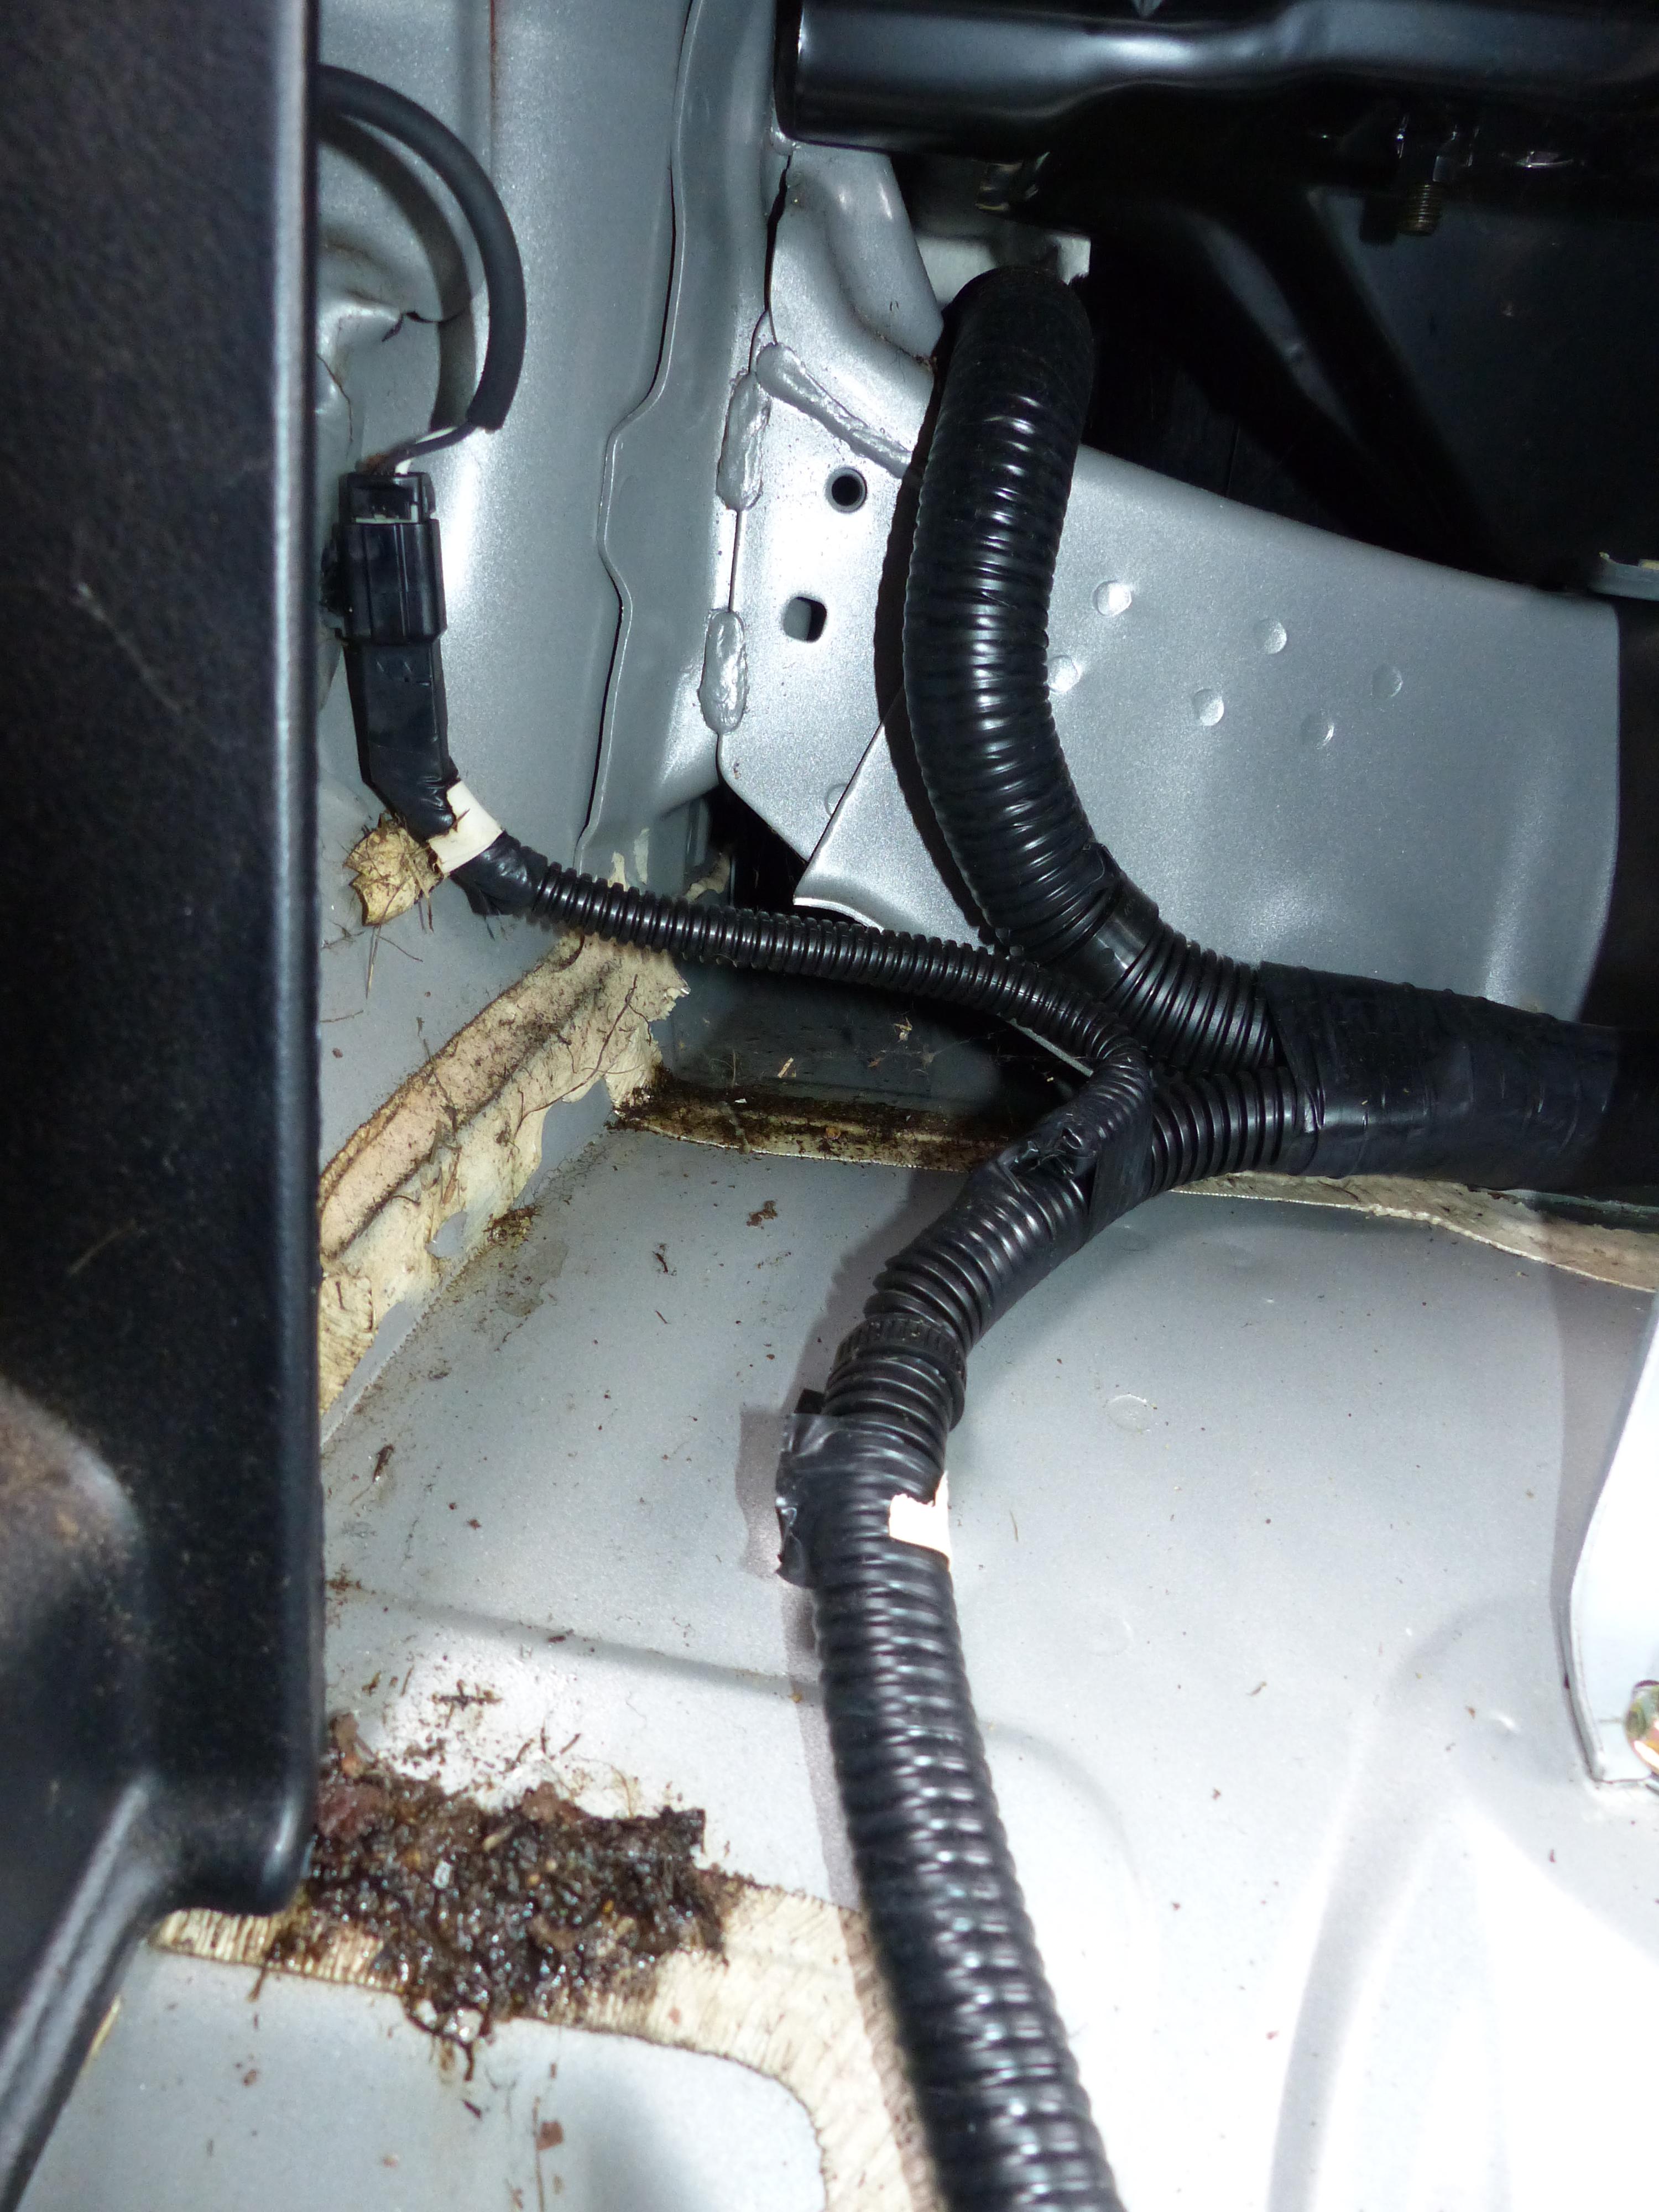
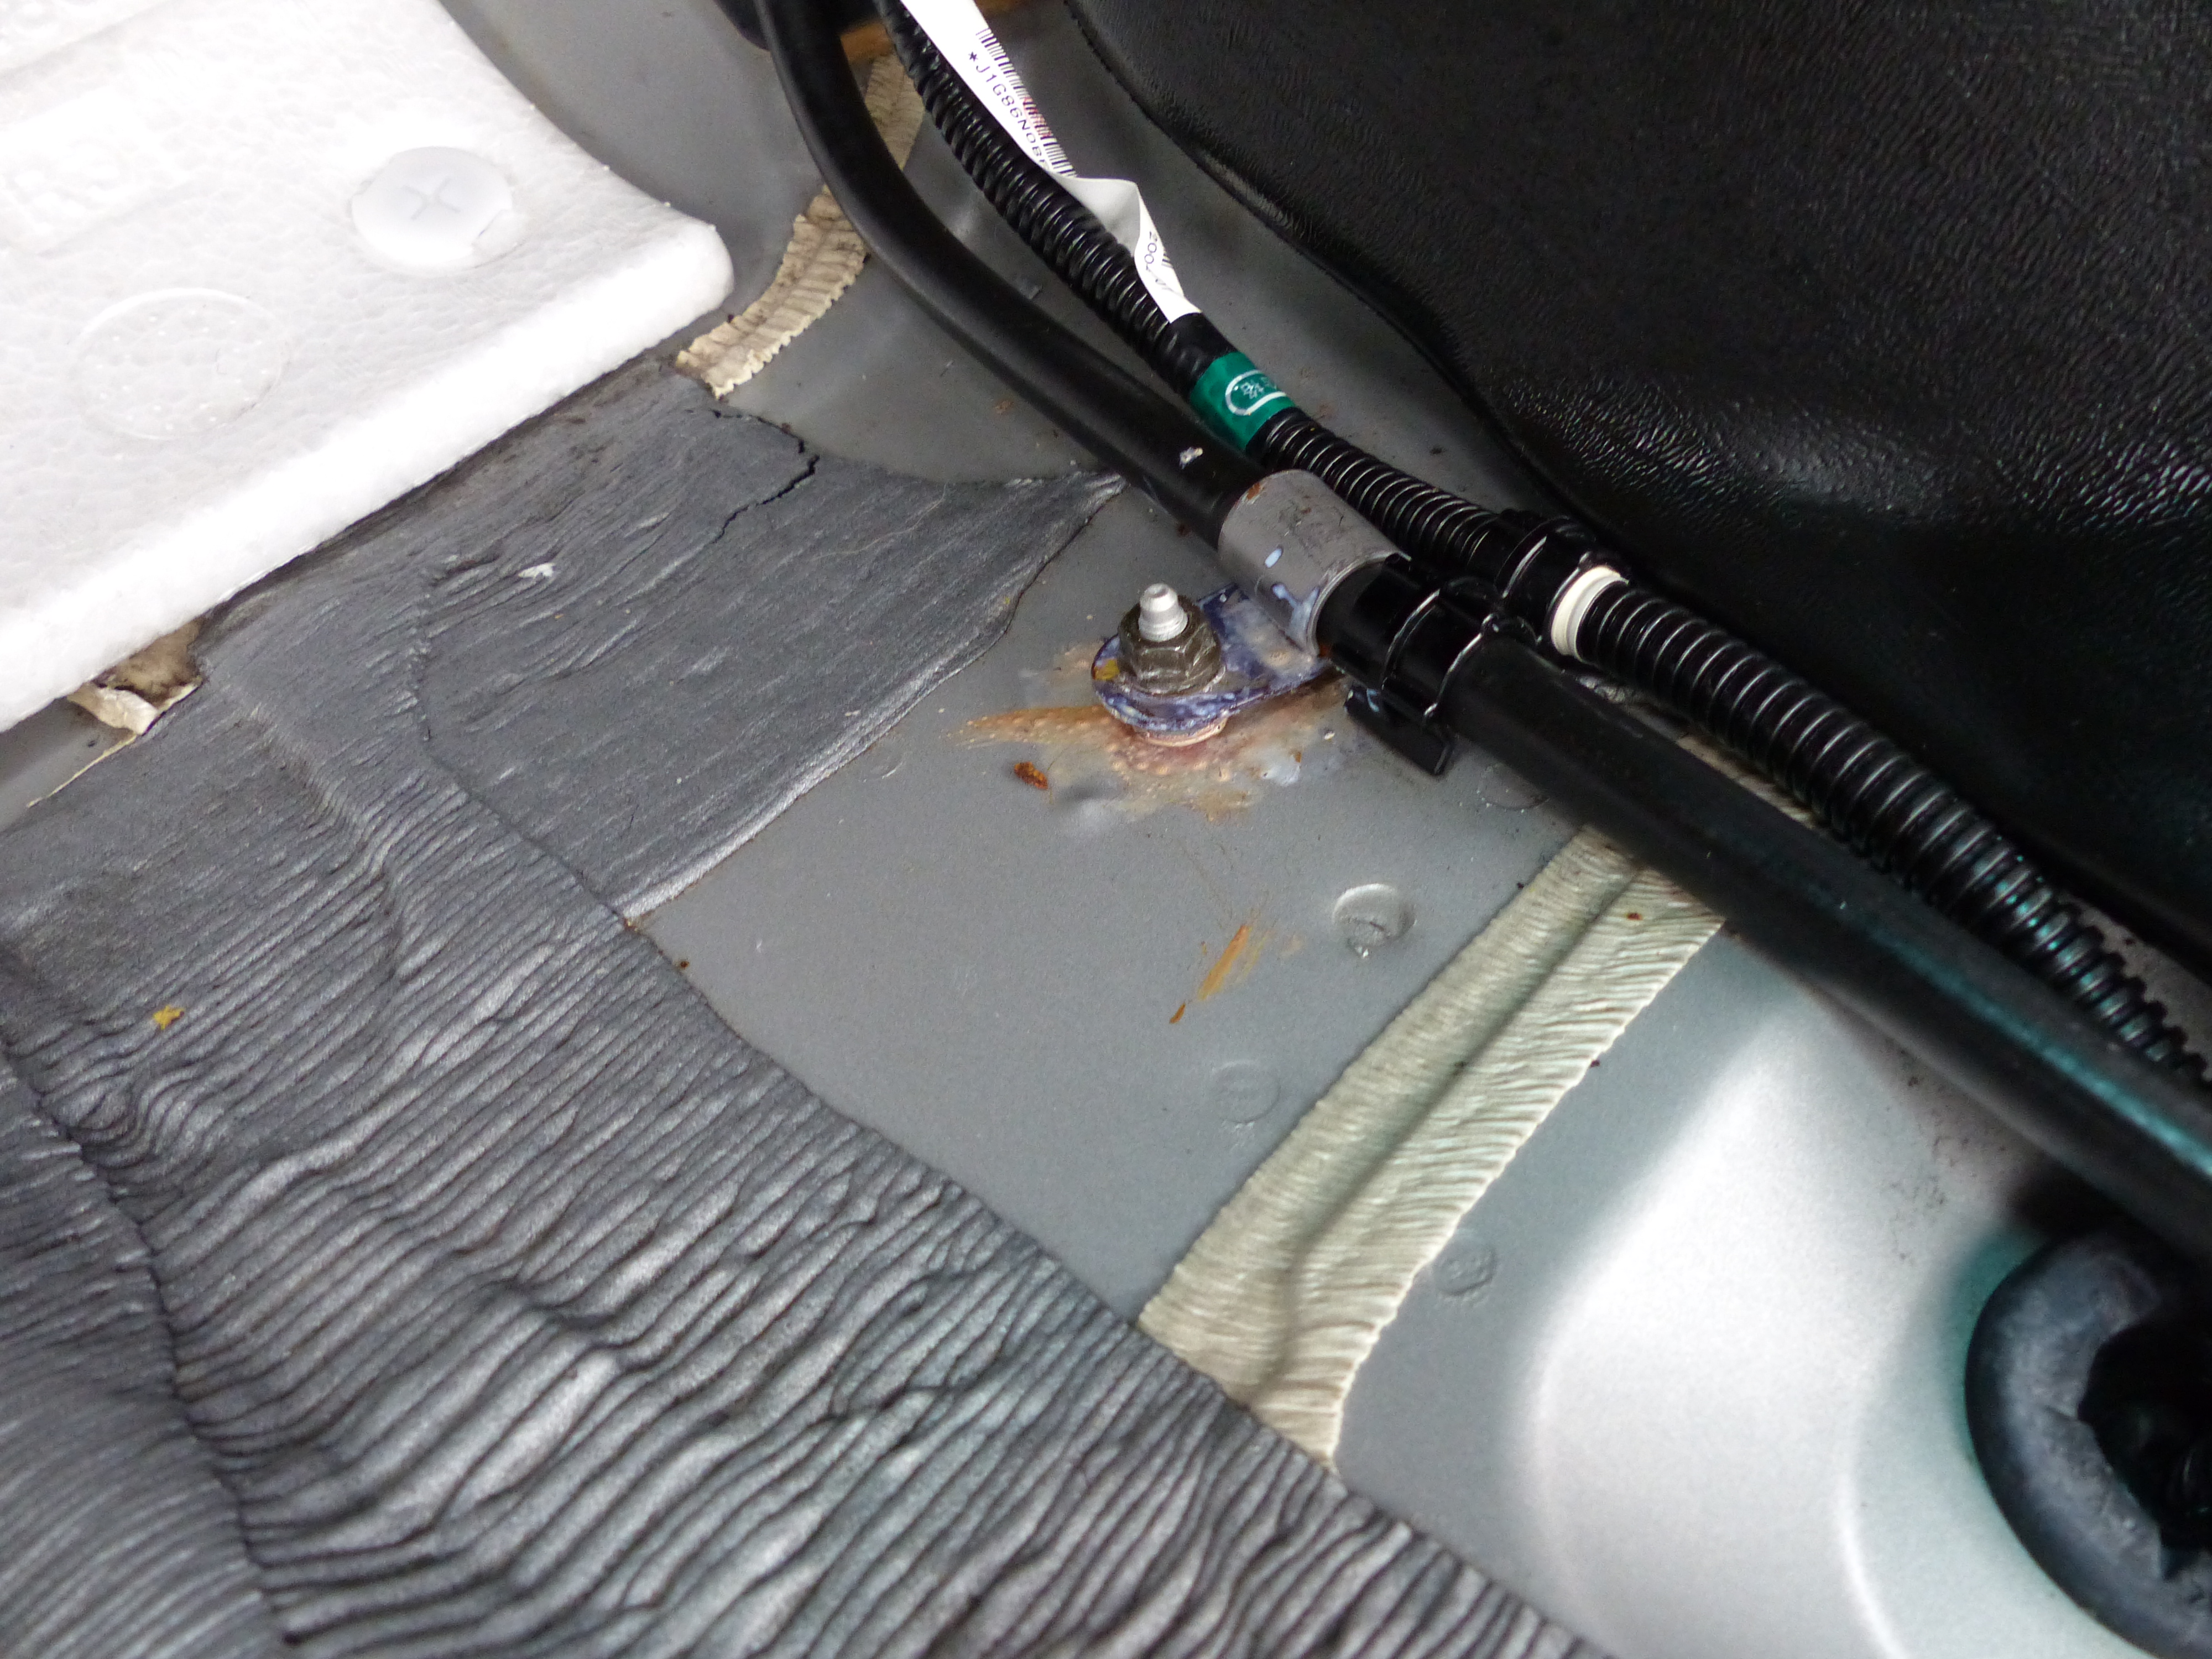
Okay, so was ready to get the carpet in today, checked the car this morn after heavy rain and can see pool of water on RH drivers footwell! Omg. Seems to be coming from up behind above the pedals but cannot see where. Attached a pic. Blue is where water is tracking down and pooling. Red is traces of water you can see. Any ideas?? I've poured water all over the shop and cannot seem to replicate it, it's worth noting I have just replaced the Roof rack seals (after seeing the water this morning) a couple were leaking, could that have caused it? Seems a long way off for water to track.
-
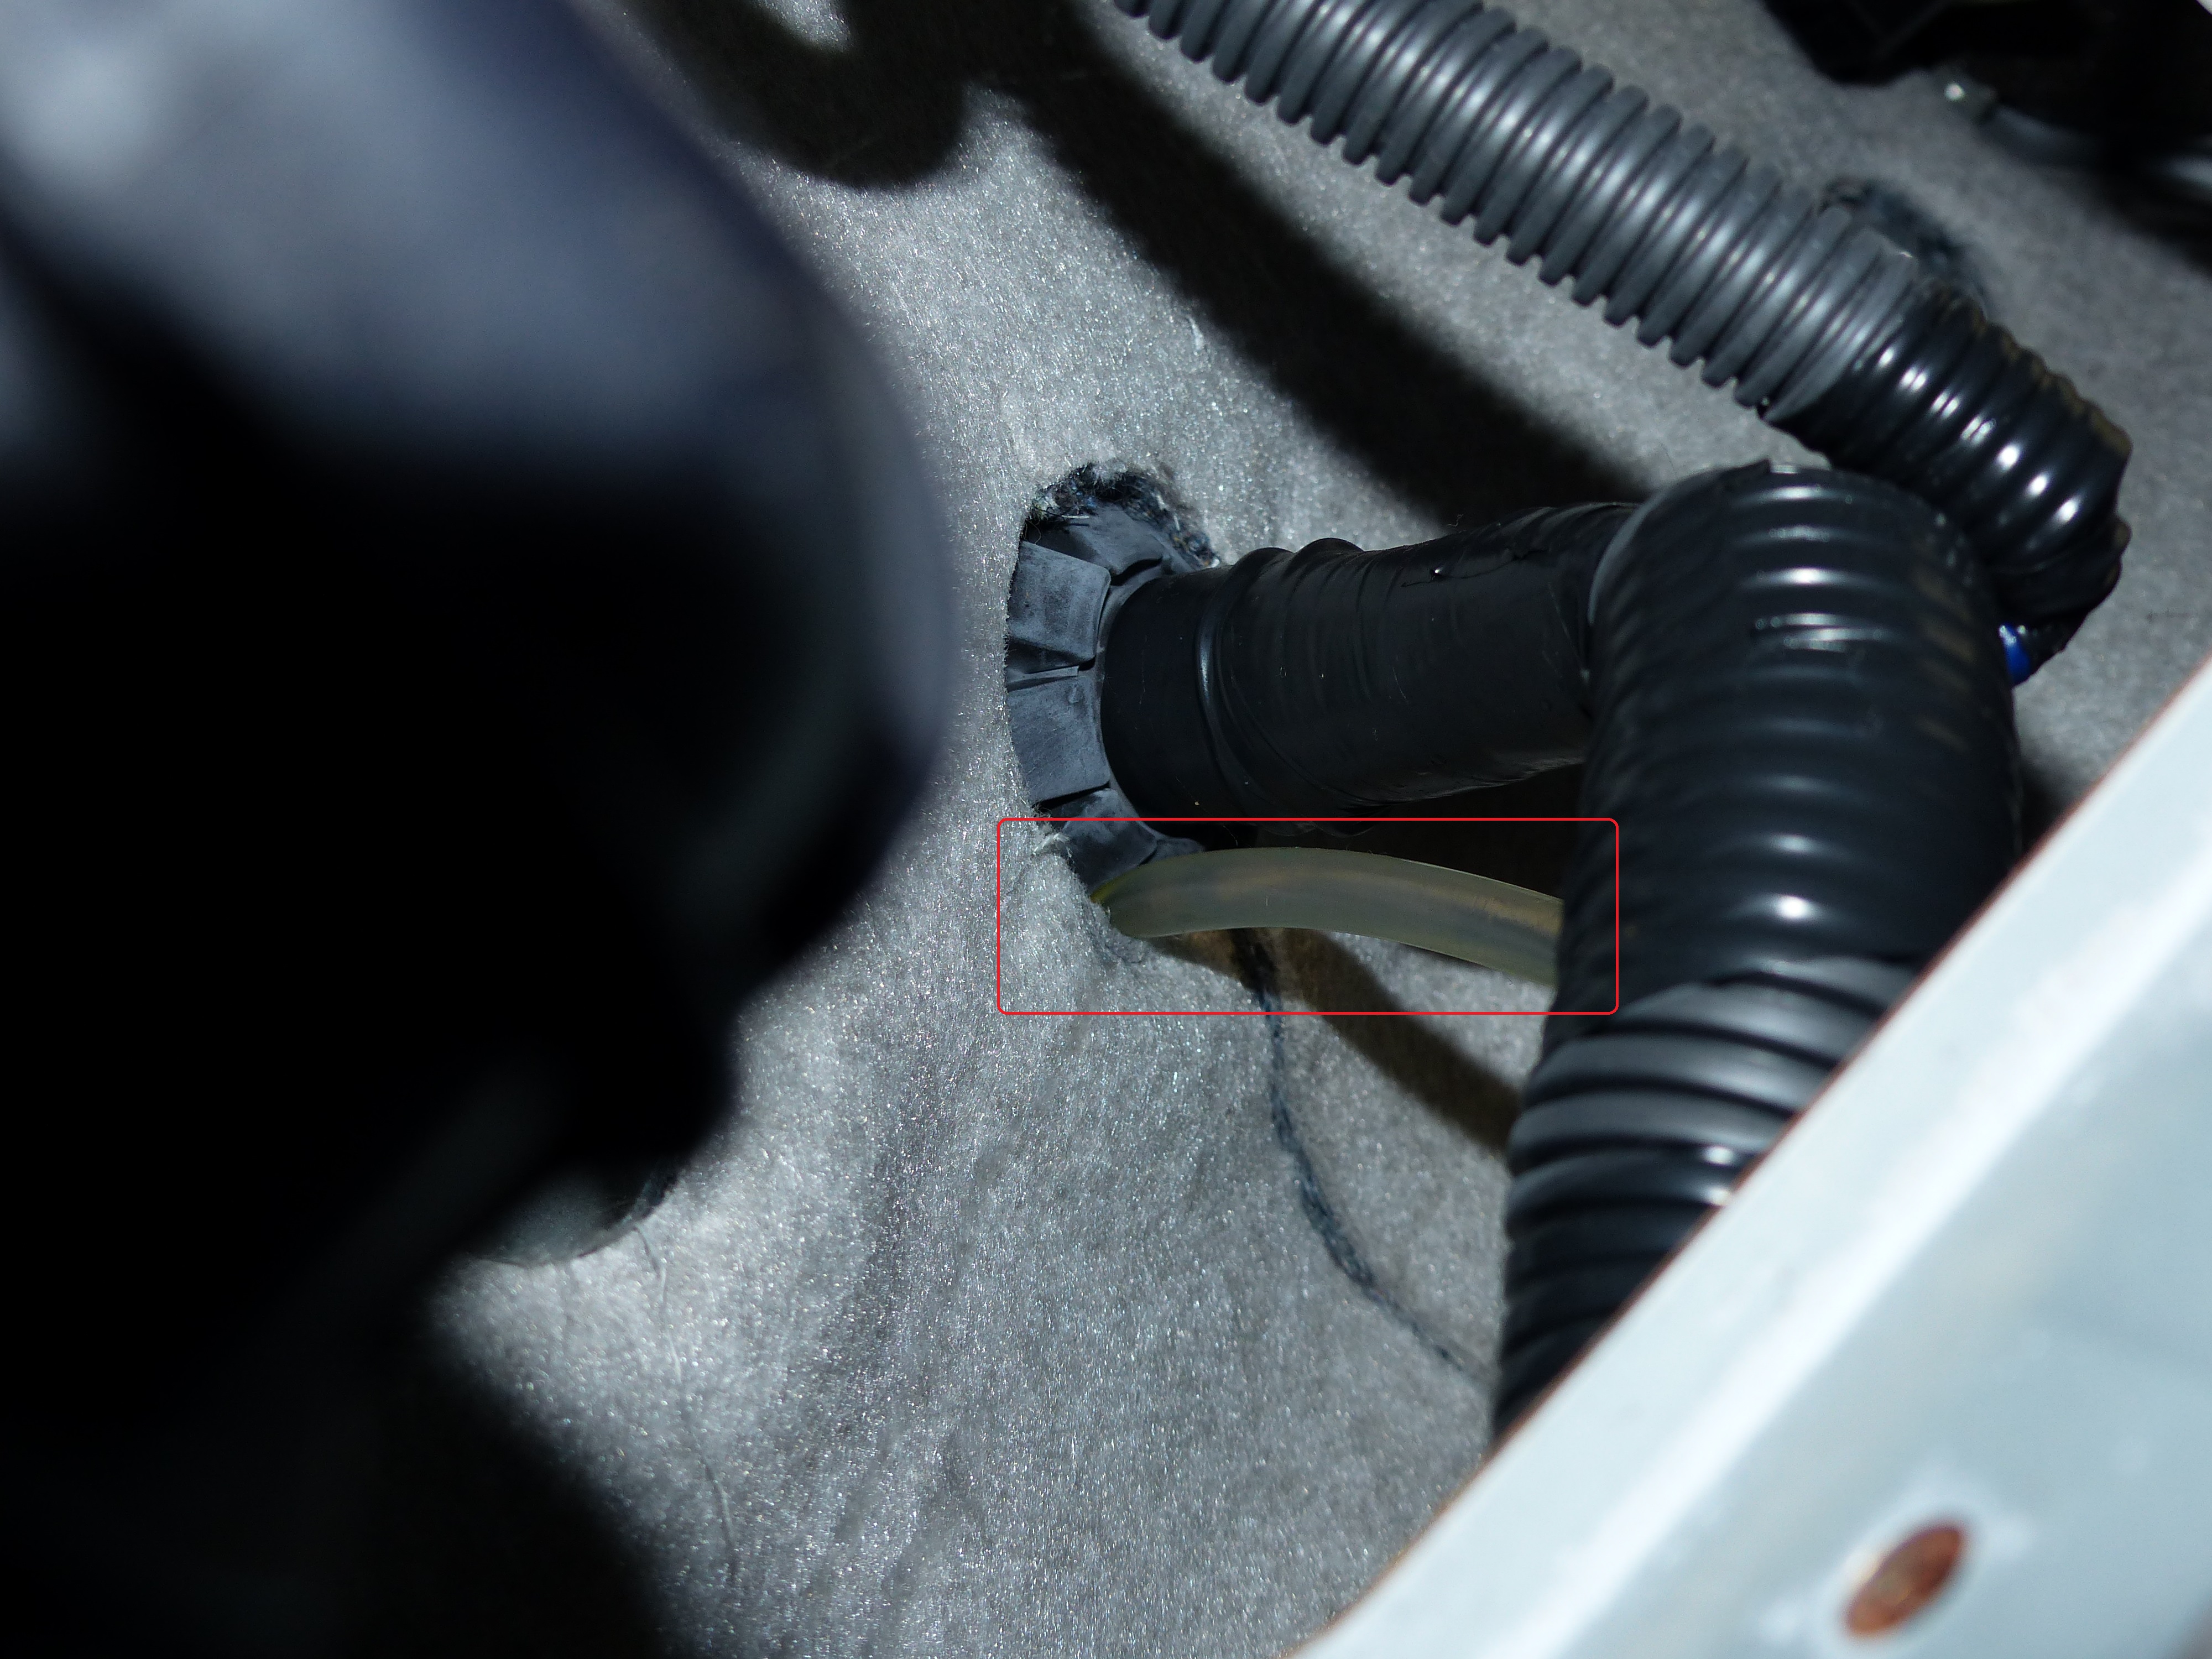
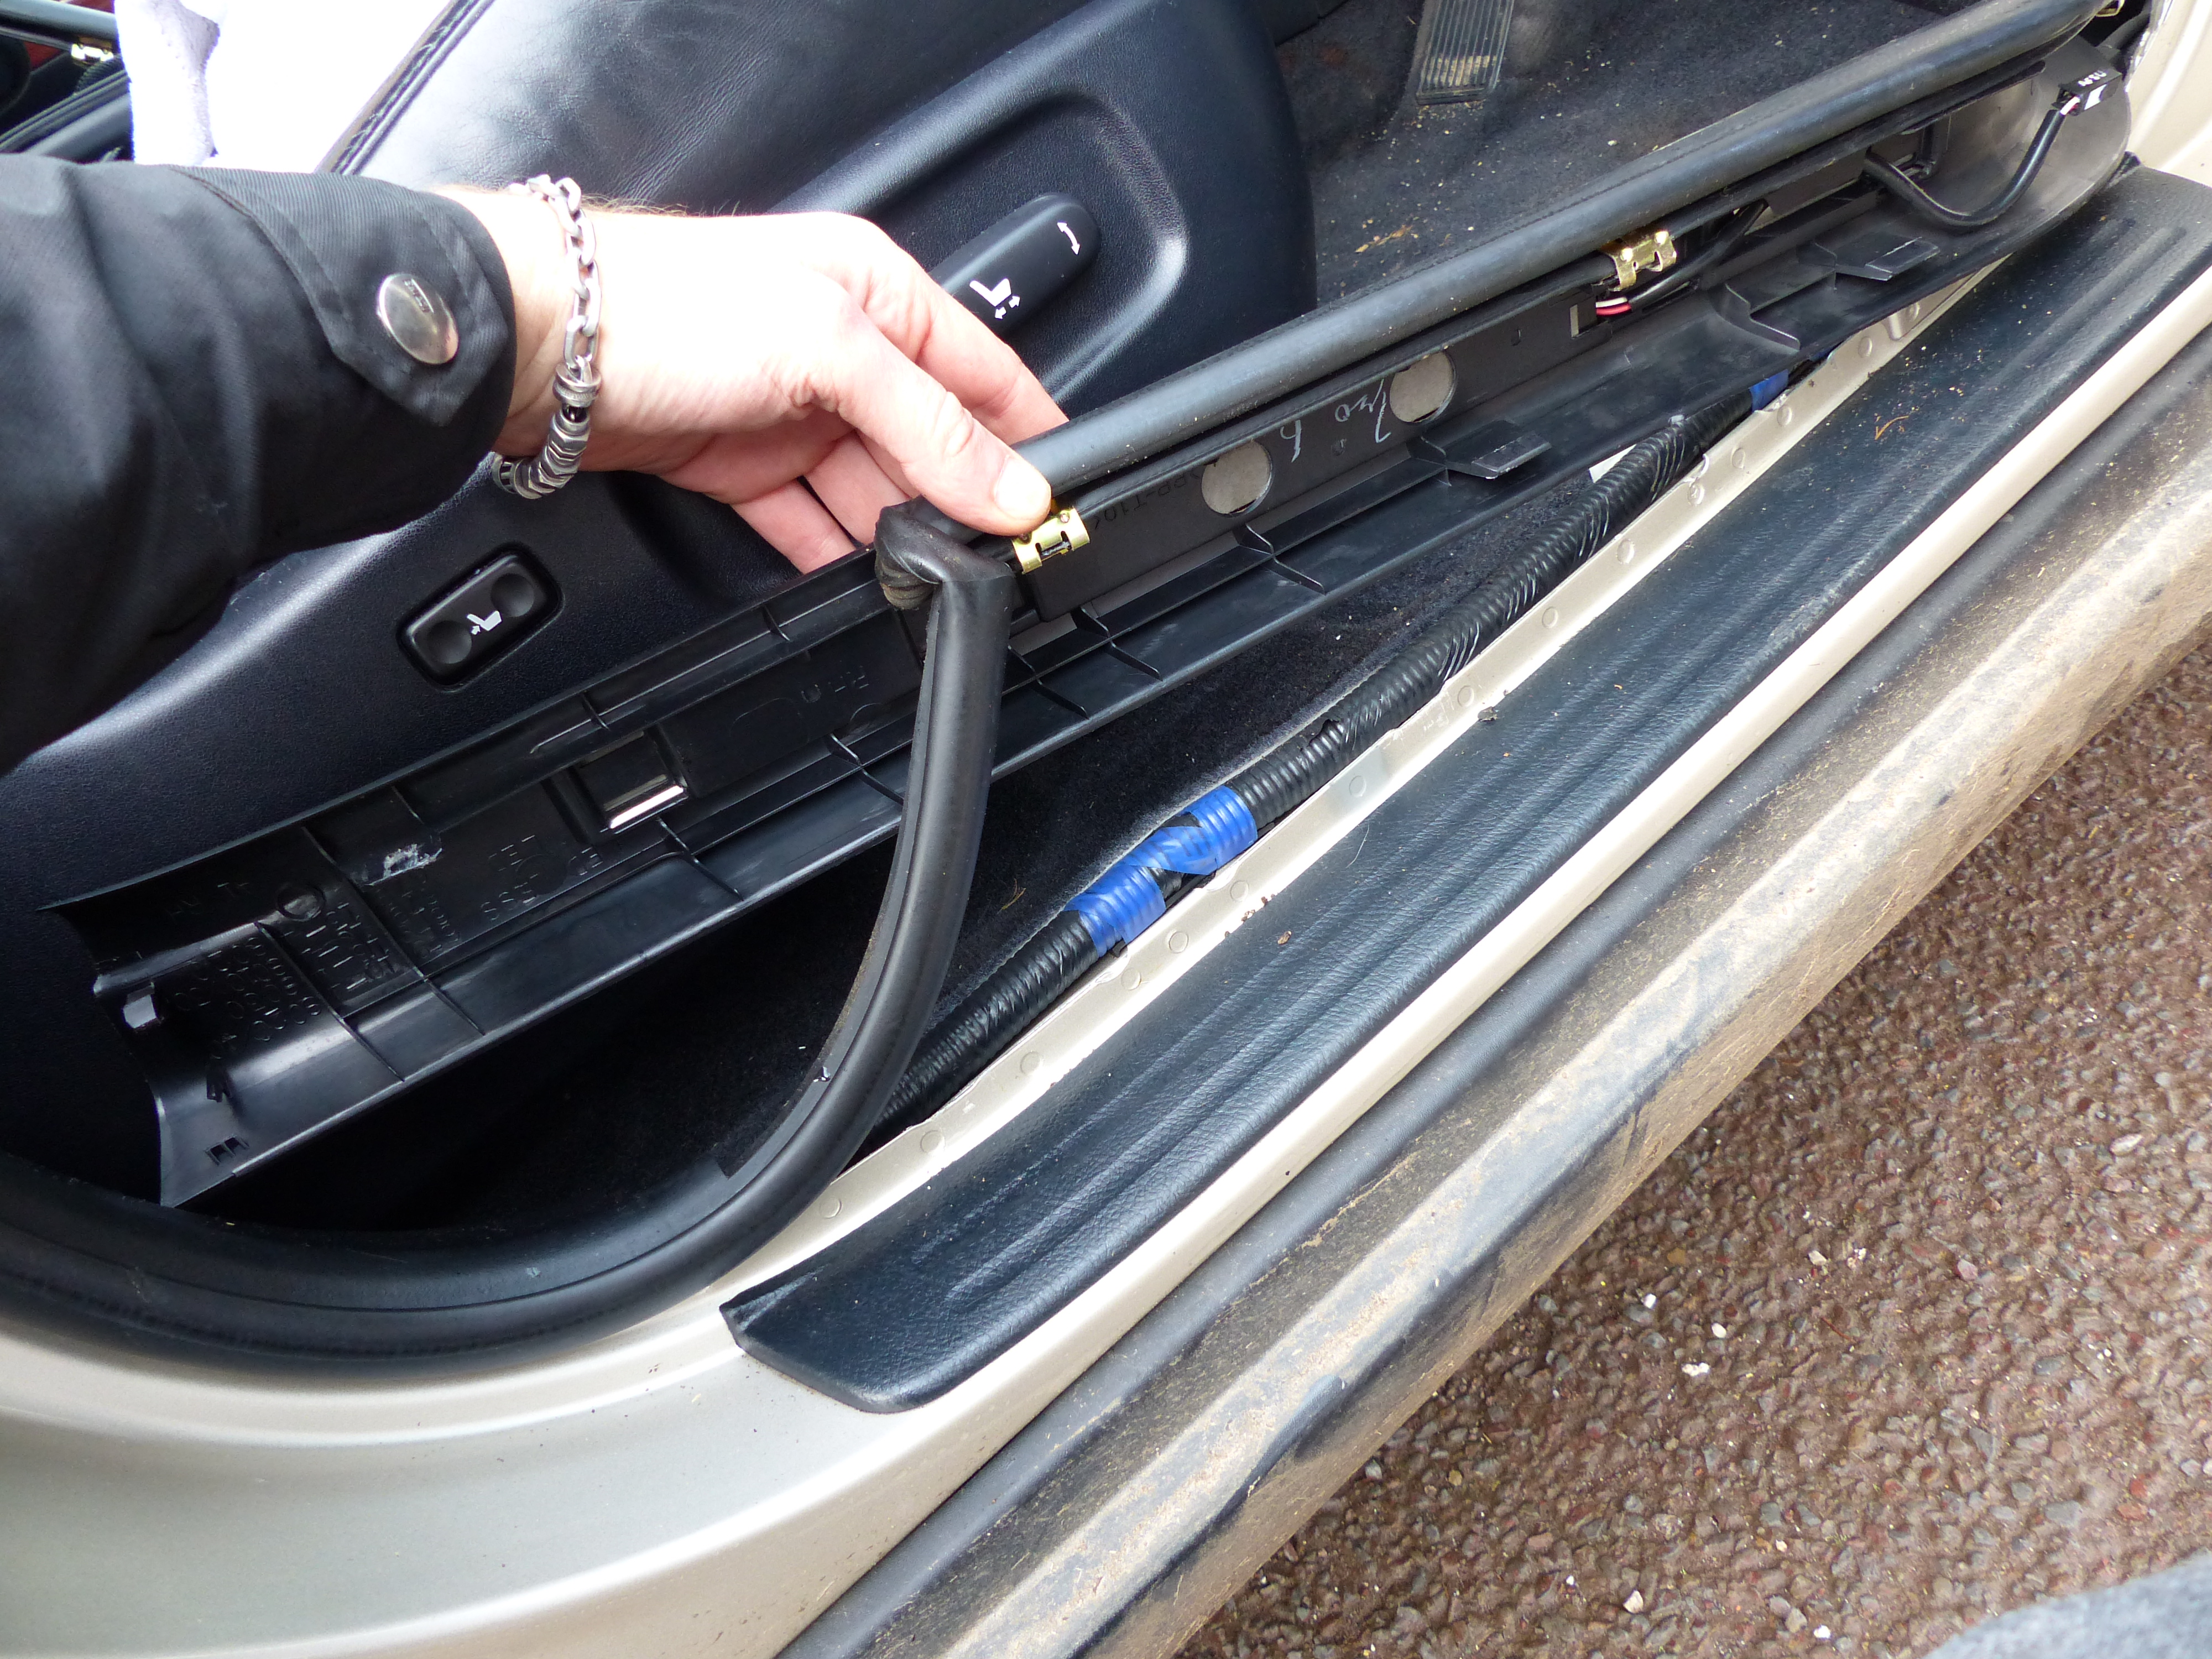
Confirmed, when using rear washer you can see bubbles flowing through this tube Thanks very much, one down in the process of elimination.
-
great stuff, you might be right!!
-
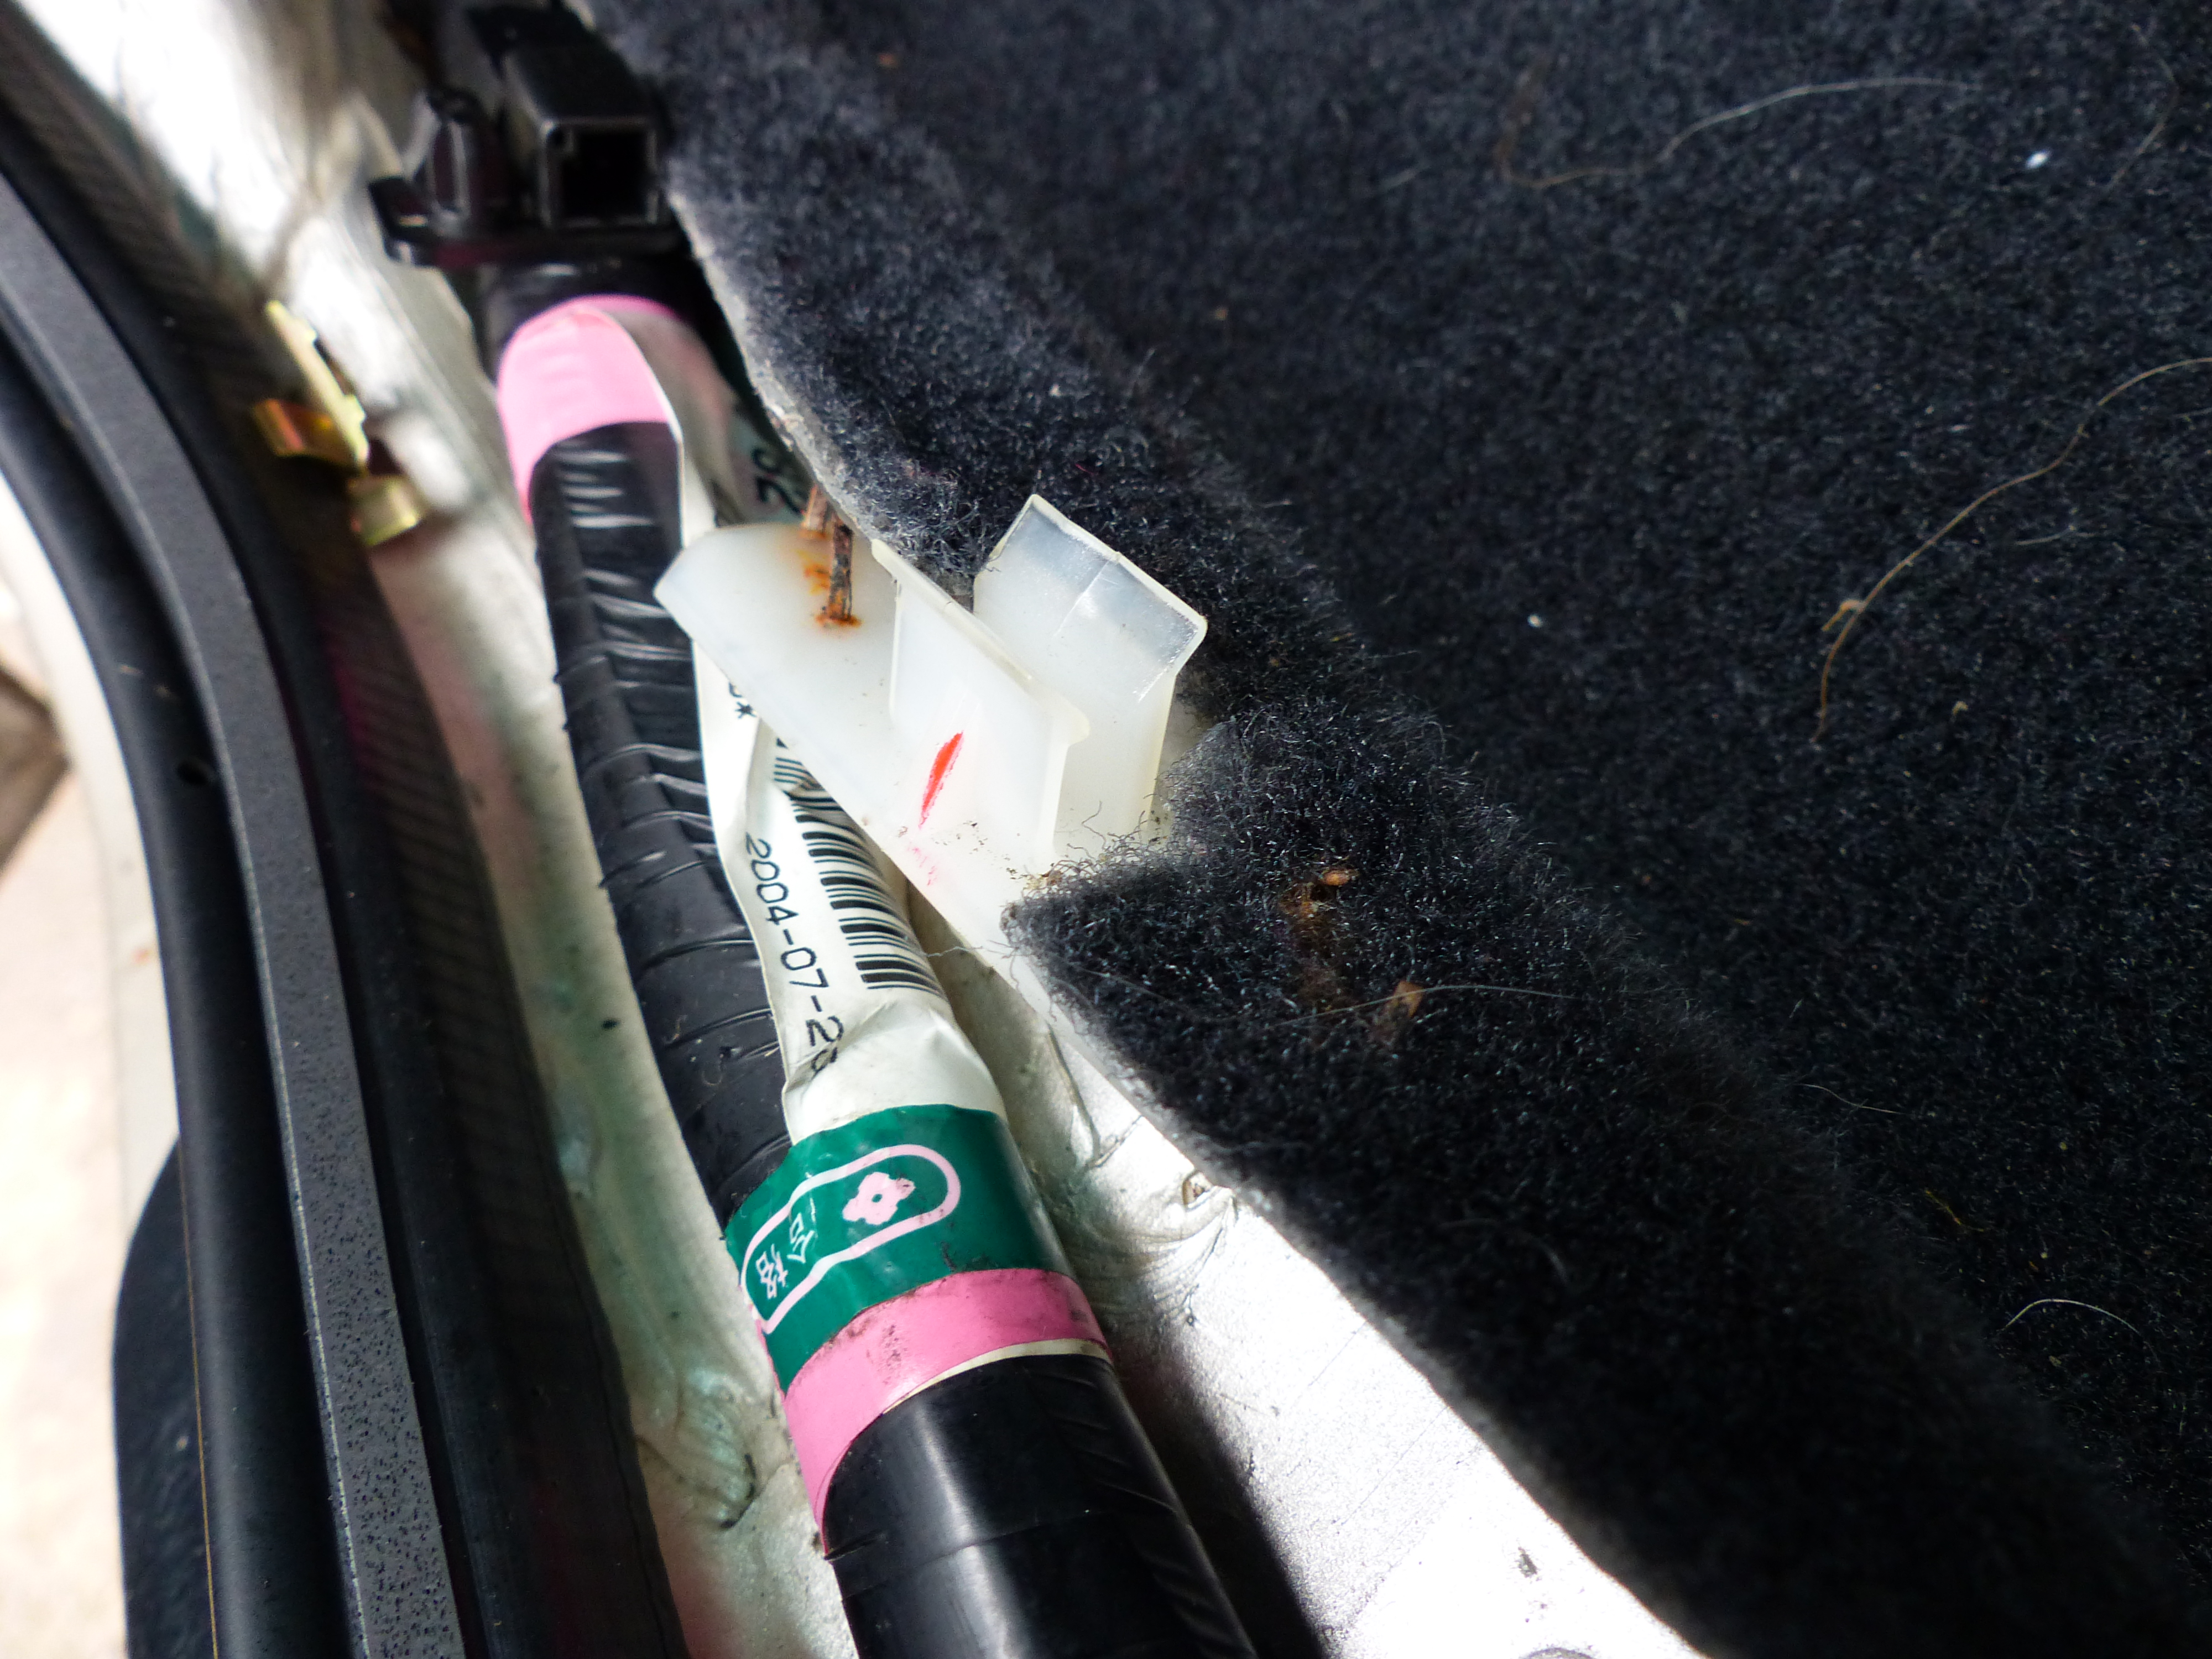
It's right up above the pedals, is clipped to the firewall and runs out through the firewall. I think this is also leaking. I have traced it back as much as possible and seems to run up the A pillar alongside the sun-roof drain.
-
Had carpets out on Thursday. Full rinse down with cold water in the garden to remove initial dirt Deep shampoo with high quality carpet shampoo and degreaser Rinse through repeated as above until water running clear from carpet and sound absorption material. Final rinse with very hot water. Above washing time in total. 120 Minutes. Drip dry Then hung in small room with heater and dehumid. Carpets hopefully going back in today. Will take some pics of re-installation. Word to the wise - if you ever have a substantial ingress of water into your RX enough that it affects the sound absorption material under the carpet I would urge you to remove and dry the carpet properly. Put it this way, it's taken 3 days of drying in a 90 degree room with a de humid on flat out to fully dry that sound absorption material it's so thick. If like me you initially thought it would dry out naturally in the car whilst running around with the heaters on then you are very much mistaken, as I was. As well as noting there are no natural vent areas on the floor pan coupled with the fact the carpet is polyurethane/similar backed means almost zero possibility for moisture to escape adequately enough. No wonder it was so stagnant.
-
Anyone have THE genuine lexus boot liner specifically for a MK 2 RX300? Am keen to get hold of one.
-
Thanks Graham, good info. I called Lexus today on replacement carpet, £1500 and wait time till early April (ETA) Pricey.
-
Rx300 air ride
Coxy replied to SLACKBLADDER's topic in RX 300 / RX 350 / RX 400h / RX 200t / RX 450h Club
Hi Slack - I don't know for definite but will share what I offered in another thread on a similar question I looked into this quite heavily before purchasing an SE as there were so many SE-L's around but I didn't want the hassle of air bellows going wrong. From what I have found it's entirely feasible, and likely not too difficult, the shocks look relatively the same length (from pics) with the same mounting brackets. The mounts on the body should be universal for air/coil - wouldn't be economical for Lexus to modify a whole chassis just to fit a specific shock, so if I were doing this I would buy one used shock off ebay for 40 quid or whatever (http://www.ebay.co.uk/itm/Lexus-RX300-RX-300-Front-front-let-passenger-side-shock-absorber-/272500930604?hash=item3f7252382c:g:KvoAAOSw5cNYY7xw) with a view of getting the wheel off, under-arch plastic off and offering it up and checking dimensions and mountings vs my current air shock - once confirmed it offers up okay with no modification I would of taken the plunge to buy 4x good ones and fit them in a day myself. I ended up finding a nice SE finally so didn't need to follow through on this so as far as my knowledge took me. -
Hi Graham, Thanks - tell me more about this, I want to make sure I've covered everything as I'm only doing this exercise once! Where exactly can I find it? Your description is good but my sense of direction from words is not great. Thanks in advance.
-
Apparently yes, I disconnected the battery when removing the chair wiring harnesses just to be safe. Unplugging is very simple, couldn't be easier. 3 typical automotive clip type connectors. The hardest part was actually un-doing the plastic clip holding the harness to the bottom of the chair!
-
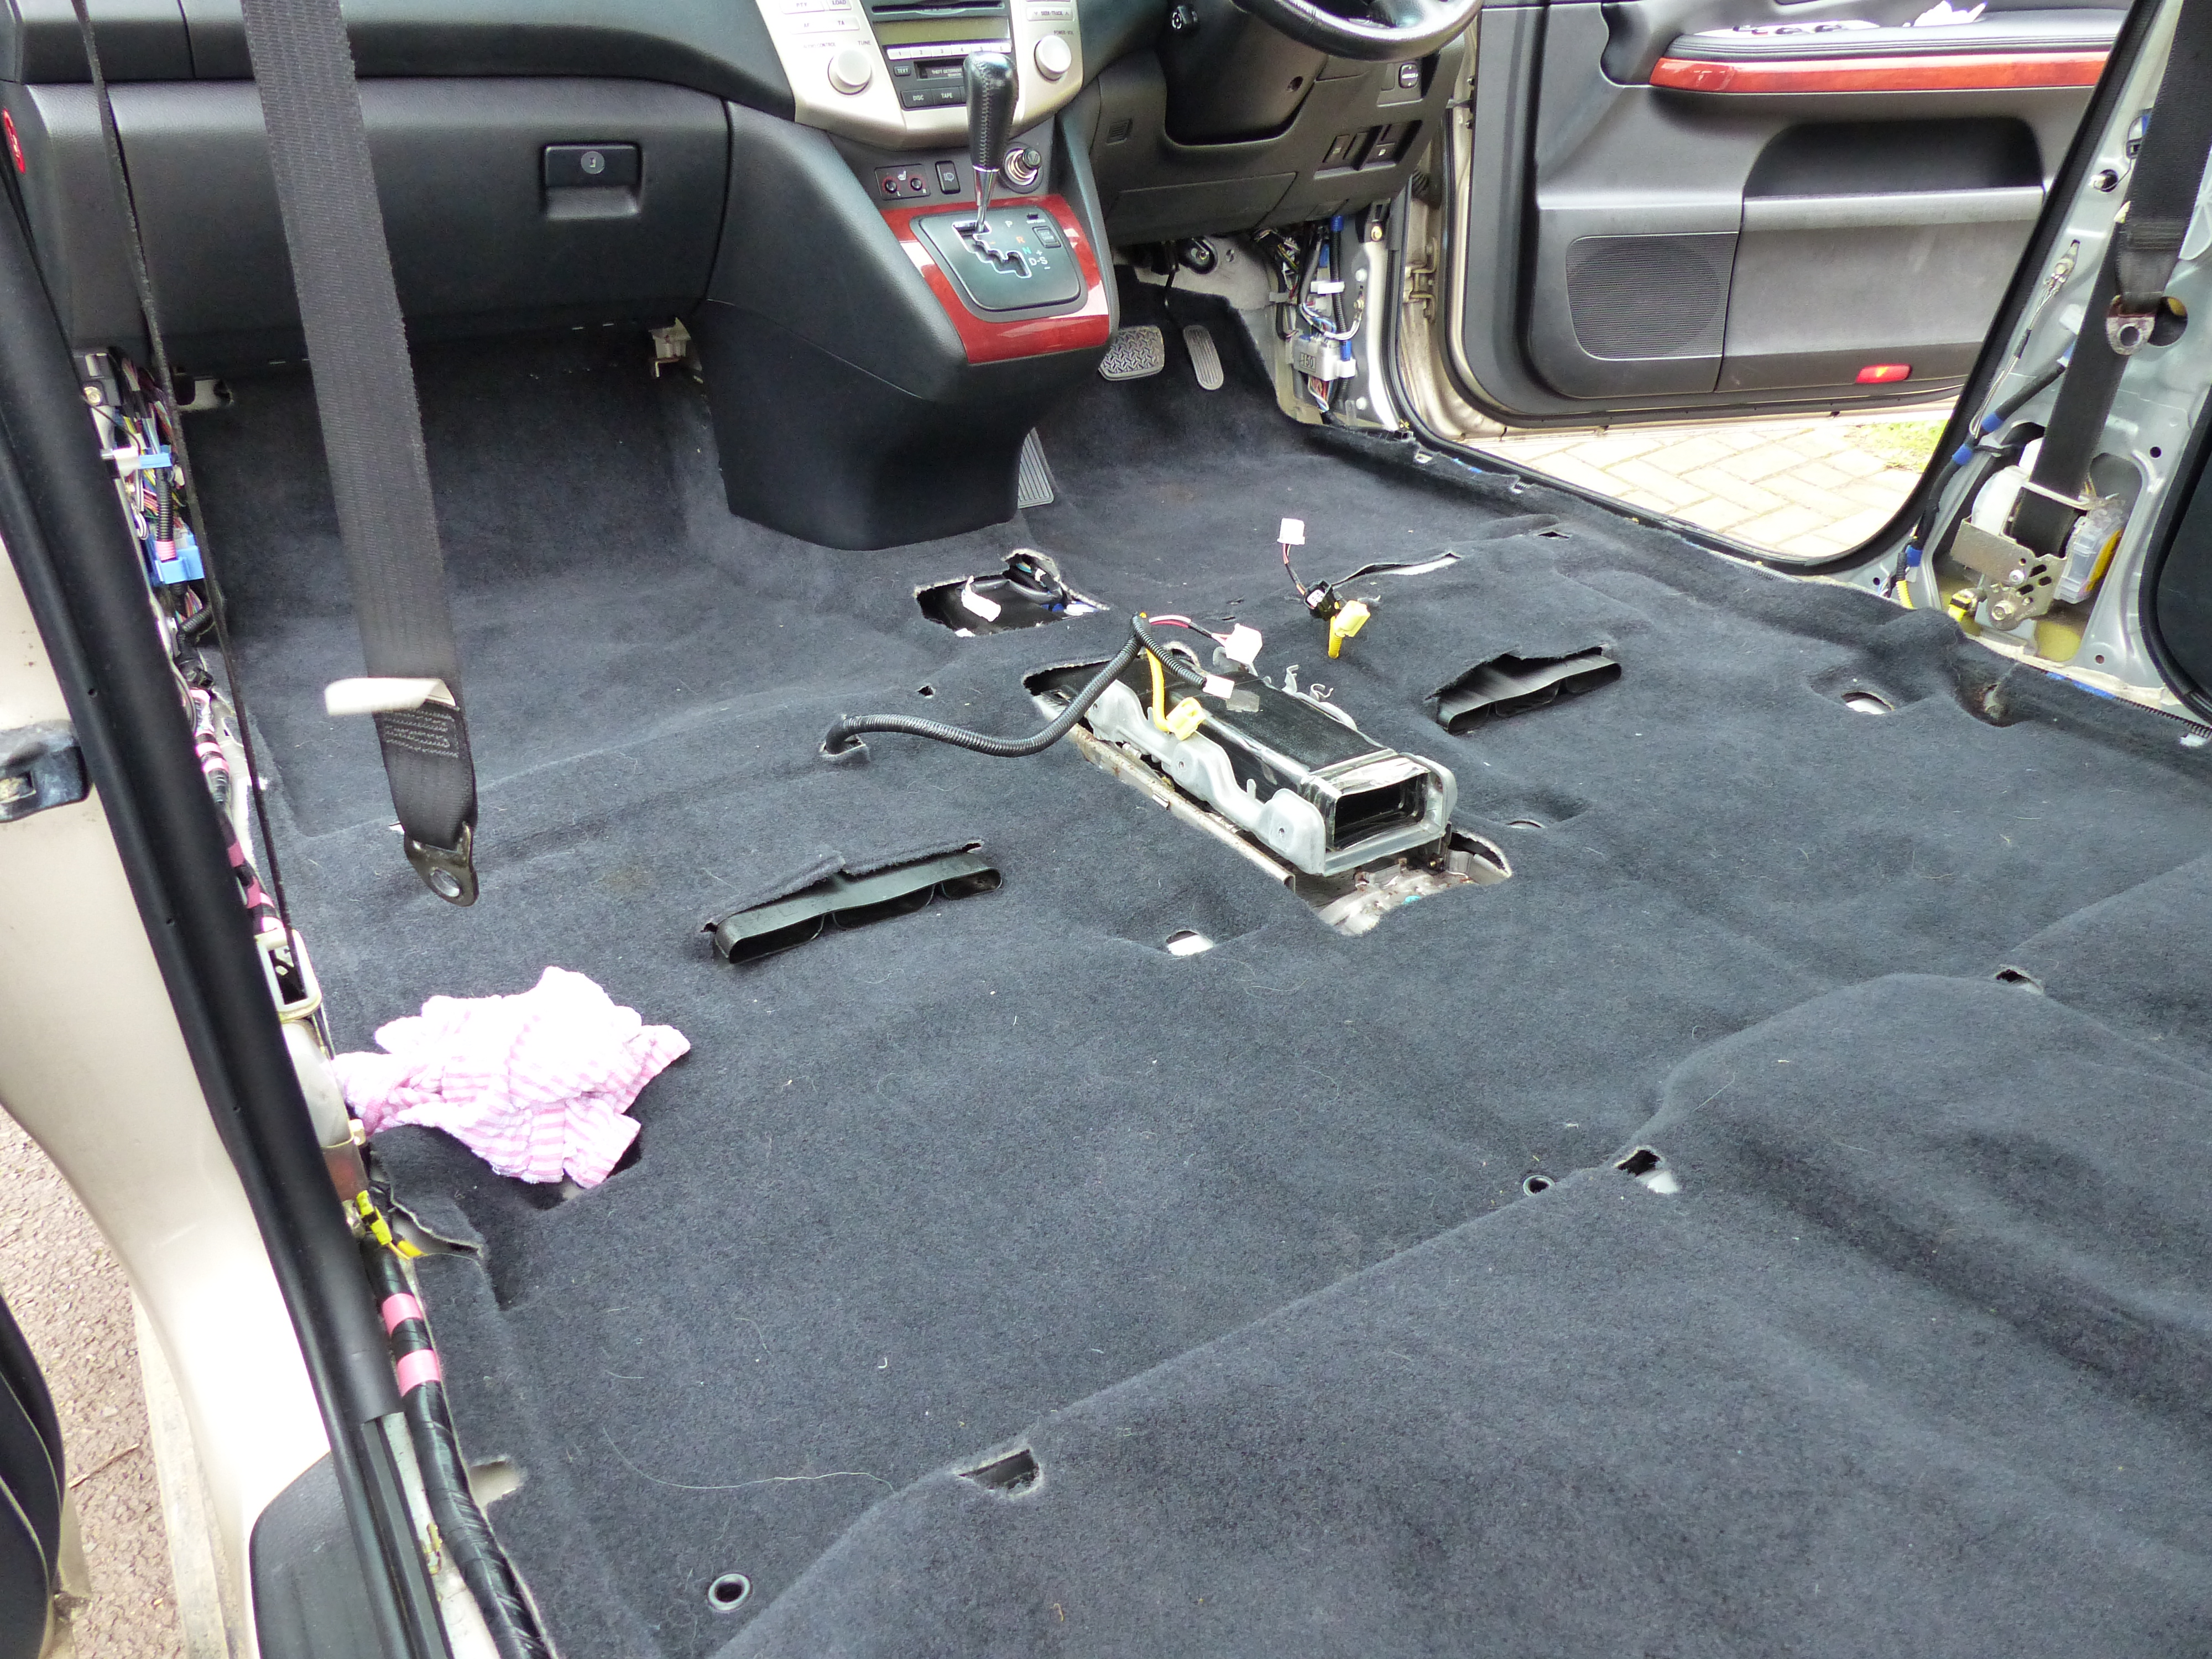
Thank you. Me too, I'm prob going to hose test it in the next few days in all areas and watch for water trickling in (or hopefully not!) Initally seemed daunting making the decision to strip back but you know what actually it was pretty easy. Each chair is only 4 bolts and three electrical connectors. The rears were easier as not electrics. Straight out then center console, 6 bolts some trim bits here and there and carpet up and out!
-
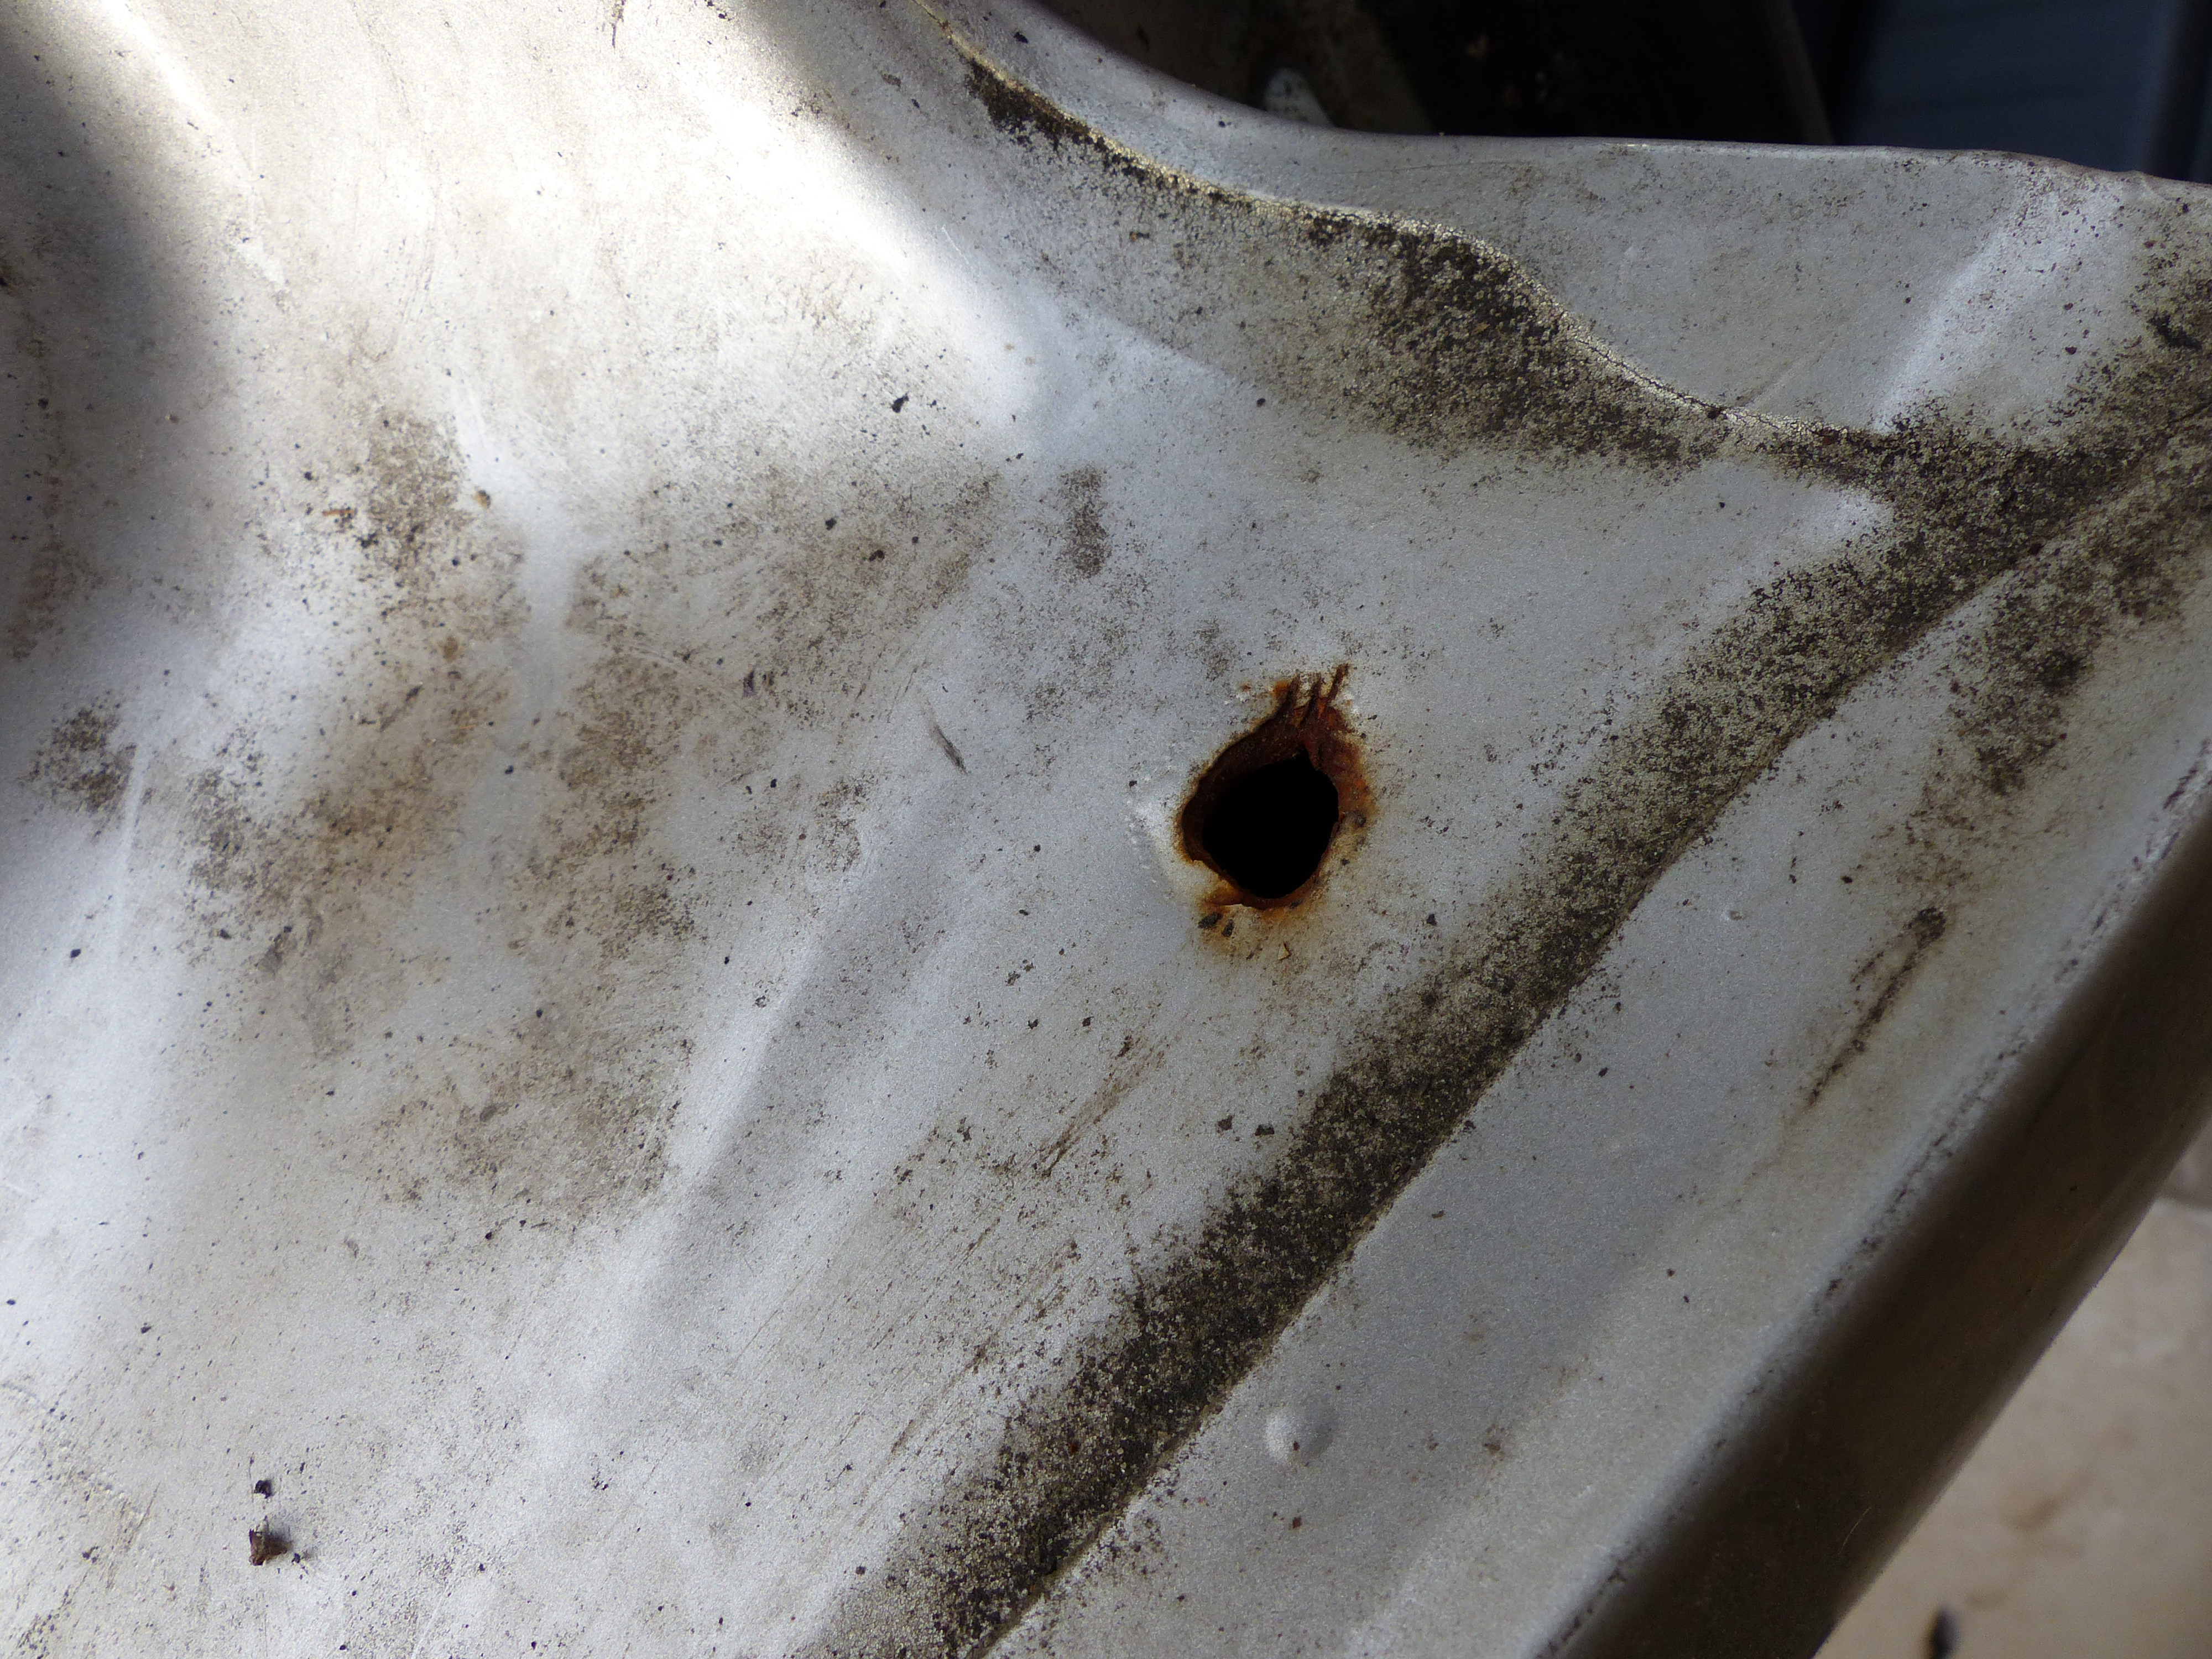
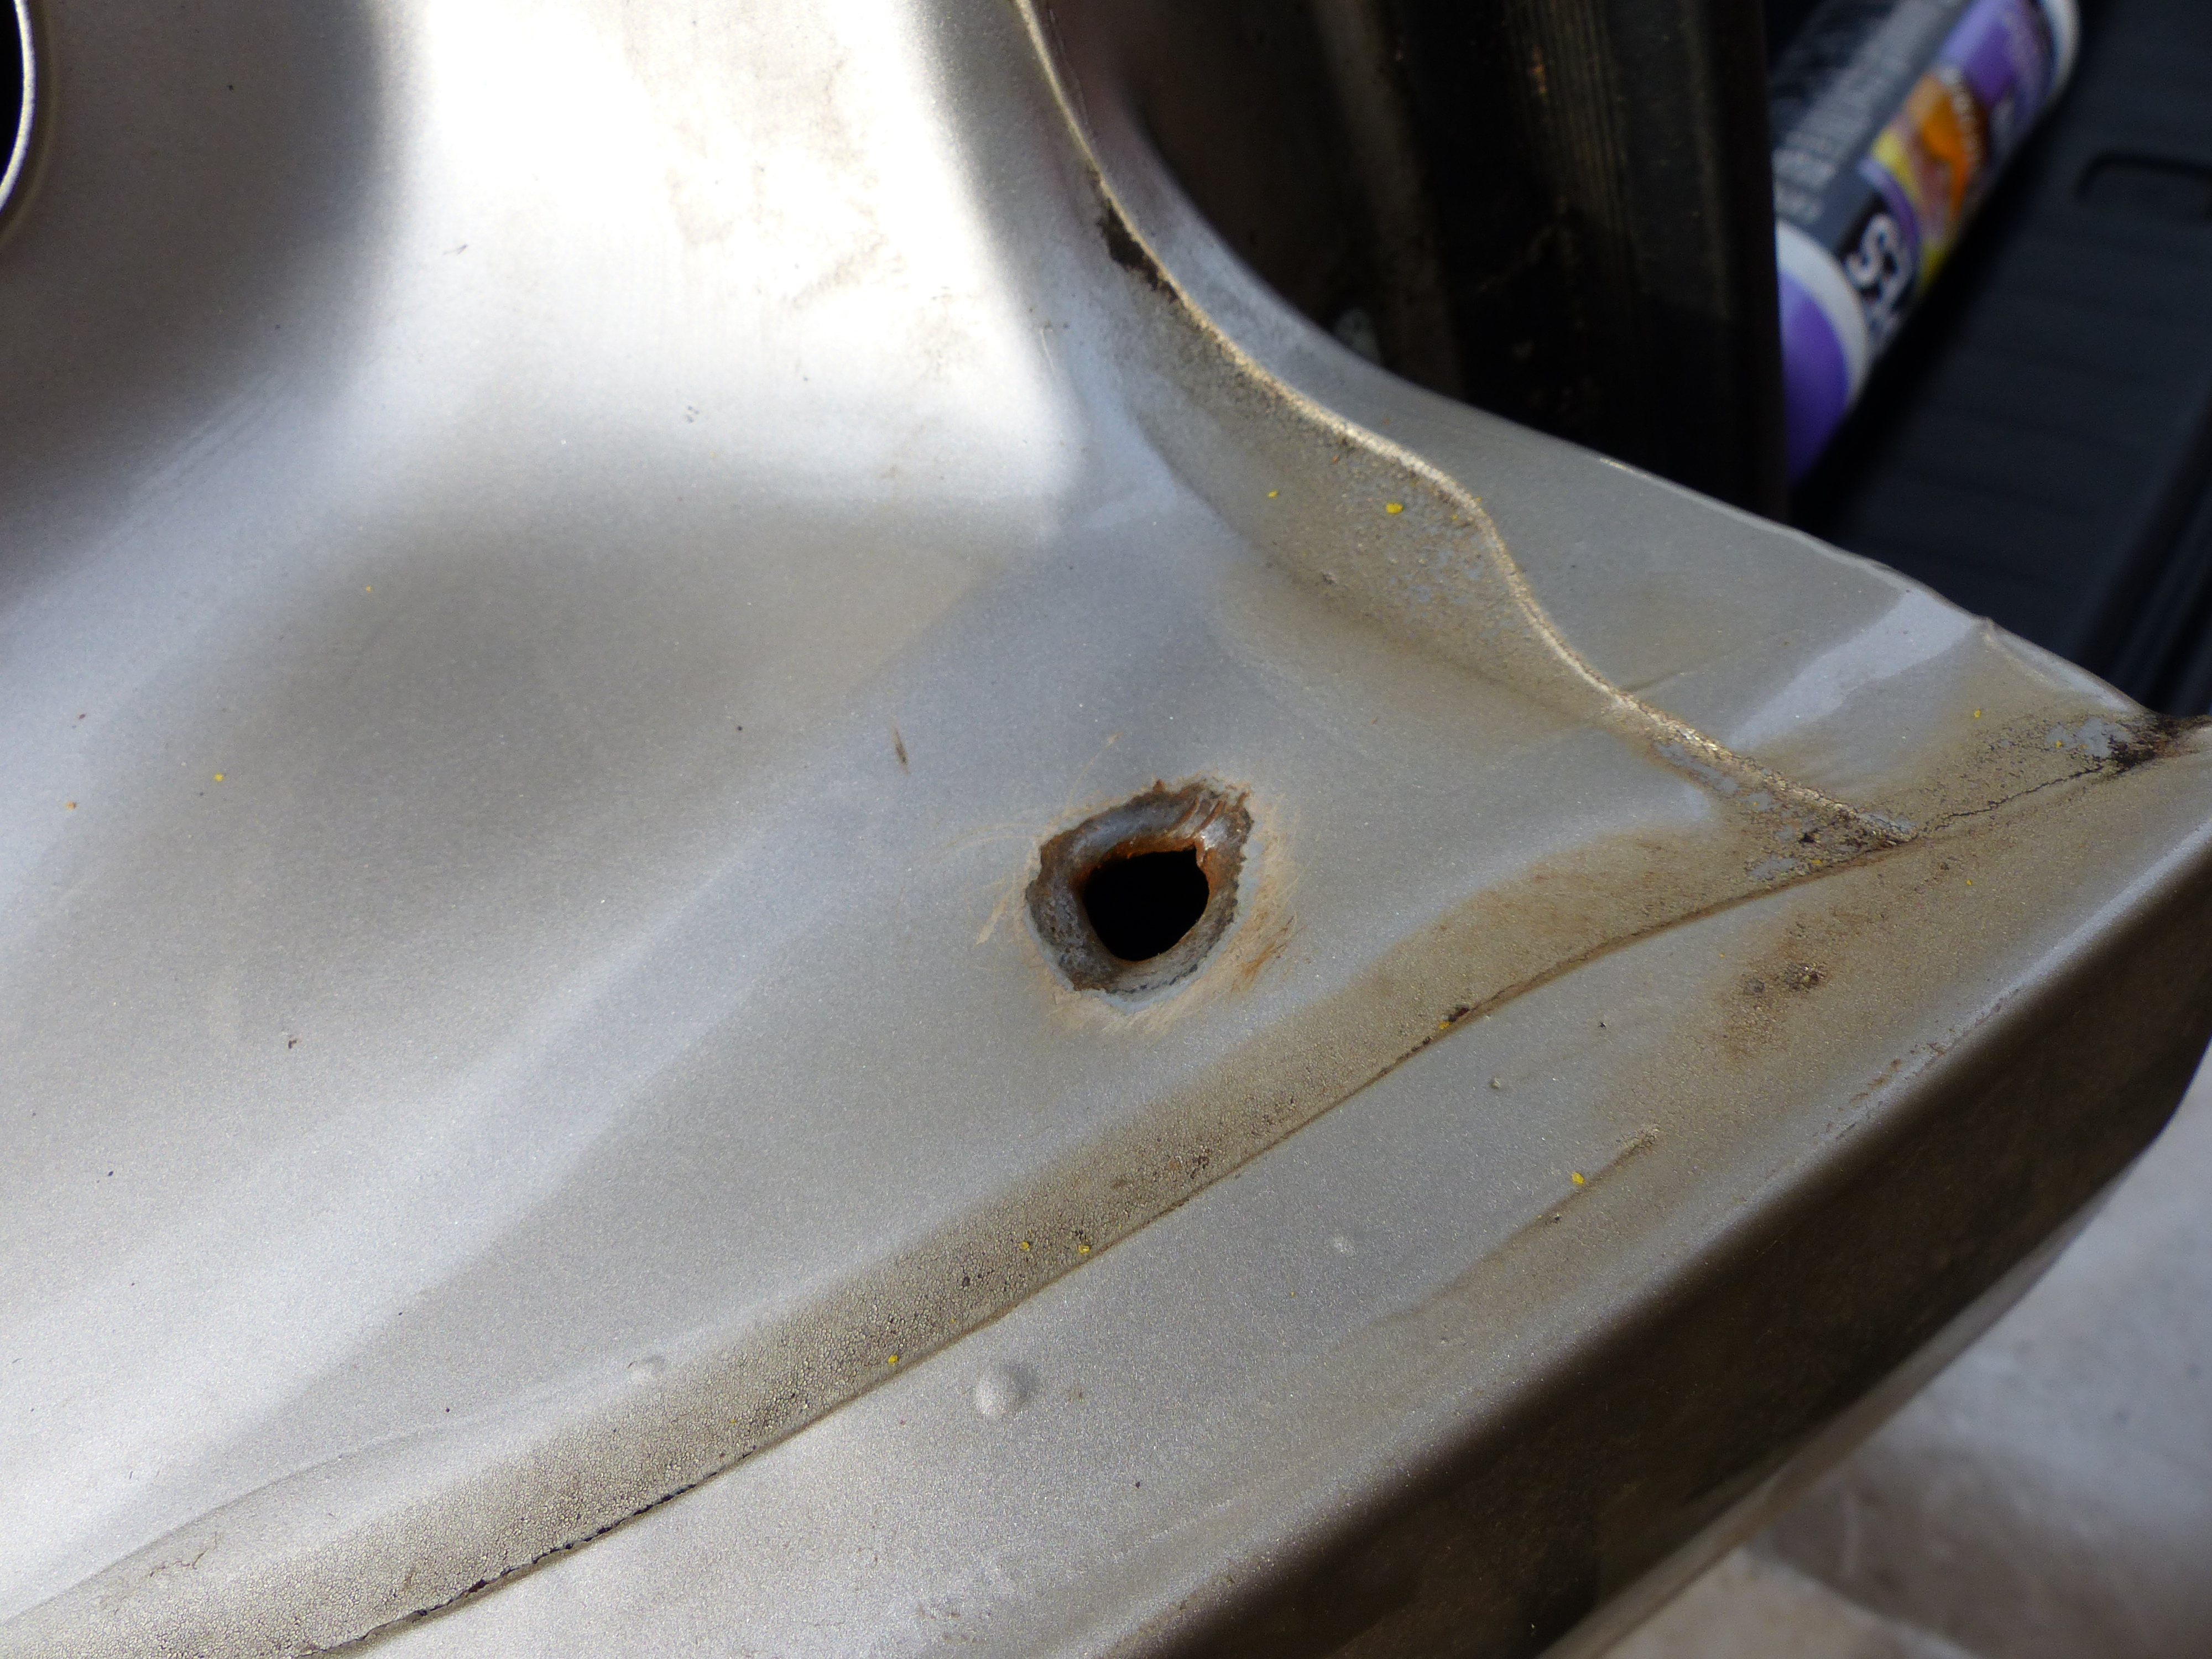
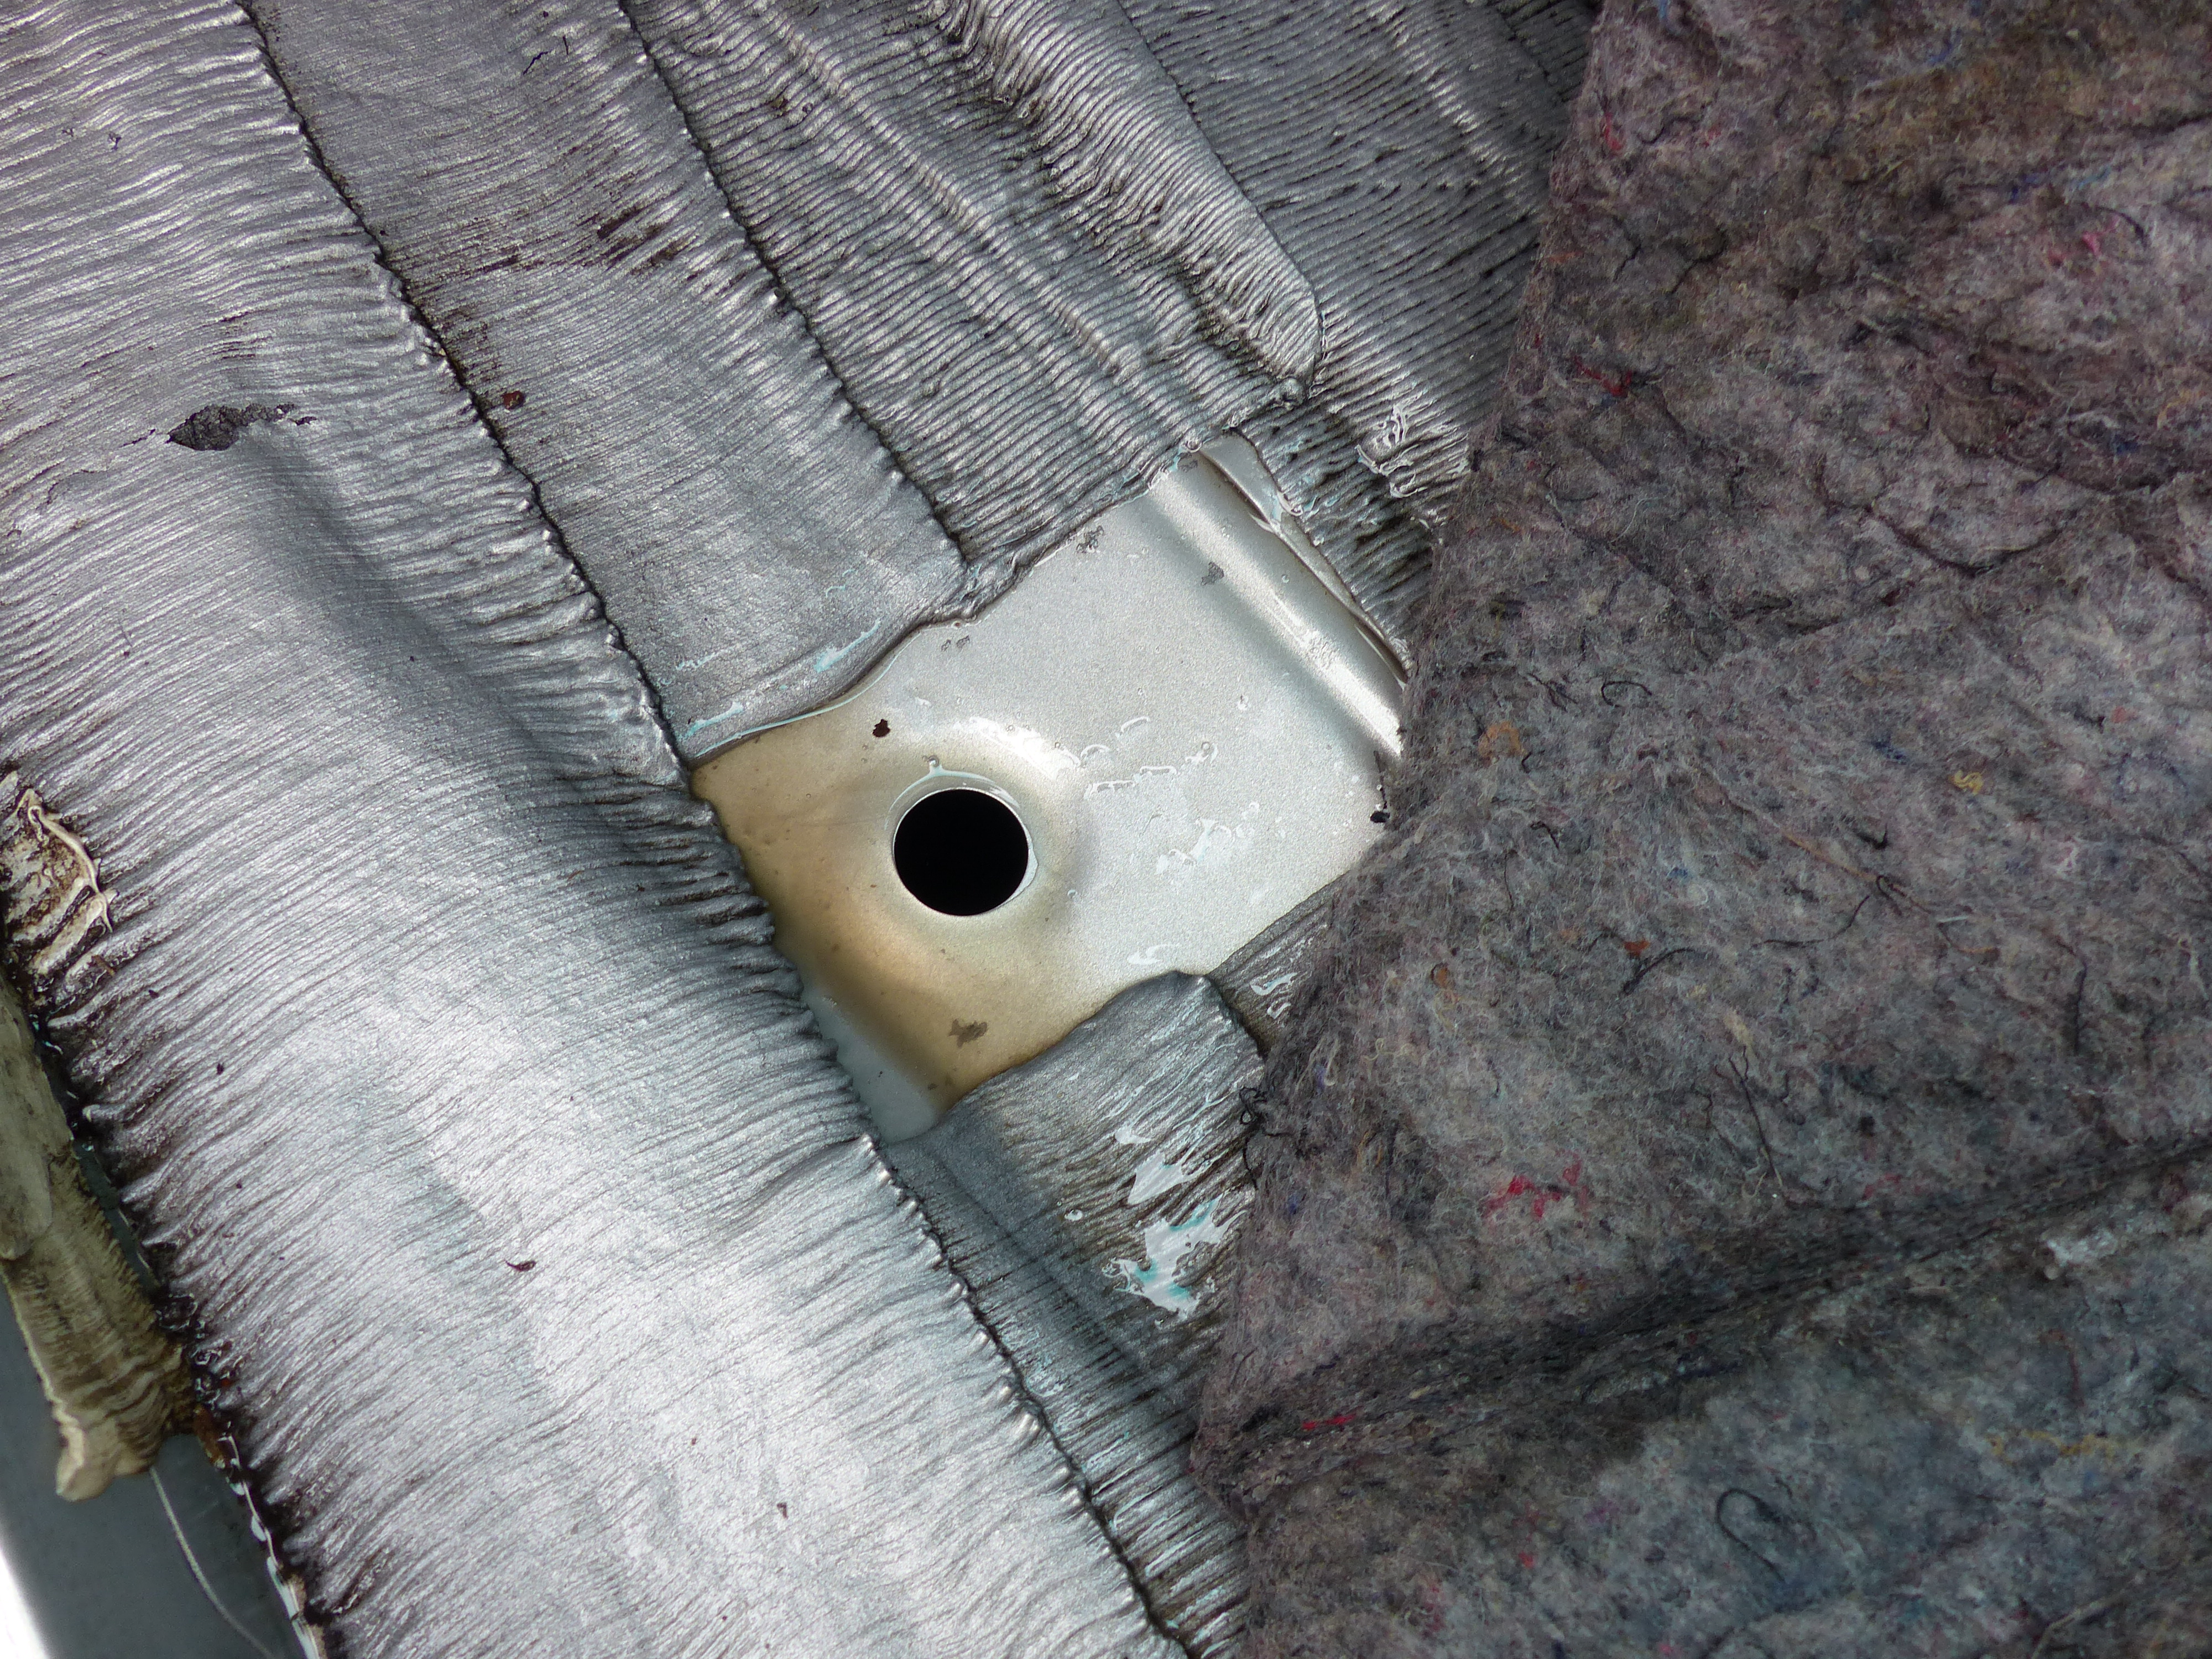
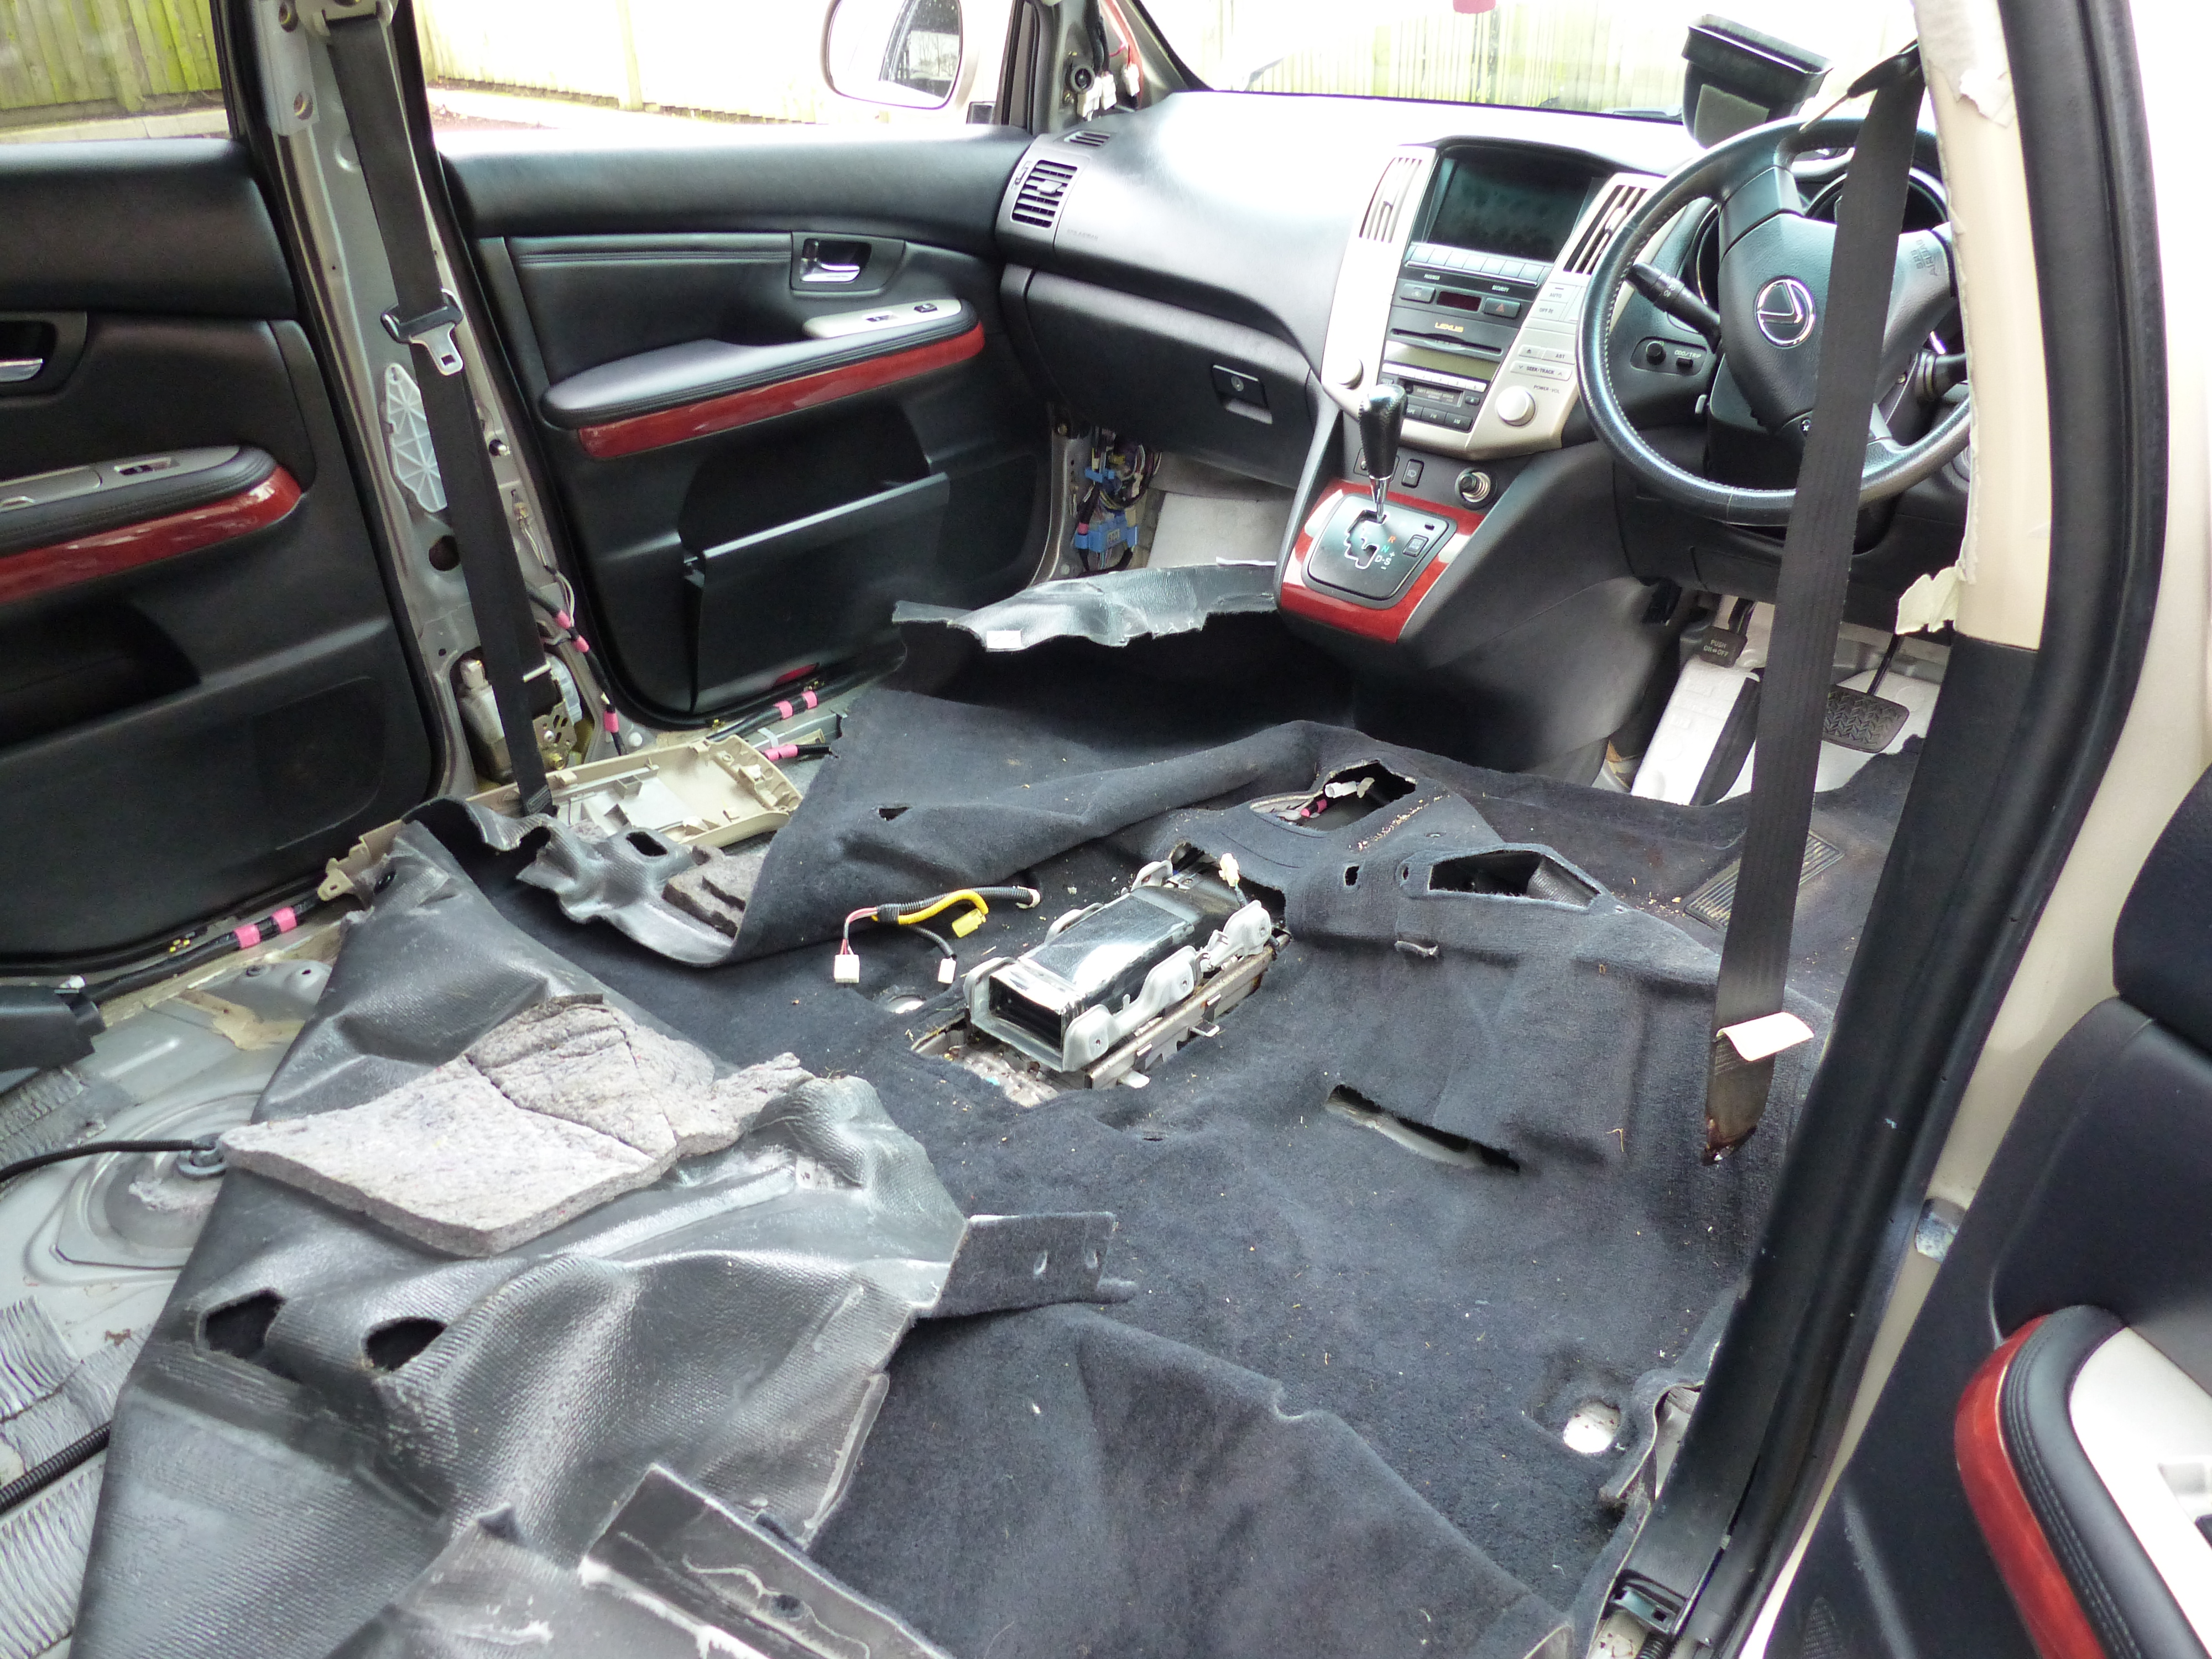
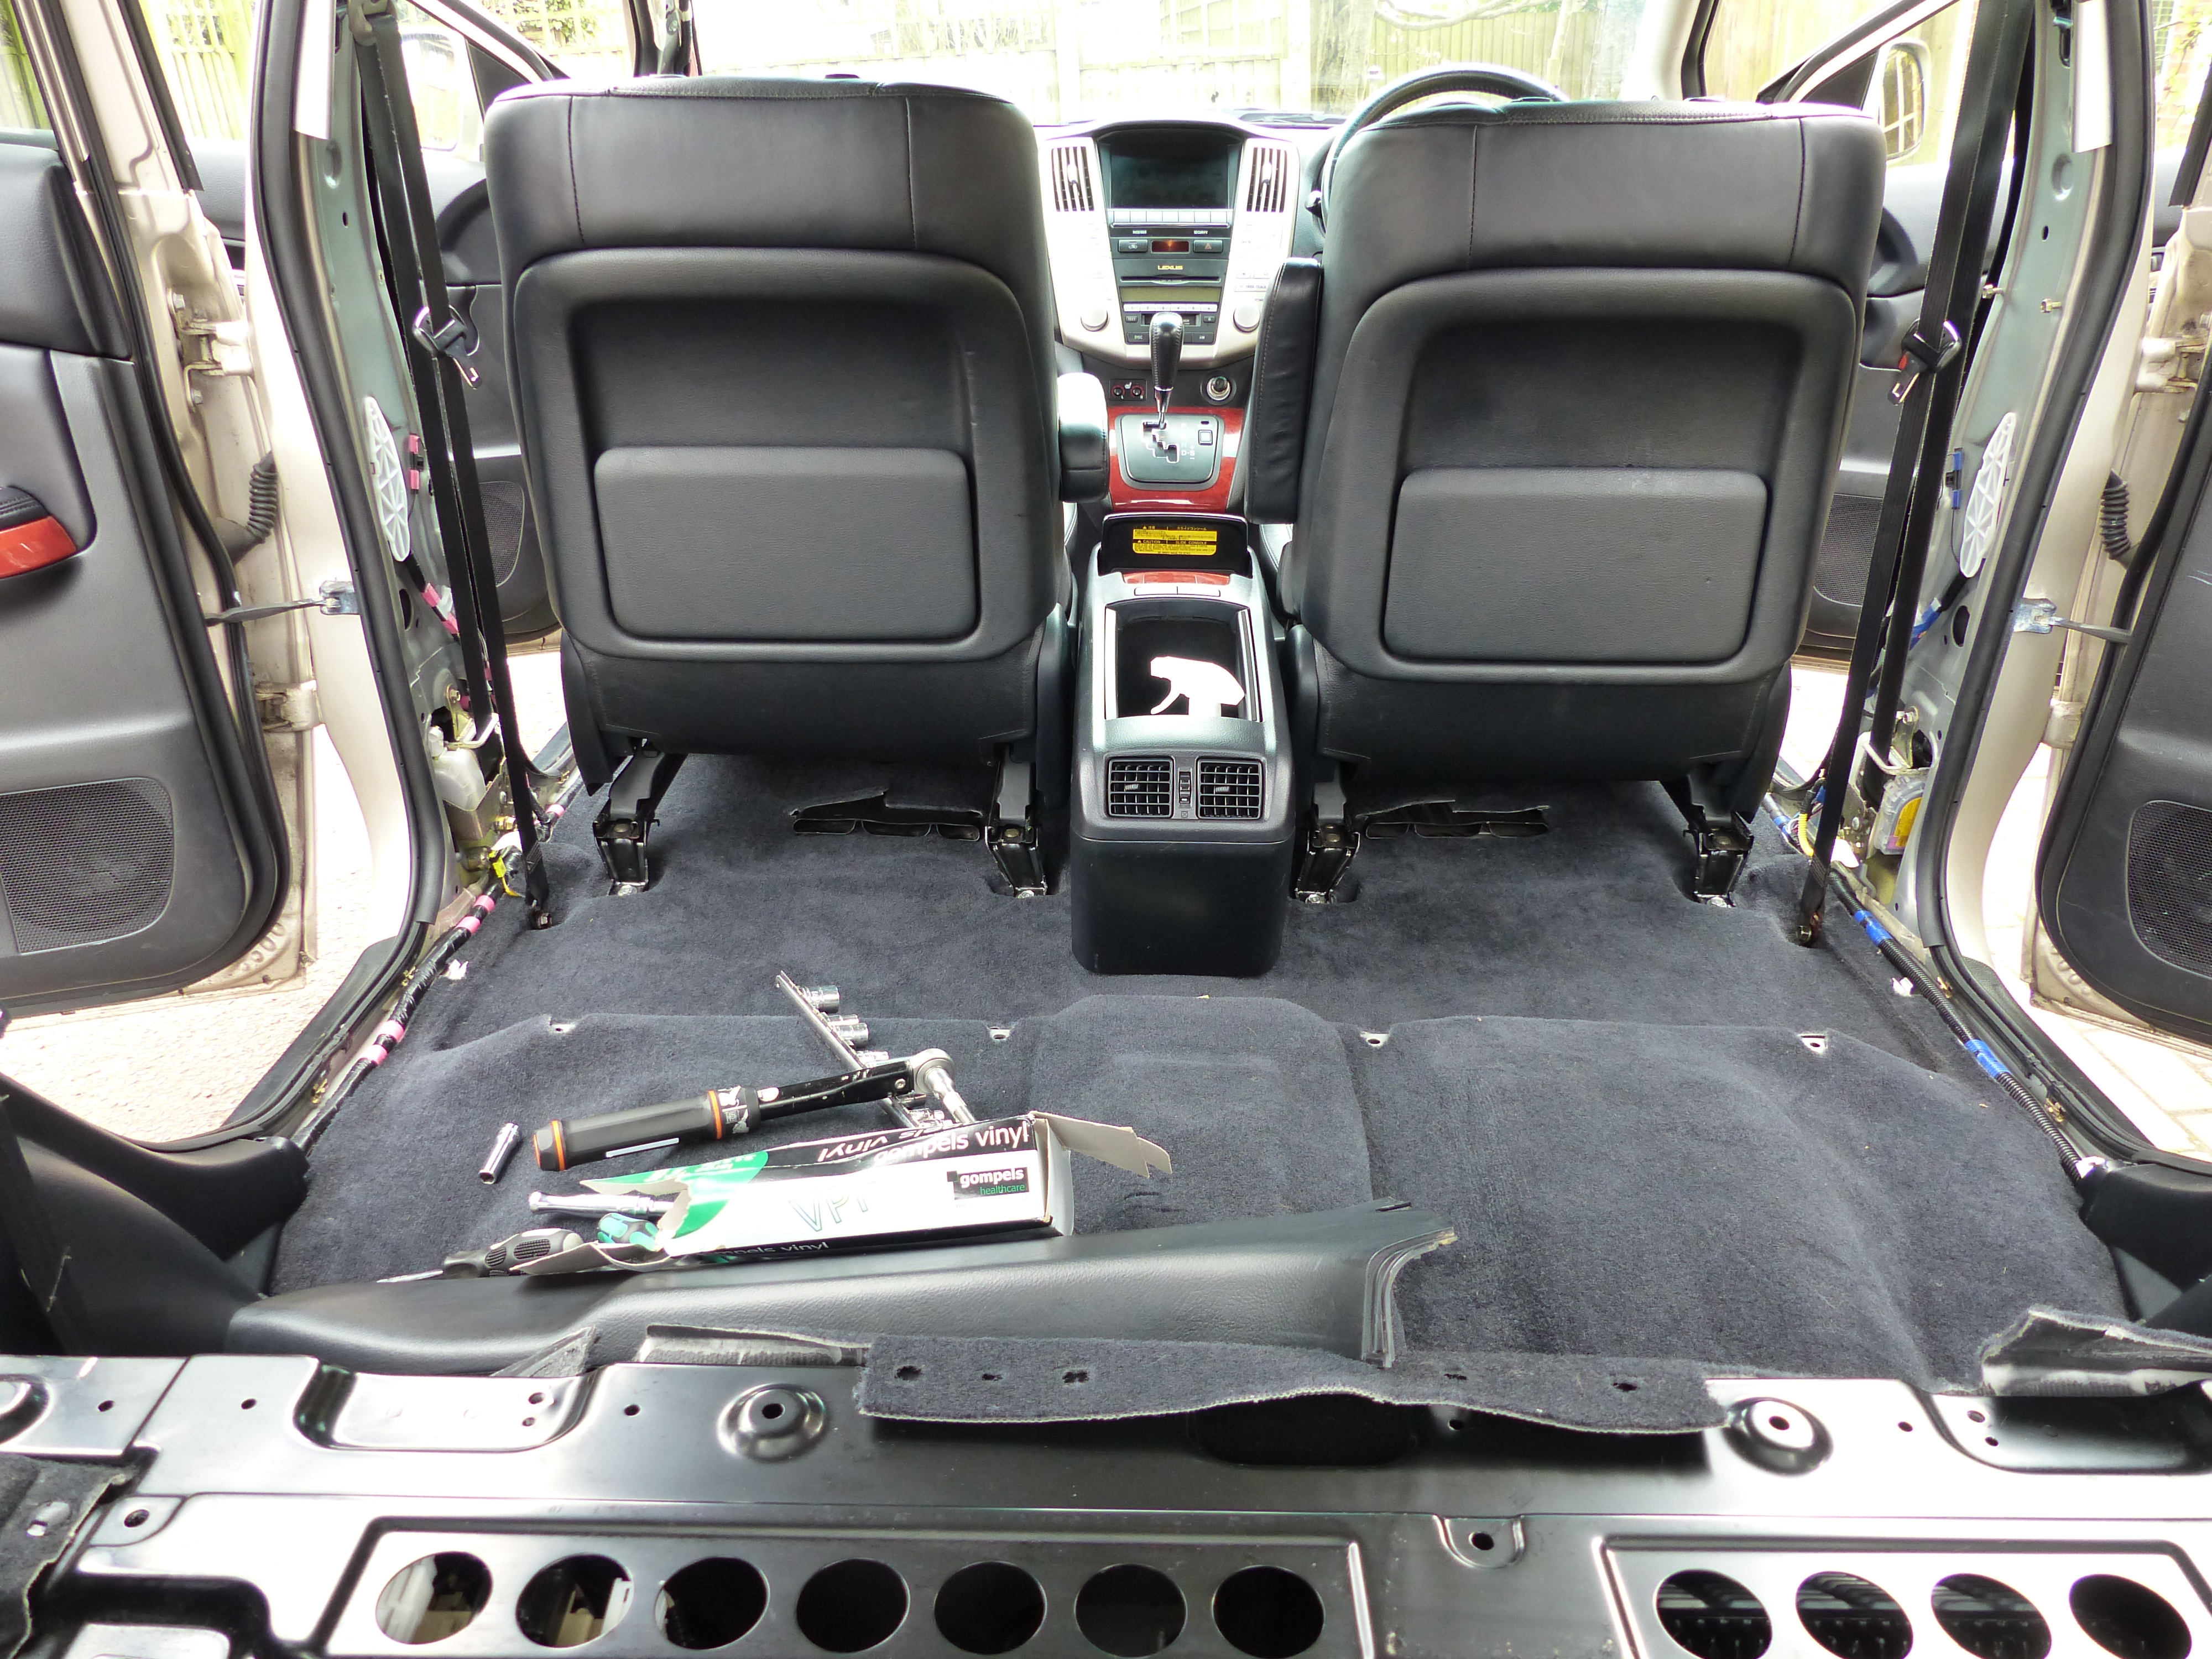
Hi Guys Well, I posted in another topic due to leak in the back that I had thought I had fixed, I am back to say unfortunately it returned with a overpowering damp smell again (despite running an ozone generator for 2 hours in the car) So determined to get to the source of the issue this time.... 1. LH front passenger seatbelt damp again - I naturally think sunroof again and start stripping off the trim to look for water ingress/mould trails. 2. LH scuff plates off, bit dirty underneath but looks okay, door seals come off too. Again no surprises with those. 3. LH B pillar off hoping to find a trickle from sun roof to seatbelt coil (would answer wet seatbelt conundrum) - surprisingly, looks quite healthy inside, no signs of mould, mould smell or water marks. 4. Peel back carpet at the edges where possible - find the whole underlay SATURATED. 5. Start stripping back more trim to get more carpet up, the more carpet I can peel back the more water I find! Literally pools, not puddles, pools of water in the footwells (the body has peaks and troughs in it) 6. Pull some rubber grommets and start getting the water out. 7. Noticed on tracking back the water left a sandy/dirty trail which I trace back to the boot area. 8. Light clusters out - what do I find? What can only be described as a bullet hole underneath the LH light cluster. It's not uniform enough to be a intentionally drilled hole and would of taken some force to get through, as it stands I am still at a loss to understand how it got there... (pic shows hole and unadulterated right hand side of the same area for comparison) 9. Onwards and upwards. I test the hole by pouring water in it and sure enough it floods the insides. 9b. Treat the hole with rust inhibitor and anti rust primer. (Hammerite Kurust) 9c. Plug the hole with a rubber grommet and silicone it up as much as poss. (halfords grommet and granville sealent) 10. End up peeling back more carpet where possible but again more I peel back more dampy/mouldy/brown water I find. 11. Having enough at this point I remove all seats and completely strip the carpet out. 11B. Pull out all rubber grommets where water is collecting and let her drain! 12. Wash down the bare metal with diluted bleach solution. Scrubbing off the mould where possible. Water keeps wringing out brown even after the 3rd pass. 13. Many passes later, spray the area with some decent household cleaner and final rinse out and wash through with clear water. Carpet & it's sound absorption material is still drip drying in the garden but I reckon it's totalled, it's got mould in the absorbtion material. It's polythene backed so would of never dried out on it's own with the amount of water present and whilst it was a big job (4 hours) I am glad I did it. Going to get a new carpet and just fit it whilst I've got the opportunity. I'm going to run it round bare for the moment just to ensure all leaks fixed. Equipment used: Trim Removal - Flat blade screwdriver Light cluster - 10mm spanner and socket (tricky to get to, rachet spanner is ideal) B Pillar cover - 10mm socket Chairs removal - 14mm socket Seatbelt bolt - 14mm socket Center console - 10mm socket Granvile silicone sealent Halfords assorted grommets Araldite epoxy to fix broken lug on light cluster All purpose wipes Bleach and other cleaners
-
boot compartment clips
Coxy replied to Coxy's topic in RX 300 / RX 350 / RX 400h / RX 200t / RX 450h Club
Monte, great help. I did search but my criteria and wording was way off so didn't find anything (not even on google!) How did you get yours out? -
boot compartment clips
Coxy replied to Coxy's topic in RX 300 / RX 350 / RX 400h / RX 200t / RX 450h Club
Monte, great help. I did search but my criteria and wording was way off so didn't find anything (not even on google!) Thanks so much -
boot compartment clips
Coxy replied to Coxy's topic in RX 300 / RX 350 / RX 400h / RX 200t / RX 450h Club
nah not that the buttons on the rear trim to pop up them lids that have carrier bag hooks on -
Hi rx300 those bits of the boot floor that pop up when you press the button on the boot edge one of them is permenently up/open as the push button clip that secures it has stuck inside what would this be called? so i can find a replacement and is it replaceable on its own?
-
"Yet another MPG thread" - RX450h
Coxy replied to GSLV6's topic in RX 300 / RX 350 / RX 400h / RX 200t / RX 450h Club
All things being equal on average most cars are anywhere from 10% to 15 % less efficient at 80mph than they are at 70mph. That figure is just from trying to get through the air resistance alone and won't factor increased frictional loads like tyres and drivetrain working more RPMs thus increasing frictional loads further. That all adds up after a while. -
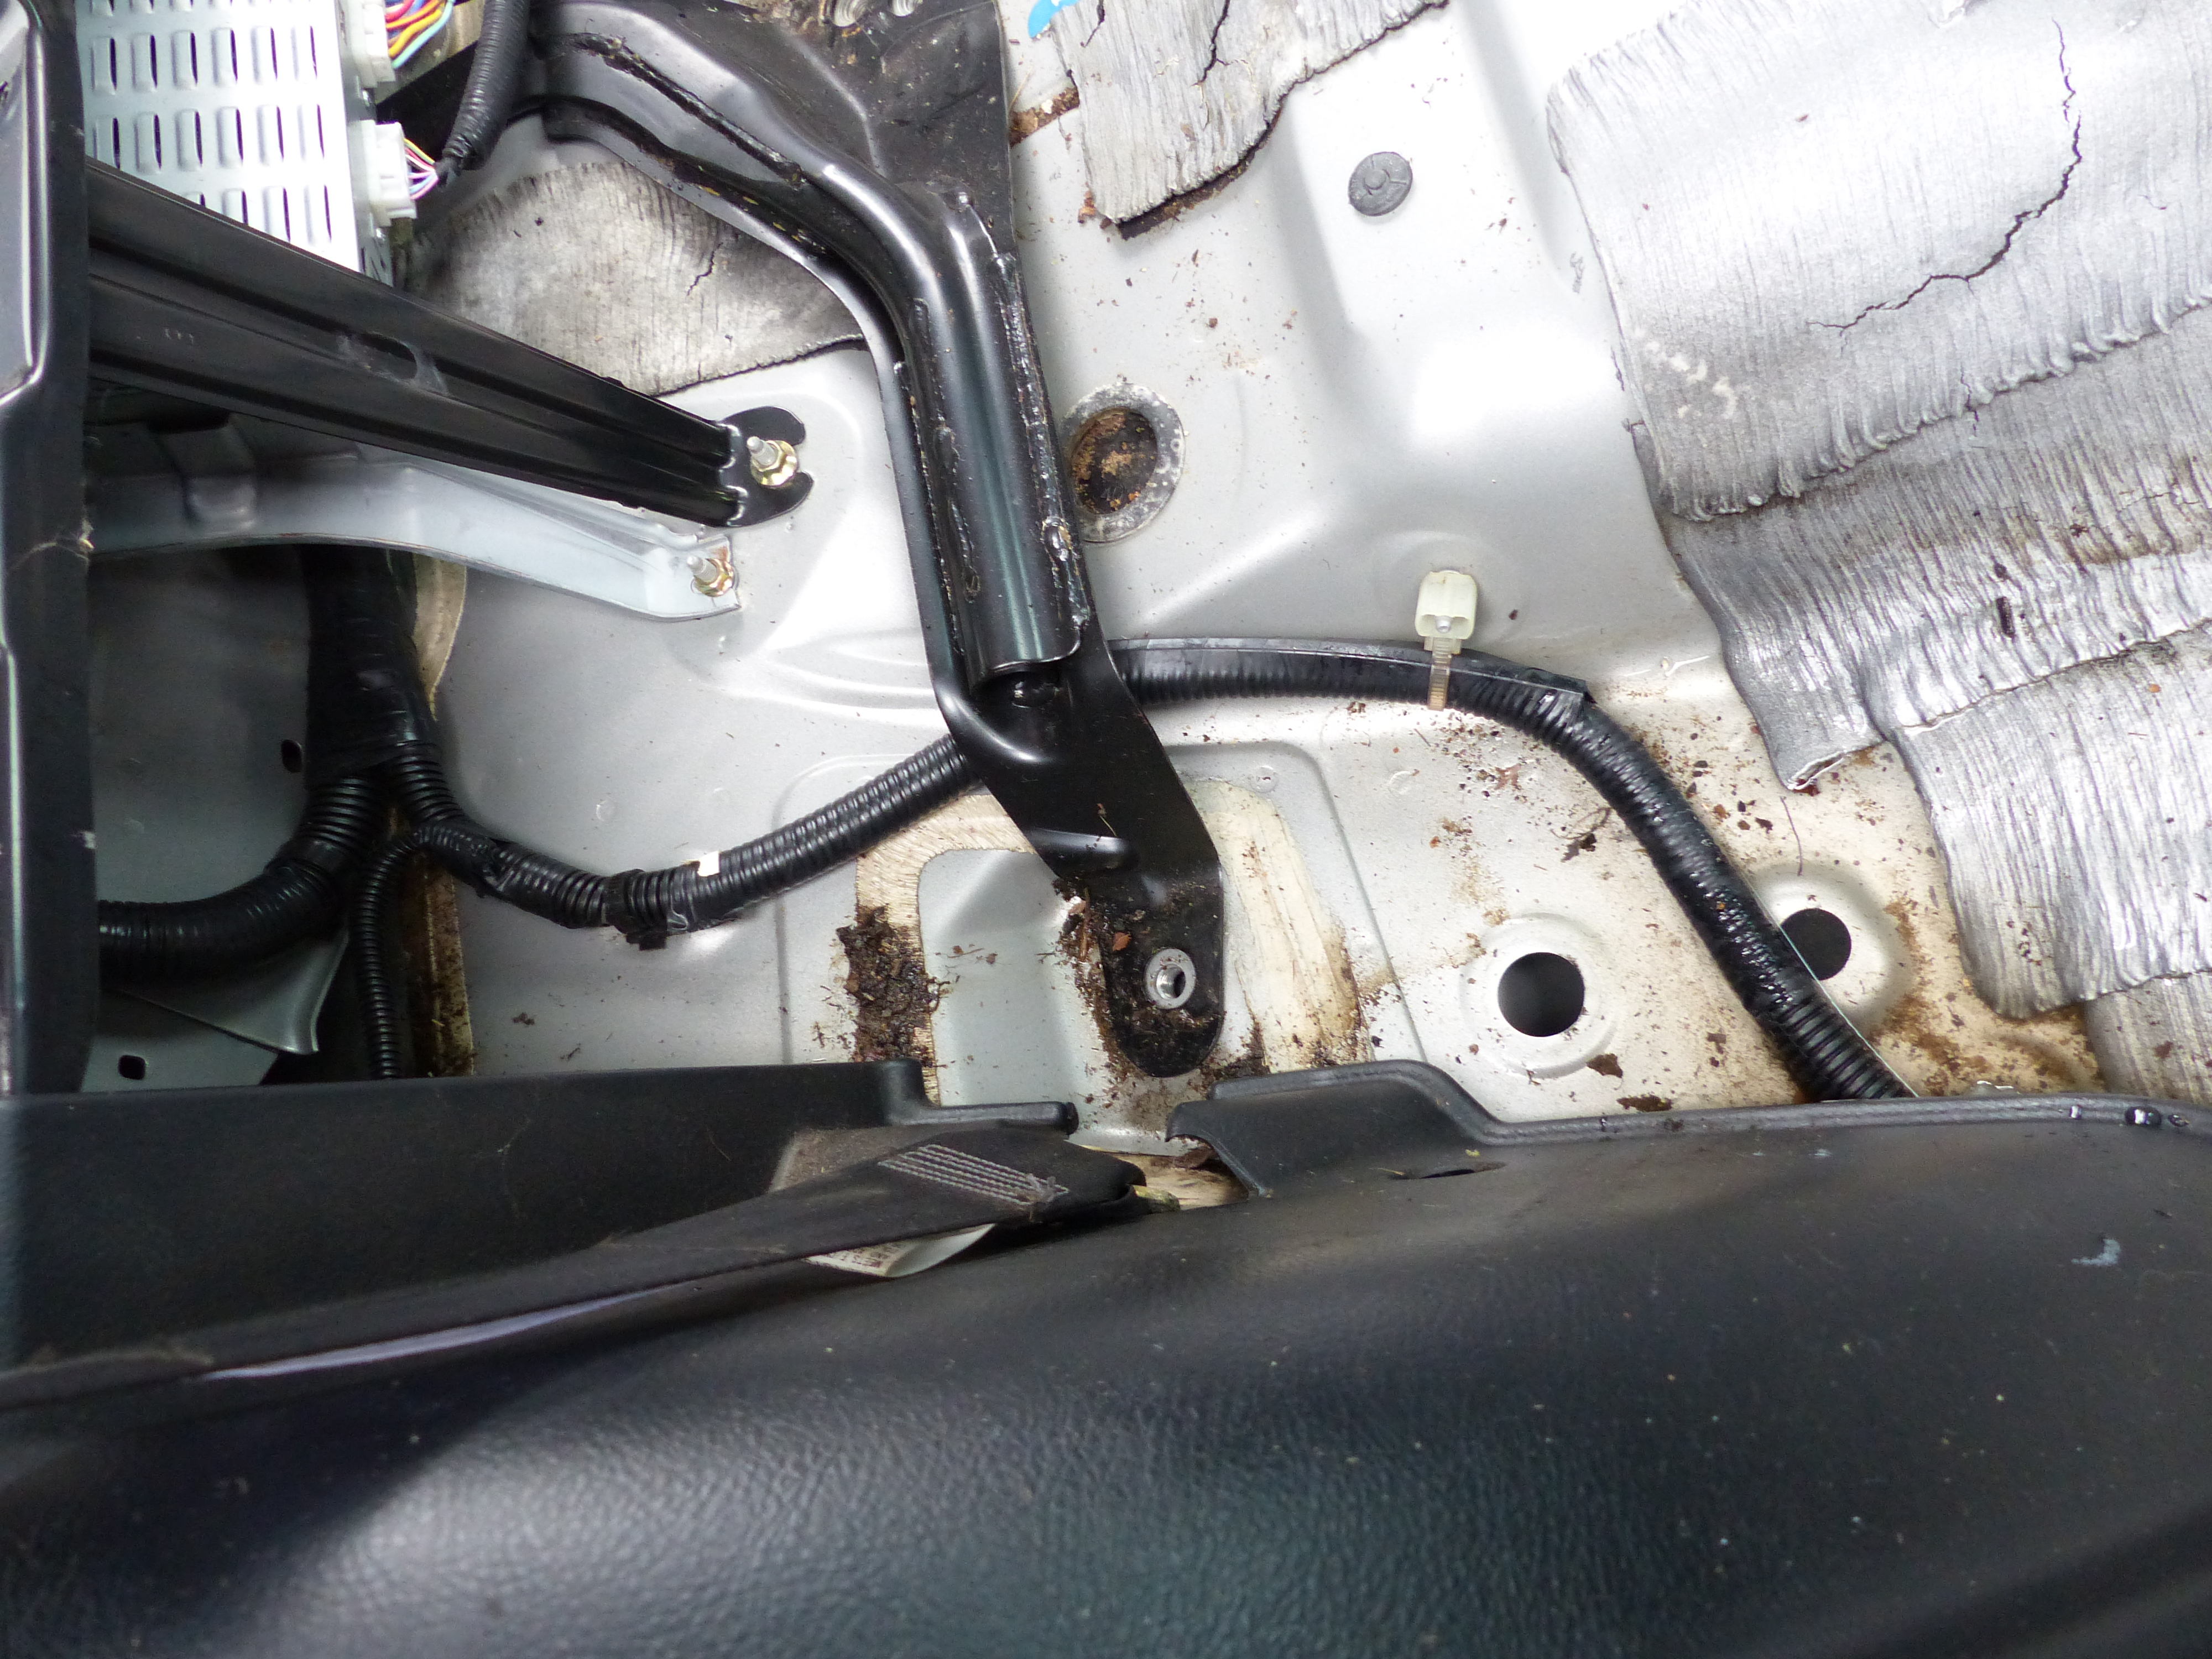
Hi guys Now fixed the rear tail gate, just needed some silicone lubricant on the gas struts as they were dry and not extended far enough to trigger the sensor to say it was opened - thus not letting it close when you pushed the close button. Has anyone any idea on these drain plugs though? Should it be there/ And what about the holes pictured without plugs, should I have plugs there? Is there a parts diagram anywhere I can search?
-
Shock Mounts - for air..
Coxy replied to tonych's topic in RX 300 / RX 350 / RX 400h / RX 200t / RX 450h Club
I looked into this quite heavily before purchasing an SE as there were so many SE-L's around but I didn't want the hassle of air bellows going wrong. From what I have found it's entirely feasible, and likely not too difficult, the shocks look relatively the same length (from pics) with the same mounting brackets. The mounts on the body should be universal for air/coil - wouldn't be economica for Lexusl to modify a whole chassis just to fit a specific shock, so if I were doing this I would buy one used shock off ebay for 40 quid or whatever (http://www.ebay.co.uk/itm/Lexus-RX300-RX-300-Front-front-let-passenger-side-shock-absorber-/272500930604?hash=item3f7252382c:g:KvoAAOSw5cNYY7xw) with a view of getting the wheel off, underarch plastic off and offering it up and checking dimensions and mountings vs my current air shock - once confirmed it offers up okay with no modification I would of taken the plunge to buy 4x good ones and fit them in a day myself. I ended up finding a nice SE finally so didn't need to follow through on this so as far as my knowledge took me. -
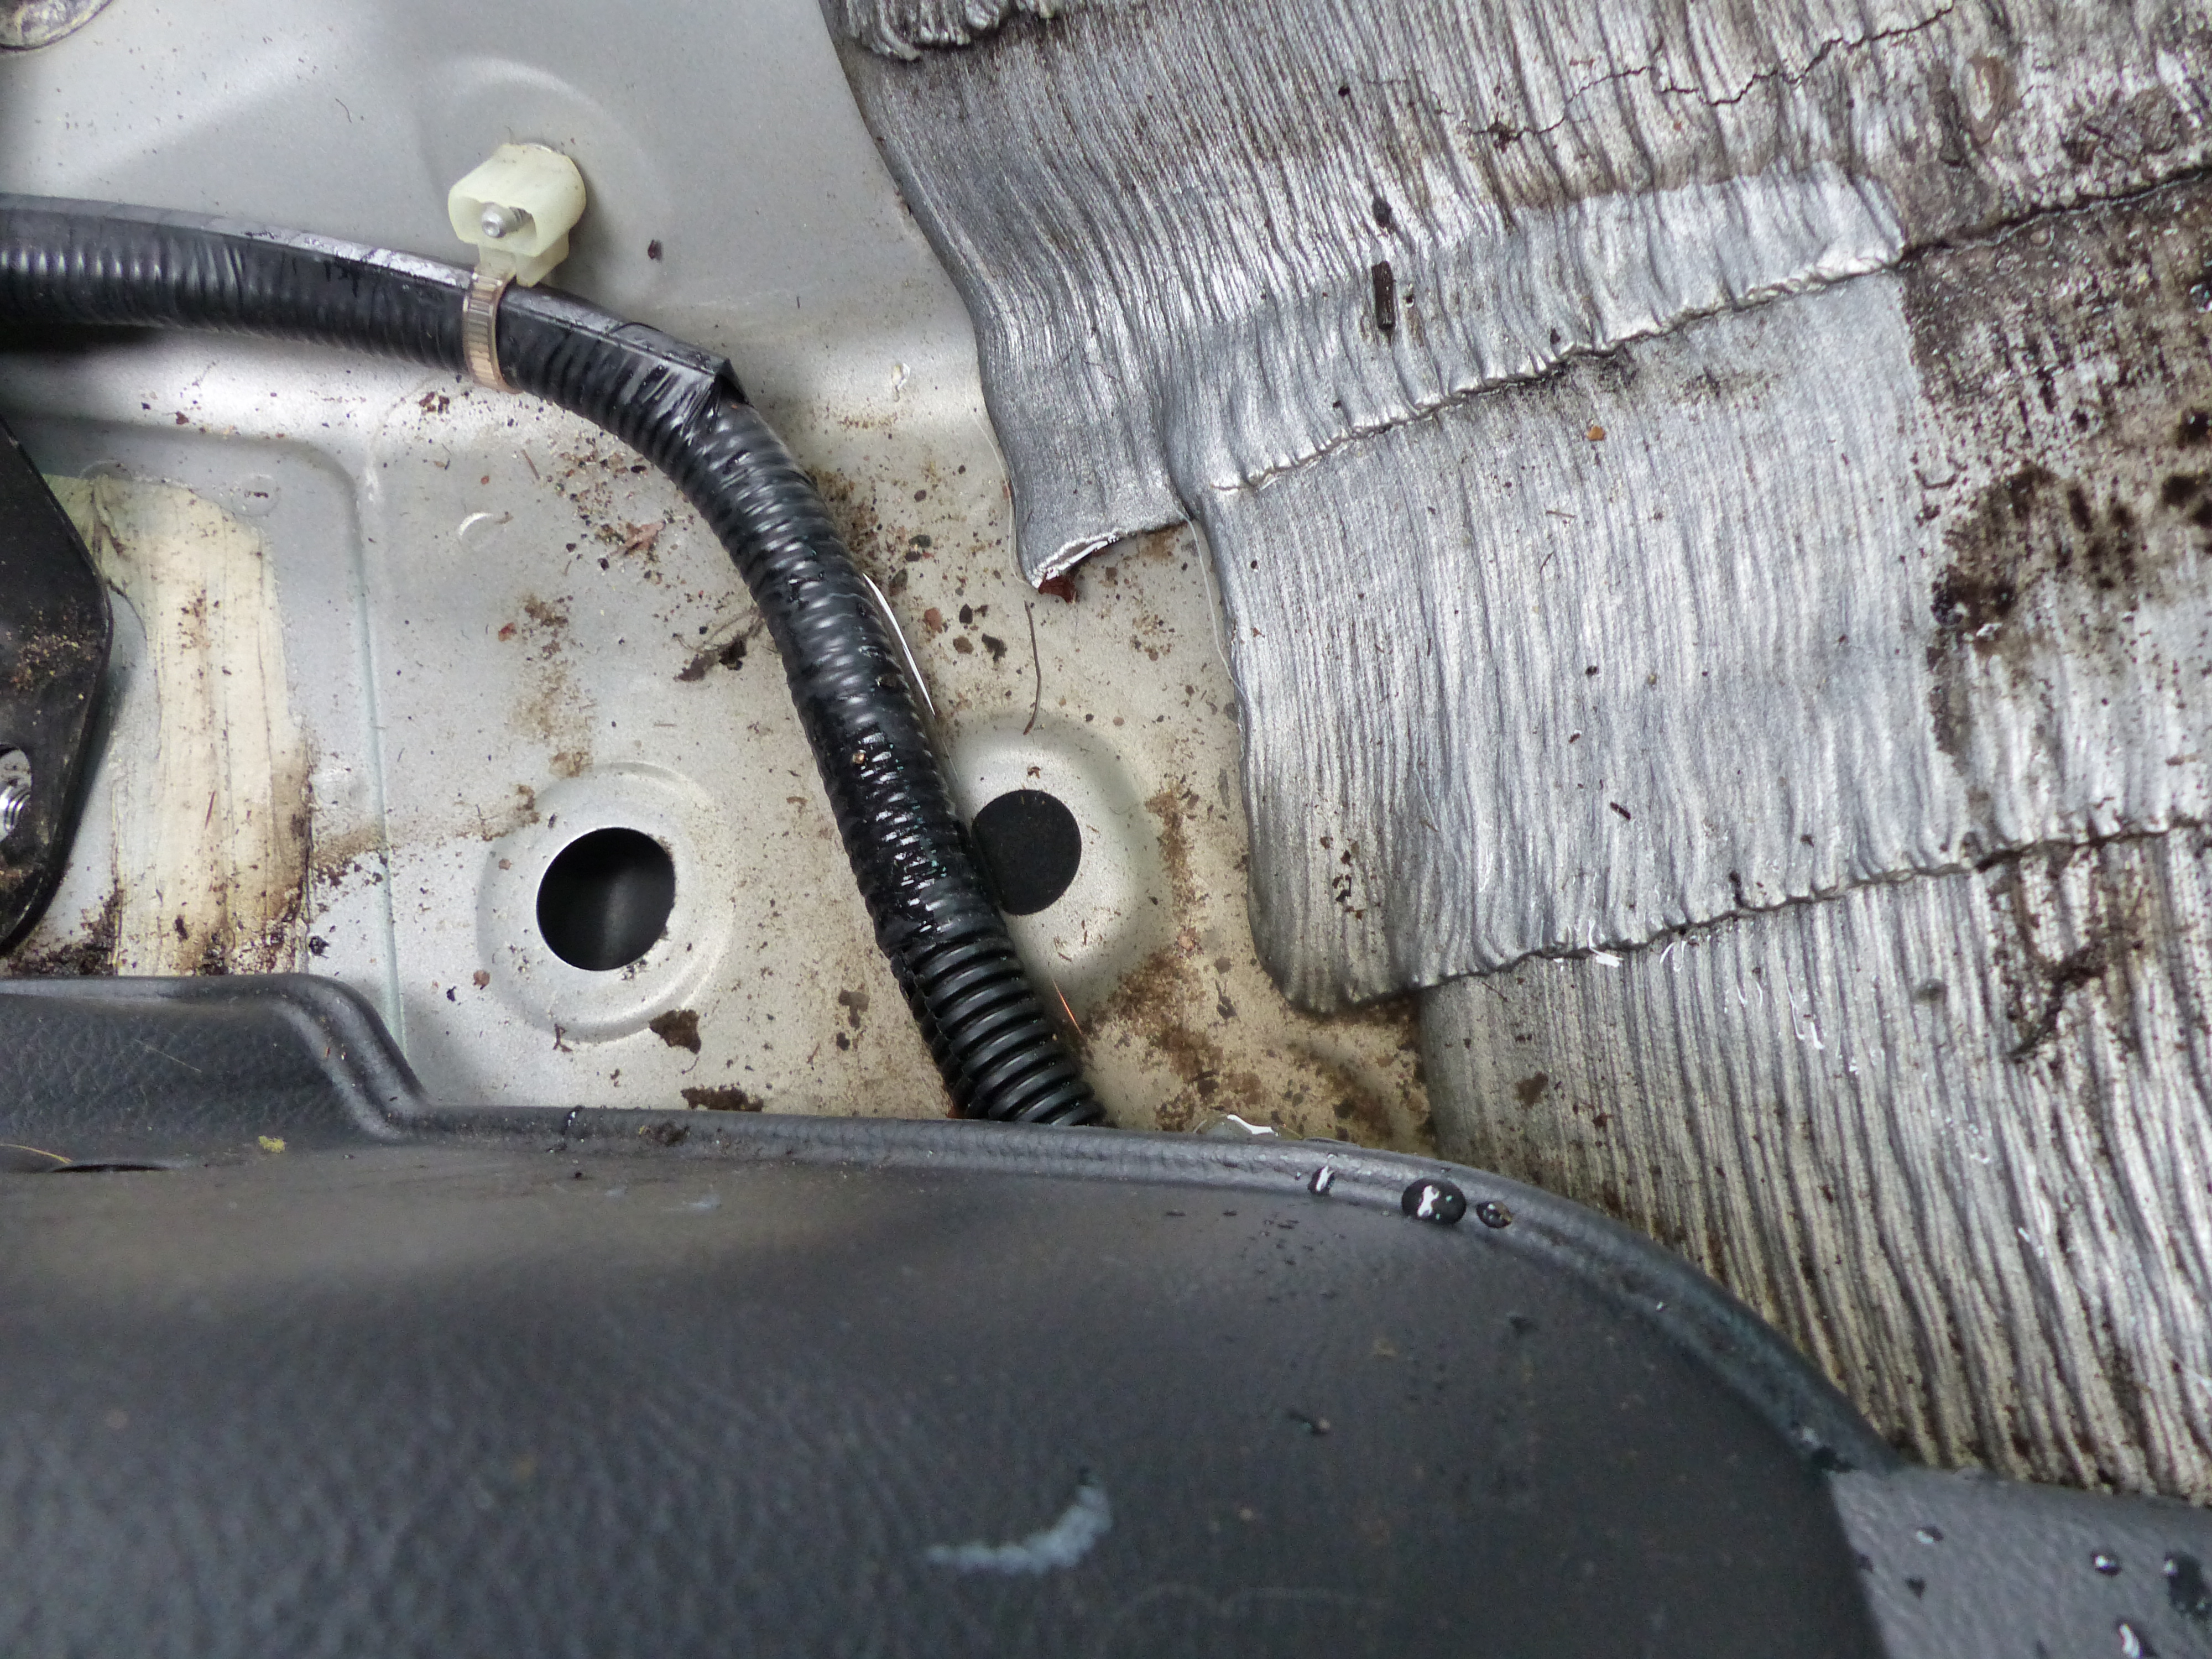
Hi Just managed to snap a pic this morn. There are a few circular holes under here, one of them has the rubber grommet (circled) which is where water runs out. Oh and just checked the footwell and seatbelt, so far so dry.


.JPG.0a293fe236896ea22dfa48fba84dd6c4.JPG)
.JPG.ea49e33a98dda4085a1c8f2463c5e4be.JPG)