Tinonline
-
Posts
786 -
Joined
-
Last visited
-
Days Won
1
Content Type
Profiles
Forums
Events
Store
Gallery
Tutorials
Lexus Owners Club
Gold Membership Discounts
Lexus Owners Club Video
News & Articles
Everything posted by Tinonline
-
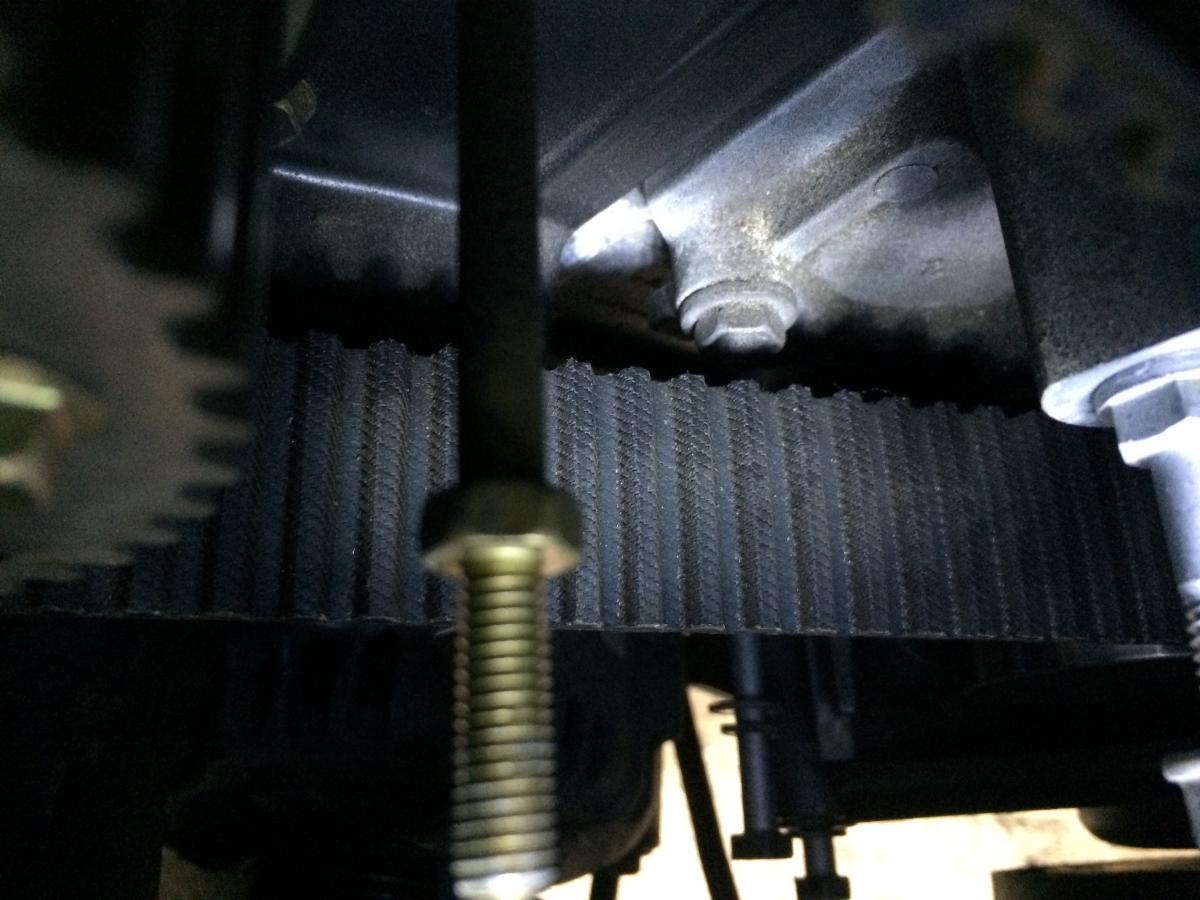
 Thanks - I'll check it. However - I'm stuck again. This time fitting the timing belt - I expected a tight fit but this is horrendous. Fitted belt to crank mark, slipped the retaining plate on. Belt around the cam with the lip L/H side. Had the cam slip where it springs forward but using the old belt I moved it back to where I wanted it. If it flicked the other way I did the same with a rachet to turn clockwise. Fitted the belt and buggered about getting as much tension on that side as possible. Then to R/H - or the other pulley without the lip. Well it was way off fitting and I checked the belt length - same and couldn't fit the old belt back on either. Panic... Checked the pulley sizes against the newly fitted - all the same. Buggered about the R/H side and got close but not enough to get the belt on. Closer but not enough. Can't see how I can do this. Belt is tight with good tension all the way around when I'm trying to do the last bit. Any ideas?
 -
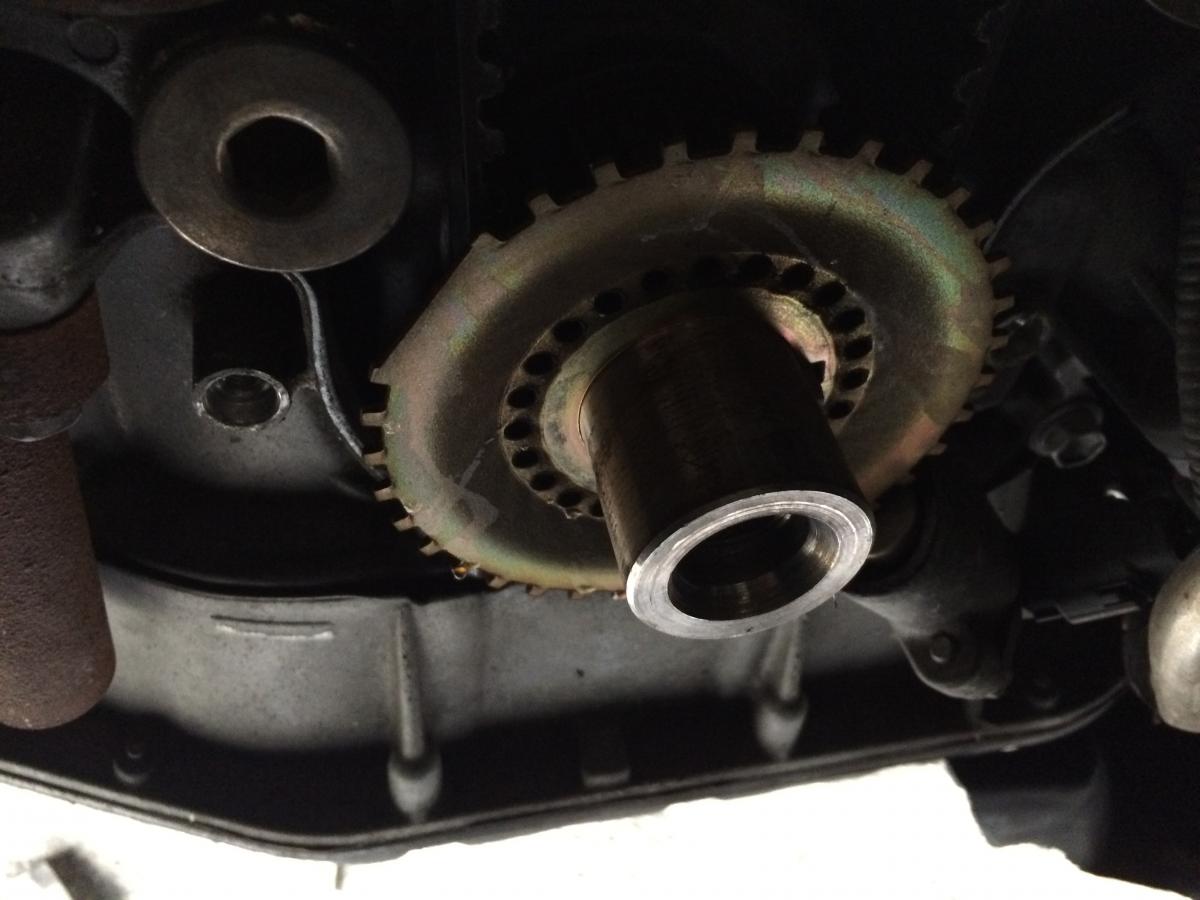
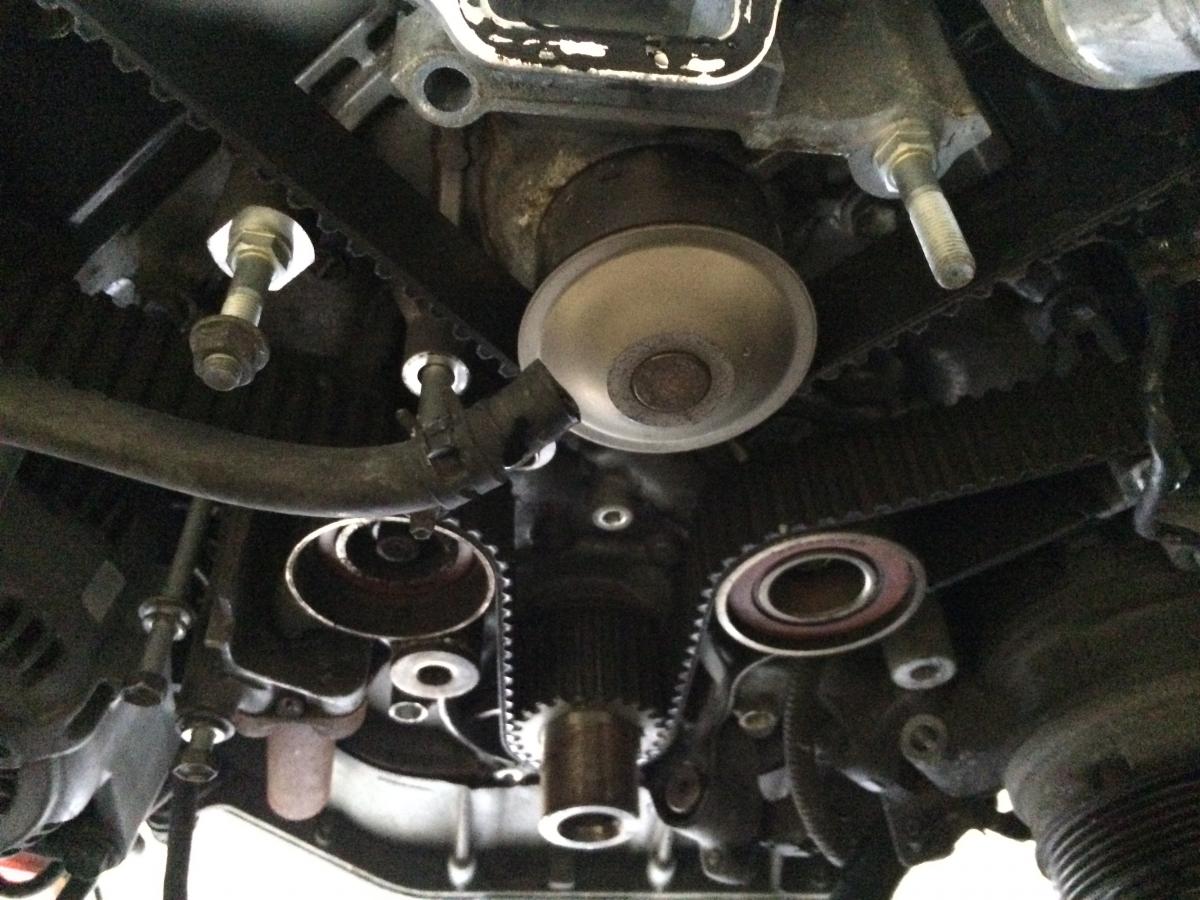
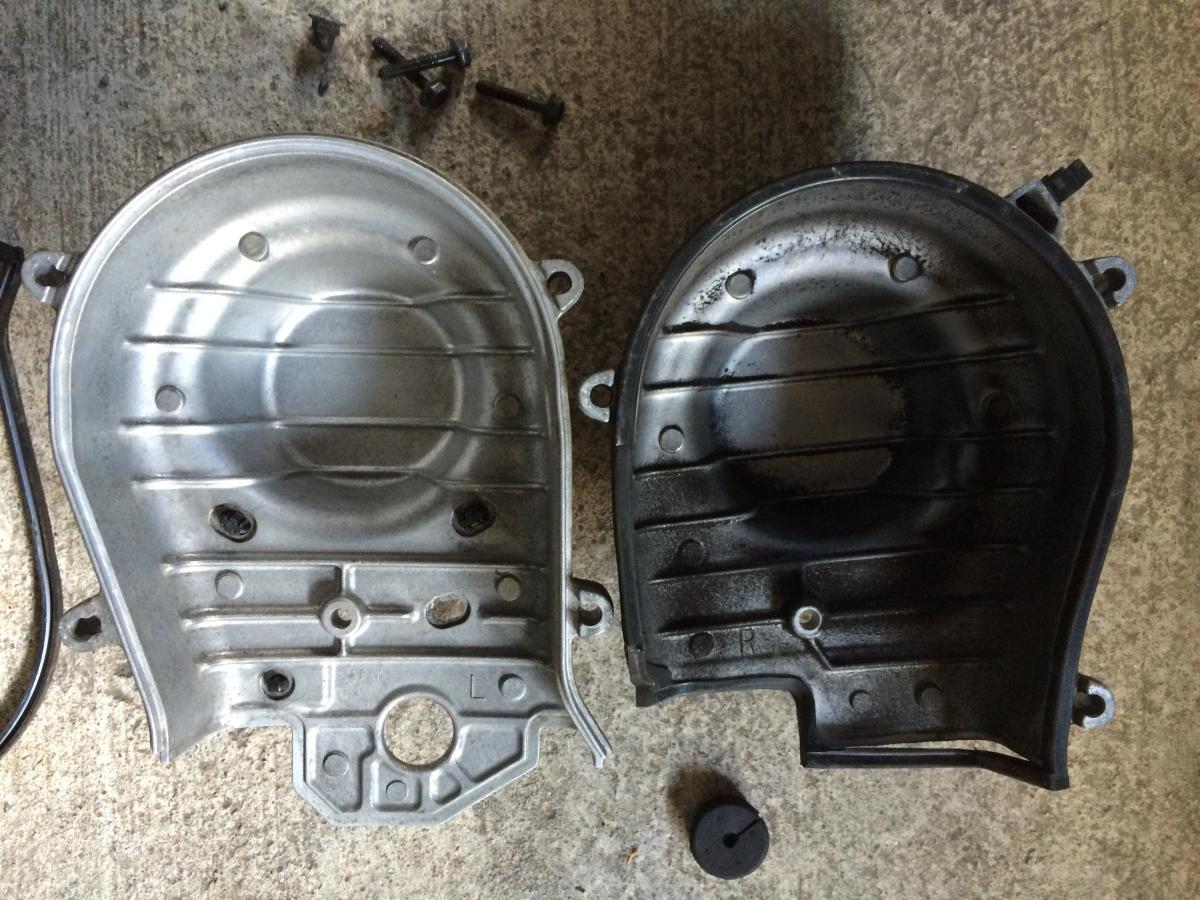
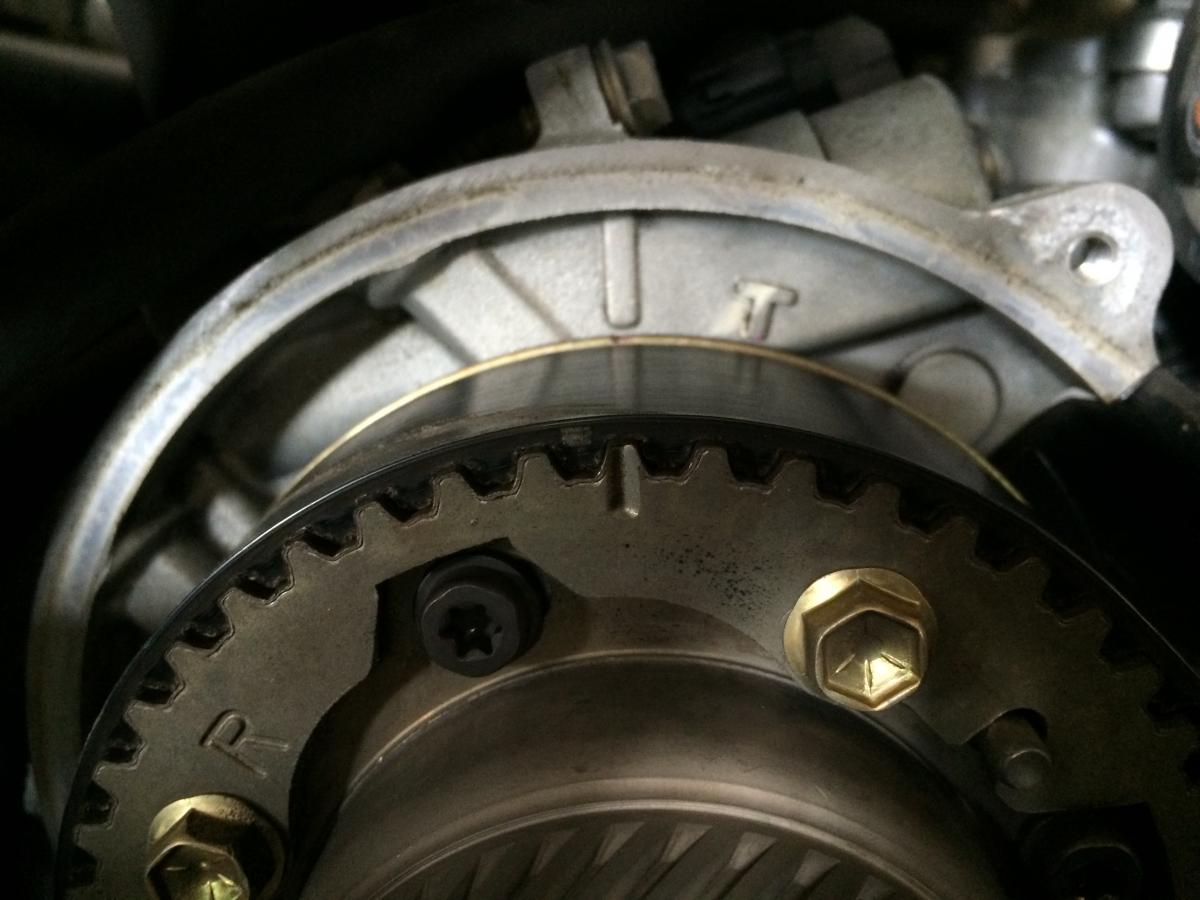
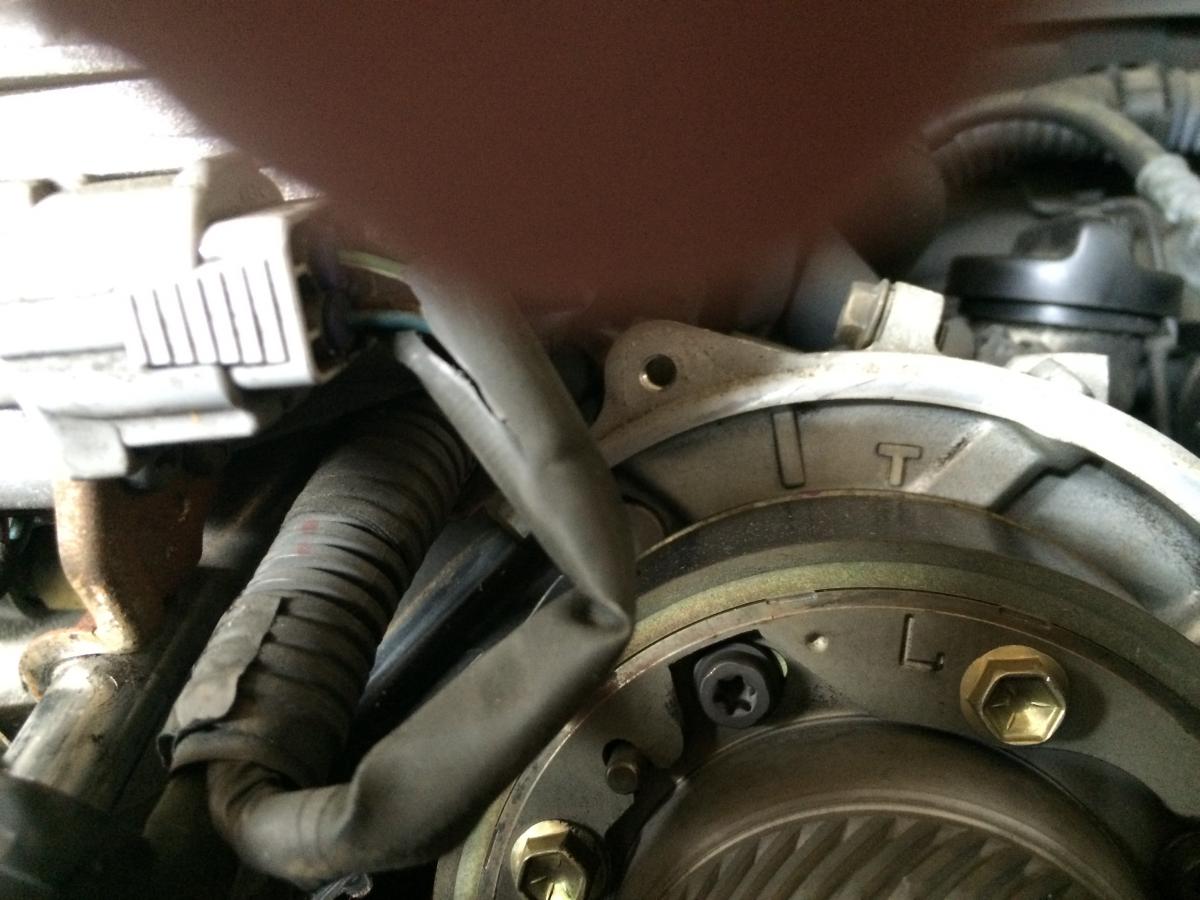
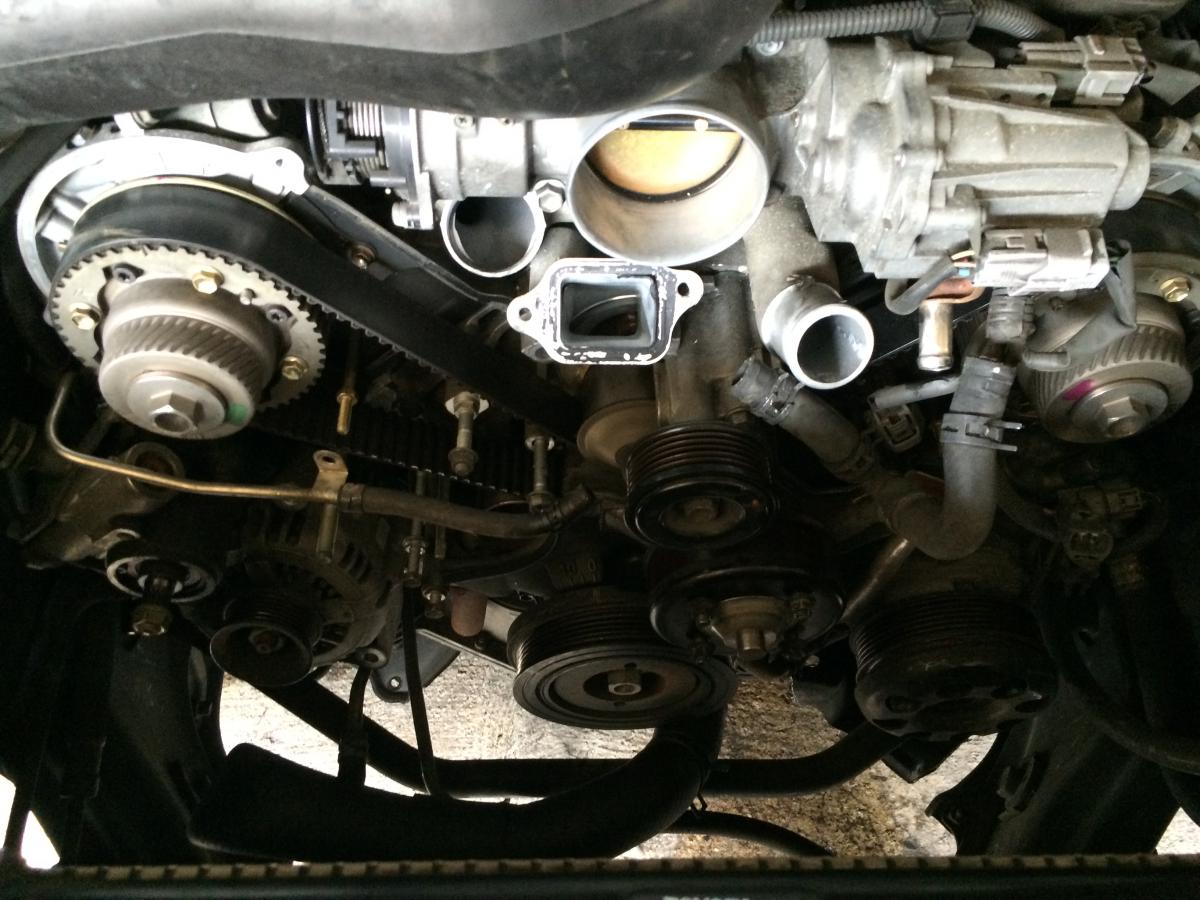
. . so how's it all going ?? Malc Hi Malc and my Lexus friends What a day! I have the front of the car up on axle stands. I checked the security of these and put them up a notch to give me more room underneath the car. One could have been better positioned so I moved it. The trolley jack is under one side although not bearing full weight, just there in case. 1) Found the inspection cover. It faces the front of the car, held on by 2 bolts. You need a screw driver to pry it out as it has a retaining lip. The rubber gasket around the plate is cracked and worn - I'll see if I can replace that. 2) I used the substantial allen key in the hole method. Facing the driver's side as you insert the angled part into one of the holes. It isn't going anywhere and is secure. Then with my impressive torque wrench and impact socket I prepared to fight. Actually it is more a question of getting comfy, the best angle so as not to hit anything...take up the slack...yep looks good...couple of pulls and it's done like undoing a normal bolt! No excessive or outrageous force required. I used a cheap as chips pulley remover and although the bolts were unwilling to screw into the pulley at first they did eventually. I suspect this was dirt inside the hols/threads. 3) I did the crank nut back up and turned the crank to get the timing to 50% on the white dot. Holding the pulley I re-undid the nut. Nothing moved. Cam marks are on the T markings on the body passed TDC. 4) With fiddling and identifying what relevant bolts needed to come out for the pulley bracket, I managed to get the 14mm bolt free from underneath the car. So much for ordereding the 1/4 drive socket - was only a few quid, might help when I put it back together. Wiggling and tapping got that out. I had to gently hammer a small 1/4" drive 10mm socket onto the coolant pipe bracket as it would not easily fit on and a spanner was impossible. This did the trick. 5) Time for the timing belt to come off: I started with the tensioner, then the tensioner pulley with the allen key then the idler pulley. All the time I was watching the cams and belt and crank to observe for any movement. As the belt slackened - everything remained in place. The belt came out and I noted in a couple of places the metal is begining to peep out like strands of wires on the belt ridge. I noted wear on both pulleys and very slight play on the water pump pulley. Then I removed the water pump - more wiggling and gentle prying. Before I start the rebuilding process, I'm going to clean up the pulleys and see if I can buff up the cam pulley covers too. Felt good and everything went to plan. :hocus-pokus:

-
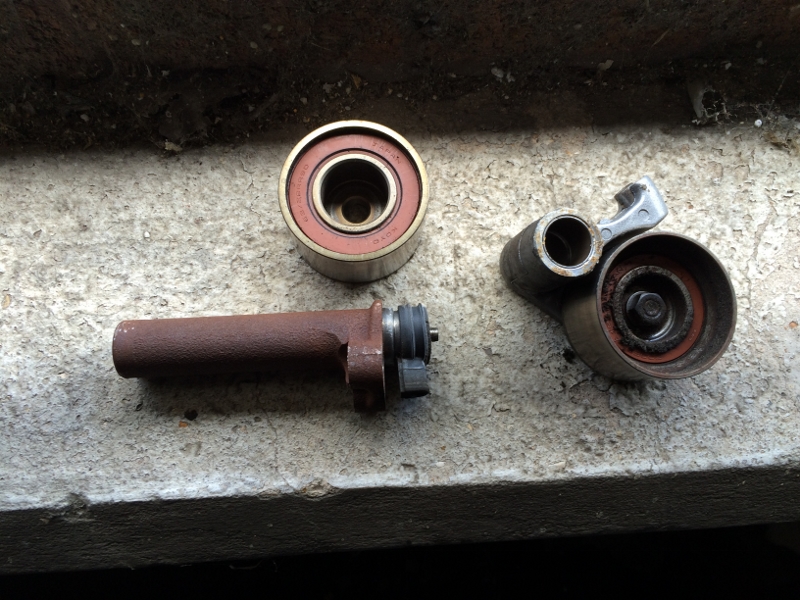
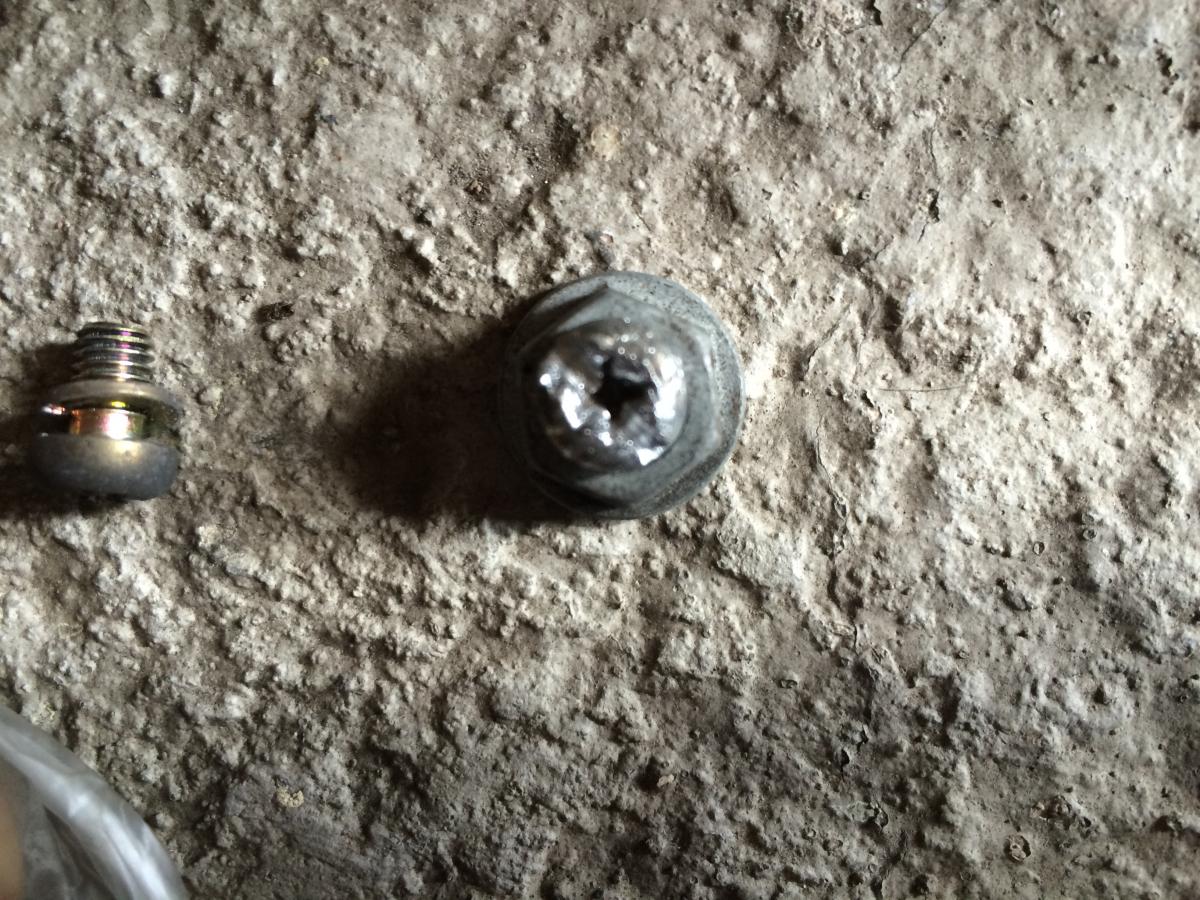
Hi Malc Taking a breather at the moment hope to put a day or so in this week. I need to remove the fan pulley bracket next and am waiting on a 14mm 1/4dr socket. Plus the crank bolt needs to be dealt with now. All parts have been cleaned and I'll clean the cams and crank gear too so as soon as I set-up the timing the reassembly will be a straight through process. I won't be using brake cleaner here on in - just a cloth and cotton buds. I've ordered a new drive belt Idler pulley and drive belt tensioner as they are both not worth putting back on the car. There's bearing noise and rough running from the tensioner and movement on the bracket pulley. I'm a bit surprised for 72k miles, probably some mileage left in them but not worth the risk and it would be a poor job putting them back on. Quite struck at the moment how poorly we are served for Lexus parts in the UK. Again I've had to go to Rock Auto as for £84.00 all in I can get a Gates idler tensioner. I've spent £244 on parts in total: Cam belt, waterpump, belt tensioner, idler; drive belt idler pulley, drive belt tensioner. That's fully inclusive. I'll replace the anti-freeze as it's old. I'm not sqeamish about non OEM as these are ancilliary service items of good quality. I'll post an update when I've done more.
-
quite right - it's the fear of getting really stuck but I have put aside time to do it. Today I cleaned up a few parts: cam covers, including using Turtle wax black polish on the seals and grommet as it cleans, protects trim and rubber really well. Cleaned the fan and the coupling as best as I could. I have the little pitter rattle of tiny bearings in the drive belt tensioner pulley and some movement in the fan bracket pulley. So there's no way I can avoid replacing those. For that tricky bolt on the side of the fan bracket, I've ordered a 1/4 drive socket which will go on to my 1/4 drive torque wrench - that'll fit and should be more comfortable to grip and put some torque on it. After that it's crank bolt time.
-
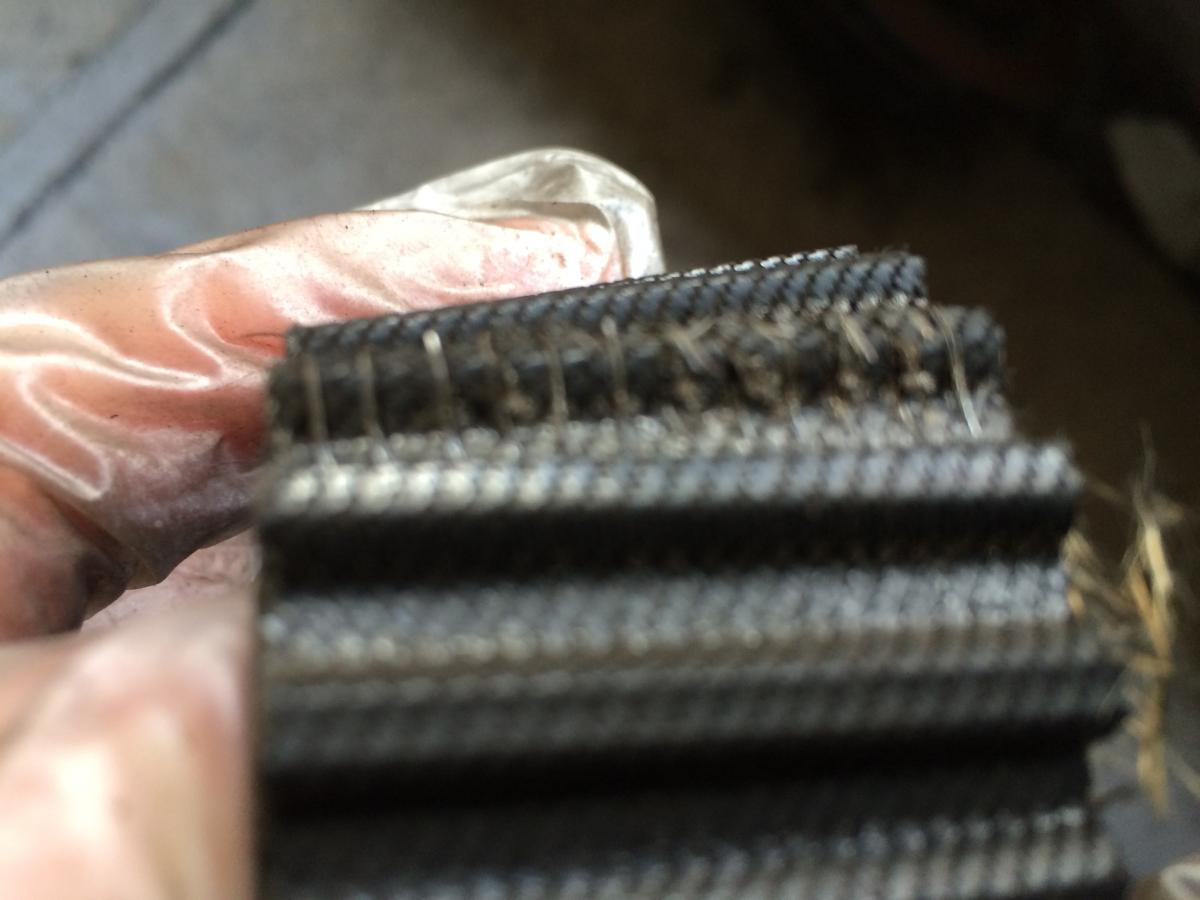
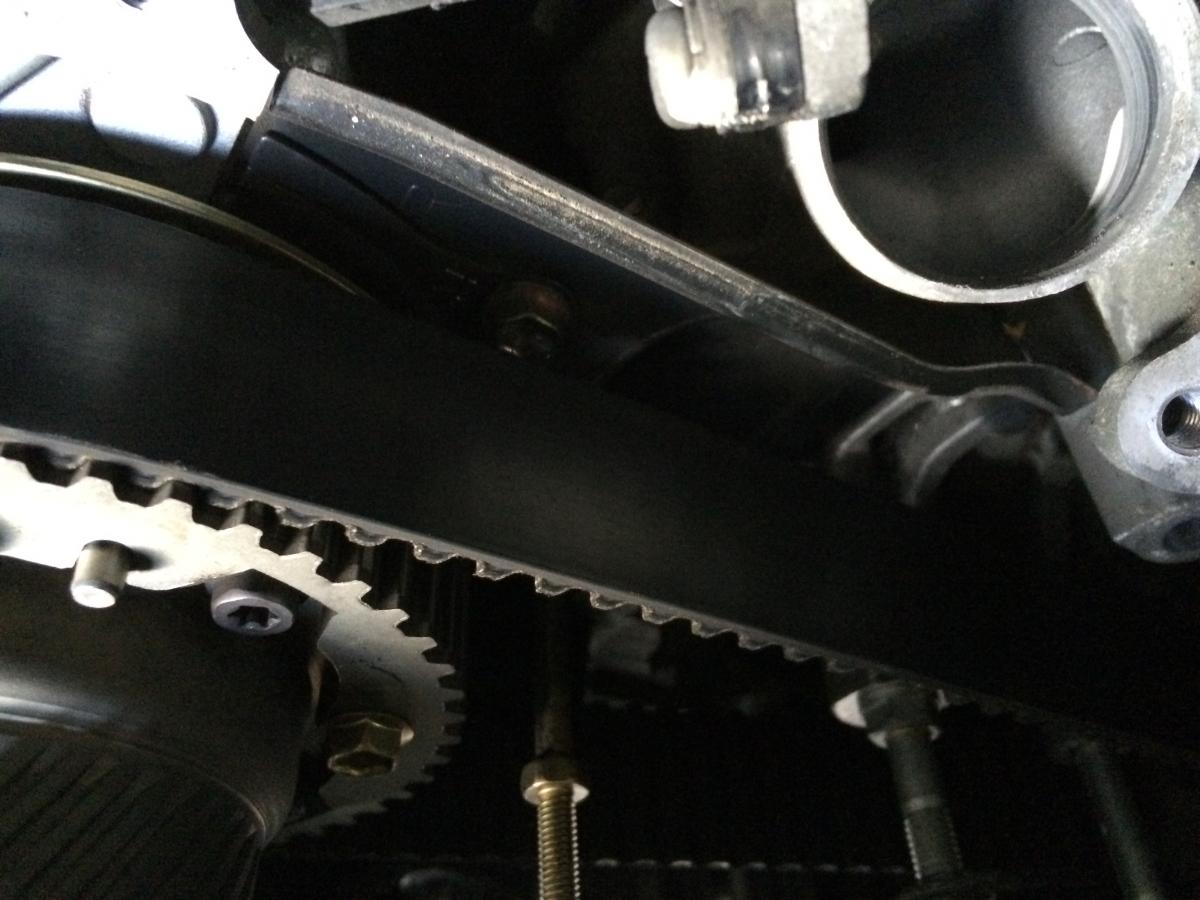
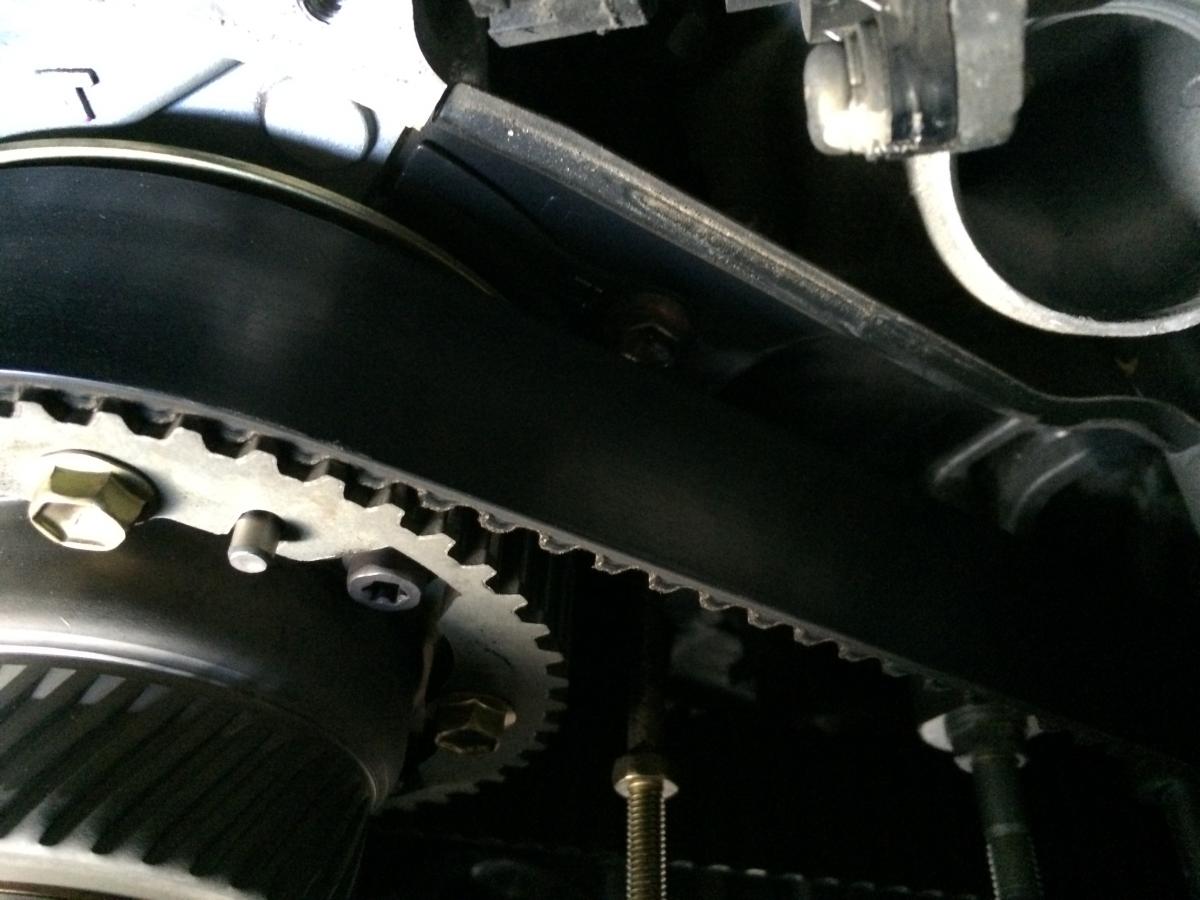
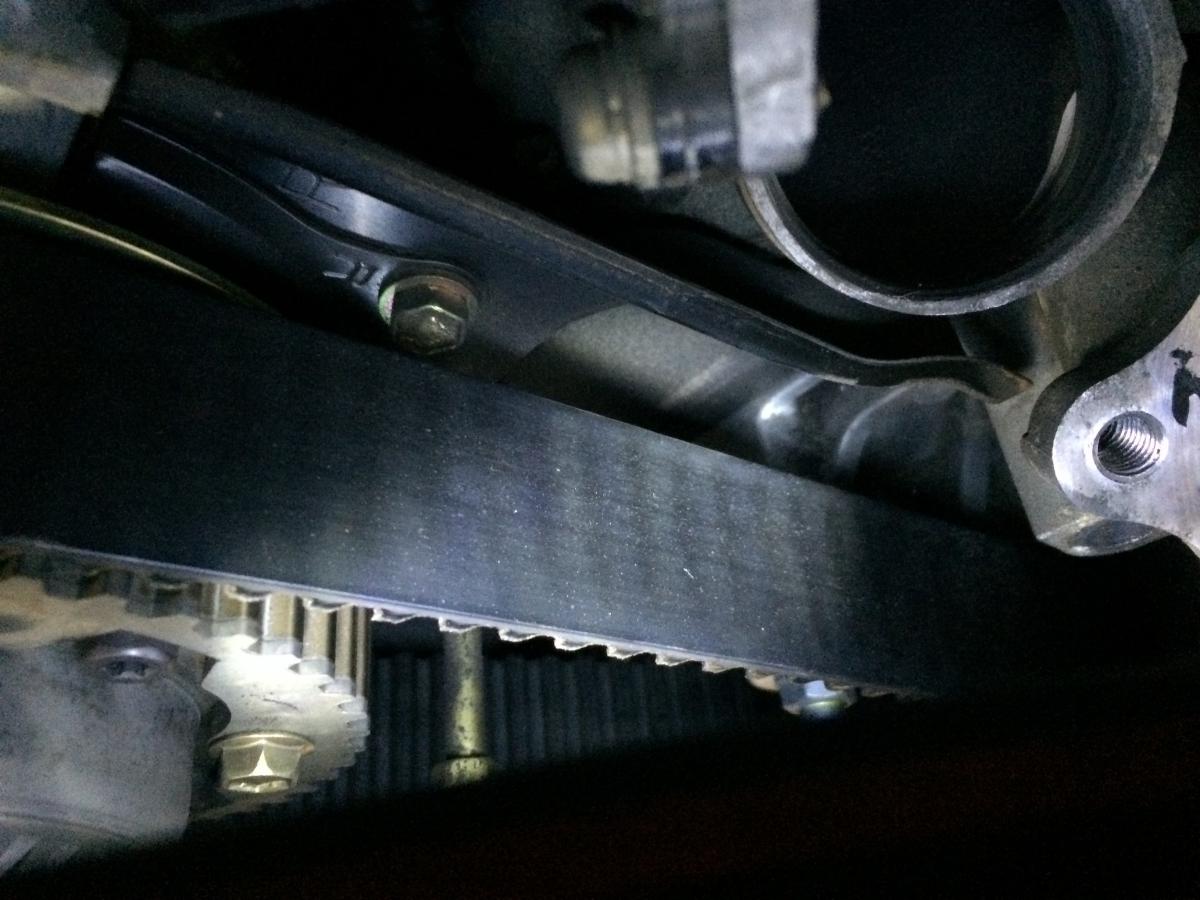
Hi Malc Belt is original: covered 72,000 miles. No cracks to teeth, as mentioned shiny with shadow or imprint of teeth on the flat outside surface. Some pics attached for you. Is this what you expected? Simon
-
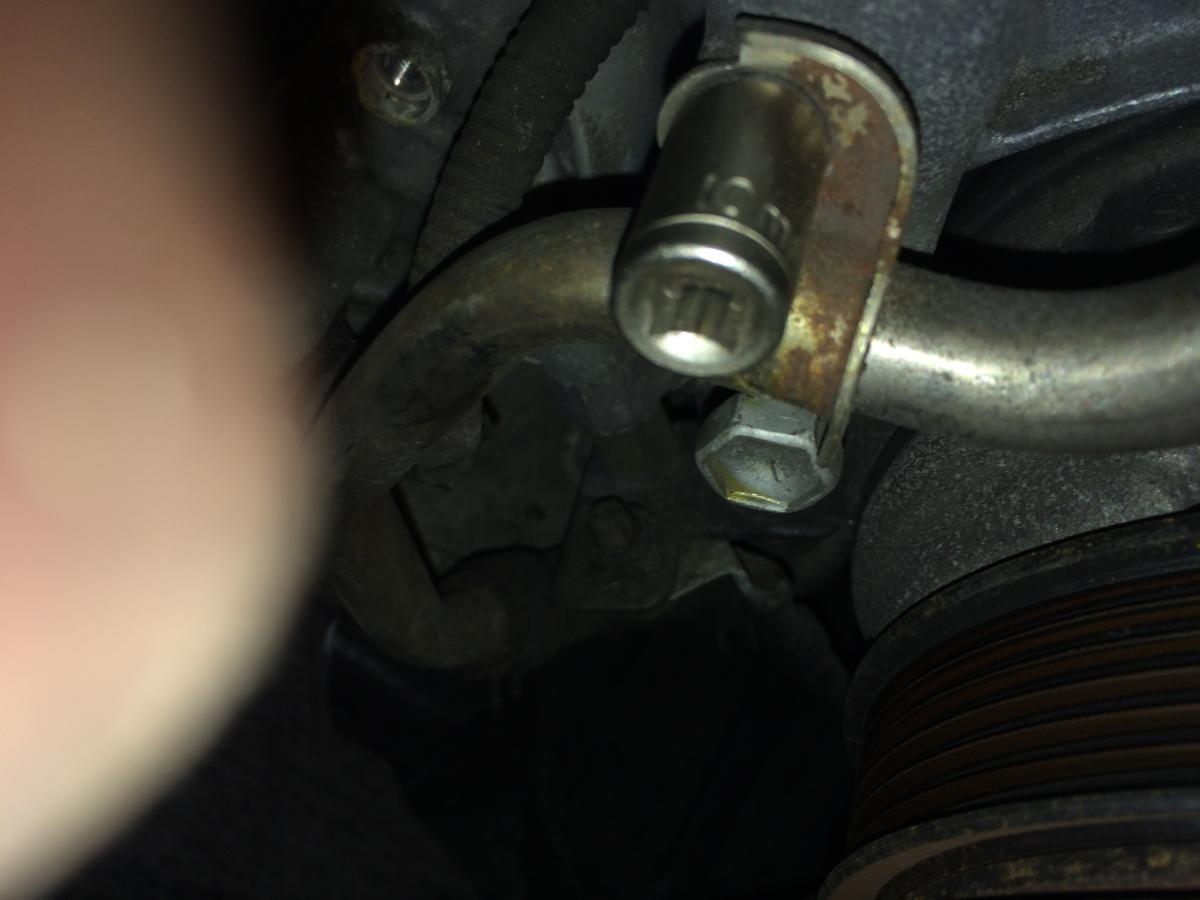
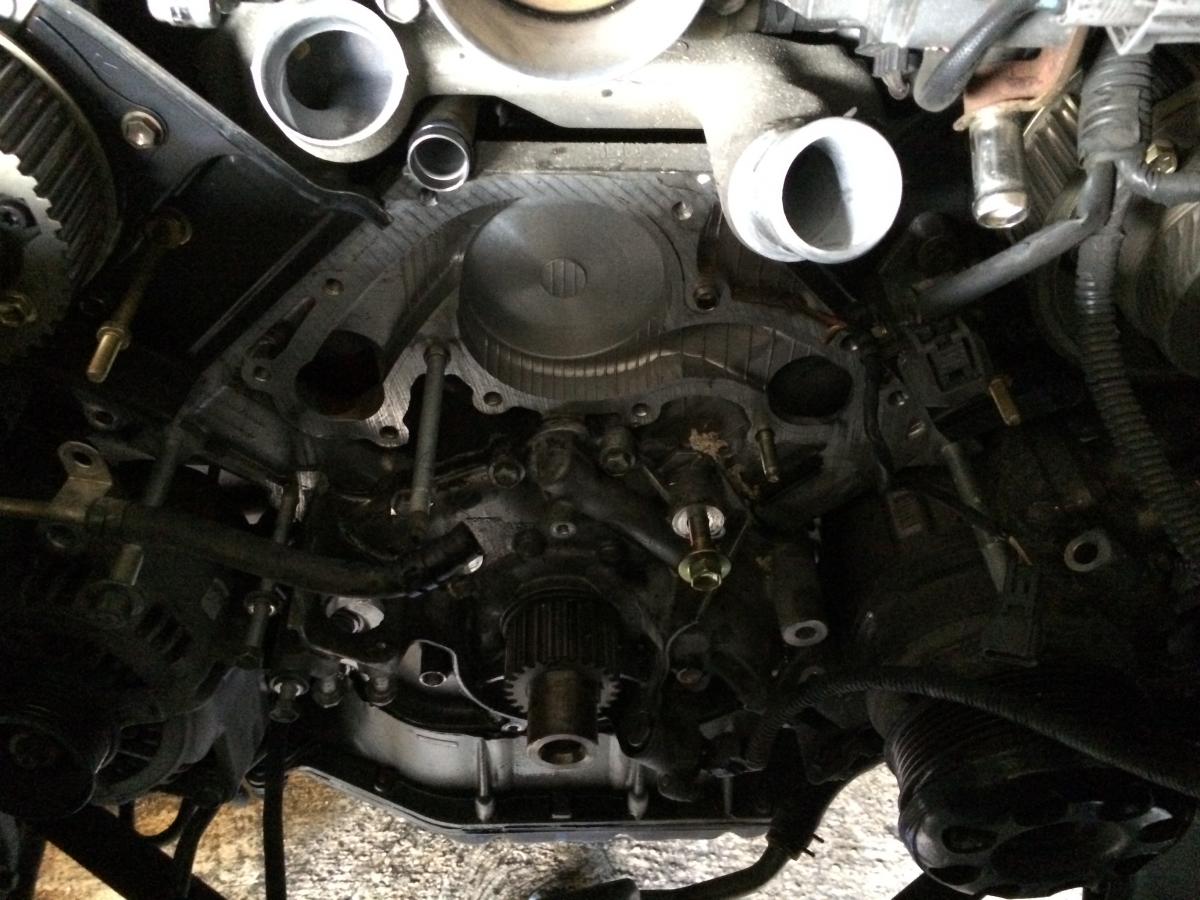
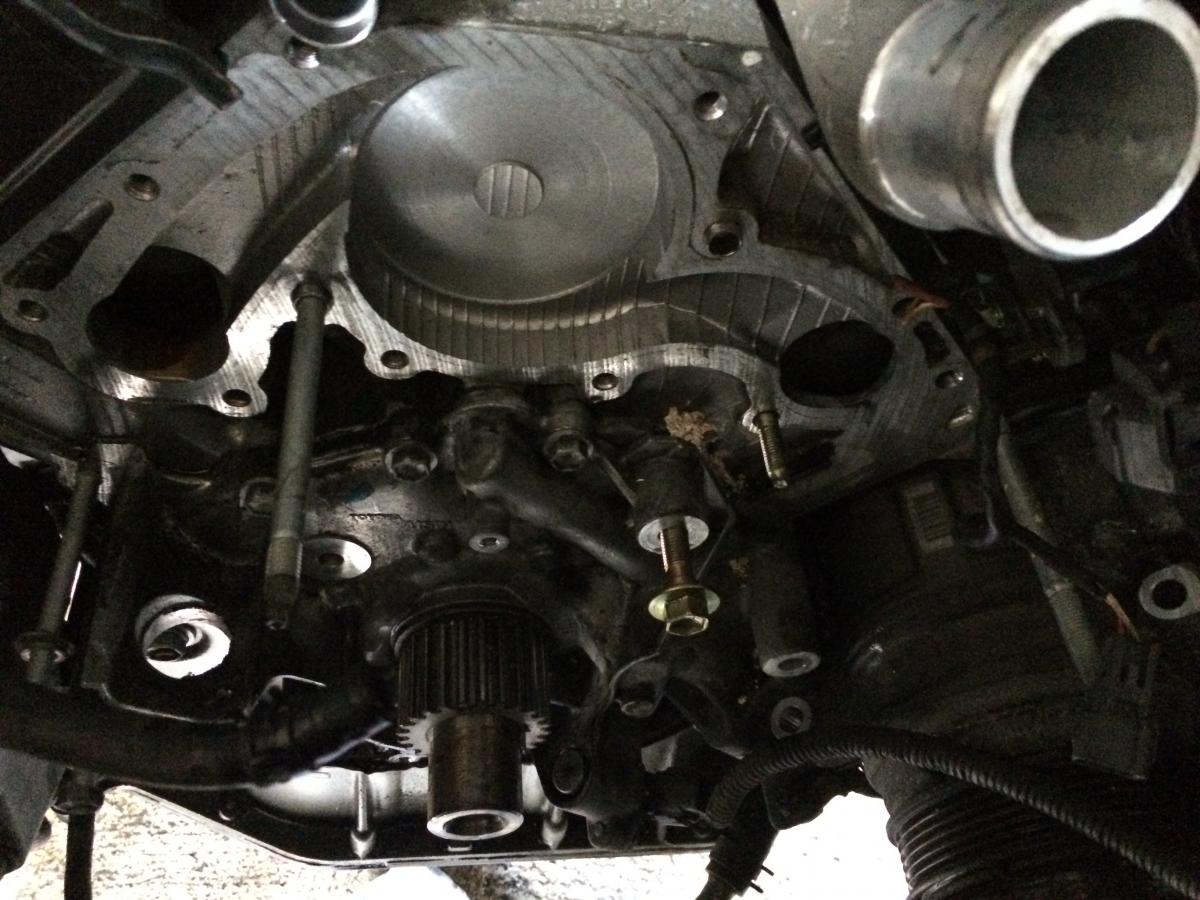
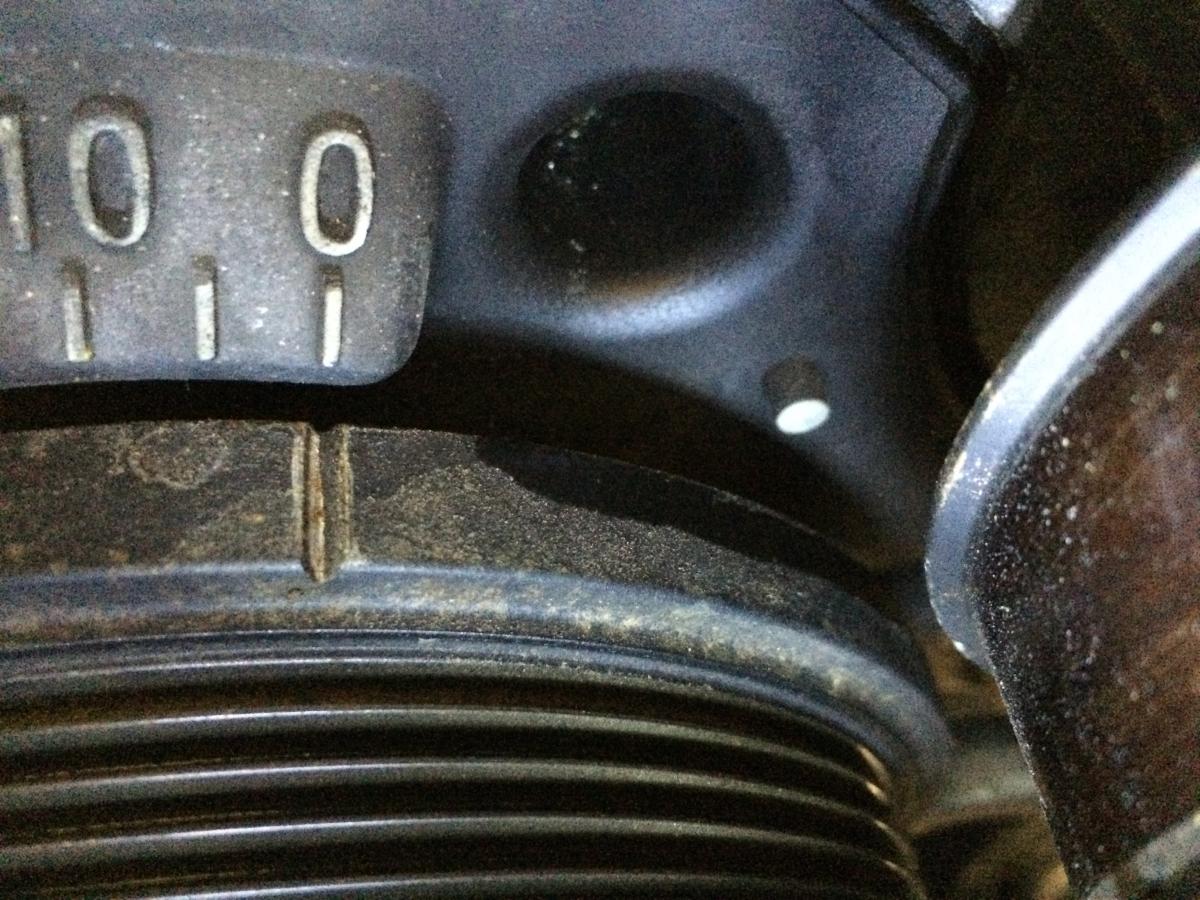
Thanks and that's good advice. Today some of the steps went well: alternator moved, pulley came of the steering pump with a gentle tap, drained the engine. The anti-freeze is certainly tired! Troublesome steps were the connectors and especially the bracket attached with 2 screws to the fan housing bracket - near the AC piping. I managed to strip the head on the hardest to reach bolt and had to saw a groove into the head to remove it with a 1/4 ratchet, socket and screw driver head - took ages. The 14mm bolt on the fan bracket won't shift at all with a spanner and 1/2 drive set is too big. I'll re-visit that another day and re-read the instructions. I've bagged sets of bolts (freezer bags so you can write descriptions on them) and arranged the covers with the accompanying bolts in the boot to aid reassembly. Job coming up is removing the flywheel cover - can't locate that - to assist in reoving the crank nut. I set the timing and got the cam covers off. Belt looks OK - I'd say shiney and on the thin side so well worn but OK. You can see the white 50 degs mark in the crank pulley photo.
-
OK here's an update I found the engine drain "tap". It's a long brass body with a small or short tube, opened up by a 14mm socket to the nut. Passenger side if you are UK. Access from behind the wheel & suspension. Left cam cover off ok. R/h is a pta. So far it seems the small things are taking ages: disconecting hoses, connector on r/h cam - can't work out how that separates, and how to remove it from the clip attached to cover. Access on this side is fiddly. Anyway taking a breather and will probably come back to the cam cover after doing something else on it!
-
Thanks - done it with wood/hammer and lots of wiggling. Finding the hose clips tough going...god bless jubilee clips. Couple of outstanding points: can't locate the engine drain plug or inspection cover at flywheel... At least I'm moving again! :luck:
-
Thanks - I'll have another go with a mallet and some wood...
-
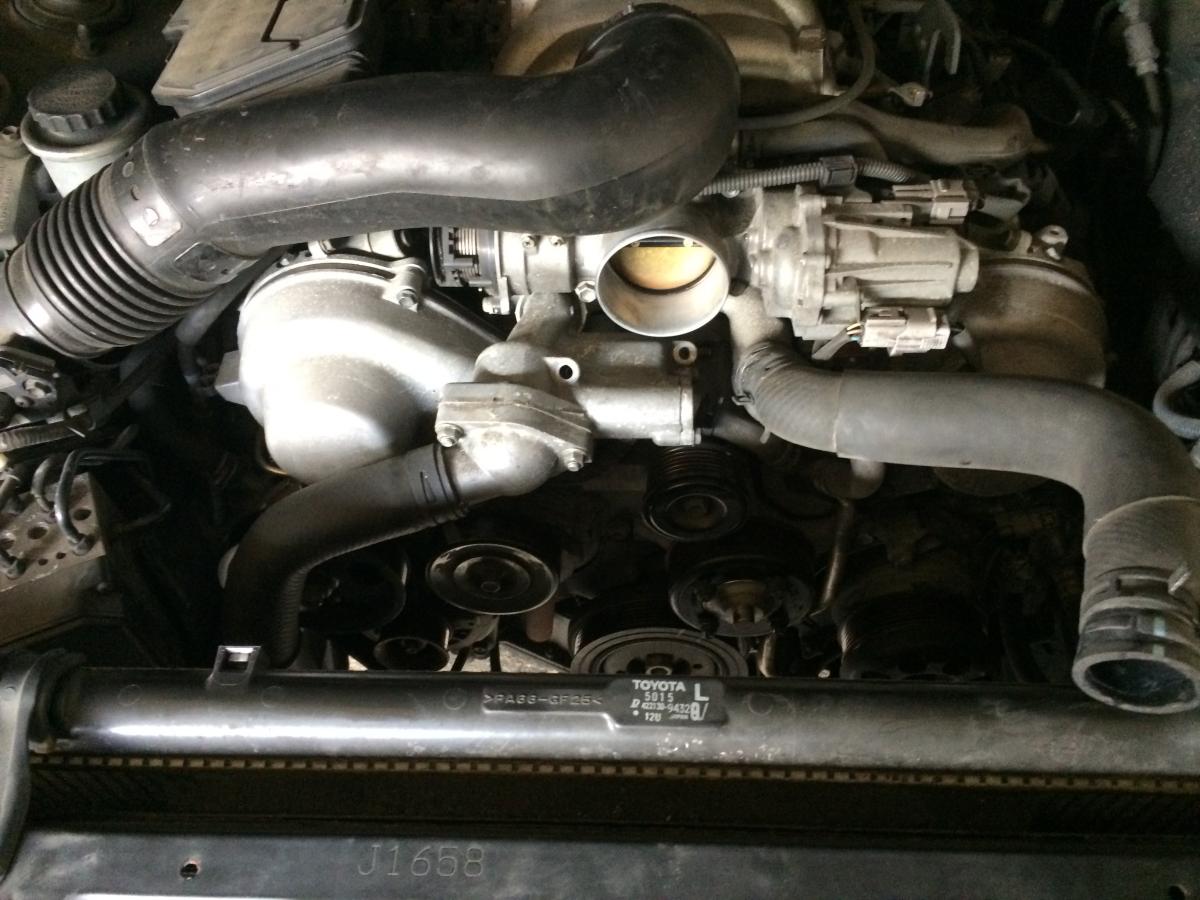
Hi Got the project off to a start this morning but now stuck: how to get in thermostat/inlet housing off? Removed the x2 bolts, can't see any other fastener - won't budge and I can't get enough leverage without fear of bending the left hand dist cover. What I've done so far: 1) Removed engine cover, trim covers 2) Removed air intake pipe 3) Removed radiator ducting, top hose to rad end off 4) Removed fan and coupling 5) Removed Under tray 6) Removed aux belt 7) Drained rad at radiator Any help gratefully received!
-
Thanks to everyone for your responses - Steve, that is the battery I have just purchased from Toyota in Boston £88 incl. Vat with 3 years guarantee. Nice one - I did the same after worrying about fit. I also noticed it was difficult to get the same spec as the OEM, most were under the cold cranking amps and sizes were allover the place. Prices not special either and Lexus was same price as yours. Most expensive quote was from Kwik Fit, takes a few minutes to fit so that can't justify their £140 odd...from memory...
-
Brake Pads
Tinonline replied to arfur45's topic in LS 400 / Lexus LS 430 / Lexus LS 460 / Lexus 600h / Lexus 500h Club
If you don't mind the price, definately. I had a Merc a few years ago, went to a great non-franchise Merc specialist who always worked on an emergency issue there and then, no booking or bggering about. They replaced my pads using Merc parts taht are made by a brand who supply, let's say a big, big motor factor. He checked his supply with Merc and I asked why he didn't source from xyz as he'd make more margin. He said they were supposed to be identical, same supplier, same box, but everytime he had fitted them - he ended up having to swop them out as customers complained about break squeal. Oh I said I've had that trouble too with pads from them for my Renault, Porsche and BMW (over time you understand...) I thought it was me... I fit Mintex to my wife's Jag - excellent performance but need to be cleaned or they squeak a bit. My ex Jag XKR had Brembos - I was terrifed - not of hitting anything in an quick stop, but of being hit in the back by a following vehicle where the driver could not appreciate 60-zero on a sixpence... Now if I upgraded: I'd fit Brembo discs and pads and would expect them to be safe from warping. That and exceptional performance. -
Will do - I'll check torques, I'll see if I can use the old belt to rotate the cams as required. I'll try not to use the bolts.
-
Ready to start when my horrendous cold has gone...that'll be the last excuse...
-
Best place to seek advice is those that power tune Lexus for racing. They will identify any quick wins in tuning £/efficiency and be able to given more precision on the weak/low performance areas of the induction circuit. What usually happens is that if you raise the induction process, to release the benefits you need to add staright through sports exhausts and possibly sports CATS. You get a completely different exhaust noise! That's quite a few £ for not a massive BHP increase and to modestly get 30-45 HP whilst retaining reliability, you need to remap the engine to ensure it works efficiently with the mods you make. Given the silly low prices of Lexus, probably worth getting the latest and quickest varient. How about adding a supercharger? Now you can just do that to a standard engine.
-
Yes, known faults should be listed...
-
The gentleman that sold me the torque wrench also gave me a couple of big spanners as part fo the deal. Now following advice on another post I can use the 2.5 inch one as a pulley holder, with drilling 2x8mm holes 66mm apart in the forks of the spanner. Or...use an allen key in the flywheel...if it's toqued on correctly then it should let go. (I don't believe it has ever been removed) I wonder if those that are over torqued have been off in the past and "re-torqued" with an air gun.
-
Hope so and may he do himself and his car full justice. :winky:
-
The Most Common Road Sign On Uk Roads?
Tinonline replied to steve2006's topic in Lexus General Discussions
Oh I thought you meant the v sign...when you dare object to lack of indicator use and other challenging behaviours... -
Can anybody help Tarun? Yep I looked at AISIN a lot, I went for the complete kit - bonnet struts is an ok job with a fiddle and brush to prop one side of the bonnet to take the weight...
-
"Would you buy a car from this man?" errr nope. Methinks he hath too much to say 'pon so little... I don't like 'bad' buyers or sellers in any walk of life as it is just poor manners. No offence intended to the seller in question, I believe he is misguided. The price is too high for a SORN and listed as spares or repair for the bonnet struts well, that's a poor story. Kind of looks ok if the history is there but...there is reason for SORN. If it was near you could look...but I think the price expectation would be too high. Only voicing my opinion, that's how I react/respond/would do to it...
-
Hi Steve Big torque wrench - very lucky to have bought this via Gumtree from a retired engineer who used it to torque up boat propellors! 10mm allen key socket - I have allen keys but I dont want to break them or get them stuck in sockets... Harmonic Puller - ebay 18" Breaker bar - take the weight out of uncracking bolts - I'll use the torque wrench for undoing/tightening crank bolt - it's a beast 22mm impact socket - for c/shaft bolt, if I hire impact wrench I'll need this, but tougher than my current set anyway Light - can't get enough of it at my age... Most folk don't lock the cams but set at 50 degs to avoid/minimise rolling. I've seen a workshop manual where they are not used and a pulley holder is used to move the cams to position to slip the belt on to each camshaft pulley. Leaves me with another question though...how hard to move the camshafts/pulley then?!
-
Yes thanks - true. On more research I noted that for the later 400's the timing mark on the crankshaft does indeed line up with the belt's mark on the ridge of the belt. Earlier versions are slightly different.
-
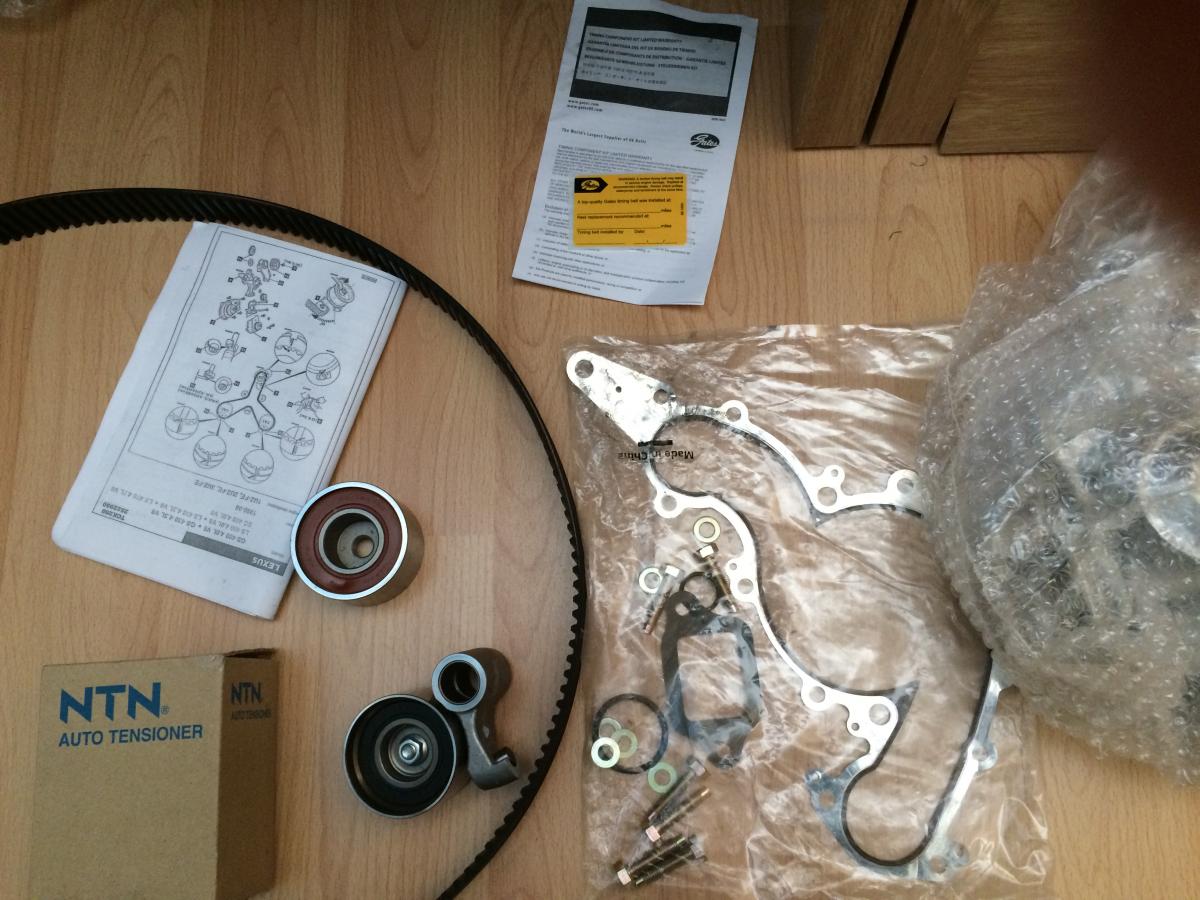
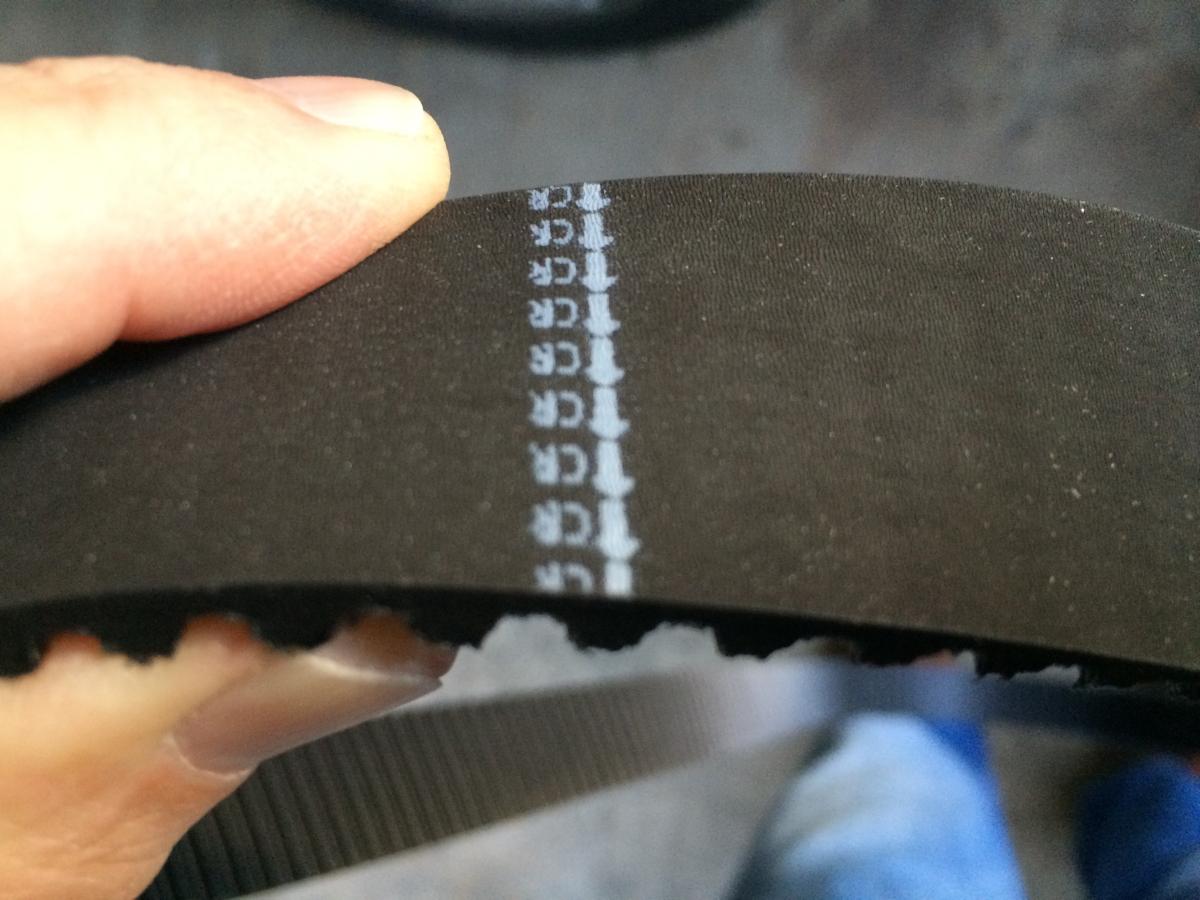
Hi I readying a cambelt change on my Year 2000 LS400, studying posts, tutorials, fretting, pacing and ordering a few extra tools that I need to make the job possible. After much deliberation, a great deal more than 'much' in fact...I opted for the Gates kit: TCKWP298; its the 5 piece with water pump and tensioner. Even with all the issues around Jaguar tensioners, having owned Jags, I prefer chains. They are on for life. Noisier? No. Heavier? So? Jags are amongst the quickest in class on engine size. This is what's in the box: The descriptions of contents is really poor and I've read posts where folk complain about not having seals and gaskets etc. and I do believe it's an easy up sell to give options to customers. This kit does have everything to do the job: including the square inlet gasket, small round seal and larger one for the outlet (?) plus bolts and washers for the water pump. Gates probably made the belt, made in the USA. The pulleys are Koyo from Japan and the w/pump is from China. (Nothing wrong with that as long as it's not knock off or built to poor specifications). The tensioner is a NTN...anyway they have sourced other components for 'their' kit. Rock Auto need to pad the internals of the Gates boxes for transport - there is plenty of bumps and bends to the w/pump gasket and a compression injury to one of the pulley plastic covers. The instructions are present but are of a poor quality. By the way this kind of detail is not expensive...so add a few $ or £ to cover and make margin. I bought the kit from Rock Auto as it included VAT, shipping etc, for £160 inclusive. First thing I did was to take a look at the timimng marks on the belt: The crank mark is on a ridge of the belt. That's not as expected having read all the tutorials, even the specific later engines. Comments most welcome...
-
New Cam Belt
Tinonline replied to Foulsbane's topic in LS 400 / Lexus LS 430 / Lexus LS 460 / Lexus 600h / Lexus 500h Club
Given the work involved that's pretty good going. A water pump and pulleys should be, or ought to be good for 100,000 miles....for an average motor but for a quality product I'd expect double. Don't you hate this commodity approach? Well all the related bits should be replaced etc etc. No they should last the lifetime of the vehicle.