
Peter P18
-
Posts
1,654 -
Joined
-
Last visited
-
Days Won
26
Content Type
Profiles
Forums
Events
Store
Gallery
Tutorials
Lexus Owners Club
Gold Membership Discounts
Lexus Owners Club Video
News & Articles
Everything posted by Peter P18
-
 So, great day at Tuner Fest South today at Brands Hatch. Even more so after I was announced 'Car of the show' in the Kleers show 'n' shine!! Here's some photos I took. And I saved arguably the best photo till last!
 -
No worries Stu. Weather looks like it should be ok today. Hopefully it stays dry, that's the main thing. Will take some photos. Cheers! Peter
-
Hi, Afraid not. You're understanding of the modes is correct. The box differs from others by not nannying things in manual mode. It will change eventually, but can't see it being healthy for the box or engine. Try sport button or Apexi throttle controller? Both help in their own different ways.
-
RR-Racing USRS group Buy
Peter P18 replied to DT_Racing's topic in Lexus F Club - Lexus IS-F / GS-F / RC-F Club
Guys, I deal with Rafi and Simon. Already have the USRS, AOS, Titanium intake, and about to buy their performance package (PPE headers, tuned intake, handheld controller for remapping the ECU). I will be heading to New Jersey before the end of the year to do an audit. I plan to visit RR-Racing HQ, and see their supercharged shop car in person. I can probably bring a bunch of these back to help out? If you then want to donate a small fee to help keep developing my car, I can post these out recorded delivery when I get back? Not expecting much, but a token donation for my time and effort would seem reasonable (say £20 per person plus shipping costs?). If we can get 5 buyers, I'll email Rafi to see what discount he can offer me. Let me know if that works. Cheers. Peter -
Hi All, Appreciate it's short notice, and Fathers Day, but thought I'd see if anyone else is planning to attend? My car will be on display at the Kleers stand, so if you are coming, please stop by and say hello. Weather looks promising, but not so much tomorrow when I need to get the car cleaned up and ready! Hoping there will be some dry spells, but we'll see! Cheers for now. Peter
-
Looking to buy an IS-F
Peter P18 replied to Tom24's topic in Lexus F Club - Lexus IS-F / GS-F / RC-F Club
Hi Tony, The IS-F is a great car for sure. Fast, reliable, rare, and fun to drive. Early cars can be improved relatively easily to address a number of the issues Lexus themselves rectified on later cars. Prices vary depending on age, mileage, etc, but important to find a car with a complete service history. You often find prior owners ignored the correct servicing schedule, and worked on the basis of every 10K miles (even if that took longer than the year recommended). If the car is a 2009, you should in theory have at least 7 if not 8 stamps in the book. Lexus can normally help with any gaps in the service history if you give them the VIN number. Fortunately most of the dealerships back everything up on the computer as well as the service book. If your budget doesn't stretch to a 2011 or newer version, don't give up. Good 2008 cars can be had for high teens/low 20's, and with improved suspension (you can also retrofit the later stuff as others have done), and a mechanical LSD, you would be hard pushed to notice the difference. Best of luck with your search, and let us know if you need any help with anything. Cheers. Peter -
ISF Pictures, just ..... because
Peter P18 replied to DT_Racing's topic in Lexus F Club - Lexus IS-F / GS-F / RC-F Club
Thanks. Both sourced from the States. The diffuser is an Arkym item, which I believe is now discontinued. The boot spoiler is a Wald replica, sourced through the US forum. Believe it or not, I brought both back as checked luggage on business flights from the States! Lol. -
The problem is there are a number of variables that can affect the results you get. I'm guessing you didn't have the bonnet open for your runs (hence the high manifold temps)? Also worth considering removing the main engine cover, as it is well insulated to reduce road noise, but allows quite a bit of heat build up. I don't believe anyone in the UK has quite mastered the art of dyno'ing the IS-F as yet. We did a couple of dyno days in the past (should be a thread on it around here somewhere), but the first place were utterly useless! Eurospec were a lot better, but we were doing the runs in 6th gear as recommended from our American brethren! I guess it would be useful and worthwhile trying to keep these results together on a new thread? We can then start trying to fine tune and replicate as many conditions as possible to get more accurate results. The dyno operator plays a huge part in this process though. If they mess up the calibrations for the dyno, the results will be way off!
-
Picking my ISF up on Thursday :)
Peter P18 replied to Flytvr's topic in Lexus F Club - Lexus IS-F / GS-F / RC-F Club
Welcome! So big day for you today! Hope it all goes smoothly, and you have a safe and fun drive home with the new car chap. Congrats on joining a great 'F'amily. It's a small group, but we are all happy to help one another where we can. Enjoy today. Cheers. Peter -
iNFO ON SAT NAV & RATTLES
Peter P18 replied to Matrixxxx's topic in Lexus F Club - Lexus IS-F / GS-F / RC-F Club
I've got an annoying rattle somewhere inside my front passenger door to address at some point! I'd highly recommend grabbing a set of these if you plan to remove trim panels: http://m.ebay.co.uk/itm/Bojo-Blue-Genius-Car-Trim-Clip-Pry-Removal-Tool-Kit-10-Piece-With-Tool-Roll-/260873110956?nav=SEARCH They are easy to use, and less likely to scratch/scuff the soft plastics than screwdrivers. Have a word with Ian at Hayward & Scott about the exhaust rear section. He gets a few every now and then. I'm sure he'd be more than happy for you to have one, saves him having to scrap it. -
Hey Mike, How did the test drive go? All good I hope. Let me know if you feel any parts of my DIY guide could use extra detail. Hopefully you tried red mode?
-
Hey Mike, Correct. This is to wire in the reverse safety cut-off feature that hardly anyone bothers with! Lol. I honestly think it's more for the guys in the States that might let the valet park their cars. I am now used to switching off the throttle controller when I pull up. That way it's never on when I select reverse gear. You can discard the grey wire in my opinion, but it's ultimately up to you. I should add the DIY is my interpretation of how to do the install. I can't be held liable if you don't wire up the cut-off, then crash into a load of parked Ferrari's! Lol.
-
Looks pretty good to me. Will await your further explanation etc when you have more time to spare.
-
Nice! Look forward to hearing how you get on.
-
New ISF Owner
Peter P18 replied to Matrixxxx's topic in Lexus F Club - Lexus IS-F / GS-F / RC-F Club
Welcome to the 'F'amily! Guessing from your harsh ride comment it's an early model? 08 I'm thinking? Even Lexus realised the ride was too harsh, so later models received softer setups. I switched out the stock coilovers and springs to BC BR's with Swift springs. Rides much smoother nowadays, I'll probably get something better at some point, but these are pretty good for the money. Enjoy! -
ISF Pictures, just ..... because
Peter P18 replied to DT_Racing's topic in Lexus F Club - Lexus IS-F / GS-F / RC-F Club
Thanks. Yes, 19's. These are the now discontinued Wedsports SA67R's. They've actually been refinished since that photo in dark anthracite by Rimtec in Meopham. Lost the blue inner band, but actually look better now I think. Changed the lug nuts since this photo as well! Lol. Need some up to date shots it seems! -
ISF Pictures, just ..... because
Peter P18 replied to DT_Racing's topic in Lexus F Club - Lexus IS-F / GS-F / RC-F Club
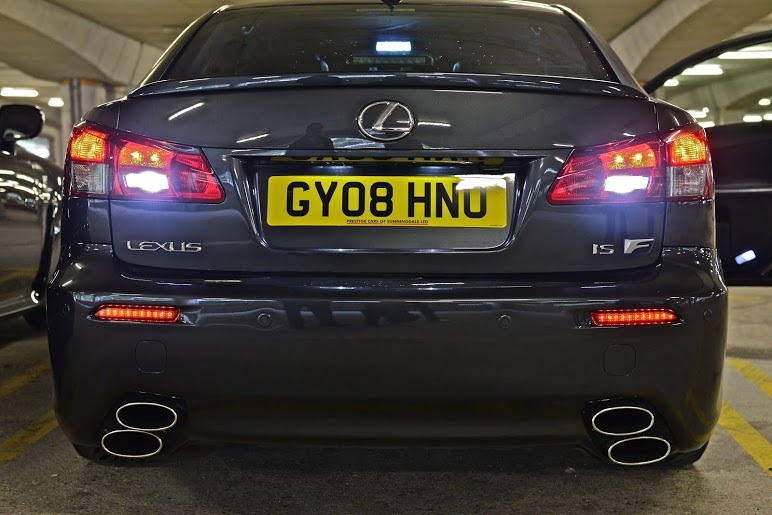
Probably my favourite photo so far. Really looking forward to getting the ones Matt did for the Banzai article. Guess that won't be for a while though! Still waiting for them to contact me to write the article. -
Thanks guys. Happy to try and help out my fellow 'F'er's! Hopefully a mod will be along soon to validate my DIY thread and give me my second club contributor star! Will then have a think about the next DIY guide I think will be useful for people. If anyone needs anything, let me know.
-
Thanks. I probably need a couple more photos to cover the pin connector install. I'll hopefully get those when I do the next install. Should add I'm happy to help fit these if people are worried about tackling it themselves. Just need to come see me in Kent. The throttle controller on red mode is a nice compromise between normal and sport mode. Highly recommend it. If anyone wants one installed, PM me. Cheers guys.
-
Hi Chaps, So I was asked to compile a DIY for the Apexi throttle controller. Tools you will need: - small flathead screwdriver - medium Philips screwdriver - Bojo trim removal tools (optional, but they will save your soft plastics from scratches). You can use a flathead screwdriver, but I suggest wrapping the tip in some electrical tape. - 3M double sided tape So, first things first, have you got the model specific wiring loom from Apexi? If not, you need it! Should look like this. Here are my set of Bojo tools. These are made from hard plastic, but not too hard to scratch or damage your soft trim. You can grab a set from eBay for £30-40, but if you don't do much DIY stuff, might not be worth the investment. Using the flat headed tool, carefully pry off this side panel. Note you don't need to remove it fully, just need access to the switch panel where we are using a blank switch to house the Apexi button, and feed the switches wire down towards the pedals. See the blank on the far right beside the headlight washer switch, that's coming out. You can push the entire switch panel from the back to make removing the blank switch much easier. If you carefully release the switch panel, you'll see the tabs top and bottom on the blank you need to squeeze to release it. Now pull it towards you to remove it completely. Should leave a hole like this. Now feed the switch wire into the hole, guiding it down by looking at the open side panel we pried open at the beginning. Next, below the knee airbag you will find the panel that contains the OBD2 port. This can be removed by undoing two Philips screws. Now lower the panel to gain access to the pedals. I didn't undo the wiring etc for the OBD2 port, but it is fiddly if you leave it connected. You can now see to feed the wire down from the switch panel to the pedals. Next, you need to look at the throttle pedal, follow up the pedal to the top, you'll see a plug at the top of the pedal. It has a tab to push in on the right side. You'll notice it's identical to the one on the end of your Apexi loom. Connect the loom to the thick black wire from the black box. This can only plug in one way. You'll see that for yourselves. Unplug the one on the top of the throttle pedal. Clip the part that looks identical on to the pedal, now you need to fit the pin connector from the loom to the plug you removed. This bit is a 50/50 shot. Get it the right way round, you're golden. Get it wrong, you could see a lot of dash warning lights, and have the car start with a fast idle, and go into limp home mode! Be warned!! Saying that, if you do get this, unplug the pin connector, turn it around, plug back in, and make sure you can configure the switch per the instructions you get in the box. Provided the switch has no lights on, you can remove the negative battery terminal, give it 5-10mins, now re-connect and try starting the car. It will probably not catch on the first push, that's normal. Push the ignition button again with the brake pedal depressed, and it should fire up without any warning lights etc. Now here's my top tip to avoiding this hassle. There is a coloured blob on one side of the pin connector. This should face away from you when connected (so the side you see under the dash should be plain black). Also, when you first fire up the controller, don't start the engine! Just push the ignition button twice to operate all the electrics only. Using some carefully placed double sided tape, locate the throttle controller button with the word 'APEXI' facing up in the hole we made by removing that blank. Now clip the button harness into the main black box which is the controller itself. Its the multi-coloured wire on the right of the picture above. Look at the pins as it only fits one way around. The thicker black wire below my thumb should lead to the loom we fitted to the throttle pedal switch. You can ignore the white wire, that is for the reverse safeguard hardly anyone has connected up. Now with the button located in the blank on the dash, the ignition on twice but without the engine running(just electrics working), the Apexi switch will be flashing constantly white. You now push the '.' bottom of the switch and hold it till the colour flashes blue. Once it has flashed blue, let go. Switch continues to flash white. Depress the accelerator fully to the floor. Now press the top of the switch '...' And hold it down with the accelerator pedal until the switch flashes red. Once it has flashed red, let go of the switch and pedal. If the switch is no longer flashing white, you are all set. If it continues flashing white, repeat the steps above. Note the installation guide from Apexi does detail this process if you want to double check it. Try it a few times. If it is still flashing white, check your pin connector again. Dis-connect it, and turn the pins round. Push it back together carefully. Try the install process again. If the switch is no longer flashing white, you're ready to go. You need to locate the black control box and excess wiring up inside the dash. There are some mini cable ties in the box to help with this. Once you have it safely tucked away from the pedals, push the panel back into place, and screw the two Philips screws back in. Check no wires are showing near the pedals. If they are, you need to re-feed them up into the dash. Remember you don't want wires getting fouled up on your pedals mid-journey! It could be very dangerous! Now push/clip the side panel back into place. Job done! Now go for a drive and try out the different modes. These are signified by different colours. All the info you need is in the user guide. Hope this helps. If you get stuck, PM or post here and I'll try to help get you sorted out.
-
Door Card Light Issue
Peter P18 replied to G10RRE's topic in Lexus F Club - Lexus IS-F / GS-F / RC-F Club
I'd be inclined to say poor ground somewhere in the circuit. Might be best getting a local auto sparky to look at it. Sounds like you've done all you can, unless you feel confident removing the door card? Hope you get it sorted. -
Out again this weekend
Peter P18 replied to gumball3000's topic in Lexus F Club - Lexus IS-F / GS-F / RC-F Club
Nice! Looking good chap. -
Nitrogen Inflation
Peter P18 replied to Mike Peter's topic in Lexus F Club - Lexus IS-F / GS-F / RC-F Club
That's an Aussie video! We all know they are crooks! Lol. Not at all chap. Just saying there are plenty of us with Nitrous that are happy, and plenty who don't see the point in it. Its a personal choice. Much like only using premium grade petrol in our cars. Some do, some don't. There isnt a right answer. -
Nitrogen Inflation
Peter P18 replied to Mike Peter's topic in Lexus F Club - Lexus IS-F / GS-F / RC-F Club
I guess everyone has their own opinions on this topic. Lets all agree to disagree, and move on shall we?! I personally like nitrogen in my tires, and whilst I still perform visual checks regularly, I don't need to check the pressures as often as I did with normal air, unless I notice an issue. Also worth mentioning the gauges on the garage forecourts are usually broken or hugely inaccurate. My tires are wearing evenly across the whole tire, not like they did before with air. Granted the RR-Racing USRS has helped with that, but I think the nitrogen has helped as well. I dont daily my car, so it tends to stand in my garage for several days if not a couple of weeks. I've not lost any pressure whatsoever. The ride also felt smoother/less harsh on potholes and uneven surfaces. I can't prove that's the case, but I know what I feel pretty well. I used to help setup race cars for friends, so would like to think I know what I'm talking about. My current tires were fitted new, and inflated with nitrogen from day one by the way. Unlikely therefore I have leftover air in them. I don't mind a technical discussion, but let's keep it that way. Life is full of sceptics, I get that. -
Nitrogen Inflation
Peter P18 replied to Mike Peter's topic in Lexus F Club - Lexus IS-F / GS-F / RC-F Club
As already mentioned, nitrogen is a no brainer really. Cheap to do (was £1.50 a tire at Kwik Fit last time I seem to think?), and won't need checking anywhere near as often as with normal air (most people get a check up every 12 months or so, but never need any more putting in). Had a work colleague thank me for the tip a couple of weeks ago. His BMW had the tire monitoring system installed, and when it was really cold weather, the alarms were going off all the time until the tire's warmed up. He had them filled with Nitrogen, and hasn't had any problems since. Also finds the ride more comfortable, as do I with my IS-F. Try it. Not much to lose other than £6, and you can't buy much for that these days!

