Do Not Sell My Personal Information Jump to content


Recommended Posts

I finally picked up my mk1 gs300 sport last weekend. Got a great deal due to buying from a friend. the car turned out to be better than expected apart from one serious issue i noticed when driving home in the rain - the wiper stalk was broken.

I have on order a second hand complete unit from eBay with both wiper and indicator stalks and it looks like the steering wheel etc will need removing. any help on how to fit this would be highly appreciated if its possible as a DIY. Ive searched through the forums and havent found anything that can help me with this.

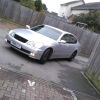
Heres the first picture of the car but please excuse the quality as it was getting dark

IMG_1485.jpg

Broken wiper stalk ;)

IMG_1497.jpg

I've purchased the car as a small winter project to get on road and then use as a daily driver so i will be keeping this topic updated as the car progresses along with pictures and guides that havent already been covered

Link to comment
Share on other sites

Looking forward to seeing some day light pics.

I think,although not positive, that the wiper stalk can be removed seperately from the whole switch body and spiral cable without having to remove the steering wheel. That should just be a case of removing the upper and lower shroud and using the replacement item as a guide for what to remove/undo. If not, the steering wheel will have to come off, which involves removing the airbag first. Disconnect the Battery and leave for 5 minutes before touching the airbag. There are two torx bit screws from the rear of the wheel holding it on. Once the airbag is off, store it face up, not face down.

As a side note, If you are disconnecting the Battery, ensure there isn't a security code set on the stereo. To confirm if a code is set, switch the ignition on, and turn the stereo on. If "SEC" is shown momentarily on the display, a code is set and you will need to know it so that you can enter it when the power is restored. It is user defined at the point of setting the code, so you will need to know it as there is no default. If "SEC" isn't shown, no code is set and there is no need to worry.

Link to comment
Share on other sites

  • 2 weeks later...

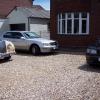
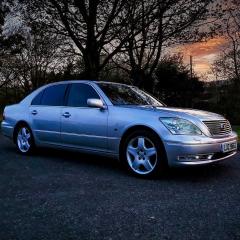
Small Update along with daytime pictures before any work has started

IMG_1550.jpg

IMG_1541.jpg

IMG_1540.jpg

IMG_1539.jpg

IMG_1538.jpg

IMG_1537.jpg

IMG_1552.jpg

Wiper stalk arrived - will be fitting this sometime next week along with a a fitting guide

IMG_1548.jpg

Current plans so far, will be many more as things progress

Wheel refuribshment ( Black with badging on center caps metallic gold)

Custom Audio Install keeping factory head unit consisting of 2 Diamond Audio 10" subwoofers, 3 amplifiers, Uprated tweeters, graphic equalizer, head rest monitors, rear dvd player

Repairs to rear damage, replace and repaint smoked damaged rear light

Lowering Springs (Unfortunatly have to do this due to one of the front springs being very corroded and its a nightmare finding springs for the sport model plus im sure it will only lower the car a little due to the factory springs being lower than the standard model springs)

Wiper Stalk fix

HID 6000k headlight conversion including hid fogs

Replace Exhaust (Most likely most of the system will need replacing as both the rear backboxes are rotten, center pipe looks to have a hole in also.

Link to comment
Share on other sites

Doesn't look bad at all.

One thing to keep in mind if you are going the powder coat refurb route on the wheels is that once the centre caps are powder coated to match, the logo doesn't have such a sharp edging and doesn't lend itself well to painting. May work ok if going the painting route rather that powder coating.

Are the centre caps missing at the moment, or did you remove them yourself? They are hard to come by nowadays unfortunately.

The wheels will just be primered, painted and lacquered as im on a tight budget at the moment. I do have the center caps, but i have work to do work on these as the previous owner had trouble getting them off at one point and all four got damaged in the process removing them. Ive actually been looking for new caps since buying the car and nothing anywhere. The TTE wheels seem to be some of the rarest out there. Also i have a crack in the spare wheel so you were definatly right about them being prone to cracking. A slow puncture aswell on one of the front wheels so im guessing a second cracked rim

Link to comment
Share on other sites


It's a common issue on the 10" rears, so you have been very unlucky having the 8.5" ones crack.

Yeah, it isn't often you see the caps separately. Now that TTE have closed down, you can't even get the TTE logo ones. I even tried borbet (who make the wheels) direct, as the caps look similar to the borbet A wheels, they dont make those either. Someone is selling two sets of complete wheels refurbed on eBay, but way over priced IMO.

Try PM'ing user ACLex (he works in the Lexus Poole parts department), I got some used centres off him that I think they just had on the shelves as spares, but not sure what he had left after that though.

Link to comment
Share on other sites

  • 2 weeks later...

Monday i started fitting the wiper/ indicator stalk and got it done within 4 hours. the airbag, steering wheel, airbag clock spring, upper and lower steering column shroud was removed. Not an easy task but as always problems did come along. After removing all of this along with the wiper/indicator stalk, it looked like there was no way to get to the wiring behind the dash as alot of metal was blocking me from removing the old connector for this. Therefore i went and chopped the wires from the old wiper stalk, removed it, reconnected the new one, then chopped them from the new one and soldered them to the original wiring. I wouldnt reccomend this at all but it worked perfectly for me and saved alot of time. So for anyone planning on replacing an indicator or wiper stalk themselves the proper way, i wouldnt reccomend it as a DIY unless you have intentions of chopping up wiring. It worked for me so far, no wires getting hot, no blown fuses but im still very wary of it eventhough a qualified electrician friend of mine told me its perfectly safe as long as no wires come in contact with each other.

Another issue i came across was after refitting the steering wheel and airbag, the steering wheel now scrapes against the steering shroud, ive loosened, tightened the steering wheel and everything but still an annoying little scraping sound when the shroud is on.

Also, I have removed the standard subwoofer to get ready for the audio install thanks to tigerfish's guide

Picked the only 2 center caps the owner had and they are pretty much ruined.

Heres a few more pictures including the wiper stalk fix

Picture010_zps77a95c7b.jpg

Picture007_zps6f58dccb.jpg

Picture002_zps59b93357.jpg

Picture003_zps01740f37.jpg

Link to comment
Share on other sites

  • 2 months later...

Not been on here in a while as not alot has really been done due to the awful weather and alarm system giving me trouble which has now finally been fixed after days of research.

A couple of things have been changed, rear backboxes fitted, only cost £70 delivered for second hand ones in good condition. HID 6000k headlights fitted along with white full beams, LED Sidelights and white Fogs also a few small things such as LED interior lighting (dash lighting etc will eventually be replaced to white LED's)

A few more issues ive stumbled up across - very bad smell of fuel coming from passenger side of the car, inside and outside. Put in 12 litres and needle didnt even move then ran out after being left to idle for 1 hour! No signs of leaks but the smell has got worse over the past 2 weeks. Im guessing a cracked filler pipe. And finally, me stupidly left the spare TTE wheel in garden planning to do some designs/colour decisions on the wheels. Gate left unlocked for one night and it gets stolen.

Couple more pictures to share as progress is VERY slowly coming on. Apart from the fuel smell/leak problem, car is almost MOT ready.

IMG_0045_zps5c2fd37e.jpg

LED Sidelights

IMG_0156_zpsfd105e46.jpg

HID Headlights & Full beam (Need adjusting)

IMG_0157_zps82d80a24.jpg

Again

IMG_0161_zpsbb7ad1fb.jpg

IMG_0200_zps12eaab5f.jpg

Backboxes bought for £70

IMG_0205_zpsa1d47bb8.jpg

temporary fix to center caps - found all 4 - sorry for the upside down photo, it refuses to rotate, its almost 3am so i cant be bothered :(

Link to comment
Share on other sites

Is the smell of fuel at the front or rear? I had a couple of things fuel related over the time I had my mk1. At the rear, the rubber pipe between pump and tank split, very obvious leak on the floor though, just behind the rear wheel on the passenger side. Second was a leaking o ring on one of the injectors (actually caused by the cowboys that did the head gasket job). This leak wasn't so obvious as the fuel ran down the side of the block. Once the engine warmed up, it would evaporate off the hot block and not reach the ground. Dodgy as f**k and less than impressed the garage left that leak. Too far a trip to take it back, and not sure I would've trusted them to touch the car again (wasn't the only balls up I found).

Link to comment
Share on other sites

The smell is only coming from the passenger side rear of the car, cant see any leaks at all inside or outside. no smell coming from near the fuel tank. Its mainly when the car is running. Just been out to the car its very low on fuel and no smell even when started. It only seems to happen when theres more than £15 worth in the tank. Will be filling it up tomorrow to see if it still happens. Is the pipe that connects to the pump to tank easy to access?

Dont really want to have to take it to a garage to get this looked at as ive had so many nightmares with them in the past like you have. Just hopefully its nothing too complicated

Link to comment
Share on other sites

Yeah, if you look at the underside of the car behind the front edge if the rear wheel, you should see the pipe connecting to, if memory serves, a cylindrical can (might be a filter rather than pump thinking about it). If it is a case of having a decent amount of fuel, it could be the filler neck as suggested, or tank seam, although the tank is actually behind the trim in the boot (under the parcel shelf), so a leak in those areas would've stunk the inside of the car out I would've thought.

Link to comment
Share on other sites

Left the car running again for 10 minutes and found the leak. Its near the drivers side rear wheel underneath the car and is now dripping heavily along with a hissing sound. Pics of leak location soon to be added before i take it in to a friends garage.

Link to comment
Share on other sites


leaking fuel pics:

moved the car slightly forward to see this: definatly a very strong smell of fuel

IMG_0346_zpsb1d58fd2.jpg

then looked under the car to see more fuel leaking from this location

IMG_0353_zpsc5f97cb7.jpg

IMG_0351_zps4e40930f.jpg

IMG_0350_zps040904a3.jpg

IMG_0349_zps73570a18.jpg

IMG_0348_zps01aa4ca3.jpg

cant get the car to a garage till saturday unfortunatly

Link to comment
Share on other sites

  • 2 weeks later...

Got the car recovered yesterday thanks to my dad and taken a friends garage to fix the fuel leak and get MOT done

IMG_0391_zps634f97a4.jpg

last picture i thought i would ever get of the car ( was worrying about how bad the fuel leak was going to be so had thoughts on scrapping it :unsure:

IMG_0393_zpsd0872014.jpg

3 mechanics on 1 car... lovely

Cause of fuel leak was caused by a small pinhole in the metal fuel pipe (right at the end) along with a split rubber hose which connects to this. Luckily the pinhole in the metal fuel pipe was right at the end where the rubber joins so was very easily fixed. Tigerfish was right yet again :D

Picture of the faulty piping (rubber pipe at top & metal fuel line)

IMG_0394_zpsa7b13c70.jpg

Today, mot failed. surprisingly it wasnt was bad as i suspected

4 reasons for failure and 6 advisories

1.Rear lenses heavily tinted / less than 50% of light sources illuminating
- i expected this so the rear lights will have paint removed then re-done legally

2. off side suspension arm - excessive play in ball joint **dangerous**

- another i expected due to cracking noise going over speed bumps when driving the car home from buying it

3. same suspension arm ball joint dust cover damaged

4. off side front steering inner rack end has exessive play in ball joint

2 parts needed are on order for tomorrow so should be on the road. next step is to get the mot advisories sorted, bodywork tidy, possibly new 19" deep dish alloys as i suspect a buckled rim, audio etc to be done also during summer.

Link to comment
Share on other sites

  • 3 weeks later...

Another small update:

Mot passed on the 8th march - few pics from the garage of the sorted problems

20130308_038_zps0ea5456e.jpg

20130306_011_zpsb0e9e9bb.jpg

Rear lights replaced from a toyota aristo (some slight differences between these and the gs300 ones- no more weak 501 bulbs for tailights therefore no problems with re-tinting these ones)

before they were changed (even with very bright LED bulbs)

IMG_0154_zpsa3129572.jpg

after:

IMG_0599_zps71daa48d.jpg

IMG_0603_zps8557d0ff.jpg

IMG_0605_zps5b82eaa8.jpg

Bumper damage temporarily repaired

IMG_0600_zpsbe1bf7c0.jpg

And a little photoshopped picture to show hopefully what the end result should look like

photoshop12_zps0221219a.jpg

Wheel refurbishment should be done within the next 2 weeks & sound system is slowly getting there, all wiring almost complete

Link to comment
Share on other sites

  • 2 weeks later...

Thanks guys, its slowly getting somewhere now that the weather has been improving so another minor update

last weekend, gave the car a full clean inside and out (first time in at least 3 years!) along with 2 coats of t cut followed by Autoglym polish. i was very surprised how it came out

turned out like this:

IMG_0674_zpsca18c07e.jpg

bonnet

IMG_0649_zps41352462.jpg

wheel refurbs, still going with the black with gold badges on center caps along with a little coat of ............

IMG_0710_zps05a151d3.jpg

IMG_0711_zps3fb32d56.jpg

started taking a few bits off the car to get resprayed and had a few visitors come along to give me a hand

IMG_0734_zps848ebcd4.jpg

indicators removed, number plate surround for spraying. took an hour just to remove the number plate surround

IMG_0737_zpsdd82573a.jpg

IMG_0739_zps9d029e72.jpg

should have some pictures and videos tomorrow uploaded of the sound system and how thats coming along

Link to comment
Share on other sites

Car looks awesome, who did the wheels, mine need doing so looking for tips, I had a look on Youtube but all there is companies advertising

The wheels havent been refurbished yet. The picture of them black with chrome badging on center caps was just a quick photoshop i made to give an idea of what they will turn out like. And the latest pictures with the wheels in silver were last refurbed at least 7 years ago according to the previous owner. The guy who will be doing my wheel refurbs is a close friend who does it in his free time. Does a great job - did the black wheels on another mates e46 convertible(in one of the pics) The lex is now up on axle stands, 2 wheels will be done to pick up mid week so once they are done, i will upload pictures of the finished result - Black with a very light coat of gold metalflake in the laquer so tiny bits of gold will be visible in certian lighting & angles

Link to comment
Share on other sites

Latest Deals

Lexus Official Store for genuine Lexus parts & accessories

Disclaimer: As the club is an eBay Partner, The club may be compensated if you make a purchase via eBay links

Join the conversation

You can post now and register later. If you have an account, sign in now to post with your account.

Guest
Reply to this topic...

×   Pasted as rich text.   Paste as plain text instead

  Only 75 emoji are allowed.

×   Your link has been automatically embedded.   Display as a link instead

×   Your previous content has been restored.   Clear editor

×   You cannot paste images directly. Upload or insert images from URL.

 Share


Lexus Owners Club Powered by Invision Community


eBay Disclosure: As the club is an eBay Partner, the club may earn commision if you make a purchase via the clubs eBay links.

DISCLAIMER: Lexusownersclub.co.uk is an independent Lexus forum for owners of Lexus vehicles. The club is not part of Lexus UK nor affiliated with or endorsed by Lexus UK in any way. The material contained in the forums is submitted by the general public and is NOT endorsed by Lexus Owners Club, ACI LTD, Lexus UK or Toyota Motor Corporation. The official Lexus website can be found at http://www.lexus.co.uk
×
  • Create New...