Leaderboard


Popular Content
Showing content with the highest reputation on 06/05/2018 in all areas
-
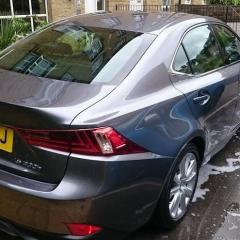
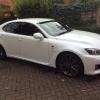
Done some wet sanding to some fine scratches, filled in some stone chips with lacquer then sand flat, wet sanding with 2500 grit paper to do the job. Not bad looking for a 10 year old car and 115670 miles.
 4 points
 -
Sun was out in Scotland today, well for last 2 weeks it's been sunny, think Scotland must have slid down the side of the earth closer to Spain lol So washed the beast this morning, this is a washed pic. All day today I'm going to wet sand and polish it and post pics tonight as the sun goes down, hope I can cut and buff the paint back up yikes.
3 points
-
A shopping trolly with a V8 strapped to the front of it.3 points
-
Some of you will know of Harry Metcalf (founder and long-time editor of Evo magazine, gentleman farmer, JLR SVO consultant and general go-to car collector and guru) who has - in my humble, but ultimately irrelevant, opinion - a simply superb channel on YouTube. Anyway, his latest couple of videos show him taking his eBay sourced £4100 Rolls Royce Silver Shadow to the Arctic circle, in February! Now, it's a good watch in itself, here in Part 1 and Part2. But I wonder, are there any LS400 owners here, who would fancy a similar challenge? It strikes me that that seminal Lexus is the spiritual successor to the Silver Shadow. If you have a set of winters, that is, or prefer to do it in July!2 points
-
Will check dates, would like to have a run out. 👍🏻2 points
-
@designo Ahmed thanks for coming back to me on that, this is the same wheel I saw as original equipment in Singapore last week on both the GsF and the Rcf as well as the Lc500. We do not get this in the Uk and there are a few of us here keen to get our hands on them including me. Now that you are part of the fold so to speak would it be to much to ask you to find the availability of ordering them at your dealers. They are impossible to get here and Singapore Lexus can’t help. Could you obtain the cost and very importantly the part number for me. Its only the wheel we are after. To be honest good condition used ones would be fine if you know a source. Thanks in Advance Big Rat2 points
-
Hi there, The OEM spare wheel my car with was not the a GSF wheel. It was what some people would call.. a transport wheel? Here's a picture of the wheel.
2 points
-
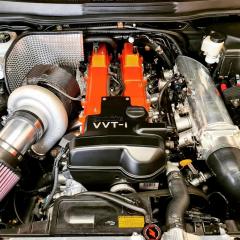
More done today, went to toyota to see my friend behind the parts counter to order 9 valve shims........... £10 each!!!!!!! I almost had a stroke when he told me, but needs and musts i reluctantly handed my card over 🙈🙈 needless to say that has set me back a bit as i never expected that!! Also took the manifold to a local welders, company called megarweld in wolves. They have done a few things for me now and its always top work. Got the new flange welded on. Perfect fit no issues, also had 2 strengthening bars welded on to help with the weight of the turbo. Maybe save the welds from cracking in the future. can just see a glimpse of the crower cams. Then got the wastegate springs thrown in and bolted the wastegate onto the manifold. Ive loaded it with green, blue and black springs which will give me 14.5 psi or 1bar of wastegate pressure. This will allow me to run quite a bit of boost if needs be. Roll on the weekend, will have my shims from toyota and valve covers will be sent for paint.
2 points
-
why invest in runflats when your breakdown service will try and fix a puncture if not they will fit one of those multi fit donut wheels for a small fee.. as some already confirmed some punctures render run-flats useless anyway...2 points
-
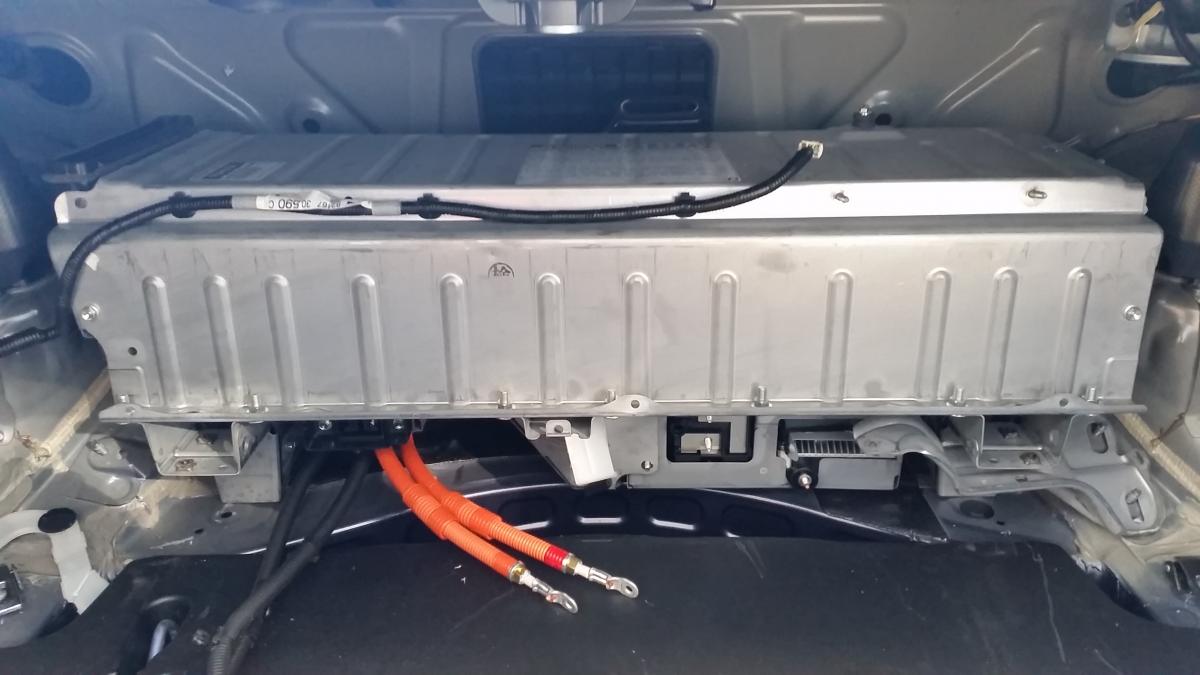
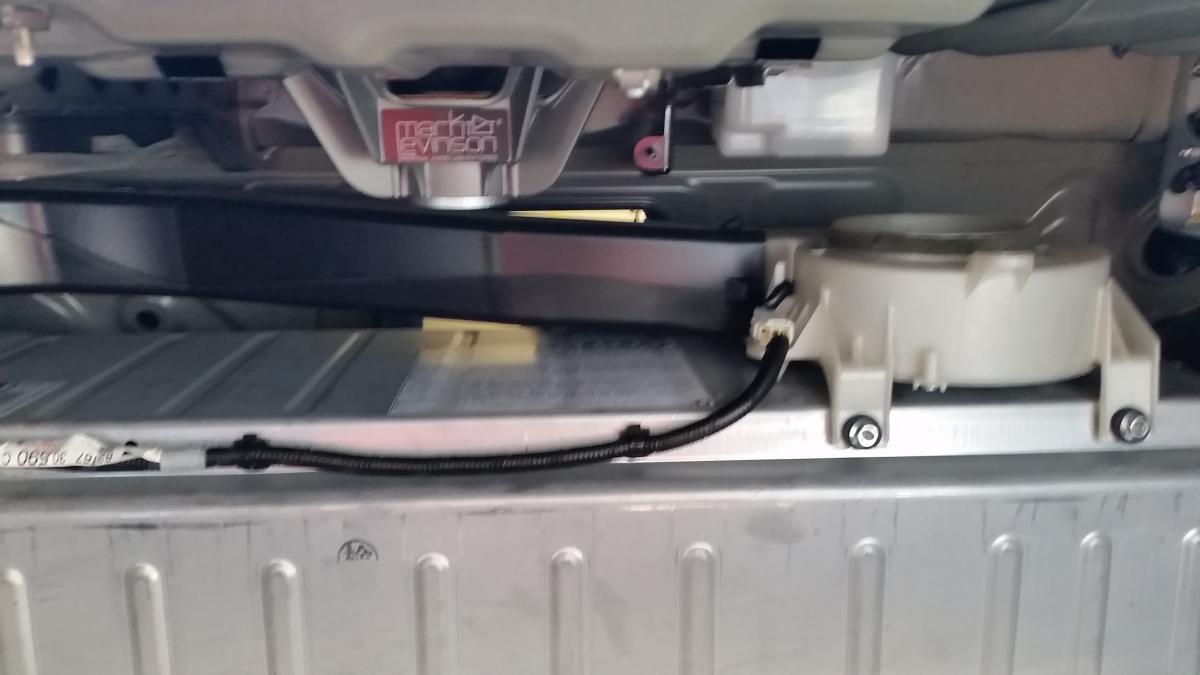
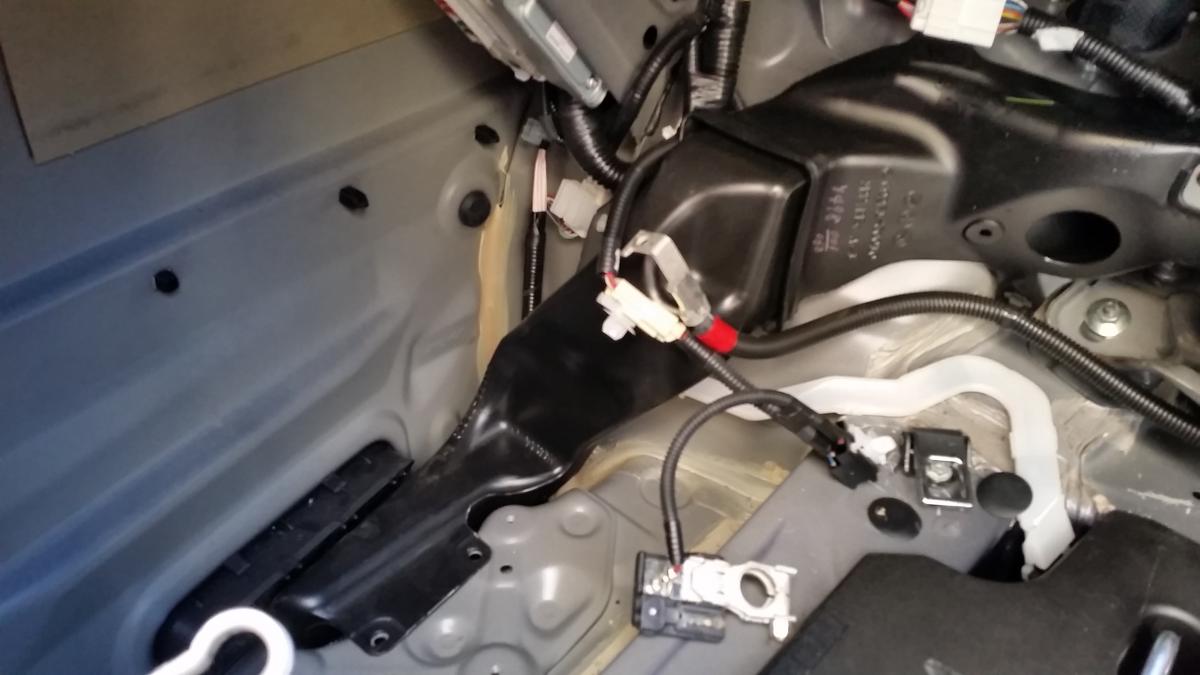
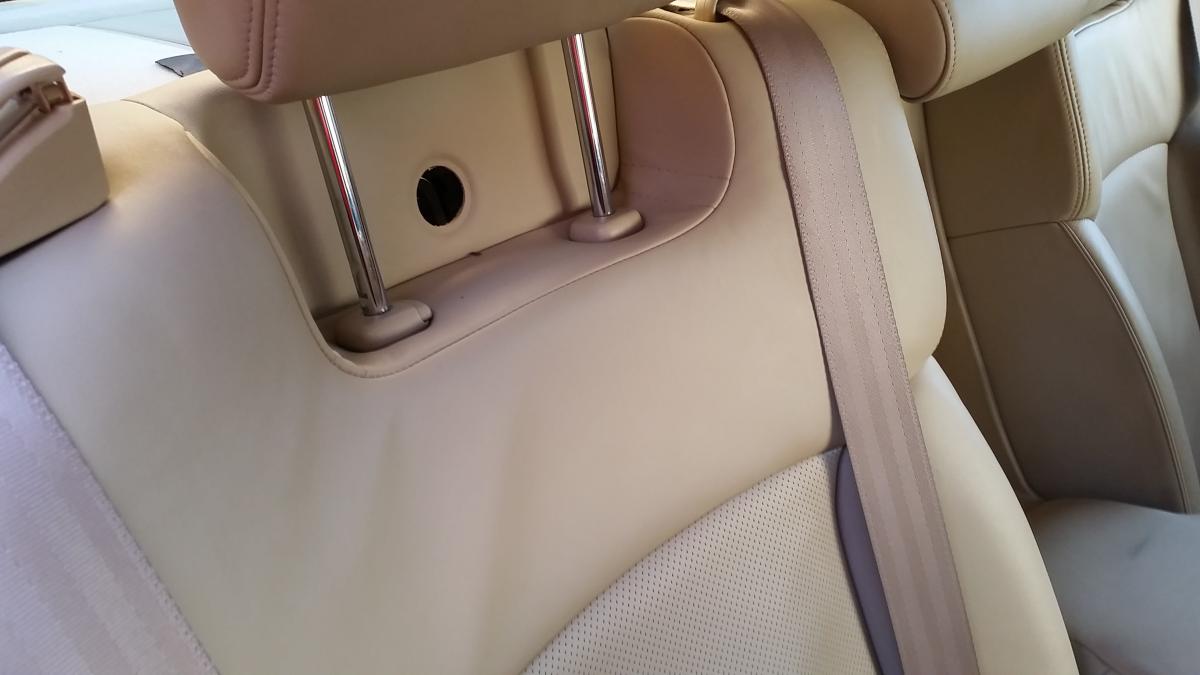
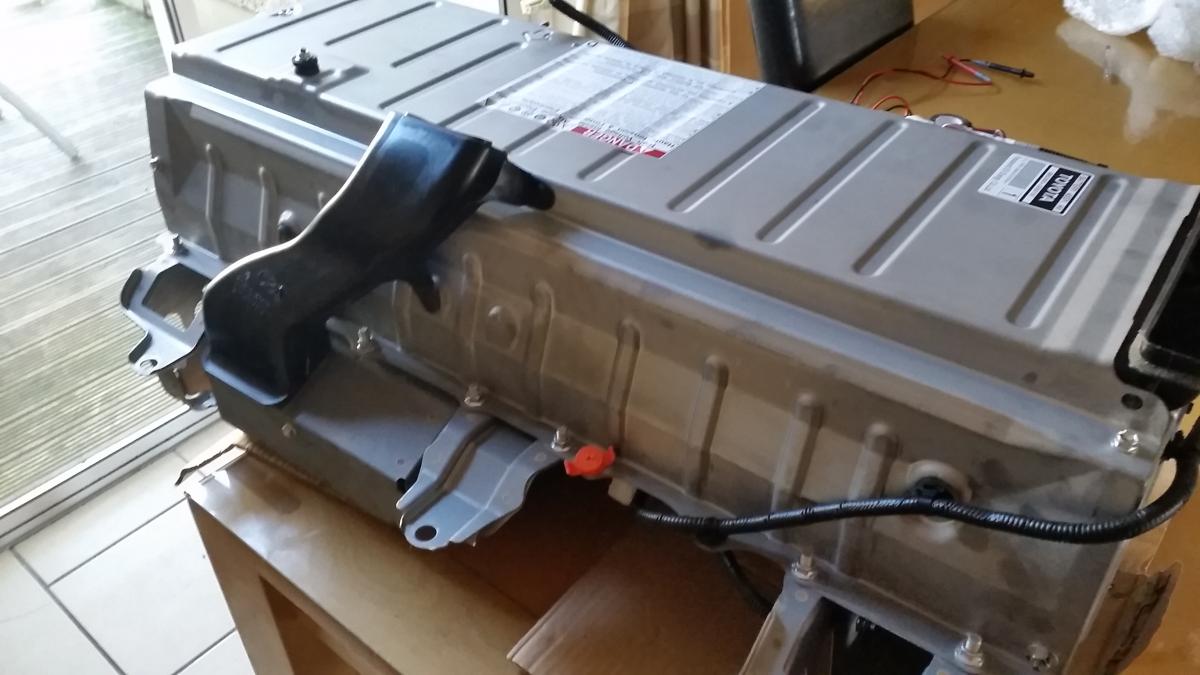
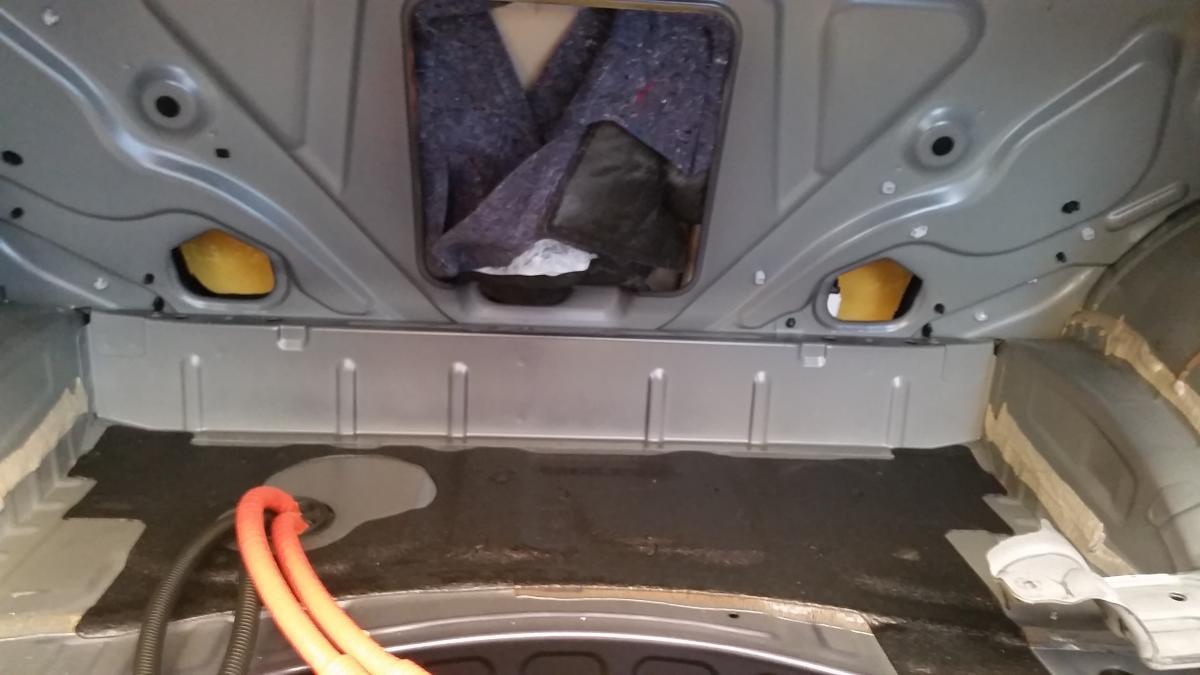
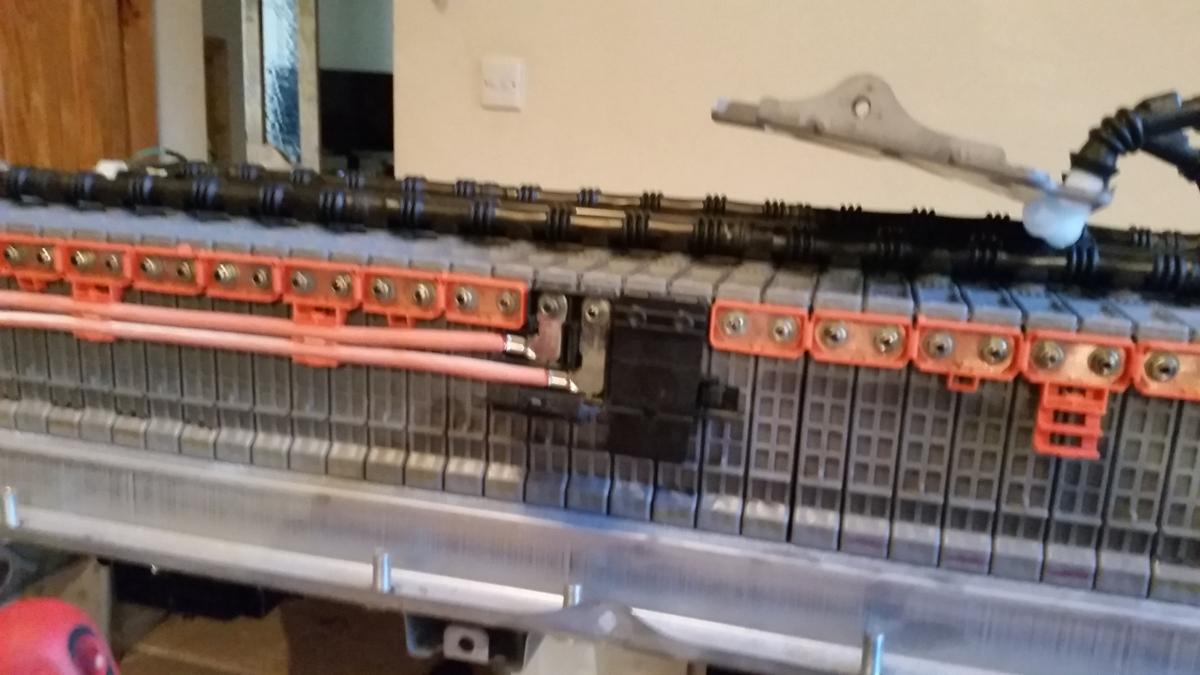
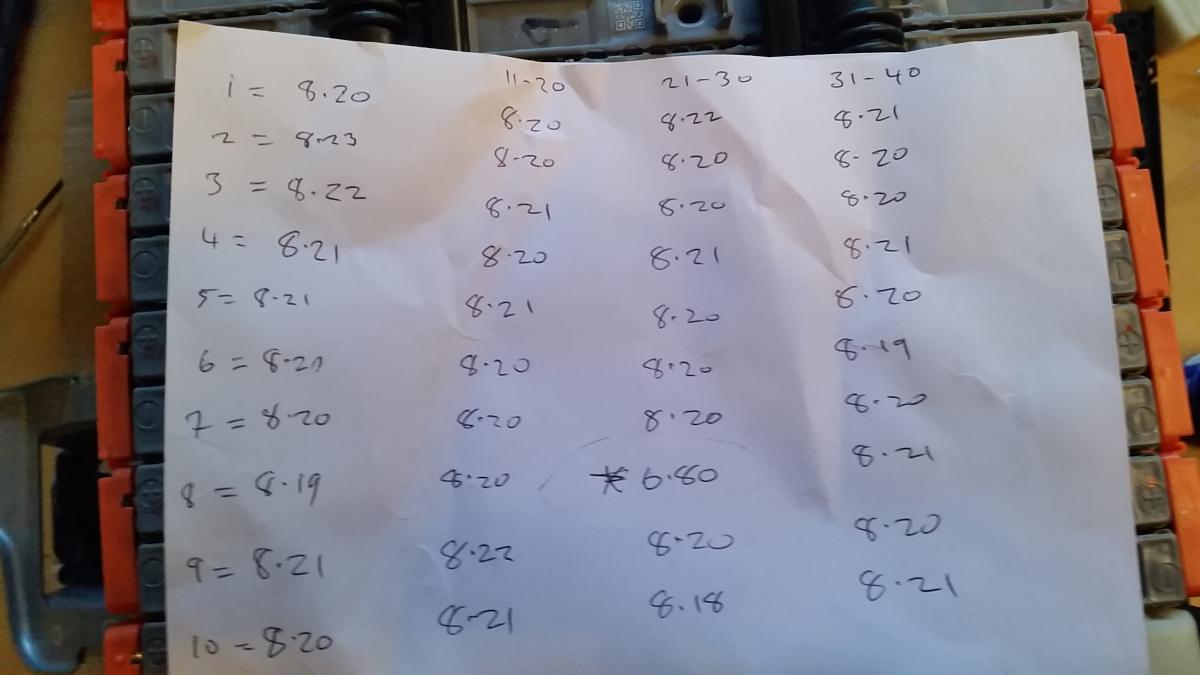
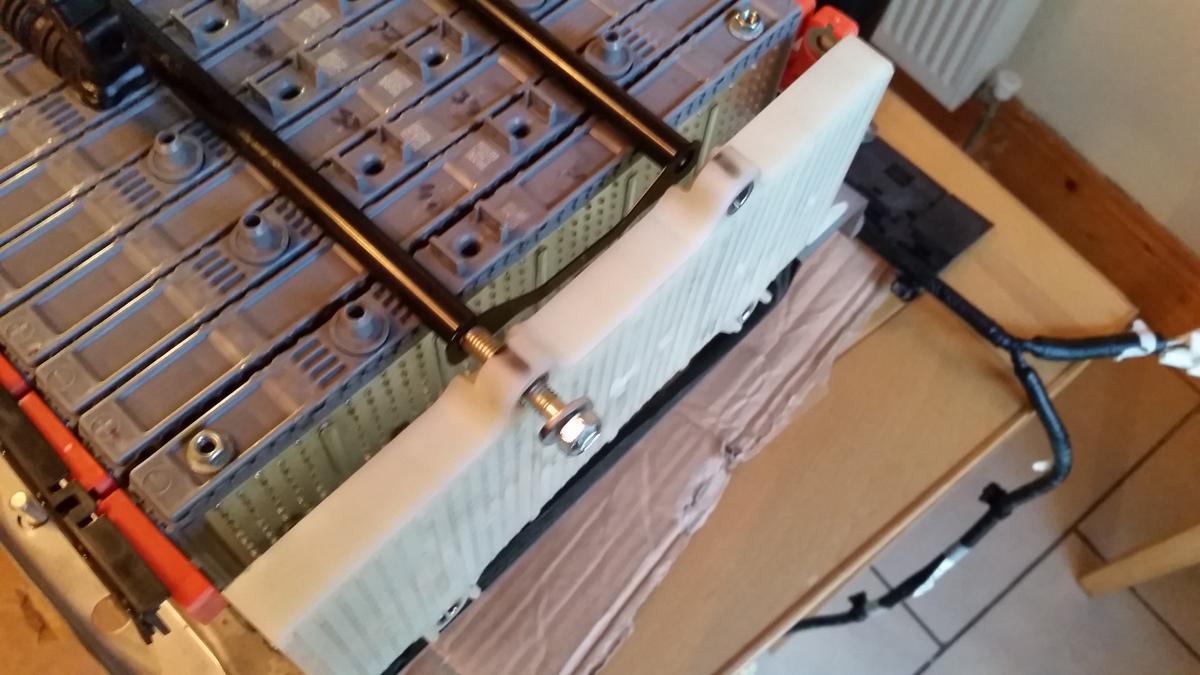
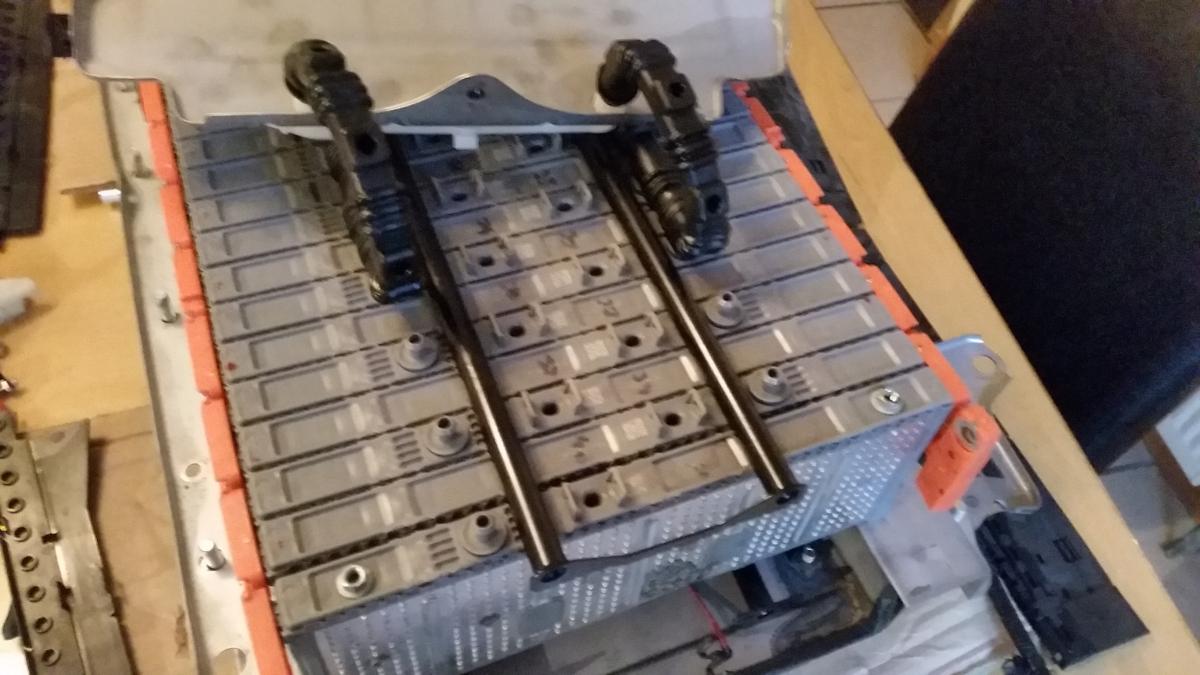
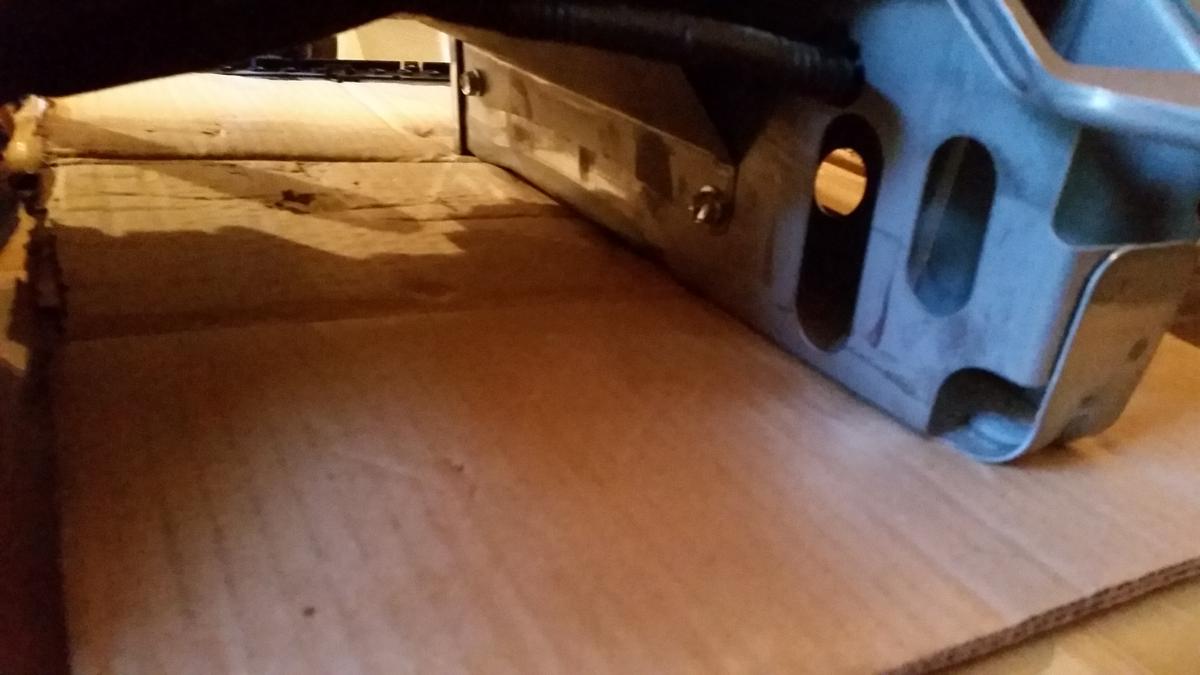
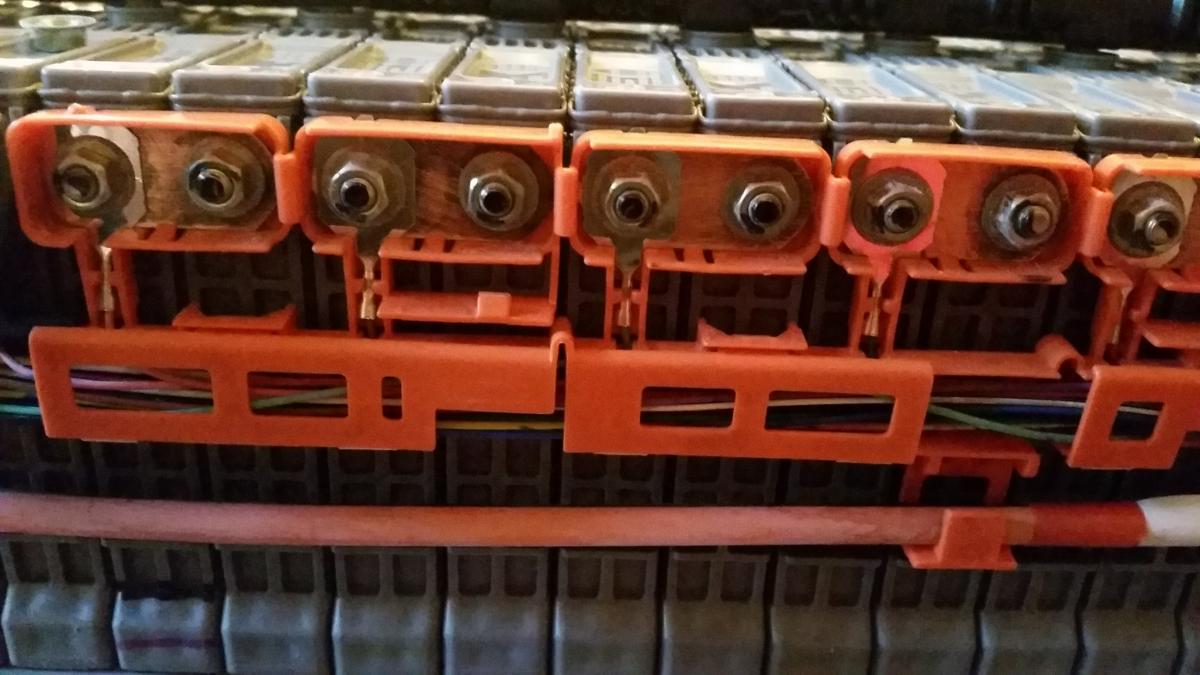
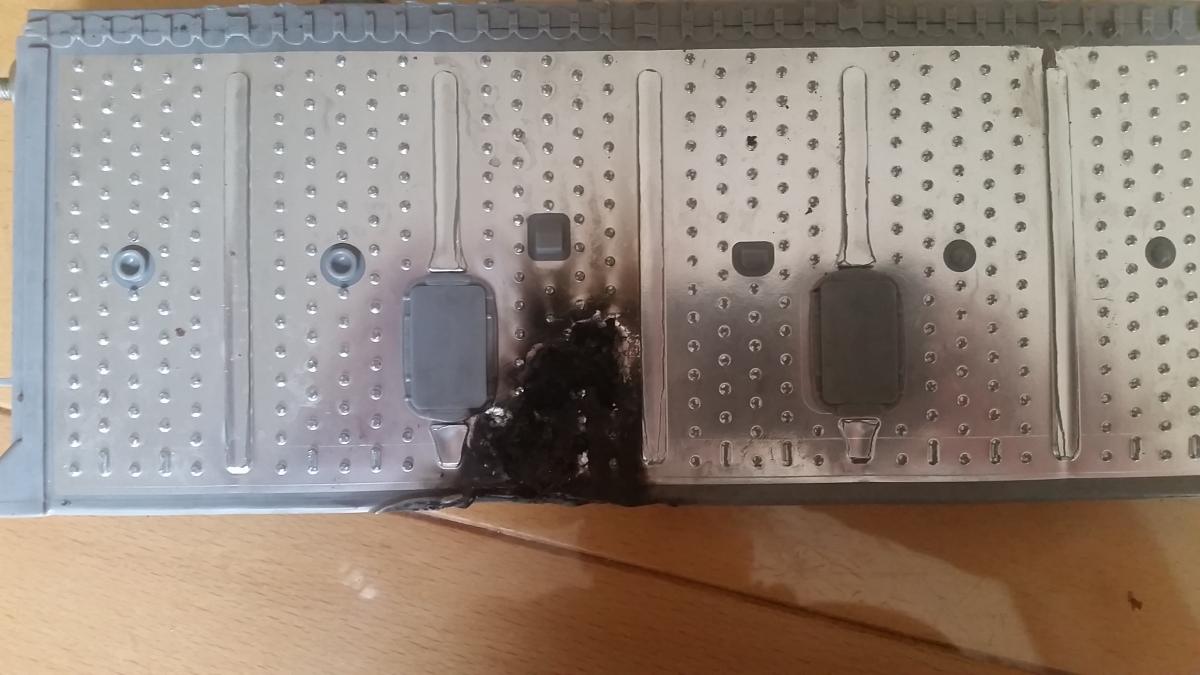
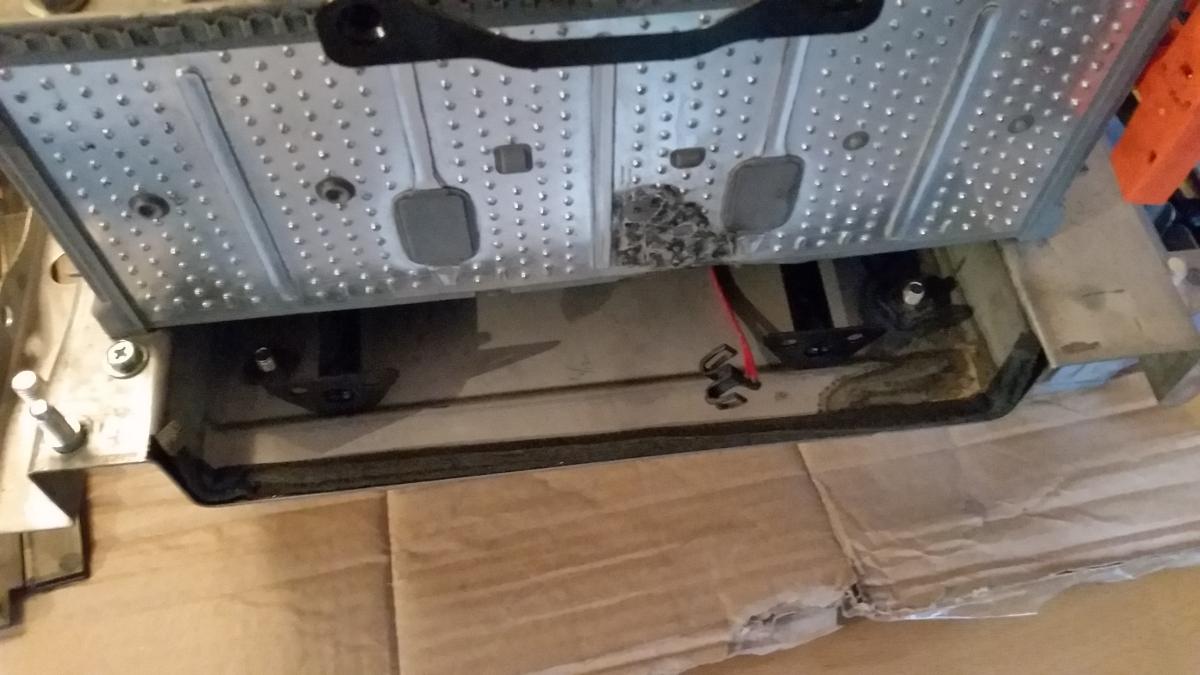
I got the dreaded Check Hybrid, Check VSC and Check EBC warning lights. Fault code readings P0A80 Hybrid and P3017 (battery cell block number 7 fault). Having gotten a quote for around €6000 to fix it, I decided to do it myself. I ordered a battery cell on ebay for €45.00 delivered to Ireland. Tools needed: Socket set with 8mm, 10mm and 12mm. Flat head screwdriver, long nose pliers and a multi meter to read voltage. (You may also need a slow trickle 12v battery charger, I'll explain later). Time needed: about 4 hours, more if your connections a very dirty. 1: Remove ALL carpeted paneling from the boot (trunk if you're in the US). This is done by inserting the flathead screwdriver into the black plastic rivets and popping them out. Remove the boot flooring too, just leave the tool tray in place. You will need the 10mm socket to remove the rear boot floor luggage anchor points once you've popped open their plastic covers. The upper hanging points need to be squeezed to remove. Disconnect the power supply to the light on the right hand panel. 2: Remove the orange circuit breaker on the HV battery by sliding to the right and then pulling towards you. 3: Remove the black air duct on the bottom of the HV battery by popping the 2 black plastic rivets. 4: Unplug the power supply to the white cooling fan on the upper right of the HV battery and remove the 2 nuts holding on the fan. This should allow the 2 upper black ducting to move sufficiently to be able to remove them. 5: Open the panel covering the 2 Orange Cables (3 x 8mm nuts) and disconnect the 2 orange cables, (you can tape them up with electrical tape if you so wish). Pull back the rubber cover on the Black cable and unbolt that too. You should now look something like this: 6: Disconnect the cable running from the HV battery to the 12v lead battery. Continue to remove the 12v battery by disconnecting the +ive and -ive terminals and the white connector plugs attaching it the the HV battery. Also need to take off the temp sensor and the vent hose on the 12v battery. Remove the 12v battery support bracket and the battery tray itself. 7: Remove the last 2 bits of black ducting that was clamped by the 12v battery tray. 8: Remove the white tubing on the right of the HV battery. 9: Remove the 4 12mm nuts holding the base of the HV battery in place, 2 on each side. 10: You need to unbolt the nuts hidden behind the back seat headrests. 11: Pull the rear seats forward enough to remove the large plastic panel in the center between the rear seats and the boot wall, its hidden behind the fireproofing fabric. Use this panel cover to hold the seats away from the boot wall by wedging it between seats and wall. 12: Pull back the fireproofing to reveal 2 smaller access panels covered by a black sticky rubber square. Now remove the 3 12mm nuts holding the HV battery to the boot wall. 13: Now the tricky bit, lift the HV battery over the bolts in the boot and slide it out. (I recommend putting cardboard on the tool tray to avoid scratching when sliding the HV battery). If you are strong enough you can lift the HV battery out on your own, if not get help, it weighs about 50 kilos. Your boot should now look like this with the access panels behind the seats visible: You should also have this, I placed mine on some cardboard on my kitchen table: 14: Take off the HV battery cover by opening all the 10mm nuts, and a few 8mm. unclip the black cable while taking off the three cover panels. 15: Unclip the black plastic covering on both sides of the HV battery to reveal the 8mm connector nuts in the orange casing. 16: Number the cells 1 to 40 using a permanent marker. Use your multi meter to get a reading across each of the 40 individual cells, i.e. one lead on the +ive terminal of the cell and the other on the -ive, and record your findings, as you can see cell 28 was low for me: 17: Pull back the rubber vent tubing running along the top of the HV battery until to get beyond your bad cell/cells. 18: Remove the white end panel holding the cells in place: 19: Remove the 80 x 8mm nuts in the orange casing and clean if necessary. I used bleach and some sand paper to clean all nuts a copper plates, if you're gonna do it - do it right). 20: Remove the 8mm nuts holding each cell in place underneath until you reach your bad cell (this will probably involve removing the support leg and the converter assembly unit below the HV battery: 21: Good cells look like this Bad ones like this: 22: Start replacing your cells back into the HV battery, it doesn't matter what order and you can't mess up polarity as it only screws in on one side. I put my new cell in last in case it was a dud. (If your new cell is of a lower or higher voltage use a slow trickle 12v battery charger to get it to the same voltage as the other cells. 23: WATCH THE TEMP SENSORS UNDER THE BATTERY CELLS (3 of them), MAKE SURE YOU CLIP THEM ON AS YOU GO. See the black plastic clip peeping out here: 24: That's it you're done, just reverse everything to put in back in. Mind your back and don't bother touching cell 1 and 40 at the same time if you have the orange connector put back on. Good Luck!
1 point
-
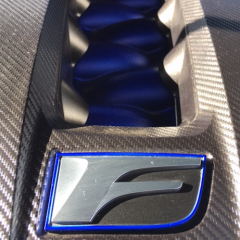
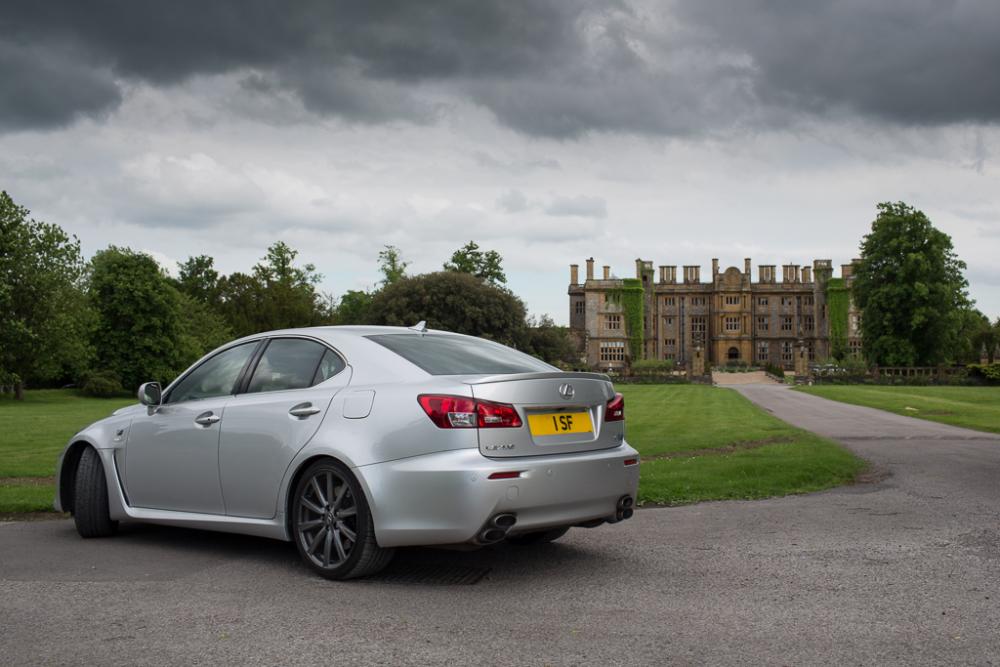
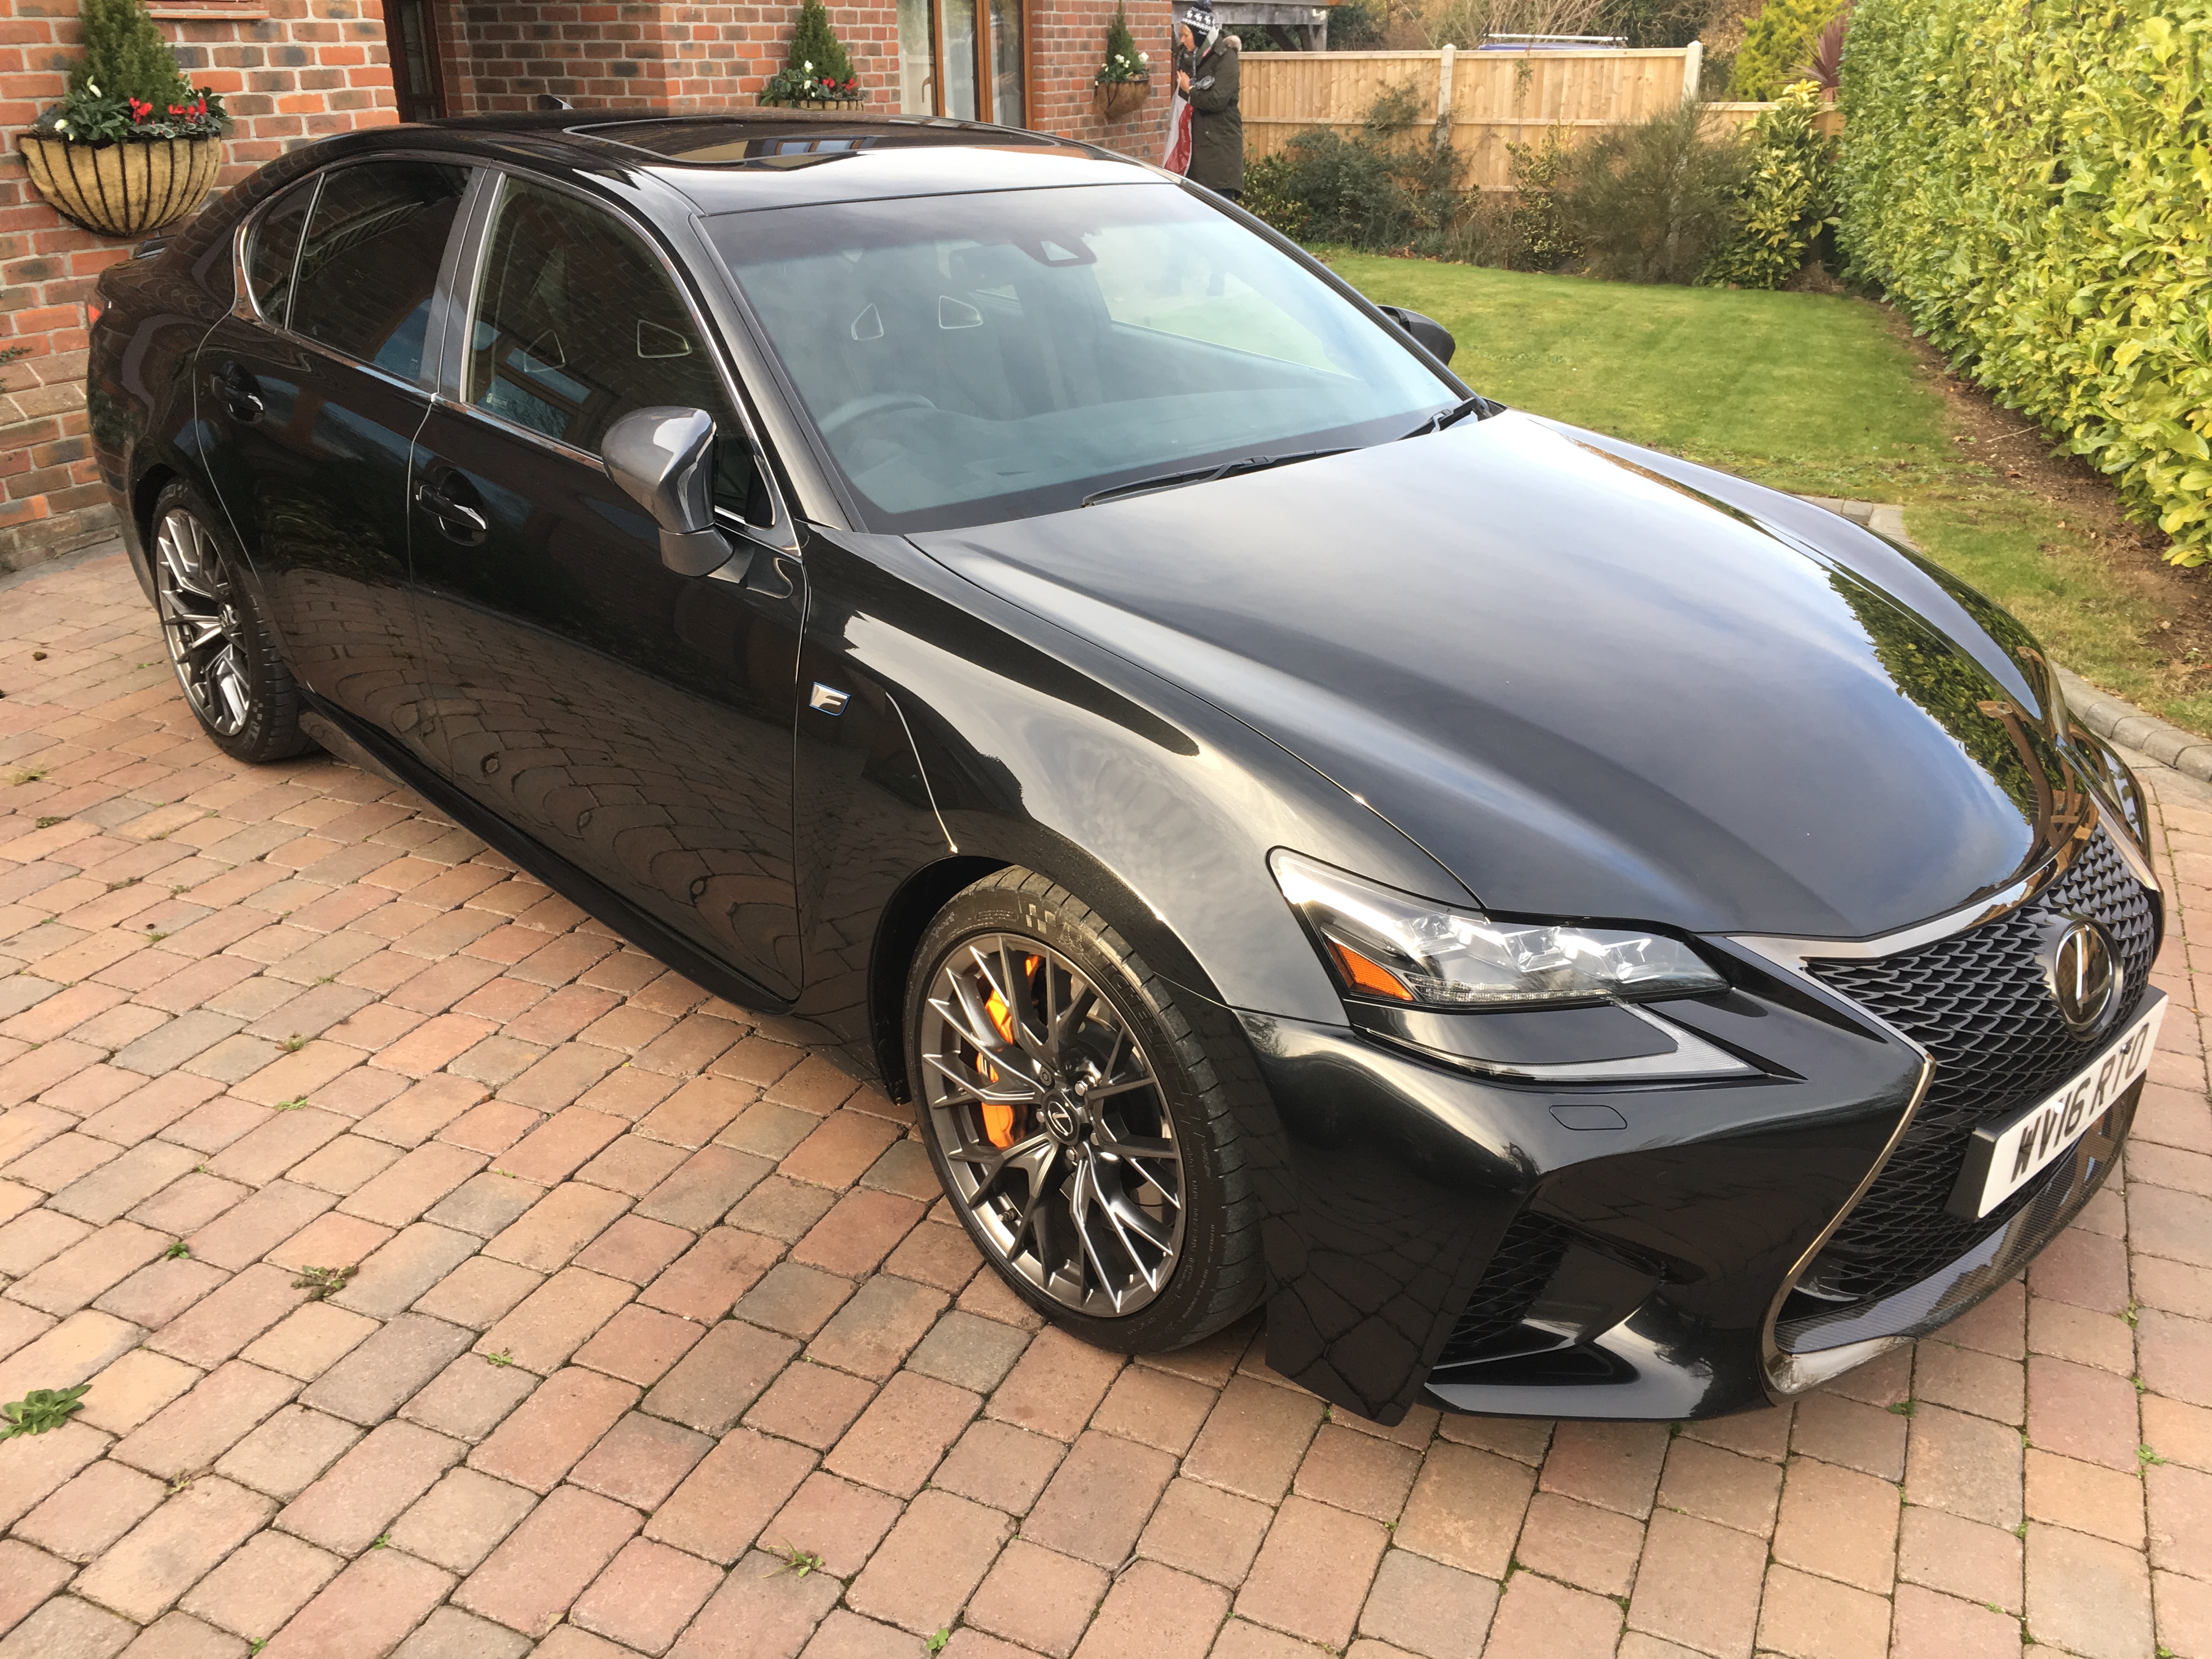
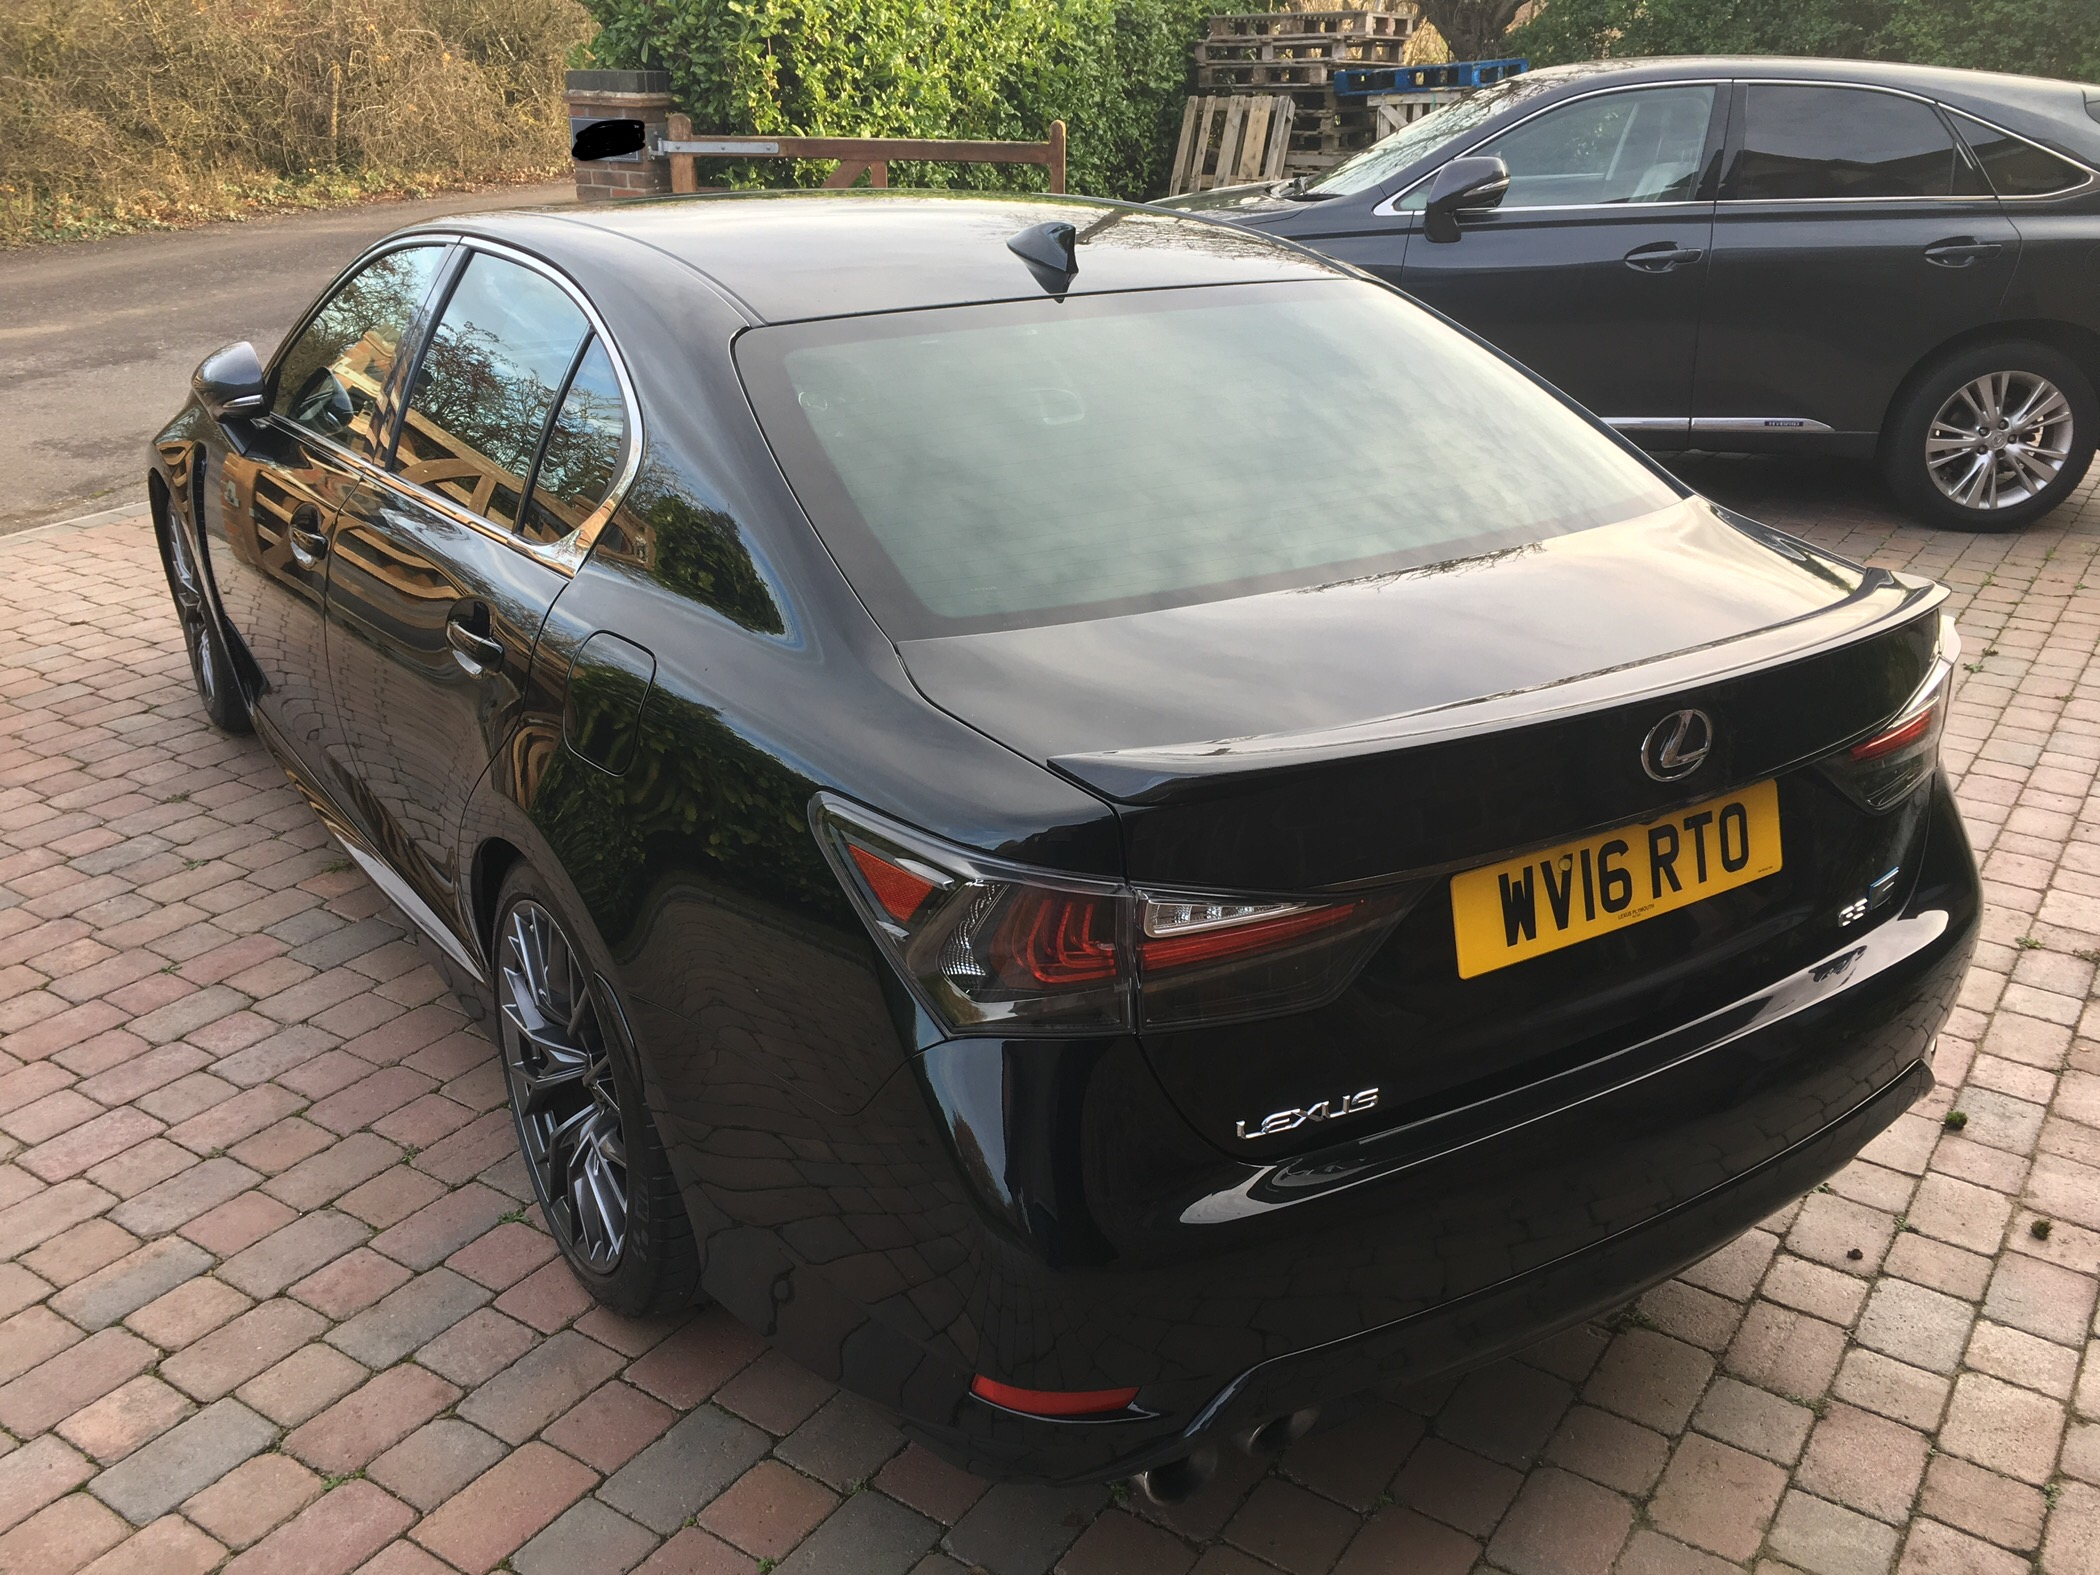
Well, in anticipation of the creation of a giant 'F' section of the forum, and as a previous ISF owner; I thought I'd leave this here: I’ve gone and bought a GSF! I’d had my ISF for around two and a half years and after sorting out what was, in my opinion, a hilariously firm OEM suspension setup, it was smooth sailing all the way. I loved that car – great looks, biblical noise (thanks, H&S) and a real Jekyll and Hyde personality. The last bit was so important to me as the old ‘race car for the road’ adage gets pretty uncomfortable and wearing on a daily driver. I’d covered 12,000 miles, taken it to Le Mans, done a Silverstone track day and on one occasion discovered the speed limiter – yes, there is one and yes, it’s around 170mph… The trouble is, just after it was launched, my local Hedge End dealer had a black GSF in the showroom and ever since I’d sat in it – I’d wanted one. I’ll stop the preamble now with – I caved eventually; it’s around 16months old, it was previously owned by the area manager for Lexus, travelling the South West, and it has 17,500miles on the clock. What’s it like in the cabin? I’ll start with the seats – they are a vastly improved over the ISF, which weren’t bad at all! – they’re heated and ventilated. There’s a cornucopia of materials used all over the dashboard etc, which displeases some people. I like it. I love the alcantara topped dash, the bespoke clock and the carbon fibre detailing. There is a bewildering array of settings, both for the radio/sat nav and the dashboard hidden within menus and submenus, but thankfully the basic controls are simple and easy to use. The Mark Levinson stereo (is it still a stereo if it has a dozen speakers?) is excellent and Bluetooth integration is seamless. The screen is over a foot wide and makes the satnav look spectacular, where post code lookup is available! Driving? The engine sounds different to the ISF, despite being of very similar design and the noise in the cabin is a bit more aggressive on cold start. The rev limit is now 7300rpm and the gearbox seems identical to the ISF with slightly smoother shifts. There are 4 drive modes – eco, normal, sport and sport+. These progressively quicken gear changes, firm up the steering, sharpen throttle response and change the behaviour of the torque-vectoring differential (which I believe acts more like a traditional LSD than the e-diff on the early ISFs, which applied the brakes to the wheel struggling for grip). Sport and sport+ also introduce more engine noise to the cabin through first the rear speakers, then the fronts as well in sport+. The brakes are exceptional – grooved discs now rather than drilled. On the move, the ride is slightly softer but definitely more composed, and the car feels a lot more grown up over my local potholed roads. It’s bigger than the ISF (obviously) and more powerful, but I would guess the performance to be fairly similar. Initial journeys suggest it’s slightly more economical than the ISF too, perhaps 2/3mpg better on average. Other random musings… The boot is HUGE – utterly cavernous! I love the noise it makes – the over-flowery blips on the down change are still there! The headlights are the clearest/brightest I have ever seen. The carbon rear spoiler is extremely pretty. The carbon front splitter is a magnet for stone-chips. The steering wheel is pleasantly chunky. The high build quality is obvious immediately – it’s like the thing has been hewn out of granite. A head-up display makes me feel like a fighter pilot. The previous owner ought to be horrified that this car has lost £2/mile in depreciation alone. The amount of information you can display on the dashboard is enormous – amount of torque applied to each wheel – yup, G-force – of course, lap timer – no problem! So, there we have it. It might seem like I’ve only got positive things to say*, but I liked the ISF so much, and this is essentially a newer version with everything turned up to 120%. I’ve only had the car for a couple of days, but I shall keep this thread updated every once in a while. Happy to answer any questions…. *One negative. I had real trouble getting the headlights to switch to full beam. It turns out that there are TWO auto settings for the lights. One for switching them on automatically as it gets dark, and the other for auto full beam (switching back to dipped beam in the face of oncoming traffic and a few other parameters). Human Factors obviously has a day off when they put these two switches on opposite sides of the driving position! It’s all sorted now!
1 point
-
This is fairly straightforward but not in a setup area where you would expect it to be....to do this press your home button that will display your current split screen configuration, move across to the navigation screen, once you've done that push the mouse up once and you should notice the cursor going on top of a rectangular shape box at the top of the screen. It's near the Bluetooth symbol. Once this is highlighted select it which then pulls up the configuration settings for splitting out and sorting where you want what on the screens. The 2 screens split are available here......hope that describes it and helps...1 point
-
No 😜1 point
-
Flytvr . Am I allowed?1 point
-
I have now completed swapping everything over from the old one to the new one and given the interior a good clean and fed the leather, the inside is now looking near new, just a few small marks on the leather to repair, I have sent a piece of leather to Furniture Clinic https://www.furnitureclinic.co.uk/Leather_Colourant and ordered 250ml colour matched to the grey. Any marks or dark areas are just shading, it doesn't photograph that well, all the leather has cleaned up well and the rather grubby carpets have cleaned well to... the drivers footwell was rather dirty all around the edge of the floor mat... now looking good.... I ended up with a set of black and a set of grey genuine floor mats, I jet washed both sets today and got a lot of muck out and did fancy having the grey but alas they didn't clean up as well as I'd like so I've gone with the black, at least they will stay looking clean longer... Some areas where the grey has gone sort of beige... (If anyone wants a set of 4 niceish grey mats, let me know, going cheap...) The edge binding of the mats gets worn and frayed over time, the black set wasn't bad, just a bit of hairy edge... A quick run round the edge with a hot air gun and they look a lot better.... If anyone wonders what it looks like under the rear seat it's pretty packed with goodies...!!! And one of the last things to swap over was the filler cap for the screen wash That is rodent teeth marks!!!! the little blighters love chewing a bit of hard plastic... So the list of swapped bits reads like this 4 wheels and tyres 2 Front discs and pads 2 Lower wishbone rear bushes Front seat Rear seat swab Center console Sat Nav surround Rear door card Boot floor Outer chrome door trim Screen wash cap Next job on it will be to book it in for some paintwork soon.... Next job for me is to find my good lady an Is250, found one 3 hours away with the spec we want SE-L with nav so a trip south is in order....
1 point
-
Ha!
1 point
-
I killed it 😀1 point
-
Yep, count me in........thanks!!1 point
-
Looks like you've done a cracking job! 🙂1 point
-
There used to be a sticky with gsf specs but it’s gone now! 😎 good luck if you decide to take the plunge 👍🏻 Great looking cars1 point
-
Father and daughter too which I thought was rather nice.1 point
-
When sorting my son's insurance out with Admiral, I asked about this They gave a £25 discount for having the dashcam. However, they said that seen as though I told them I have a dashcam on that car, they would still ask for footage even if I didn't want the discount. Obviously, took the discount lol They said payout won't be affected by a faulty dashcam as they make their own assessments anyway and dashcam's only provide evidence. Was told that you would have to pay the discount back though.1 point
-
So.... Newcastle Lexus have black with black (and white ISF stitching) GSF in their used car stock. Arrived this morning, I've been out in it, quite taken by it. And most importantly they're being sensible with numbers. Anyway a couple of quick questions. The car is a September '16 (66 plate). When were the variable rate dampers fitted to the GSF? And the caliper colour - I thought it was originally bronze metallic - the calipers on this car are a bright chrome orange (like the lotus orange) - is this std or am I mistaken with the bronze colour? My car is going in for a check over by the garage in the morning - so lets see what they have to say then!1 point
-
I have just literally had massive clear out, as had so much stuff, I can't believe how much I acquired over the years. While nothing as exciting as a rally car, as a poor student and only affording an old hand me down rover metro and the the massive upgrade to an old rover 200!, I had to do a hell of a lot of jobs myself. It's only when the brake disc stuck a second time I though it time to look to see if there is a new best practice and was really shocked to read that copperslip isn't really used anymore, just shims and grease for anti corrosion reasons. Obviously from my experience bring back the old days, I have never had a brake pad seize into the caliper before (i assume it's due to my car only really been used for motorway slogs, so the rear brakes maybe aren't regularly used). EBC Red pads on mine now, i'm hoping they will stop the alloys turning black, time will tell, at £70 a set I hope I'll notice the difference.1 point
-
That looks to be an excellent job at a very reasonable Price Rich. You must be delighted. £65 used to pay my monthly mortgage.How times change!1 point
-
They weren't. You'd have thought they knew better 10 years later! And I'm jealous for your cars.1 point
-
It is fitted as standard. You just have to enable it. Dealer will do it for free providing you know that its not their responsibility if you manage to flood the car in the rain1 point
-
Of course when we run out of the Davi bashing Carbon stuff..... there’s always the........nah Let’s stick with that it’s the best...... 🐀1 point
-
@Toothy David don’t talk aircraft technical to @Comedian helicopter s and stuff, his knowledge doesn’t go past airfix kits and so on....... 🐀1 point
-
Ok to try and be of more use Jay, I am considering an exhaust change myself at the moment. I though the car sounded fantastic until I visited youtube 😞 I also dont want anything over the top. The Hayward and Scott seems to give a nice not over the top sound, guarantees no drone and replaces the fake tailpipes with real ones that look like stock, its just quite costly. I have recently also been looking at just axel back exhausts. I heard a car with the mufflers removed and it sounded great but was a little over the top and droney so I dont think thats for me. A friend recently had race mufflers fitted to his 5.0 mustang and that sounds spot on now, a little fruitier than stock but not offensive. The only example of this I can find on an ISF is where someone has had a magnaflow centre build them an axel back with a set of race mufflers but the exhaust is now single exit and I dont want them to be even faker. There is a good custom exhaust place near to me called pipewerx so I am considering asking them to build me something or seeing if H&S above will do just an axel back.1 point
-
Surely an argument for making this thread a sticky 😜👍1 point
-
Yep, sticky pad and no issues so far. This is the one I got and, because my back injury was playing up at the time I had it professionally installed at a local auto-electricians instead of doing it myself, cost £57 inc VAT.1 point
-
@Flytvr - Issue is that with everyone replying to a thread named "Too many Sticky Posts" this post itself has become a sticky in it's own right (including this reply) 😉 So... until this post gets deleted I think we should all just keep replying to it just to wind you up further. You reap what you sow 😉1 point
-
Dav - Believe me it's not a major annoyance, but it has made me think twice about joining the carbon appreciation club1 point
-
I used Delphi brake grease, apparently copperslip is considered old tech... Hopefully mine won't stick again.1 point
-
I guess the suspension was softened to compensate for the stiff tyres, so overall the ride is good. But what would your RC F have been like if you had put run flats on it.1 point
-
Same experience as many said above, had BMW328xi with run flats, ride was terrible. And it wasn't like just hard (which it was) like on very low profile tyres, but they tend to "skip the traction" and thus where very unpredictable in little bouncy corners - the feeling like if you severely over-inflate the tyres. The only time I had puncture on the car was on BMW328xi with these runflats and I do blame the hardness of the tyres for the puncture, I really do believe that standard and softer tyres would have survived. Not only that, the tyre have dismounted and thus I could not drive anyway. Changing to normal tyres really transformed the car in both terms of ride and handling. So my experience with run flats - more likely to be punctured because of harder walls, but as well quite often cannot be driven anyway after puncture. Many people I know had similar experience - I mean they just dismount after puncture when you hit kerb or pot hole. They are only good for something like nails - so why not have normal tyres and glue bottle then?1 point
-
i have Bridestones1 point
-
I got a 'road rash' kit from Chipex. Includes the silver base coat and red top coat. Paint code 3T5.1 point
-
I would pursue your claim against the council stating you have reasonable evidence from your dash cam. Tell the council you are prepared to take the issue to the small claims court. Point out that the type of grass cutting equipment being used was not of a type that was suitable for use in close proximity to cars, and people "pedestrians" as this could have been much more serious had your window been open, and the stone went a little higher or the "stone" hit someone. Asking what risk assessment was carried out on the equipment used for the safety of the public in the vicinity of it's use and what measures were taken to prevent objects from being ejected from the machine as this is common with rotary cutting equipment. John1 point
-
I have had run-flats on BMW X5s and they do give a harsh ride. However, the LC has them (as stated above) and they seem fine. I suspect that the electronic suspension is tuned to make it comfortable. @wendle Do you have the Bridgestones or the Michelin PSS tyres which were on the original demo cars?1 point
-
Totally agree with @Big Rat and @rayaans. My wife had a 325i (E90?) with run flats before her RX450h. The ride was atrocious. Properly awful. We switched the tyres to normal ones and the car was utterly transformed. I think it spoke volumes that BMW didn’t fit run flats to their M cars of that generation. Do they now? I would never fit run flats to a car, and I’d take them off anything I ever own in the future if at all possible! I’d take a slight inconvenience one day every 5 years compared to putting up with run flats for the rest of them. Just my opinion!1 point
-
Available from your friendly Lexus dealer - part # PZ448-W3T5109 I have the touch-up kit here in front of me, curiously it has an expiry date of 08/18. I wonder what happens to it after that date??1 point
-
Here it is on PDF done in Mach this year. Restoring Headlights March 2018.pdf1 point
-
Toothpaste works a treat but nothing is instant, it all requires elbow work.1 point
-
If they are plastic,on my wife’s ford c max I used 1500 and 2000 grit wet and dry,and sanded in a cross cross (instructions on line somewhere)and then buff out the scratches with a machine polisher.Very good results and they were really bad to start with,if they aren’t to bad you could use finer wet and dry.1 point
-
maybe take your car to a local independent body repair shop and ask them to work a little magic on your lamp covers .... shouldn't be too expensive and it will work They make busted cars look like new very often and can use their trade products that are more effective than retail stuff. Malc1 point
-
Meg's headlamp kit gets good reviews.. http://www.meguiars.co.uk/shop/two-step-headlight-restoration-kit1 point
-
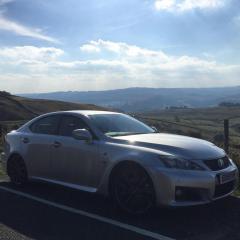
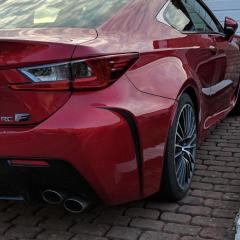
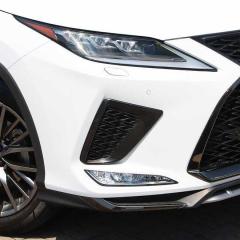
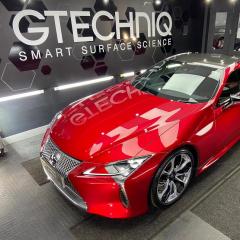
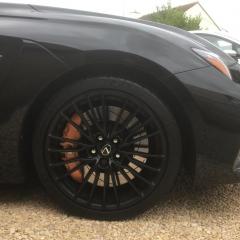
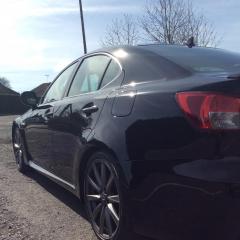
Can I show my old F (please) ?
1 point


.thumb.jpg.edb79cf13e211f30df011991ac297e20.jpg)


.thumb.jpg.2a51647832f96058b5b5e478518006f6.jpg)


.jpg.d7c3008218b2fe60565ae484aea06423.thumb.jpg.acd03711e7ee8dd3ab51445472b05a9d.jpg)